

Page 1

CLI PLUG-IN GUIDE Release 20.6
Nokia Service Router Linux
CLI PLUG-IN GUIDE
Release 20.6
3HE 16119 AAAA TQZZA
Edition: 1
July 2020
Nokia — Proprietary and confidential.
Use pursuant to applicable agreements.
Page 2

CLI PLUG-IN GUIDE
Release 20.6
Nokia is a registered trademark of Nokia Corporation. Other products and company
names mentioned herein may be trademarks or tradenames of their respective
owners.
The registered trademark Linux® is used pursuant to a sublicense from the Linux
Foundation, the exclusive licensee of Linus Torvalds, owner of the mark on a
worldwide basis.
The information presented is subject to change without notice. No responsibility is
assumed for inaccuracies contained herein.
© 2020 Nokia.
Contains proprietary/trade secret information which is the property of Nokia and must
not be made available to, or copied or used by anyone outside Nokia without its
written authorization. Not to be used or disclosed except in accordance with
applicable agreements.
2
3HE 16119 AAAA TQZZA Edition: 1
Page 3

CLI PLUG-IN GUIDE
Release 20.6
Table of contents
1 Getting started ................................................................................5
1.1 About this document....................................................................................5
1.2 Summary of changes...................................................................................5
1.3 Precautionary messages .............................................................................5
1.4 Conventions.................................................................................................6
2 Show routines .................................................................................7
2.1 Create a show routine .................................................................................7
2.1.1 Step 1: Build the SchemaNode ..................................................................8
2.1.2 Step 2: Retrieve the state from the management server.............................9
2.1.3 Step 3: Populate a data object ..................................................................10
2.1.4 Step 4: Add formatter instances ................................................................10
2.1.5 Step 5: Implement the callback method .................................................... 11
2.1.6 Show routine code example ......................................................................11
2.1.7 Step 6: Use streaming to optimize reports ................................................12
3 Managing CLI plug-ins .................................................................15
3.1 Install a CLI plug-in....................................................................................15
3.2 Modify a CLI plug-in...................................................................................15
3.3 Remove a CLI plug-in................................................................................16
4 Classes and utility functions .......................................................17
4.1 Formatters ................................................................................................17
4.1.1 ColumnFormatter.......................................................................................18
4.1.2 TagValueFormatter....................................................................................20
4.1.3 TagValueWithKeyLineFormatter ...............................................................20
4.1.4 Indent.........................................................................................................21
4.1.5 Border........................................................................................................21
4.1.6 Header.......................................................................................................22
4.1.7 Footer ........................................................................................................23
4.1.8 Whiteline ................................................................................................... 23
4.1.9 FilteredFormatter .......................................................................................24
4.2 Format utilities ..........................................................................................25
4.2.1 ColumnPrinter............................................................................................25
4.2.2 TagValuePrinter.........................................................................................27
4.2.3 TagValueWithKeyLinePrinter ....................................................................27
4.2.4 print_line ....................................................................................................28
4.2.5 print_double_line .......................................................................................28
4.2.6 indent ........................................................................................................29
4.2.7 format_value.............................................................................................. 29
4.3 Data ...........................................................................................................29
4.4 DataChildrenOfType..................................................................................33
4.5 SchemaNode.............................................................................................35
Edition: 1 3HE 16119 AAAA TQZZA 3
Page 4

CLI PLUG-IN GUIDE
Release 20.6
4
3HE 16119 AAAA TQZZA Edition: 1
Page 5

CLI PLUG-IN GUIDE
Release 20.6
1 Getting started
1.1 About this document
Getting started
This chapter provides an overview of this document, includes summaries of changes
from previous releases, and lists precautionary messages and command
conventions.
The Nokia Service Router Linux (SR Linux) CLI is a python-based application that
can load dynamic plug-ins. Plug-ins are custom show commands that you can create
and run from the SR Linux CLI. This document describes how to create custom CLI
plug-ins, and defines the classes and utility functions used to create them. It also
defines how to install, modify, and remove a CLI plug-in.
This document is intended for network technicians, administrators, operators,
service providers, and others who need to create and install custom show
commands.
1.2 Summary of changes
There are no changes since the last release.
1.3 Precautionary messages
Observe all dangers, warnings, and cautions in this document to avoid injury or
equipment damage during installation and maintenance. Follow the safety
procedures and guidelines when working with and near electrical equipment.
Table 1 describes information symbols contained in this document.
Edition: 1 3HE 16119 AAAA TQZZA 5
Page 6
Getting started
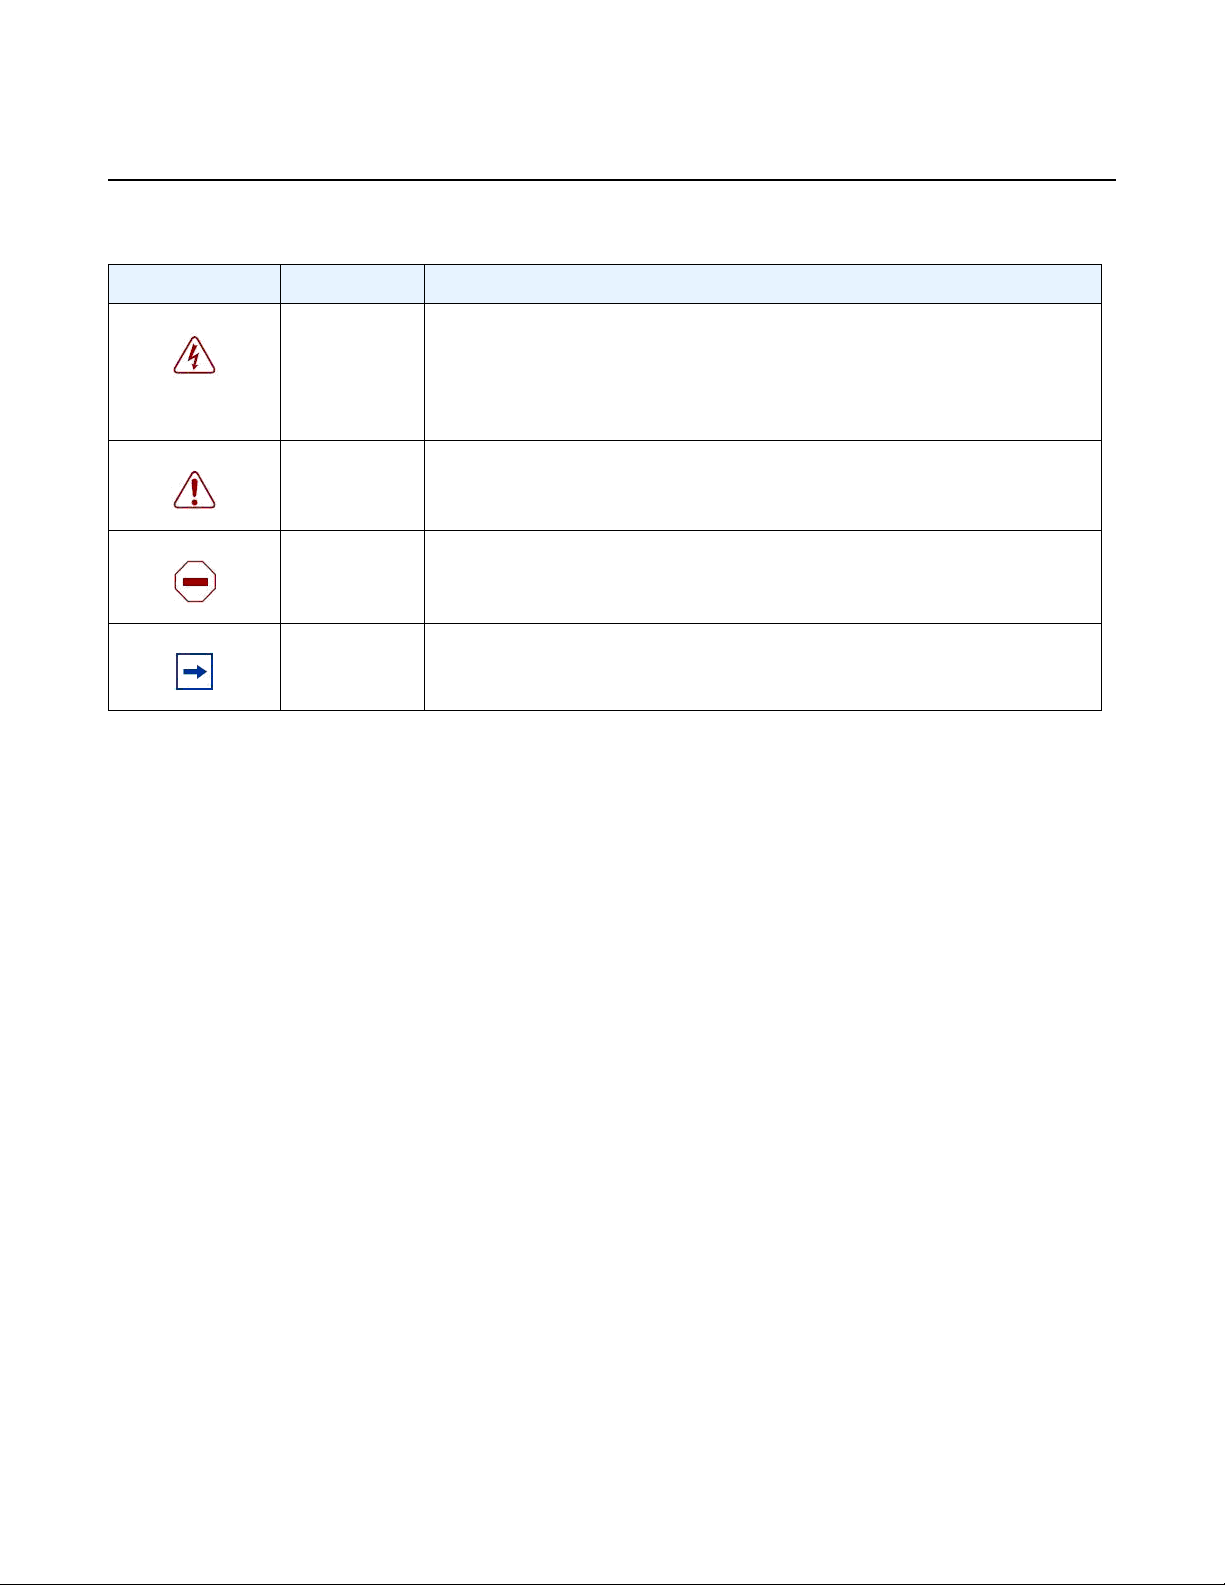
Table 1 Information symbols
Symbol Meaning Description
Danger Warns that incorrect handling and installation could result in bodily injury.
An electric shock hazard could exist. Before beginning work on this
equipment, be aware of hazards involving electrical circuitry, be familiar
with networking environments, and implement accident prevention
procedures.
Warning Warns that incorrect handling and installation could result in equipment
damage or loss of data.
Caution Warns that incorrect handling may reduce component or system
performance.
Note Notes contain suggestions or additional operational information.
CLI PLUG-IN GUIDE
Release 20.6
1.4 Conventions
Nokia SR Linux documentation uses the following command conventions.
• Bold type indicates a command that the user must enter.
• Input and output examples are displayed in Courier text.
• An open right angle bracket indicates a progression of menu choices or simple
command sequence (often selected from a user interface). Example: start >
connect to
• Angle brackets (< >) indicate an item that is not used verbatim. For example, for
the command show ethernet <name>, name should be replaced with the name
of the interface.
• A vertical bar (|) indicates a mutually exclusive argument.
• Square brackets ([ ]) indicate optional elements.
• Braces ({ }) indicate a required choice. When braces are contained within square
brackets, they indicate a required choice within an optional element.
• Italic type indicates a variable.
Generic IP addresses are used in examples. Replace these with the appropriate IP
addresses used in the system.
6
3HE 16119 AAAA TQZZA Edition: 1
Page 7

CLI PLUG-IN GUIDE
Release 20.6
2 Show routines
Show routines
This chapter provides a tutorial on how to create a routine, or set of instructions, that
results in a custom show command. It also provides a detailed description of all the
classes and utility functions used to create custom show commands.
Before creating a show routine, the following is recommended:
• Whenever you receive Data from the server, print it using:
print(str(data))
This makes it easier to visualize the data hierarchy.
• While building the SchemaNode and populating the Data structure, do not focus
on the layout of your show routine. Instead, use the output of the following:
show <your-routine> | as json
This JSON output contains all the information currently in your show routine, in
the correct hierarchy. Once the JSON output looks correct, then plan how to
format it.
2.1 Create a show routine
To create a show routine, you perform the following high-level steps:
Step 1. Build a SchemaNode to describe the data’s data model the show routine
will construct.
Step 2. Retrieve the state from the management server using
state.server_data_store.get_data(<path>)
Step 3. Populate a Data object with all the data (keys/fields/…) of the show routine.
Step 4. Add Formatter instances to determine how the data will be formatted.
Step 5. Implement the callback method to pass the Data structure to the
output.print_data command.
Step 6. Use streaming to optimize reports when working with large amounts of
data.
Edition: 1 3HE 16119 AAAA TQZZA 7
Page 8

Show routines
CLI PLUG-IN GUIDE
Release 20.6
The following is an output example once all steps are completed. As you perform the
steps in this section, you will be able to see how this example is built.
======================================
name : interface-1
description: The first interface
admin-state: enable
-------------------------------------Child-Id Is-Cool
=================
24 no
42 yes
======================================
name : interface-2
description: The second interface
admin-state: disable
-------------------------------------Child-Id Is-Cool
=================
1337 yes
======================================
2.1.1 Step 1: Build the SchemaNode
Schema nodes describe a data model. Similar to the output of the tree command or
the content of a YANG file, they indicate what lists, containers, keys, fields, and leaflists can be created.
To build a SchemaNode, start with a FixedSchemaRoot()
then add your top-level list/container using FixedSchemaNode.add_child() as
shown in the SchemaNode reference.
For example:
from srlinux.schema import FixedSchemaRoot
def _get_my_schema(self):
root = FixedSchemaRoot()
interface = root.add_child(
'interface',
key='name',
fields=['description', 'admin-state']
)
child = interface.add_child(
'child',
key='Child-Id',
fields=['Is-Cool']
)
The code above generates a data model for the following YANG model:
8
3HE 16119 AAAA TQZZA Edition: 1
Page 9

CLI PLUG-IN GUIDE
Release 20.6
Show routines
list interface {
key "name";
leaf "description";
leaf "admin-state";
list child {
key "Child-Id";
leaf "Is-Cool";
}
}
Ensure that the filter auto-completes all fields by passing the schema node into the
add_command call when you install the plug-in. This ensures that the filter operator
(|) can auto-complete all fields. For example:
class Plugin(CliPlugin):
'''
Adds a fancy show report.
'''
def load(self, cli, **_kwargs):
cli.show_mode.add_command(
Syntax('report').add_unnamed_argument('name'),
update_location=False,
callback=self._print,
schema=self._get_my_schema(),
)
2.1.2 Step 2: Retrieve the state from the management server
To retrieve the state, use build_path() to populate a path of the key you need to
retrieve, and call get_data.
This returns a Data object pointing to the root of the data returned by the
management server:
from srlinux.location import build_path
def _fetch_state(self, state, arguments):
path = build_path('/interface[name={name}]/
subinterface[index=*]', name=arguments.get('name'))
return state.server_data_store.get_data(path, recursive=True)
Edition: 1 3HE 16119 AAAA TQZZA 9
Page 10

Show routines
CLI PLUG-IN GUIDE
Release 20.6
2.1.3 Step 3: Populate a data object
With the data from the management server and a data model, populate the Data
object:
from srlinux.data import Data
from srlinux import strings
def _populate_data(self, server_data):
result = Data(self._get_my_schema())
for interface in server_data.interface.items():
data = result.interface.create(interface.name)
data.description = interface.description
data.admin_state = interface.admin_state
self._add_children(data, interface.subinterface)
return result
def _add_children(self, data, server_data):
# server_data is an instance of DataChildrenOfType
for subinterface in server_data.items():
child = data.child.create(subinterface.index)
cool_ids = [42, 1337]
is_cool = subinterface.index in cool_ids
child.is_cool = strings.bool_to_yes_no(is_cool)
2.1.4 Step 4: Add formatter instances
To format the output, assign Formatter instances to the different Data objects. The
type of Formatter determines whether the output is formatted using key: value pairs,
as a grid-based table, or using a custom format.
from srlinux.data import Border, ColumnFormatter, Data, TagValueFormatter, Borders,
Indent
def _set_formatters(self, data):
data.set_formatter(
'/interface',
Border(TagValueFormatter(), Border.Above | Border.Below | Border.Between,
'='))
data.set_formatter(
'/interface/child',
tion=2))
Indent(ColumnFormatter(ancestor_keys=False, borders=Borders.Header), indenta
10
A list of all the built-in formatters is in the Formatters section.
3HE 16119 AAAA TQZZA Edition: 1
Page 11

CLI PLUG-IN GUIDE
Release 20.6
2.1.5 Step 5: Implement the callback method
2.1.6 Show routine code example
Show routines
The following example shows how to implement the callback method which can then
be invoked to complete the routine:
def _print(self, state, arguments, output, **_kwargs):
server_data = self._fetch_state(state, arguments)
result = self._populate_data(server_data)
self._set_formatters(result)
output.print_data(result)
Once you have completed Steps 1 - 5 (in sections 2.1.1 - 2.1.5), the show routine
first shown in section 2.1 Create a show routine is now complete.
The following is an example of the complete show routine code:
from srlinux import strings
from srlinux.data import Border, ColumnFormatter, TagValueFormatter, Borders, Data,
Indent
from srlinux.location import build_path
from srlinux.mgmt.cli import CliPlugin
from srlinux.schema import FixedSchemaRoot
from srlinux.syntax import Syntax
class Plugin(CliPlugin):
def load(self, cli, **_kwargs):
cli.show_mode.add_command(
Syntax('report').add_unnamed_argument('name'),
update_location=False,
callback=self._print,
schema=self._get_my_schema(),
)
def _print(self, state, arguments, output, **_kwargs):
server_data = self._fetch_state(state, arguments)
result = self._populate_data(server_data)
self._set_formatters(result)
output.print_data(result)
def _get_my_schema(self):
root = FixedSchemaRoot()
interface = root.add_child(
'interface',
key='name',
fields=['description', 'admin-state']
)
child = interface.add_child(
'child',
key='Child-Id',
fields=['Is-Cool']
Edition: 1 3HE 16119 AAAA TQZZA 11
Page 12

Show routines
CLI PLUG-IN GUIDE
Release 20.6
)
return root
def _fetch_state(self, state, arguments):
path = build_path('/interface[name={name}]/
subinterface[index=*]', name=arguments.get('name'))
return state.server_data_store.get_data(path, recursive=True)
def _populate_data(self, server_data):
result = Data(self._get_my_schema())
for interface in server_data.interface.items():
data = result.interface.create(interface.name)
data.description = interface.description
data.admin_state = interface.admin_state
self._add_children(data, interface.subinterface)
return result
def _add_children(self, data, server_data):
# server_data is an instance of DataChildrenOfType
for subinterface in server_data.items():
child = data.child.create(subinterface.index)
cool_ids = [42, 1337]
is_cool = subinterface.index in cool_ids
child.is_cool = strings.bool_to_yes_no(is_cool)
def _set_formatters(self, data):
data.set_formatter(
'/interface',
Border(TagValueFormatter(), Border.Above | Border.Below | Border.Between
, '='))
entation=2))
data.set_formatter(
'/interface/child',
Indent(ColumnFormatter(ancestor_keys=False, borders=Borders.Header), ind
2.1.7 Step 6: Use streaming to optimize reports
The previous steps detail how to obtain data, and then separately print a report. With
streaming, data is retrieved and begins printing immediately. This is useful for reports
that have large amounts of data (for example, route tables) because printing begins
immediately instead of waiting for the entire data collection to complete.
Perform the following to implement streaming:
1. Enter state.server_data_store.stream_data(<path>) instead of
state.server_data_store.get_data(<path>) to retrieve server data
12
3HE 16119 AAAA TQZZA Edition: 1
Page 13

CLI PLUG-IN GUIDE
Release 20.6
Show routines
For example:
def _fetch_state(self, state, arguments):
path = build_path('/interface[name={name}]/subinterface[index=*]',
name=arguments.get('name'))
return state.server_data_store.stream_data(path, recursive=True)
2. When constructing data, flush the data using flush_fields() and flush_children().
If no data is flushed, it displays as though streaming was not implemented.
Implement flushing as soon as you know that a node is finished (but not sooner).
For example:
data.synchronizer.flush_fields(data)
for interface in server_data.interface.items():
data = data_root.interface.create(interface.name)
data.description = interface.description
data.admin_state = interface.admin_state
data.synchronizer.flush_fields(data)
data_root.synchronizer.flush_children(data_root.interface)
Note that you cannot change fields after a flush_fields() is called, and you cannot
create new child nodes for the list you called flush_children().
3. Enter output.stream_data instead of output.print_data. Because it is a context
manager python class, it can be used as `with output.stream_data(result):`.
When the `with` block exits, flush_fields() and flush_children() are called on
every node to ensure everything prints at the end.
For example:
def _print(self, state, arguments, output, **_kwargs):
result = Data(arguments.schema)
self._set_formatters(result)
with output.steam_data(result)
self._populate_data_V4(result)
4. Ensure formatted output is aligned. If needed, the column width can be explicitly
passed to the formatter.
Pass width of columns to formatter ::
ColumnFormatter(widths=[Percentage(10), 6, 10, Width(min_width=8,
percent=20)])
The following is an example of the complete show routine code using streaming.
from srlinux import strings
from srlinux.data import Border, ColumnFormatter, TagValueFormatter, Borders, Data,
Indent
from srlinux.location import build_path
from srlinux.mgmt.cli import CliPlugin
from srlinux.schema import FixedSchemaRoot
from srlinux.syntax import Syntax
Edition: 1 3HE 16119 AAAA TQZZA 13
Page 14

Show routines
CLI PLUG-IN GUIDE
Release 20.6
class Plugin(CliPlugin):
def load(self, cli, **_kwargs):
cli.show_mode.add_command(
Syntax('report').add_unnamed_argument('name'),
update_location=False,
callback=self._print,
schema=self._get_my_schema(),
)
def _print(self, state, arguments, output, **_kwargs):
result = Data(arguments.schema)
self._set_formatters(result)
with output.steam_data(result)
self._populate_data(result, state, arguments)
def _get_my_schema(self):
root = FixedSchemaRoot()
interface = root.add_child(
'interface',
key='name',
fields=['description', 'admin-state']
)
return root
def _fetch_state(self, state, arguments):
path = build_path('/interface[name={name}]/
subinterface[index=*]', name=arguments.get('name'))
return state.server_data_store.stream_data(path, recursive=True)
def _populate_data(self, data_root, state, arguments):
server_data = self._fetch_state(state, arguments)
data_root.synchronizer.flush_fields(data_root)
for interface in server_data.interface.items():
data = data_root.interface.create(interface.name)
data.description = interface.description
data.admin_state = interface.admin_state
data.synchronizer.flush_fields(data)
data_root.synchronizer.flush_children(data_root.interface)
def _set_formatters(self, data):
data.set_formatter(
'/interface',
, '='))
Border(TagValueFormatter(), Border.Above | Border.Below | Border.Between
14
3HE 16119 AAAA TQZZA Edition: 1
Page 15

CLI PLUG-IN GUIDE
Release 20.6
3 Managing CLI plug-ins
3.1 Install a CLI plug-in
Managing CLI plug-ins
This chapter contains procedures for installing, modifying, and removing a CLI plugin on the SR Linux.
To install a CLI plug-in, perform the following steps:
1. Open an SSH session.
2. Save the CLI plug-in Python code to a file; for example, my_cli.py.
3. Copy the CLI plug-in file to the /opt/srlinux/python/virtual-env/lib/
python3.6/site-packages/srlinux/mgmt/cli/plugins/reports
directory.
4. Edit the file /opt/srlinux/python/virtual-env/lib/python3.6/
site-packages/srlinux-0.1-py3.6.egg-info/entry_points.txt
and add an entry for the new CLI plug-in. For example:
my_cli = srlinux.mgmt.cli.plugins.reports.my_cli:Plugin
5. Restart the SR Linux CLI by closing the SSH session and reconnecting via SSH
as the admin user.
3.2 Modify a CLI plug-in
To modify an existing CLI plug-in, perform the following steps:
1. Open an SSH session.
2. Modify and save the CLI plug-in file in the /opt/srlinux/python/virtual-
env/lib/python3.6/site-packages/srlinux/mgmt/cli/plugins/
reports directory.
3. Restart the SR Linux CLI by closing the current SSH session and reconnecting
via SSH as the admin user.
Edition: 1 3HE 16119 AAAA TQZZA 15
Page 16

Managing CLI plug-ins
3.3 Remove a CLI plug-in
CLI PLUG-IN GUIDE
Release 20.6
To remove an existing plug-in from the SR Linux CLI, perform the following steps:
1. Open an SSH session.
2. Open the file /opt/srlinux/python/virtual-env/lib/python3.6/
site-packages/srlinux-0.1-py3.6.egg-info/entry_points.txt
3. Delete the entry for the CLI plug-in you are removing. Save the file.
4. Restart the SR Linux CLI by closing the current SSH session and reconnecting
via SSH as the admin user.
16
3HE 16119 AAAA TQZZA Edition: 1
Page 17

CLI PLUG-IN GUIDE
Release 20.6
4 Classes and utility functions
4.1 Formatters
Classes and utility functions
This chapter provides detailed descriptions of all the classes and utility functions
used to write custom show commands.
There are a number of built-in formatters to choose from (or create your own using
the Format utilities):
ColumnFormatter:
Formats the data using a column-based table, which supports a number of ways to
customize the look-and-feel.
Example:
+----------+---------+-------------+
| entry-id | source | destination |
+==========+=========+=============+
| 10 | 1.2.3.4 | 5.6.7.8 |
+----------+---------+-------------+
TagValueFormatter:
Formats the data using a single tag: value pair on each line.
Example:
entry-id : 10
source : 1.2.3.4
destination : 5.6.7.8
TagValueWithKeyLineFormatter:
Formats the data using:
• a single line to print the name and keys
• a line for each field and leaf-list, formatted as a “tag: value” pair
Example:
Entry 10
source : 1.2.3.4
destination : 5.6.7.8
Edition: 1 3HE 16119 AAAA TQZZA 17
Page 18

Classes and utility functions
There are also built-in decorators which you can wrap around a formatter to add
embellishments to the output. Table 2 lists the built-in decorators.
Table 2 Built-in decorators
Built-in decorator Description
Indent Adds an indentation before every output line.
Border Adds lines above, below, or between the printed entries.
Header Adds a header above the first printed entry.
Footer Adds a footer below the last printed entry.
Whiteline Adds an empty line above, below, or between the printed
FilteredFormatter Filters out fields/leaf-lists.
CLI PLUG-IN GUIDE
Release 20.6
entries.
4.1.1 ColumnFormatter
Class srlinux.data.ColumnFormatter(ancestor_keys=True,
horizontal_alignment=None, vertical_alignment=None, borders=None
Formats the specific Data object as a column-based table.
Example output:
+----------+-------------------+--------------------+---------------+
| Entry id | Ip prefix | Origin protocol | Next hop |
+==========+===================+====================+===============+
| 1 | 1.1.2.0/24 | local_aggregate | None |
| 2 | 1.1.2.2/32 | directly_connected | None |
+----------+-------------------+--------------------+---------------+
The output can be customized using the following constructor arguments:
ancestor_keys : bool or list
• Controls whether the ancestor keys will be added as columns to the output table
• True - (the default) includes all ancestor keys
• False - does not include any ancestor keys
• A list provides more granular control. The list must contain a value for each
ancestor key, and can contain:
- None - suppresses the key
18
3HE 16119 AAAA TQZZA Edition: 1
Page 19

CLI PLUG-IN GUIDE
Release 20.6
Classes and utility functions
- A string to specify the column key to use for the ancestor key
For example, when passed [None, “A”, None], the first and third ancestor key are
dropped, and the second is renamed to “A”.
horizontal_alignment : dict{str: Alignment}
Dictionary mapping column-names to their horizontal alignment (Alignment.Left/
Center/Right). Columns not mentioned are left-aligned.
vertical_alignment : dict{str: Alignment}
Dictionary mapping column-names to their vertical alignment (Alignment.Top/Middle/
Bottom). Columns not mentioned are top-aligned.
borders : Borders
Combination of Borders values indicating which borders to print. Defaults to
“Borders.Outside | Borders.Header | Borders.Columns”.
Class srlinux.data.Alignment
The values used to align data in the table cells. Table 3 lists the alignment values.
Table 3 Cell alignment values
Alignment value Description
Left= 1 Horizontally aligns the data to the left
Right= 2 Horizontally aligns the data to the right
Center= 3 Horizontally centers the data
Top= 4 Vertically aligns the data to the top
Middle= 5 Vertically centers the data
Bottom= 6 Vertically aligns the data to the bottom
Class srlinux.data.Borders
Specifies which borders to draw when drawing the table. Values can be combined
together using the symbol ‘|’. For example: Borders.Outside | Borders.Header
draws a border around the table and line below the header. Table 4 defines the
border values to use when drawing a table.
Edition: 1 3HE 16119 AAAA TQZZA 19
Page 20

Classes and utility functions
Table 4 Types of table borders
Table border Description
Nothing= 0 Draws no borders
Outside= 1 Draws a border around the table
Header= 2 Draws a horizontal line between the header and the first row
Rows= 4 Draws a horizontal line between the rows
Columns= 8 Draws a vertical line between the columns
4.1.2 TagValueFormatter
Class srlinux.data.TagValueFormatter(filter=None)
CLI PLUG-IN GUIDE
Release 20.6
Formats the specified Data object as a list of “tag: value” pairs (one on each line).
Example output:
key : <name>
field: <value>
4.1.3 TagValueWithKeyLineFormatter
Class srlinux.data.TagValueWithKeyLineFormatter(filter=None)
Formats the specified Data object as a single line with the name and the keys,
followed by a list of “tag: value” pairs (one on each line).
Example output:
node <name> id <id>
field: <value>
20
3HE 16119 AAAA TQZZA Edition: 1
Page 21

CLI PLUG-IN GUIDE
Release 20.6
4.1.4 Indent
Classes and utility functions
Class srlinux.data.Indent(formatter, indentation=' ')
Decorator that indents every line printed by the wrapped formatter.
Example usage:
Indent(MyOtherFormatter(), 6)
Indent(MyOtherFormatter(), '')
Either example adds six spaces before every line printed by MyOtherFormatter.
Table 5 defines the indent arguments.
Table 5 Indent arguments
Argument Description
indentation: str or int The indent string put before every line, or an integer that
4.1.5 Border
Class srlinux.data.Border(formatter, position=None, character='-')
Decorator that prints a border line above, below, or above and below another
formatter.
Example usage:
Border(MyOtherFormatter(), Border.Above | Border.Below, '+')
This example prints a border line of ++++++++++ above and below the output of the
other formatter.
Table 6 lists the border line arguments.
Table 6 Border line arguments
indicates the amount of spaces to add.
Argument Description
position : Border Controls where the border lines are drawn. Multiple
values can be combined together using the “|” symbol.
Edition: 1 3HE 16119 AAAA TQZZA 21
Page 22

Classes and utility functions
Table 6 Border line arguments (Continued)
Argument Description
Border.Above Prints a line above the first Data entry. Defaults to
Border.Below Prints a line below the last Data entry. Defaults to
Border.Between Prints a line between each Data entry. Defaults to
character: char (optional) Defines the character used to draw the border line.
4.1.6 Header
CLI PLUG-IN GUIDE
Release 20.6
printing a line above and below.
printing a line above and below.
printing a line above and below.
Defaults to “-”.
Class srlinux.data.Header(formatter, text, character='-')
Decorator that prints a header above another formatter.
Example usage:
Header(
MyOtherFormatter(),
text='The header text',
character='+'
)
This example prints:
++++++++++++++++++++++++
The header text
++++++++++++++++++++++++
<snip here is the output of MyOtherFormatter>
Table 7 defines the header arguments.
Table 7 Header arguments
Argument Description
text: str Defines the header text, which can contain new lines.
22
character: char (optional) Defines the character used to draw the border.
Defaults to “-”.
3HE 16119 AAAA TQZZA Edition: 1
Page 23

CLI PLUG-IN GUIDE
Release 20.6
4.1.7 Footer
Classes and utility functions
Class srlinux.data.Footer(formatter, text, character='-')
Decorator that prints a footer below another formatter.
Example usage:
Footer(
MyOtherFormatter(),
text='The footer text',
character='+'
)
This example prints:
<snip here is the output of MyOtherFormatter>
++++++++++++++++++++++++
The footer text
++++++++++++++++++++++++
Table 8 defines the footer arguments.
Table 8 Footer arguments
Argument Description
text: str Defines the footer text, which can contain new lines.
character: char Defines the character used to draw the border. Defaults to
4.1.8 Whiteline
Class srlinux.data.Whiteline(formatter, position=None)
Decorator that prints an empty line above, below, and between entries of another
formatter.
Example usage:
Whiteline(MyOtherFormatter(), Whiteline.Above | Whiteline.Below)
“-”.
This example prints an empty line above and below the output of the other formatter.
Table 9 defines the Whiteline arguments.
Edition: 1 3HE 16119 AAAA TQZZA 23
Page 24

Classes and utility functions
Table 9 Whiteline arguments
Argument Description
position : Whiteline Controls where the empty lines are drawn. Multiple values
Whiteline.Above Prints a line above the first Data entry. Defaults to printing a
Whiteline.Below Prints a line below the last Data entry. Defaults to printing a
Whiteline.Between Prints a line between each Data entry. Defaults to printing a
4.1.9 FilteredFormatter
CLI PLUG-IN GUIDE
Release 20.6
can be combined together using “|”.
line above and below.
line above and below.
line above and below.
Class srlinux.data.FilteredFormatter(formatter, schema, fields=[], leaflists=[])
Decorator that only displays the selected fields and leaf-lists.
Example usage:
FilteredFormatter(
MyOtherFormatter(),
schema=data.schema,
fields=['field-to-keep', 'other-field-to-keep'],
leaflists=['leaflist-to-keep', 'other-leaflist-to-keep'],
)
A common use case for this decorator is to enhance the format of some fields, but
keeps the original field values available for when the output is formatted as JSON.
In this case, add both the original fields and the combined field to the Data object,
and filter the original fields out for formatting.
data = Data(schema)
# The 2 original fields. Added to data so that 'show <snip> | as json' displays them
in a useful fashion.
data.source = '1.2.3.4'
data.destination = '5.6.7.8'
# The combined field we want to show in the show report.
data.flow = f'{data.source} -> {data.destination}'
24
# Only show the combined field in the show report.
data.formatter = FilteredFormatter(
TagValueFormatter(),
3HE 16119 AAAA TQZZA Edition: 1
Page 25

CLI PLUG-IN GUIDE
Release 20.6
Classes and utility functions
schema=data.schema,
fields=['flow']
)
Table 10 defines the available FilteredFormatter arguments.
Table 10 FilteredFormatter arguments
Argument Description
schema : SchemaNode Defines the schema of the Data object this formatter is
applied to
fields : list of str Defines the names of the fields to display. Any field not
mentioned is omitted from the output. The default is to
remove all fields.
leaflists : list of str Defines the names of the leaf-lists to display. Any leaf-
list not mentioned is omitted from the output. The default
is to remove all leaf-lists.
4.2 Format utilities
If the built-in formatters are not sufficient, you can add a summary line or other
modifications.
To help with this, the following utilities can be used when writing your own Formatter.
4.2.1 ColumnPrinter
Class srlinux.data.ColumnPrinter(columns, max_width, horizontal_alignment,
vertical_alignment, borders, filter=None)
Utility class to print a set of rows as a column-based table.
Example output:
+----------+-------------------+
| Entry id | Ip prefix |
+==========+===================+
| 1 | 1.1.2.0/24 |
| 2 | 1.1.2.2/32 |
+----------+-------------------+
Edition: 1 3HE 16119 AAAA TQZZA 25
Page 26

Classes and utility functions
Usage:
printer = ColumnPrinter(['Entry id', 'Ip prefix'], borders=Borders.Outside, max_widt
h=80)
printer.add_row([1, '1.1.2.0/24'])
printer.add_row([2, '1.1.2.2/32'])
printer.iter_format()
# Returns
#(
# '+----------+-------------------+',
# '| Entry id | Ip prefix |',
# '+==========+===================+',
# '| 1 | 1.1.2.0/24 |',
# '| 2 | 1.1.2.2/32 |',
# '+----------+-------------------+'
#)
Table 11 defines the constructor arguments that can be used to customize the
output.
CLI PLUG-IN GUIDE
Release 20.6
Table 11 ColumnPrinter constructor arguments
Constructor argument Description
horizontal_alignment : dict{str: Alignment} Dictionary mapping of column-names to
their horizontal alignment (Alignment.Left/
Center/Right). Columns not mentioned
here are left-aligned.
vertical_alignment : dict{str: Alignment} Dictionary mapping of column-names to
their vertical alignment (Alignment.Top/
Middle/Bottom). Columns not mentioned
here are top-aligned.
borders : Borders Combining borders values that indicate
what borders can be drawn. Defaults to
“Borders.Outside | Borders.Header |
Borders.Columns”.
filter : Filter Filters out fields from the output. Fields that
do not match the filter are not printed.
26
3HE 16119 AAAA TQZZA Edition: 1
Page 27

CLI PLUG-IN GUIDE
Release 20.6
4.2.2 TagValuePrinter
Classes and utility functions
Class srlinux.data.TagValuePrinter(tags, max_width, filter=None)
Utility class to print a set of “tag: value” pairs.
Usage:
printer = TagValuePrinter(['first', 'second'], max_width=80)
printer.iter_format(['value', 'other-value'])
# Returns (
# 'first : value',
# 'second: other-value',
#)
If None (or ‘’ or []) is passed in as a value, the item is skipped in the output:
printer.iter_format([None, 'other-value'])
# Returns (
# 'second: other-value',
#)
Table 12 defines the TagValuePrinter arguments.
Table 12 TagValuePrinter arguments
Argument Description
filter : Filter Filters out fields/leaf-lists from the output. Fields that do not
match the filter are not printed.
4.2.3 TagValueWithKeyLinePrinter
Class srlinux.data.TagValueWithKeyLinePrinter(name, keys, tags, max_width,
filter=None)
Utility class to print a single line with the name and the keys, followed by a list of “tag:
value” pairs (one on each line).
Example output:
node <name> id <id>
field: <value>
Edition: 1 3HE 16119 AAAA TQZZA 27
Page 28

Classes and utility functions
Usage:
printer = TagValueWithKeyLinePrinter(name='node', keys=['key'], tags=['first-
field', 'second-field'], max_width=80)
printer.iter_format(keys=[<name>], values=['value', 'other-value'])
# Returns (
# 'node <name>',
# ' first-field : value',
# ' second-field: other-value',
#)
If None (or ‘’ or []) is passed in as a value, the item is skipped in the output:
printer.iter_format(keys=['<name>'], [None, 'other-value'])
# Returns (
# 'node <name>',
# ' second-field: other-value',
#)
Table 13 defines theTagValueWithKeyLinePrinter arguments.
CLI PLUG-IN GUIDE
Release 20.6
Table 13 TagValueWithKeyLinePrinter arguments
Argument Description
filter : Filter Filters out fields/leaf-lists from the output. Fields that do not
match the filter are not printed.
4.2.4 print_line
srlinux.data.print_line(width, character='-')
Returns a line of length “width”, consisting of the specified character.
4.2.5 print_double_line
srlinux.data.print_double_line(width)
Returns a line of length “width” consisting of ============.
28
3HE 16119 AAAA TQZZA Edition: 1
Page 29

CLI PLUG-IN GUIDE
Release 20.6
4.2.6 indent
4.2.7 format_value
Classes and utility functions
srlinux.data.indent(values, indentation)
Indents each given value with the specified indentation. The indentation can either
be a string, or an integer indicating the number of spaces to use for the indentation.
srlinux.data.format_value(value)
Formats the Data value as a string, which works for key, field, and leaf-list values of
all accepted types (number, string, bool), even if the field/leaf-list is absent.
4.3 Data
The class used to represent all data; both the data retrieved from the server and the
data displayed in the show report.
Class srlinux.data.data.Data(schema, parent=None, **keys)
Allows easy access to a configuration/state instance. When creating a top-level Data
object, you must specify an instance of a SchemaNode. The code analyzes the
schema, and makes all fields, keys, leaf-lists, and children accessible as attributes.
For example, assume that this is the data model:
list interface {
key 'name';
field 'admin-state';
leaflist 'values';
list subinterface {
key 'id';
}
}
You can then:
• Get the keys:
value = data.name
Edition: 1 3HE 16119 AAAA TQZZA 29
Page 30

Classes and utility functions
• Get and set the fields:
value = data.admin_state # returns the value or None if unset
data.admin_state = 'enabled'
• Get and set leaflists:
value = data.values # returns a list
data.values = ['a', 'b']
• Access children:
child = data.subinterface.create(42) # Creates the subinterface with id '42'
child = data.subinterface.get(42)
if data.subinterface.exists(42):
for si in data.subinterface.items():
Note: Names are changed so that any character that is not a to z, A to Z, or 0 to 9 is replaced
by an “_”.
CLI PLUG-IN GUIDE
Release 20.6
# Returns True/False
# Walks all subinterfaces, ordered by their key
Children
When accessing a child (data.subinterface in the preceding example), an instance of
DataChildrenOfType is returned. Follow the link to see all the accessors it provides.
Values
All key/field/leaf-list values are of the following types:
•bool
• integer
• string
Formatters
To generate the show report, Formatter objects are used. These can be tied to a
specific Data object using two methods:
• By assigning a formatter to the Data.formatter property.
• By using Data.set_formatter().
30
3HE 16119 AAAA TQZZA Edition: 1
Page 31

CLI PLUG-IN GUIDE
Release 20.6
Classes and utility functions
Both methods assign the formatter to all sibling Data objects. For example, calling
the following sets the formatter for all interfaces and not just for subinterface 42.
data.subinterface.get(42).formatter = ColumnFormatter()
Table 14 flists the different types of formatters.
Table 14 Types of formatters
Formatter Description
parent Returns the parent Data object, or None if this is the
root.
schema Returns the SchemaNode.
key_names Returns an iterator over the names of the keys.
key_values Returns an iterator over the key values. Iterators are
returned in the order specified by self.key_names,
which is the same as the order that the keys were
added to the SchemaNode.
get_key(name) Returns the value of the key with the given name.
keys_dict Returns a “name: value” dictionary of the keys.
type_name Returns the type-name, which is self.schema.name.
field_names Returns an iterator over the names of the fields.
field_values Returns an iterator over the field values. Iterators
are returned in the order specified by
self.field_names, which is the same as the order
that the fields were added to the SchemaNode.
set_field(name, value) Assigns the value to the field with the given name.
get_field(name, default=None) Returns the value of the field with the specified
name, or the default if the field is unset.
is_field_set(name) Returns True if the field is set.
leaflist_names Returns an iterator over the names of the leaf-lists.
leaflist_values Returns an iterator over the leaf-list values. Iterators
are returned in the order specified by
self.leaflist_names, which is the same as the order
that the leaf-lists were added to the SchemaNode.
get_leaflist(name) Returns a list containing the values of the leaf-list
with the specified name. This list is empty if the leaflist is unset.
Edition: 1 3HE 16119 AAAA TQZZA 31
Page 32

Classes and utility functions
Table 14 Types of formatters (Continued)
Formatter Description
set_leaflist(name, value) Assigns the value to the leaf-list with the specified
is_leaflist_set(name) Returns True if the leaf-list is set.
child_names Returns an iterator over the names of the children.
get_children(name) Returns the DataChildrenOfType instance that
CLI PLUG-IN GUIDE
Release 20.6
name. The value must be a list.
contains all the children of the specified type. This
returned object is mutable and can be used to walk/
retrieve/add children.
iter_children_by_type(predicate=<f
unction Data.<lambda>>)
iter_children() Iterates over all child instances.
get(name) Returns the value of the specified key, field, leaf-list,
get_annotations(name=None) Returns a list containing the annotations of this node
add_annotation(annotation,
name=None)
formatter Returns the Formatter that can be used to generate
iter_format(max_width) Invokes the Formatter of this Data object. Returns
iter_format_children(max_width) Invokes the Formatter of all children of this Data
Iterates over all DataChildrenOfType instances for
which the predicate is True. By default, this returns
all children.
or child.
(if called with no arguments) or the field with the
specified name.
Adds the specified annotation to this node (when
called with a single argument) or to the field with the
specified name (when called with two arguments).
The annotation must be an instance of Annotation.
the show report for this Data object.
an iterator over the formatted output lines.
object. Returns an iterator over the formatted output
lines.
32
set_formatter(schema, formatter)Adds a Formatter to the Data object with the
specified schema. The schema can be specified as
an XPath string (without keys). For example, “/
interface/subinterface”.
get_schema(path) Get the SchemaNode of the Data object with the
specified path. The path must be an XPath string, for
example, “/interface/subinterface”.
3HE 16119 AAAA TQZZA Edition: 1
Page 33

CLI PLUG-IN GUIDE
Release 20.6
4.4 DataChildrenOfType
Classes and utility functions
Use this class when you need to access children through a Data object. It allows you
to retrieve, create, and iterate all children.
Class srlinux.data.data.DataChildrenOfType(schema, parent)
The children of a Data object of a single type.
Returned by Data.get_children() or by accessing the attribute with the child name
(for example, Data.interface). Most methods require you to pass a value for each key
defined in the schema.
For example, if the schema has no keys, use:
data.node.get()
data.node.create()
data.node.exists()
If the schema has a single key, this becomes:
#node has a single key 'name'
data.node.get('abc')
data.node.create('abc')
data.node.exists('abc')
#or
data.node.get(name='abc')
data.node.create(name='abc')
data.node.exists(name='abc')
If the schema has a multiple keys, specify them all in the correct order:
# node has 2 keys, 'name' and 'id'
data.node.get('abc',1)
data.node.create('abc',1)
data.node.exists('abc',1)
#or
data.node.get(name='abc', id=1)
data.node.create(name='abc', id=1)
data.node.exists(name='abc', id=1)
Table 15 defines the DataOfChildrenType Attributes.
Edition: 1 3HE 16119 AAAA TQZZA 33
Page 34

Classes and utility functions
Table 15 DataOfChildrenType attributes
Attribute Description
get(*args, **kwargs) Returns an existing child with the specified keys.
exists(*args, **kwargs) Returns True if a child with the specified keys exists.
create(*args, **kwargs) Creates and returns a child with the specified keys. If
count() Counts the number of children.
is_empty Returns True if there are no children of this type.
CLI PLUG-IN GUIDE
Release 20.6
Generates an AttributeError if a wrong number of keys
is given, and KeyError if there is the child does not
exist.
Generates an AttributeError if a wrong number of keys
is given.
this child already exists, the existing child is returned
(and no changes are made). Generates an
AttributeError if a wrong number of keys is given.
items() Iterates over all children of this type and are sorted
based on their keys.
clear() Removes all children of this type.
formatter Returns the Formatter that can be used to generate
the show report for the Data object.
iter_format(max_width) Invokes the Formatter.iter_format_type() of these
Data objects. Returns an iterator over the formatted
output lines.
34
3HE 16119 AAAA TQZZA Edition: 1
Page 35

CLI PLUG-IN GUIDE
Release 20.6
4.5 SchemaNode
Classes and utility functions
srlinux.schema.fixed_schema.FixedSchemaNode.add_child(self, child_name,
key=None, keys=[], field=None, fields=[], leaflist=None, leaflists=[],
importance=<ShowImportance.High: 3>)
Adds a list/container to the current node, which allows you to specify the keys, fields,
and leaf-lists of the new child.
Table 16 defines the SchemaNode arguments.
Table 16 Schema Node arguments
Argument Description
child_name : str The name specified for the newly created child.
key : str or None If not None, a key with the specified name is added.
keys : list of str The names of the keys to be added.
field : str or None If not None, a field with the specified name is added.
fields : list of str The names of the fields that are added.
leaflist : str or None If not None, a leaf-list with the specified name is added.
leaflists : list of str The names of the leaf-lists to be added.
Edition: 1 3HE 16119 AAAA TQZZA 35
Page 36

Classes and utility functions
CLI PLUG-IN GUIDE
Release 20.6
36
3HE 16119 AAAA TQZZA Edition: 1
Page 37

Customer Document and Product Support
Customer Documentation
Customer Documentation Welcome Page
Technical Support
Product Support Portal
Documentation Feedback
Customer Documentation Feedback
Page 38

© 2020 Nokia.
3HE 16119 AAAA TQZZA
 Loading...