

Nokia IP60 - Security Appliance Quick Setup Manual

4. Set Up Your Connection
• Launch your Web browser and type http://my.firewall in the address bar.
Follow the instructions for setting up your administrator password.
5. Software Updates & Technical Support
• Please refer to the Nokia IP60 Appliance User Guide
Nokia IP60 Appliance
Internet Security Appliance
Quick Setup Guide
Keeping Your Network Safe with Proven Internet Security
Note: If the welcome page
fails to load, verify that the
IP60 appliance has been
properly installed. If your browser is
configured to use a proxy server make
sure my.firewall is included in the
browser’s exception list.
• After logging in for the first time the Setup Wizard window opens automatically. If at
a later time you wish to return to the configuration wizard, click on Setup and choose
Setup Wizard.
• The Wizard takes you through the connection setup process. Fill in the parameters
as provided by your service provider or system administrator.
Copyright © 2006 Nokia
The Check Point logo is a trademark of Check Point Software Technologies Ltd. All rights reserved.
N450000294 Rev 001
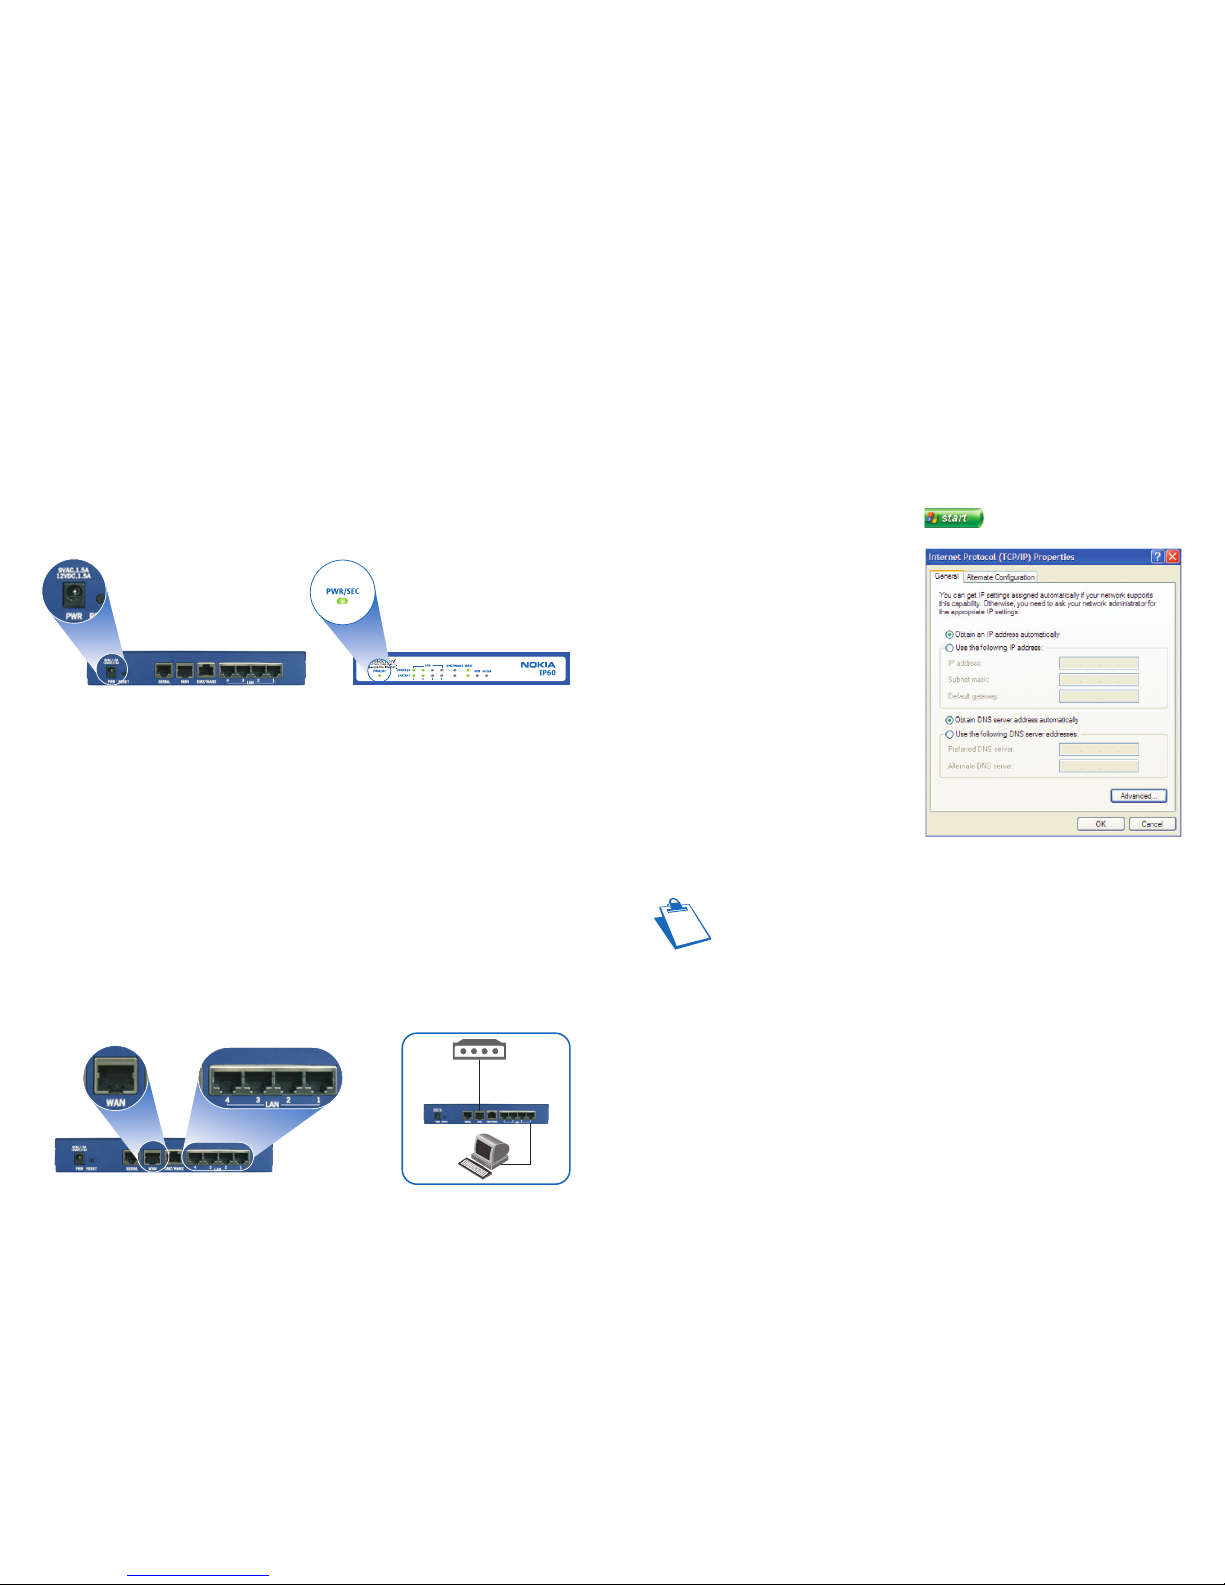
2. Connect Your Network
• Connect one end of your network cable to one of the four IP60 LAN ports and the other
end to your PC. If you have additional PCs or other network devices you can connect
them to other LAN ports.
• A corresponding LAN LED lights up, for each connected computer.
• Connect one end of the telephone cable provided with your IP60 appliance to the
WAN socket on the rear panel of your IP60 appliance and the other end into the cable
modem, as shown in the figure below.
• Make sure your cable modem is powered on.
• The WAN LED will light up, indicating proper connection to your modem.
Cable
modem
PC
Nokia IP60
Network Diagram
3. Configuring Your PC
Before continuing, make sure that all of your PCs are configured correctly.
For Windows XP Operating Systems:
• Open the Control Panel window by clicking and then choosing Control Panel.
• Select Network and Internet Connections.
• Select Local Area Connection and
double-click to open.
• Select Properties.
• Select Internet Protocol (TCP/IP),
Properties.
• Under the General Properties tab, select
Obtain an IP address automatically and
select Obtain DNS server address
automatically.
• Select OK and then select Close.
• If you are prompted to restart your PC, click Yes.
1. Turn On Your Nokia IP60 Appliance
• Connect the power supply to the power port on the rear panel of the IP60 appliance,
and then plug it into the power outlet.
• The Power LED on the front panel starts flashing, indicating that your IP60 appliance is
now turned on.
Note: The configuration process varies between operating systems. If you are
using a Macintosh or another operating system, please consult the Nokia IP60
User Guide, which is available on the included CD-ROM.
 Loading...