

Page 1
User’s Guide for the Nokia Digital
Pen (SU-1B)
9356642
Issue 1
Page 2
DECLARATION OF CONFORMITY
We, NOKIA CORPORATION declare under our sole responsibility that the product SU-1B is in
conformity with the provisions of the following Council Directive: 1999/5/EC. A copy of the
Declaration of Conformity can be found at
http://www.nokia.com/phones/declaration_of_conformity/.
Copyright © 2003 Nokia. All rights reserved.
Reproduction, transfer, distribution or storage of part or all of the contents in this document in any form
without the prior written permission of Nokia is prohibited.
Nokia is a registered trademark of Nokia Corporation. Bluetooth is a registered trademark of Bluetooth
SIG, Inc. Other product and company names mentioned herein may be trademarks or tradenames of their
respective owners.
Nokia operates a policy of continuous development. Nokia reserves the right to make changes and
improvements to any of the products described in this document without prior notice.
Under no circumstances shall Nokia be responsible for any loss of data or income or any special,
incidental, consequential or indirect damages howsoever caused.
The contents of this document are provided "as is". Except as required by applicable law, no warranties of
any kind, either express or implied, including, but not limited to, the implied warranties of
merchantability and fitness for a particular purpose, are made in relation to the accuracy, reliability or
contents of this document. Nokia reserves the right to revise this document or withdraw it at any time
without prior notice.
The availability of particular products may vary by region. Please check with the Nokia dealer nearest to
you.
In some countries there may be restrictions in using Bluetooth devices. Check with your local authorities.
Page 3

Contents
1.Introduction.......................................................................................................5
Bluetooth wireless technology................................................................................................................5
2.Getting started ..................................................................................................7
Charging the battery..................................................................................................................................8
Chargers and batteries...........................................................................................................................9
Pairing your Nokia Digital Pen................................................................................................................. 9
Pairing the pen from your phone........................................................................................................9
Activating pairing from your pen.................................................................. ....................................10
3.Using the Nokia Digital Pen with your compatible phone...........................12
Switching the pen on or off...................................................................................................................12
Nokia Digital Pen indicators...............................................................................................................12
Writing and drawing with the pen.......................................................................................................13
Using the notepads................................................................................................................................14
Using the stylo settings............................... .........................................................................................15
Creating and sending a multimedia message to the phone..........................................................15
4.Using the Nokia Digital Pen with a PC..........................................................17
Installing the PC application.............................................................................. ....................................17
Sending and saving notes on your PC.................................................................................................18
Resetting the Nokia Digital Pen............................................................................................................19
Partial reset..............................................................................................................................................19
Full reset.................................................................... ...............................................................................20
Changing the ink cartridge of the pen................................................................................................20
Copyright
© 2003 Nokia. All rights reserved.
3
Page 4

5.Battery information.........................................................................................23
Charging and Discharging.......................................................................................................................23
CARE AND MAINTENANCE.................................................................................25
Copyright © 2003 Nokia. All rights reserved.
4
Page 5

1. Introduction
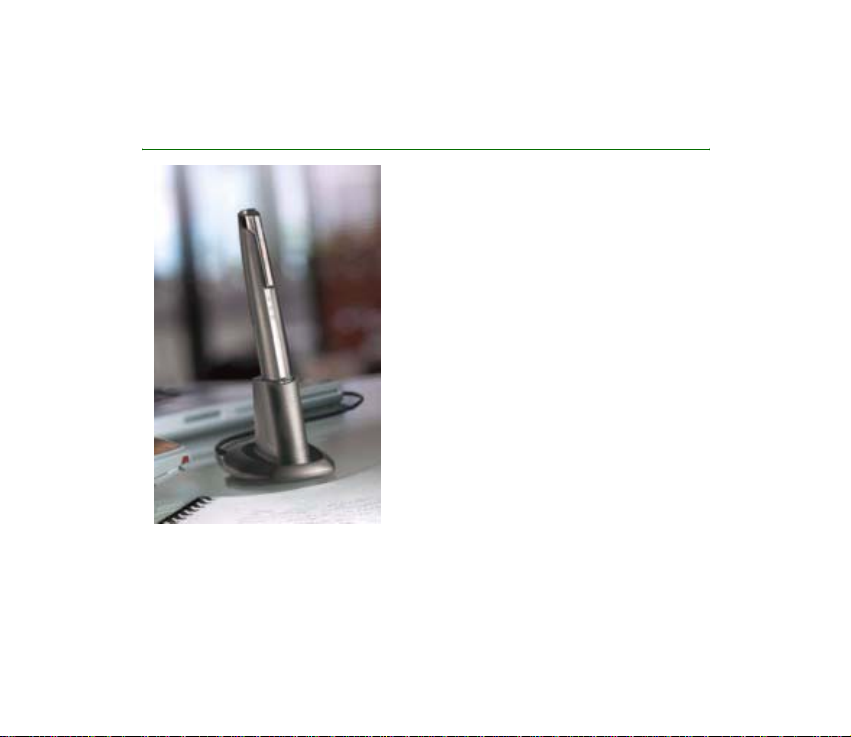
The Nokia Digital Pen allows you to create colourful and personal multimedia
messages (MMS). Draw a picture or write a poem, and send it to the compatible
phone that supports Bluetooth wireless technology. Display the image on your
phone or forward it as a multimedia message to another compatible phone or to
an e-mail address.
The Nokia Digital Pen also allows you to write meeting minutes or personal notes,
and save them in your PC. The Nokia Digital Pen can save up to 100 A5 pages, all
of which can be sent to your PC by placing the pen in the Connectivity Stand,
which is connected to your PC via the USB port.
Read this user’s guide carefully before using the Nokia Digital Pen. For important
safety and maintenance information and for details about phone features, check
the user’s guide of your phone.
■ Bluetooth wireless technology
The Nokia Digital Pen is specially designed for compatible phones that support
Bluetooth wireless technology and Object Push Profile, Dial-up Networking
Profile, Generic Object Exchange Profile and Serial Port Profile (A profile is a set of
Bluetooth commands that your phone uses to control the pen).
With the Bluetooth wireless technology you can connect compatible devices
without cables to other products using Bluetooth wireless technology. A
Bluetooth connection does not require that the phone and the Nokia Digital Pen
Copyright
© 2003 Nokia. All rights reserved.
5
Page 6

be in line of sight, but both devices should be within 10 metres of each other,
although the connection can be subject to interference from obstructions, such as
walls, or other electronic devices.
The Nokia Digital Pen is compliant with and adopts Bluetooth Specification 1.1.
However, interoperability between the Nokia Digital Pen and other products with
Bluetooth wireless technology is not guaranteed because it depends on
compatibility. For more information on the compatibility between the Nokia
Digital Pen and other products with Bluetooth wireless technology, check with
your dealer.
Copyright © 2003 Nokia. All rights reserved.
6
Page 7

2. Getting started
Note: The use of wireless devices may be restricted in some situations. Observe
any restrictions and obey all signs and instructions concerning use of wireless
devices.
Figure 1 shows the main parts of the
Nokia Digital Pen. Note that
operations and some features are
network dependent.
1- Ink cartridge
2- Reset hole
3- Ink cartridge removal tool
4- Cap
5- Power on/off indicator
6- Data status indicator
7- Battery level indicator
8- Charging connector
Copyright
© 2003 Nokia. All rights reserved.
7
Page 8
Before you can start using your Nokia Digital Pen, you must:
• Charge the battery.
• Pair a compatible phone with the pen, see Pairing your Nokia Digital Pen on
page 9.
You need your Bluetooth passcode to pair the Nokia Digital Pen. The Bluetooth
passcode is included in the sales package. Keep the card in a secure place.
• To use the Nokia Digital Pen with your PC, install the PC application to your
computer that is provided on the CD-ROM in the sales package, see Using the
Nokia Digital Pen with a PC on page 17.
■ Charging the battery
Charge the pen in either of the two ways:
• Plug the charger into an AC wall
outlet and connect it to the charging
connector on the pen, see Figure
2 (1).
• Plug the charger into an AC wall
outlet, connect it to the
Connectivity Stand, and place the
pen in the stand.
The battery indicator on the pen blinks during charging. Charging the battery
fully takes up to 2 hours depending on the charger. Note that the pen need not
be fully charged before you can use it.
Copyright © 2003 Nokia. All rights reserved.
8
Page 9

Chargers and batteries
Check the model number of any charger before using it with this device. The Nokia Digital
Pen is intended for use with the following chargers: ACP-8, ACP-12, and LCH-12.
Warning! Use only chargers approved by Nokia for use with this particular
enhancement. The use of any other types will invalidate any approval or
warranty applying to the enhancement, and may be dangerous.
For availability of approved chargers, check with your local dealer.
When you disconnect the power cord of any enhancement, grasp and pull the plug, not the
cord.
■ Pairing your Nokia Digital P en
You must pair the pen with a compatible phone to enable it to communicate with
the phone. You can start the pairing from either your phone or from your pen. The
pen can be paired with one phone at a time. If you want to use your pen with
another phone, you must pair it with that phone.
Note: Do not point the IR (infrared) beam at anyone's eye or allow it to interfere
with other IR devices.
Pairing the pen from your phone
1. Take the cap off the pen and make sure that both your pen and compatible
phone are switched on. Create the Bluetooth connection within 5 minutes.
2. Activate the Bluetooth connection from the phone. For more information, see
the user’s guide of the phone.
Copyright
© 2003 Nokia. All rights reserved.
9
Page 10

3. Set the phone to search for Bluetooth devices as instructed in the user’s guide
of the phone.
The phone searches for all Bluetooth devices within approximately 10 metres
and displays them in a list.
4. Select the Nokia Digital Pen from the list and key in the Bluetooth passcode
included in the sales package
When you have keyed in the correct passcode, the pen vibrates three times to
indicate that pairing has succeeded and that the pen is ready for use.
Activating pairing from your pen
1. Activate the Bluetooth connection from the phone. For more information, see
the user’s guide of the phone.
2. Use the pen to select the "Pair pen with mobile phone" box. (The "Pair pen with
mobile phone" box is in the end of the notepad).
The indicator blinks to show that the pen is searching for Bluetooth devices
within approximately 10 metres.
3. The pen selects the nearest device and asks to be paired with it. Enter the
Bluetooth passcode included in the sales package.
When you have keyed in the correct passcode, the pen vibrates three times to
indicate that pairing has succeeded.
4. To allow the pen to create the Bluetooth connection automatically and to send
data to the compatible Bluetooth phone automatically, set your phone to
accept Bluetooth connection requests without your permission.
Copyright © 2003 Nokia. All rights reserved.
10
Page 11

In Nokia phones, this can be done by changing your paired devices settings in
the Bluetooth menu.
5. Start using the pen.
Note that the Bluetooth connection between the Nokia Digital Pen and the
compatible phone is active only when the Nokia Digital Pen is sending data to the
phone.
Copyright
© 2003 Nokia. All rights reserved.
11
Page 12

3. Using the Nokia Digital Pen with your compatible phone
Note: The use of wireless devices may be restricted in some situations. Observe
any restrictions and obey all signs and instructions concerning use of wireless
devices.
■ Switching the pen on or off
To switch the pen on, remove the cap. The pen vibrates briefly and the on/off
indicator appears.
To switch the pen off, replace the cap.
To save power and to protect the lens from dirt, always keep the cap on when you
are not using the pen.
Nokia Digital Pen indicators
Off: The pen is switched off or the battery has run out of charge.
White: The pen is ready for use or is registering strokes.
Flashing: The pen has not been used for over 5 minutes. Put the cap on to
save power.
Flashing: The pen is connecting to a Bluetooth device and/or sending
data.
Copyright © 2003 Nokia. All rights reserved.
12
Page 13

Flashing red: A message transmission has failed due to a Bluetooth
connection failure or other service error.
White: Message has been sent successfully.
Off: The pen is sufficiently charged and the charger is not connected to
the pen.
Red: You need to charge the pen. The pen will soon switch off.
Flashing white: The pen needs to be recharged, but it can still be used.
White: The pen is fully charged, but the charger is connected to the pen.
■ Writing and drawing with the pen
When you write or draw, use the digital
paper included in the sales package. See
Figure 3 for using your pen.
• Draw or write within the patterned
area of the paper.
• You can change the colour of the ink
or the line thickness, see Using the
stylo settings on page 14.
Note that the colour of the ink or the
line thickness does not change on
paper while you write. When you send
the message to a compatible phone or
display, the changes are shown on the display.
Copyright
© 2003 Nokia. All rights reserved.
13
Page 14

• You can stop writing and put on the cap to continue later. Text and drawings
are saved in the pen until its memory is full.
Once the pen’s memory is full, the new data replaces the oldest one in the
pen’s memory.
• When you run out of paper, you can obtain notepads from authorized Nokia
retail stores. You can also print a specific PDF file (on CD-ROM) that contains
the digital paper pattern on normal printing paper and use it as digital paper.
Using the notepads
The sales package includes two types of notepad paper, a small MMS pad (B7 size)
and a large notepad (A5 size). Use the smaller notepad for sending multimedia
messages to a compatible phone or to an e-mail address.
The bigger notepad has two functions. You can either save the notes in a PC using
the PC application included in the sales package or send them to a compatible
phone via a Bluetooth connection. In both cases you only need to select whether
you want to send the notes to PC or to the phone by selecting the appropriate box
on the notepad, see Using the Nokia Digital Pen with a PC on page 17.
Before starting to use a new notepad, select the box "New notepad" on the first
page. Use only one notepad type (MMS pad and notepad) at a time, and start
using a new pad of the same type only after you have finished the old pad.
Using the stylo settings
You can change the colour and line thickness of the digital ink while you write or
draw. The stylo settings are listed in the fold-out of the notepad back cover.
Copyright © 2003 Nokia. All rights reserved.
14
Page 15

• To change the colour and/or the line thickness, select the respective selection
box on the paper. The pen vibrates briefly to confirm your selection.
Your selections are used until you put the cap on. When the cap is put on, the
pen returns to the default line colour and thickness.
Note that the pen does not change the colour or the line thickness of the ink on
the paper. The different colour or line thickness become visible only when you
have sent the image or text to a compatible phone or PC.
■ Creating and sending a multimedia message to the
phone
Note: Only devices that offer compatible multimedia message or e-mail
features can receive and display multimedia messages. Multimedia message
objects may contain viruses or otherwise be harmful to your device or PC. Do
not open any attachment if you are not sure of the tru stworthiness of the
sender.
Use the multimedia notepad for writing and sending mu ltimedia me ssages to
compatible mobile phones. Before you can send a multimedia message from the
phone, you need to set the multimedia settings in your phone. See you phone’s
user’s guide for the multimedia settings. For availability and subscription
information on multimedia messaging services, contact your network operator or
service provider.
1. Select the "New notepad" box on the first page of the notepad.
Copyright
© 2003 Nokia. All rights reserved.
15
Page 16

2. Make sure that the Bluetooth connection is active on your phone and that the
pen is connected (paired) to the phone. The pen and the phone should be
within 10 metres of each other.
3. Write a message or draw a picture.
4. To select the size of the image to be sent to the phone, select the appropriate
box.
5. To send a picture to your phone, select . The indicator blinks while the
message is being sent and stops when the message has been sent to the phone.
You can forward the multimedia message to another phone or to an e-mail
address, or you can save it in the phone. For more detailed information on
multimedia messaging, see the user’s guide of the phone.
Copyright © 2003 Nokia. All rights reserved.
16
Page 17

4. Using the Nokia Digital Pen with a PC
■ Installing the PC application
To use your pen with your PC, you need to install the PC application provided on
CD-ROM.
1. Insert the CD in the CD drive of your PC and follow the instructions on the
screen.
2. Plug the Connectivity Stand into the USB port
of your PC and connect it with a charger cable
to an AC wall outlet, if you want to charge the
pen while it is in the Connectivity Stand, see
Figure 2 (2).
3. Remove the cap from the pen and place the pen
in the Connectivity Stand.
Your PC detects the new hardware and loads
the appropriate drivers automatically.
Your PC is ready to receive and save notes from
your pen.
Copyright
© 2003 Nokia. All rights reserved.
17
Page 18

■ Sending and saving notes on your PC
You can send and save notes on your PC using the larger notepad.
To send and save a note to PC:
1. Write a message or draw a picture.
2. Select the PC box on the notepad and to create a draft e-mail of the page
content, or to simply send your notes to your PC without creating the draft email, put the pen in the Connectivity Stand for the pen.
Your PC application includes a help file. To view the file, click the pen icon and
select Help from the menu.
To view notes on a PC:
1. Write a note or draw a picture using the larger notepad.
2. Place the pen in the Connectivity Stand. Your notes are automatically
transferred to your PC and saved in memory.
3. To view, edit and rearrange the notes, start the Digital Note Viewer application
on your PC.
4. On your PC, press Start, select Programs, Nokia Digit al Pen and Digital Note
Viewer.
Copyright © 2003 Nokia. All rights reserved.
18
Page 19

■ Resetting the Nokia Digital Pen
Partial reset
Partial reset can be necessary if the
pen freezes, but you do not want to
lose the data that has been saved in
the pen’s memory. To reset the pen,
push the reset hole with a paper clip.
The pen restarts and you can continue
using it normally. Note that you
should not hold the tip of pen against
a surface, or all of its memory will be
cleared, see Figure 4 (1).
Copyright
© 2003 Nokia. All rights reserved.
19
Page 20

Full reset
Use ful reset, if you want to give
the pen to someone else and you
want to make sure that it does not
contain any personal information.
Full reset clears all the settings of
the pen and resets all values to
their original settings, including
pairing information. See Figure
4 (2).
1. Take the cap off the pen.
2. Push the reset hole with a paper clip and, at the same time, press the pen tip
against the table.
All three indicators of the pen blink simultaneously when the pen resets.
After the reset is done, the pen vibrates.
3. Remove the paper clip and replace the cap.
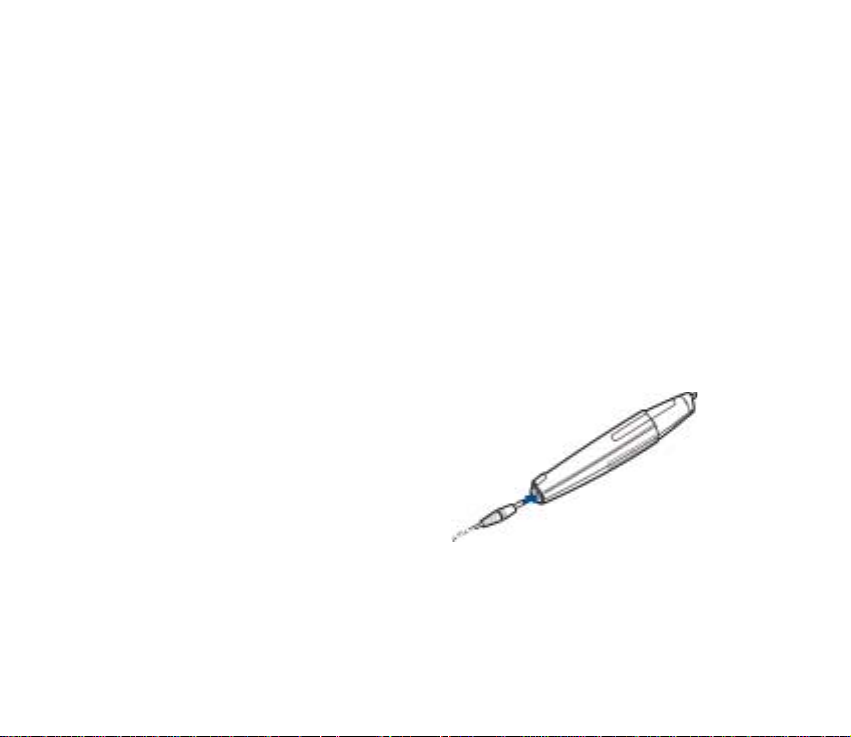
■ Changing the ink cartridge of the pen
To change ink cartridges with the built-in tool on the top of the pen cap, See
Figure 5 (1-4):
Copyright © 2003 Nokia. All rights reserved.
20
Page 21

1. Place the pen tip in the hole on the cap (1 and 2).
Copyright
© 2003 Nokia. All rights reserved.
21
Page 22

2. Tilt the cap slightly and take out the ink
cartridge by pulling the cap away. Dispose of
the ink cartridge properly (3).
3. Gently slide a new ink
cartridge into the pen until it
cannot be pressed in any
further (4).
You can get ink cartridge
refills at local office supply
retailers. Use only ink refills
that are ISO 12757-2 DOC
compliant.
Note: Make sure that you slide the new ink cartridge in the correct hole.
Copyright © 2003 Nokia. All rights reserved.
22
Page 23

5. Battery information
■ Charging and Discharging
Your device is powered by a rechargeable battery.
Note that a new battery's full performance is achieved only after two or three complete
charge and discharge cycles!
The battery can be charged and discharged hundreds of times but it will eventually wear out.
When the operating time is noticeably shorter than normal, it is time to buy a new battery.
Unplug the charger when not in use. Do not leave the battery connected to a charger for
longer than a week, since overcharging may shorten its lifetime. If left unused a fully
charged battery will discharge itself over time.
Temperature extremes can affect the ability of your battery to charge.
Use the battery only for its intended purpose.
Never use any charger or battery which is damaged.
Leaving the Digital Pen in hot or cold places, such as in a closed car in summer or winter
conditions, will reduce the capacity and lifetime of the battery. Always try to keep the
battery between 15°C and 25°C (59° F and 77° F). Digital Pen with a hot or c old batter y may
temporarily not work, even when the battery is fully charged. Batteries' performance is
particularly limited in temperatures well below freezing.
Copyright
© 2003 Nokia. All rights reserved.
23
Page 24

CARE AND MAINTENANCE
Your device is a product of superior design and craftsmanship and should be treated with
care. The suggestions below will help you to fulfil any warranty obligations and to enjoy this
product for many years.
• Keep the device and all its parts and accessories out of the reach of small children.
• Keep the device dry. Precipitation, humidity and all types of liquids or moisture can
contain minerals that will corrode electronic circuits.
• Do not use or store the device in dusty, dirty areas. Its moving parts can be damaged.
• Do not store the device in hot areas. High temperatures can shorten the life of electronic
devices, damage batteries, and warp or melt certain plastics.
• Do not store the device in cold areas. When it warms up (to its normal temperature),
moisture can form inside, which may damage electronic circuit boards.
• Do not attempt to open the device. Non-expert handling may damage it.
• Do not drop, knock or shake the device. Rough handling can break internal circuit boards.
• Do not use harsh chemicals, cleaning solvents, or strong detergents to clean the device.
• Do not paint the device. Paint can clog the moving parts and prevent proper operation.
• Use only the supplied or an approved replacement antenna. Unauthorised antennas,
modifications or attachments could damage the device and may violate regulations
governing radio devices.
All of the above suggestions apply equally to your device, battery, charger or any accessory.
If any of them is not working properly, take it to your nearest qualified service facility. The
personnel there will assist you and, if necessary, arrange for service.
Copyright © 2003 Nokia. All rights reserved.
24
 Loading...