


CPE25150

1
Contents
Contents
Desktop CPEi 150 User Guide
Overview. . . . . . . . . . . . . 2
Powerful Features in a
Single Unit . . . . . . . . . . . 4
Front of CPE . . . . . . . . . . 5
Bottom Panel. . . . . . . . . . 6
Operating Information. . . 7
Overview. . . . . . . . . . . . . 8
Before You Begin . . . . . . 9
Easy Setup. . . . . . . . . . . 10
Before you Begin
Configuration . . . . . . . . 11
User Interface Overview 12
Logging In to the CPE. . 15
Setup Wizard and Authentication
Step 1 - Change Password 16
Step 2 - Device Time. . . 17
Step 3 - WiMAX Security 17
Basic Configuration
Personalize Men u . . . . . 19
Internet Menu . . . . . . . . 23
Status Menu. . . . . . . . . . 28
Advanced Configuration
Port Fowarding Menu . . 29
Local Address Menu. . . 32
Control Panel. . . . . . . . . 37

2
Contents
Configuring TCP/IP
Configuring TCP/IP in
Windows 2000 . . . . . . . . 40
Configuring TCP/IP in
Windows XP. . . . . . . . . . 44
Troubleshooting
Power LED is Off. . . . . . 49
A Computer Cannot
Log On to the CPE. . . . . 49
Cannot Connect to
the Internet . . . . . . . . . . . 49
Additional
Troubleshooting Help. . . 49
Important Safety and Legal Information
Disposal of Motorola
Equipment in
EU Countries . . . . . . . . . 54
Disposal of Motorola
Networks Equipment in
Non-EU countries. . . . . . 55
CMM Disclosure
Copyrights and Trademarks
Notice. . . . . . . . . . . . . . . 58
Copyrights . . . . . . . . . . . 58
Usage and Disclosure
Restrictions. . . . . . . . . . . 59

3
Desktop CPEi 150 User Guide
Desktop CPEi 150 User
Guide
Overview
Thank you for purchasing the Motorola CPE Indoor (CPEi) 150
desktop device. The Desktop CPE allows you to connect to the
wireless world easily and seamlessly without complicated installa-
tion and setup procedures.
The Desktop CPE device provides the user:
•
Convenience — with easy plug and play functionality.
Flexible connectivity. Compact design.
•
Performance — dual antennas supply diversity technology.
Best in Class Radio Performance. Reliable indoor coverage.
High throughput.
•
Control — remote management capability allows easy
detection and authentication once the unit is setup. Robust
security.

4
Desktop CPEi 150 User Guide
CPEi 150 Unit
The features and the physical appearance of your Desktop CPEi
device may differ slightly from the illustration. This illustration
represents the model w ith internal antennas.
This product is subject to change. Not all features described in this
WiMAX CPEi150 User’ s Guide are available on all models.
For the most recent documentation, visit the Product
Documentation page on www.motorola.com.

5
Desktop CPEi 150 User Guide
Powerful Features in a Single Unit
The CPE device provides the following features:
•
WiMA X Authentication
•
WAN DHCP Client
•
LAN DHCP Server
•
Router Functions
•
Firewall Protection
•
Port Forwarding

6
Desktop CPEi 150 User Guide
Front of CPE
The CPE unit contains an LED indicator at the top of the unit. The
LEDs provide the status of the unit and signal strength for easy
adjustment during setup.
LED Indicator Interface
Note:
There is no reset button on this CPE unit. If you want to reset
the CPE, simply pull out the power cord and plug it in again.
Power Status
The LEDs are:
•
On — power to the CPE is on .
•
Off —power to the CPE is off.
Signal Strength
•
If all LEDs on the bar are l it, full
signal is being received.
•
If all LEDs are off, no signal is
being received.
•
LEDs will display a cha se
pattern when the device is
attempting to locate and connect
to the network.

7
Desktop CPEi 150 User Guide
Bottom Panel
The bottom panel of the unit contains the Ethernet Port, the Power
Connection Port, and a LAN Port LED.
CPEi 150 Bottom Panel
Port Descriptions
Back Panel Ports Description
Ethernet Ethernet Port
Power AC Power Connector
LAN Port The LED is:
•
On - LAN Port is connected.
•
Off - LAN Port is not connected.

8
Desktop CPEi 150 User Guide
Operating Information
Operating temperature for this unit is 0-40C (32-104F).
AC Power Rating for the CPE 150 is:
•
110V ~240, 1A

9
Desktop CPEi 150 User Guide
Installation
Overview
T o install the Desktop CPEi 150 Series, you need to review the
following sections:
•
Before You Begin
•
Easy Setup

10
Desktop CPEi 150 User Guide
Before You Begin
Before you begin installation, check that you have received the
following items with your CPE:
In the box with your CPE you should have:
In addition, you will also need:
•
A computer
Item Description
AC Adapter
Power adapter.
Power Cord
Power cord that connects to the AC
Adapter to connect the unit to an AC
electrical outlet.
Ethernet Cable
Cable to connect the Internet port on
your CPE to your PC or laptop
computer
Quick Start Guide
Guide to demonstrate the setup and
basic IP configuration

11
Desktop CPEi 150 User Guide
Easy Setup
The CPE is easily set up in your home. Basic installation equipment
needed are the power adapter and cord, Ethernet cable, a PC or lap-
top computer and the CPE device.
Perform the following tasks before attaching the power cord or
powering up the unit:
•
Place the CPE vertically on a flat surface.
•
Connect one end of the Ethernet cable to the Ethernet port of
the CPE (1).
•
Connect the other end of the same Ethernet cable to an
Ethernet port on your PC or laptop computer.
•
Connect the power cord and the power adapter together.
•
connect the power adapter to the power connector on the
bottom of the unit(2).
•
Plug the power adapter into an AC power outlet. The CPE
will automatically turn on.

12
Desktop CPEi 150 User Guide
Procedure to Log into the CPE
Before you Begin Configuration
Some settings on your computer must be verified or changed to
ensure that your computer configuration can support the Desktop
CPE.
•
Confirm that your service provider has registered your unit.
•
Ensure your internet browser supports JavaScript.
•
Verify that the IP addresses and DNS settings are
automatically generated in your Local Area connection of
your Internet Protocol (TCP/IP) properties. Refer to the
chapter titled “Configuring TCP/IP” for information on how
to do this.
•
Ensure you know which protocol you will need to enter in
the Setup Wizard procedure. This will either be EAP-TLS or
EAP-TTLS. If EAP-TTLS is to be used, your service
provider will provide you a Username and Password.
13
Desktop CPEi 150 User Guide
User Interface Overview
A web based Graphical User Interface (GUI) is used to configure
the features of the CPE.
Main Menu Sample
There are six main menus in the GUI:
Menu Descriptions
Menu Description
Personalize Use this menu to set up your password,
device time and device name. You can
also abandon your personal settings by
clicking “
Restore Factory Settings
”.
Internet Use this menu to configure internet
connection settings, including
authentication, protocol, firewall and
dynamic DNS.

14
Desktop CPEi 150 User Guide
The following buttons appear at the bottom of each configuration
page:
Button Descriptions
Status Use this menu to display network status,
including WiMAX, Internet, LAN and
Device Information
Port Forwarding Use this menu to enable Universal Plug
and Play (UPnP) Internet Gateway
Device (IGD) profile to allow certain
Windows applications to setup the port
forwarding rule dynamically when NAT
is enabled on this device.
Local Access Use this menu to disp lay the IP A ddre ss
and netmask addres s in th e lo c al
network.
Control Panel Use this menu to manage the device
software.
Button Function
Apply Saves your changes. If you restart your
CPE without saving your changes, all
changes are lost. After the device
restarts, the last saved configuration is
used.
Undo Clears your changes on the current page
and returns to the main menu. Once you
click Apply, the Undo button will NOT
clear your changes.
Next Confirms the current setting and moves
on to the next screen

15
Desktop CPEi 150 User Guide
Note:
Illustrations in this manual containing an image of what you
see on your computer screen are for reference purposes only. Values
shown in the illustr ations in this manual m ay be dif ferent from what
you see on your computer screen.
Back Allows you to go back a screen to revise
the previous setting.
Refresh Updates to the new configurations and
settings.
Auto Refresh Updates automatically without needing
you to refresh manually.
Wizard Starts Setup Wizard manually if your
CPE did not run the setup program
automatically.
Start Sign Restart CPE.

16
Desktop CPEi 150 User Guide
Logging In to the CPE
Use the following procedure to log into the Desktop CPE.
1
On a computer that is connected to the CPE, open a web
browser.
2
In the Address or Location field, type
http://mywimax.
and
press
ENTER
to display the login screen.
Note:
You must include the period (.) after http://mywimax. in
order to access the login screen.
3
The Welcome to Motorola WiMAX CPE screen will be
displayed and will prompt you for a password.
Login Screen
4 In the Password field, type the password (default is motorola).
5
Click
Login.
6
First time users will see a pop-up box that states: “
The Wizard
application will guide you through for the first time
configuration. Click OK button to continue.”
7 Click the OK button to launch the wizard application.

17
Setup Wizard and Authentication
Setup Wizard and
Authentication
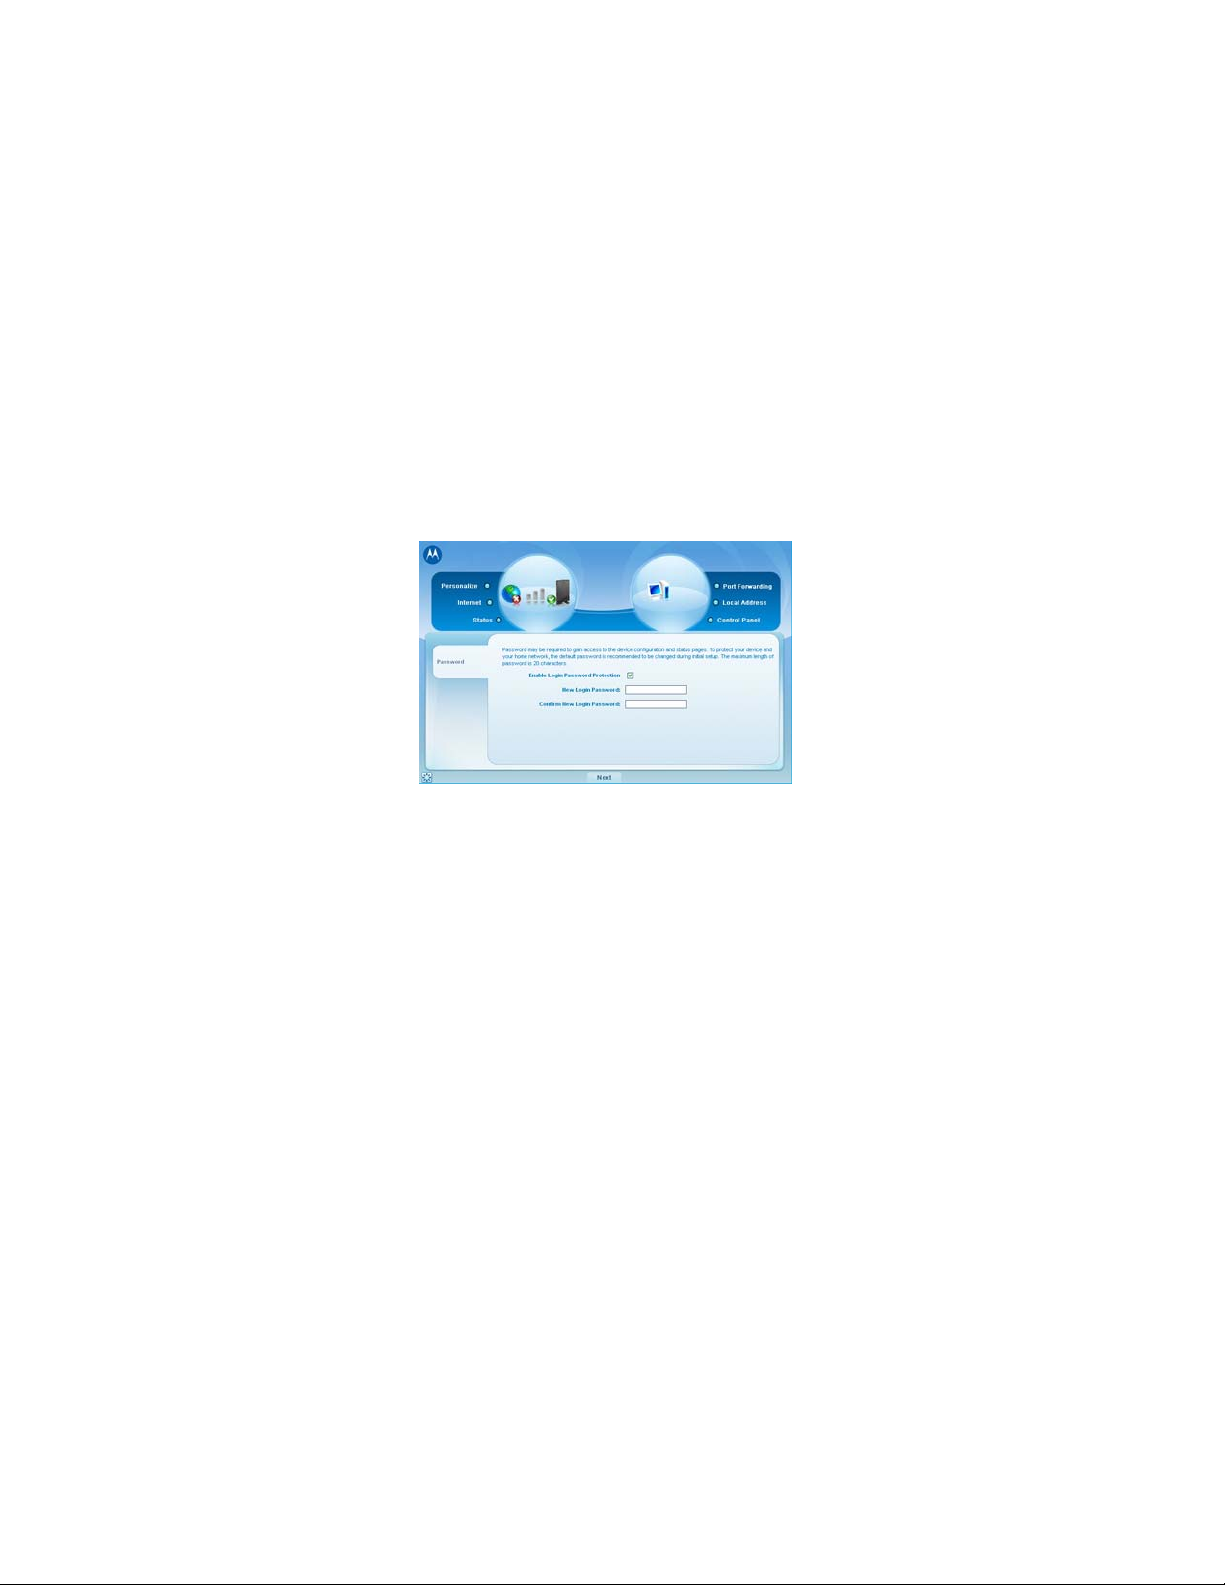
Step 1 - Change Password
Once you have launched the setup wizard, you will be prompted to
change your password. Motorola recommends using a password to
protect your home network and CPE device. Passwords are
case-sensitive.
T o change your passwo rd:
•
Ensure the “Enable Login Password Protection” box is
checked.
• Enter a New Login Password in the box. Passwords can be
no more than 20 characters in length.
•
Re-type your new password in the Confirm New Login
Password box.
•
Click
Next.

18
Setup Wizard and Authentication
Step 2 - Device Time
This screen allows you to set the time zone and to enable Daylight
Savings Time (when applicable) for your location.
•
Select the appropriate time zone for your location from the
drop down box.
•
Check the box called “Auto Adjust for Daylight Savings
Time” if you live in a region that observes Daylight Savings
Time (this box is checked by default).
•
Click the
Next
button.
Step 3 - WiMAX Security
The WiMAX Security tab will contain your authentication method.
Check with your service provider to determine if they require a user
name and password for authentication purposes.
•
If the Authentication Method is EAP-TLS, no User Name
and Password are required. Enter the Realm information
supplied by your service provider. Click the
Next
button.
•
If the Authentication Method is EAP-TTLS/MS-CHAPv2,
you will have to enter a User Name and Password and
Realm information supplied by your Service Provider. Once
you have entered the User Name/Password/Realm
information, click the
Next
button.
•
If you are unsure of the Authentication Method, select
EAP-TLS (this is the default) and click the
Next
button.
Click the
Apply
button when finished.
19
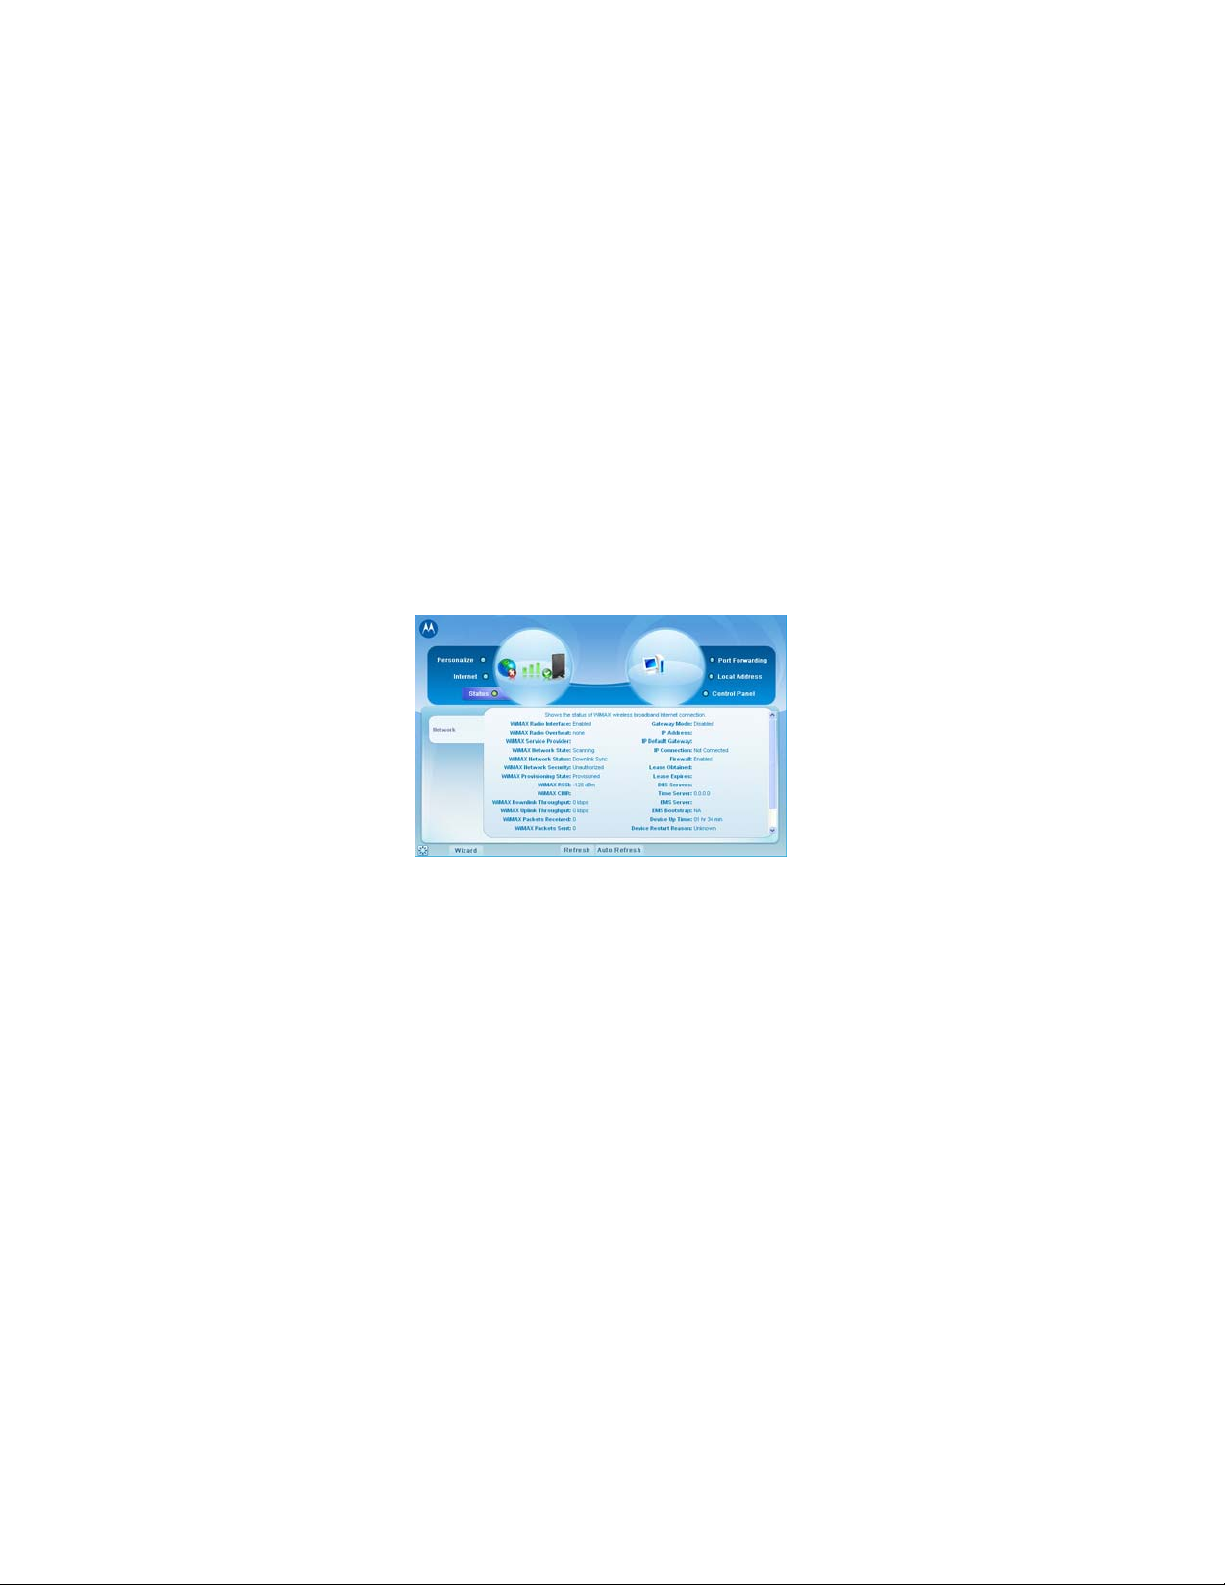
Setup Wizard and Authentication
Congratulations! You have now completed the setup of your
WiMAX connection.
Click
OK
on the Congratulations! dialog box.
A status screen will appear showing Network status. When your
CPE successfully connects to the Internet, you will see actual
linking status and statistics.
Status Screen
 Loading...