

Nokia 6800 Service Manual

CCS Technical Documentation
NHL-6 Series Transceivers
Service Software and Tuning Instructions
Issue 01 03/03 Copyright Nokia. All rights reserved.

NHL-6
CCS Technical Documentation
[This page left intentionally blank]
Page 2 Copyright Nokia. All rights reserved. Issue 01 03/03

CCS Technical Documentation
Quick Guide for Phoenix Service SW Installation ........................................................ 5
Phoenix Installation Steps in Brief ..............................................................................5
Phoenix Service SW....................................................................................................... 6
Before Installation .......................................................................................................6
Startup ..........................................................................................................................7
Dongle Driver Installation and Version Check ...........................................................8
First Time Installation of Phoenix ...............................................................................9
Update Installation of Phoenix ..................................................................................13
How to Uninstall Phoenix ..........................................................................................14
Data Package for Phoenix (Product Specific).............................................................. 16
Before installation ......................................................................................................16
Installation of Phoenix Data Package (Product Specific) ..........................................17
How to Uninstall Data Package .................................................................................20
How to Manage Connections .....................................................................................21
Manual Settings....................................................................................................... 22
How to Update Flash Support Files for FPS-8* and FLS-4* ...................................... 23
Before Installation .....................................................................................................23
Installing the Flash Support Files ..............................................................................23
How to Update The FPS-8* Flash Prommer SW ......................................................27
FPS-8 Activation and Deactivation.............................................................................. 29
Activation ..................................................................................................................29
Deactivation ...............................................................................................................31
JBV-1 Docking Station SW ......................................................................................... 32
Before Installation .....................................................................................................32
Installing SW Needed for the JBV-1 SW Update .....................................................33
Updating the JBV-1 Docking Station Software .........................................................37
Service Tool Concept For Baseband Tunings.............................................................. 39
Baseband Tunings ........................................................................................................ 40
Energy Management Tuning .....................................................................................40
Limits for Energy Management Calibration: ......................................................... 41
LCD Contrast Tuning ................................................................................................43
Quick Guide for Tuning the NHL-6* Phone With Phoenix ........................................ 44
General .......................................................................................................................44
Service Tool Concept for RF Tunings ......................................................................... 45
Receiver tunings........................................................................................................... 46
RX Channel Select Filter Calibration ........................................................................46
RX Calibration ...........................................................................................................47
Typical values and limits in (GSM900) RX Calibration: ....................................... 48
Typical values and limits in (GSM1800) RX Calibration: ..................................... 49
RX Band Filter Response Compensation ..................................................................50
Typical values and limits in Rx Band Filter Response Compensation EGSM900: 53
Typical values and limits in Rx Band Filter Response Compensation GSM1800: 54
RX AM Suppression ..................................................................................................56
Transmitter Tunings..................................................................................................... 59
TX I/Q Tuning ...........................................................................................................59
Typical TX IQ Tuning Values and tuning limits GSM900 :................................... 61
Typical TX IQ Tuning Values and tuning limits GSM1800:.................................. 62
TX Power Level Tuning ............................................................................................64
NHL-6
Issue 01 03/03 Copyright Nokia. All rights reserved.. Page 1

NHL-6
CCS Technical Documentation
Typical values: GSM1800....................................................................................... 67
Flashing Setup Instructions.......................................................................................... 71
Flash Concept with FPS-8............................................................................................ 71
POS (Point of Sales) Flash Concept .......................................................................73
Module Jig Concept ..................................................................................................... 74
JBV-1 Flash Concept .................................................................................................75
JBV-1 Baseband Tunings Concept ...........................................................................77
Parallel Flash concept ................................................................................................78
Page 2 Copyright Nokia. All rights reserved. Issue 01 03/03
Company confidential NHL-6
CCS Technical Documentation
Quick Guide for Phoenix Service SW Installation
Phoenix Installation Steps in Brief
The 4th generation Test and Service Software is called “Phoenix”
These are the basic steps to install the Phoenix
• Install the Phoenix Service SW
• Install the Data Package for Phoenix (product specific data and flash update
package)
• Phoenix is now ready for FLS-4S Point of Sales Flash Device use
If you use FPS-8:
1 Update FPS-8 SW
2 Activate FPS-8
3 Update JBV-1 Docking Station SW (only when needed)
The flash update files are delivered with the Phoenix Data Package so unless you want to
use certain version of this package, separate installation package is not needed anymore.
If you want to use it, it should be installed after connection management, before FPS-8
update.
Please refer to Service Manual and Service Bulletins for more information concerning phone model specific service tools and equipment setup.
Issue 01 03/03 Copyright Nokia. All rights reserved.. Page 5
NHL-6 Company confidential
Phoenix Service SW
Before Installation
• Check that a Dongle is attached to the parallel port of your computer.
• Download the installation package (e.g. phoenix_service_sw_a6_04_13_005.exe) to
your computer (e.g. C:\TEMP)
• Close all other programs
• Run the application file (e.g. phoenix_service_sw_a6_04_13_005.exe) and follow
instructions on the screen
• Administrator rights may be required to be able to install Phoenix depending on
the Operating System
• If the dongle driver is installed or updated, you need to reboot your PC before the
installation can continue.
CCS Technical Documentation
• If uninstalling or rebooting is needed at any point, you will be prompted by the
Install Shield program.
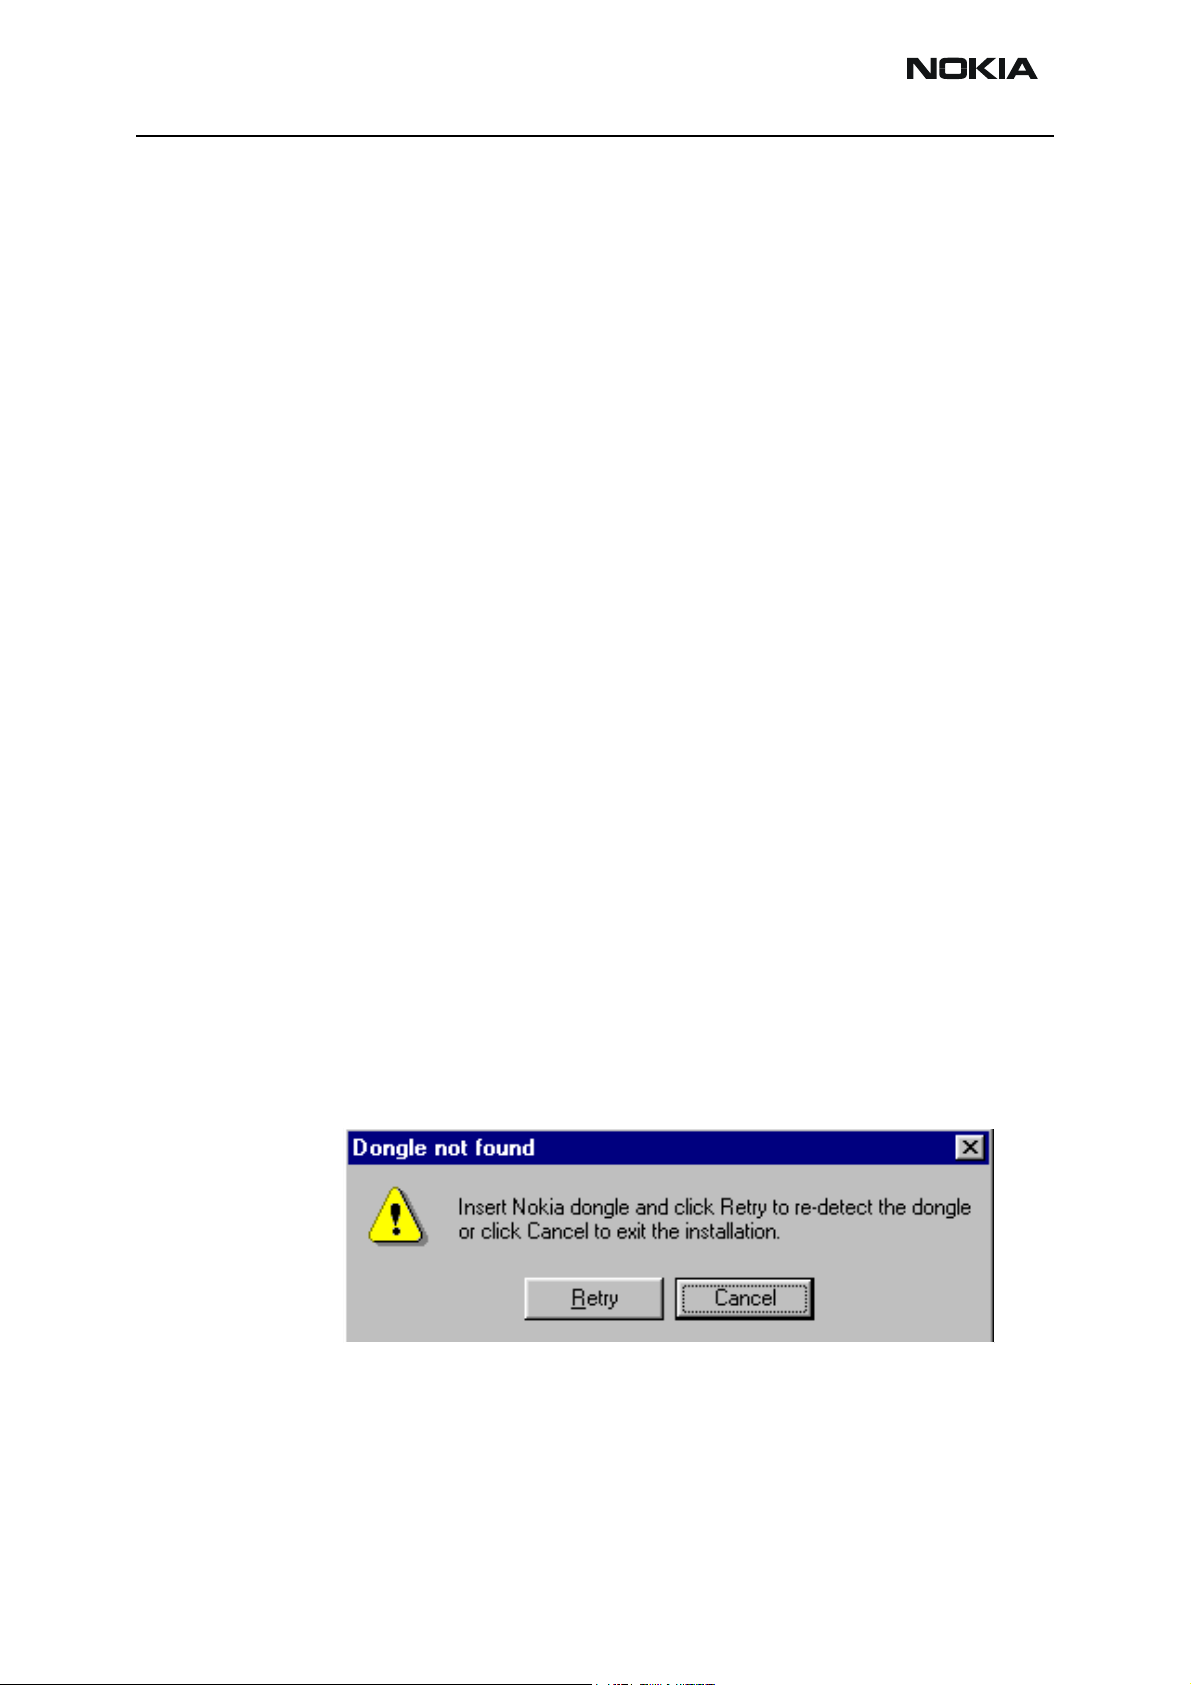
If at any point during installation you get this message, Dongle is not found and installation can´t continue.
Possible reasons may be defective or too old PKD-1Dongle (five digit serial number Dongle when used with FPS-8 Prommer) or that the FLS-4S POS Flash Dongle is defective or
power to it is not supplied by external charger.
Check the COM /parallel ports used first! After correcting the problem Installation can be
restarted.
Page 6 Copyright Nokia. All rights reserved. Issue 01 03/03
Company confidential NHL-6
CCS Technical Documentation
Startup
Run the phoenix_service_sw_a6_04_13_005.exe to start installation.
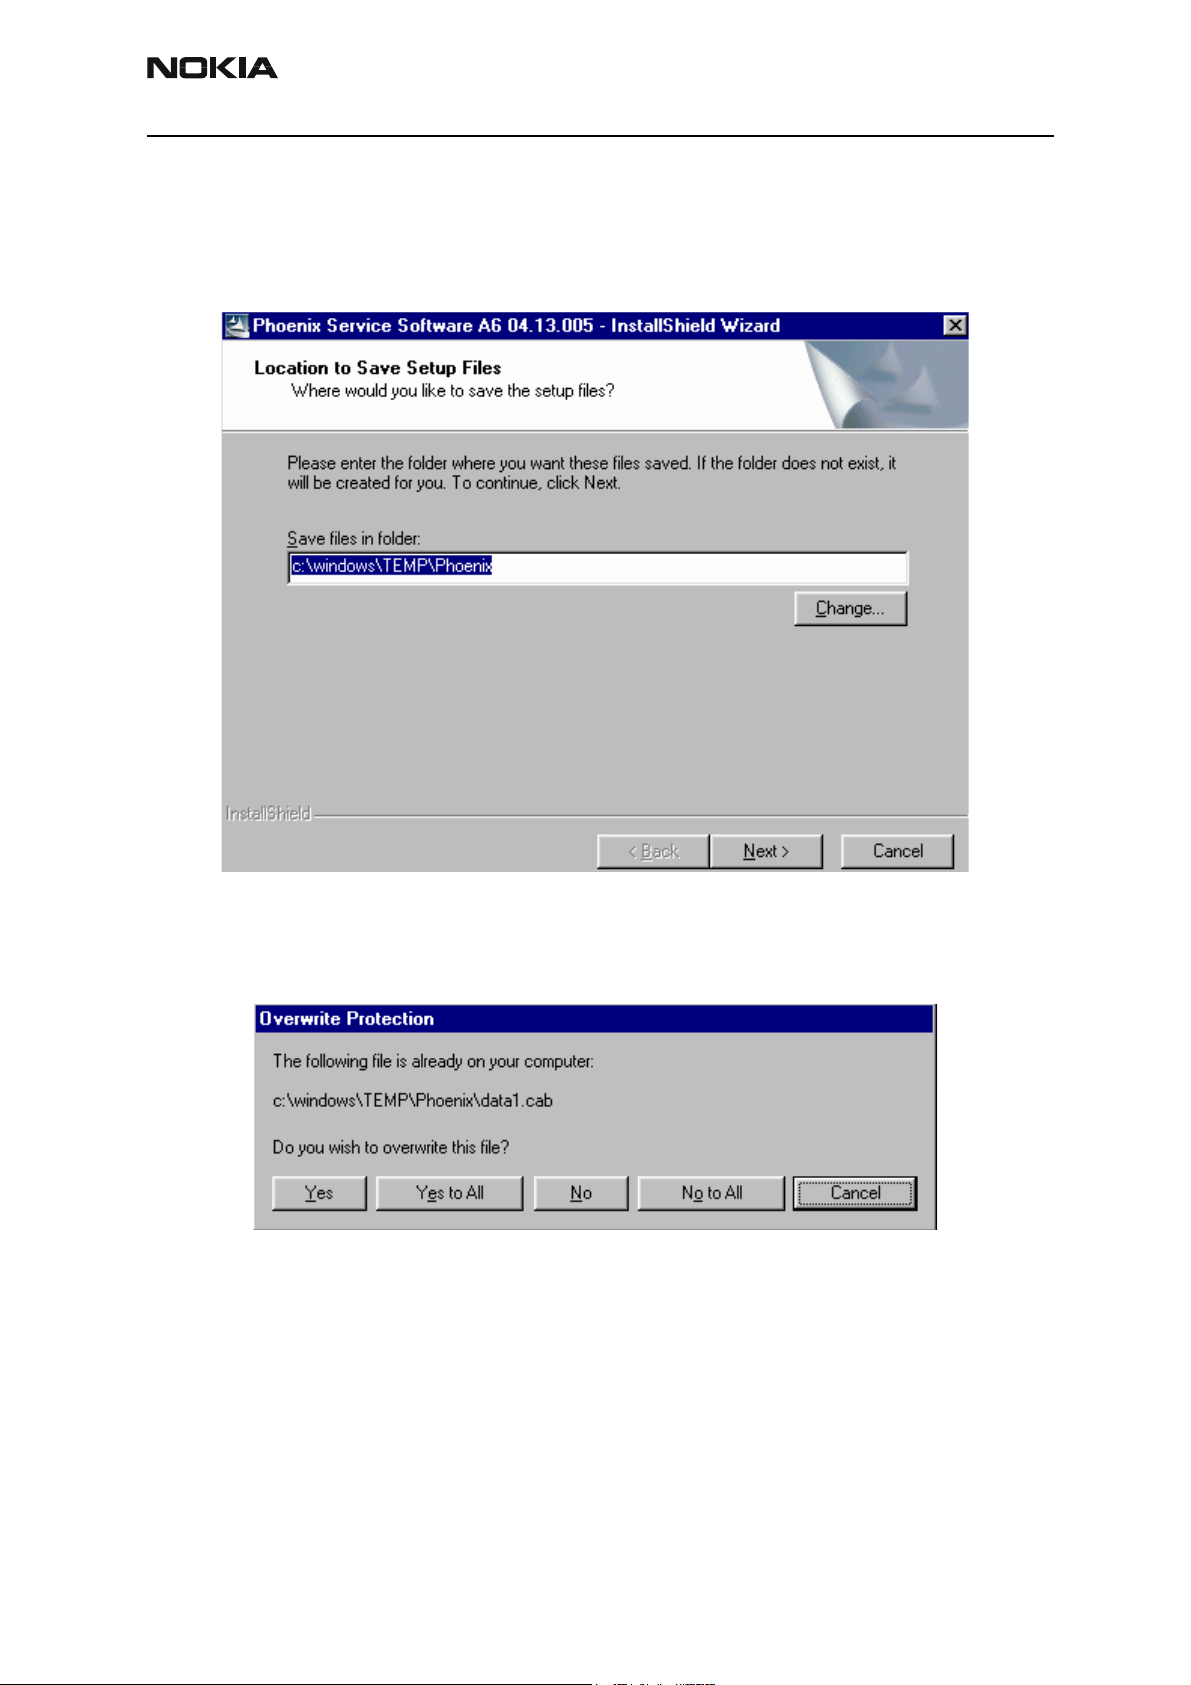
When you choose “Next” the files needed for installation will be extracted. Please wait.
If the setup files are already extracted (left in the file system from previous installation)
following dialog appears. Always click "Yes to All" to overwrite the existing setup files.
Issue 01 03/03 Copyright Nokia. All rights reserved.. Page 7
NHL-6 Company confidential
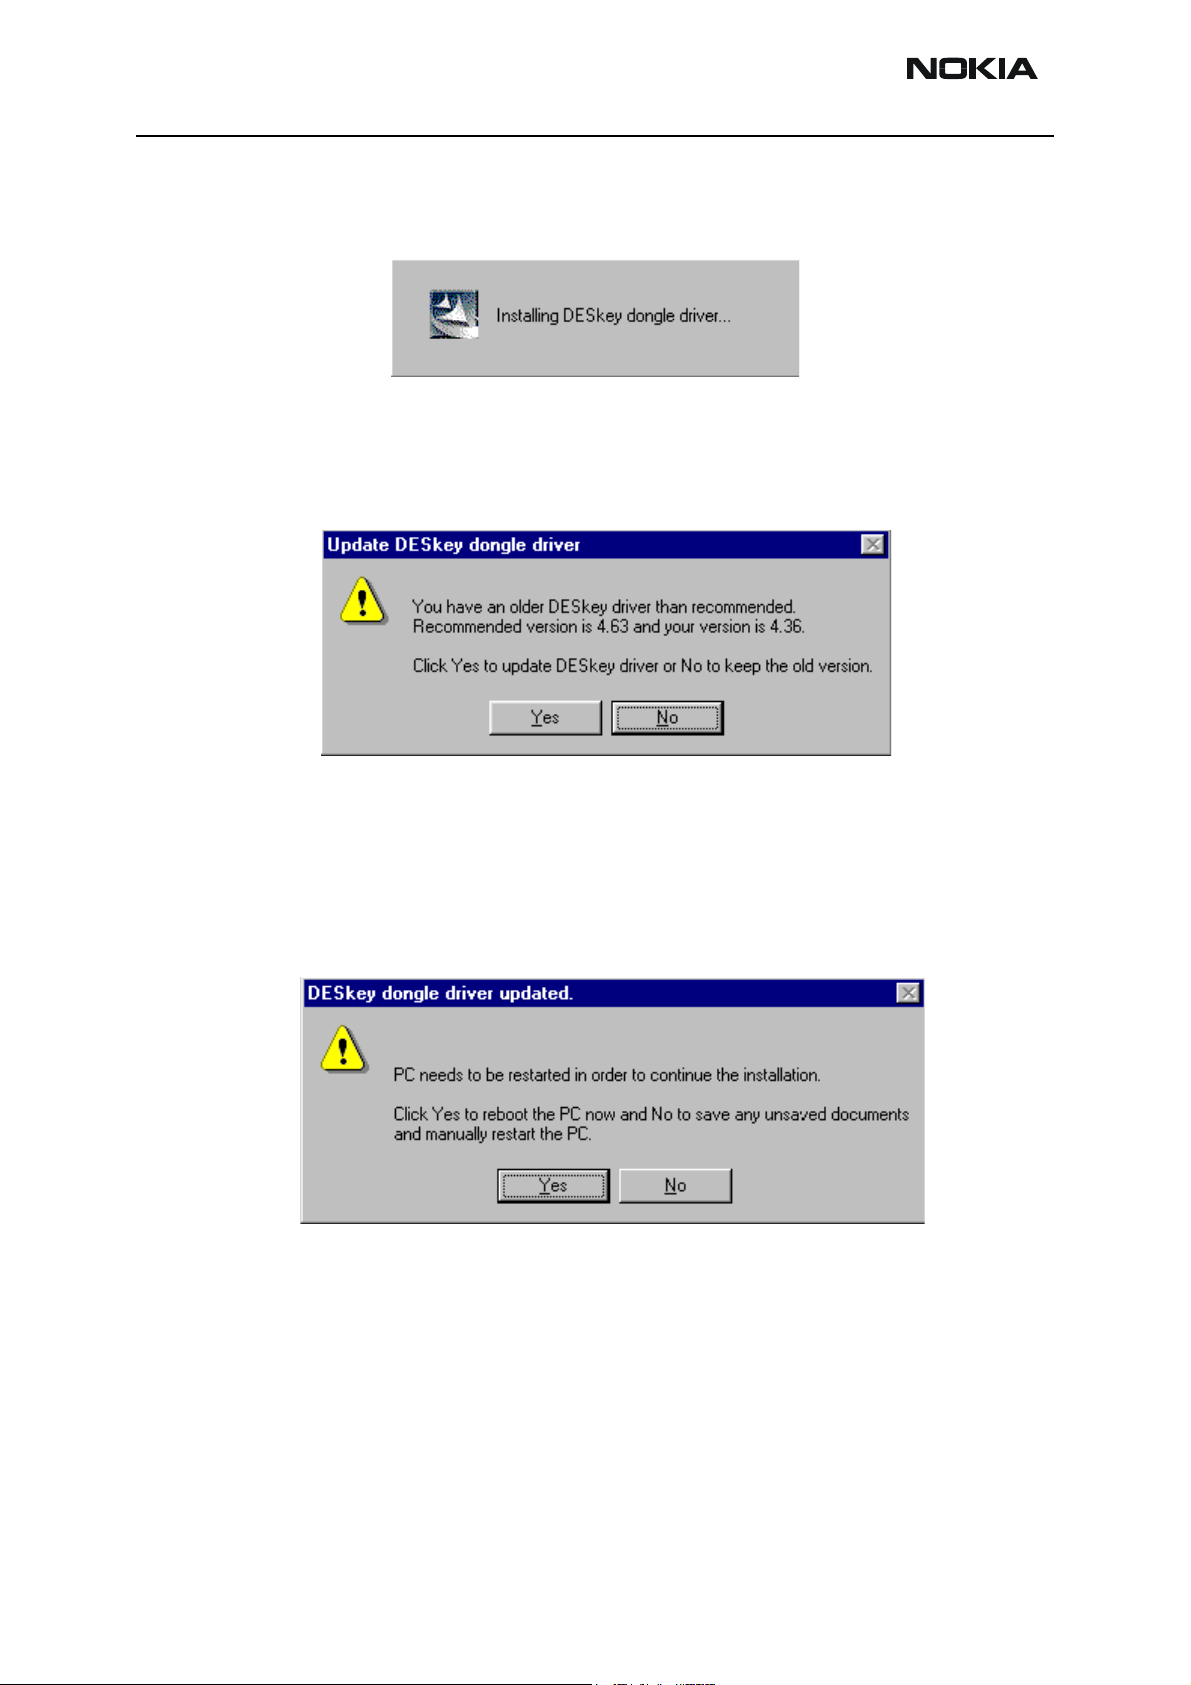
Dongle Driver Installation and Version Check
If there is no previously installed Dongle driver, installation will take place...
If the Dongle driver is installed and it is older than the latest supported version, the latest
version will be installed when you choose “Yes”. The latest version is always included in
the latest Phoenix installation package.
CCS Technical Documentation
PC needs to be rebooted before installation can continue. Click "Yes" to reboot the PC.
Setup is restarted automatically after reboot.
Page 8 Copyright Nokia. All rights reserved. Issue 01 03/03
Company confidential NHL-6
CCS Technical Documentation
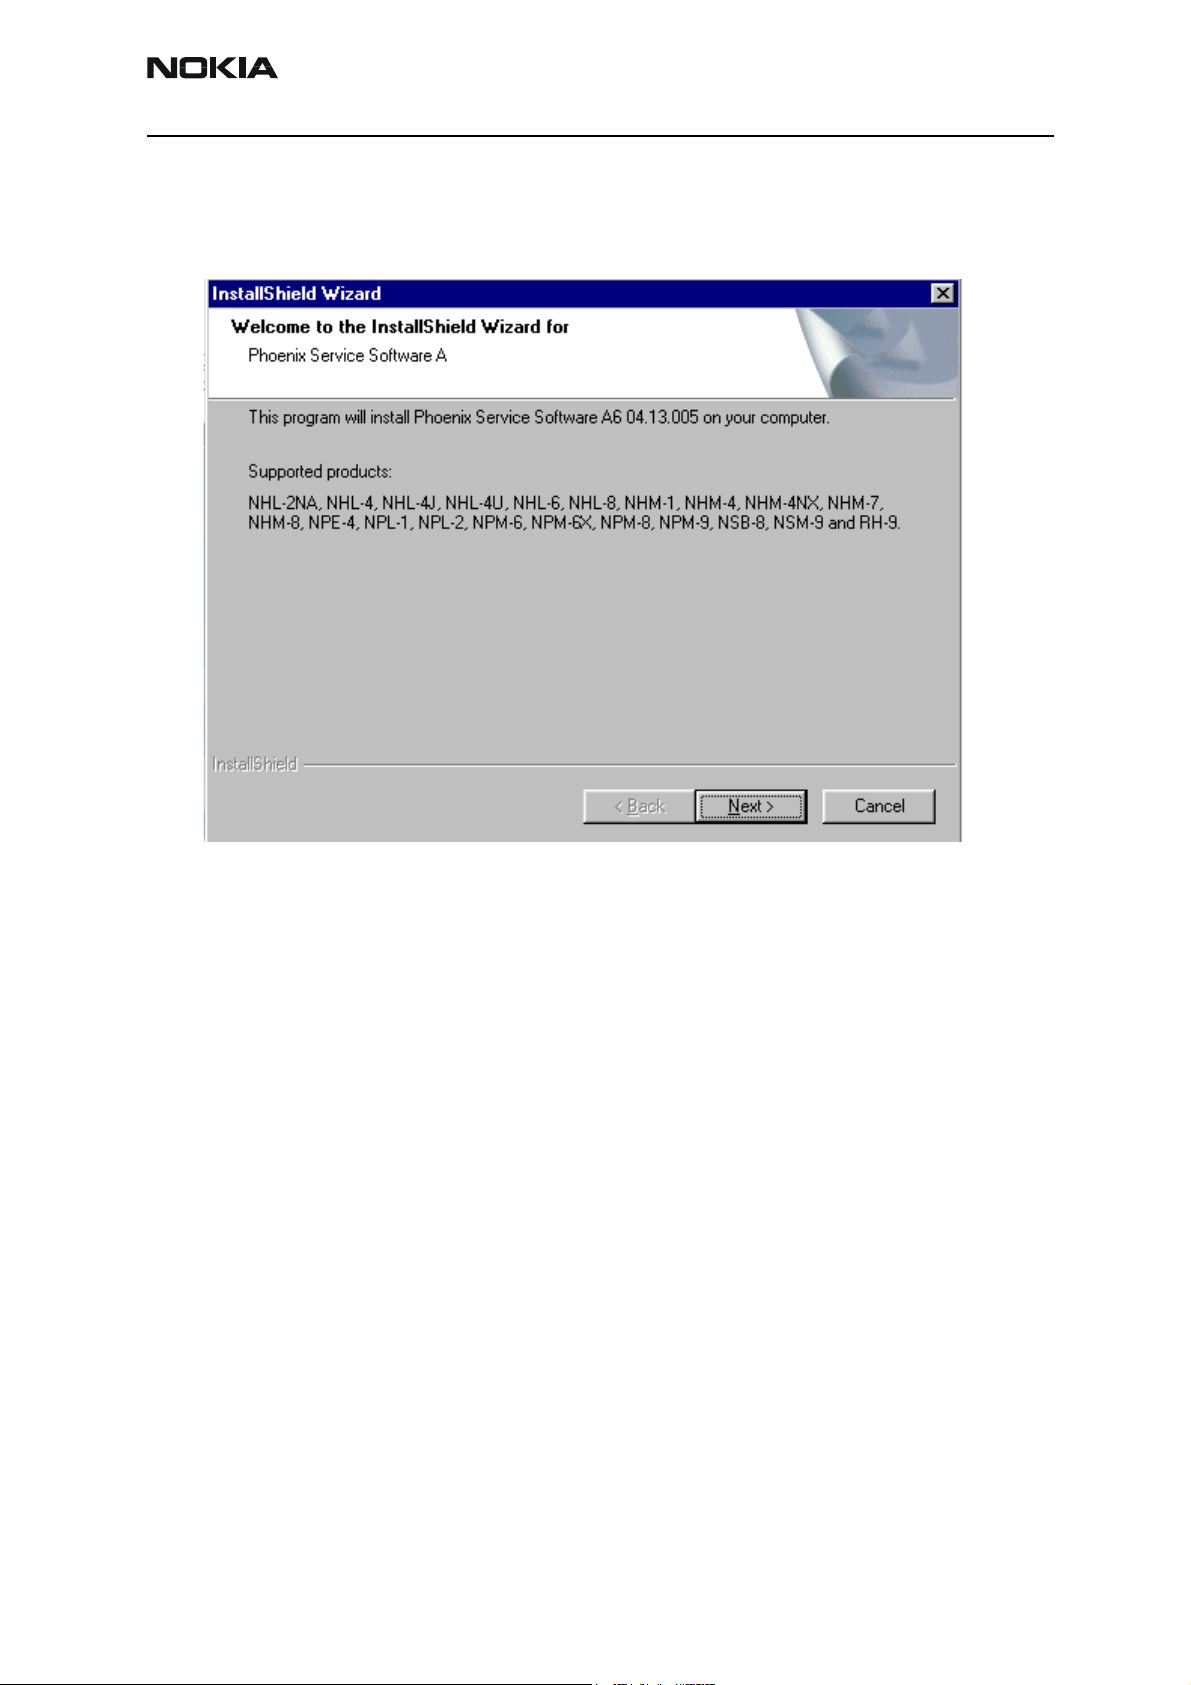
First Time Installation of Phoenix
After Dongle driver installation / update (if needed) installation continues from this step.
Click "Next" in Welcome dialog to continue.
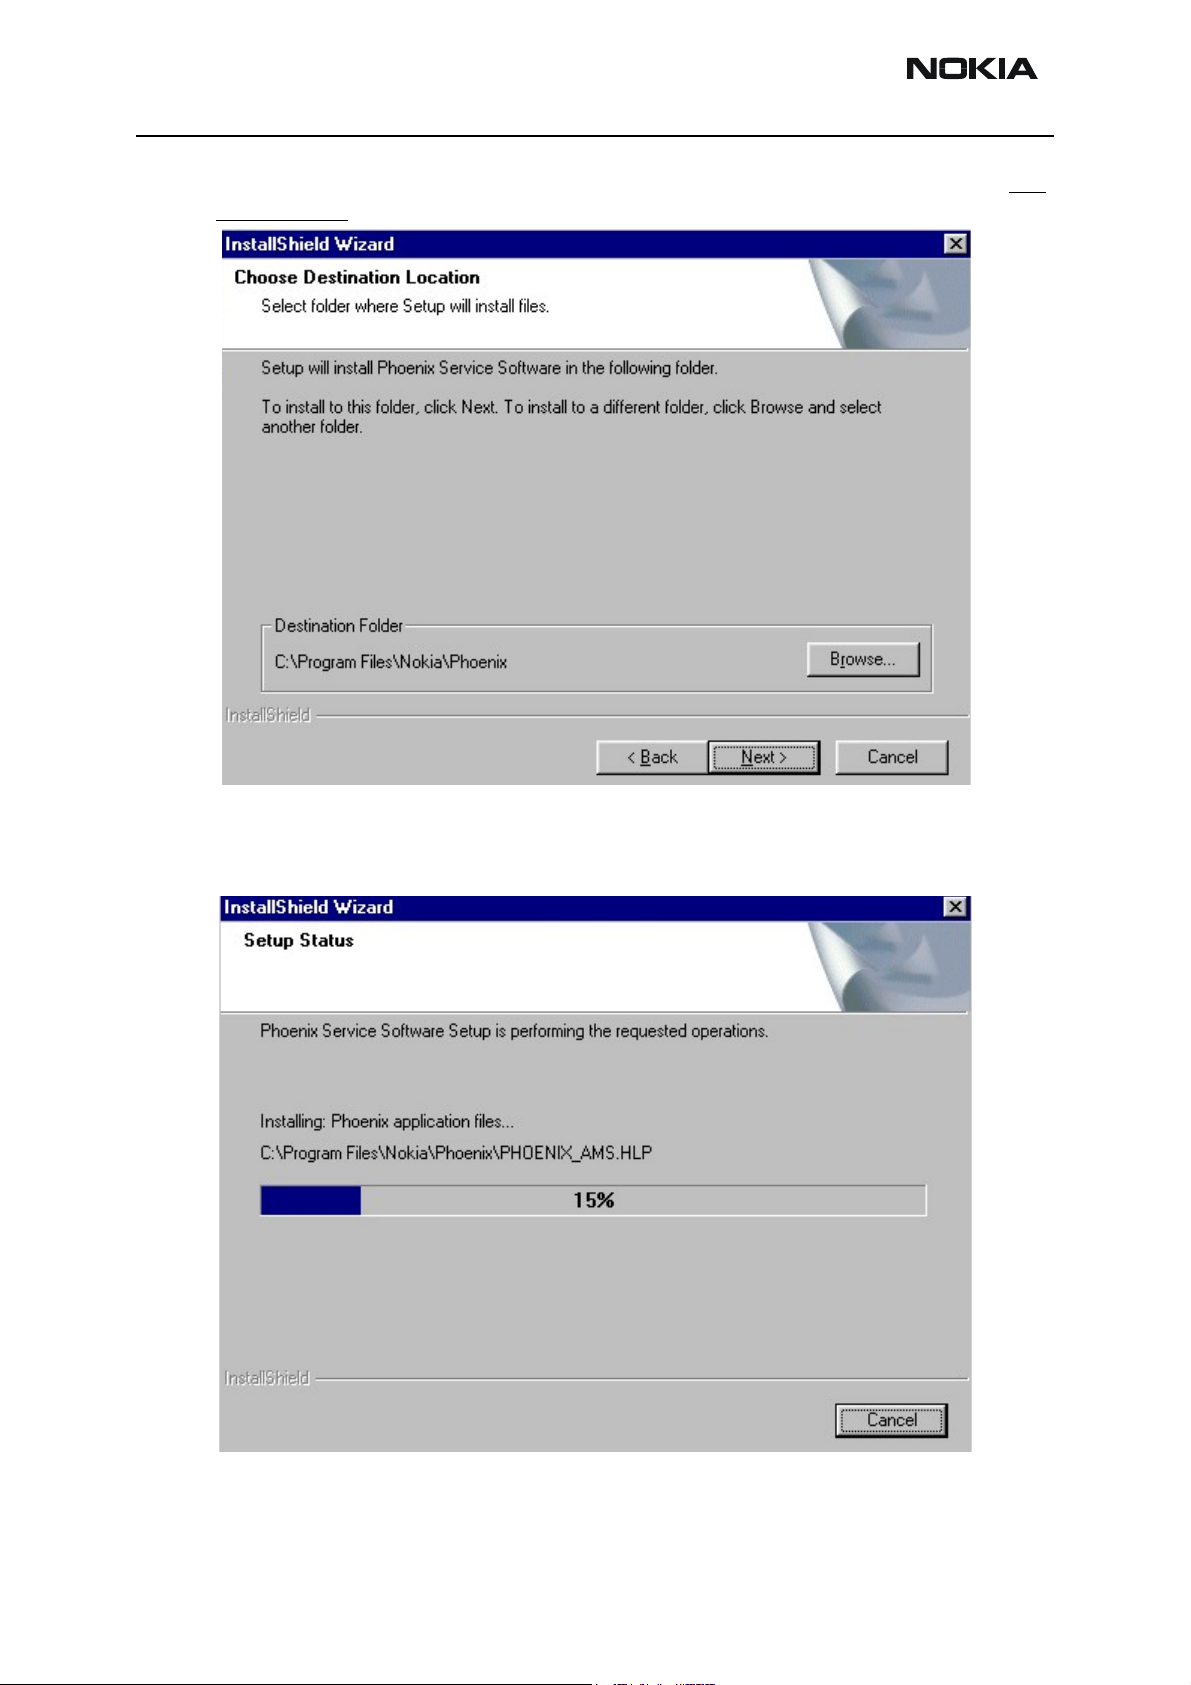
Choose the destination folder, it is recommended to use the default folder C:\Program-
Files\Nokia\Phoenix.
Issue 01 03/03 Copyright Nokia. All rights reserved.. Page 9
NHL-6 Company confidential
Choose “Next” to continue. You may choose another location by selecting “Browse” (not
recommended)
CCS Technical Documentation
Setup copies the components, please wait.
Progress of the setup is shown. Please wait
Page 10 Copyright Nokia. All rights reserved. Issue 01 03/03
Company confidential NHL-6
CCS Technical Documentation
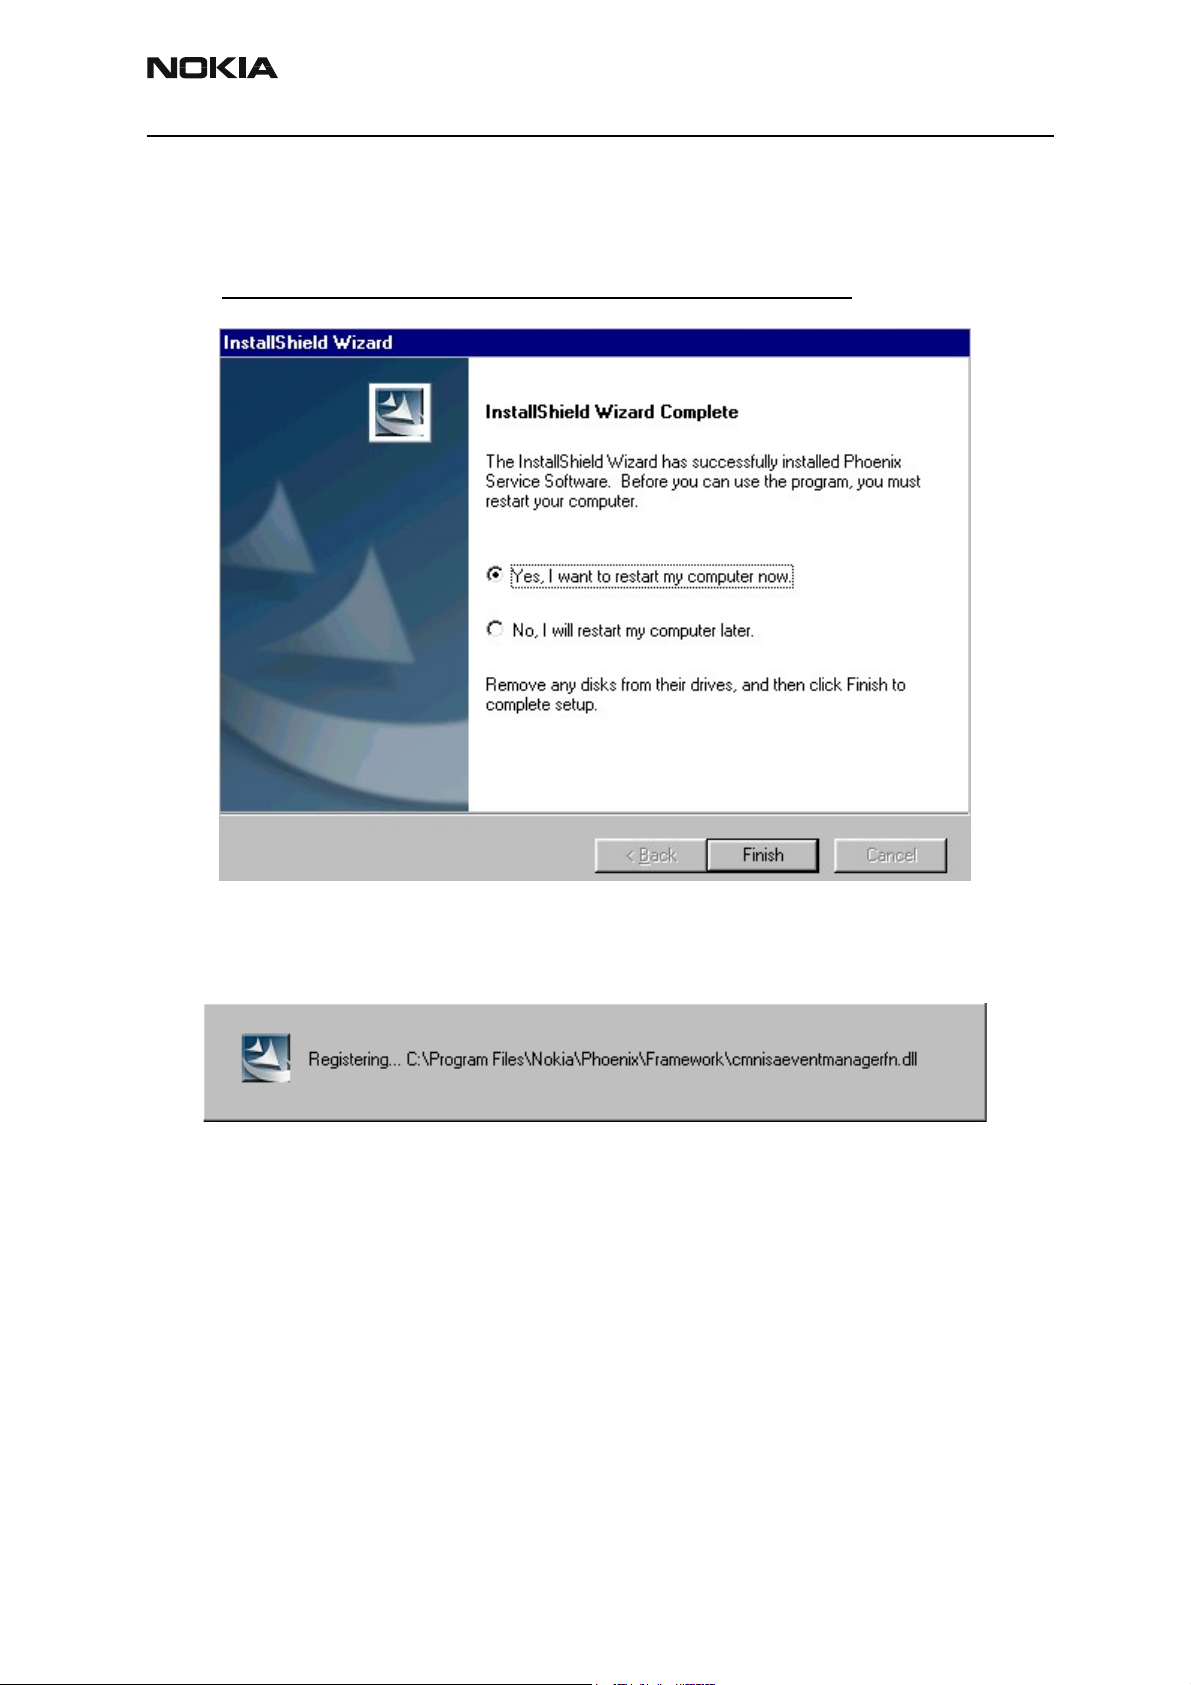
If restarting of your computer is needed the Install Shield Wizard will tell you about it.
Select "Yes..." to reboot the PC immediatelly and "No..." to reboot the PC manually.
Note that Phoenix doesn't work, if components are not registered
continue.
. Click "Finish" to
After the reboot components are registered and Phoenix is ready for use.
If reboot is not needed components are registered after copying them.
Issue 01 03/03 Copyright Nokia. All rights reserved.. Page 11
NHL-6 Company confidential
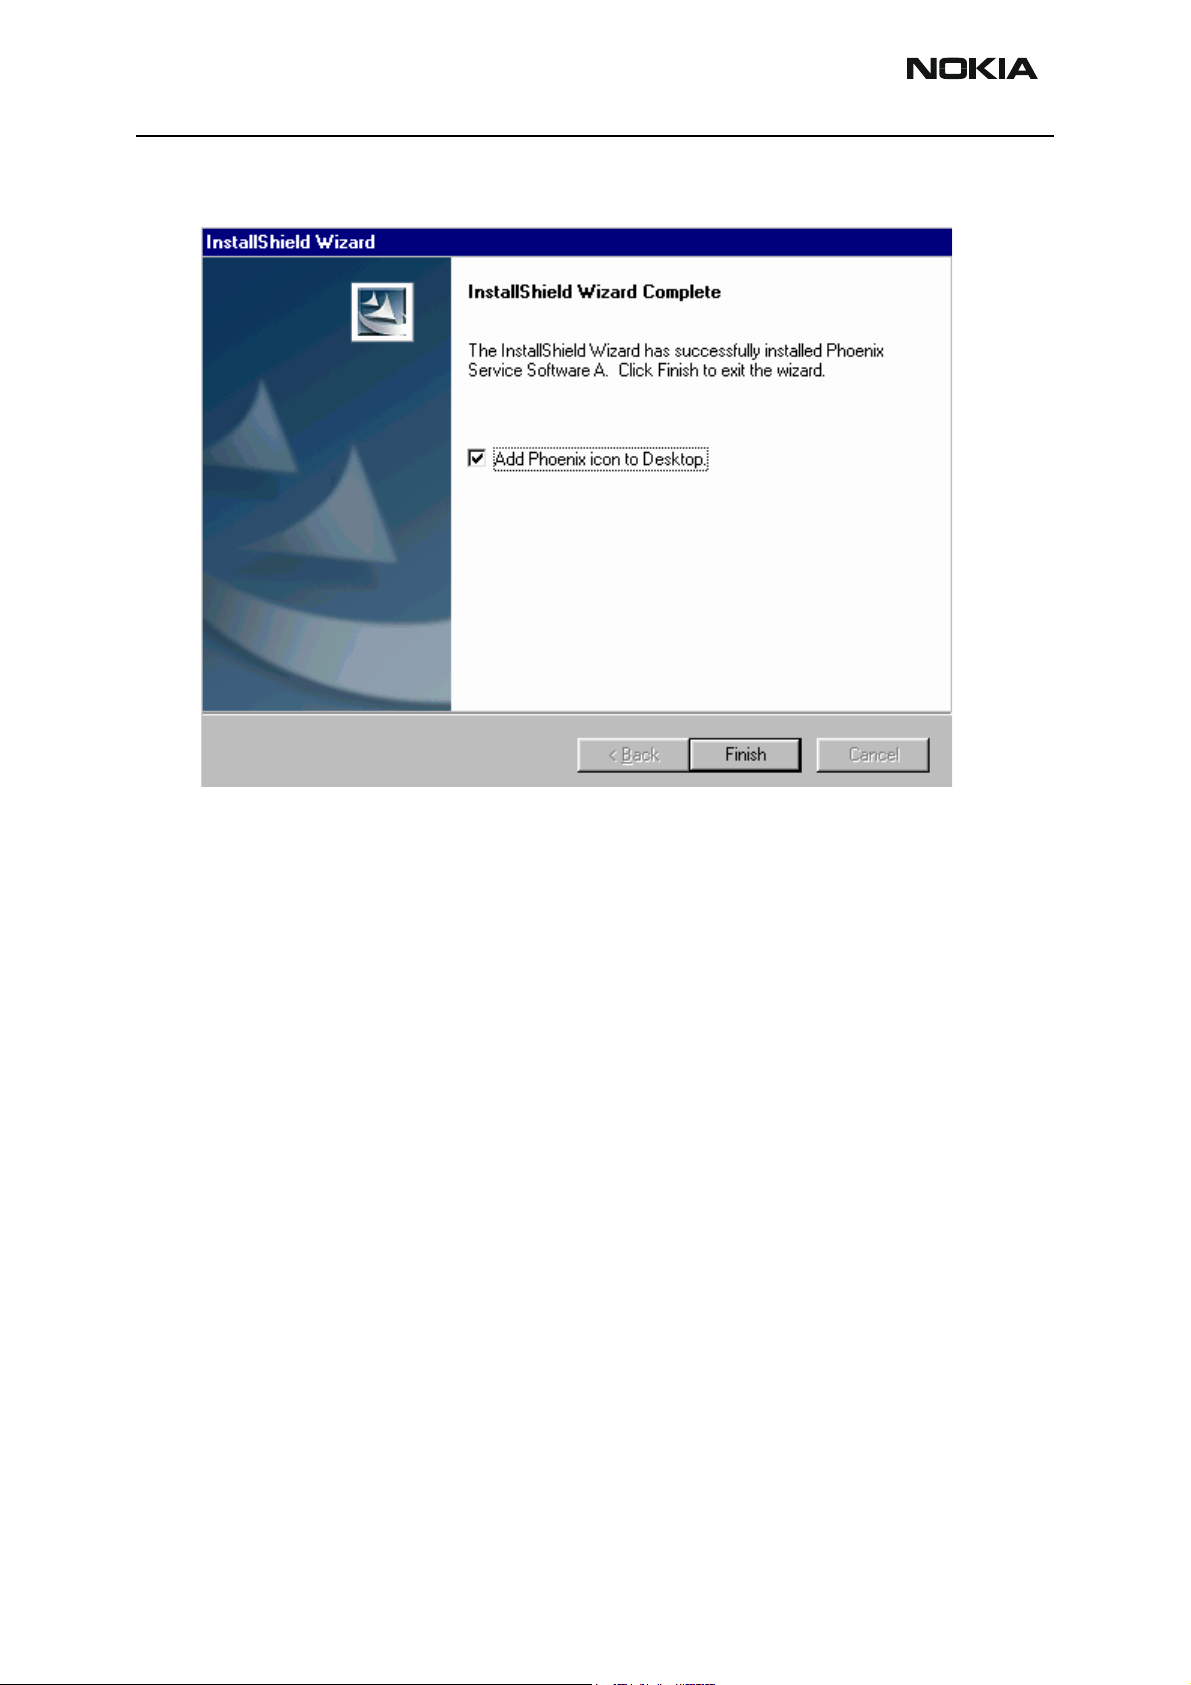
If restarting of your computer is not needed, this view will be shown instead. Click
“Finish” to exit the setup. Phoenix is now ready for use.
CCS Technical Documentation
Now the installation of Phoenix Service SW is ready and it can be used after:
• Installing Phone model specific Phone Data Package for Phoenix
• Configuring the connections
• Updating the Flash Update Package files used with FPS-8* and FLS-4* tools
Page 12 Copyright Nokia. All rights reserved. Issue 01 03/03
Company confidential NHL-6
CCS Technical Documentation
Update Installation of Phoenix
If you already have the Phoenix Service SW installed on your computer, sooner or later
there will be need to update it when new versions are released.
Please note that very often the Phoenix Service SW and the Phone Specific Data Package
for Phoenix come in pairs, meaning that certain version of Phoenix can only be used with
certain version of Data Package. Always use the latest available versions of both. Instructions can be found in phone model specific Technical Bulletins and Phone Datapackage
readme.txt files (shown during installation).
To update the Phoenix you need to take exactly the same steps as when installing it for
the first time.
• Download the installation package to your computer hard disk
• Close all other programs
• Run the application file (e.g. phoenix_service_sw_a6_04_13_005.exe)
• Dongle driver version will be checked and updated if needed
• After reboot installation starts automatically
• Newer version of Phoenix will be installed
When you update the Phoenix from old to new version (e.g. update from 4.08.004 to
4.13.005)
, the update will take place automatically without uninstallation
If you try to update the Phoenix with the same version that you already have (e.g.
4.13.005 to 4.13.005) you are asked if you want to uninstall the version of Phoenix you
have on your PC. Answer “OK” to uninstall Phoenix, “Cancel” if you don’t want to uninstall.
If you try to install an older version (e.g. downgrade from 4.13.005 to 4.08.004) installation will be interrupted.
Always follow the instructions on the screen.
Issue 01 03/03 Copyright Nokia. All rights reserved.. Page 13
NHL-6 Company confidential
How to Uninstall Phoenix
Uninstallation can be done manually from Windows Control Panel - Add / Remove Programs.
Choose “Phoenix Service Software” and click "Add/Remove".
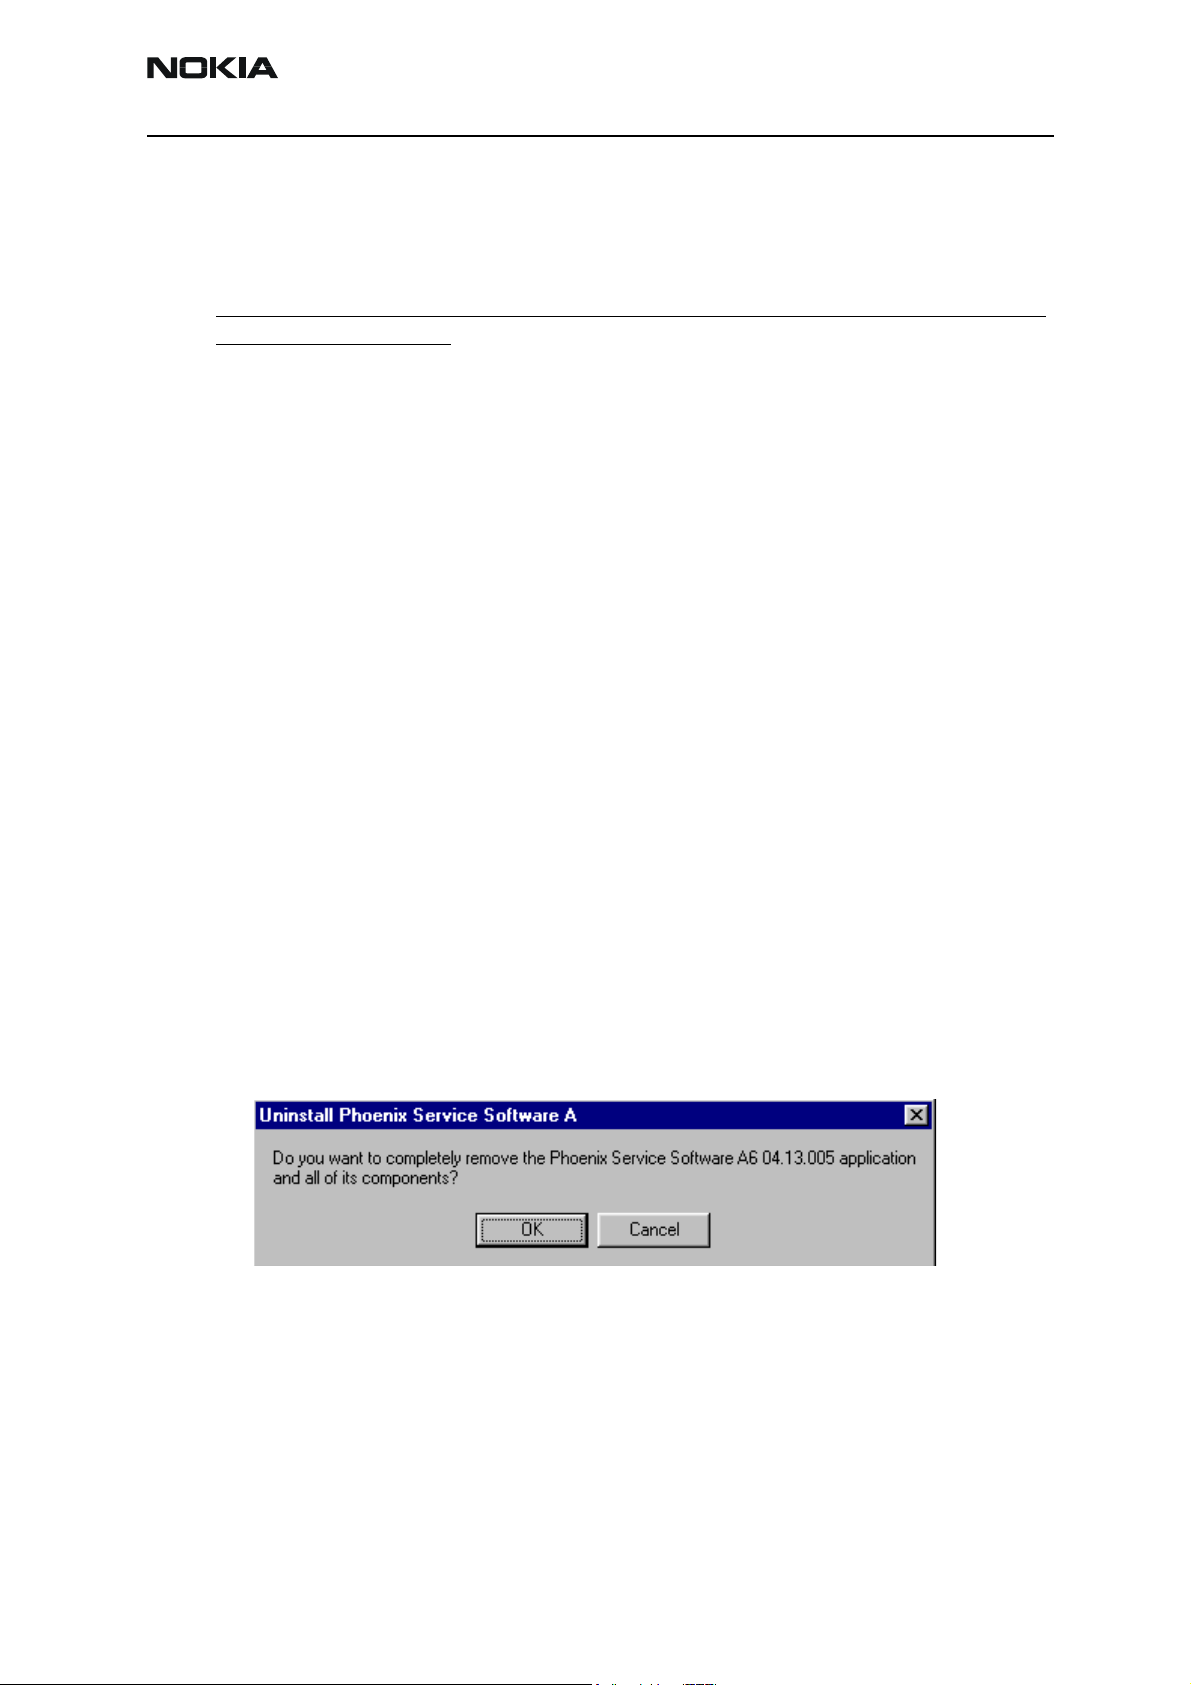
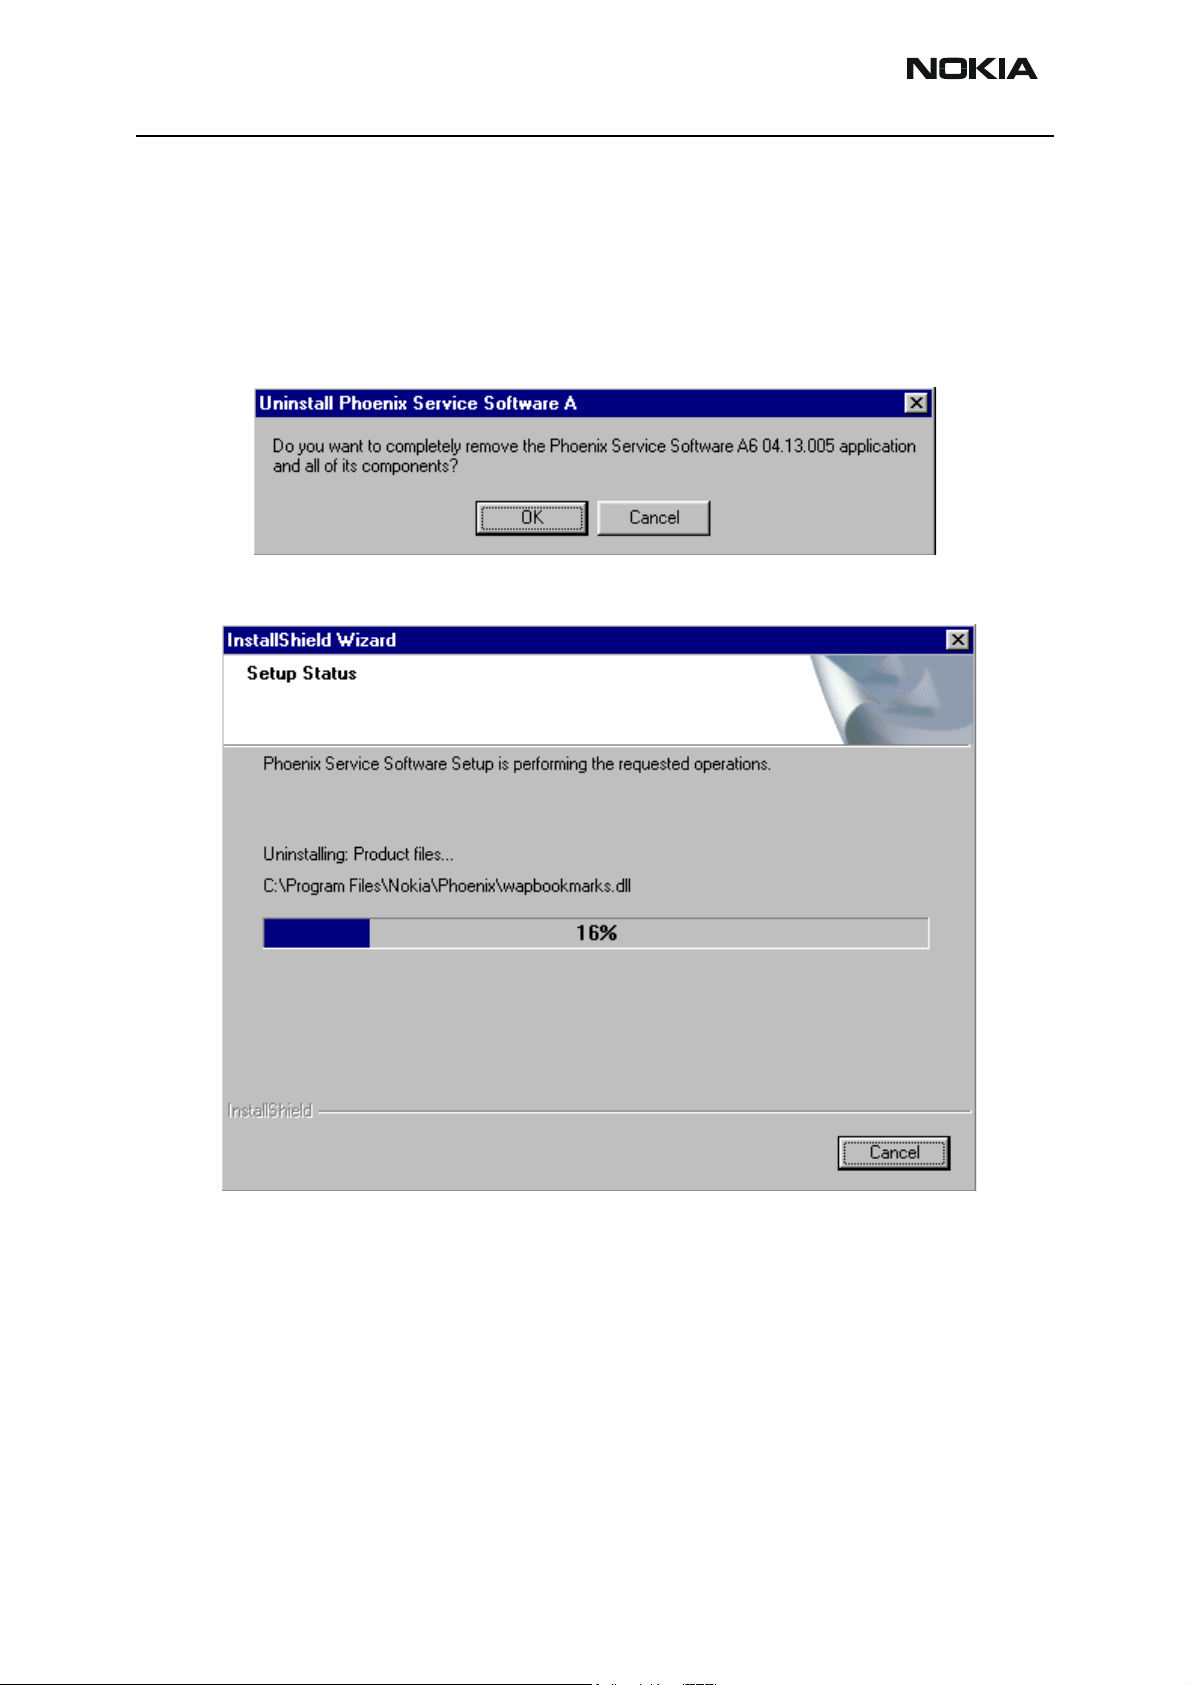
Choose “OK” to uninstall
Progress of the uninstallation is shown.
CCS Technical Documentation
Page 14 Copyright Nokia. All rights reserved. Issue 01 03/03
Company confidential NHL-6
CCS Technical Documentation
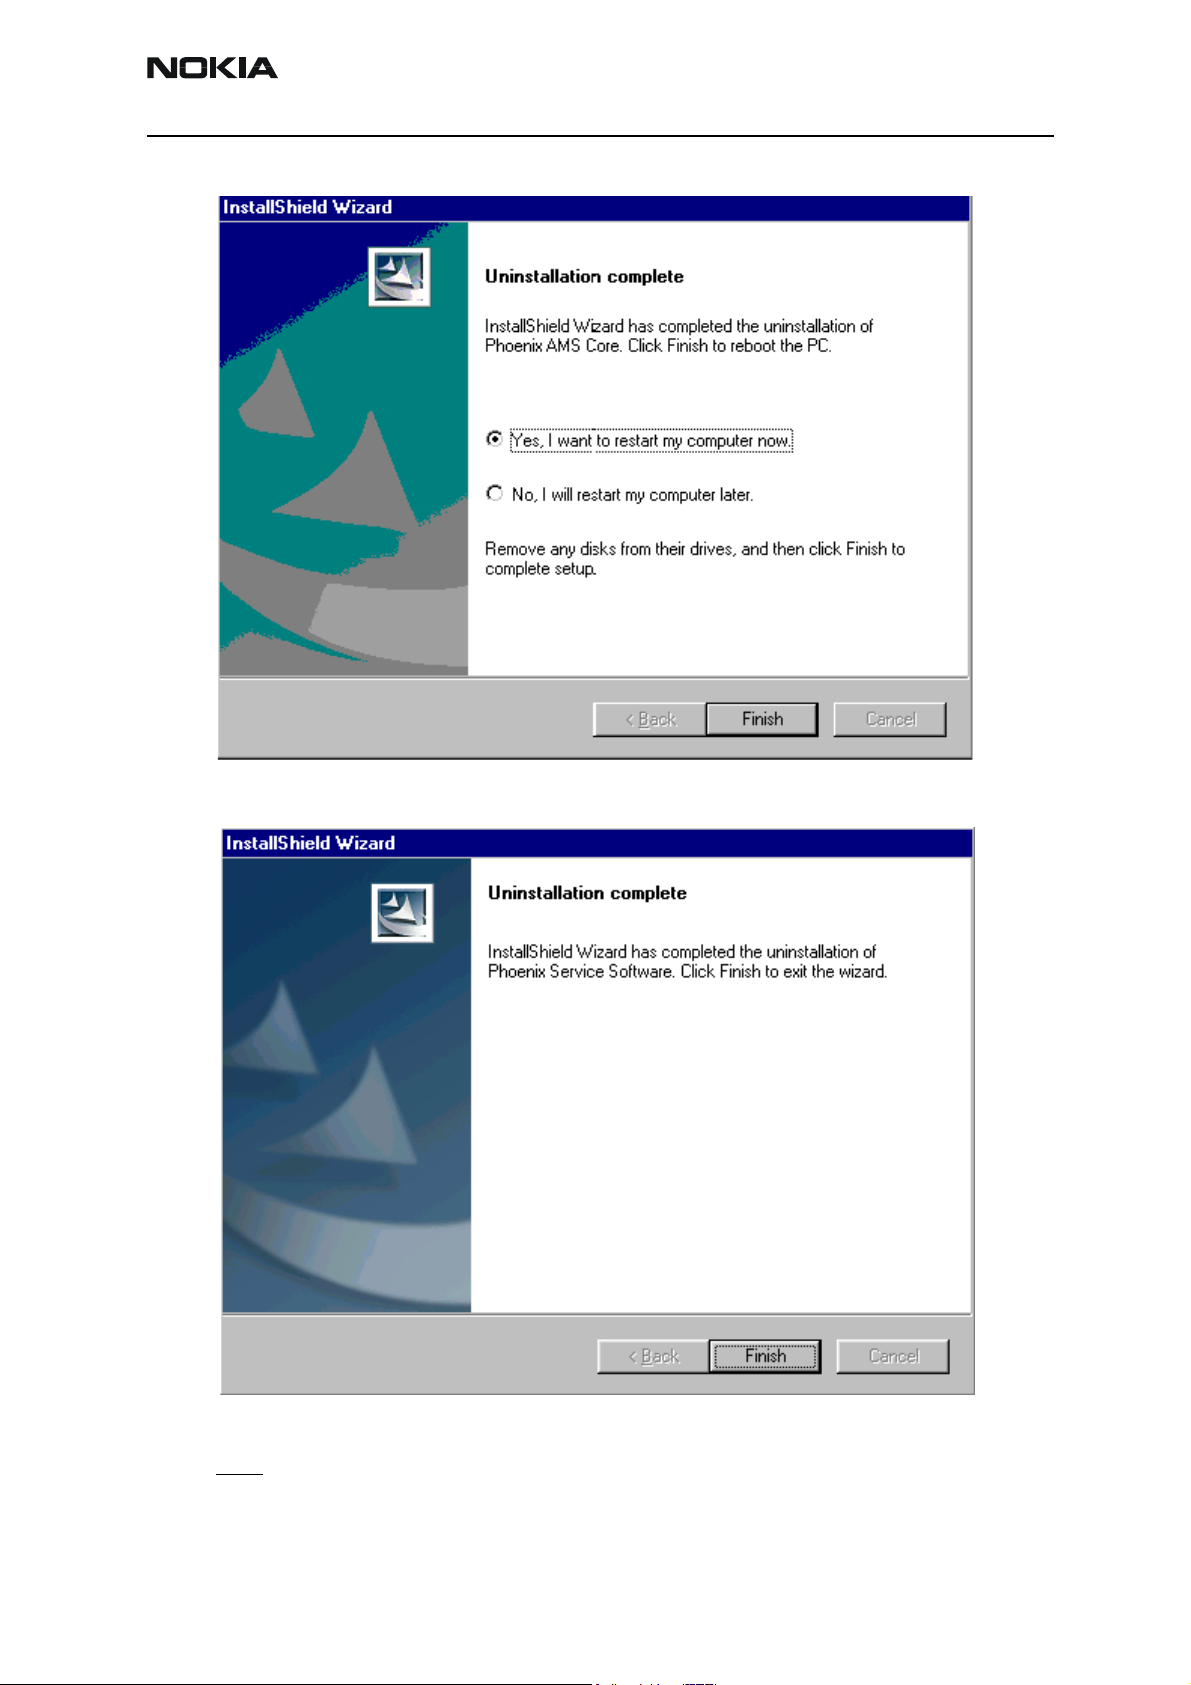
You may have to reboot the PC after uninstallation.
If restarting is not needed, the following dialog will appear:
Note! If you have different product packages installed, components are uninstalled only if they are not
included in other product packages.
Issue 01 03/03 Copyright Nokia. All rights reserved.. Page 15
NHL-6 Company confidential
CCS Technical Documentation
Data Package for Phoenix (Product Specific)
Before installation
Product Data Package contains all product specific data to make the Phoenix Service
Software and tools usable with a certain phone model.
It also includes the latest version of flash update package for FLS-4* and FPS-8*
• Check that the Dongle is attached to the parallel port of your computer.
• Install Phoenix Service SW
• Download the installation package (e.g. NHL-6_dp_1.00.exe) to your computer
(e.g. C:\TEMP)
• Close all other programs
• Run the application file (e.g.NHL-6_dp_1.00.exe) and follow instructions on the
screen
If you already have the Phoenix Service SW installed on your computer, sooner or later
there will be need to update it when new versions are released.
Please note that very often the Phoenix Service SW and the Phone Specific Data Package
for Phoenix come in pairs, meaning that certain version of Phoenix can only be used with
certain version of Data Package. Always use the latest available versions of both. Instructions can be found in phone model specific Technical Bulletins.
Page 16 Copyright Nokia. All rights reserved. Issue 01 03/03
Company confidential NHL-6
CCS Technical Documentation
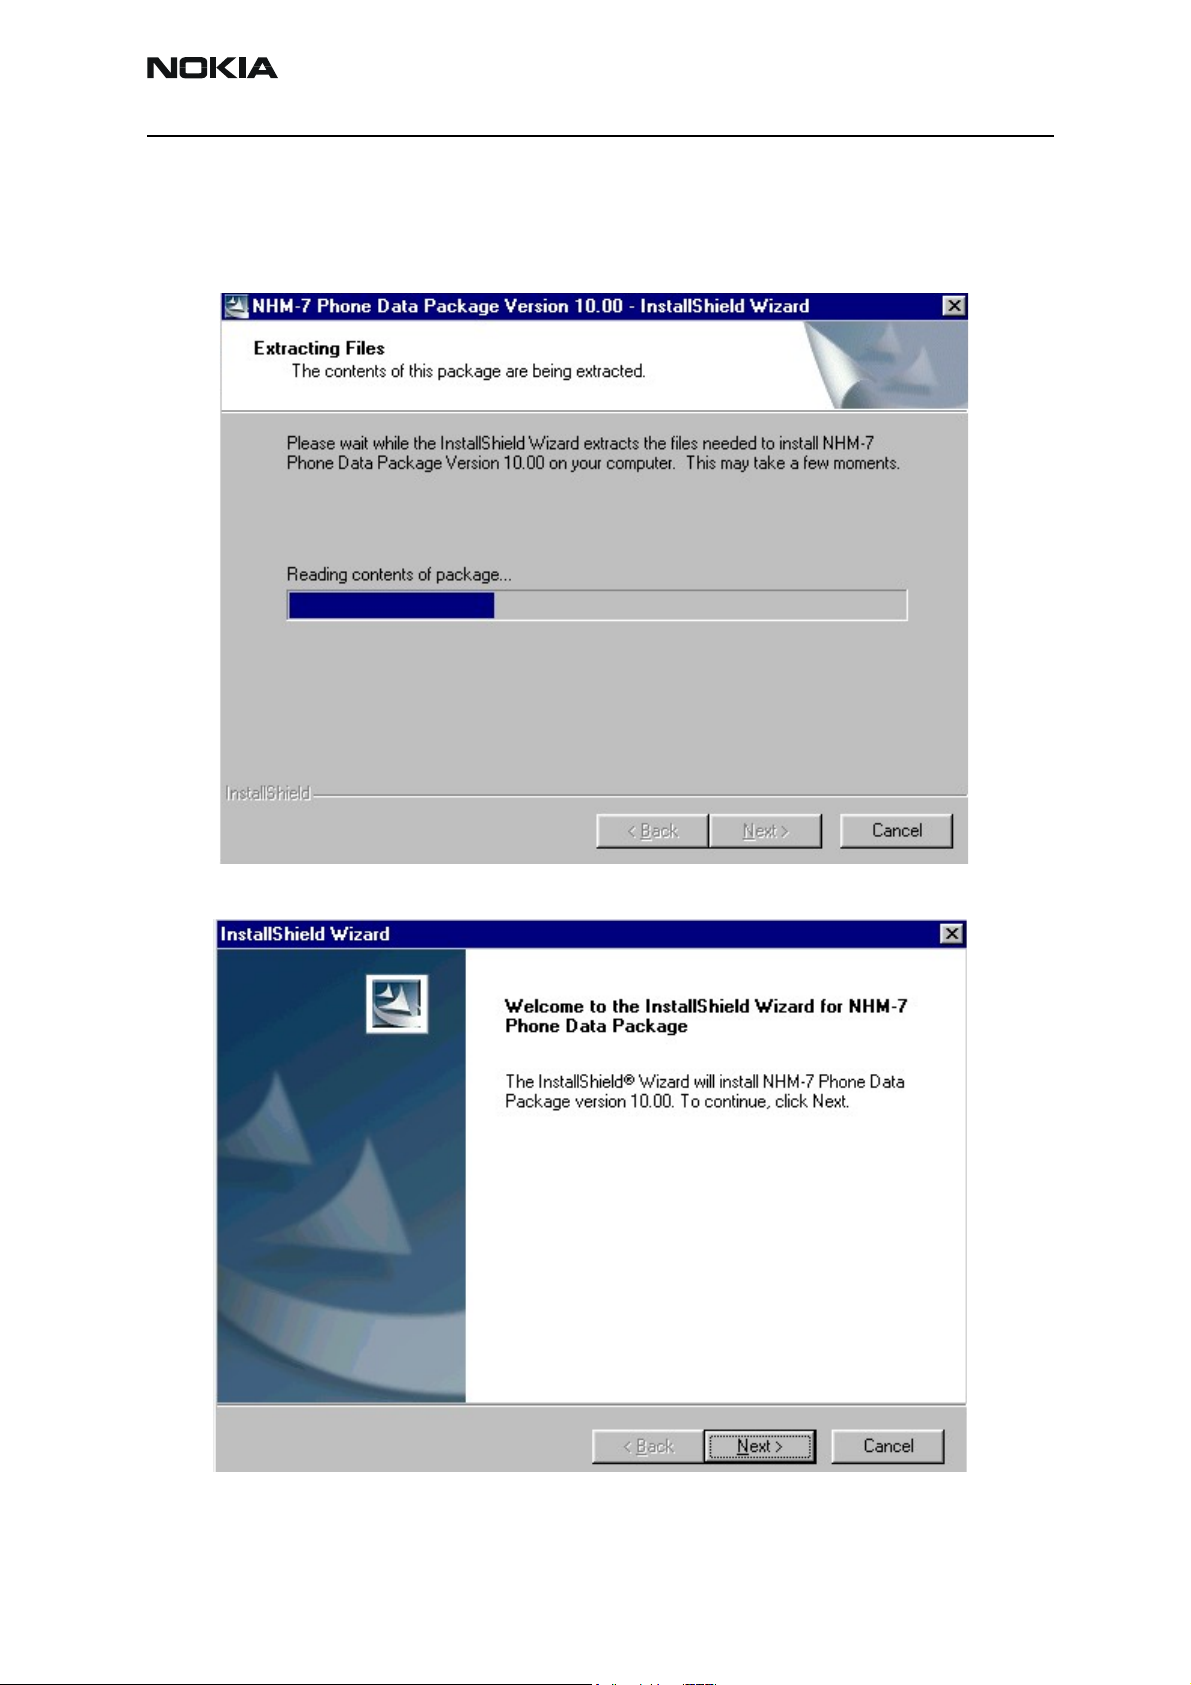
Installation of Phoenix Data Package (Product Specific)
Run the
When you choose “Next” the files needed for installation will be extracted. Please wait.
NHL-6_dp_v_1.00.exe
to start installation.
Choose “Next” to continue.
Issue 01 03/03 Copyright Nokia. All rights reserved.. Page 17
NHL-6 Company confidential
From this view you can see the contents of the Data Package.
Read the text carefully.
There should be information about the Phoenix version needed with this data package.
Choose “Next”.
CCS Technical Documentation
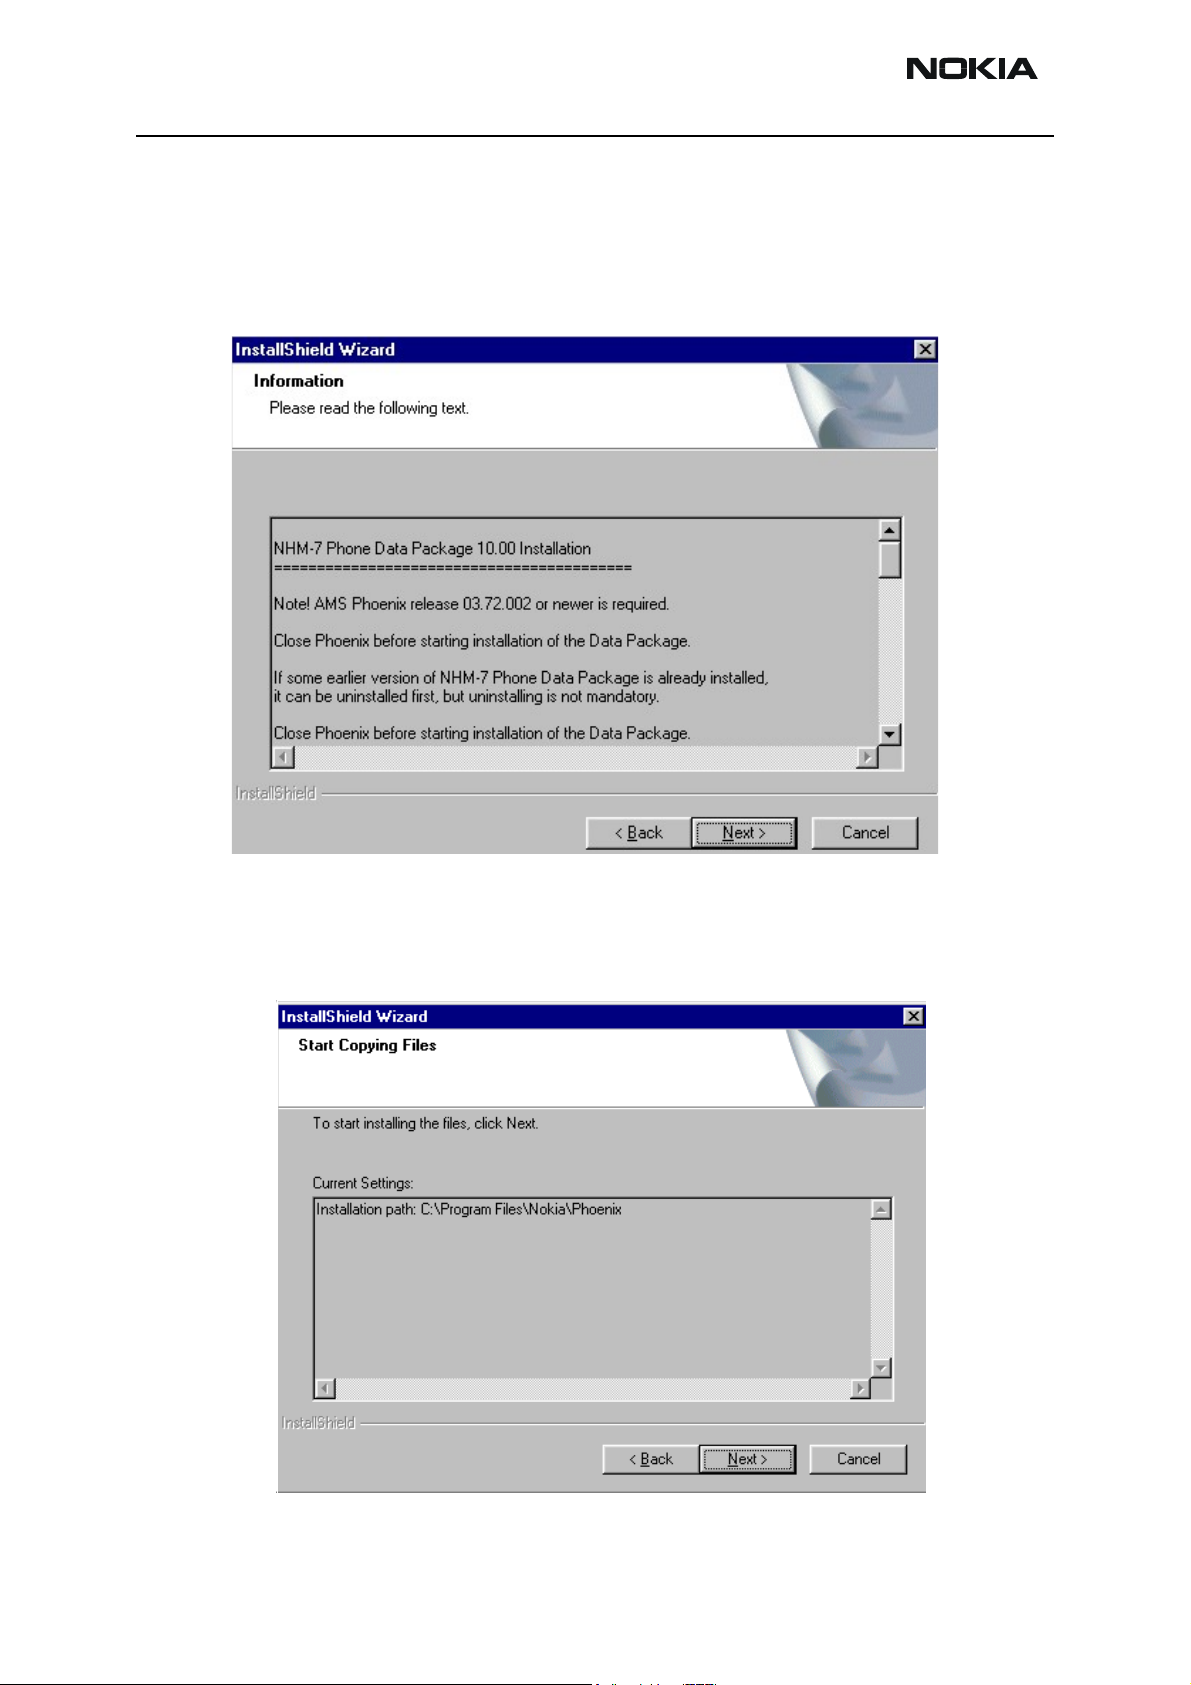
Confirm location and choose “Next” to continue.
Install Shield checks where the Phoenix application is installed and the directory is
shown. Choose “Next” to continue.
Page 18 Copyright Nokia. All rights reserved. Issue 01 03/03
Company confidential NHL-6
CCS Technical Documentation
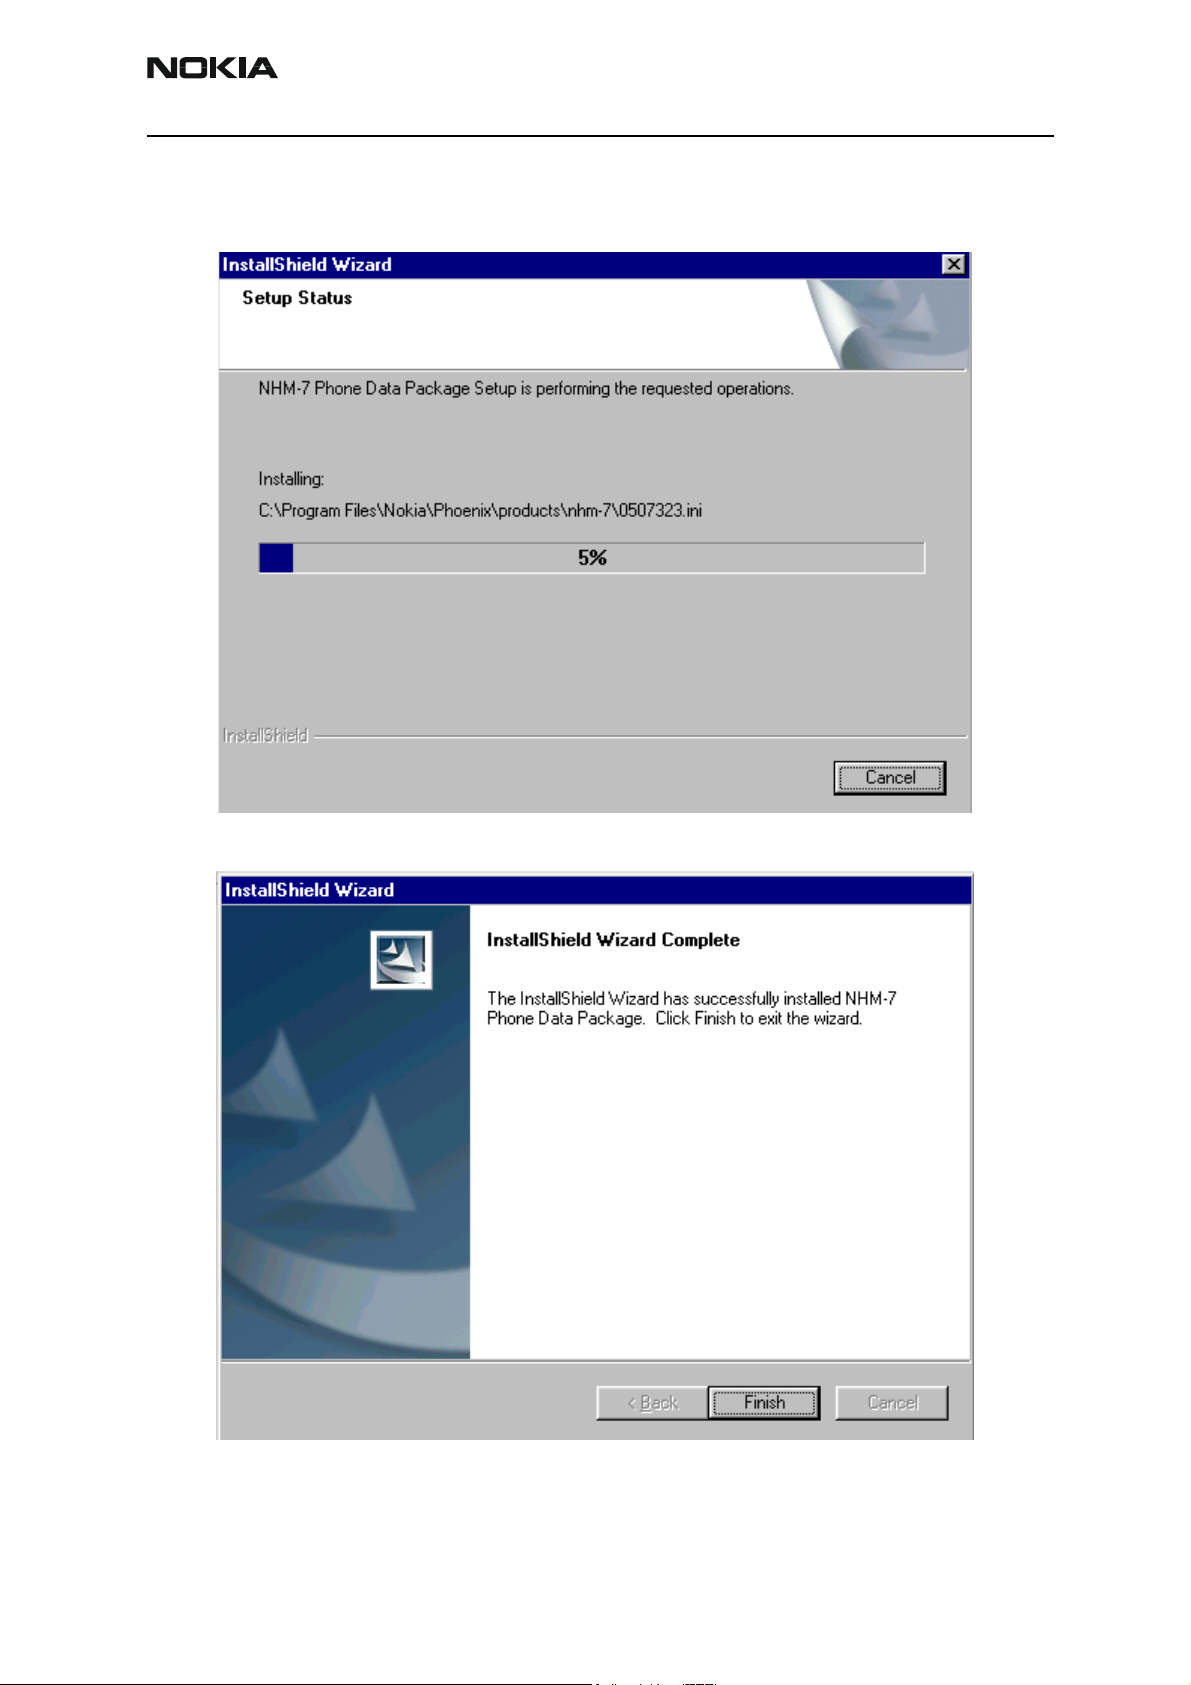
Phone model specific files will be installed. Please wait.
Choose “Finish” to complete installation.
You now have all phone model specific files installed in your Phoenix Service SW.
Issue 01 03/03 Copyright Nokia. All rights reserved.. Page 19
NHL-6 Company confidential
How to Uninstall Data Package
Uninstallation can also be done manually from Windows Control Panel / Add / Remove
Programs/ “NHL-6 Phone Data Package”.
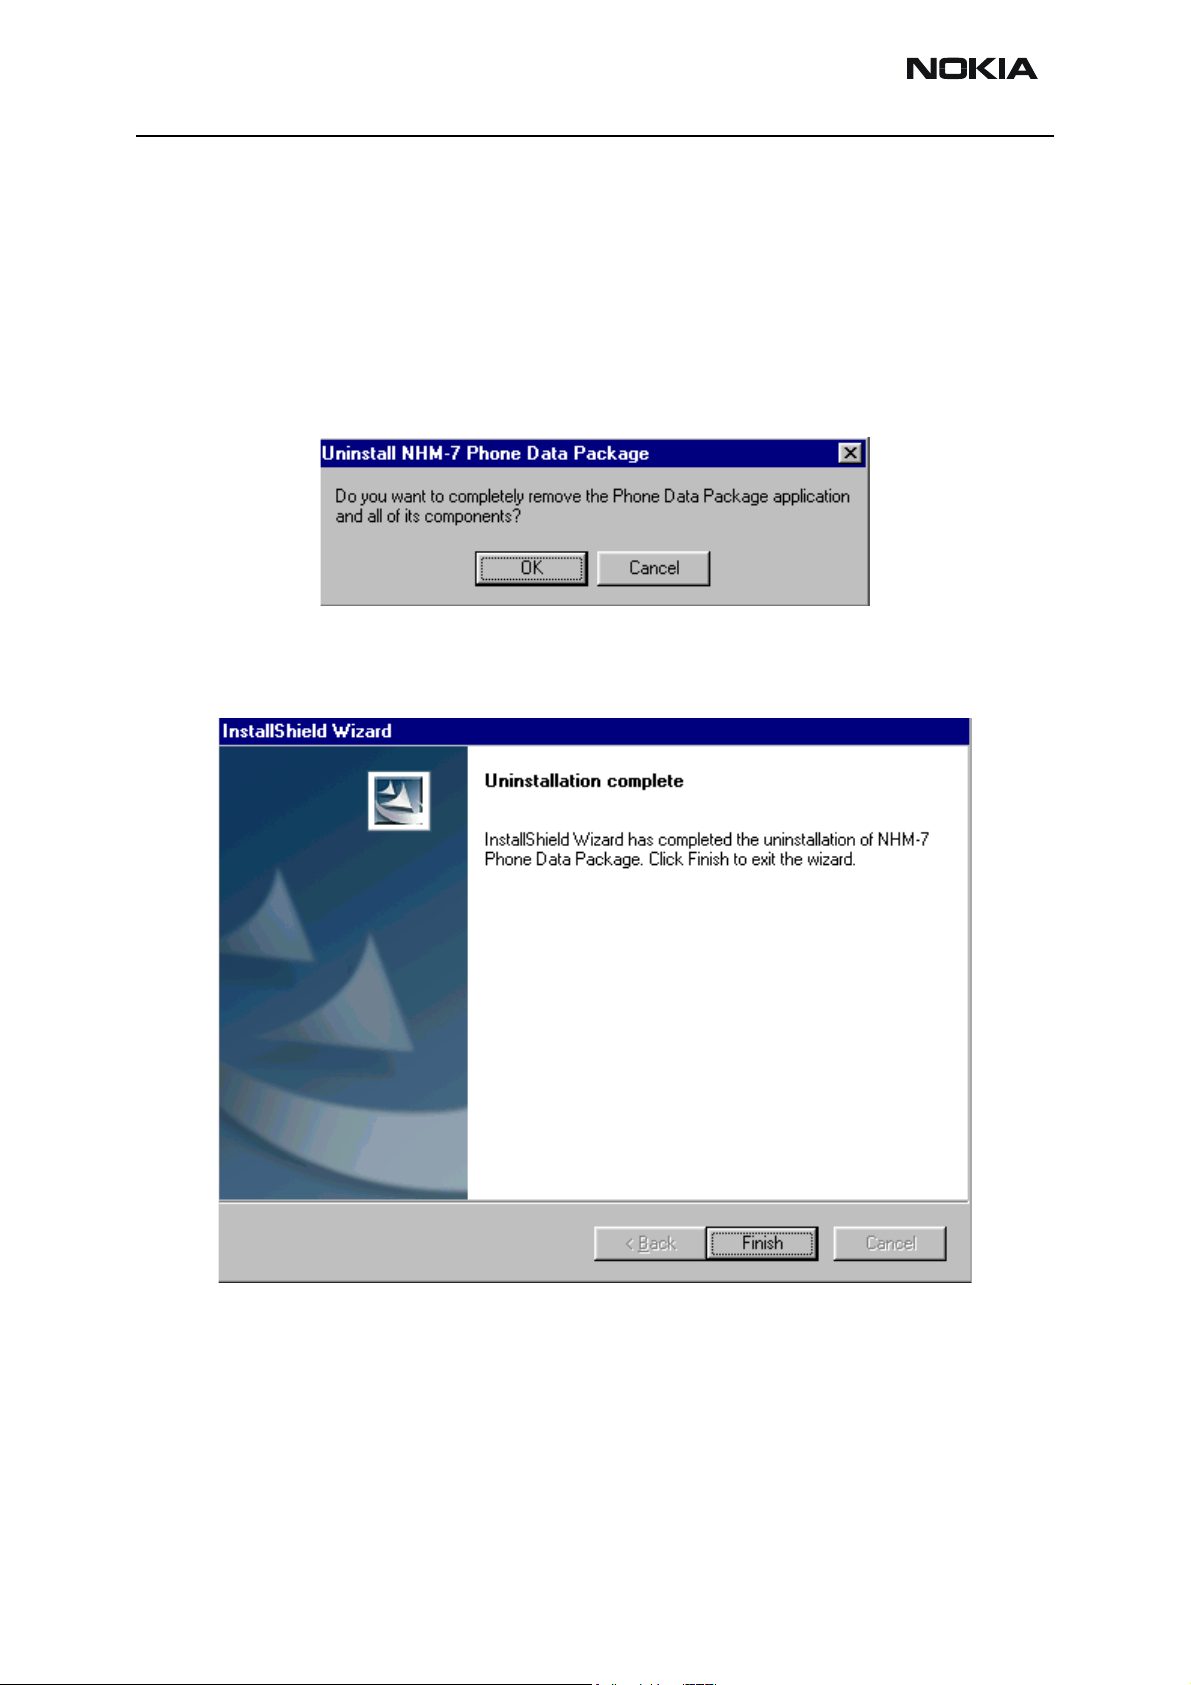
If you try to install the same version of Phoenix Data Package that you already have, you
are asked if you want to uninstall the version you have on your PC. Answer “OK” to uninstall, “Cancel” if you don’t want to uninstall. Older versions of data packages do not need
to be uninstalled.
CCS Technical Documentation
Once the previously installed Data package is uninstalled, choose “Finish”.
Run the
Page 20 Copyright Nokia. All rights reserved. Issue 01 03/03
NHL-6_dp_v_1.00.exe
again to continue installation from the beginning.
Company confidential NHL-6
CCS Technical Documentation
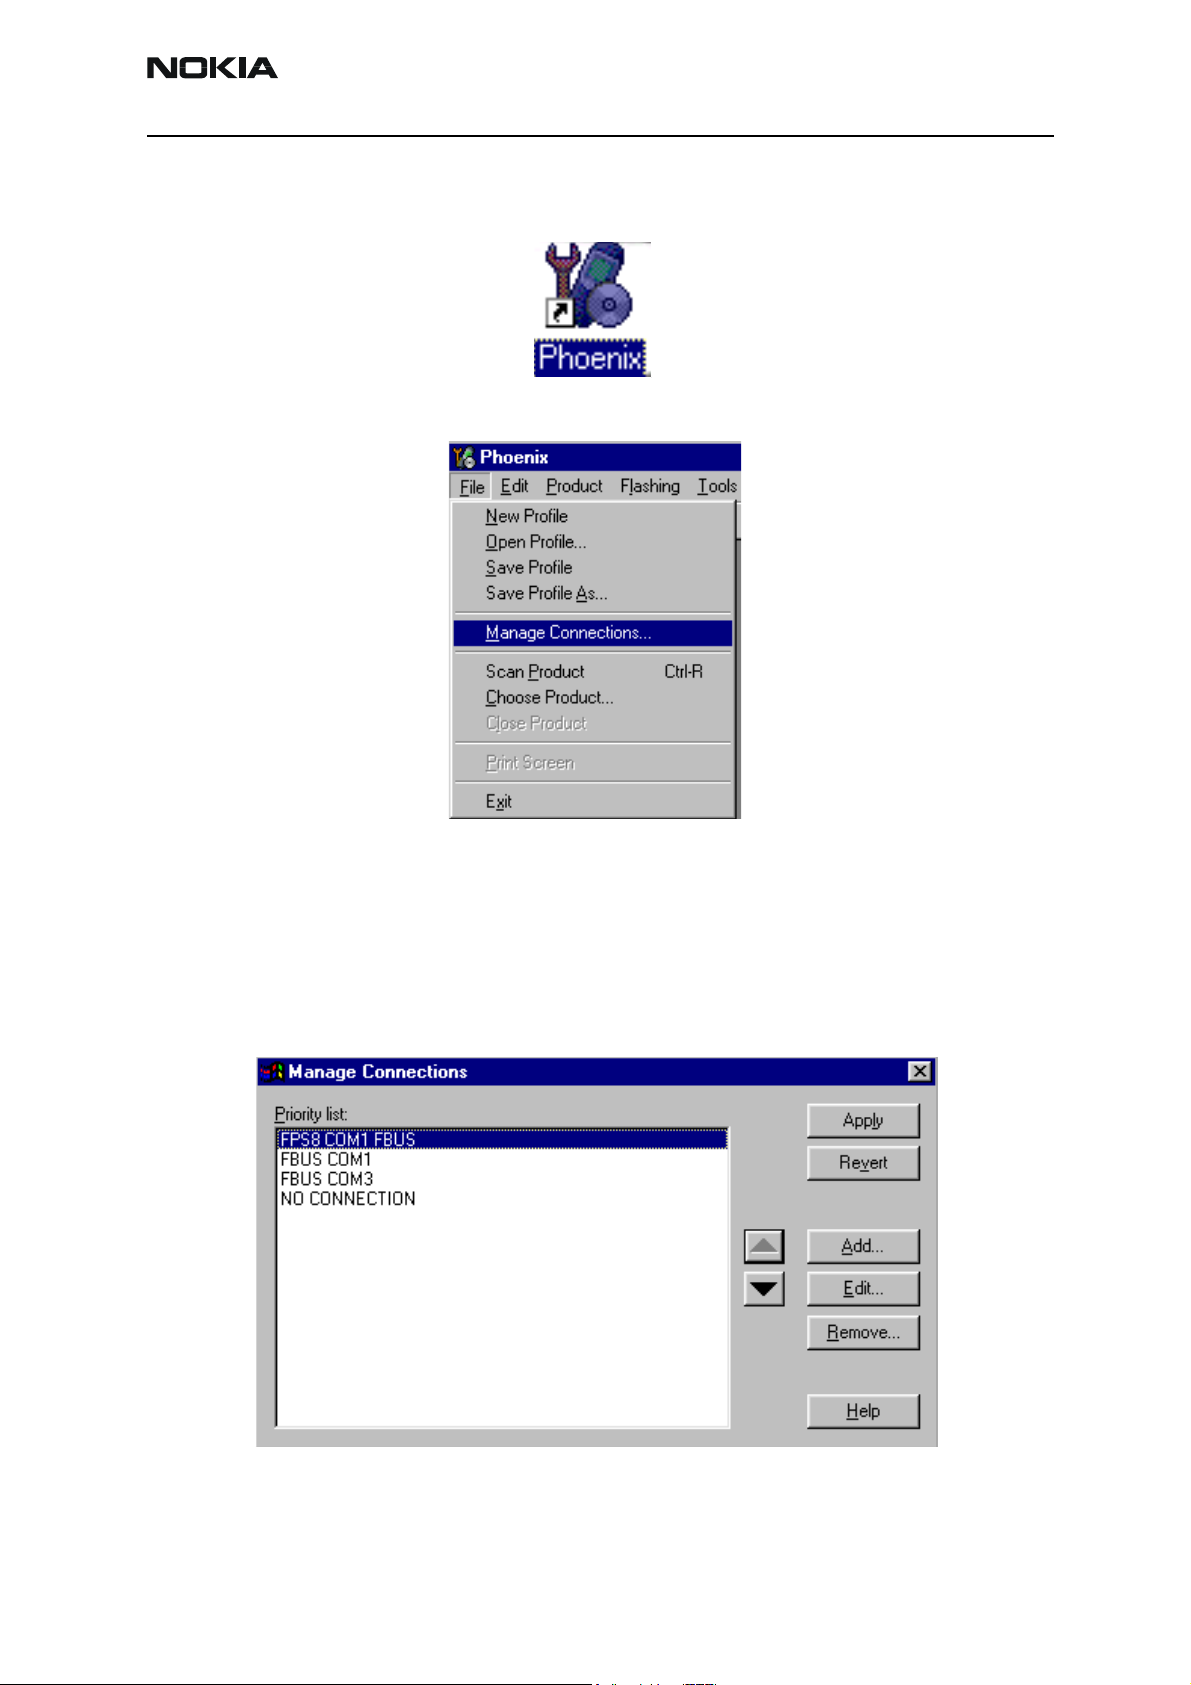
How to Manage Connections
Start Phoenix Service SW and Login.
Choose “Manage Connections” From “File” – Menu
Existing connections can be selected, edited, deleted and new ones created by using this
dialog.
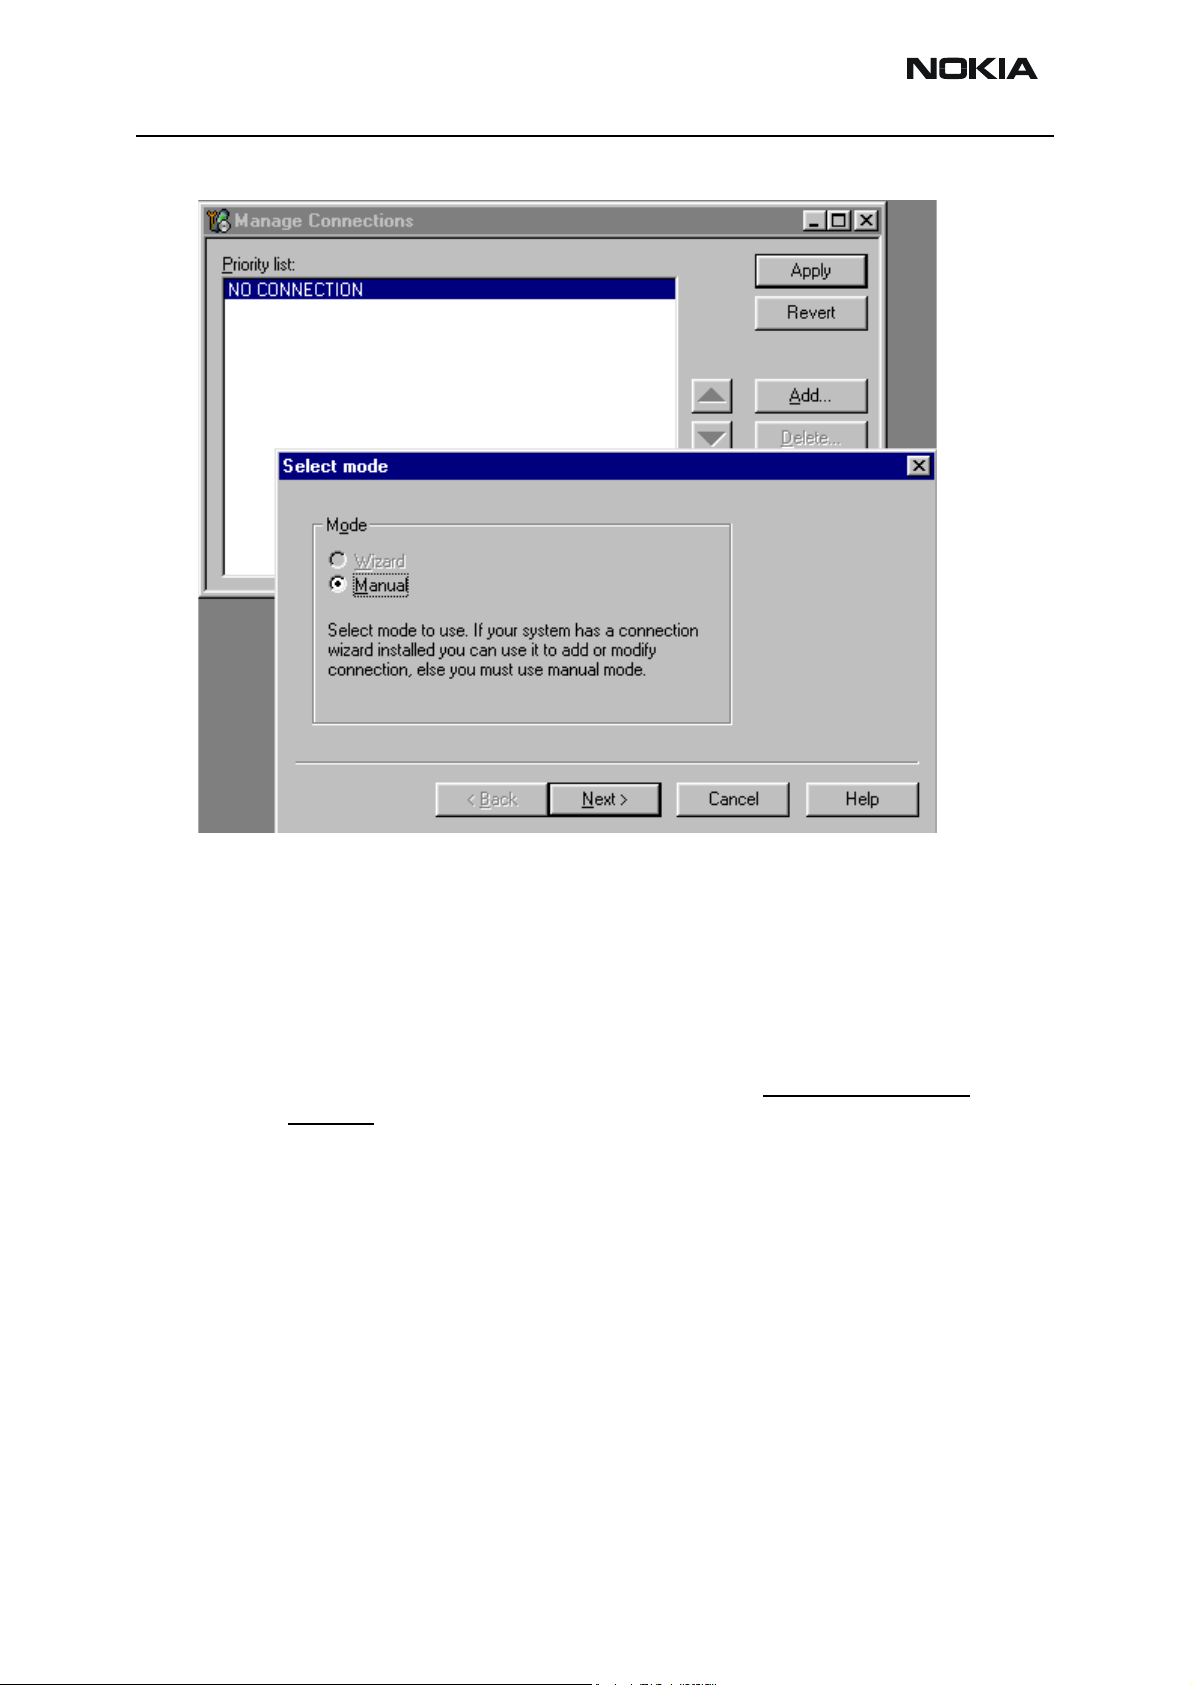
A connection can be created either manually or by using a Connection Wizard.
To add new connection, choose “Add” and select if you want to create it manually or by
using the Wizard.
Choose “Next” to continue.
Issue 01 03/03 Copyright Nokia. All rights reserved.. Page 21
NHL-6 Company confidential
In the next dialogs you will be asked to select some settings for the connection
CCS Technical Documentation
Manual Settings
A) For FLS-4S POS Flash Device choose following connection settings
• Media: FBUS
• COM Port: Virtual COM Port used by FLS-4 Please check this
always!
(To check please go to Windows / Control Panel / FLS Virtual Port / Configuration)
B) For FPS-8 Flash Prommer choose following connection settings:
• Media: FPS-8
• Port Num: COM Port where FPS-8 is connected
• COMBOX_DEF_MEDIA: FBUS
Choose “Finish” to complete.
If you use the Wizard, connect the tools and a phone to your PC and the wizard will
automatically try to configure the correct connection.
Page 22 Copyright Nokia. All rights reserved. Issue 01 03/03

Company confidential NHL-6
CCS Technical Documentation
Activate the connection you want to use by clicking it and use up/down arrows to move
it on top of the list. Choose “Apply”.
The connection is now selected and can be used after closing the “Manage Connections”
window.
Selected connection will be shown on the right hand bottom corner of the screen.
To use the selected connection, connect the phone to Phoenix with correct service tools,
make sure that it is switched on and select “Scan Product”.
When the Product is found, Phoenix will load product support and when everything is
ready, name of the loaded product support module and its version will be shown on the
bottom of the screen.
Issue 01 03/03 Copyright Nokia. All rights reserved.. Page 23

NHL-6 Company confidential
CCS Technical Documentation
Page 24 Copyright Nokia. All rights reserved. Issue 01 03/03
 Loading...