


mechanical repair on Service
0
Nokia2 Dual/Single SIM
Key features
•
Android 7.1 Operating System
•
Qualcomm MSM8909, 4-Core ,1.6GHz
•
5.0”HD w/capacitive touch
•
ROM: 8GB EMMC, RAM: 1GB LPDDR3, uSD up to 128G
•
Main/Front Camera:8M/5M
Version 1.0
First
Check the repair policy
before performing any
Level 1 & 2!
Make sure you have the
required skills and
knowledge to use this
manual.
Warnings and cautions
Disassembly steps
Service devices
Disassembly video
Exploded view
Assembly steps
Assembly video
Service concept
Solder components
Phone reset
Product controls and
interfaces

Version history
Version Date Description
1.0 2017/11/1 Initial version.

The purpose of this document
is to help service levels 1 and 2 workshop technicians to carry out service to
Warnings and cautions
Nokia products. The content of it is confidential. Follow these regularly and comply with the given
instructions.
While every endeavor has been made to ensure the accuracy of this document, some errors may exist. If you
find any errors or if you have further suggestions, please recommend a change to this document to your
contact window whom you get this document from.
Please keep in mind also that this documentation is continuously being updated and modified, so watch
always out for the newest version
Warning and caution icons
.
Warning Warns of danger that could result in personal injury or threat to health.
Caution
Pointer Displays a specific location on the device.
Recycle bin Indicates that the spare part is not reusable.
Pay special attention not to damage the device or any components and parts
nearby.
Important
This document is intended for use by qualified service personnel only.

Copyright
·Copyright ©2017 TNS Mobile Oy. All rights reserved.
·Reproduction, transfer, distribution or storage of part or all of the contents in this document in any form
without the prior written permission of TNS is prohibited.
Nokia and Nokia Connecting People are trademarks or registered trademarks of Nokia Corporation. Other
product and company names mentioned herein may be trademarks or trade names of their respective
owners.
TNS operates a policy of continuous development. TNS reserves the right to make changes and
improvements to any of the products described in this document without prior notice.
·Under no circumstances shall TNS be responsible for any loss of data or income or any special, incidental,
consequential or indirect damages however caused.
·The contents of this document are provided “as is”. Except as required by applicable law, no warranties of
any kind, either express or implied, including, but not limited to, the implied warranties of merchantability
and fitness for a particular purpose, are made in relation to the accuracy, reliability or contents of this
document. TNS reserves the right to revise this document or withdraw it at any time without prior notice.
The availability of particular products may vary by region.

with processing
EHS Requirements
LCD Screen Recycling
According to EHS, the screen over 100 square centimeters or the LCD with gas discharge lamp should be
designed with processing scheme to remove from product. All the devices with display screen over 100
square centimeters are required to be removed by processing scheme for separate recycling.
Printed Circuit Board Recycling
According to EHS, the printed circuit board over 10 square centimeters should be designed
scheme to remove from product. All the devices with printed circuit board over 10 square centimeters are
required to be removed by processing scheme for separate recycling.
Battery Recycling
According to EHS, electronic product should be guided with processing scheme to remove disused battery.
All the devices with battery or hybrid
battery
should be guided with processing scheme to remove disused
battery safely. If the service life of product is greater than battery life, it should make terminal customers
able to replace battery. If the operation mode of battery removing is stated in user manual, other
processing scheme of battery do not needed to guide terminal customers.

Anti
-
Static
Screw
Anti
-
Static Cross Screw
C
Service devices
Service Cable
Torque screwdriver
Anti-static Wrist band
Anti-Static Tweezers
Anti-static Hand-gloves
Plastic Rod
Driver(T2)
Driver(PH000)

Exploded view

.
Disassembly steps
Warning Warns of danger that could result in personal injury or threat to health.
Caution
Pointer Displays a specific location on the device.
Pay special attention not to damage the device or any components and parts
nearby.
Recycle bin Indicates that the spare part is not reusable.

1) Remove the battery cover with the plastic rod.
12
1
11
2
3
13
8
9
10
4
Unscrew the screws no1~10 (SCREW_M_Cross_Flat Head_M1.4*3.5_Zn) with the cross screwdriver.
2)
Unscrew the screws no11~14 (SCREW_M_Hexagon_Flat Head_M1.2*2.0_BLANK) with the T2
screwdriver.
5
14
6
7

3) Remove the rear case with the plastic rod.
4) Remove the rear case with the plastic rod.

6)
Remove
the vibrator
with the tweezers.
5) Remove the shielding cover battery with the plastic rod.

7) Remove the speaker with the plastic rod.
8) Disconnect the BTB from the battery.
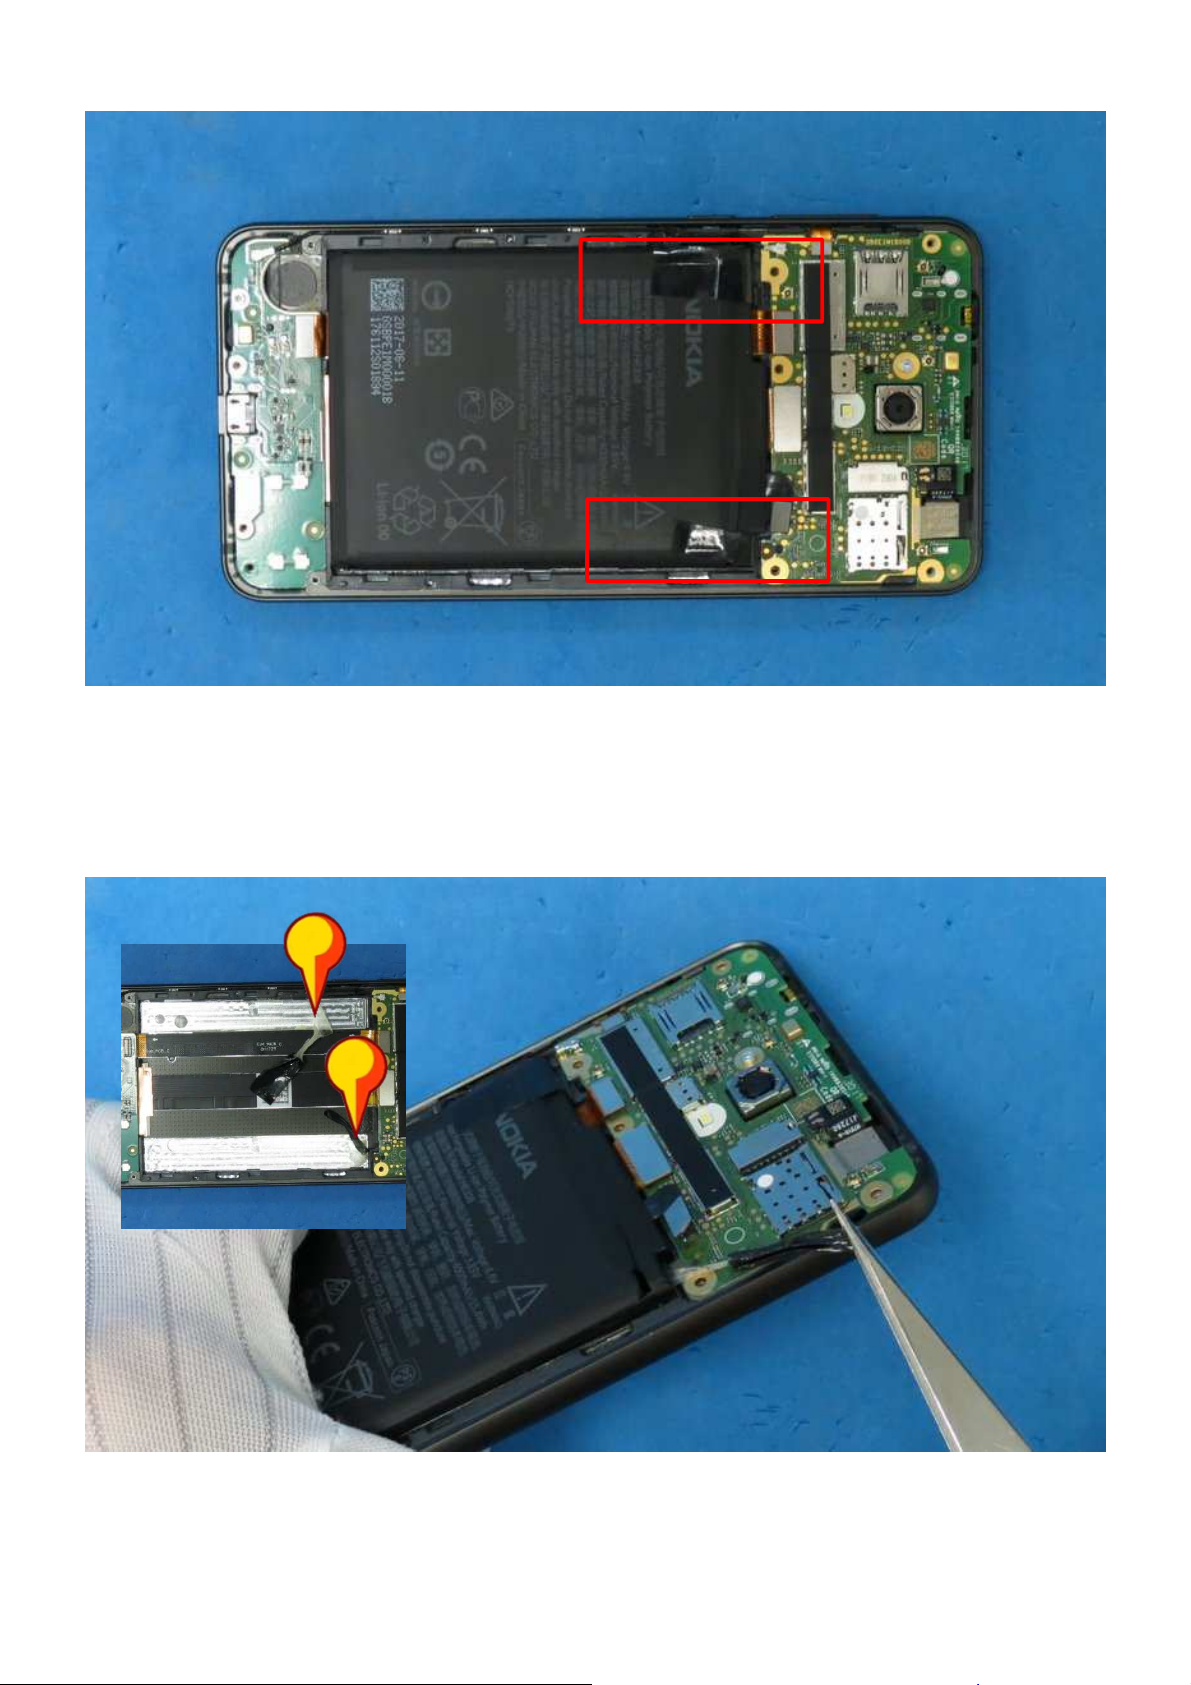
9) There are two magic pull tabs between the LCM/TP module and battery.
10) Use the tweezers to pull the front black part out slightly and do not break black part, or the adhesive
cannot be pulled out. When those done, the battery module is separated successfully.
Do the same for another one.
And clean the Pressure Sensitive Adhesive as the small picture shows.
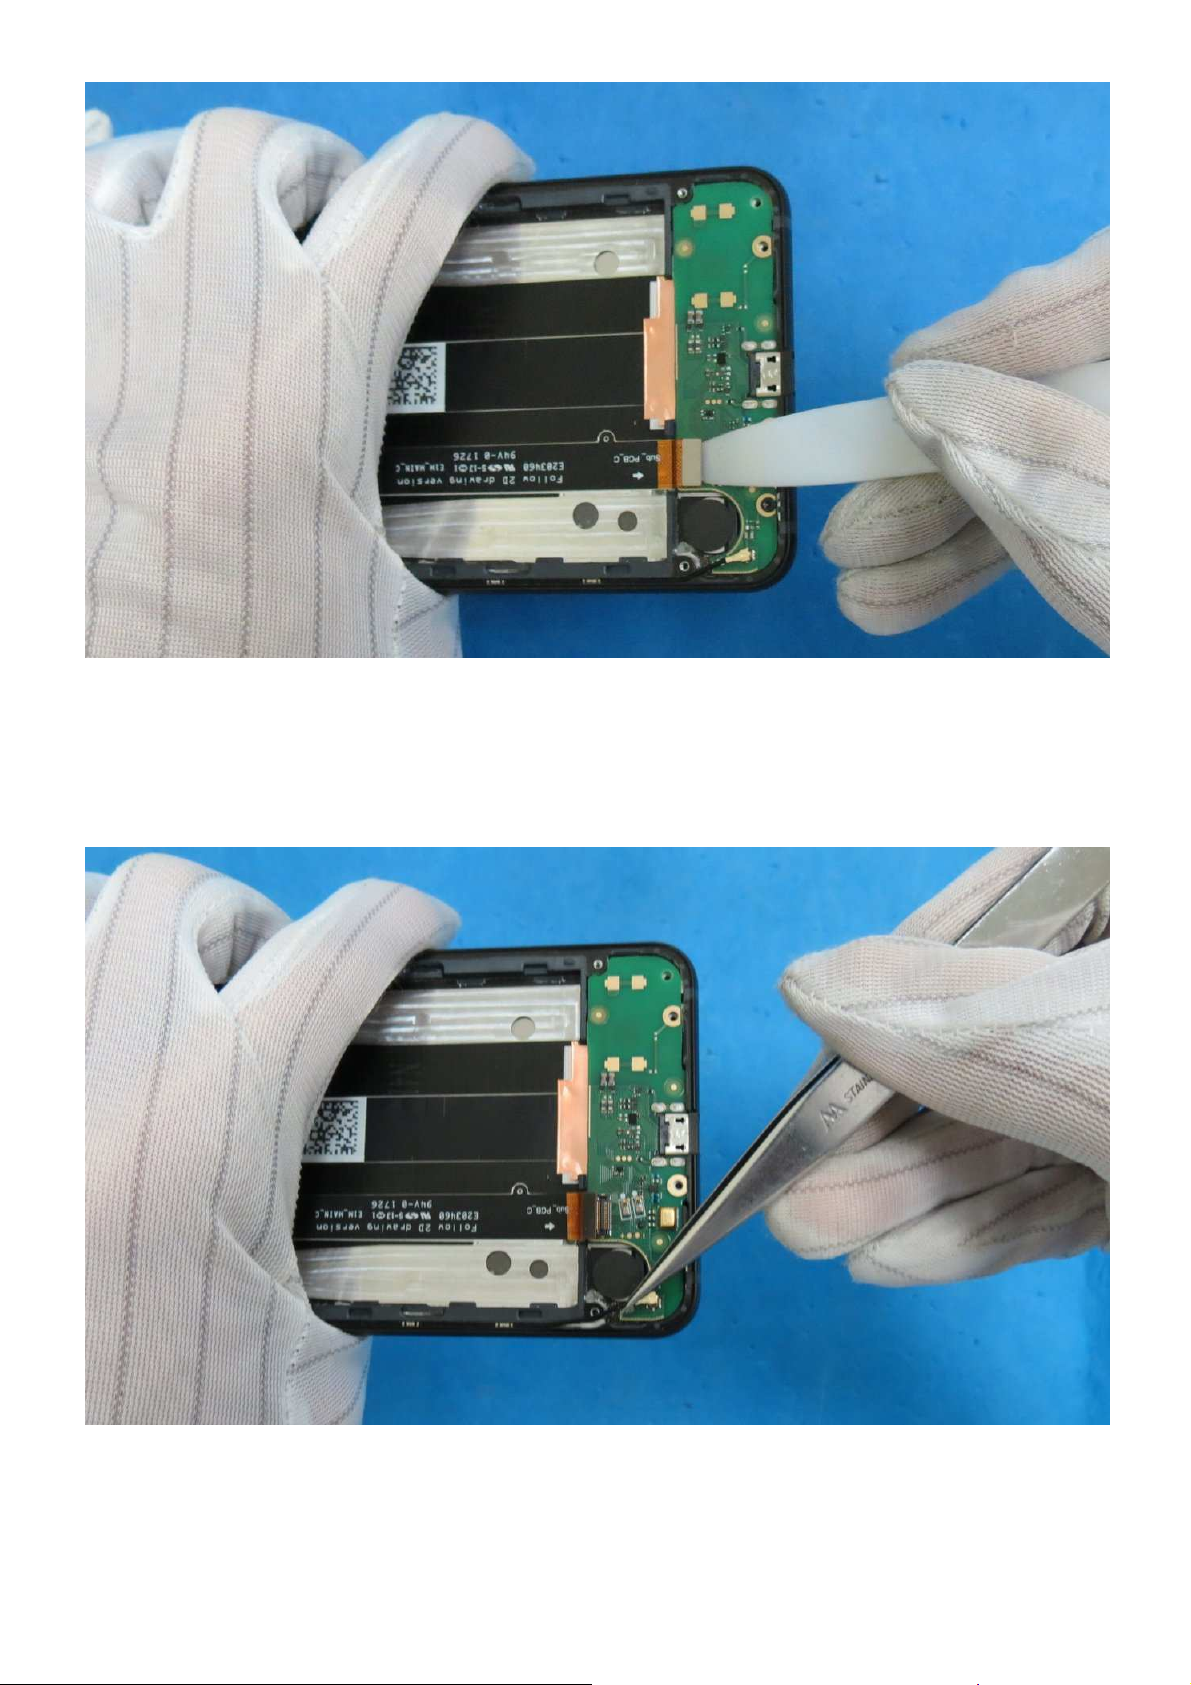
11) Disconnect the BTB from the sub-board.
12) Disconnect the contact of the coaxial cable from the sub-board.

13) Unscrew the screws (Screw_M_Hexagon_Flat_Head_M1.4*2.6_Zn) with the T5 screwdriver.
14) Remove the sub-baord with the plastic rod.

15) Unscrew the screws(Screw_M_Hexagon_Flat_Head_M1.4*2.6_Zn) with the T5 screwdriver.
Disconnect the contact of the coaxial cable and the 2 BTBs from the PCBA accordingly.
16) Remove the PCBA with the plastic rod.

17) Remove the front camera.
18) Remove the main camera and rubber on p-sensor.

19) Remove rubber on sub mic with the tweezers.
20) Remove the earpiece speaker.

21) Remove the coaxial cable and the main FPC from the TP/LCM module.
Unscrew the screws (SCREW_M_Cross_Flat Head_M1.4*3.5_Zn) with the cross screwdriver.
22)
 Loading...