

Page 1
GB User manual
CafeRomatica
5 6 7 8 9 10
Page 2
2 Introduction2
WELCOME TO THE
NIVONA FAMILY!
We are delighted at the confidence you have shown in us by choosing a quality product from NIVONA.
We would like to express our sincere THANKS.
To ensure maximum enjoyment of your NIVONA machine, please
read through this document carefully and pay attention to the safety
instructions before using the machine for the first time.
Please keep this document in a safe place. Then you can use it as a
reference or pass it on to any subsequent owner.
We hope you enjoy your NIVONA product and, with it, a good, flavourful cup of coffee.
Best wishes to you from the NIVONA team!
SYMBOLS USED
The following symbols are used in these instructions:
CAUTION
This symbol draws your attention to possible
dangers.
NOTE
This symbol draws your attention to special information.
TIP
This symbol indicates helpful advice on how to use
the machine.
Page 3

Table of contents 3
TABLE OF CONTENTS
1. SAFETY INFORMATION ................................................ 4
1.1. Correct use ..................................................................................... 4
1.2. General instructions for the user ..................................... 4
1.3. Limits to the range of users ................................................ 5
2. CONTROL ELEMENTS ................................................... 6
3. OPERATION OF THE MACHINE ................................... 7
3.1. Function switches ....................................................................... 7
3.2. Operation with the rotary dial ............................................ 7
3.3. Functions of the buttons........................................................ 8
4. INITIAL STARTUP ........................................................... 8
4.1. Preparation ..................................................................................... 8
4.2. Initial Start menu ....................................................................... 9
5. MENU NAVIGATION ...................................................... 11
6. PREPARE SPECIALITY COFFEES ............................... 11
6.1. Draw speciality coffee ............................................................ 11
6.2. Recipe menu .............................................................................. 12
6.3. 2-cup function ........................................................................... 13
6.4. Cappuccino-Connaisseur .................................................. 13
6.5. Flavour profiles ......................................................................... 13
6.6. AROMA PRE-select ................................................................13
6.7. My Coffee (for individual speciality coffees) ........................ 13
6.8. Prepare ground coffee ......................................................... 14
7. BASIC SETTINGS ......................................................... 15
7.1. General settings ....................................................................... 15
7.2. Set grind fineness ................................................................... 16
7.3. Aroma Balance System ...................................................... 16
7.4. NIVONA App .............................................................................. 17
7.5. Flying Picture ............................................................................. 17
8. CLEANING & MAINTENANCE .................................... 18
8.1. Rinse frother ............................................................................... 18
8.2. Clean frother............................................................................... 19
8.3. Rinse system ............................................................................. 20
8.4. Clean system ............................................................................ 20
8.5. Descale system.......................................................................... 21
8.6. Remove & clean brewing unit ........................................ 22
8.7. Clean regularly by hand ..................................................... 22
8.8. Disassemble and clean frother ..................................... 23
8.9. Change filter ............................................................................... 24
8.10. Status of Maintenance ......................................................... 24
9. SOLVING PROBLEMS YOURSELF ............................ 25
10. ACCESSORIES & COFFEE ASSORTMENT ............. 28
11. CUSTOMER SERVICE & WARRANTY ....................... 28
12. PACKAGING & DISPOSAL ......................................... 28
13. TECHNICAL DATA ....................................................... 29
DE
GB
FR
NL
PL
RU
Page 4

4 Safety instructions
1.
1. SAFETY INSTRUCTIONS
CAUTION
Repairs to electrical appliances must be carried out
only by specialised technicians! Improper repairs can
expose the user to considerable dangers! If the machine is used other than for its intended purpose or is
operated or maintained improperly, we cannot accept
liability for any resulting damage!
CAUTION
Actuating the on/off switch during the brewing process can damage the machine! Switch the machine
off only when it is idle!
CAUTION
Danger of burns! Hot water might spray out of the
outlet at first when steam or hot water is drawn. Touch
the outlet only when cold.
1.1. Correct use
The machine may only be used for its designated
purpose (use only in private households) and is not
intended for commercial use, which would void the
warranty (see accompanying warranty terms).
1.2. General instructions for the user
Set the machine on a dry, level and stable surface, and
use it only indoors. Never place this machine on a hot
surface, near other appliances which become very hot
when in use (e.g. stove, deep fryer), or near open flames.
The machine must not be used in cupboards or other
closed pieces of furniture.
The mains supply voltage must always match the
working voltage of the machine. Please refer to the
type plate on the machine.
The machine must not be used at altitudes over
2000 m above sea level.
Do not operate the machine if the mains supply cable
or the casing is damaged. Never let the mains supply
cable touch hot parts.
If the mains supply cable of the machine is damaged,
it must be replaced by the manufacturer, its customer
service representative, or a similarly qualified technician to avoid hazards.
Never immerse the machine in water.
Always keep the mains supply plug dry and keep it
away from moisture
Do not pull on the mains supply cable to disconnect
the plug from the mains socket.
Page 5

5Safety instructions
If a fault occurs, disconnect the mains plug immedi-
ately (never by pulling on the mains supply cable or
the machine itself).
Before carrying out maintenance or cleaning, check
that the machine is switched off and that the mains
plug is disconnected.
No liability for damage is accepted in case of incor-
rect operation, improper use, or incorrect repairs. The
warranty is void in these cases.
Always follow the instructions for cleaning and desca-
ling! Failure to comply voids the warranty.
Never clean the machine or individual parts in the
dishwasher. Failure to comply voids the warranty.
Do not leave the machine switched on unnecessarily.
If you will be away for several days, always unplug the
mains cable.
Please use the integrated coffee grinder only to grind
roasted and untreated coffee beans, not for other
food items! Always make sure that there are no
foreign objects mixed in with the coffee beans, which
voids the warranty.
If repair of the machine is required (including replace-
ment of the mains cable!), please first contact the
NIVONA service telephone or the dealer from which
the machine was purchased, and, after consultation
with us and observing the section “How to make your
machine ready for shipment” in Chapter 11 of this document, send it to NIVONA Central Customer Service,
Südwestpark 49, D-90449 Nurember, Germany.
1.3. Limits to the rane of users
This machine can be used by children 8 and older and
by persons with physical, sensory, or mental impairments or who are lacking in experience and knowledge, provided they are acting under supervision or
have been instructed on how to use the machine safely
and are aware of the possible dangers. Children must
not play with the machine. Cleaning and maintenance
of this machine must not be carried out by children
unless they are age 8 or over and are acting under
supervision. The machine and its connection line must
be kept away from children younger than 8.
DE
GB
FR
NL
PL
RU
Page 6
Control elements6
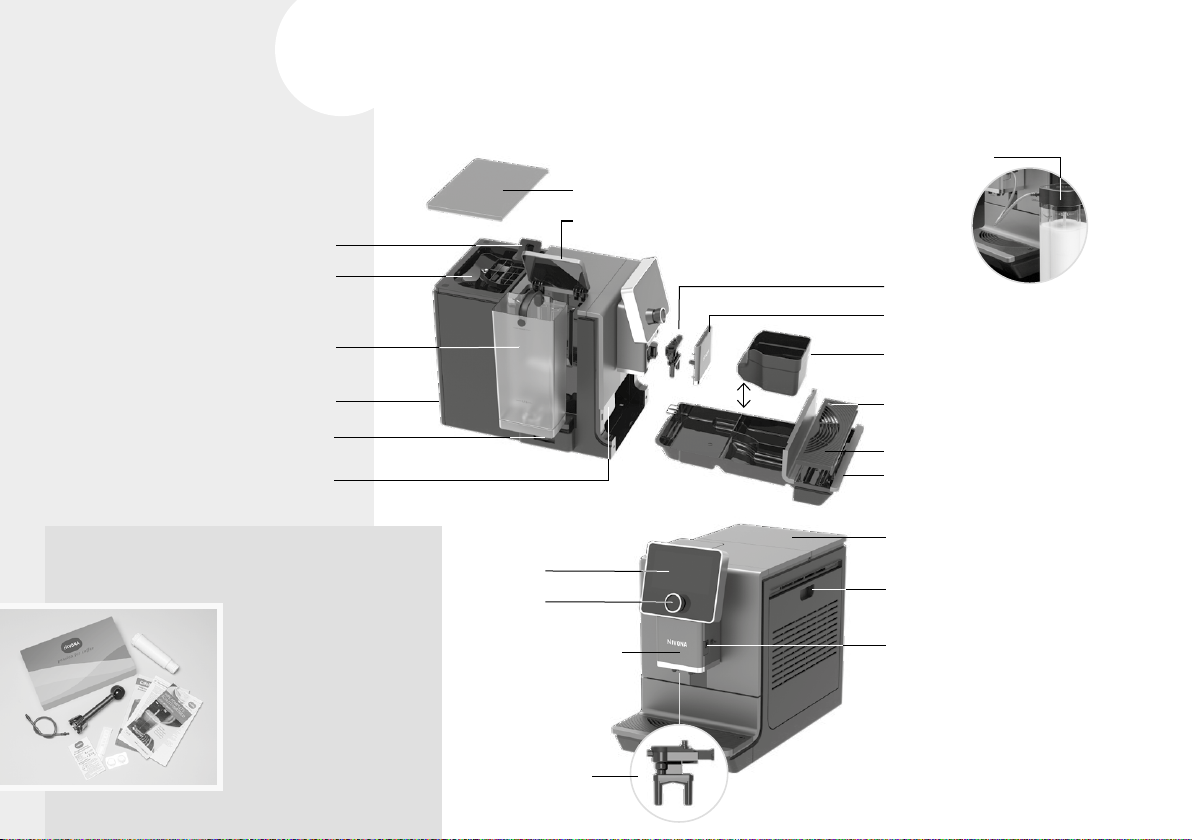
Ground coffee shaft
Rear rollers (in back)
Cable compartment (in back)
Coffee bean holder
Water tank
On/off switch
Type plate
(remove drip pan)
2.
2. CONTROL ELEMENTS
Milk container
Cover for coffee bean holder
Water tank cover
Frother
Cover plate
Coffee grounds container
(inside)
Connection for milk tube
(in the drip pan)
Drip grid
Drip pan
WELCOME PACK
(included with machine)
CLARIS fresh water filter
User manual
Warranty terms
Measuring spoon
2 cleaning tablets
Test strips
(for measuring water hardness)
Connection tube for milk
Display
Rotary
Height-adjustable
outlet with
cover plate
(frother behind)
Frother
Cup storage area
Service door with handle
(brewing unit behind)
Connection for milk tube
(in height-adjustable outlet)
Page 7
3.
Operation of the machine 7
3. OPERATION OF THE MACHINE
3.1. Function switches
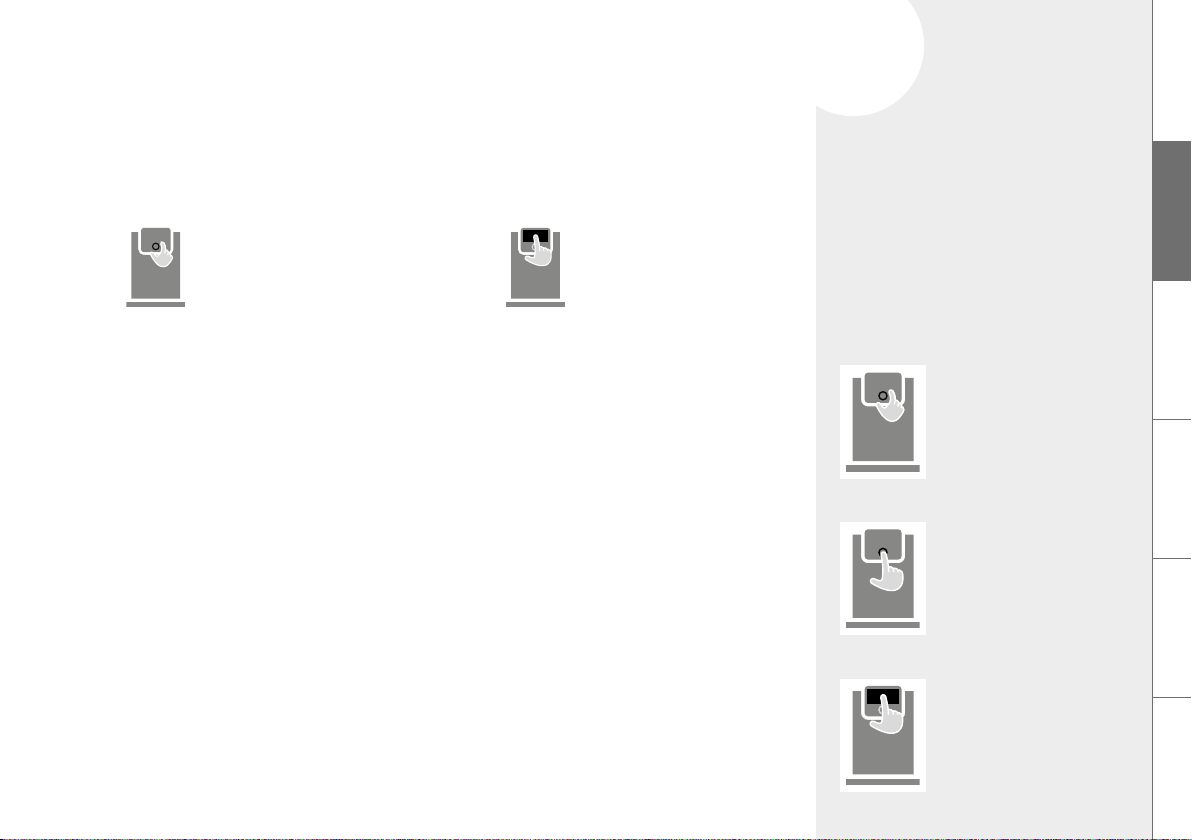
The NIVONA machine can be operated using the rotary dial and the touchscreen.
Rotary dial
navigate / select /
change / confirm
by turning and pressing
Touchscreen
navigate / select /
change / confirm
by touching
3.2. Operation with the rotary dial | Touchscreen
Turning the rotary dial
To select / navigate between and within the main menus BEVERAGES (speciality coffees),
SETTINGS and MAINTENANCE and to change the setting options in the submenus and
recipe menu.
Short press | Short touch
To start / confirm the currently marked / selected function and to switch between the three main
menus BEVERAGES (speciality coffees), SETTINGS and MAINTENANCE.
In the recipe menu, the first short press / touch selects the setting parameters.
The parameter can be changed by turning the rotary dial or by another short touch on the
parameter. Another short press confirms the change.
A parameter changed by a short touch does not have to be confirmed.
The quantity of beverages can only be changed by turning the rotary dial.
A short press when the beverage is drawn cancels the procedure. If the draw is cancelled while the
parameters are still optically marked, the rotary dial must be pressed 2x.
DE
GB
FR
Turning
NL
Pressing
PL
Long press | Long touch
In the BEVERAGES (speciality coffees) menu, a long press / touch switches to the recipe menu to
change the settings here.
Touching
RU
Page 8
8 Initial startup
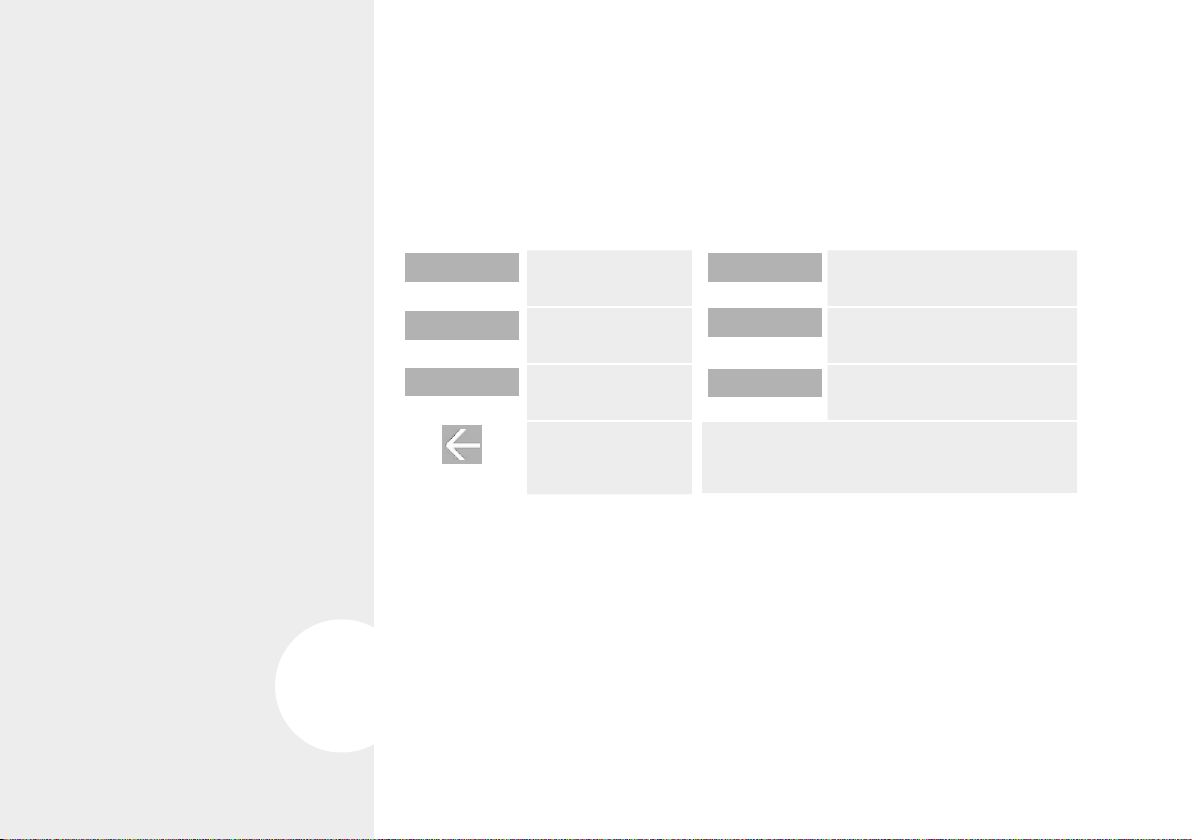
3.3. Functions of the buttons
The switches can be selected either by touching (directly) or with the rotary dial (by turning and pressing). To change a setting option in the BEVERAGES (speciality coffees)
and SETTINGS menus, turn the rotary dial.
4.
START
SAVE
NEXT
Even durin a coffee draw that has already started, various parameters can be changed by
turning the dial as long as they are optically marked.
A beverage draw can be cancelled with CANCEL. If the draw is cancelled with the rotary dial
while the parameters are still optically marked, it must be pressed 2x.
start
save
confirm |
to next step
one step back
CANCEL
DELETE
EDIT NAME
The currently selected symbol /
function is optically marked
cancel
delete My Coffee recipe
change the name of a
My Coffee recipe
4. INITIAL STARTUP
4.1. Preparation
Remove the machine and other supplied parts from the packaging.
Place the machine on a level, dry work surface (ventilation slots must not be covered).
Page 9
Initial startup 9
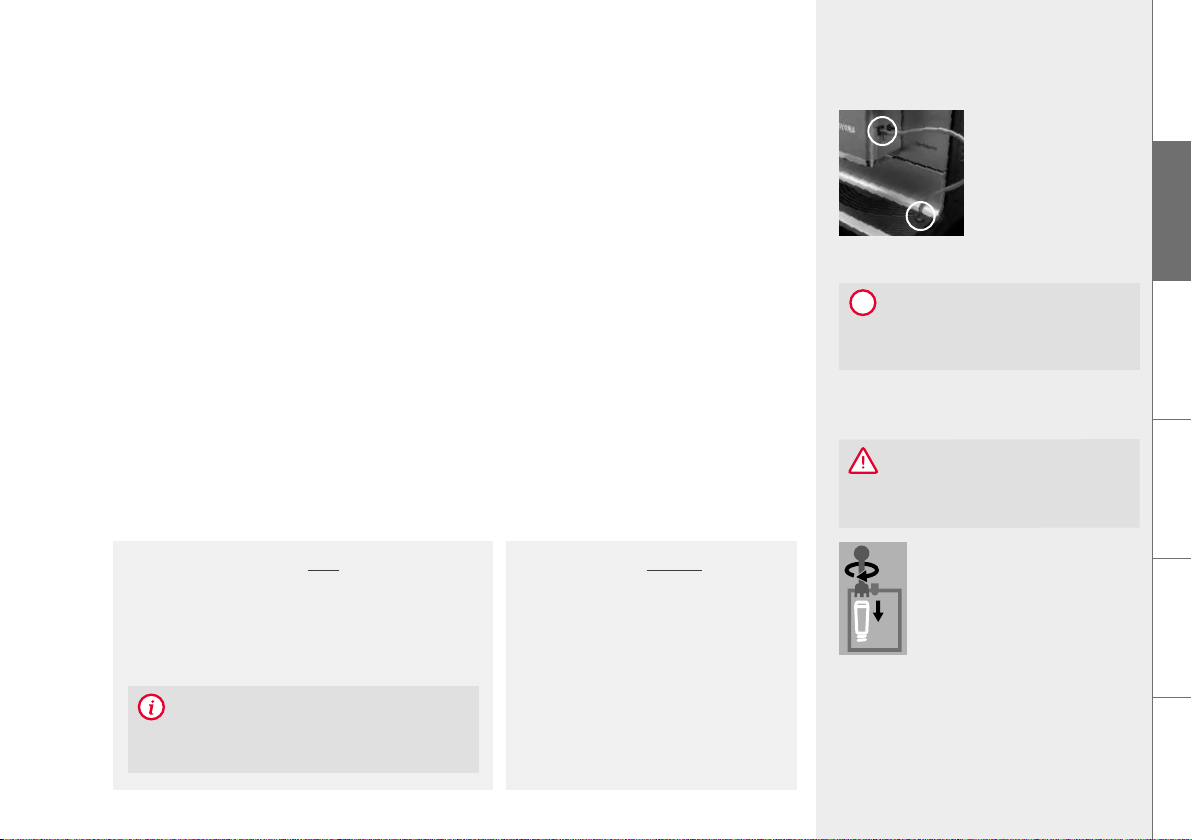
Connect the mains supply cable to a power socket which has been correctly installed
(any unnecessary length of cable remains inside the cable compartment)
Connect milk tube to the height-adjustable outlet and drip pan
Switch on machine
When the machine is switched on after the initial startup, it first heats up. If the automatic
switch-on rinse is activated, the display shows SYSTEM RINSES and the rinse procedure
starts automatically. If the automatic switch-on rinse is deactivated, the display shows Please
rinse system and the rinse procedure must be started manually by confirming.
4.2. Initial Start menu
The instructions on the display lead you through the Initial Start menu conveniently and
step-by-step.
Set language
Select the language with the rotary dial and confirm
Set filter
Select filter setting with the rotary dial
Operation with filter
Set the menu to Yes
Using the mounting aid at the end of the
measuring spoon, screw the filter into the
water tank and confirm using the rotary dial.
NOTE
If used with a filter, the machine does not need to
be descaled as often.
Operation without filter
(factory setting)
Set the menu to No and confirm
with the rotary dial
When using the machine without
a filter, the water hardness must be
entered in the next step.
Milk tube – connected to drip pan
NOTE
i
Details on Operation of the Machine are
contained in Chapter 3, starting at page 7.
CAUTION
Insert the filter straiht and do not overturn!
Screw filter
into the
water tank
DE
GB
FR
NL
PL
RU
Page 10
10 Initial startup
Test strips Deree of
≤
1 red point
2 red points 8 - 14° Water hardness 2
3 red points 15 -21° Water hardness 3
≥ 4 red points > 21° Water hardness 4
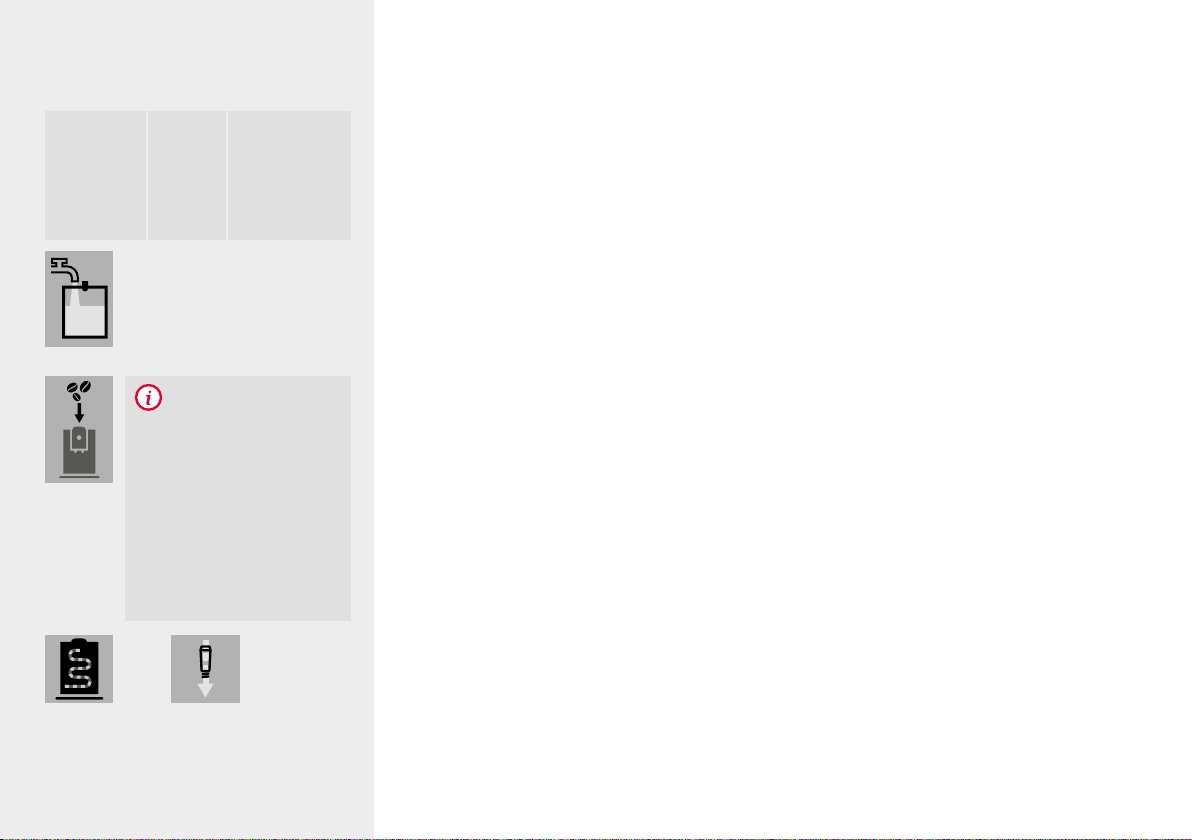
Fill water tank
Fill coffee
beans
SYSTEM
FILLS/RINSES
hardness
At initial startup, the grind
chamber is still empty. After the
first grinding, it is possible that
Please fill coffee beans is displayed and the machine does
not make coffee.
Press the rotary dial again
for an additional draw; the process is then repeated
FILTER
RINSES
Display
1 - 7° Water hardness 1
(factory setting)
NOTE
Set water hardness*
Immerse supplied test strip briefly in water, shake it off and read the test result after
about 1 minute
In the menu, use the rotary dial to select the water hardness read from the test strip
and confirm
Fill water tank (> 0.5l)
Remove the water tank, fill water tank with fresh, cold water without carbonation
(no mineral water), reinsert the tank, and confirm using the rotary dial
Do not fill with any carbonated liquids or any other liquids, or the warranty is void!
Fill coffee bean holder
Fill the coffee bean holder with untreated, roasted coffee beans without foreign objects
or dirt and without sugar, then close the flavour protection cover well and confirm using
the rotary dial
Fill / rinse system, rinse filter
Place a large container (> 0.5 l) under the outlet and confirm with the rotary dial
Wait until no more water comes out of the outlet, then empty the container
Operating note
At the end of the initial startup, a note appears for the beverage draw.
Confirm note as well as the next instruction with the rotary dial / by touching
All settings that were determined during initial startup can be changed at any time in the
SETTINGS menu.
* For operation without filter
Page 11
Prepare speciality coffees
11Menu navigation
6.5.
5. MENU NAVIGATION
In the NIVONA machine, you can select the main menus SETTINGS, BEVERAGES (speciality
coffees), and MAINTENANCE. All available functions of the machine can be carried out within
these main menus.
Detailed information on navigation within and between the main menus is found in Chapter
3 starting at page 7.
6. PREPARE SPECIALITY COFFEES
6.1. Draw speciality coffee
Select the desired speciality coffee in the BEVERAGES (speciality coffees) menu
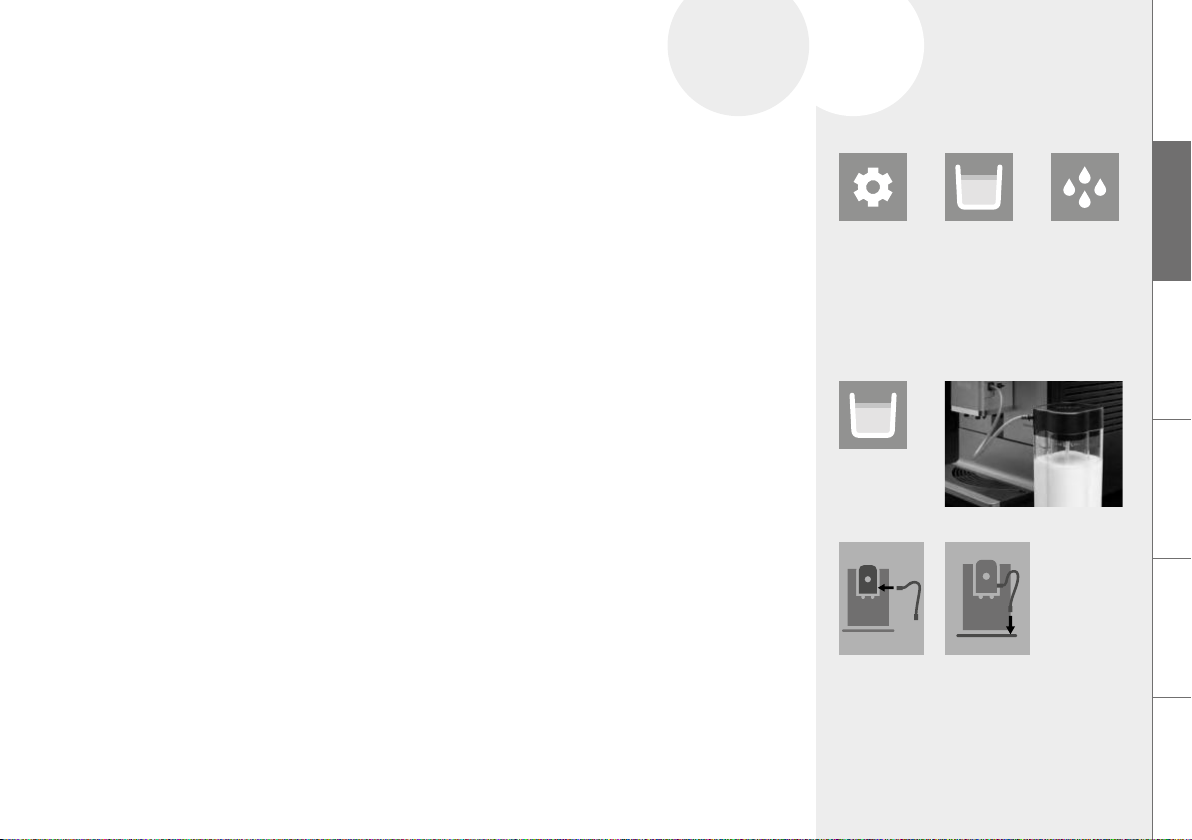
For speciality coffees with milk, connect the milk-filled container (milk container, milk
refrigerator, Tetra Pack, or similar) to the lower end of the milk tube. The upper end
remains in the outlet
A short press / touch on the desired speciality coffee begins the beverage draw
After completion of the draw of a speciality coffee with milk, the display shows the
message / instruction to rinse the frother. The frother should then be rinsed as soon
as possible, but at the latest before switching off the machine. To do this, reconnect the
tube to the drip pan, and select and confirm the message / instruction on the display.
Follow the instructions in the display up to the end of the program.
SETTINGS MAINTE-
BEVERAGES
(speciality
coffees)
Connect tube
to the outlet ...
BEVERAGES
(speciality
coffees)
Connect milk source
…and put in
drip plate
NANCE
DE
GB
FR
NL
PL
RU
Page 12
12 Prepare speciality coffees
6.2. Recipe menu
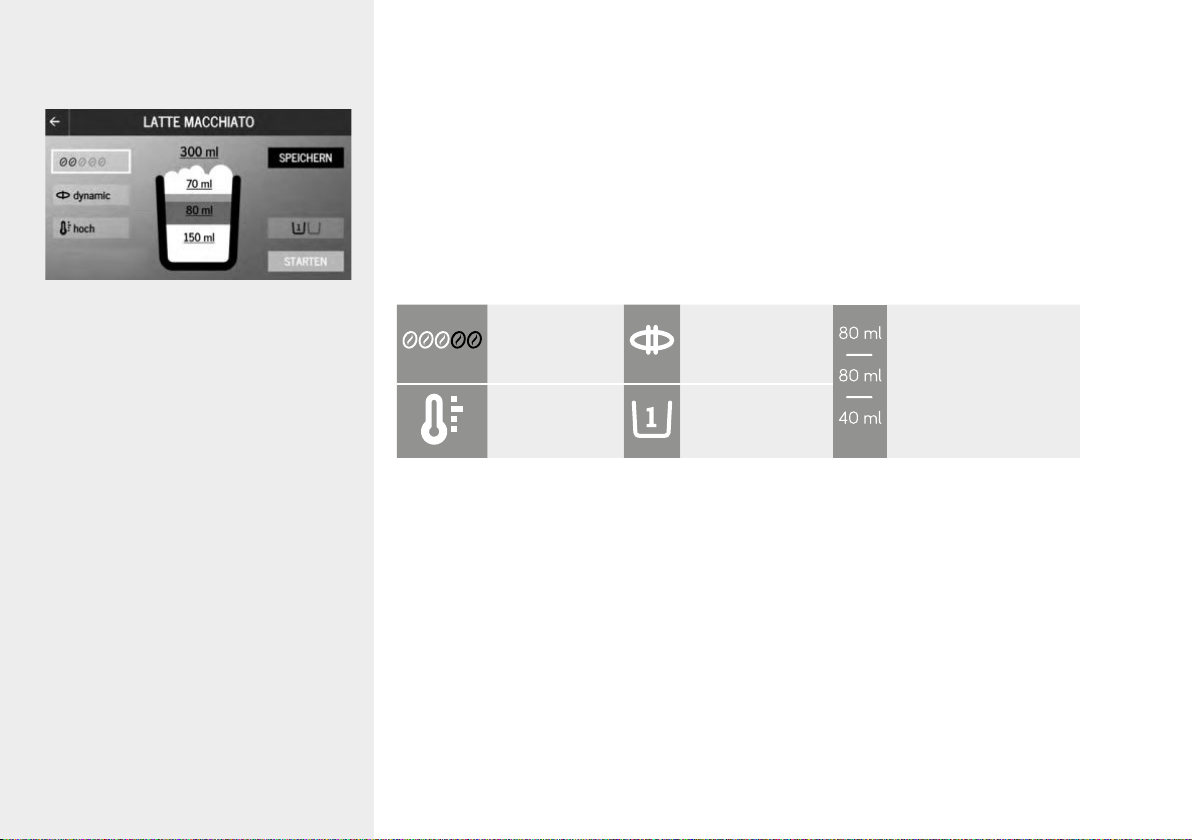
The recipe menu is a submenu in the individual speciality coffees. Here, the factory recipe
settings can be changed individually and stored permanently.
A long press / touch on the symbol of a speciality coffee leads to the recipe menu of
the beverage
Recipe menu
Adjustable parameters in the recipe menu:
Bean strenth Flavour profiles
(dynamic,
constant, intense)
Temperature 1- or 2-cup-
function
A short press / touch on the (activated) SAVE switch saves the beverage recipe with
the changed parameters.
A short press / touch on the (activated) STA R T switch begins the beverage draw with
the changed parameters.
Quantity
(coffee / milk foam /
water / milk, depending
on the speciality coffee)
Page 13
13Prepare speciality coffees
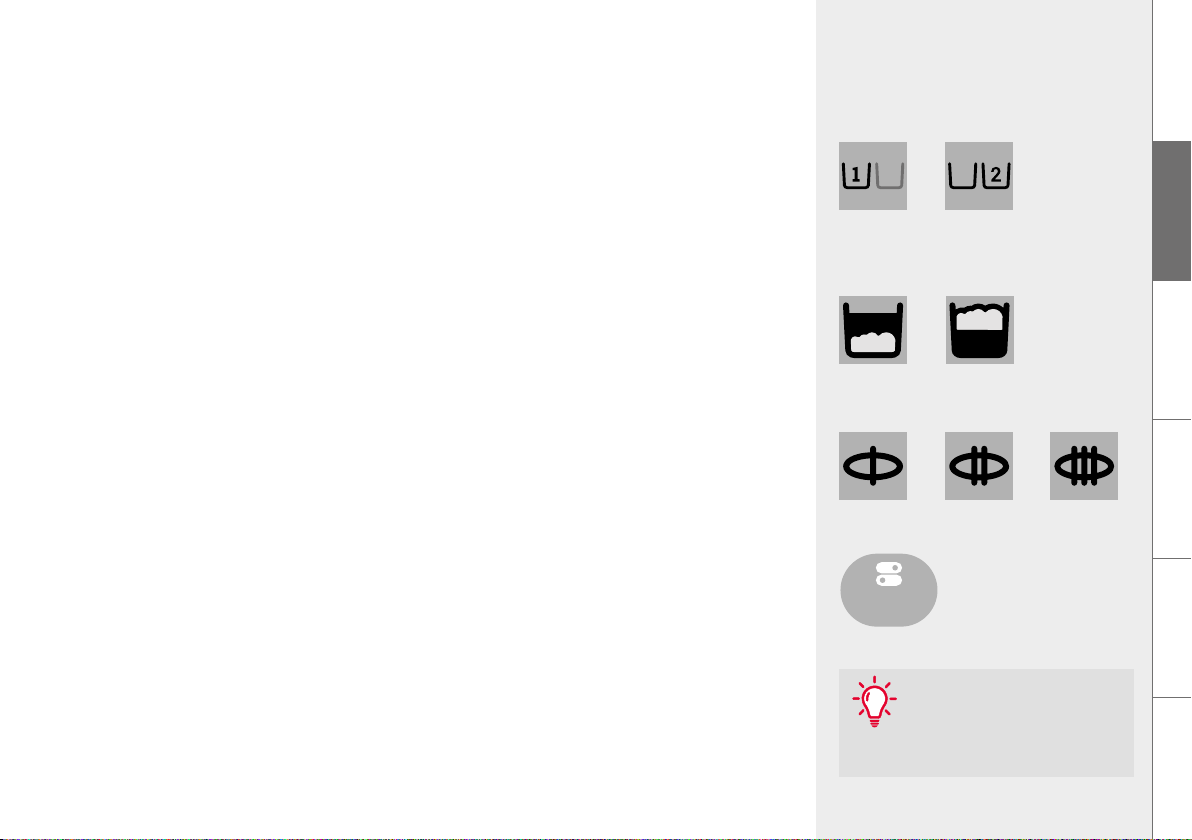
6.3. 2-cup function*
To fill two cups directly next to each other from the same beverage draw, a second cup must
be placed under the outlet and then either
Press the rotary dial briefly twice in succession to start beverage preparation (for the
current draw) or
Change the cup symbol in the recipe menu of the speciality coffee
6.4. Cappuccino-Connaisseur
By changing the sequence in the sequence symbol, cappuccino / caffè latte enthusiasts can
specify in the recipe menu whether the milk or the coffee goes into the cup first.
6.5. Flavour profiles
Changing the flavour profile (dynamic | constant | intense) in the recipe menu changes the
brewing process and extraction from the beans and thus the taste of the coffee (see also
Chapter 7.3. Aroma Balance System on page 16).
6.6. AROMA PRE-select
With the NIVONA App, all coffee recipes that have been perfectly matched to the respective
NIVONA coffee type can be transferred to the NIVONA machine via an activated Bluetooth
connection (see chapter 7.4.).
Start AROMA PRE-select in the NIVONA App and select the NIVONA coffee type used.
1 Cup 2 Cups
1st milk
dynamic constant intense
AROMA
PRE-select
AROMA PRE-select
The NIVONA coffee types
are available from our authorised
NIVONA retailers.
1st coffee
TIP
DE
GB
FR
NL
PL
* not for CAFFÈ AMERICANO, HOT WATER, MY COFFEE, ground coffee
RU
Page 14
14 Prepare speciality coffees
My Coffee
Fill Coffee
powder
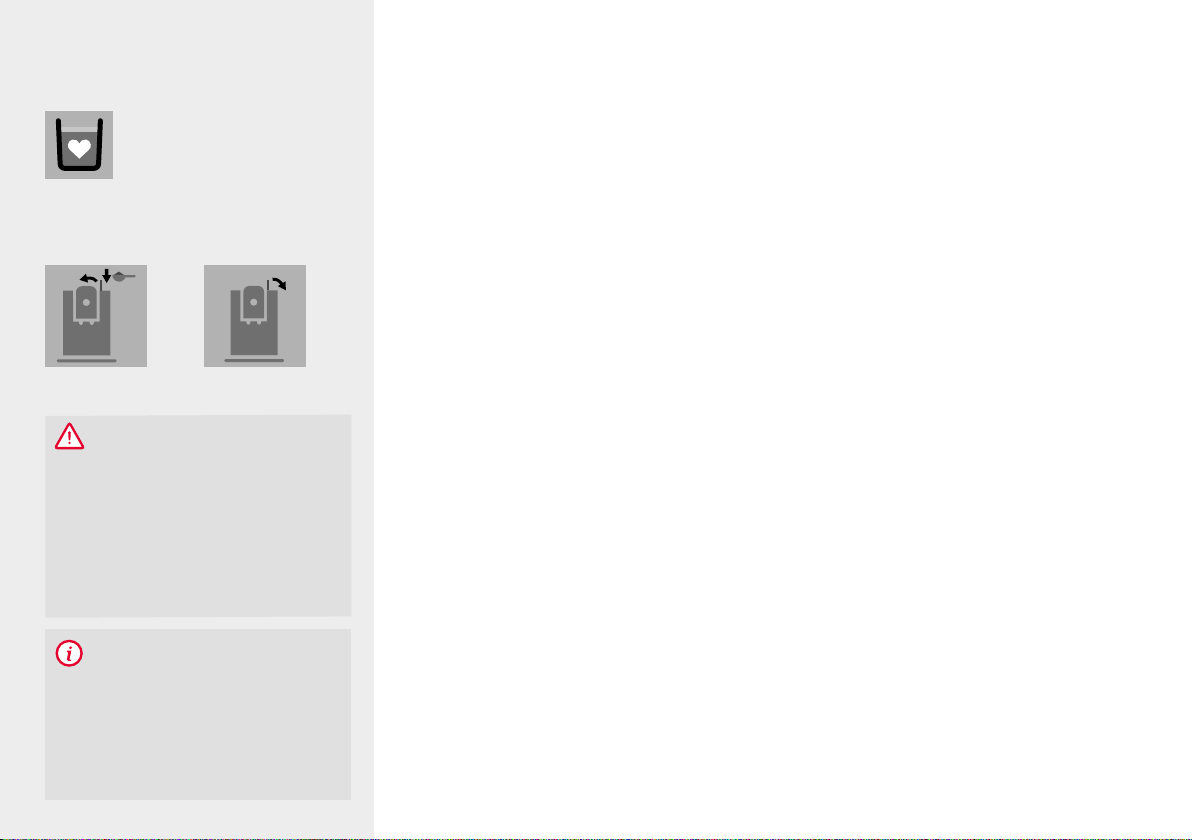
CAUTION
The ground coffee shaft is not a storage
container. Therefore, never add more than
one portion to the shaft and use only fresh
or vacuum-packed ground coffee from
coffee beans.
Water-soluble instant coffee must not be
used!
NOTE
If you accidentally open the ground coffee
shaft – or have not started a beverage draw
after adding ground coffee – the machine
is automatically rinsed about one minute
after the cover is closed again and is then
ready for use again.
Close powder
shaft
6.7. My Coffee (for individual speciality coffees)
Up to 9 different beverages can be individually set, named and stored with the NIVONA
machine.
To do this, in the BEVERAGES (speciality coffees) menu select the menu option
MY COFFEE
Select a memory location with a long press / touch
Select a base recipe (speciality coffee), assign a name (if necessary, delete the MY
COFFEE presetting and save the name with OK), set the recipe individually and save it
A stored My Coffee recipe can be changed or edited with a long press of the rotary dial
on the corresponding symbol and also removed through confirmation of deletion
6.8. Prepare round coffee
Open the cover of the ground coffee shaft (underneath the cover on the upper right of
the machine)
The display shows Fill Coffee powder and Close powder shaft
Add a level measuring spoon of ground coffee
Close cover and flap
The display shows when the ground coffee is ready
Place a cup in the middle below the coffee outlet
Select the beverage
Start preparation
Page 15
7.
Basic settings
15
7. BASIC SETTINGS
7.1. General settins
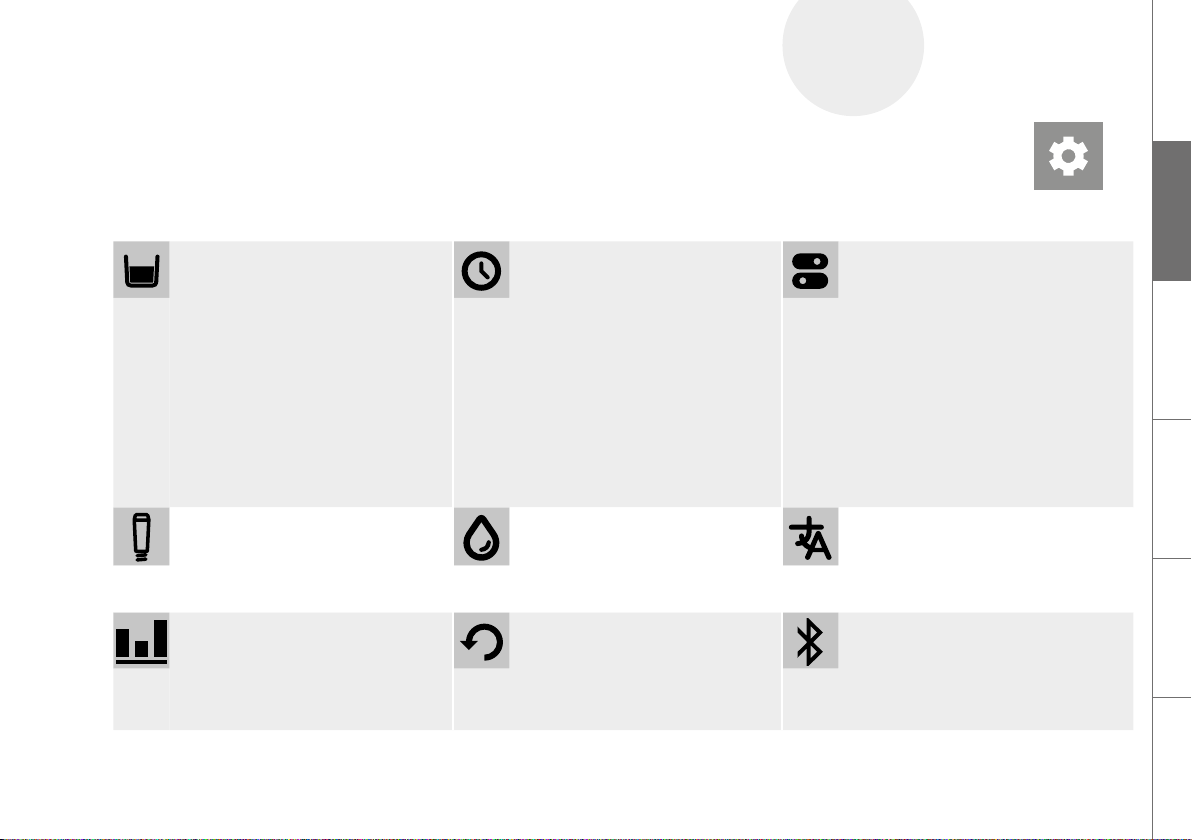
All of the following parameters can be changed, edited or checked in the SETTINGS menu using the rotary dial.
Live Prorammin
– Change and save the recipe
setting while a beverage is
being drawn
(choose a speciality coffee and follow
the instructions on the display)
Filter
– Set operation with / without
filter
Statistics
– Displays the draws per speci-
ality coffee and the performed
maintenance functions since
initial startup
Times
– Activate / deactivate automatic
switch-on time
(setting of the current time as well as
the switch-on time)
– Activate / deactivate automatic
switch-off time
– Set time of day*
(Only appears if the switch-on time is
activated in the menu Activate / deactivate automatic switch-on time)
Water hardness
– Set the water hardness
(Only displayed during
operation without filter)
Factory settin
– Recipes, settings and
Bluetooth can be reset
to the factory settings here
Comfort Settins
– Set water tank lighting
– Activate / deactivate energy-saving
(ECO) mode**
– Set display brightness
– Activate / deactivate
automatic display lock
– Activate / deactivate automatic
switch-on rinse
– Activate / deactivate automatic
switch-off rinse
Lanuae
– Set the language
Bluetooth
– Connection to smartphone /
tablet and control of the
machine with the NIVONA App
DE
SETTINGS
GB
FR
NL
PL
* After disconnection from the power network, the time of the day must be reset
** If the rotary dial has not been actuated for a longer period of time, the machine switches automatically into the ECO mode.
A screen saver appears on the display. Actuate the rotary dial to leave the ECO mode.
RU
Page 16
16 Basic settings
Open/close
service door
CAUTION
The rind fineness may only be set when
the rinder is runnin!
The grinder can be adjusted to adapt to the
roast of the coffee beans. We recommend
always leaving the grinder at a medium
setting.
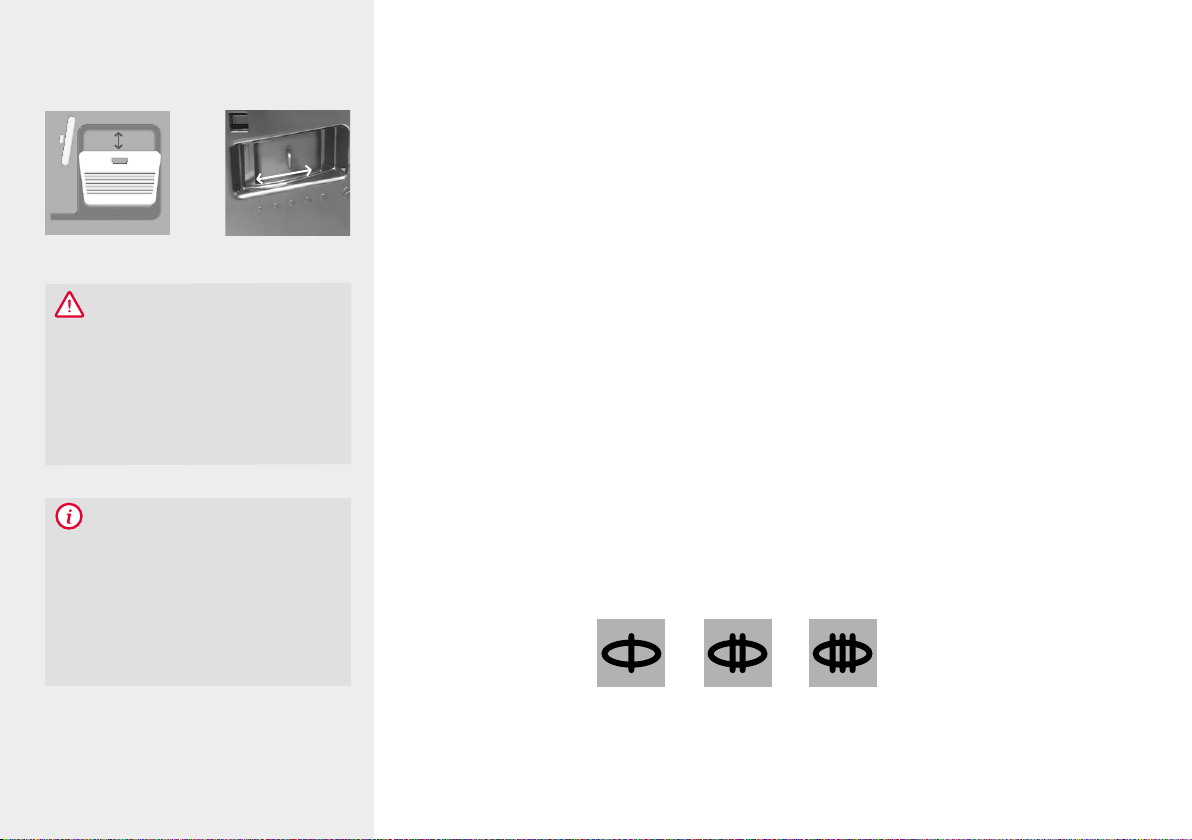
Set grind fineness
7.2. Set rind fineness
To change the grind fineness, please:
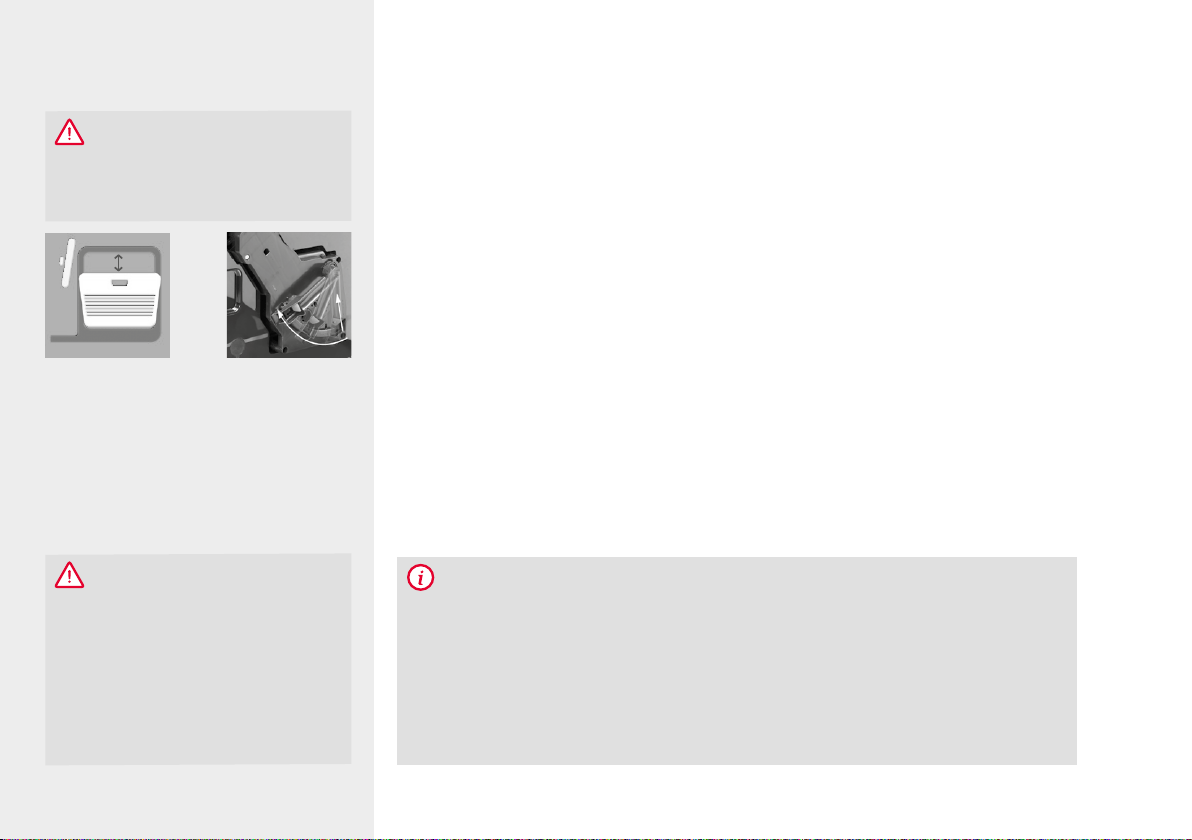
Open the service door on the right side of the housing (gently pull the unlocking device
inside the handle upward, then carefully remove the service door from the housing)
Place cup under the height-adjustable outlet
Set rotary dial in the BEVERAGES (speciality coffees) menu to Espresso, then press
the rotary dial.
While the grinder grinds, change the grind fineness by moving the regulator (above
right) (left = finer, right = coarser)
Close service door again (guide pins on the bottom of the service door into the recesses,
then press the service door until it locks in place)
NOTE
When changing the grind fineness,
we recommend:
– a finer setting for light roasts
(regulator further to the left),
– a coarser setting for dark roasts
(regulator further to the right).
7.3. Aroma Balance System
The NIVONA machine is equipped with the Aroma Balance System, which brings out the
best of the bean for every taste. The three flavour profiles dynamic, constant and intense
create a different taste with the same bean, same coffee strength, and same water amount.
dynamic constant intense
Page 17
17Cleaning & maintenance
7.4. NIVONA App
The NIVONA machine can be controlled and operated through the NIVONA App as it is
equipped with a Bluetooth interface.
Download the NIVONA App from the Google Play Store (Android) or from the Apple
App Store (iOS) onto your mobile device
In the SETTINGS menu, select the Bluetooth menu option and activate Bluetooth
with Connect on the NIVONA machine
Activate Bluetooth on your mobile device and from there connect to the NIVONA
machine through the NIVONA App
Now the NIVONA machine can be operated / controlled through the app.
7.5 Flyin Picture
A personalised display lock can be startup as a setting on the NIVONA machine using the
NIVONA App. An activated Bluetooth connection can be used to transfer a picture from the
mobile end device (smartphone, tablet) to the NIVONA machine’s display (Flying Picture)
which is then displayed as a personal display lock (see also Chapter 7.4).
Bluetooth
INSIDE
Flying Picture
DE
GB
FR
NL
PL
RU
Page 18
18 Cleaning & maintenance
MAINTE
NANCE
-
CAUTION
The runnin proram must not be interrupted!
8.
8. CLEANING & MAINTENANCE
All cleaning and maintenance programs can generally be selected and started in the MAIN
TENANCE menu. If a message / instruction for a cleaning / maintenance activity appears
on the display, this program can also be started directly through the message / instruction.
Select and confirm the instruction with the rotary dial or
Select MAINTENANCE menu.
Select the cleaning or maintenance program and start it with the rotary dial / by touching
The machine starts the corresponding cleaning or maintenance process and displays
instructions for additional actions.
Follow the instructions in the display up to the end of the program and confirm each
time with the rotary dial / by touching
8.1. Rinse frother
After you make speciality coffees with milk, the display instructs you to rinse the frother.
This should be done as soon as possible, but at the latest before switching off the machine.
Proceed as follows:
Select and confirm the instruction with the rotary dial or
In the MAINTENANCE menu, select the menu option Rinse frother
Rinse frother
Page 19
19Cleaning & maintenance
Clean frother
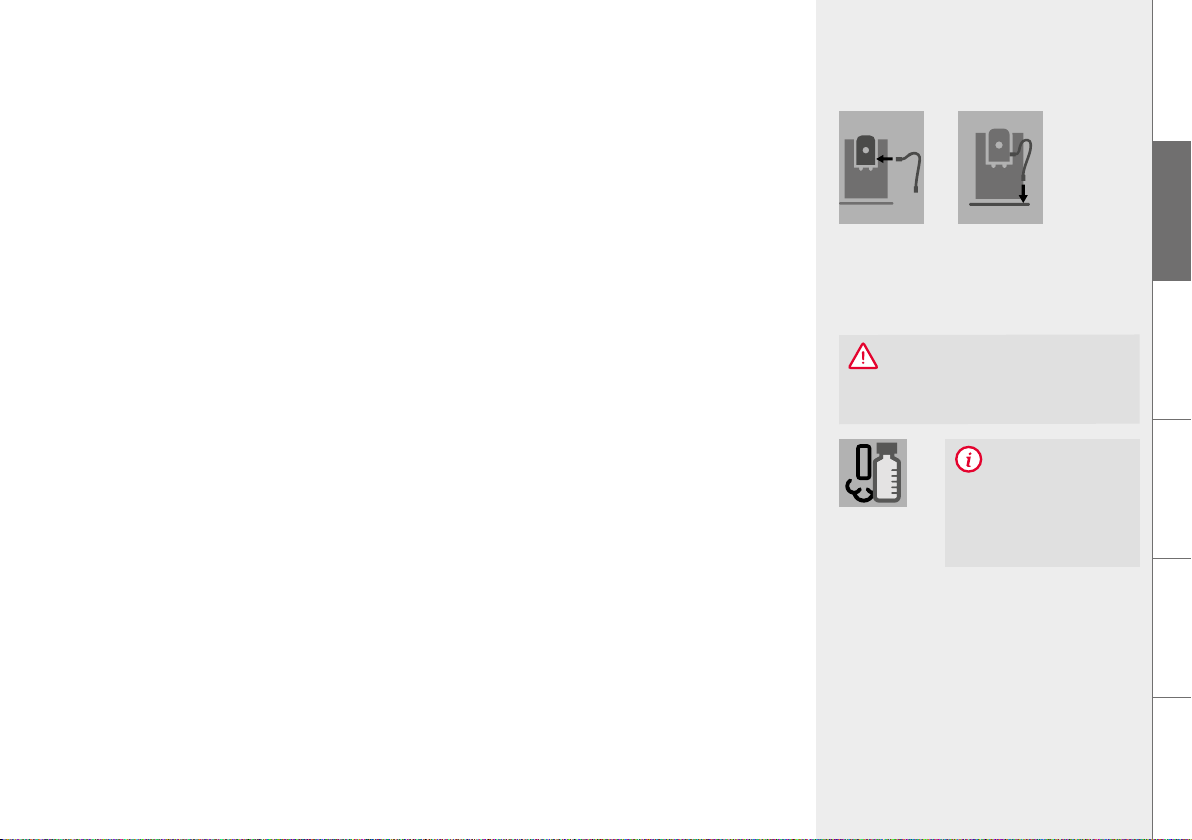
Connect the supplied tube with one end to the height-adjustable outlet and put the
other end in the drip pan, and confirm with the rotary dial
Place a sufficiently large container (≥ 0.5 l) under the height-adjustable outlet and
confirm with the rotary dial / by touching
The machine starts the rinse process. As soon as the rinse cycle is ended, the machine heats
up and is then ready for operation again.
8.2. Clean frother
Select and confirm the message / instruction with the rotary dial / by touching or
In the MAINTENANCE menu, select the menu option Clean frother
Put some detergent (recommendation: NIVONA CreamClean milk system cleaner) and
water in a container (at least 0.3 l)
Please observe the instructions of the detergent manufacturer for the mix ratio
Follow the instructions in the display up to the end of the program and confirm each
time with the rotary dial / by touching
The machine then heats up and is ready for operation again.
Connect tube
to the outlet ...
CAUTION
The runnin proram must not be interrupted!
…and put in
drip plate
NOTE
A message / instruction
is shown on the display
when the frother has to
be cleaned.
DE
GB
FR
NL
PL
RU
Page 20
20 Cleaning & maintenance
CAUTION
The runnin proram must not be interrupted!
Rinse system
CAUTION
The runnin proram must not be interrupted!
Please do not insert a cleaning tablet into
the round opening of the brewing unit until
the machine instructs you to do this.
Clean system
8.3. Rinse system
The system should be rinsed from time to time.
In the MAINTENANCE menu, select the menu option Rinse system. The display shows
SYSTEM RINSES
As soon as the rinse cycle is ended, the machine heats up and is then ready for operation
again.
8.4. Clean system
Put a sufficiently large container (≥ 0.5 l) under the height-adjustable outlet
Select and confirm the instruction with the rotary dial or
In the MAINTENANCE menu, select the menu option Clean system
Follow the instructions in the display up to the end of the program and confirm each
time with the rotary dial / by touching
The machine then heats up and is ready for operation again.
NOTE
A message / instruction is shown on the display when the machine has to be cleaned. Beverages
can still be drawn. But we recommend carrying out the cleaning program as soon as possible to
avoid endangering the warranty.
We recommend also cleaning the brewing unit BEFORE the system cleaning (see also Chapter
Remove & clean brewin unit on page 22).
Page 21
21Cleaning & maintenance
8.5. Descale system
CAUTION
The runnin descalin proram must not be interrupted!
Never use vinegar or vinegar-based material for descaling, but always use liquid products recom-
mended for fully automatic coffee machines (recommendation: NIVONA PREMIUM liquid descaler).
The filter (if present) must be removed from the water tank prior to the start of the descaling
program.
Durin descalin, please follow exactly the sequence of the displays!
First pour in the corresponding amount of water up to the 0.5 l mark and then add the descaler.
Never in reverse order! Observe the instructions of the descaler manufacturer.
Select and confirm the instruction with the rotary dial or
In the MAINTENANCE menu, select the menu option Descale system
Put a sufficiently large container (≥ 0.5 l) under the height-adjustable outlet
Follow the instructions in the display up to the end of the program and confirm each
time with the rotary dial / by touching
The machine then heats up and is ready for operation again.
Icon „ATube _to_outlet and
tube_in_drip_plate
Text at 2.: ... and put in drip plate
CAUTION
Please always remove residual descaling
fluid on the housing with a moist cloth afterwards!
Descale
system
NOTE
A message / instruction is shown on
the display when the machine has to
be descaled. (The descaling program
can also be started manually at any
time.) Beverages can still be drawn. But
we recommend carrying out the cleaning
program as soon as possible to avoid
endangering the warranty.
DE
GB
FR
NL
PL
RU
Page 22
22 Cleaning & maintenance
CAUTION
Clean the brewing unit before every cleaning program, but at least once a month.
Otherwise, the warranty can be void.
Open/close
service door
CAUTION
Never immerse the machine in water!
Do not use scouring agents for cleaning.
Dried milk residue is hard to remove.
Therefore, always clean immediately after
the machine cools down! Always follow the
message / instructions in the display on
rinsing and cleaning the frother.
Unlock
brewing unit
8.6. Remove & clean brewin unit
The brewing unit should be removed and cleaned under running water as needed and before
each cleaning program. Please never use detergent, but only pure cold water!
Open the service door on the right side of the housing (gently pull the unlocking device
inside the handle upward, then carefully remove the service door from the housing)
Unlock brewing unit (press red switch upwards and turn the handle to the left up to the
stop and to lock)
Carefully remove the brewing unit with the handle
Clean brewing unit under cold, running water and then let it dry
Carefully insert brewing unit again and lock it (hold down red switch and turn the handle
to the right up to the stop and to lock it)
Close service door again (guide pins on the bottom of the service door into the
recesses, then press the service door until it locks in place)
8.7. Clean reularly by hand
NOTE
Please follow these cleaning instructions. Maximum cleanliness is required, especially when handling
food and beverages.
When cleaning the drip pan, make sure that the two metal contacts and the space between them at
the rear of the drip pan are always clean and dry. Occasionally use some soapy water to clean the
drip pan.
The machine is equipped with rear rollers. These permit movement on a flat work surface. This
allows cleaning under the machine.
Page 23
23Cleaning & maintenance
Clean the housing inside and outside only with a soft, moist cloth without detergent
Empty the drip pan and coffee grounds container not later than when shown in the
display (only with the machine switched on, as only then can it tell that the containers
have been emptied)
After the drip pan and coffee grounds container have been removed, clean the housing
inside with a soft, moist cloth without detergent
The water tank should be rinsed with clean water daily and refilled with fresh, cool water
Clean the frother, tube and outlet regularly
8.8. Disassemble and clean frother
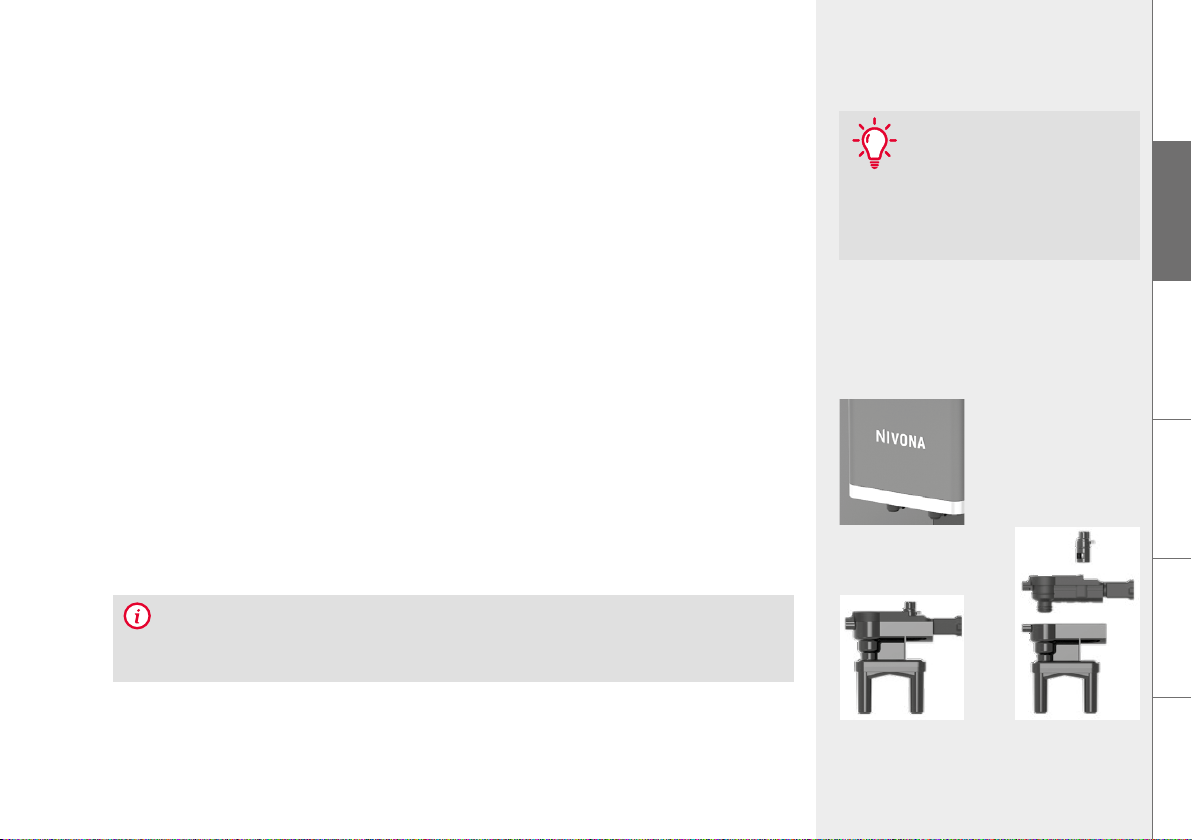
Remove the cover plate at the height-adjustable outlet, gently pull the frother down
and then out to the front and take it apart
Thoroughly clean the parts and put the frother back together
Insert the assembled frother back in the height-adjustable outlet
Reattach the cover plate to the height-adjustable outlet
NOTE
From time to time (ideally before every longer break in coffee making, but always on a regular basis!),
the frother must be disassembled completely and then cleaned under clean water.
TIP
To clean the display during
operation, the display can be locked in
the MAINTENANCE menu under Display
Lock. Pressing the rotary dial once
releases the lock.
Cover plate on the
height-adjustable
outlet
DE
GB
FR
NL
PL
Assembled
frother
Individual parts
of the frother
RU
Page 24
24 Cleaning & maintenance
NOTE
You can continue to draw beverages. But
we recommend changing the filter immediately.
CAUTION
Insert the filter straiht and do not overturn
Filter
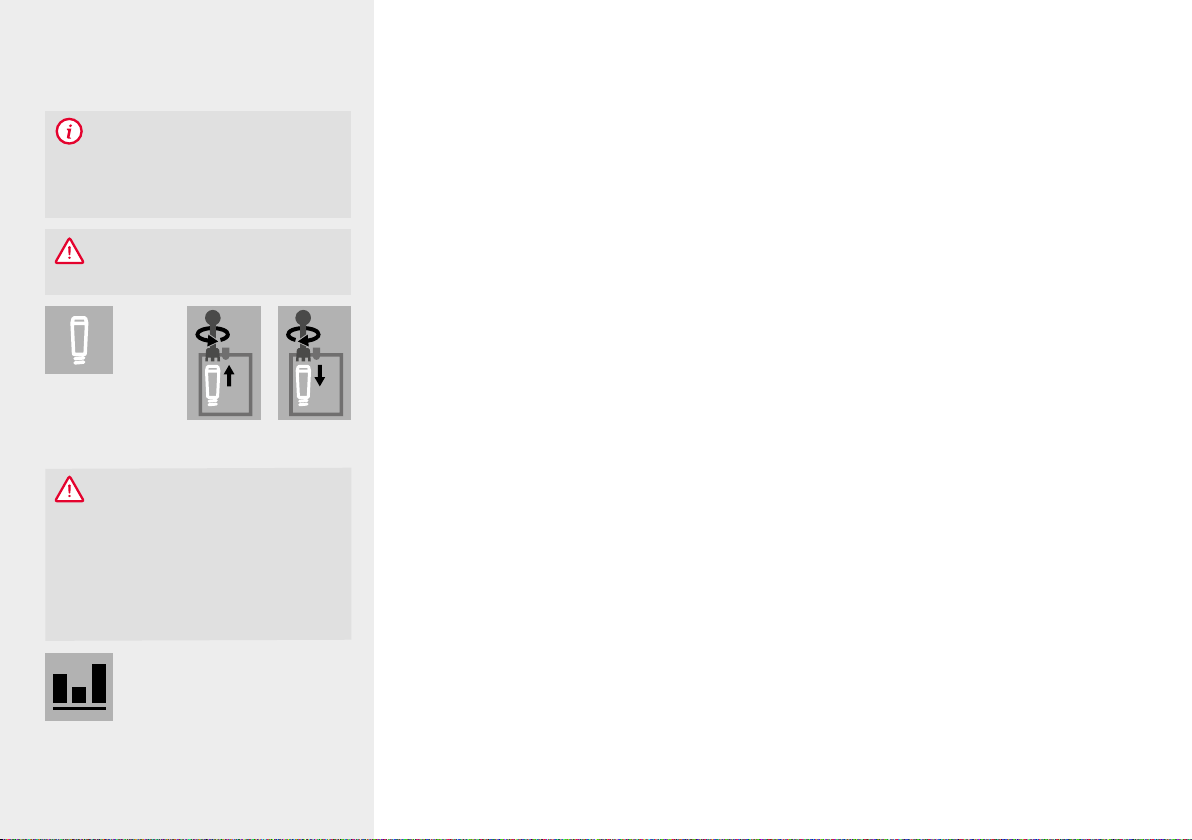
Unscrew / screw in the
filter (in the water tank)
CAUTION
In case of low water consumption, you
must replace the filter not later than after two months. No message appears in
the display. You can set the replacement
date with the dial on the head of the filter
(month indicator).
Status of
Maintenance
8.9. Chane filter
The filter’s effectiveness is used up after about 50 l of water has flowed through it. A message
/ instruction to replace the filter appears in the display.
In the SETTINGS menu, select the Filter menu option
Select Yes so that the machine detects that a filter is currently inserted
Select Chane filter
Empty the water tank; carefully unscrew the old filter from its holder using the mounting
aid at the end of the measuring spoon, and throw the filter away
Carefully screw the new filter into its intended holder in the water tank using the mount-
ing aid at the end of the measuring spoon
Follow the instructions in the display up to the end of the program and confirm each
time with the rotary dial / by touching
Wait for some time until no more water comes out of the outlet
The machine then heats up and is ready for operation again.
8.10. Status of Maintenance
The machine shows through a progress bar whether cleaning or descaling will be required
soon. The further to the right the progress bar is, the sooner the cleaning / descaling will be
needed
In the MAINTENANCE menu, select the Status of Maintenance menu option
Page 25
9.
25Solving problems yourself
9. SOLVING PROBLEMS YOURSELF
The following table shows some causes and options for solving the problem if the machine
does not work properly.
If the system detects a fault, an error message appears in the display:
Note error messae
(According to the table on page 26 / 27, error 8 can sometimes resolve itself)
Switch off machine
Pull out mains plu
CAUTION
If an error occurs or a problem cannot be solved by yourself, please contact your specialist retailer
or visit the service area at www.nivona.com.
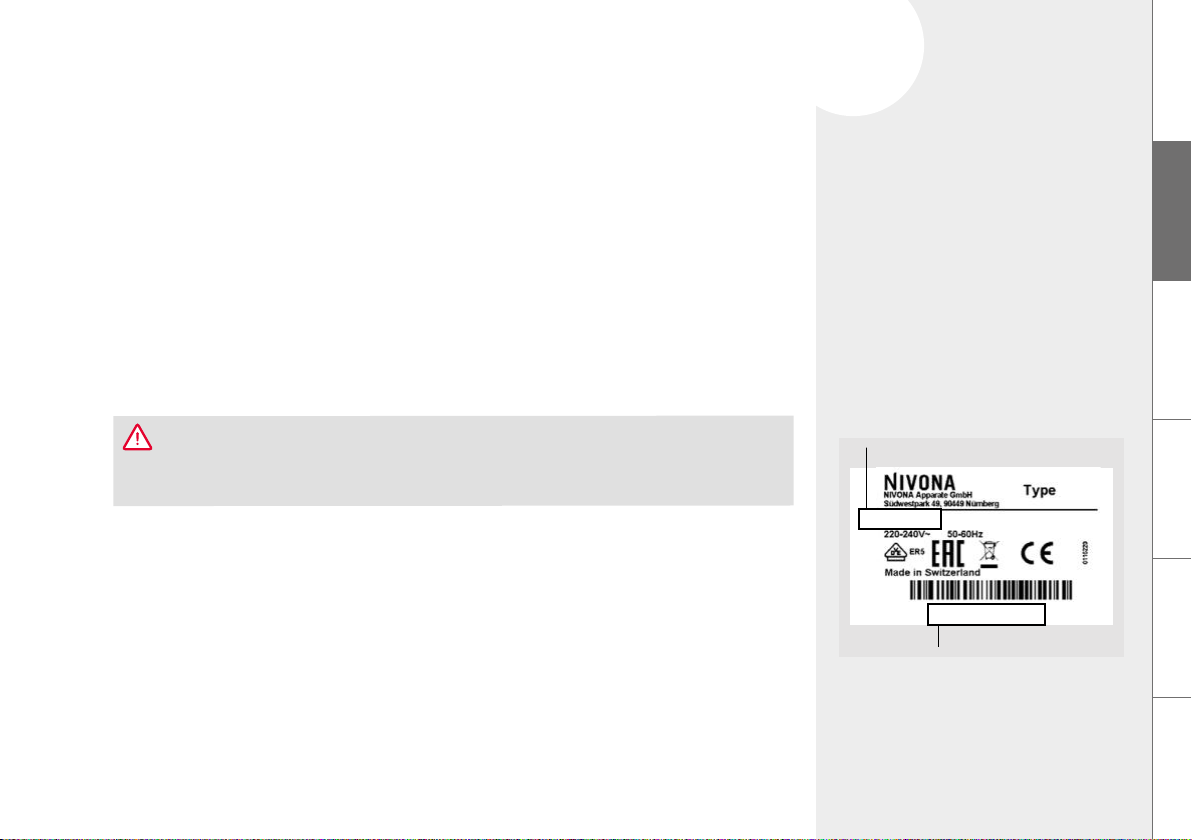
The following information is important for fast, competent processing of the matter
Model of the NIVONA product
Serial number
If available:
Error number / Error messae
Type plate (example)
Model
NICR XXX
XXXXXXXXXXXXXXX
Serial number
XXXX W
DE
GB
FR
XXX
NL
PL
RU
Page 26
26 Solving problems yourself
NOTE
To avoid problems, the following should be
observed:
Always remove the water tank
from the machine to fill it
Do not store coffee beans
in the refrigerator
Always empty containers
with the machine switched on
Use fresh and cooled milk
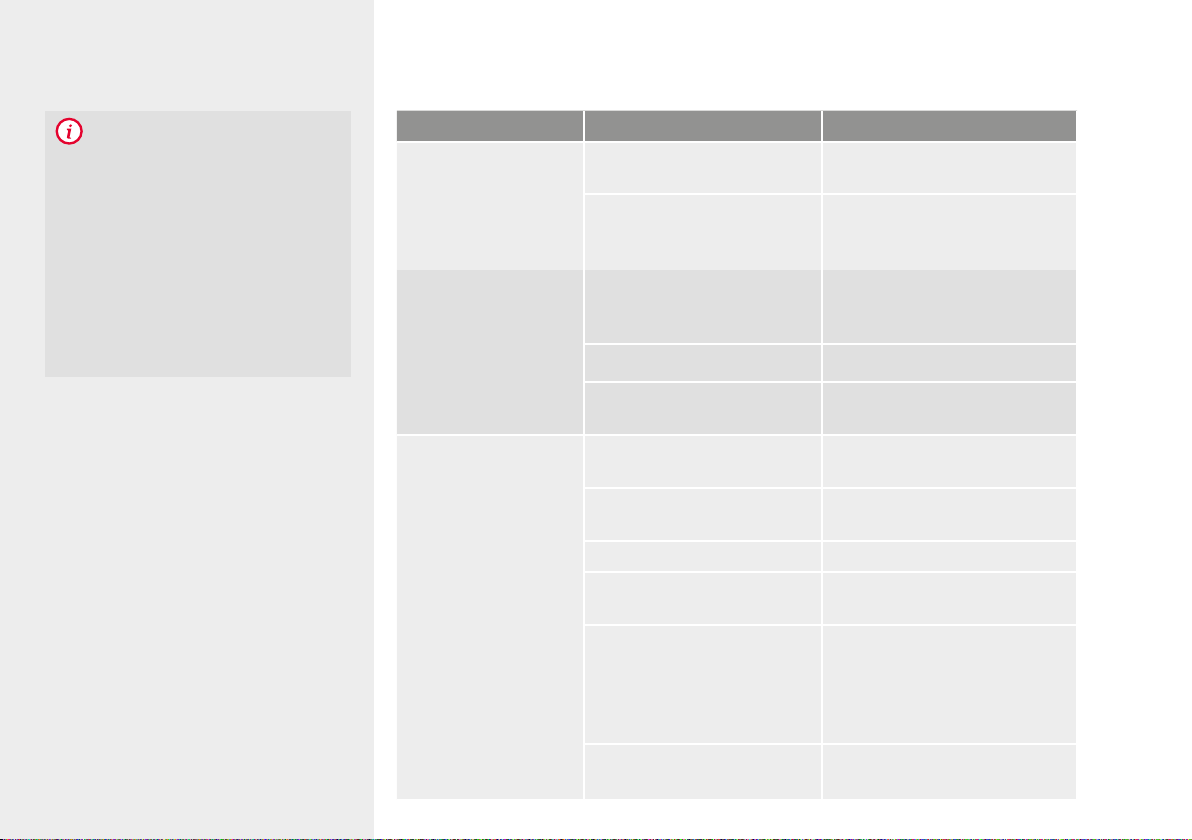
Problem Cause Remedy
No hot water or
drawing of milk foam /
steam possible
System might need
descaling
Perform high-dosage descaling
(Chapter 8.5.)
Frother is plugged Disassemble frother
completely and clean it
thoroughly
Too little milk foam or
liquid froth
Frother is plugged Disassemble frother
completely and clean it
thoroughly
Unsuitable milk Use cold milk
Coffee comes out only
dropwise
System might need
descaling
System might need
descaling
Grind fineness is too fine /
too coarse
Perform high-dosage descaling
(Chapter 8.5.)
Perform high-dosage descaling
(Chapter 8.5.)
Set grind fineness coarser /
finer (Chapter 7.2.)
Ground coffee is too fine Use coarser ground coffee
Too much ground coffee
Add less ground coffee
added
Brewing unit is plugged Remove and clean brewing unit
(Chapter 8.6.).
Reinsert brewing unit and
perform a system cleaning
(Chapter 8.4.)
Coffee outlets are plugged Perform system cleaning
(Chapter 8.4.)
Page 27
27Solving problems yourself
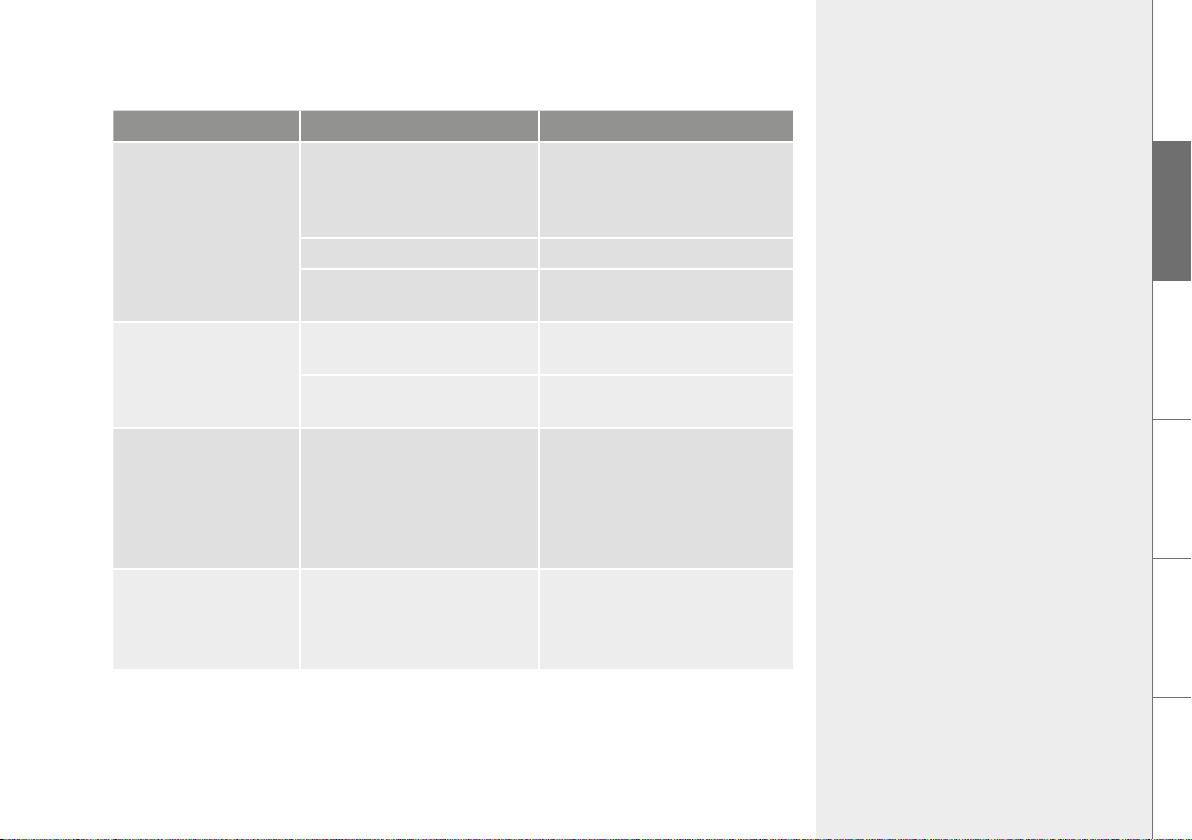
Problem Cause Remedy
Coffee does not have
“foam”
Brewing unit is plugged Remove and clean brewing unit
(Chapter 8.6.). Replace brewing
unit and perform a system
cleaning (Chapter 8.4).
Unsuitable coffee type Change coffee type
Beans are no longer
Use fresh beans
roast-fresh
Loud noise in the
coffee grinder
The display shows
Error 8 Service Tel
Grind fineness not adapted to
coffee beans
Foreign matter in the grinder,
e.g. small stones
The drive cannot properly
position the brewing unit
Optimise grind fineness
(Chapter 7.2.)
Call NIVONA service telephone;
ground coffee can still be used
Switch off the machine and pull
out the plug. Plug it back in and
switch on the machine. If the
machine is ready for operation,
remove and clean the brewing
unit (Chapter 8.6.).
Despite emptied and
inserted containers,
the display shows
Gap between the contacts at
the rear end of the drip pan
is dirty
Clean gap between the contacts
with water and some detergent
as well as a brush, then dry
Empty trays
DE
GB
FR
NL
PL
RU
Page 28
28
Accessories & coffee assortment
Customer service & warranty
Packaging & disposal
10. ACCESSORIES & COFFEE ASSORTMENT
10.
CAUTION
The runnin proram
must not be interrupted!
Evaporate
system
WARRANTY AND CUSTOMER
SERVICE CONDITIONS
Please see the accompanying information
sheet for detailed warranty and customer
service conditions.
12.
11.
Our current assortment of accessories and coffee can be found at www.nivona.com.
11. CUSTOMER SERVICE & WARRANTY
If you have to send in the machine due to a defect, first evaporate it out so that no water
remains in the system.
How to make your machine ready for shipment | Evaporate machine
In the MAINTENANCE menu, select the Evaporate system menu option
Follow the instructions in the display up to the end of the program and confirm each
time with the rotary dial / by touching
Empty drip pan, coffee grounds container, water tank and the coffee bean holder as
well as possible
Reinsert all parts
Pack the machine, ideally in the original packaging (no liability can be accepted for
transportation damage)
12. PACKAGING & DISPOSAL
The machine’s complete original packaging should be kept to protect it during shipping in
case customer service is needed.
Electrical and electronic appliances contain many materials which are still valuable or are
harmful to the environment, and these should not be treated in the same way as normal
Page 29
13.
Technical data
29
household waste. If treated as household waste or handled incorrectly, they may cause harm
to human health or the environment. Therefore, never throw a defective machine away with
household waste, but bring it to the community collection point for return and recycling of old
electrical and electronic devices
You can obtain more information from your local town hall, waste disposal service provider,
or the retailer from whom the machine was purchased.
Filter cartridges are disposed of as household waste.
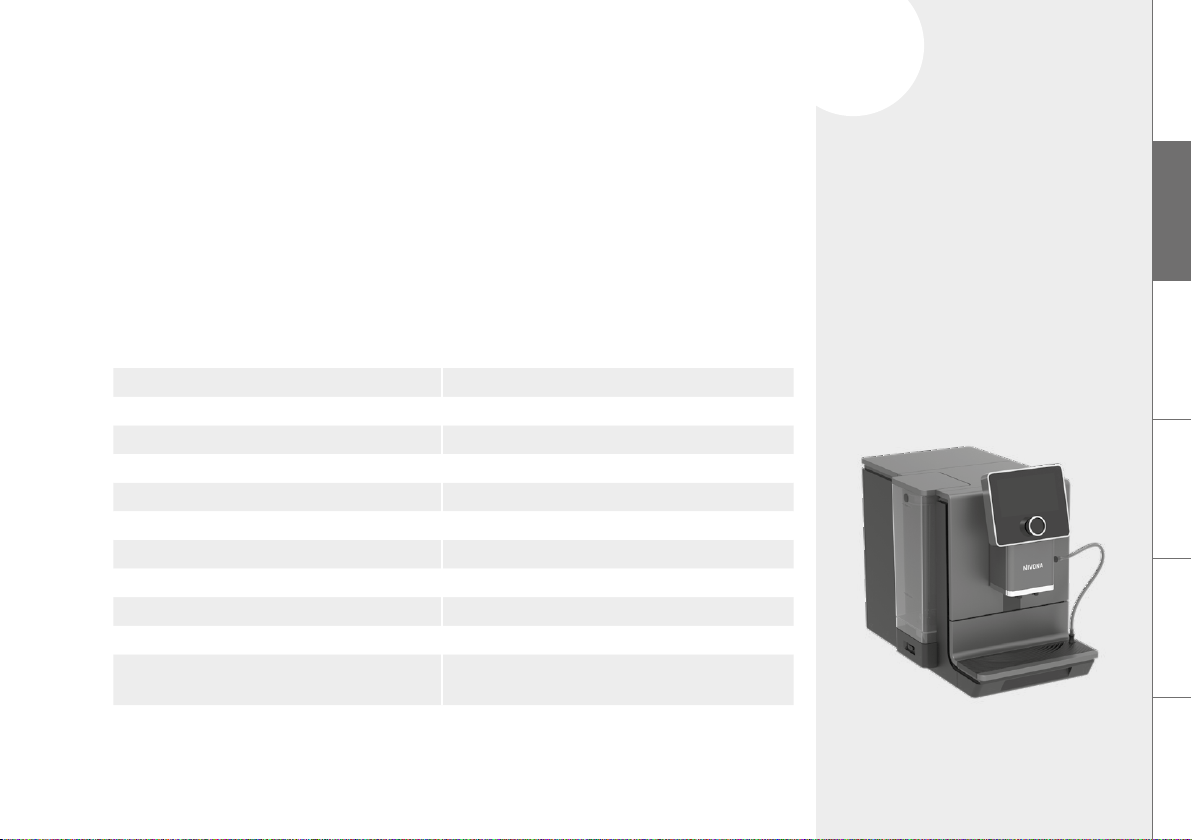
13. TECHNICAL DATA
Voltage 220–240 V AC, 50-60 Hz
Power output 1465 W
Conformity mark CE
Static pump pressure max. 15 bar
Water tank capacity approx. 2.2 l
Coffee bean holder capacity approx. 270 g
Coffee grounds container capacity approx. 10-15 portions*
Cable length approx. 1.1 m
Weight approx. 11.4 kg
Dimensions (W x H x D): approx. 28 x 36 x 50 cm
Bluetooth** Frequency range: 2,400 MHz - 2,483.5 MHz
Max. transmission output: 10 mW
DE
GB
FR
NL
PL
* Depending on the amount of beans used
** NIVONA Apparate GmbH hereby declares that the radio equipment complies with the Directive 2014/53/EU.
The complete text of the EU conformity declaration is available at the internet address www.nivona.com
in the SERVICE download area.
RU
Page 30

NIVONA Apparate GmbH
Südwestpark 49
D-90449 Nürnberg, Germany
www.nivona.com
2022 © Copyright NIVONA Apparate GmbH, Germany
All rights reserved
ANR 000129137
BDA NICR 960 – 970 GB Rev.01 15.08.2022
 Loading...