

Page 1

1 Health & Safety
Basic Information
2 Getting Started
3 Saving and Erasing Data
Solo
4 Beginning a Chapter
5 The Game Screen
6 Controlling Pit
7 Failing a Chapter
8 Far Away
9 Nearby
10 Rules
Together
AR Cards
11 AR Card Battle
Page 2

12 SpotPass
Other Modes
13 StreetPass
14 Vault / Options
Support Information
15 How to Contact Us
Page 3
1 Health & Safety
Thank you for selecting
KID ICARUS™: UPRISING for
Nintendo 3DS™.
This software is designed only for
use with the European/Australian
version of the Nintendo 3DS system.
Please read this manual carefully
before using this software. If the
software is to be used by young
children, the manual should be read
and explained to them by an adult.
Before use, please also read the
Operations Manual for your
Nintendo 3DS system. It contains
important information that will help
you enjoy this software.
Health and Safety Information
IMPORTANT
Important information about your
health and safety is available in the
Health and Safety Information
application on the HOME Menu.
To access this application, touch the
icon on the HOME Menu, then
touch OPEN and read the contents
of each section carefully. When you
are finished, press to return
to the HOME Menu.
Page 4

You should also thoroughly read the
Operations Manual, especially the
Health and Safety Information
section, before using Nintendo 3DS
software.
For precautions related to wireless
communication and online play,
please refer to the Operations
Manual, "Health and Safety
Information".
Language Selection
The in-game language depends on
the one that is set on the system.
This title supports five different
languages: English, German, French,
Spanish and Italian.
If your Nintendo 3DS system
language is set to one of these, the
same language will be displayed in
the game.
If your Nintendo 3DS system is set
to another language, the in-game
default language will be English. For
instructions about how to change the
system language, please refer to the
Operations Manual, "System
Settings".
Age Rating Information
For age rating information for this
and other software, please consult
the relevant website for the age
rating system in your region.
Page 5

www.pegi.info
PEGI (Europe):
USK (Germany):
www.usk.de
COB (Australia):
www.classification.gov.au
OFLC (New Zealand):
www.censorship.govt.nz
Advisories
When you download or use this
software (including any digital
content or documentation you
download or use in connection with
this software) and pay any
applicable fees, you are granted a
personal, non-exclusive, revocable
licence to use this software on your
Nintendo 3DS system. Your use of
this software is subject to the
Nintendo 3DS Service User
Agreement and Privacy Policy, which
includes the Nintendo 3DS Code of
Conduct.
Unauthorised reproduction or
distribution is prohibited. Your
Nintendo 3DS system and this
software are not designed for use
with any unauthorised device or any
non-licensed accessory. Such use
may be illegal, voids any warranty,
and is a breach of your obligations
under the user agreement.
Page 6

Furthermore, such use may lead to
injury to yourself or others and may
cause performance issues and/or
damage to your Nintendo 3DS
system and related services.
Nintendo (as well as any Nintendo
licensee or distributor) is not
responsible for any damage or loss
caused by the use of such device or
non-licensed accessory.
This software, instruction manual
and other written materials
accompanying the software are
protected by domestic and
international intellectual property
laws. The furnishing of this
document does not provide you with
any licence or other ownership
interest in such materials.
Nintendo respects the intellectual
property of others, and we ask
Nintendo 3DS software content
providers to do the same. In
accordance with the Digital
Millennium Copyright Act in the US,
the Electronic Commerce Directive in
the EU, and other applicable laws,
we have adopted a policy of
removing, in appropriate
circumstances and at our sole
discretion, any Nintendo 3DS
software that appears to infringe
anyone else's intellectual property.
If you believe your intellectual
Page 7
property rights are being infringed,
please visit this website to view the
full policy and understand your
rights:
ippolicy.nintendo-europe.com
Australia and New Zealand
consumers please visit:
support.nintendo.com
© 2012 Nintendo
© 2012 Sora Ltd.
Trademarks are property of their
respective owners. Nintendo 3DS is
a trademark of Nintendo. All rights
reserved.
This product uses the LC Font
by Sharp Corporation.
LCFONT, LC Font and the LC logo
mark are trademarks of Sharp
Corporation.
CTR-P-AKDP-EUR
Page 8
2 Getting Started
Start up the game. When the title
screen appears, touch the lower
screen.
Choosing a Save
File
When playing for the
first time, choose any
empty save file and
confirm your name,
birthday and Mii™. If
you have already created a file,
simply select it from the menu.
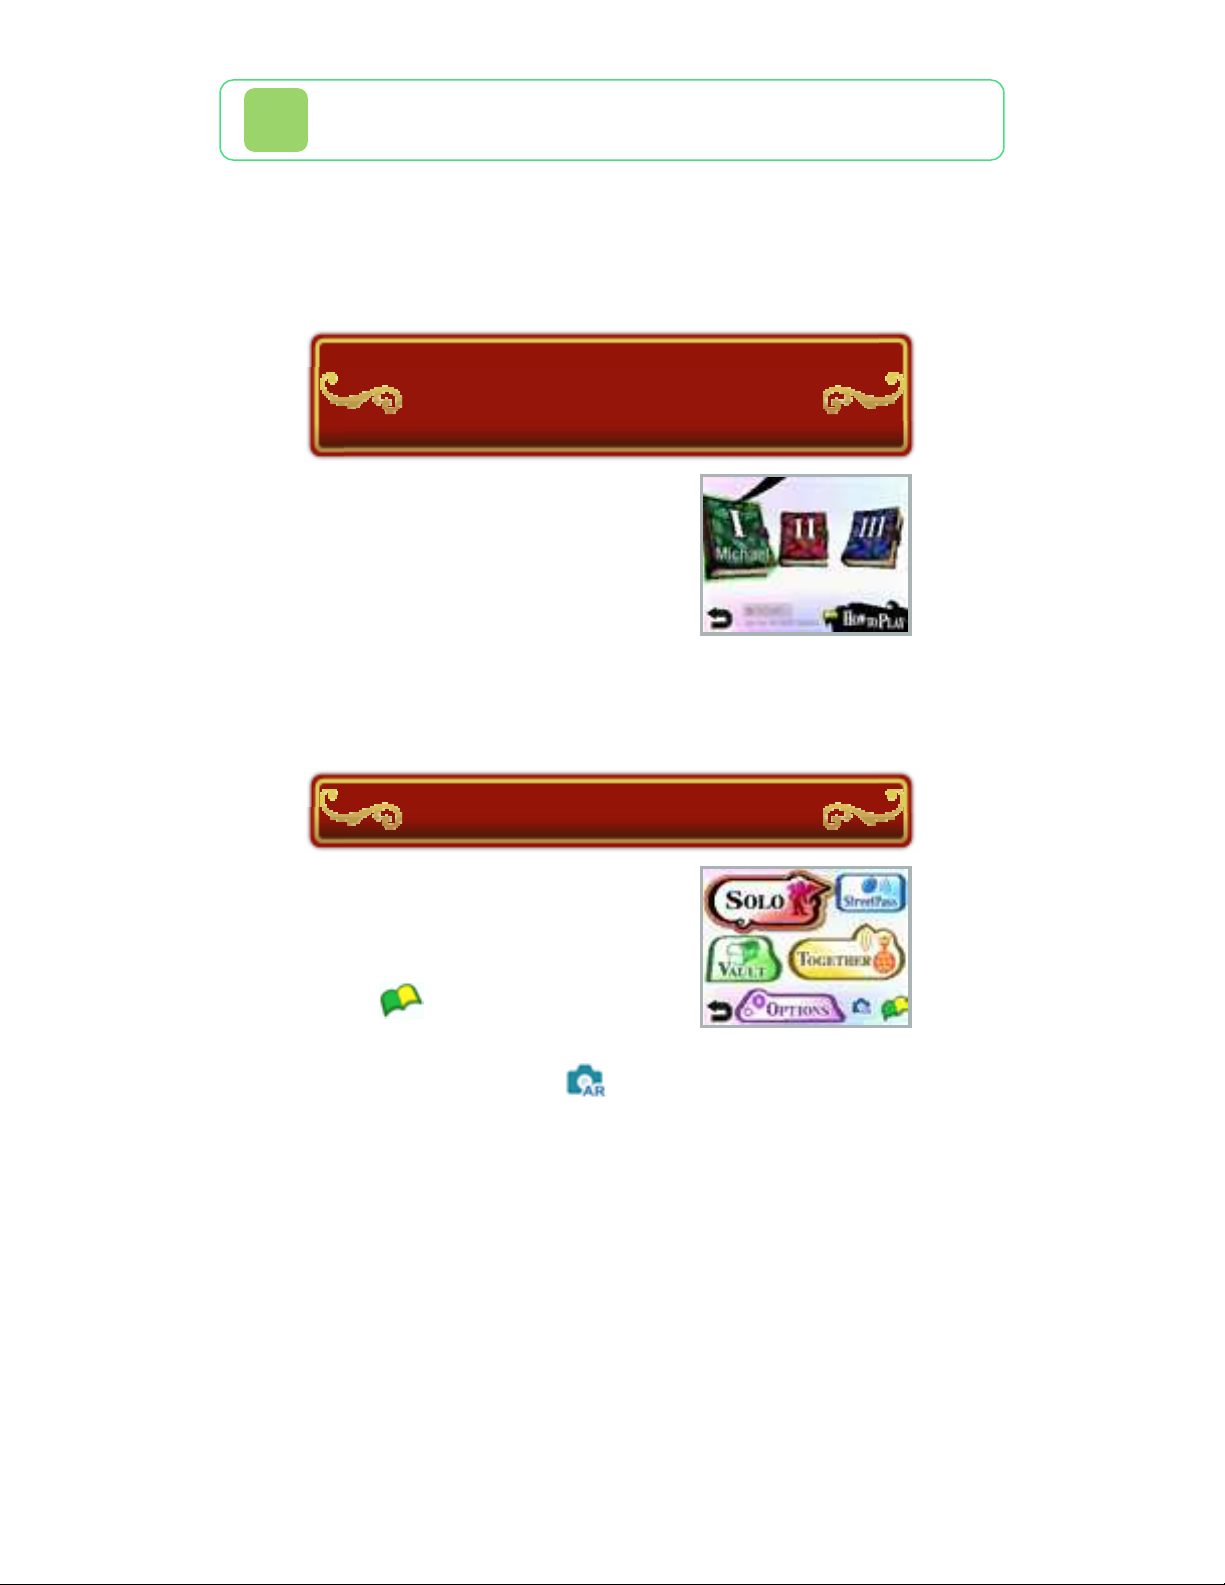
Main Menu
Choose which mode
you would like to play
by touching it. Touch
the icon to access
the How to Play
videos, or the icon to battle
using KID ICARUS: UPRISING
AR Cards (p. 11) .
Page 9

How to Play videos
The hero of the
game, Pit, and
the goddess
Palutena will
explain how the
game is played.
For more information on this
title, visit the official website:
www.nintendo.co.uk/kidicarus
● A wireless connection is
required to connect your
Nintendo 3DS system to the
internet.
● The official website may be
closed in the future without
notice.
About Sleep Mode
Close your Nintendo 3DS system
during play to activate Sleep
Mode, greatly reducing battery
consumption. Reopen the system
to resume play.
This function is not available in
multiplayer.
Page 10

3 Saving and Erasing Data
Saving Data
Your progress in the game will be
automatically saved to your save
file. While saving is in progress, the
icon will be displayed at the top-
left of the upper screen.
● Do not turn the power off and
on repeatedly or remove the
Game Card or SD Card while
saving. Make sure not to reset
the system during saves or get
dirt in the terminals. These
actions could result in
permanent data loss.
● Do not use external accessories
or software to modify your save
data, as this can lead to an
inability to progress or loss of
save data. Any modification is
permanent, so be careful.
Erasing Data
To erase a save file, go to the save
file selection screen and highlight
the file you wish to erase, hold
down , and then follow the
directions that appear on the lower
screen.
Note: When erasing data, ensure
Page 11
that you select the correct file.
Data
that has been erased cannot be
recovered, so be careful.
Erasing All Saved Data
Immediately after loading the
game, after the Nintendo 3DS
logo has disappeared but before
the title screen is displayed, hold
down +++ to erase all
saved data for this game.
Page 12

4 Beginning a Chapter
Move Out!
Choose SOLO from the
main menu, and then
touch MOVE OUT! You
will be able to choose
the chapter and
difficulty, and then begin playing.
The Fiend's Cauldron
Before beginning a
chapter, you can
place hearts in the
Fiend's Cauldron to
alter the chapter's
Intensity. The higher the
Intensity, the more difficult the
chapter will be, but you will
receive more hearts for
completing it and earn better
loot.
About Hearts
Hearts can be obtained in various
ways, such as defeating enemies
or dismantling weapons. You can
use them to alter the Intensity of
chapters or redeem them for new
weapons.
Gear
Page 13

Here you can choose
which weapon to use
in the chapter and
equip powers that
grant special effects
during gameplay. After equipping
new gear, it can be helpful to test it
out in the Practice Range.
Arms Altar
This is where you can redeem hearts
for new weapons, or fuse multiple
weapons together to create new
weapons (the weapons used in this
process will be lost) . You can also
dismantle unwanted weapons,
converting them into hearts.
Idol Toss
Place an egg into
the tray, then slide the
tray downwards and
release. This will send
the egg flying into the
sky, where it will turn into an Idol. It
is also possible to use multiple eggs
at once.
Eggs can be obtained by
progressing through the game, or by
spending Play Coins accumulated on
your Nintendo 3DS system.
Note: For more information on Play
Coins, please refer to the Operations
Manual for your Nintendo 3DS
system.
Page 14

You will obtain new treasure by
Treasure Hunt
fulfilling certain in-game conditions.
Page 15

5 The Game Screen
Air Battle
❶
❹
❺
Health Gauge
❶
Decreases as Pit takes
damage.
❷
Score
❷
❸
❻
❼
Enemy Indicator
❸
Appears above any enemies
within firing range.
Reticle
❹
Indicates the direction in
which Pit will attack.
❺
Special Attack Gauges
These will fill continuously
over time. Touch one when it
is full to unleash a powerful
attack.
Page 16

Note: These can only be used
during Air Battles.
Intensity (Difficulty)
❻
The label to the left shows the
current difficulty level. To the
right is the number of hearts
you have placed into the
Fiend's Cauldron (p. 4) . If you
fail the chapter, some of these
hearts will fall out of the
cauldron and the difficulty will
decrease.
Hearts Obtained
❼
Land Battle
Some display elements are different
from those used in Air Battles.
❷
❶
❸
❹
❶
Guide Arrow
Head in this direction to
progress through the stage.
Page 17

Item Indicator
❷
Appears above obtainable
items.
Power Palette
❸
Touch here to use any powers
that you have equipped.
Items
❹
If you have a usable item,
such as a grenade, it will be
displayed here. Press to
use it.
Page 18

6 Controlling Pit
Basic Controls
Move
Move Reticle
Slide across Touch Screen
Attack
● You can also attack with , ,
or .
● The reticle can also be moved by
holding down and using .
However, during Land Battles, the
reticle will only move vertically if
you move slowly.
Other Controls
Continuous Fire
(hold down)
Charged Shot
(after waiting a short while
without firing any shots)
Page 19

Melee Attack
(tap repeatedly when an enemy
is nearby)
Pause Game
Note: Hold down ++ at
any time to reset the game and
return to the title screen.
This function is not available in
multiplayer.
Land Battle Controls
Turn
Slide quickly across the Touch
Screen
Dodge
(slide rapidly just before an
attack connects)
Dash
(quickly)
Dash Shot
(while dashing)
Page 20

Switch Between Powers
Slide the Power Palette
Use Power
Touch icon in the Power Palette
Centre Camera
(tap)
Zoom Camera
While stationary, tap the Touch
Screen twice quickly (hold down
the second tap)
Toggle First-Person View
Note: You can also switch between
powers with and use them with .
Page 21

About Vehicles
During certain
Land Battles,
special vehicles
will appear.
Approach and
press to ride them. While riding
a vehicle, touch the icon on
the Touch Screen to perform that
vehicle's special action (the
design of this icon will vary
depending on the vehicle being
used). When you want to exit the
vehicle, touch the icon.
Circle Pad Pro
If you attach the Nintendo 3DS
Circle Pad Pro (sold separately) to
your system, you can use the Right
Circle Pad to control Pit instead of
the main Circle Pad on the left.
If you do not have a Circle Pad Pro,
you can still change the settings
from the Options menu (p. 14) so
that Pit's movement is controlled
with , , and .
Please attach the Circle Pad Pro
either before launching the game, or
while the game is paused.
Note: For detailed information on
setup and use of the Nintendo 3DS
Circle Pad Pro, please refer to the
Operations Manual of the accessory.
Page 22

If the Right Circle Pad
is not responding
correctly...
Right Circle Pad
If the Right Circle Pad is not
responding correctly, or it is sending
signals to the software without being
touched, follow the instructions
below to calibrate the accessory.
● Calibration
❶ While the Title Screen is
displayed or the game is paused,
press , and at the same
time.
❷ Follow the on-screen instructions
to calibrate the Right Circle Pad.
● This calibration function is not
available during multiplayer.
● Calibration of the Nintendo 3DS
system's Circle Pad can be carried
out in the System Settings. Please
refer to the Operations Manual for
details.
Page 23

7 Failing a Chapter
If the health gauge is
depleted completely,
Pit will enter Crisis
mode, in which the
health gauge does not
appear. If Pit takes too much
damage while in Crisis mode, the
chapter will be failed. You will be
given the option to retry the chapter
from a specific point (Continue),
return to the Move Out! menu or
change gear (this last option will not
be available in certain chapters).
As failing the chapter causes the
Intensity to lower, the loot you have
gathered will become slightly less
valuable.
● If you pick up a Drink of the Gods
item during Crisis mode, the
health gauge will be immediately
refilled.
● Pit will recover from Crisis mode
automatically after a short period
of time.
Page 24

8 Far Away
You can compete alone or in teams
with up to five other players over
the internet.
● Having more players involved in a
match, or playing with registered
friends, will improve the rewards
that you can earn at the end of
the match.
● For information about connecting
your Nintendo 3DS system to the
internet, or about registering
Friend Codes, refer to the
Operations Manual.
With Friends
Play with friends
registered on your
Nintendo 3DS system.
❶ If a friend you want to play with
has already created a room,
select it. Otherwise, select
CREATE ROOM, choose whether
to play Light vs. Dark or Free-forAll (p. 10) and wait for your
friends to join.
❷ Adjust the rules (only the player
who created the room can do
this) and equipment you would
like to use, then select MOVE
OUT! to begin the game.
Page 25

Note: If you choose to play with
friends, registered friends will be
able to see your online status using
the in-game friend list. This applies
even if you have opted not to show
friends your online status from the
main friend list in the HOME Menu.
Joining from the
Friend List
It is also possible to
join a game from the
friend list (accessible
from the HOME Menu).
If one of your friends is
available to be joined, a mark will
appear on the friend list icon .
Choose a yellow friend card marked
with "OK to Join", and touch JOIN
FRIEND'S GAME to launch this
software and join your friend's
multiplayer game.
● The KID ICARUS: UPRISING
Game Card must be inserted into
the system.
● In certain in-game situations, it
may not be possible to join your
friend's game.
● If the current match has already
started, you will be able to join in
starting from the next match.
Play with other players from
With Anyone
Page 26

anywhere in the world. Choose
whether you would like to play Light
vs. Dark or Free-for-All, confirm
which equipment you would like to
use, and then select MOVE OUT! to
begin the game.
Note: You can restrict online
interaction via Parental Controls.
For more information, refer to the
Operations Manual.
Page 27

9 Nearby
You can compete alone or in teams
with up to five other players over
local wireless.
You Will Need:
● One Nintendo 3DS system per
player
● One copy of the software per
player
Connection
Procedures
❶ Either choose an
existing room to join
or select CREATE
ROOM and wait for
the other players to
join.
❷ Choose the rules (only the player
who created the room can do
this) and equipment you would
like to use, then select MOVE
OUT! to begin the game.
Page 28

10 Rules
In multiplayer, there are two
possible game types to choose from.
Light Versus Dark
A team battle in
which players fight
three-on-three. If
there are fewer
than 6 players
present, the rest of the positions will
be filled by CPU players (characters
controlled by the computer).
❶ When a player on your team is
defeated, your shared Team Life
gauge will be depleted. (The
amount depleted is proportional
to the value of the weapon used
by the defeated player.)
❷ When a player's defeat causes
the Team Life gauge to be
emptied completely, that player
will transform into a powerful
angel.
❸ The first team to defeat the
enemy angel wins the game.
Page 29

Free-For-All
A battle where all other players are
considered enemies. Defeat as many
opponents as possible within the
time limit. The player with the
highest score at the end is the
winner.
Page 30

11 AR Card Battle
Select the icon from the main
menu, or the icon from the Vault,
to battle using KID ICARUS:
UPRISING AR Cards.
Note: KID ICARUS: UPRISING
AR Cards can only be used with this
game.
How To Play
❶ Point the outer
cameras at an
AR Card, and an
Idol will appear.
Up to three Idols
can be displayed at once.
❷ To make the Idols battle, place
two AR Cards so that their lower
edges directly face one another,
then press or touch FIGHT!
Only two cards may participate in
any one battle.
Note: You can take pictures of your
Idols with or . These pictures
will be saved to the SD Card, where
they can be viewed from the
Nintendo 3DS Camera application on
the HOME Menu.
Page 31

About Idols
Idols are 3D models of characters
and other game elements. Some
Idols can be obtained in the main
game's Vault, while others
appear from AR Cards.
Using AR Cards
● Place the AR Cards on a flat,
well-lit surface. Adjust the
distance and angle, keeping the
AR Cards within the sights of the
outer cameras, until they are
recognised correctly.
● Ensure that the whole AR Card is
visible on the upper screen. If
part of it is not visible, it may not
be recognised.
● Use AR Cards in areas where they
will not be illuminated directly by
sunlight or light from other
sources, as this can interfere with
the outer cameras' ability to
recognise them properly.
● If an outer camera is dirty, wipe it
with a soft cloth before you
begin.
● If the AR Cards are bent or
folded, they cannot be
recognised by the system. Ensure
that any AR Cards in use are flat
on the surface.
Page 32

When using AR Cards, it is
necessary to physically move
your Nintendo 3DS system. Make
sure you have plenty of space to
move around the cards and see
them from different angles. You
should also keep a firm grip on
the system at all times.
Avoid making forceful movements
with the system or parts of the
system, as this can lead to injury
or damage to surrounding
objects.
Page 33

12 SpotPass
This software supports automatic
download of new weapon gems and
notifications via an internet
connection using SpotPass™.
SpotPass is active only when the
system is in Sleep Mode and within
range of a compatible internet
access point.
To use SpotPass, you must first:
- Accept the Nintendo 3DS Service
User Agreement and Privacy Policy
- Set up an internet connection
- Insert an SD Card into the
Nintendo 3DS system.
For information on these, refer to
the Operations Manual.
Activating SpotPass
❶ From the Options
menu (p. 14) ,
select OTHER, and
choose ON for the
SpotPass option.
❷ When the confirmation screen
appears, touch YES.
❸ Received notifications can be
viewed by touching the
notification icon on the HOME
Menu. Received weapon gems will
appear in the Gem Case (p. 12) .
Note: You can activate SpotPass
Page 34

individually for each of the three
save files. Notifications will be
received as long as SpotPass is
activated for any one of these three
files.
Deactivating
SpotPass
If you wish to stop receiving
notifications and weapon gems via
SpotPass, go to the Options menu,
select OTHER, and choose OFF for
the SpotPass option.
If you just want to stop receiving
notifications, touch the icon
on the HOME Menu to launch
Notifications, then select any
notification from KID ICARUS:
UPRISING, and touch OPT OUT
OF NOTIFICATIONS FOR THIS
SOFTWARE.
If you later decide that you would
like to start receiving notifications
again, simply deactivate SpotPass
for this game and then reactivate
it using the procedures described
above.
Page 35

13 StreetPass
Activate StreetPass™
to trade weapon gems
with other players who
are using this feature.
To begin, select
StreetPass from the menu and
create a weapon gem.
● This feature requires that you
activate StreetPass for this
software on your Nintendo 3DS
system. When the confirmation
screen appears, please accept.
● To communicate using this
feature, all players must activate
StreetPass for this software.
Trade Weapon
Gems
❶ You can create weapon gems
from weapons (the weapons used
will not be lost) .
❷ The gems you have created will
be traded with other players'
gems, which will be gathered in
your gem bag .
❸ Select FUSE GEMS to combine
the gems you have received and
create new weapons, or select a
gem in the Gem Case and press
to turn it into a weapon without
fusing. Both options cost a small
Page 36

number of hearts, and
the gems
used will be lost . Unwanted gems
can also be converted into hearts.
Deactivating
StreetPass
To deactivate StreetPass, open the
System Settings and select DATA
MANAGEMENT, then StreetPass
MANAGEMENT.
Touch the icon for this software title,
then select DEACTIVATE StreetPass.
Note: You can restrict StreetPass
functionality via Parental
Controls. For more information,
refer to the Operations Manual.
Page 37

14 Vault / Options
View the Idols you
have collected, see
records of your past
battles, listen to the
game's music, and
more!
Options
Configure various
game settings,
Vault
including controls and
the positioning of
subtitles. You can also
edit the personal information that
you entered when creating your
save file.
Page 38

15 How to Contact Us
For product information, please visit
the Nintendo website at:
www.nintendo.com/countryselector
For technical support and
troubleshooting, please refer to the
Operations Manual for your
Nintendo 3DS system or visit:
support.nintendo.com
 Loading...