

Nintendo 3DS XL User Manual
Nintendo 3DS XL Upper LCD Display
Replacement
This guide is going to help you take apart the Upper LCD screen so you will be able to once again
play your favorite games on your Nintendo 3DS XL!
Written By: Charlene Donlon
Nintendo 3DS XL Upper LCD Display Rep…
Draft: 2019-10-29Guide ID: 25070 -
This document was generated on 2021-03-23 10:23:44 AM (MST).
© iFixit — CC BY-NC-SA www.iFixit.com Page 1 of 23
INTRODUCTION
First you will take apart the lower case of the Nintendo 3DS XL, then the upper case in order to
reach the ribbons that attach the Upper LCD screen to the rest of the device.
TOOLS:
Phillips #00 Screwdriver (1)
iFixit Opening Tools (1)
Spudger (1)
Tweezers (1)
PARTS:
Nintendo 3DS XL Upper LCD (1)
Nintendo 3DS XL Speaker Assembly (1)
Nintendo 3DS XL Upper Glass Screen
(1)
Nintendo 3DS XL Upper LCD Display Rep…
Draft: 2019-10-29Guide ID: 25070 -
This document was generated on 2021-03-23 10:23:44 AM (MST).
© iFixit — CC BY-NC-SA www.iFixit.com Page 2 of 23
Step 1 — Battery
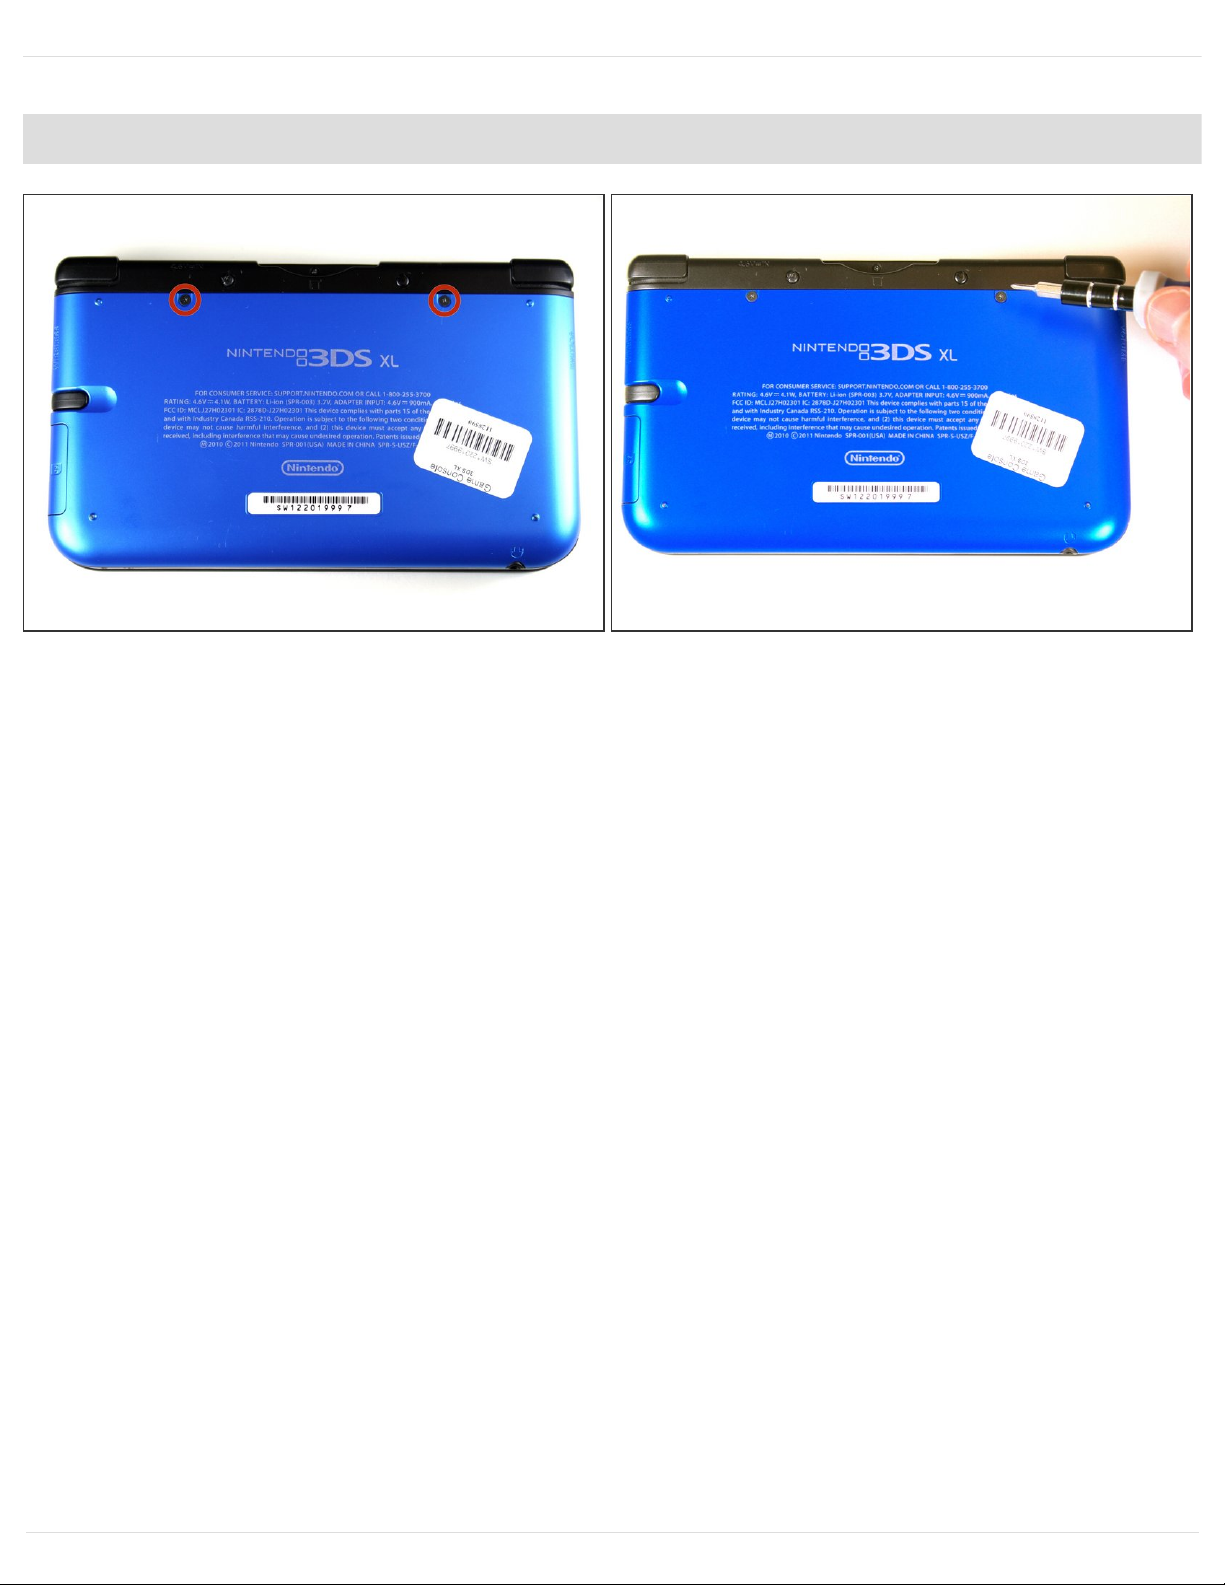
Loosen the two 4.2 mm-length screws located at the top of the back cover.
The screws have locking washers that prevent the screws from falling off of the back cover.
Leave these locking washers on the screws; it is not necessary to remove the washers for this
repair guide.
Nintendo 3DS XL Upper LCD Display Rep…
Draft: 2019-10-29Guide ID: 25070 -
This document was generated on 2021-03-23 10:23:44 AM (MST).
© iFixit — CC BY-NC-SA www.iFixit.com Page 3 of 23
Step 2
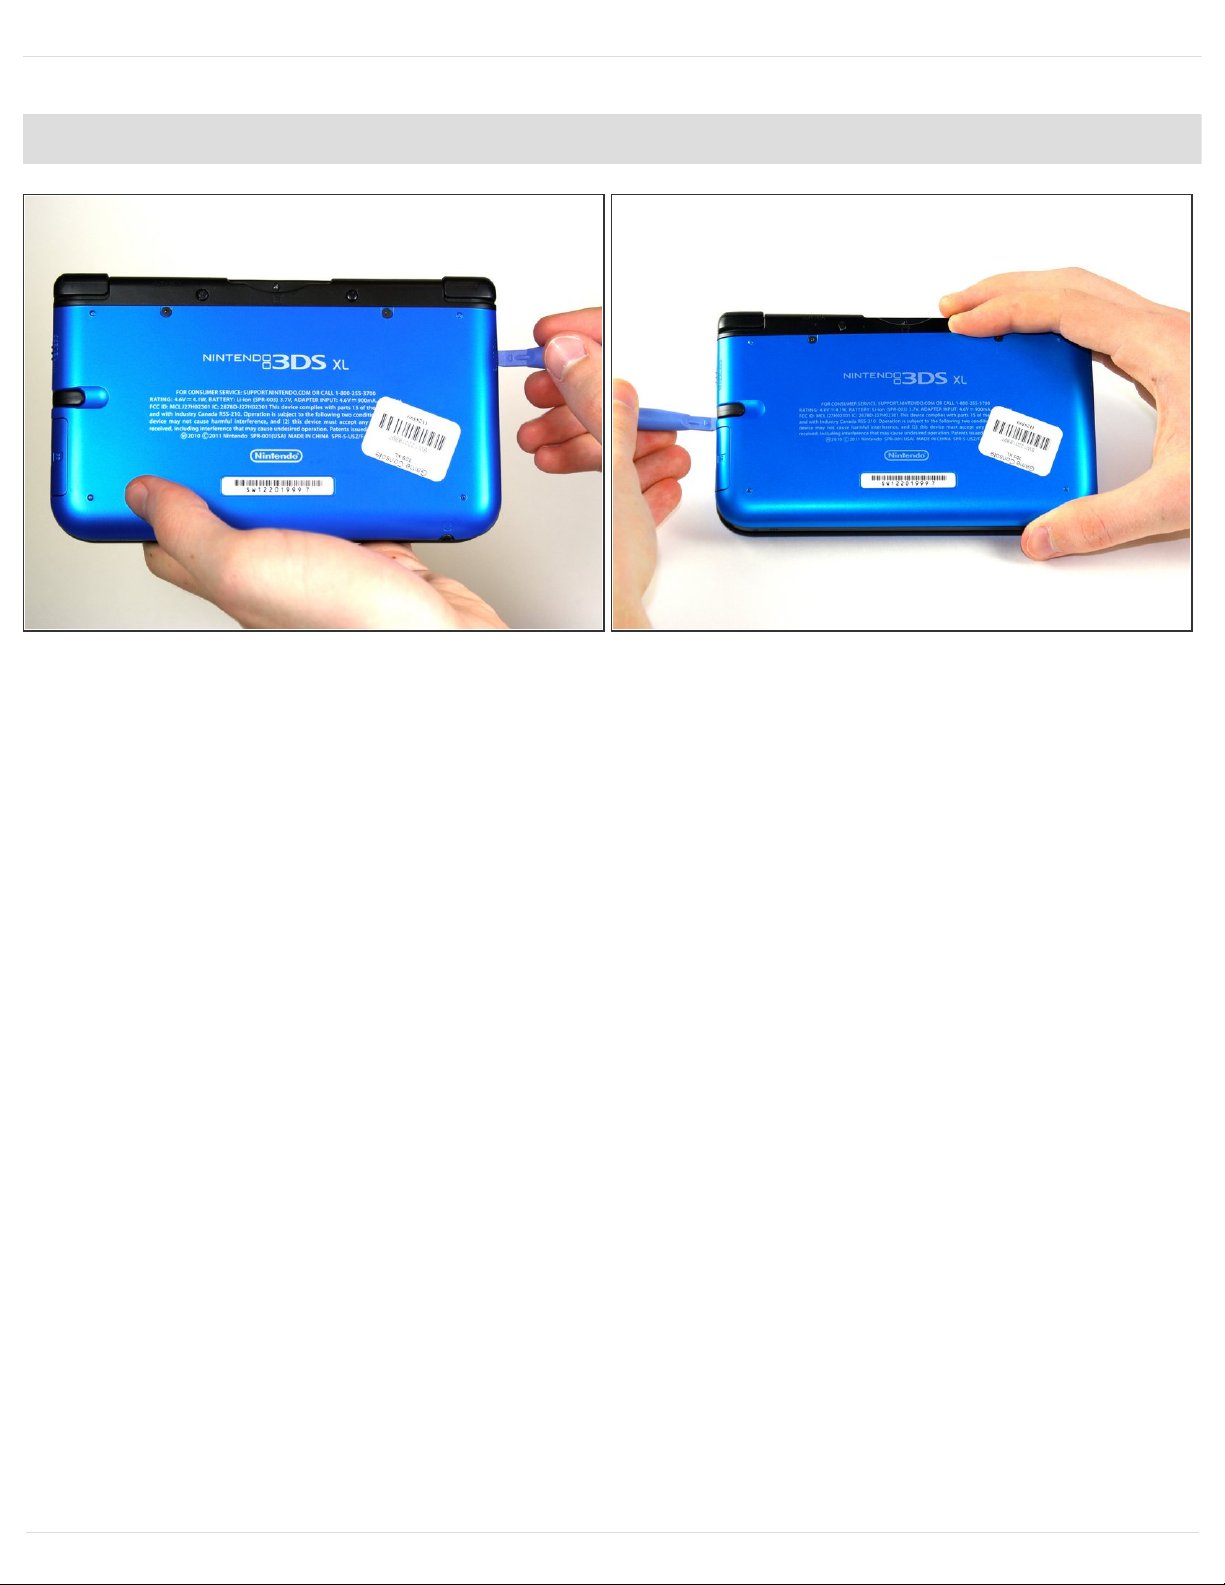
Hold the device so that the cover is facing up.
Using a plastic opening tool, pry off the cover starting at the top right corner.
Hold the edge of the cover to ensure it does not reattach.
Look for the small section below the stylus compartment. Pry off the cover at that point if it is still
attached.
Take off the cover of the device and set aside.
Nintendo 3DS XL Upper LCD Display Rep…
Draft: 2019-10-29Guide ID: 25070 -
This document was generated on 2021-03-23 10:23:44 AM (MST).
© iFixit — CC BY-NC-SA www.iFixit.com Page 4 of 23
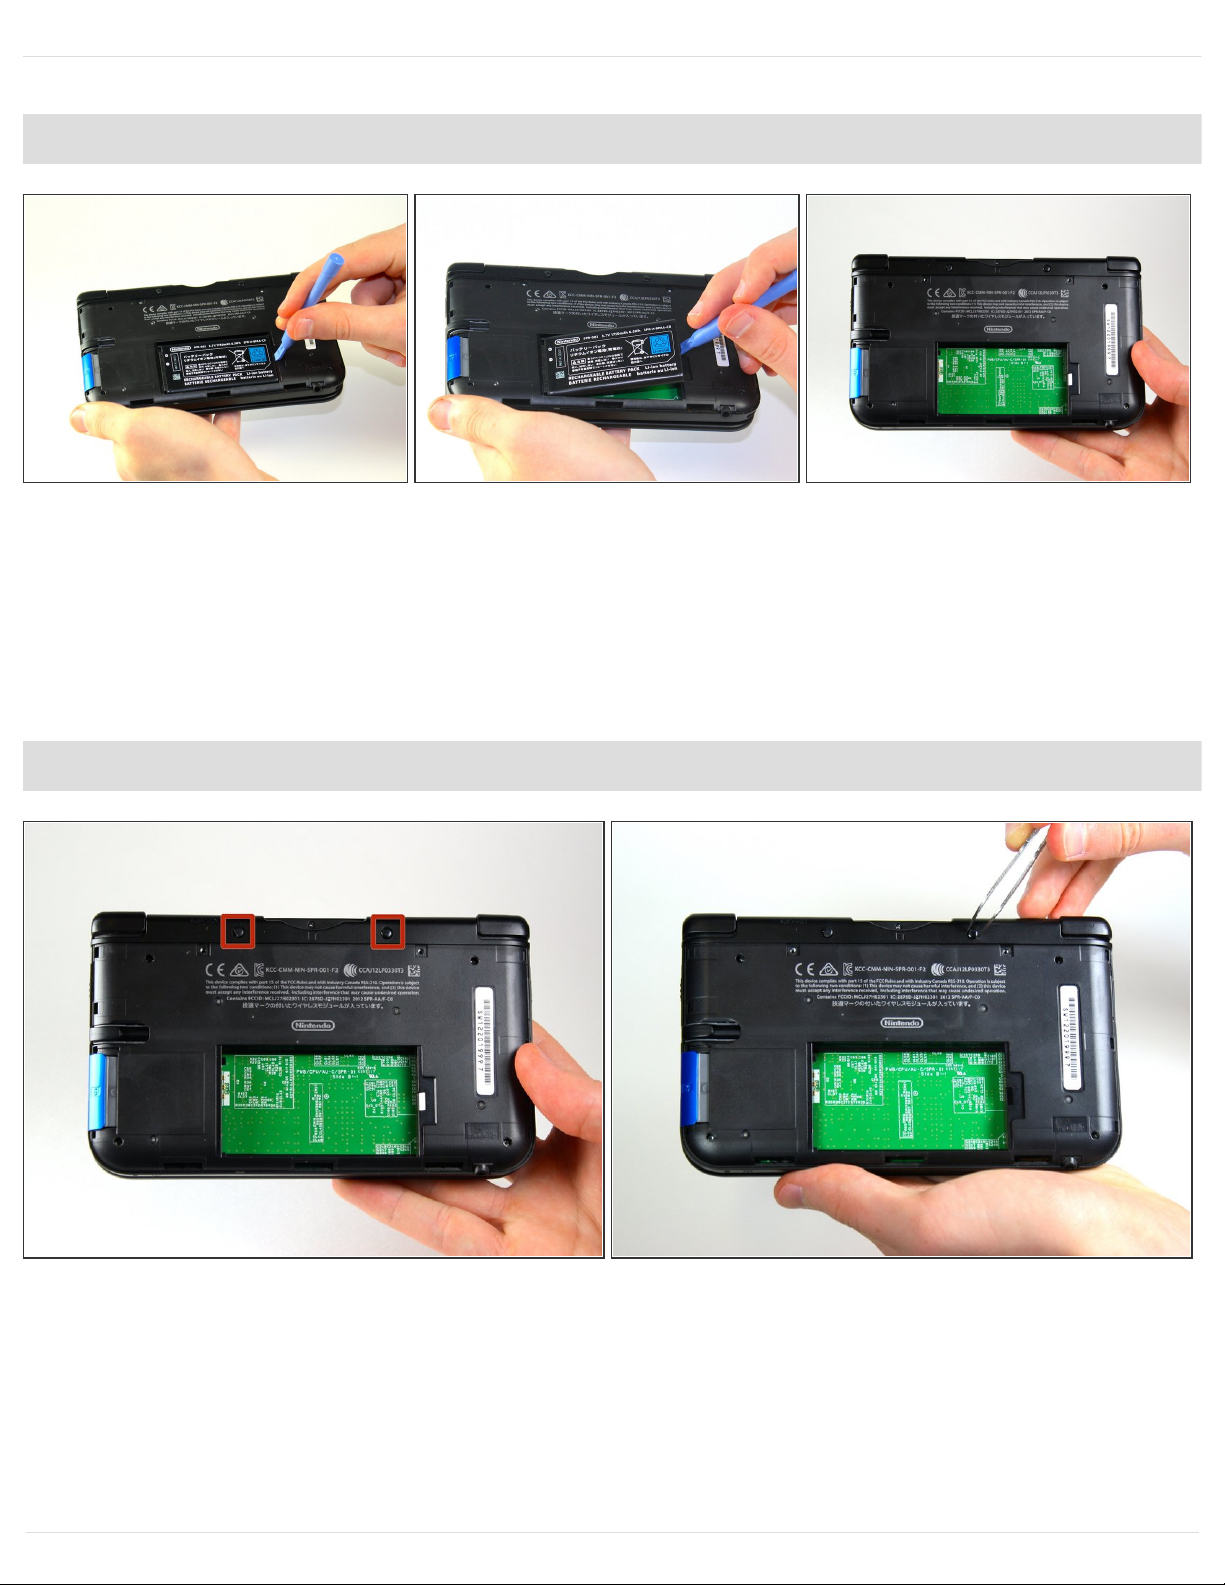
Step 3
Insert the plastic opening tool into the opening located on the right side of the battery.
Pry off the battery from the lower casing.
Lift the battery out of the case and set aside.
Step 4 — Circle Pad Joystick
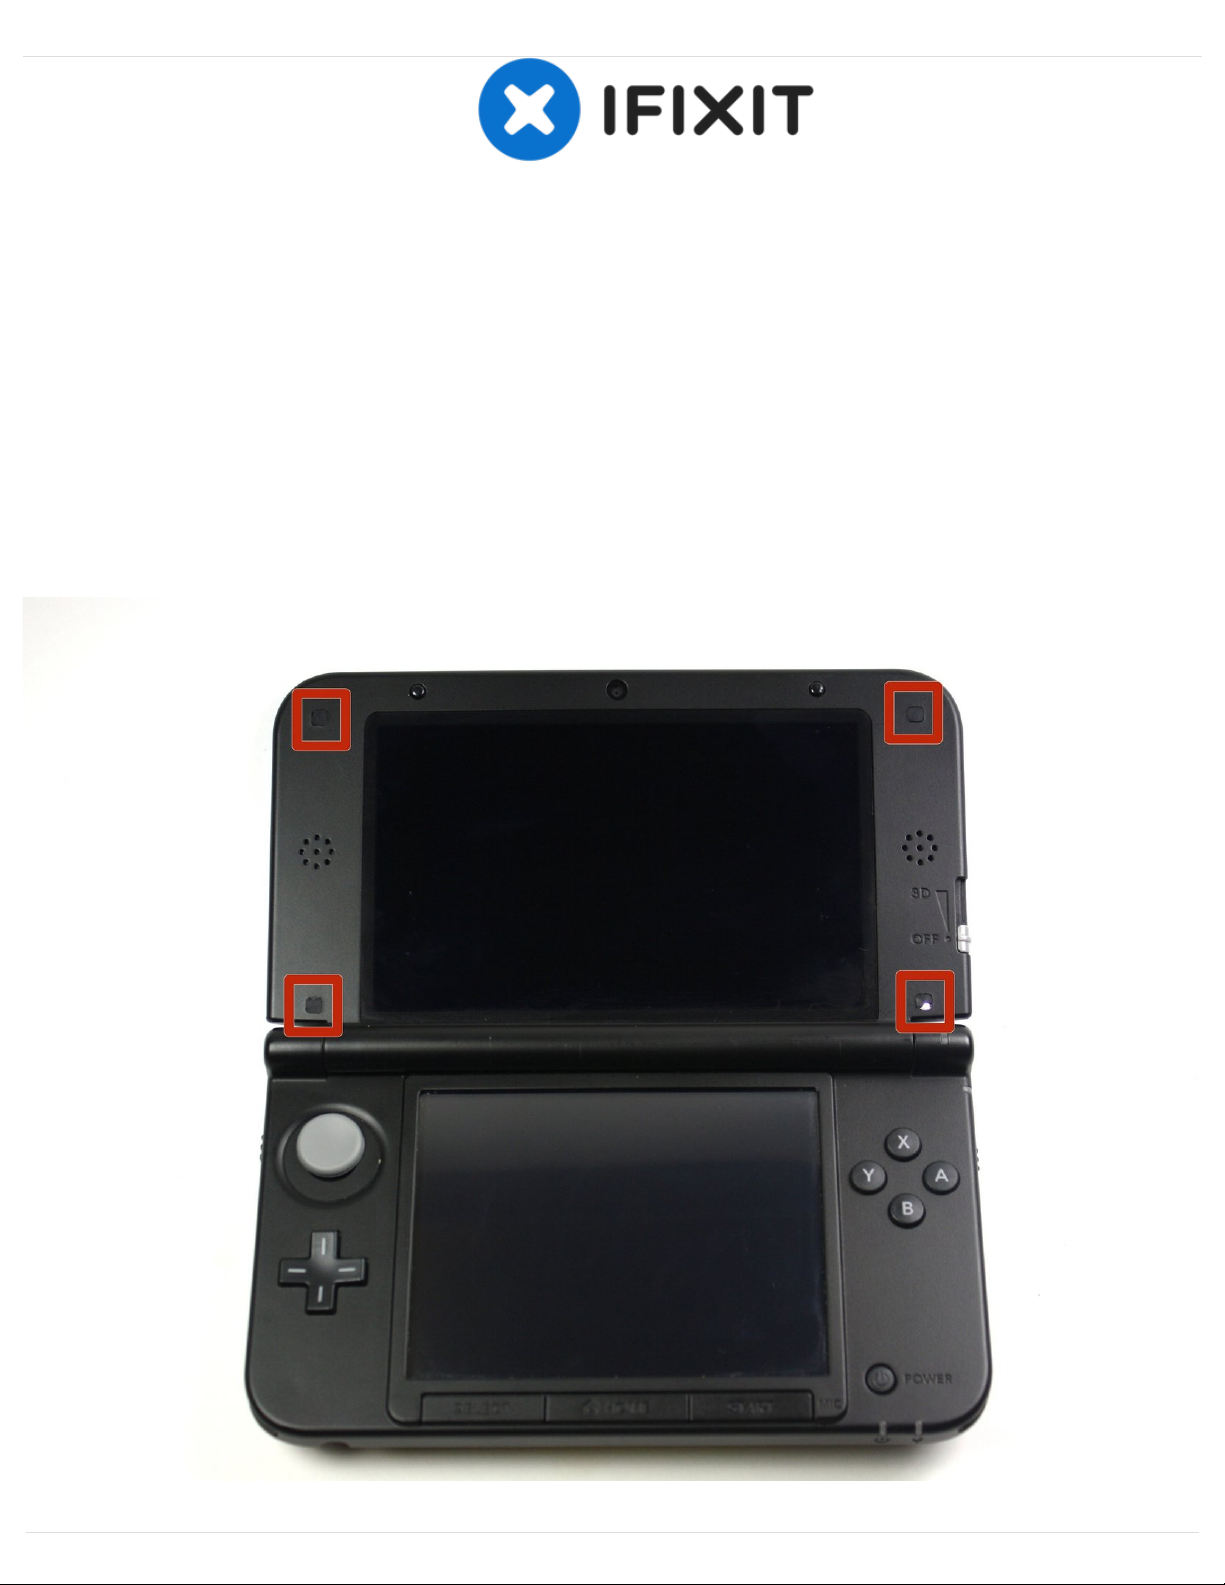
Using tweezers pull out the rubber bumpers that are located at the top of the device on either side
of the game cartridge compartment.
Nintendo 3DS XL Upper LCD Display Rep…
Draft: 2019-10-29Guide ID: 25070 -
This document was generated on 2021-03-23 10:23:44 AM (MST).
© iFixit — CC BY-NC-SA www.iFixit.com Page 5 of 23

Step 5
Remove the six 6.2 mm screws using a Phillips #00 screwdriver
Step 6
Remove the 2.3 mm screw located
above the game cartridge slot with a
Phillips #00 screwdriver.
Nintendo 3DS XL Upper LCD Display Rep…
Draft: 2019-10-29Guide ID: 25070 -
This document was generated on 2021-03-23 10:23:44 AM (MST).
© iFixit — CC BY-NC-SA www.iFixit.com Page 6 of 23

Step 7
Make sure the SD card has been removed. With a plastic opening tool pry off the lower case
starting at the bottom edge and working around the perimeter.
Two ribbon cables connect the case to the circuit board. Be careful to not pull the case too hard
and rip the ribbon cables.
Step 8
Remove the ribbon cables located underneath the left and right bumpers by prying up the base of
the cables with a plastic opening tool.
Completely remove the lower case from the rest of the device and set aside.
Nintendo 3DS XL Upper LCD Display Rep…
Draft: 2019-10-29Guide ID: 25070 -
This document was generated on 2021-03-23 10:23:44 AM (MST).
© iFixit — CC BY-NC-SA www.iFixit.com Page 7 of 23
 Loading...