

Page 1
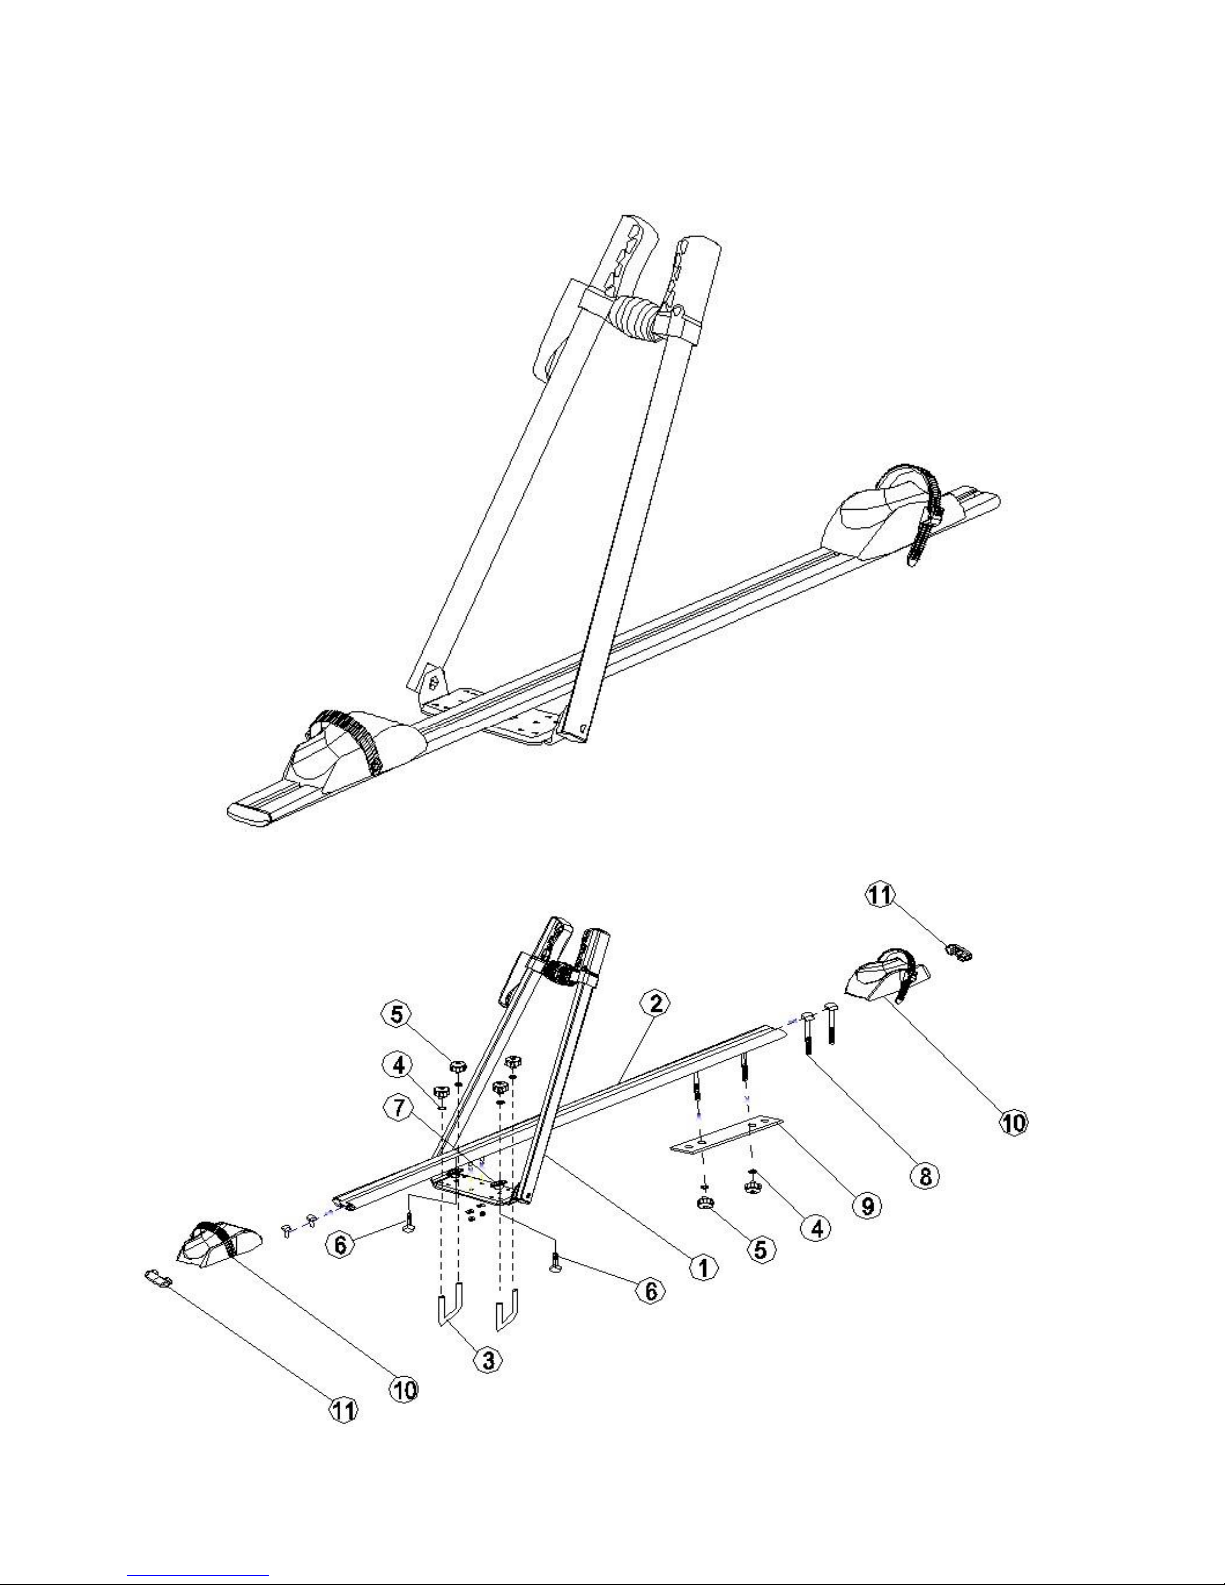
BC-001F INSTRUCTION
ASSEMBLY INSTRUCTIONS BICYCLE RACK
Page 2
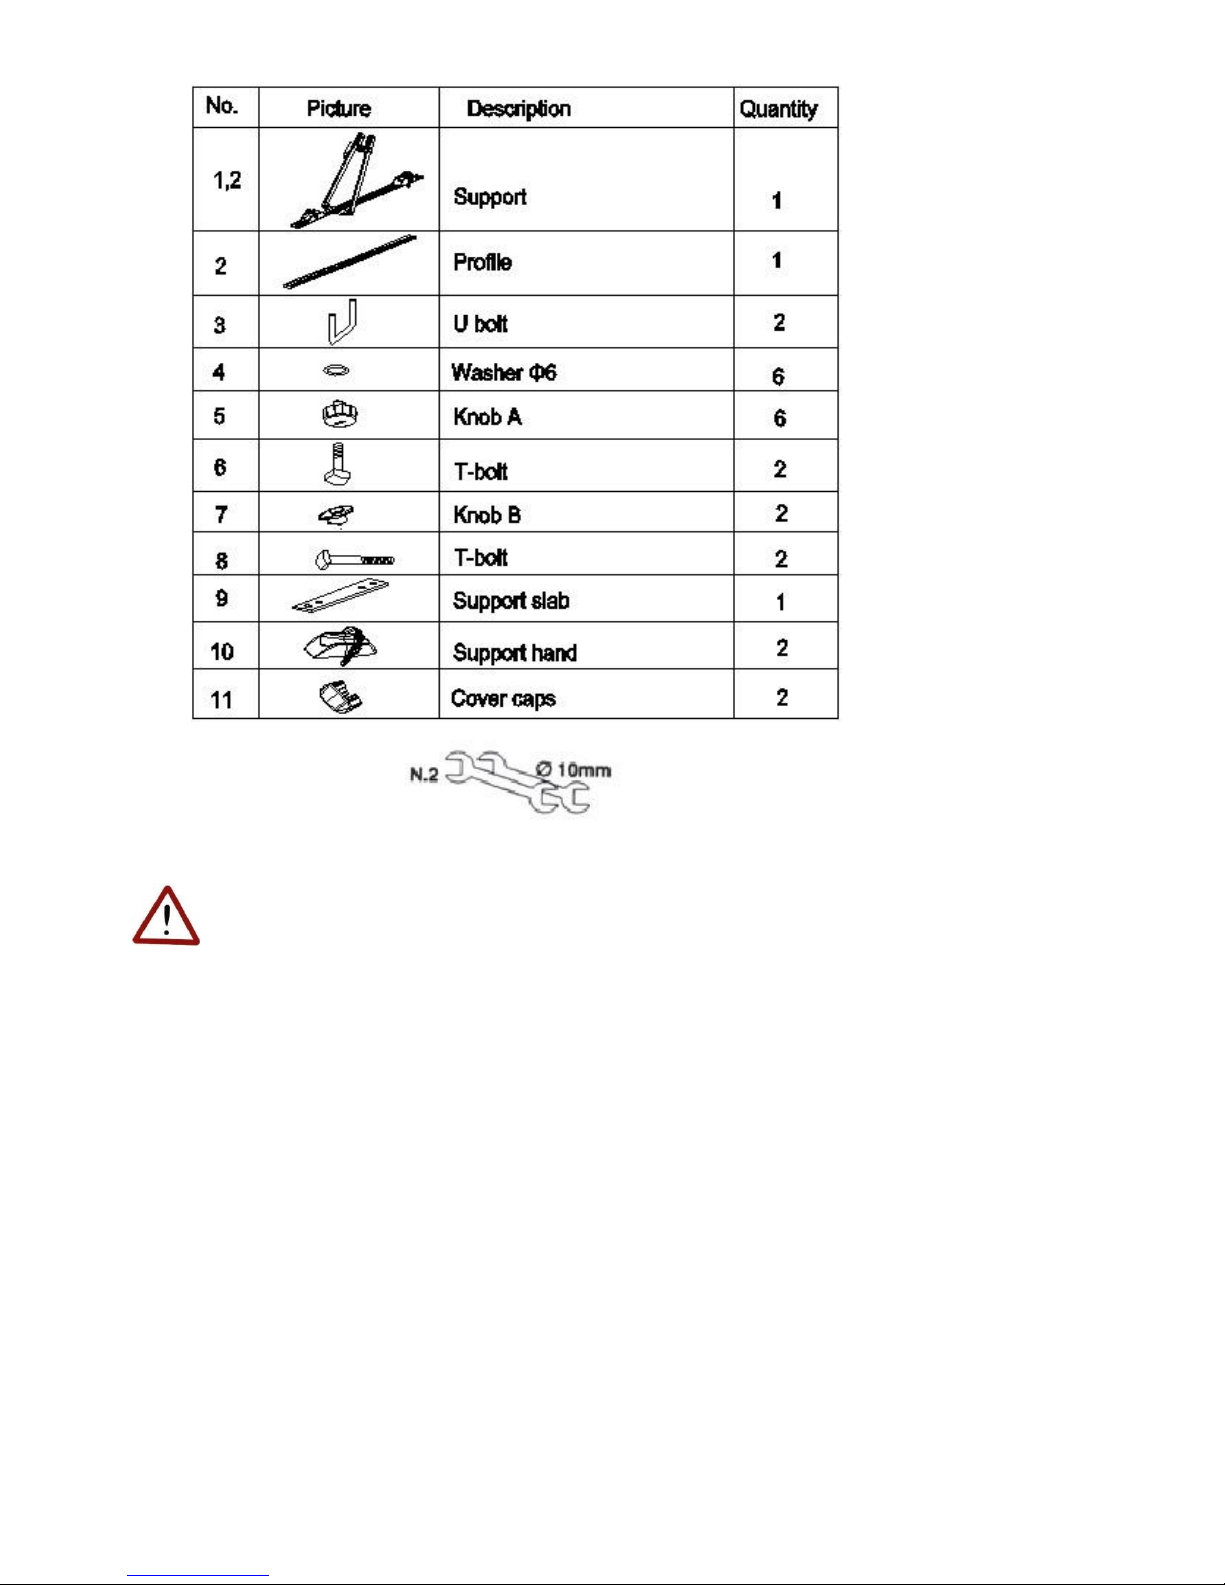
TOOLS NOT PROVIDED
IMPORTANT
Check the manufacture's indications in order to respect the maximum carrying allowed on the top of the car .Before
proceeding with the assembly, it is essential to read all the instructions and to strictly comply with the indications.
PHASE 1- ADJUST THE BIKE CARRIER'S SUPPORT MOUDULE
(No. 1 of the list, no. 1piece)
Before proceeding with this operation, it is essential to check dimensions and shape of your bicycle.
Loosen the nuts under the rear plate (No. 8) with 10mm wrench (not included), and adjust the plate to the right
position as shown in Fig 1.
Tighten the nuts firmly.
Page 3
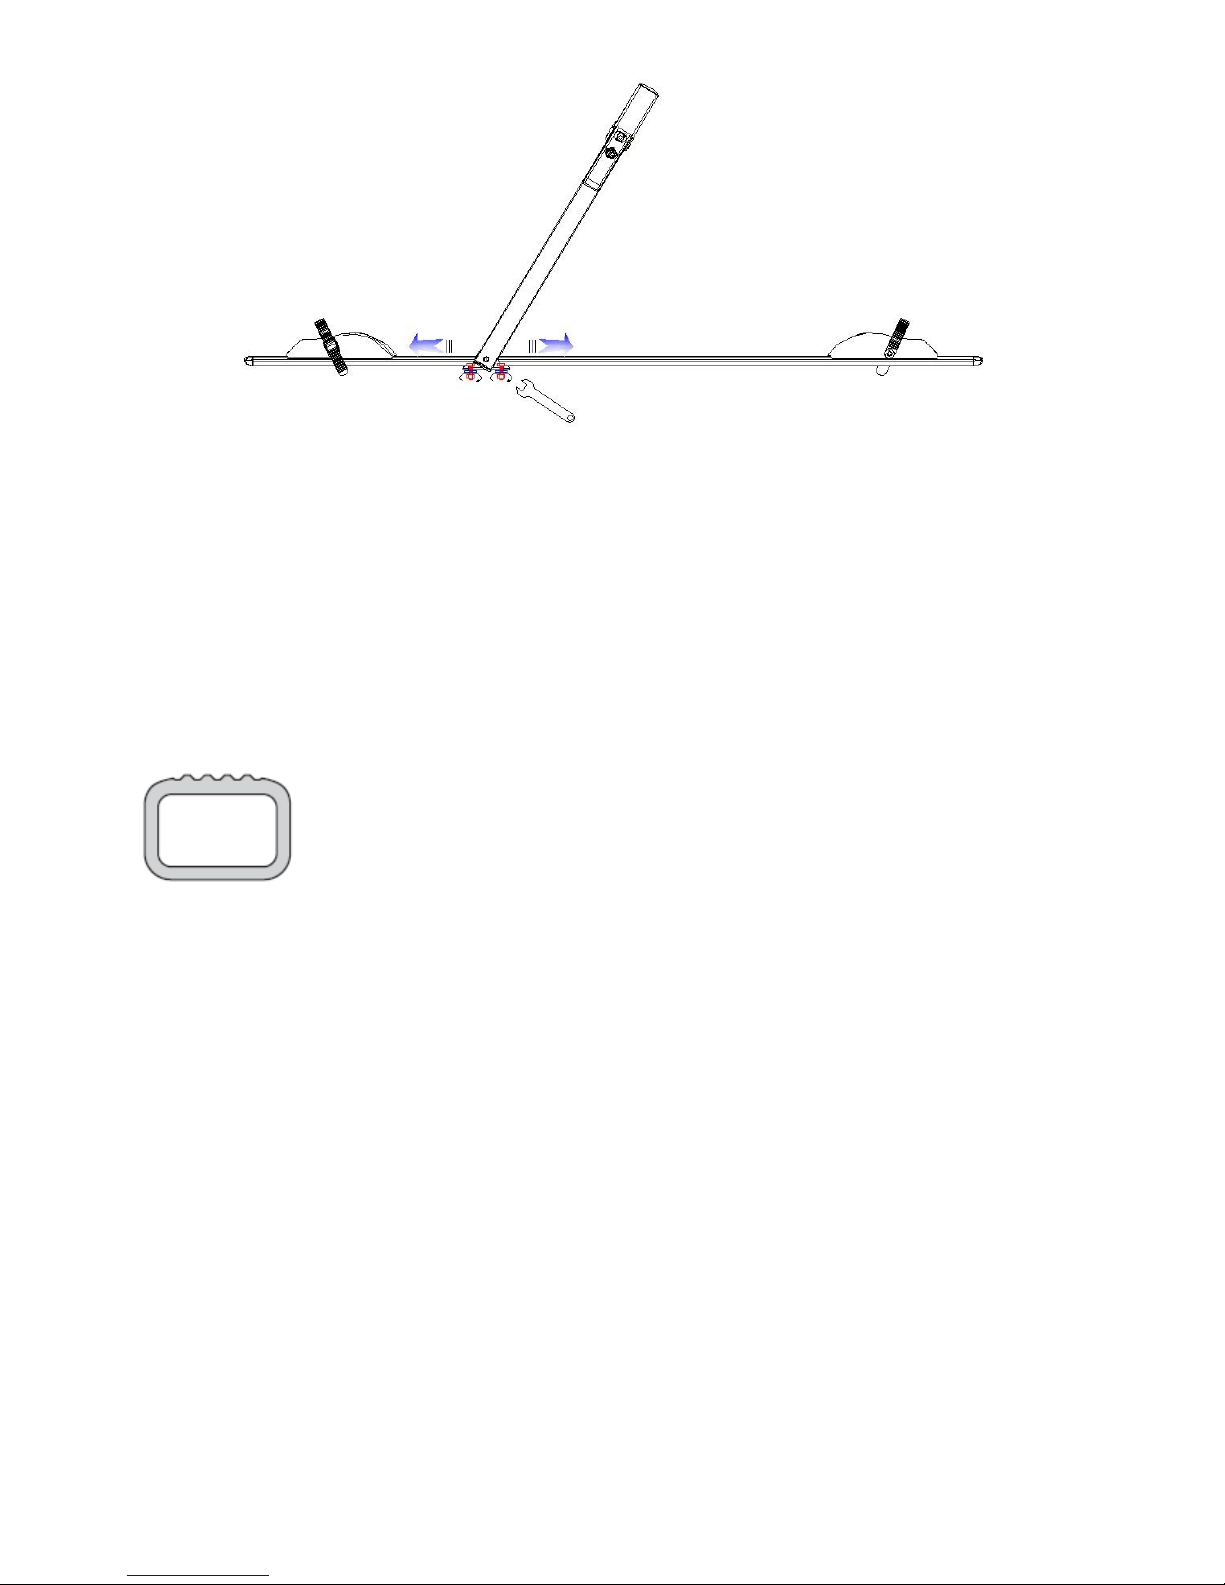
Fig. 1
PHASE 2: MOUNT THE BIKE CARRIER ON THE ROOF BAR.
Make sure the roof bars are properly installed on the car roof and the preferred distance between the two bars is
around 70cm
Place the bike carrier in the middle of the roof bar as shown in Fig.2 (or Fig.3) if to mount one bike carrier for
carrying one bike. For multiple bike carriers, place them evenly across the roof bars, and make sure the total
weight does not exceed the capacity of the roof bars.
Installation on square bars:
Fix the bike rack fitting the "U" screw (No. 3 of the list) under the bar making it entering from the bottom in the
proper holes situated on the plate.
Fit washer 6 (No. 4 of the list) inside the "U" screw and tighten firmly using knob A(No. 5 of the list).
Repeat this on the other side of the plate. And also fix on the rear part of the bike rack the T-bolt(No.8 of the list)
in the proper profile (No.2 of the list) groove as shown in Fig.2.
Fit the support slab (No.9 of the list) making it entering from the bottom, fit washers 6(No.4 of the list) and
tighten firmly using knobs (No. 5 of the list).
Page 4
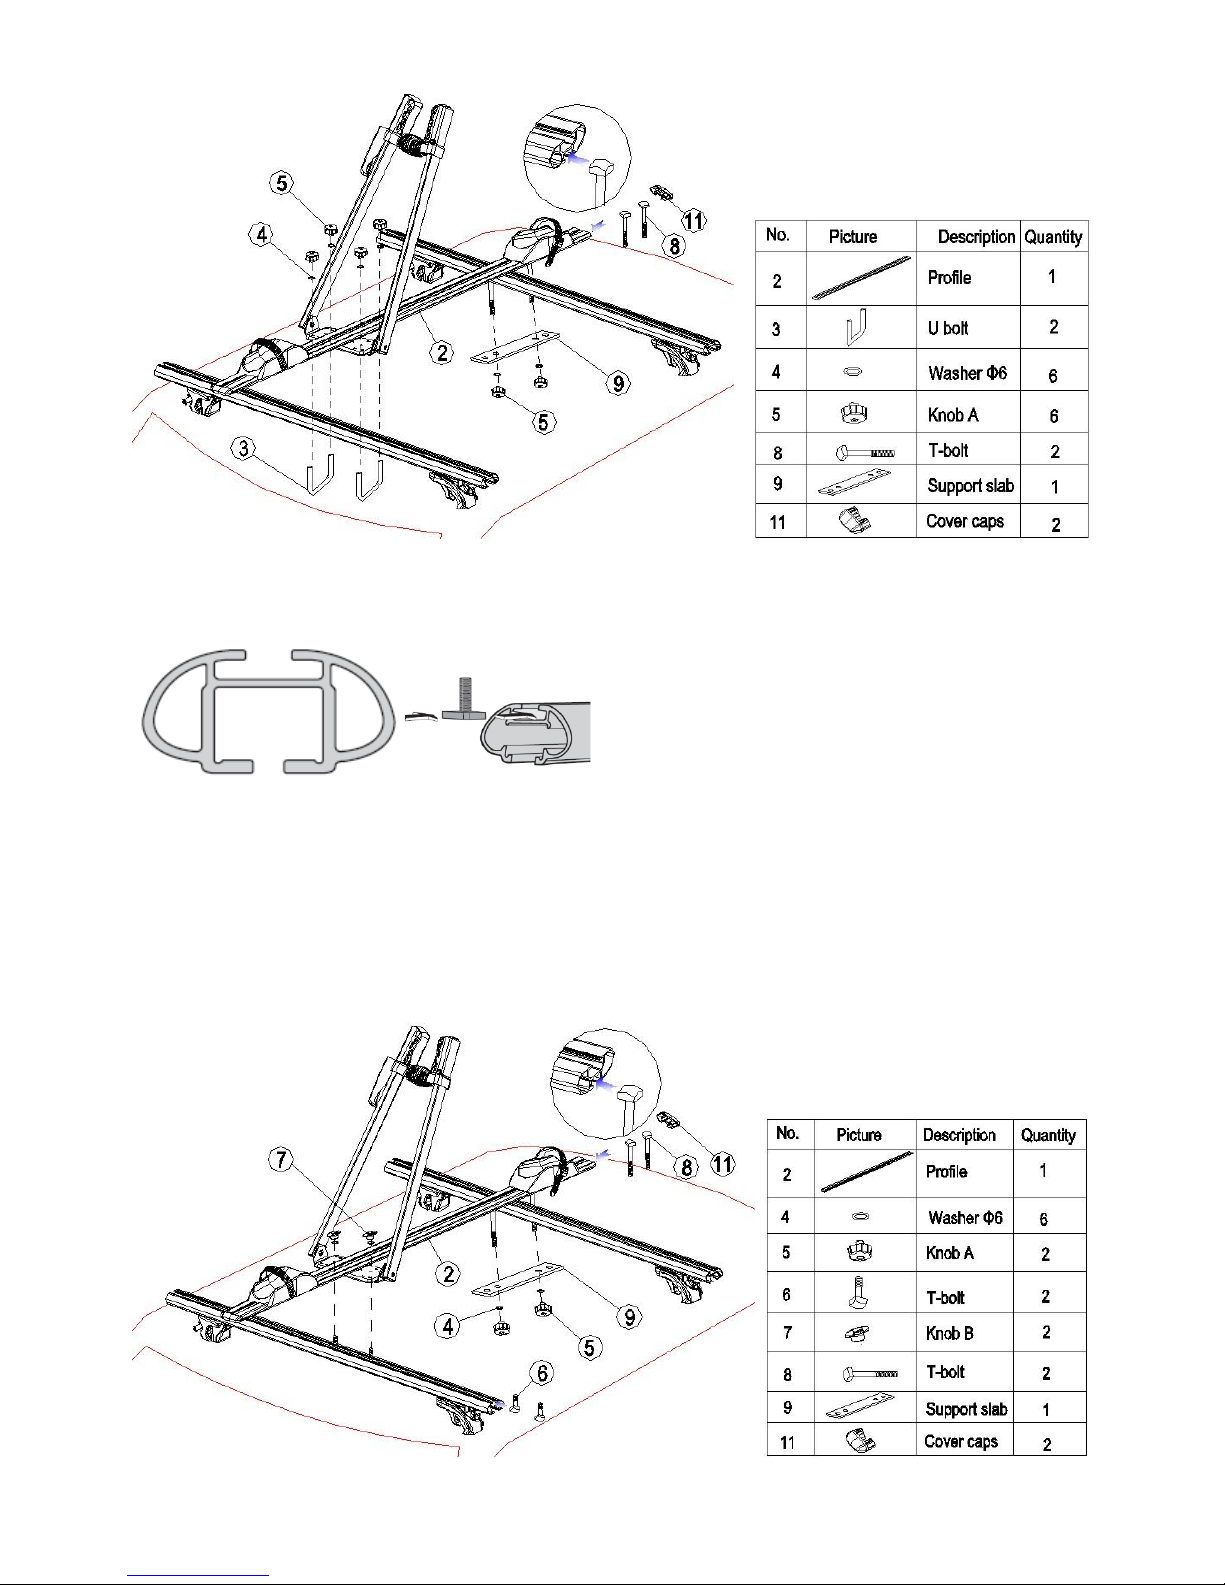
Fig. 2
Installation on oval bars with universal T-track:
Put the T-bolt (No.5 of the list) in the proper crossbar groove as shown in Fig.3, slide the T-bolt to the proper
place.
Fit washer 6 (No.4 of the list) inside the T-bolt and tighten firmly with using knobs (No.7 of the list).
Repeat this on the other side of the plate. And also fix on the rear part of the bike rack the T-bolt(No.8 of the list)
in the proper profile (No.2 of the list) groove as shown in Fig.3.
Fit the support slab (No.9 of the list) making it entering from the bottom, fit washers 6(No.4 of the list) and
tighten firmly using knobs (No. 5 of the list).
Fig. 3
Page 5
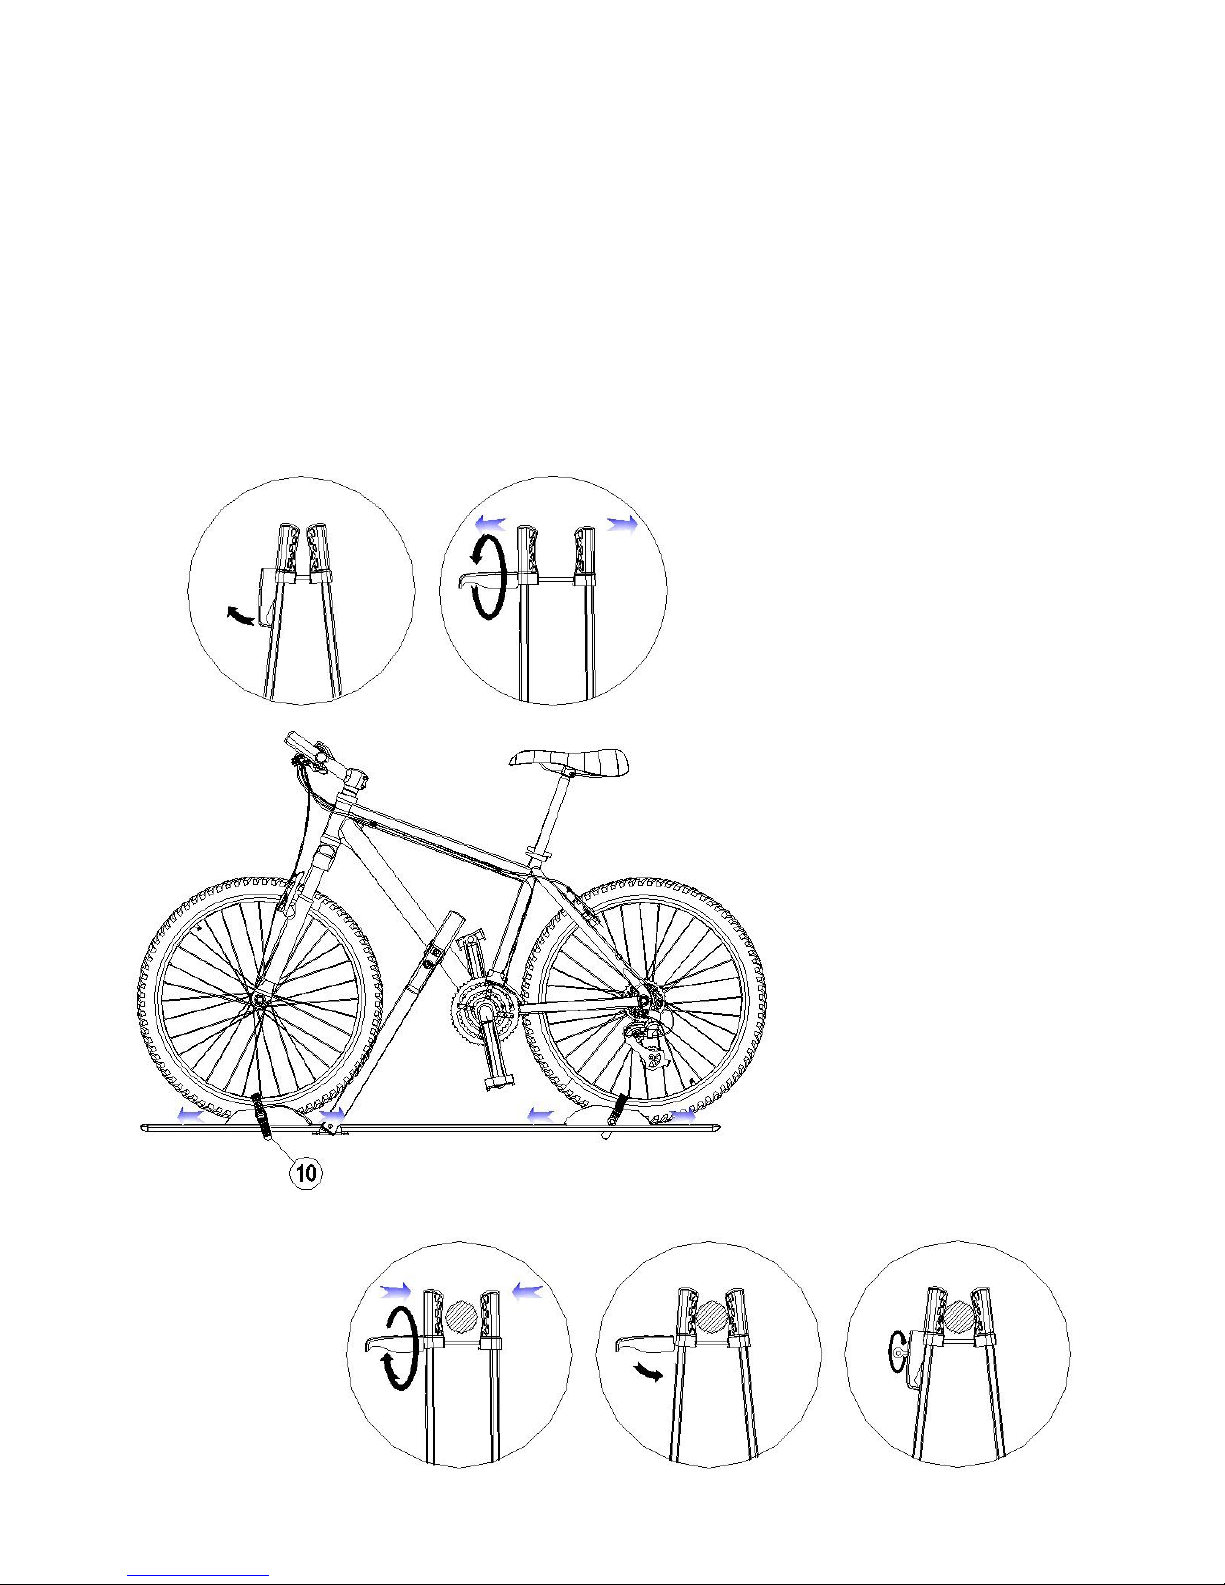
PHASE 3 MOUNT THE BIKE ON THE BIKE CARRIER
IN ORDER TO EXECUTE THIS PROCESS PERFECTLY, IT IS ADVISABLE THE TEAMWORK OF TWO
PERSONS.
Strictly comply with the instructions supplied to ensure that the bike carrier is regularly installed and that it functions
perfectly (see fig 4,5,6)
Check carefully that the bike carrier has been locked well, and that the rubber protections of support module are tightly
till they get deformed.
In case of insufficient locking, open the handle and repeat the action coming near the support module protections to the
bike frame.
Lock well taking out the key from the bike carrier, It's forbidden traveling with the key inserted in the lock.
Keep the key in a safe place.
Fig. 4
Fig.5
Fig.6
Page 6

SAFETY WARNINGS
This bike carrier has been designed, built and factory tested with care, in compliance with the safety standards.
Watch out for passing through underground passages, tunnels, car-parks, garages and the like.
After traveling a short distance, check the assembly to make sure it is fixed properly. Check the straps and the
vanous bolts to make sure they are well tightened, and subsequently check regularly during the trip.
Straps and screws will get worm with time. In this case, they must be replaced immediately.
In consequence of the presence of carrying and load device, comply the speed with the different way of driving
and braking.
Vehicle driving will be influenced by the effect of wind, sudden braking, tight bends, high speed rises and dips
on uneven roads. Therefore, reduce the speed, comply with local speed limits and, in any case, never exceed
130kph.
The manufacturer shall not be liable for damage deriving from high vehicle speed or improper driving.
Before starting, each time and frequently during the joumey, check to make sure that the fixing mechanisms and
bolts are tightened properly, and that the assembly is in good condition.
The bikes must have no exposed sharp edges that could cause injuries to persons.
Dismantle the bike rack if it is not being used.
Dismantle the bike rack when the vehicle is washed.
Do not cover the bikes with objects that can be removed by the wind-force.
This rack requires accurate assembly and strict observance of the installation and use instructions. When driving
your vehicle, you are entirely responsible for your own safety and that of others.
Respect the laws applicable in the country of use.
Make these instructions available to anyone else using your bike rack.
 Loading...