

Page 1
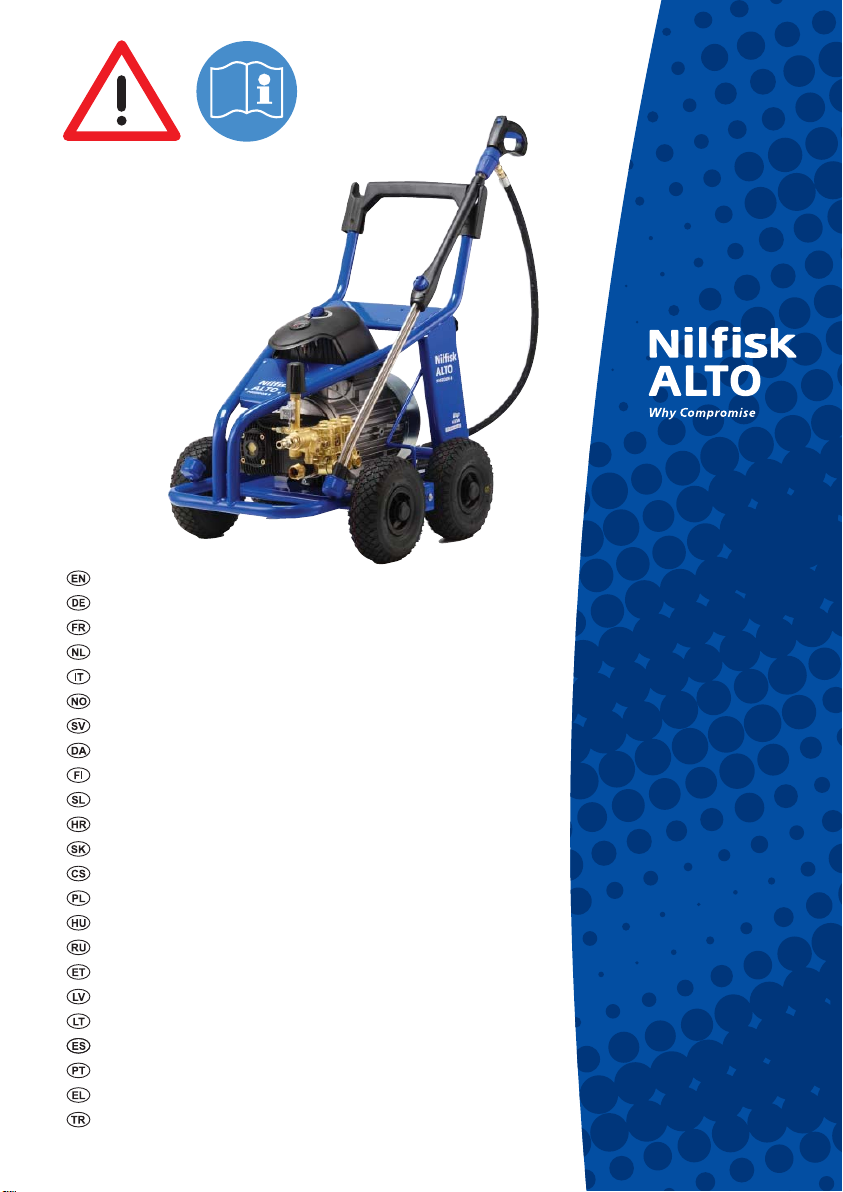
POSEIDON 8
Operating Instructions .............................................................1-16
Betriebsanleitung .................................................................. 17-32
Notice d’utilisation ................................................................. 33-48
Gebruiksaanwijzing ............................................................... 49-64
Istruzioni sull’uso ...................................................................65-80
Driftsinstruks ......................................................................... 81-96
Bruksanvisning .................................................................... 97-112
Driftsvejledning.................................................................. 113-128
Käyttöohje ......................................................................... 129-144
Navodilo za uporabo ........................................................ 145-160
Uputstvo za rad .................................................................161-176
Prevádzkový návod ...........................................................177-192
Provozní návod .................................................................193-208
Instrukcja obsługi .............................................................. 209-224
Kezelési utasítás ............................................................... 225-240
Руководство по эксплуатации ......................................... 241-256
Töö juhised....................................................................... 257-272
Lietošanas instrukcijas ..................................................... 273-288
Eksploatacijos instrukcijos ............................................... 289-304
Instrucciones de manejo ................................................... 305-320
Instruções de operação.....................................................321-336
Οδηγίες λειτουργίας ..........................................................337-352
Ýþletme kýlavuzu ..............................................................353-368
301002670 - 2007-12-06
Page 2
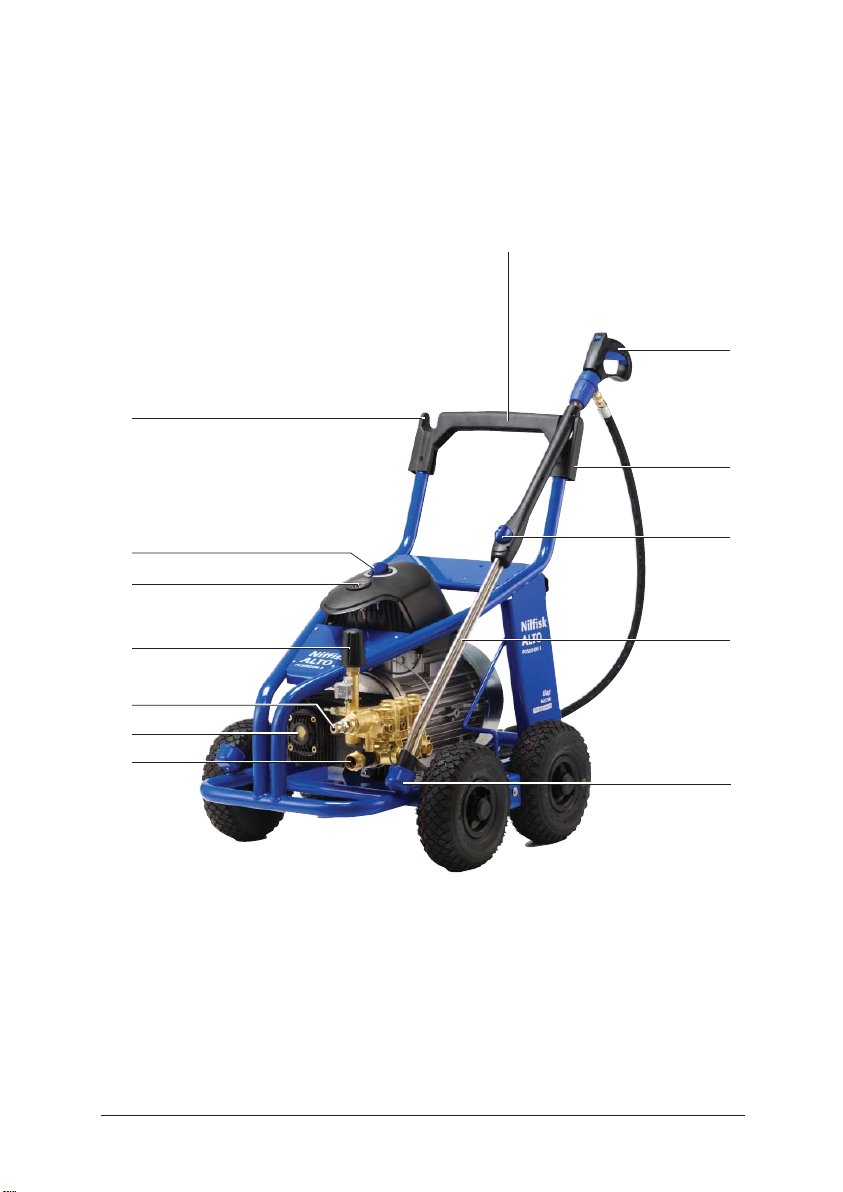
POSEIDON 8
1
2
12
3
11
10
4
9
5
8
7
6
3
Page 3

Contents
Symbols used to mark
instructions
1 Important safety
instructions
POSEIDON 8
............................................................................................2
............................................................................................2
2 Description
3 Before starting the cleaner
4 Control / Operation
5 Applications and methods
6 After using the cleaner
7 Maintenance
8 Troubleshooting
9 Further information
2.1 Purpose ................................................................................4
2.2 Operating elements ..............................................................4
3.1 Setting up the cleaner ..........................................................4
3.2 Connecting the high pressure hose (single user) .................5
3.2.1 Connecting the high pressure hoses (2 users).....................5
3.3 Connecting the water supply ................................................5
3.4 Electrical connection ............................................................6
3.5 Antifreeze - before first use ..................................................6
4.1 Connecting the spray lance to the spray gun .......................6
4.2 Switching on the cleaner ......................................................6
4.2.1 Switching on the cleaner when it is connected to a water
supply ...................................................................................6
4.2.2 Switching on the cleaner when it is connected to open
tanks (suction mode) ............................................................6
4.3 Pressure regulation (Tornado Lance) ...................................7
4.4 Pressure regulation on the machine.....................................7
5.1 Techniques ...........................................................................7
5.1.1 Soaking ................................................................................7
5.1.2 Detergent and Foam ............................................................7
5.1.3 Temperature .........................................................................7
5.1.4 Mechanical Effect .................................................................8
5.1.5 High Water Flow or High Pressure .......................................8
5.2 Some typical cleaning tasks .................................................8
5.2.1 Agriculture ............................................................................8
5.2.2 Vehicle ..................................................................................8
5.2.3 Buildings and Equipment......................................................9
6.1 Switching off the cleaner ......................................................9
6.2 Disconnecting supply lines ...................................................9
6.3 Rolling up the electrical lead and storing accessories........10
6.4 Storing the cleaner (below 0°C) .........................................10
7.1 Maintenance plan ...............................................................11
7.2 Maintenance work .............................................................. 11
7.2.1 Cleaning water inlet filter .................................................... 11
7.2.2 Checking the pump oil level ...............................................11
7.2.3 Changing the pump oil .......................................................11
..........................................................................................12
9.1 Recycling the cleaner ........................................................13
9.2 Guarantee ..........................................................................13
9.3 EU Declaration of Conformity .............................................13
9.4 Technical Data ....................................................................13
1
Page 4
POSEIDON 8
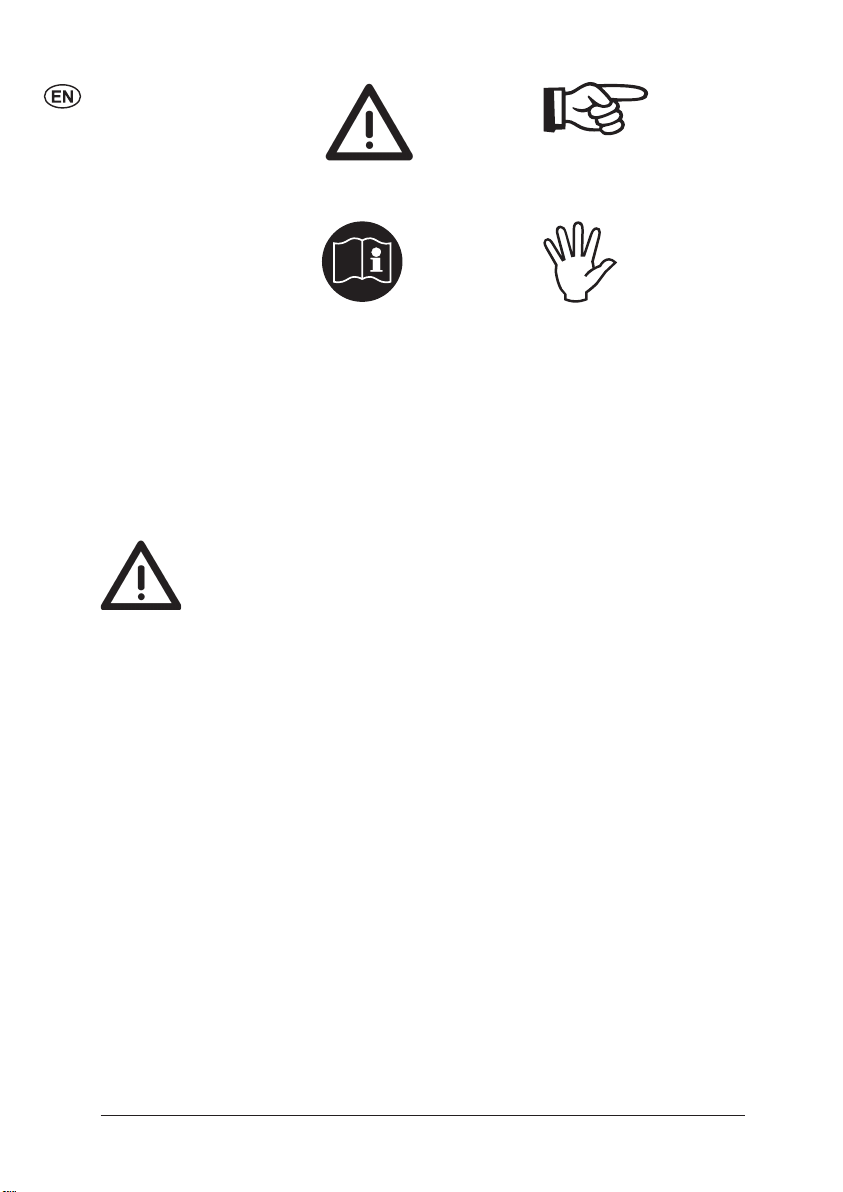
Symbols used to mark
instructions
marked with this danger symbol.
keep them within reach at all
times.
Safety instructions in
these operating in-
structions which
must be observed
to prevent risks
to persons are
Before using the
high-pressure
cleaner, be sure
to also read the
enclosed operat-
ing instructions and
t o ensure safe operation.
chine and its performance.
1 Important safety instructions
For your own safety
The high-pressure cleaner may
only be used by persons instructed in its use and who have
been expressly authorised to do
so.
Although extremely easy to operate, children should not be allowed to use the cleaner.
General
Use of the high-pressure cleaner
is subject to the applicable local
regulations.
Besides the operating instructions and the binding accident
prevention regulations valid in
the country of use, observe recognised regulations for safety
and proper use.
Do not use any unsafe work
techniques.
2
Transport
Transport of the high-pressure
cleaner is easy on its large
wheels.
For safe transport in and on vehicles we recommend to prevent
the equipment from sliding and
tilting by fixing it with belts.
For transport at temperatures
around or below 0°C, anti-freeze
should be drawn into the pump
beforehand (see chapter 6).
Before starting the cleaner
If your 3-phase cleaner was
supplied without a plug, have
it fitted with a suitable 3-phase
plug with earth conductor, by an
electrician.
Before use, check that the highpressure cleaner is safe and in
proper condition.
Regularly check whether the
power cord is damaged or shows
signs of ageing.
Use the high-pressure cleaner
only when the mains power lead
is in a safe condition. (risk of
electric shock if damaged!).
Check the rated voltage of the
high-pressure cleaner before
connecting it to the mains power
supply. Ensure that the voltage
shown on the rating plate corresponds to the voltage of the local mains power supply.
We strongly recommend that the
power supply to the high pressure cleaner be connected via a
residual current circuit breaker.
This device stops the supply of
electricity if the leakage current
to earth exceeds 30 mA for 30
ms or it has an earth tester circuit.
Operate the cleaner only in an
upright position!
Please observe the regulations
and provisions applicable in
your country. Before putting the
high-pressure cleaner into service, carry out a visual check of
all the major components.
CAUTION!
High-pressure water jets can be
dangerous if misused. The jet
must not be directed at persons,
animals, live electrical equipment or the cleaner itself.
This indicates
tips and in-
structions to
simplify work and
This symbol is used
to mark safety in-
structions that must
be observed to pre-
vent damage to the ma-
Page 5
POSEIDON 8
Wear appropriate protective
clothing and eye protectors.
Do not direct the jet towards
yourself or towards other persons in order to clean clothes
or footwear.
During operation of the cleaner,
recoil forces are produced at the
spraying device and, when the
spray lance is held at an angle,
a torque is also created. The
spraying device must therefore
be held firmly in both hands.
Do not use the cleaner when
other people without protective clothing are in the working
area.
Check that cleaning will not
result in dangerous substances (e.g. asbestos, oil) being
washed off the object to be
cleaned and harming the environment.
Do not clean delicate parts
made of rubber, fabric, etc. with
the 0° jet. Keep some distance
between high pressure nozzle
and surface in order to prevent
the surface from damage.
Do not use the high-pressure
hose for lifting loads.
NOTE!
The maximum permissible
working pressure and temperature are printed on the highpressure hose.
Do not continue to use the
cleaner if the mains power lead
or high-pressure hose is damaged.
Ensure adequate air circulation.
Do not cover the cleaner or operate it in inadequately ventilated rooms!
Store the cleaner where
it will not be exposed to
frost!
Never operate the cleaner without water. Even brief shortages
of water result in severe dam-
age to the pump seals.
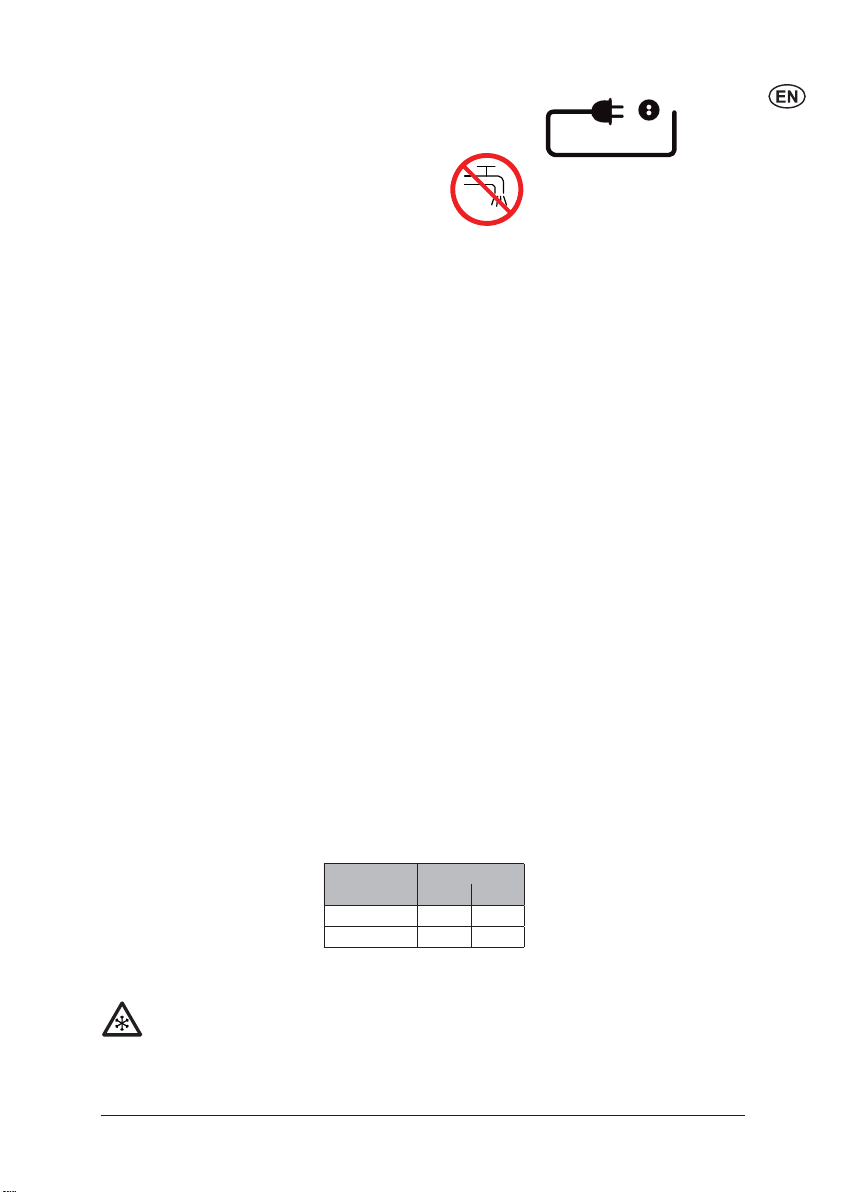
Water connection
This high pressure
washer is only allowed to be connected with the drinking
water mains, when
an appropriate backflow preventer has been installed, Type
BA according to EN 1717. The
backflow preventer can be ordered under number 10641117
7,106411178,106411179,1064
11184. The length of the hose
between the backflow preventer
and the high pressure washer
must be at least 12 metres (min
diameter 3/4 inch) to absorb
possible pressure peaks. Operation by suction (for example
from a rainwater vessel) is carried out without backflow preventer. Recommended suction
set: 61256. As soon as water
has flown through the BA valve,
this water is not considered to
be drinking water any more
Operation
CAUTION!
Unsuitable extension leads can
represent a source of danger.
Always unwind cord from the
reels completely to prevent the
power cord overheating.
Plugs and connectors of mains
power leads must be at least
splash water-proof.
When using an extension cord,
check the minimum cross-sections of the cable:
Cable lengthmCross section
<16 A <25 A
up to 20 m
20 to 50 m
ø1.5mm² ø2.5mm²
ø2.5mm² ø4.0mm²
Do not damage the mains power lead (e.g. by driving over it,
pulling or crushing it).
Disconnect the power cord by
pulling the plug only (do not pull
or tug the power cord).
Electrical equipment
CAUTION!
Never spray electrical equipment with water: danger for persons, risk of short-circuiting.
The cleaner may only be connected to a correctly installed
plug socket.
Switching on the cleaner may
cause voltage fluctuations.
Voltage fluctuations should
not occur if the impedance at
the transfer point is less than
0.15 Ω. If in doubt ask your local
electricity supplier.
Maintenance and repair
CAUTION!
Always remove the plug from the
mains plug socket before cleaning or carrying out maintenance
work on the cleaner.
Carry out only the maintenance
operations described in the operating instructions. Use only
original Nilfisk-Alto spare parts.
Do not make any technical modifications to the high-pressure
cleaner.
Ensure that the machine is regularly serviced by Authorised
Nilfisk-Alto dealers in accordance with the maintenace plan.
Failure to do so will invalidate
the warranty.
CAUTION!
High-pressure hoses, fittings
and couplings are important for
the safety of the cleaner. Use
only high-pressure parts approved by the manufacturer!
The mains power lead must not
differ from the version specified
by the manufacturer and may
only be changed by an electrician.
Please contact the Nilfisk-Alto
service department or an authorised specialist work-shop for
3
Page 6

POSEIDON 8
all other maintenance or repair
work!
Testing
The cleaner conforms to the
German „Guidelines for Liquid Spray Jet Devices“. The
high-pressure cleaner must be
subjected to a safety examination in accordance with the „Accident Prevention Regulations
for Working with Liquid Spray
Jet Devices (BGR 500-2/2.36)“
as required, but at least every
12 months, by an authorised inspector.
After all repairs or modifications to electrical equipment,
the protective conductor resistance, the insulation resistance
and the leakage current must
be measured. Furthermore, a
visual inspection of the mains
power lead, a voltage and current measurement and a function test must be carried out.
Our after-sales service technicians are at your disposal as authorised inspectors.
The complete „Accident Prevention Regulations for Working
with Liquid Spray Jet Devices“
are available from the Carl Hey-
2 Description
2.1 Purpose This high-pressure cleaner has
2.2 Operating elements See fold-out page at front of these
been designed for professional
use in
– Agriculture
– industry
– transport industry
– automotive cleaning
– municipal facilities
– cleaning trade
– construction industry
etc.
operating instructions.
1 Handle
2 Spray gun
3 Receptacle for Spray lance
4 Pressure regulation on spray
lance
5 Spray lance
manns Verlag KG, Luxemburger
Strasse 449, 50939 Cologne or
from the appropriate association of employers’ liability insurances.
Unloader valve
Unacceptably high pressure is
fed back without residual pressure via a bypass line into the
intake line of the pump when the
safety device is tripped.
The unloader valve is set and
sealed at the factory and must
not be adjusted.
Chapter 5 describes the use of
the high-pressure cleaner for
various cleaning jobs.
Always use the cleaner as described in these operating instructions. Any other use may
damage the cleaner or the surface to be cleaned or may result
in severe injury to persons.
6 Supply water connection
with water inlet filter
7 Check pump oil level
8 High pressure hose
connection
9 Pressure regulation
10 Pressure gauge
11 Main switch
12 Receptacle for electrical lead
3 Before starting the cleaner
3.1 Setting up the cleaner
4
1. Before using the cleaner for
2. Run the machine only when
3. Set the brake.
the first time, check it careful-
ly for any faults or damage.
it is in perfect working condi-
tion.
Page 7

4. Check whether the oil level
is between the minimum and
maximum marks. If necessary, add oil (see chapter 9.4
for type of oil).
POSEIDON 8
3.2 Connecting the high
pressure hose (single
user)
3.2.1 Connecting the high
pressure hoses (2
users)
1. Put the quick connector of
the high pressure hose onto
the nipple on the cleaner.
Put the quick connector of 1.
the distributor manifold onto
the nipple of the high pressure washer
Put the quick connector of 2.
the high pressure hoses
onto the nipples of the distributor manifold.
CAUTION!
In a 2 user system, the nozzle
size is different from a single
user system. It is necessary to
change to the matching spray
lances and a distributor manifold. (see chapter 9.4)
3.3 Connecting the water
supply
See chapter 9.4 Technical Data for required
quantity of water and
water pressure.
In the case of poor wa-
ter quality (sand, etc.), we
recommend that a fine water filter is
fitted in the water inlet.
We recommend the use of a textilereinforced water hose with a nominal diameter of min. 3/4" (19 mm).
1. Rinse the water supply hose
briefly in order to prevent
sand an other dirt particles
entering into the machine.
2. Connect water supply hose
to the machine.
3. Open water tap.
5
Page 8

POSEIDON 8
3.4 Electrical connection
The cleaner may
only be connected
to a correctly installed electrical installation.
3.5 Antifreeze - before first
use
When using a cord reel:
1. Release brake of the cord
reel.
2. Unwind the cord completely.
The machine is protected with
anti-freeze from the factory.
Catch the liquid discharging at
4 Control / Operation
4.1 Connecting the spray
Always remove any dirt from the
nipple before connecting the spray
lance to the spray gun.
4.2 Switching on the
4.2.1 Switching on the
The cleaner switches off automatically after the spray gun has been
closed. To start the cleaner again,
operate the spray gun.
lance to the spray
gun
cleaner
cleaner when it is
connected to a water
supply
Operate the
spray gun
several times
at short intervals to vent
the system.
A
C
B
O
I
1. Observe safety instructions
in chapter 1.
2. Put the plug into the electrical socket.
first (approx. 1 l) for re-use in a
container.
1. Pull the blue quick-release
grip (A) of the spray gun forwards and lock it by turning it
to the left.
2. Insert the nipple of the spray
lance (C) into the quick-release connection and turn
the blue quick-release grip to
the right (B).
3. Pull the spray lance (or other
accessory) forwards to check
that it is securely attached to
the spray gun.
1. Main switch
Turn the switch to position
„ I „.
2. Unlock the spray gun and
operate it.
3. Lock the spray gun even during short pauses.
4.2.2 Switching on the
cleaner when it is
connected to open
tanks (suction mode)
6
1. Before connecting the suction hose to the cleaner, fill
the hose with water. 2.
Main switch
Turn the switch to position
„ I „.
3. Unlock the spray gun and operate it.
Max. suction height = 1.5 m.
Page 9

POSEIDON 8
4.3 Pressure regulation
(Tornado Lance)
4.4 Pressure regulation on
the machine
1. Turn the twist grip on the
– High pressure =
clockwise (+)
– Low pressure =
anticlockwise (–)
1. Set pressure and water vol-
5 Applications and methods
5.1 Techniques
Effi cient high pressure cleaning is achieved by following a few
guidelines, combined with your own personal experience of specifi c
cleaning tasks. Accessories and detergents, when correctly chosen,
can increase the effi ciency of your pressure washer. Here is some
basic information about cleaning.
spray unit:
ume by twisting the pressure/volume regulation knob
on the machine.
5.1.1 Soaking
5.1.2 Detergent and Foam
5.1.3 Temperature Detergents are more effective at higher temperatures. Greases, oils
Encrusted or thick layers of dirt can be loosened or softened up by
a period of soaking. This is for example an ideal method within agriculture – for example, within pig sties. The ideal soaking method
can be achieved via use of foam or simple alkaline detergent. Let
the product lie on the dirty surfaces for around 30 minutes before
pressure washing. The result will be a much quicker high pressure
cleaning process.
Foam or detergent should be applied onto dry surfaces so that the
chemical product is in direct contact with the dirt. Detergents are
applied from bottom to top, for example on a car bodywork, in order
to avoid “super clean” areas, where the detergent collects in higher
concentration and streams downwards. Let the detergent work for
several minutes before rinsing before rinsing but never let it dry on
the surface being cleaned.
and fats can be broken down more easily at higher temperatures also.
Proteins can be cleaned at temperatures of around 60°C. Oils, traffi c
fi lm around 70°C, and grease can be cleaned at 80°C - 90° C.
7
Page 10

POSEIDON 8
5.1.4 Mechanical Effect
In order to break down tough layers of dirt, additional mechanical
effect may be required. Special lances and rotary or wash brushes
offer this supplementary effect that cuts through dirt.
5.1.5 High Water Flow or
High Pressure
High pressure is not always the best solution and high pressure may
damage surfaces. The cleaning effect also depends upon water
fl ow. Pressure levels of around 100 bar may be suffi cient for vehicle
cleaning (in association with hot water). Higher fl ow levels give the
possibility to rinse and fl ush away large amounts of dirt easily.
5.2 Some typical cleaning tasks
5.2.1 Agriculture
Task Accessories Method
Stables
Pig Pens, Sties
Cleaning of
walls, floors and
equipment
Disinfectant
Machinery
Tractors
ploughs etc.
Chemical Foam
Injectors
Foam lance
Powerspeed lance
Floor Cleaner
Detergents
Universal
Alkafoam
Disinfectant
DES 3000
Detergent injection
Powerspeed lances
Curved lances and
underchassis washers
Brushes
1. Soaking – apply foam to all surfaces (bottom to top)
and wait for approx. 30 minutes.
2. Remove the dirt from surfaces with the high
pressure lance or chosen accessory. Again, clean
from bottom to top on vertical surfaces.
3. To flush away large quantities of dirt, change to low
pressure mode and use the higher flow to push
away the dirt.
4. Use recommended disinfectant products and
methods to ensure hygiene. Apply DES 3000
disinfectant once the surfaces are perfectly clean.
1. Apply detergent to vehicle or equipment surfaces in
order to soften up dirt and grime. Apply from bottom
to top.
2. Proceed with cleaning using the high pressure
lance. Clean again from bottom to top. Use
accessories to clean in difficult to reach places.
3. Clean fragile areas such as motors, rubber at lower
pressure levels to avoid damage.
5.2.2 Vehicle
Task Accessories Method
Vehicle bodywork Standard lance
Detergent injection
Curved lances and
underchassis washers
brushes
Detergents
Aktive Shampoo
Aktive Foam
Sapphire
Super Plus
Aktive Wax
Allosil
RimTop
1. Apply detergent to vehicle or equipment surfaces
in order to soften up dirt and grime. Apply from
bottom to top. In cases of particularly dirty vehicles,
pre-spray with a product such as Allosil in order
to remove traces of insects etc, then rinse at low
pressure and apply normal car cleaning detergent.
Let detergents settle for 5 minutes before cleaning
off. Metallic surfaces can be cleaned using RimTop.
2. Proceed with cleaning using the high pressure
lance. Clean again from bottom to top. Use
accessories to clean in difficult to reach places.
Use brushes in order to add a mechanical cleaning
effect. Short lances can help for cleaning of motors
and wheel arches. Curved lances or undercarriage
washers can be valuable for the cleaning of car
underchassis and wheel arches.
3. Clean fragile areas such as motors, rubber at lower
pressure levels to avoid damage.
4. Apply a liquid wax using the pressure washer in
order to protect the bodywork from pollution.
8
Page 11

5.2.3 Buildings and Equipment
Task Accessories Method
General surfaces
Metallic equipment
Rusted or
damages surfaces
prior to treatment
Foam injectors
Standard lance
Curved lances
Tank cleaning
head
Detergents
Intensive
J25 Multi
Combi Aktive
Alkafoam
Disinfectant
DES 3000
Wet Sandblasting
equipment
1. Apply thick foam over the surfaces to be cleaned.
Apply on dry surfaces. Apply from top to bottom
on vertical surfaces. Let the foam act for up to 30
minutes for the optimal effect.
2. Proceed with cleaning using the high pressure
lance. Use applicable accessories. Use high
pressure to dislodge large amounts of incrusted
dirt or grime. Use lower pressure and high water
volume in order to rapidly flush away loose dirt and
rinse surfaces.
3. Apply DES 3000 disinfectant once the surfaces are
perfectly clean.
Areas covered by amounts of loose dirt, such as
animal remains in slaughterhouses, can be removed
by using high water flow to flush away the dirt to
evacuation pits or drains.
Tank cleaning heads can be used to clean barrels,
vats, mixing tanks etc. Cleaning heads may be
hydraulically or electrically powered and give the
possibility for automatic cleaning without a constant
user.
1. Connect the sandblasting lance to the pressure
washer and place the suction tube in the sand.
2. Always wear protective equipment during
sandblasting.
3. Spray the surfaces to be treated with the mix of
water and sand. Rust, paint etc will be stripped off.
POSEIDON 8
These are merely several examples of cleaning tasks that can be solved by a pressure washer in association with accessories and detergents. Each cleaning task is different. Please consult your local dealer
or Nilfi sk-Alto representative in order to discuss the best solution for your own cleaning tasks.
6 After using the cleaner
6.1 Switching off the
cleaner
6.2 Disconnecting supply
lines
O
I
1. Turn the main switch to posi-
tion „OFF“.
2. Close water tap.
3. Squeeze the spray gun handle until the cleaner is depressurised.
4. Lock the safety catch on the
spray gun.
1. Remove the water hose from
the cleaner.
2. Pull out the plug from the
electrical socket.
9
Page 12

POSEIDON 8
6.3 Rolling up the electrical
lead and storing
accessories
6.4 Storing the cleaner
(below 0°C)
,
1. Store the cleaner in a dry
room without danger of frost
or protect as below:
CAUTION!
If the high-pressure cleaner is
stored in a room with temperatures around or below 0°C, antifreeze should be drawn into the
pump beforehand:
1. Remove the water inlet hose
from the cleaner.
2. Remove the spray lance.
3. Switch on the cleaner with
the main switch in position „
I“ and activate trigger on the
spray gun.
Switch off the cleaner after
max. 3 minutes.
4. Connect the suction hose to
the water inlet of the cleaner
Risk of tripping!
To prevent accidents, always
carefully roll up the electrical
lead.
1. Wind up the high pressure
hose.
2. Place the spray lance into
the spray lance storage.
and place it in a tank containing anti-freeze.
5. Switch on the cleaner with
the main switch in position „
I „.
6. Hold the spray gun over the
tank containing anti-freeze
and operate it to start suction.
7. During suction operate
the spray gun two or three
times.
8. Lift the suction hose from the
tank containing anti-freeze
and operate the spray gun to
pump off the remaining antifreeze.
9. Switching off the cleaner
10. To avoid any risks, store
the cleaner temporarily in a
heated room before using it
again.
10
Page 13

7 Maintenance
7.1 Maintenance plan
POSEIDON 8
Cleaning water inlet filter
7.2.1
Checking pump oil level
7.2.2
Changing pump oil
7.2.3
7.2 Maintenance work
7.2.1 Cleaning water inlet
filter
7.2.2 Checking the pump oil
level
Weekly
QQ
Q
After the first 50
operating hours
QQ
Every six months
or 500 operating
hours
A water filter is fitted on the water
inlet to prevent large particles of
dirt from entering into the pump.
1. Unscrew the quick-release
connection.
2. Remove the filter and rinse it.
Replace damaged filter. Replace damaged filter.
1. Check whether the oil level
is between the minimum and
maximum marks. If necessary, add oil (see chapter 9.4
for type of oil).
As
required
7.2.3 Changing the pump oil
A
1. Unscrew the oil drain plug (A)
and drain oil into a suitable
container.
2. Check that the drain plug
gasket is in place and reinstall
drain plug.
3. Fill pump with proper grade
and amount of oil.
Oil grade and capacity
see chapter ‘9.4 Technical
Data’.
11
Page 14

POSEIDON 8
8 Troubleshooting
Fault Cause Remedy
Pressure drop > Air in the system • Vent the system by
> High pressure nozzle blocked
worn
> Pressure control on the spray
pipe is not set correctly
Pressure fl uctuations > Pump draws in air (only
The motor does not start when
the cleaner is switched on
When the cleaner is switched
on the motor buzzes without
starting
The motor switches off > The overload protection
possible in suction mode)
> Lack of water • Open water tap
> Water inlet hose is too long
or its cross-section too small
> Lack of water caused by
blocked water fi lter
> Lack of water because max.
permissible suction height
has not been heeded
> The plug is not inserted
properly, i.e. there is no
current
> The mains fuse is switched
off
> The mains voltage is too low
or there is a phase failure.
> The pump is blocked or
frozen
> Incorrect cross-section or
length of the extension lead
has been activated due to
overheating or overloading of
the motor
> High-pressure nozzle is dirty • Change the high-pressure
operating the spray gun
several times at short
intervals. If necessary,
operate the cleaner for a
short time without the highpressure hose connected.
• Clean/replace the high
pressure nozzle
• Set the required working
pressure
• Check that the suction set
is air-tight
• Use specifi ed water inlet
hose
• Clean the water fi lter in the
water connection (never
work without water fi lter)
• See instructions
• Check the plug, lead and
switch and if necessary
have them replaced by a
trained electrician
• Switch on the mains fuse
• Have the electrical
connection checked
• Contact the Nilfi sk-Alto
customer service
• Use lead with correct cross
section or length
• Check that the mains
voltage and the cleaner
voltage are the same.
Switch off the cleaner and
allow it to cool for at least 3
minutes
nozzle
12
Page 15

9 Further information
POSEIDON 8
9.1 Recycling the cleaner Make the old cleaner unusable
immediately.
1. Unplug the cleaner and cut
the power cord.
Do not discard of electrical appliances with household waste.
As specified in European Directive 2002/96/EC on old electrical
and electronic appliances, used
electrical goods must be collected separately and recycled
ecologically. Contact your local
authorities or your nearest dealer for further information.
9.2 Guarantee Our general conditions of busi-
ness are applicable with regard
change as a result of technical
advances.
to the guarantee. Subject to
9.3 EU Declaration of
Conformity
Product: High Pressure Cleaner
Type: POSEIDON 8
Description: 400 V 3~, 50 Hz, IP X5
The design of the unit corresponds to
the following pertinent regulations:
Applied harmonised standards: EN 12100, EN 60335-2-79
Applied national standards and technical
specifi cations:
Dipl. Ing. Wolfgang Nieuwkamp
Tests and approvals
EU Declaration of Conformity
EC Machine Directive 98/37/EEG
EC Low-voltage Directive 73/23/EEG
EC EMV Directive 89/336/EEG
EN 55014-1, EN 55014-2, EN 61000-3-2
DIN EN 60335-2-79
ALTO Deutschland GmbH
Guido-Oberdorfer-Straße 2-8
D-89287 Bellenberg
Bellenberg, 01.06.2006
9.4 Technical Data
POSEIDON
8-75 8-82
Voltage 400 V / 3~ / 50 Hz EU EU EU EU
Voltage 460 V / 3~ /60 Hz US
Voltage 460 V / 3~ /50 Hz US
Fuse (slow) A 15.1 14.6 24 24.9
Power rating kW 8.7 8.2 14 14.5
Working pressure bar (Mpa) 200/20 155/16 180/18 (2610 psi) 160/16
Volume fl ow Qmax l/h 1344 1560
Water volume Q
Max. water inlet temperature °C/°F 60/86
Max. water inlet pressure bar (Mpa) 10/1 10/1(145psi)
Dimensions l x w x h mm
Weight of cleaner kg 106 130 (286lb)
Noise level at a distance of 1m
EN 60704-1
Sound power level LW
Vibration ISO 5349 m/s² ≤ 2,5
Recoil forces N 76 83 106 124
Oil quantity l 1
Oil type SAE 30 SAE 15 W 40
Nozzle size (1 user) 0.700 0.950 1200 1590
Nozzle size (2 users) - - 0.600/0.600 0.800/0.800
IEC
A
l/h 1230 1500
897x660x913
dB(A) 79.2 79.2 81.6
dB(A) 93.1 95/93.1 95.4
8-111
8-111 ST
2100
(9.1 gal/min)
2050
(9 gal/min)
897 x 652 x 913/
35.31x25.67x35.94(inches)
8-125
8-125 ST
2500
2450
13
Page 16

http://www.nilfi sk-alto.com
HEAD QUARTER
DENMARK
Nilfi sk-Advance Group
Sognevej 25
DK-2605 Brøndby
Tel.: +45 4323 8100
Fax: +45 4343 7700
E-mail: mail@nilfi sk-advance.dk
SALES COMPANIES
AUSTRALIA
Nilfi sk-ALTO
48 Egerton St.
P.O. Box 6046
Silverwater, N.S.W. 2128
Tel.: +61 2 8748 5966
Fax: +61 2 8748 5960
AUSTRIA
Nilfi sk-Advance GmbH
Nilfi sk-ALTO
Metzgerstrasse 68
5101 Bergheim/Salzburg
Tel.: +43 662 456 400-0
Fax: +43 662 456 400-34
E-mail: info@nilfi sk-alto.at
www.nilfi sk-alto.at
BELGIUM
Nilfi sk-ALTO
Division of Nilfi sk-Advance n.v-s.a.
Internationalelaan 55 (Gebouw C3/C4)
1070 Brussel
Tel.: +32 02 467 60 40
Fax: +32 02 466 61 50
E-mail: info.be-@nilfi sk-alto.com
CANADA
Clarke Canada
Part of the Nilfi sk-Advance Group
4080 B Sladeview Crescent, Unit 1
Mississauga, Ontario L5L 5Y5
Tel.: +1 905 569 0266
Fax: +1 905 569 8586
CHINA
Nilfi sk-Advance (Shenzhen) Ltd.
Blok 3, Unit 130 1001 Honghua Road
Int. Commercial & Trade Center
Fuitian Free Trade Zone
518038 Shenzhen
Tel.: +86 755 8359 7937
Fax: +86 755 8359 1063
CZECH REPUBLIC
ALTO Ceská Republika s.r.o.
Zateckých 9
14000 Praha 4
Tel.: +420 24 14 08 419
Fax: +420 24 14 08 439
E-mail: info@alto-cz.com
DENMARK
Nilfi sk-ALTO
Division of Nilfi sk-Advance A/S
Industrivej 1
9560 Hadsund
Tel.: +45 7218 2100
Fax: +45 7218 2105
E-mail: salg@nilfi sk-alto.dk
E-mail: service@nilfi sk-alto.dk
www.nilfi sk-alto.dk
Nilfi sk-ALTO Food division
Division of Nilfi sk-Advance A/S
Blytækkervej 2
9000 Aalborg
Tel.: +45 7218 2100
Fax: +45 7218 2099
E-mail: scanio.technology@nilfi sk-alto.dk
FINLAND
Nilfi sk-Advance Oy Ab
Piispantilankuja 4
02240 Espoo
Tel.: +358 207 890 600
Fax: +358 207 890 601
E-mail: jukka.lehtonen@nilfi sk-alto.com
www.nilfi sk-advance.fi
FRANCE
Nilfi sk-ALTO
ALTO France SAS
Aéroparc 1
19 rue Icare
67960 Entzheim
Tel.: +33 3 88 28 84 00
Fax: +33 3 88 30 05 00
E-mail: info@nilfi sk-alto.fr
www.nilfi sk-alto.com
GERMANY
Nilfi sk-ALTO
Division of Nilfi sk-Advance AG
Guido-Oberdorfer-Strasse 10
89287 Bellenberg
Tel.: +49 0180 5 37 37 37
Fax: +49 0180 5 37 37 38
E-mail: info@nilfi sk-alto.de
www.nilfi sk-alto.de
GREECE
Nilfi sk-Advance SA
8, Thoukididou str.
164 52 Argiroupolis
Tel.: +30 210 96 33443
Fax: +30 210 96 52187
E-mail: nilfi sk-advance@clean.gr
HOLLAND
Nilfi sk-ALTO
Division of Nilfi sk-Advance BV
Camerastraat 9
3322 BB Almere
Tel.: +31 36 546 07 60
Fax: +31 36 546 07 61
E-mail: info@nilfi sk-alto.nl
www.nilfi sk-alto.nl
HONG KONG
Nilfi sk-Advance Ltd.
2001 HK Worsted Mills Ind’l Bldg.
31-39 Wo Tong Tsui St.
Kwai Chung
Tel.: +852 2427 5951
Fax: +852 2487 5828
HUNGARY
Nilfi sk-Advance Kereskedelmi Kft.
II. Rákóczi Ferenc út 10
2310 Szigetszentmiklos-Lakihegy
Tel: +36 2447 5550
Fax: +36 2447 5551
E-mail: info@nilfi sk-advance.hu
www.nilfi sk-advance.hu
ITALY
Nilfi sk-ALTO
Divisione di Nilfi sk-Advance A/S
Località Novella Terza
26862 Guardamiglio (LO)
E-mail: d.puglia@nilfi sk-advance.it
JAPAN
Nilfi sk-Advance Inc.
247 Nippa-cho, Kouhoku-ku
Yokohama, 223-0057
Tel.: +8145 548 2571
Fax: +8145 548 2541
MALAYSIA
Nillfi sk-Advance Sdn Bhd
Sd 14, Jalan KIP 11
Taman Perindustrian KIP
Sri Damansara
52200 Kuala Lumpur
Tel.: +60 3 603 6275 3120
Fax: +60 3 603 6274 6318
NORWAY
Nilfi sk-Advance AS
Bjørnerudveien 24
1266 Oslo
Tel.: +47 22 75 17 70
Fax: +47 22 75 17 71
E-mail: info@nilfi sk-alto.no
www.nilfi sk-alto.no
POLAND
Nilfi sk-Advance Sp. Z.O.O.
05-800 Pruszków
ul. 3-go MAJA 8
Tel.: +48 22 738 37 50
Fax: +48 22 738 37 51
E-mail: info@nilfi sk-alto.pl
www.nilfi sk-alto.pl
PORTUGAL
Nilfi sk-ALTO
Division of Nilfi sk-Advance Lda.
Sintra Business Park
Zona Industrial Da Abrunheira
Edifi cio 1, 1° A
P2710-089 Sintra
Tel.: +35 808 200 537
Fax: +35 121 911 2679
E-mail: mkt@nilfi sk-advance.es
RUSSIA
Nilfi sk-Advance LLC
Vyatskaya str. 27, bld. 7
127015 Moskow
Tel.: +7 495 783 96 02
Fax: +7 495 783 96 03
E-mail: info@nilfi sk-advance.ru
SINGAPORE
Nilfi sk-Advance Pte. Ltd.
Nilfi sk-ALTO Division
40 Loyang Drive
Singapore 508961
Tel.: +65 6 759 9100
Fax: +65 6 759 9133
E-mail: sales@nilfi sk-advance.com.sg
SPAIN
Nilfi sk-ALTO
Division of Nilfi sk-Advance S.A.
Torre D’Ara
Paseo del Rengle, 5 Pl. 10
08302 Mataró
Tel.: +3 4 902 200 201
Fax: +34 93 757 8020
E-mail: mkt@nilfi sk-advance.es
SWEDEN
ALTO Sverige AB
Member of Nilfi sk-Advance Group
Aminogatan 18, Box 4029
431 04 Mölndal
Tel.: +46 31 706 73 00
Fax: +46 31 706 @nilfi sk-alto.se
www.nilfi sk-alto.se
TAIWAN
Nilfi sk-Advance Taiwan Branch
No. 5, Wan Fang Road
Taipei
Tel.: +886 227 002 268
Fax: +886 227 840 843
THAILAND
Nilfi sk-Advance Co. Ltd.
89 Soi Chokechai-Ruammitr
Viphavadee-Rangsit Road
Layao, Jatuchak, Bangkok 10900
Tel.: +66 2 275 5630
Fax: +66 2 691 4079
TURKEY
Nilfi sk-Advance Profesional Temizlik
Ekipmanlari Tic. A/S.
Necla Cad. NI.: 48
Yenisahra / Kadiköy
Istanbul
Tel.: +90 216 470 08 - 60
Fax: +90 216 470 08 - 63
www. nilfi sk-advance.com
UNITED KINGDOM
Nilfi sk-ALTO
Division of Nilfi sk-Advance Ltd.
Bowerbank Way
Gilwilly Industrial Estate, Penrith
Cumbria CA11 9BQ
Tel.: +44 1 768 86 89 95
Fax: +44 1 768 86 47 13
E-mail: sales@nilfi sk-alto.co.uk
www.nilfi sk-alto.co.uk
USA
Nilfi sk-Advance Inc.
14600 21st Avenue North
Plymouth, MN 55447-3408
Tel.: +1 763 745 3500
Fax: +1 763 745 3718
E-mail: info@nilfi sk-advance-us.com
www.advance-us.com
VIETNAM
Nilfi sk-Advance Representative Offi ce
No. 46 Doc Ngu Str.
Ba Dinh Dist.
Hanoi
Tel.: +84 4 761 5642
Fax: +84 4 761 5643
E-mail: nilfi sk@vnn.vn
 Loading...