

Page 1
Professional
Technical Guide
—Images—
Page 2

Table of Contents
Sharpening and Softening Images ............................................................................ 3
Step 1: Make Quick Edits Using “Quick Sharp” ............................................................................ 3
Step 2: Fine-Tune “Sharpening”, “Mid-Range Sharpening”, and “Clarity” ................................. 4
“Sharpening”, “Mid-Range Sharpening”, and “Clarity” ............................................................... 7
Capture NX-D ................................................................................................................................. 9
Keeping Pictures Sharp at Small Apertures ............................................................. 10
Diraction Compensation .......................................................................................................... 10
Capture NX-D ............................................................................................................................... 10
2
Page 3
Sharpening and Softening Images
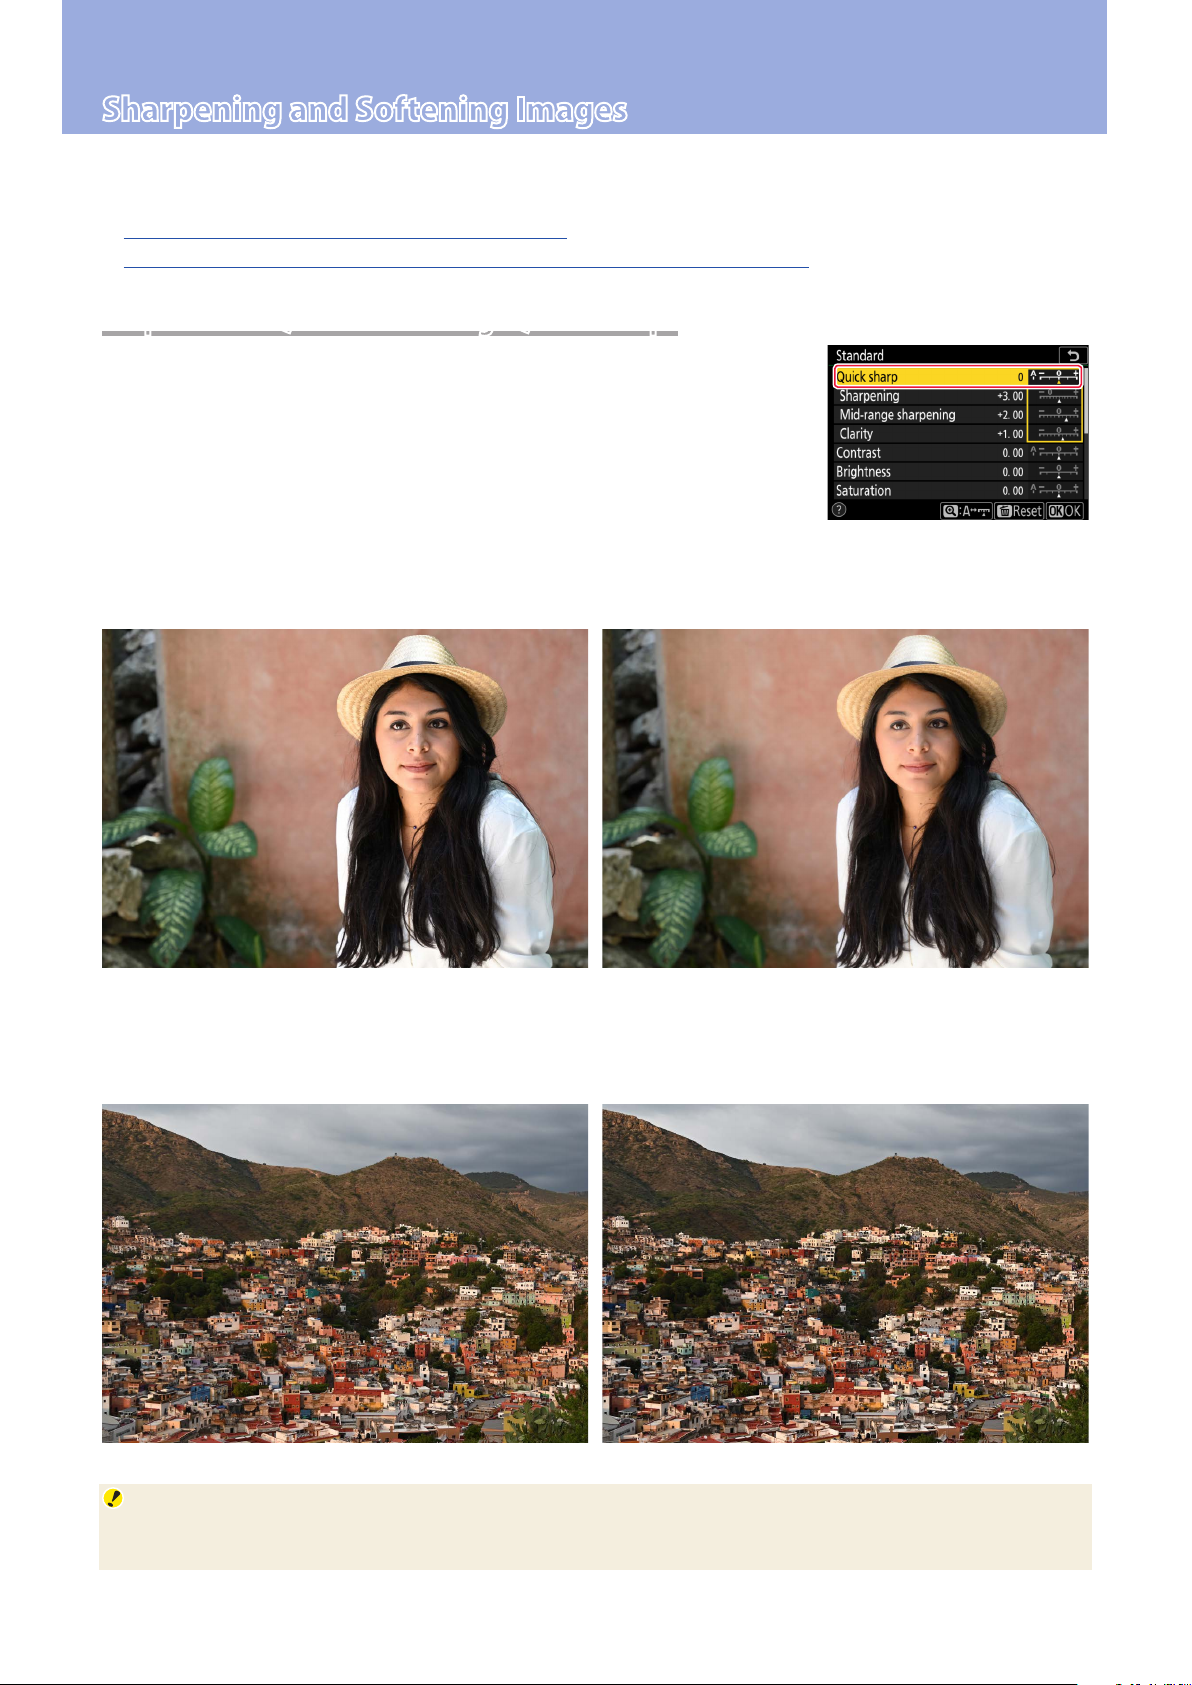
Adjusting the Quick sharp Picture Control setting is a quick way of making pictures sharper or softer.
Image denition can be further ne-tuned using Sharpening, Mid-range sharpening, or Clarity.
Step 1: Make Quick Edits Using “Quick Sharp”
Step 2: Fine-Tune “Sharpening”, “Mid-Range Sharpening”, and “Clarity”
Step 1: Make Quick Edits Using “Quick Sharp”
Adjustments to the Quick sharp Picture Control settings made by choosing a value between −2 (Softer in the i menu) and +2 (Sharper in the
i menu) are automatically matched by balanced adjustments to Sharpening, Mid-range sharpening, and Clarity. Select A to let the camera
automatically choose the optimal values for the scene.
For images that are softer overall, select a negative (softer) value. This can be used, for example, to
soften the complexions of portrait subjects.
Picture Control: Standard
Quick sharp: 0 Quick sharp: −2 (softer)
For images that are sharper overall, select a positive (sharper) value. This can be used for landscapes
and other situations in which greater overall denition may be required.
Picture Control: Standard
Quick sharp: 0 Quick sharp: +2 (sharper)
Landscapes
Positive values for Quick sharp are particularly eective when applied to distant landscapes shrouded
by mist or haze.
3
Page 4

Sharpening and Softening Images, Continued
Step 2: Fine-Tune “Sharpening”, “Mid-Range Sharpening”, and “Clarity”
After using Quick sharp to obtain the desired overall look, you can netune the results using Sharpening and its sisters. The examples below
show how to soften the complexions of portrait subjects while leaving
their eyes clearly visible. The recommended settings for images destined for printing vary with output size.
Original (Taken with the “Standard” Picture Control) Quick Sharp: −2 (“Softer”)
Sharpening 3
Mid-range sharpening 2
Clarity 1
A3 Output Viewed at a Distance of 60cm (2 ft) A1 Output Viewed at a Distance of 60cm (2 ft)
Sharpening 2
Mid-range sharpening 1
Clarity −1
The table lists the default values for
the Standard Picture Control.
Sharpening and Mid-range sharpening have been increased so that
the eyes are clearly dened, while
Clarity has been left at −1 to keep
the complexion smooth.
Sharpening −0.5
Mid-range sharpening −1
Clarity −1
Sharpening 3
Mid-range sharpening −1
Clarity −1
Selecting −2 for Quick sharp softens the complexion of the portrait
subject.
Sharpening has been raised to 3
so that the eyes are clearly dened,
while Mid-range sharpening and
Clarity have been left at −1 to keep
the complexion smooth.
Choosing Picture Control Settings Based on Output Size
How an image appears when viewed from a given distance varies with the output size:
• When pictures are printed or displayed at a large size, small details will be visible. Most adjustments should
therefore be made using Sharpening, which eectively softens or sharpens ne elements.
• When pictures are printed or displayed at a small size, small details are not visible. Most adjustments
should therefore be made using Clarity, which has its greatest eect at the borders between the main
subject and the background.
4
Page 5

Adjusting Sharpening Settings for A3 Output
Sharpening and Softening Images, Continued
Quick Sharp: −2
Sharpening −0.5
Mid-range sharpening −1
Clarity −1
Adjusted Settings
Sharpening 2
Mid-range sharpening 1
Clarity −1
Sharpening and Midrange sharpening
have been increased so
that the eyes are clearly
dened, while Clarity
has been left at −1 to
keep the complexion
smooth.
Choosing positive values for Sharpening and Mid-range
sharpening ensures that the eyes remain sharp.
Clarity is left at a negative value for a smoother complexion.
5
Page 6

Sharpening and Softening Images, Continued
Adjusting Sharpening Settings for A1 Output
Quick Sharp: −2
Sharpening −0.5
Mid-range sharpening −1
Clarity −1
Adjusted Settings
Sharpening 3
Mid-range sharpening −1
Clarity −1
Sharpening has been
raised to 3 so that
the eyes are clearly
dened, while Mid-
range sharpening
and Clarity have been
set to −1 to keep the
complexion smooth.
Sharpening has been set to a high positive value to ensure
that the eyes are clearly dened.
6
Mid-range sharpening and Clarity are left at negative
values for a smoother complexion.
Page 7

Sharpening and Softening Images, Continued
“Sharpening”, “Mid-Range Sharpening”, and “Clarity”
Sharpening, Mid-range sharpening, and
Clarity each apply to dierent areas of
the image. In the picture shown here, for
example, Sharpening can be employed
in ne-tuning the appearance of eyelashes and other ne details, while Clarity is
best used to make the subject stand out
from the background. Mid-range sharp-
ening is eective in adjusting the level of
detail visible in the middle range, such as
around the nose and mouth.
The settings best used for images that will be viewed on a display vary with the zoom ratio and other
factors.
Sharpening
Mid-range sharpening
Clarity
Clarity Mid-range sharpening Sharpening
7
Page 8

Sharpening and Softening Images, Continued
When images are printed, the visibility of each adjustment varies with the output size.
Sharpening: This parameter controls the sharpness of details and outlines and can be adjusted in the
range −3 to +9. Its eects are most visible when images are output at larger sizes, equivalent to A1
(approximately 0.5m2/5.4sq. ft).
Sharpening: −3 Sharpening: +9
Mid-range sharpening: This parameter controls the sharpness of patterns and lines in the range be-
tween Sharpening and Clarity and can be set to values of from −5 to +5. Its eects are most visible when images are output at sizes equivalent to A3 (approximately 0.125m2/1.3sq. ft).
Mid-range sharpening: −5 Mid-range sharpening: +5
Clarity: This parameter controls the sharpness of the borders between the main subject and the
background and can be adjusted in the range −5 to +5. Its eects are most visible when images
are output at smaller sizes equivalent to A4 (letter size) or a 5× 7 print.
Clarity: −5 Clarity: +5
“Clarity”
Large changes to Clarity may result in apparent changes to overall contrast.
“NEF (RAW) Processing”
Sharpening and other settings for pictures shot in NEF (RAW) format can be adjusted after shooting us‑
ing Capture NX‑D or the NEF (RAW) processing option in camera’s retouch menu, whether or not they
have previously been altered on the camera.
8
Page 9

Sharpening and Softening Images, Continued
Capture NX-D
As of January 2019, the only cameras with Quick sharp and Mid-range sharpening are the Z7 and
Z6. Capture NX-D versions 1.5.1 and later, however, oer these parameters with all NEF (RAW) images, regardless of the camera used to create them. The procedure varies depending on the camera
used for the original picture:
In the case of NEF (RAW) pictures taken with a Z7 or Z6, Quick sharp and Mid-range sharpening will
be available via the Picture Control tool in the edit palette.
In the case of NEF (RAW) pictures taken with a camera other than the Z7 or Z6 *, Quick sharp and Mid-
range sharpening will only be available if you click the Picture Control icon (q) in the edit palette
and select Camera compatible> Latest Picture Control from the Picture Control menu (w).
q
w
* Digital SLR and Nikon 1 cameras.
Capture NX-D can be downloaded free-of-charge from the Nikon Download Center at the URL below:
https://downloadcenter.nikonimglib.com
Be sure to use version 1.5.1 or later. More information is available via online help.
9
Page 10

Keeping Pictures Sharp at Small Apertures
Enabling Diraction compensation in the photo shooting menu helps
reduce loss of denition caused by diraction in pictures taken at small
apertures (high f/-numbers).
Diffraction Compensation
While the eects of diraction may still be visible in landscapes and in other pictures taken with
aperture stopped all the way down, enabling Diraction compensation lets you shoot at small apertures without worrying too much about loss of denition. It is generally recommended that you
shoot with Diraction compensation enabled, although it can be purposely disabled for photos in
which the eects of diraction are visible.
f/22, Diraction compensation o f/22, Diraction compensation on
Diraction compensation is available with Z mount lenses as well as with CPU-equipped F mount
lenses connected via an FTZ mount adapter (non-CPU lenses are not supported).
Capture NX-D
The Diraction compensation option in the Capture
NX-D Camera and Lens Corrections tool can be used
to turn diraction compensation on or o when NEF
(RAW) pictures taken with Z7 or Z6 cameras are displayed.
“Diraction Compensation”
The Diraction compensation option in Capture NX‑D
is available only with NEF (RAW) pictures taken using a
Z7 or Z6.
10
 Loading...