

Page 1
En
Macintosh
3
1
4
2
Start the WT / WTA Confi gurator
Adjust settings
Save settings to the memory card
Load settings into the camera
The WT / WTA Confi gurator
The WT / WTA Confi gurator is a computer application that creates the settings fi les needed
to confi gure WT-1 and WT-2 wireless transmitters for wireless networks. These settings
fi les can be saved to the camera memory card and loaded into the camera using the Load
settings fi le? option in the camera wireless setup menu, sparing the user the necessity of
entering settings one by one in the camera menus.
En
The main steps involved in creating settings fi les and
loading them into the camera are as follows:
Start the WT / WTA Confi gurator
1
Adjust settings
2
Save settings to the memory card
3
Load settings into the camera
4
Note:
The camera menus shown in this guide are those displayed when a WT-2 wireless
transmitter is connected to a D2X digital camera. The steps described for loading settings fi les are the same for other Nikon cameras and transmitters. Consult the manuals
for the camera, wireless transmitter, and other wireless network devices for details.
1
Page 2
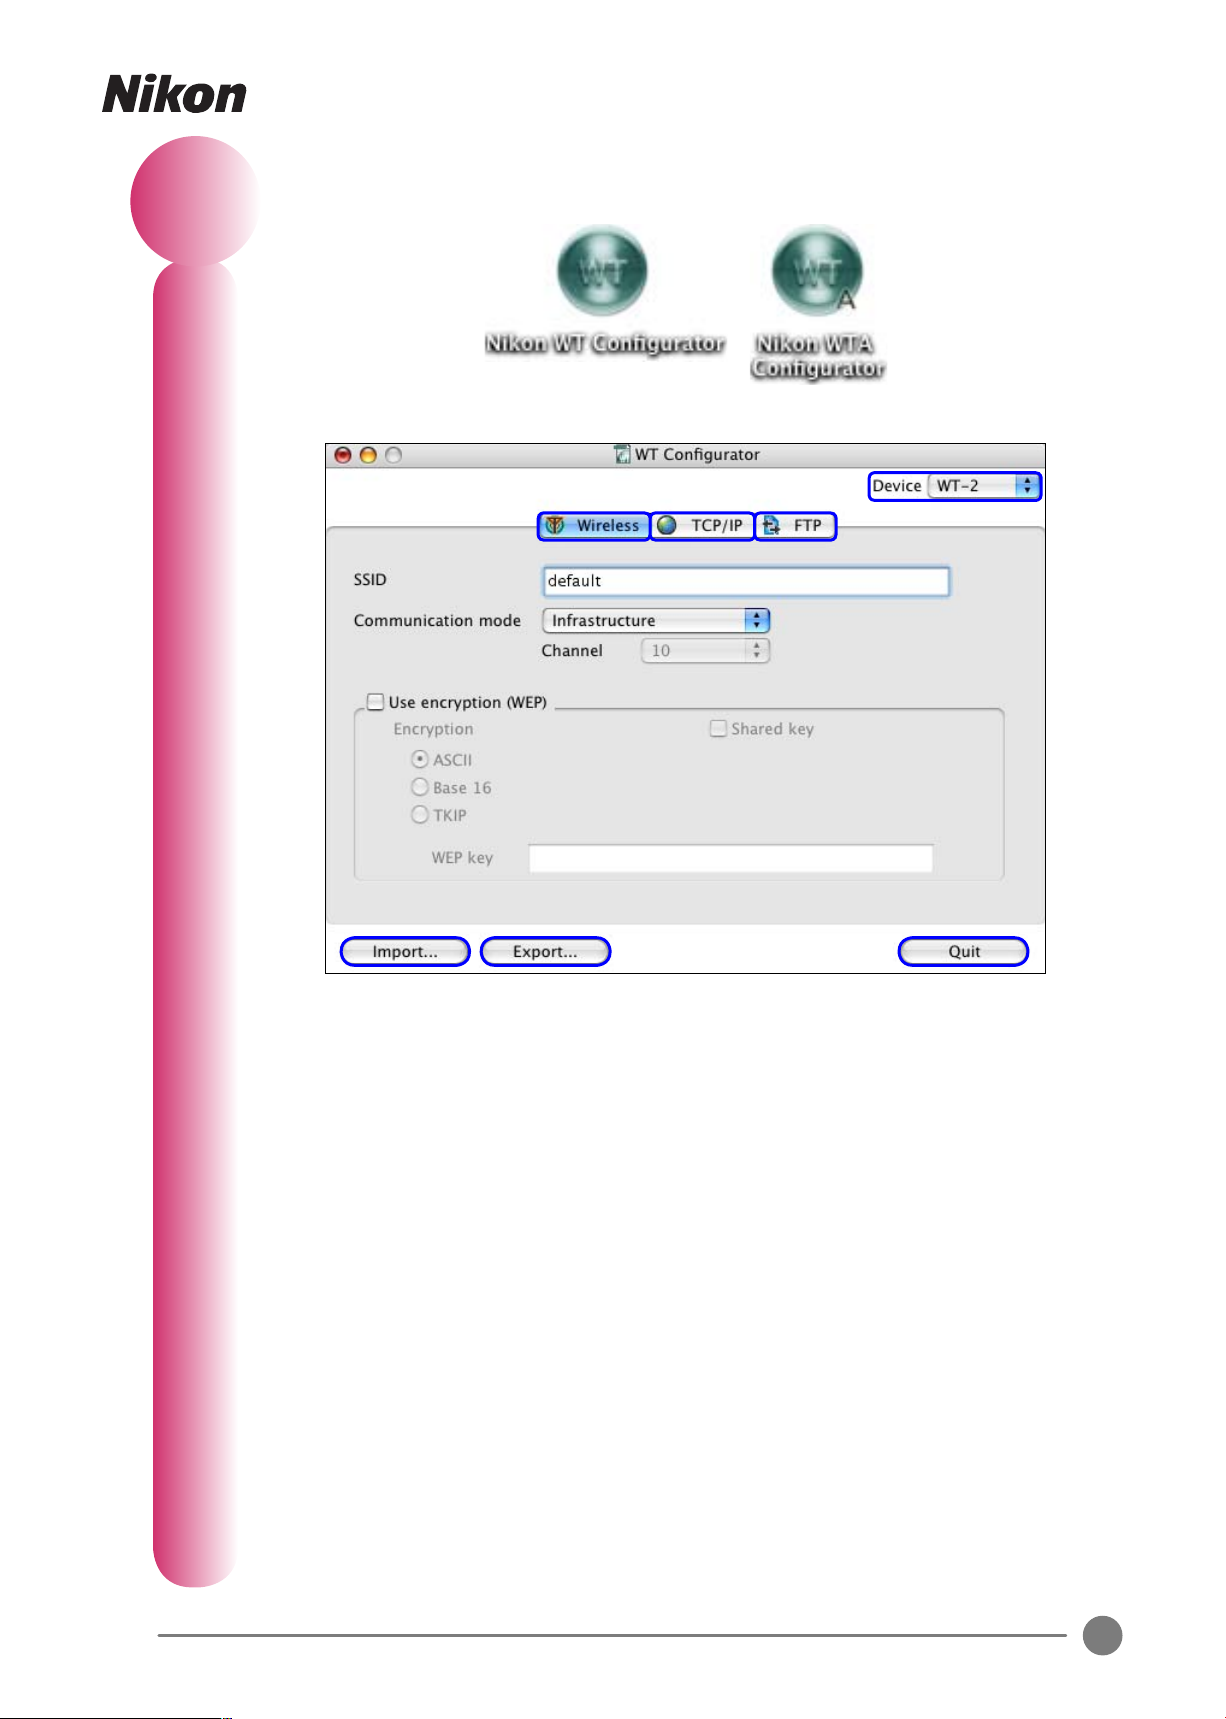
Start the WT / WTA Confi gurator
Double-click the WT / WTA Confi gurator icon.
1
The Confi gurator window will open.
햲
햳
햶
햲 Device: Edit settings for the WT-1 or WT-2.
햳 “Wireless”: View or edit wireless network settings.
햴 “TCP / IP”: View or edit TCP / IP settings.
햵 “FTP”: View or edit ftp settings.
햷햸
햴햵
햶 Import…: Load saved settings.
햷 Export…: Create a settings fi le.
햸 Quit: Quit the WT / WTA Confi gurator.
To quit the WT / WTA Confi gurator, click the Quit button.
2
Page 3
2
Adjust Settings
Note:
When entering text in the Confi gurator window, use only the characters shown
in the keyboard area of the illustration for “Text Entry in the Network Settings Menu”
on page 14 of the WT-1 User’s Manual or page 26 of the WT-2 User’s Manual.
The “Wireless” Tab: Wireless Settings
SSID: Enter the BSS- or ESS-ID for the wireless LAN adapter or access point.
Communication mode: Choose from Infrastructure and Ad-hoc.
• Infrastructure: Choose when connecting to the wireless network via an access
point. The channel is set automatically and can not be selected from the Channel
menu.
• Ad-hoc: Choose for direct peer-to-peer connection to a host. When using an ad-hoc
connection, select a Channel that matches that used by the wireless LAN adapter.
Use encryption (WEP)
of encryption (ASCII, Base 16, or TKIP), then enter the encryption key in the WEP key
text box. ASCII and TKIP keys use standard letters and numbers, while base-16 (hexadecimal) keys use only the numbers 0–9 and the letters “A–F”. The length of ASCII and
base-16 keys depends on the type of encryption used: 5 ASCII or 13 hexadecimal characters are required for 40- and 64-bit encryption, 10 ASCII or 26 hexadecimal characters
for 128-bit encryption. TKIP keys are available only with the WT-2 and may be 8 to 64
characters long. If Shared key is selected, the WT-1 will enable shared-key verifi cation
to confi rm that the other devices in the network share the same key (the WT-2 automatically selects the type of verifi cation appropriate to the network).
: To enable encryption, check this option and select the type
3
Page 4
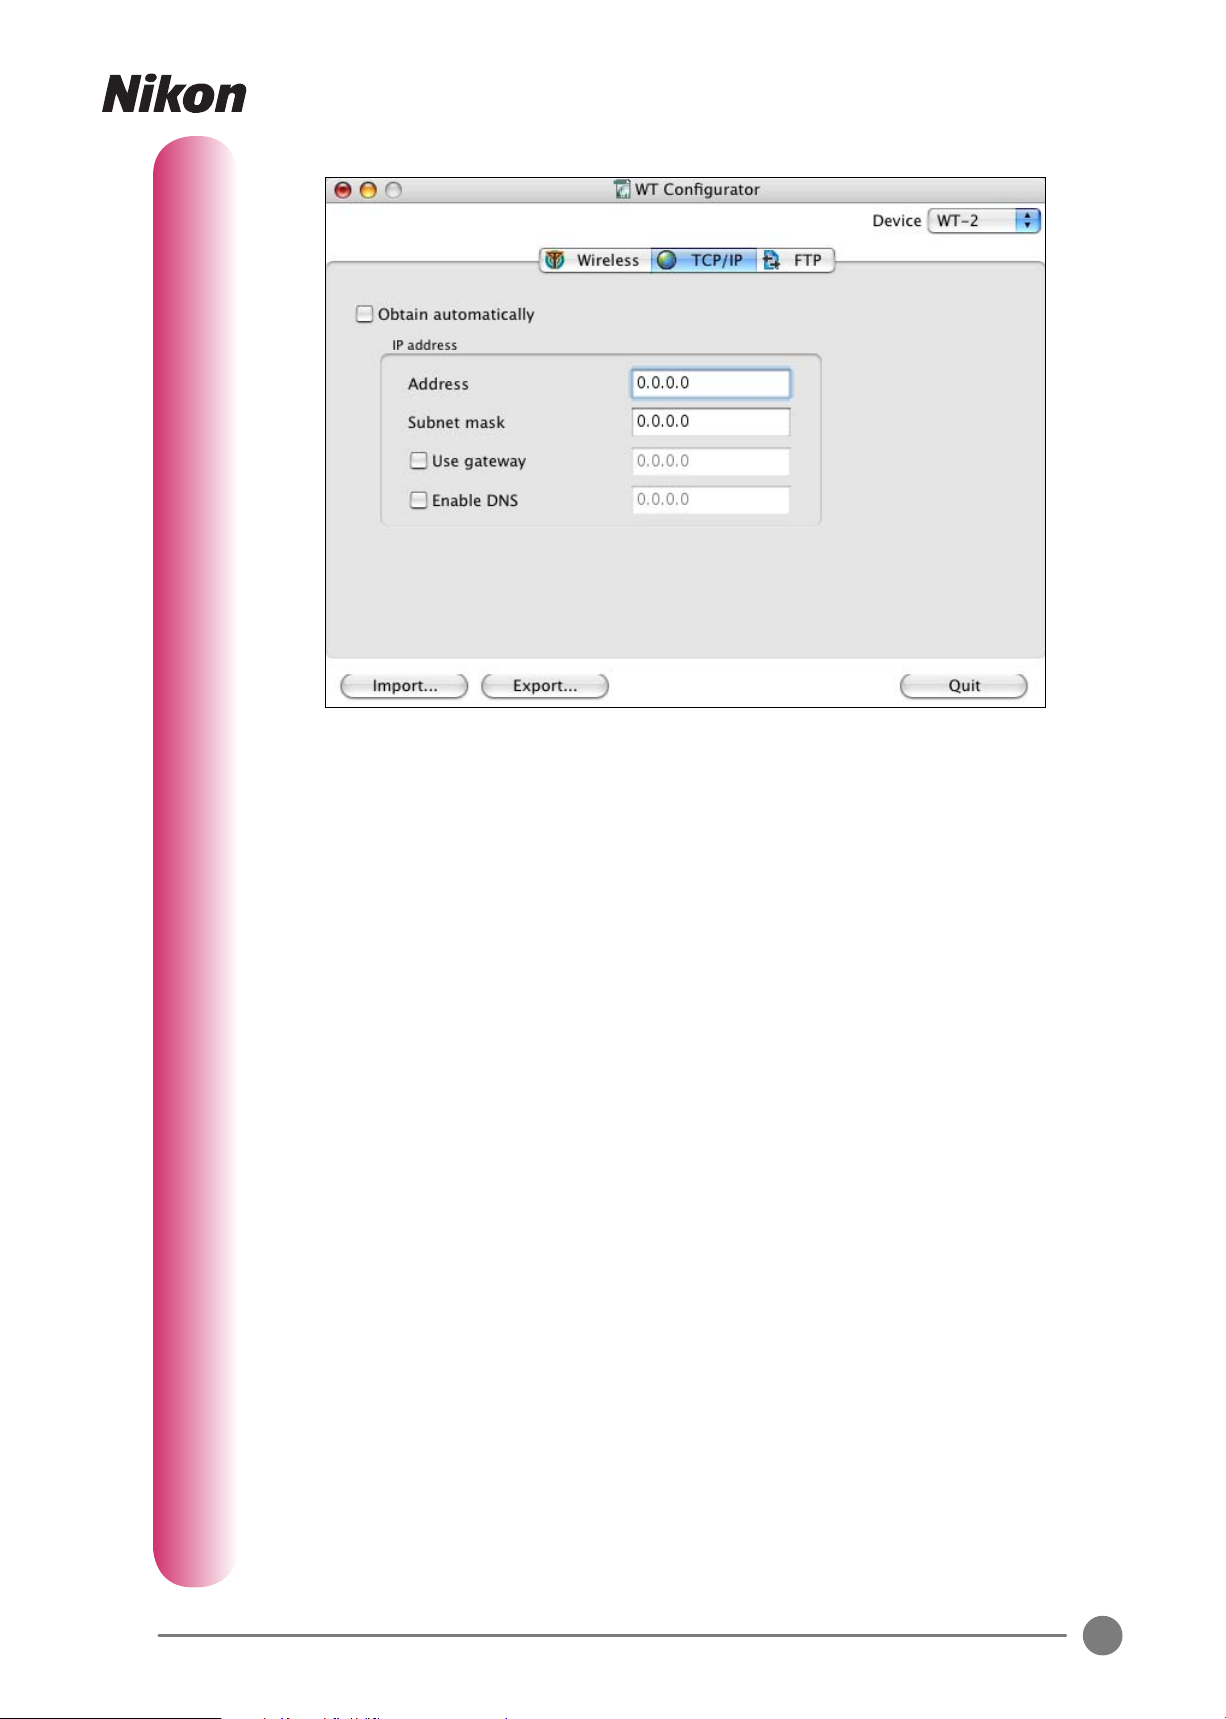
The “ TCP / IP” Tab: TCP / IP S ettings
Obtain automatically: Check this option if the network is confi gured to supply an IP
address automatically from a DHCP server or by Auto IP.
IP address: If the network is not confi gured to supply an IP address automatically,
leave the Obtain automatically option unchecked and enter the Address and Sub-
net mask provided by the network administrator. If the network requires a gateway or
DNS address, check Use gateway or Use DNS and enter the address provided by the
network administrator.
4
Page 5
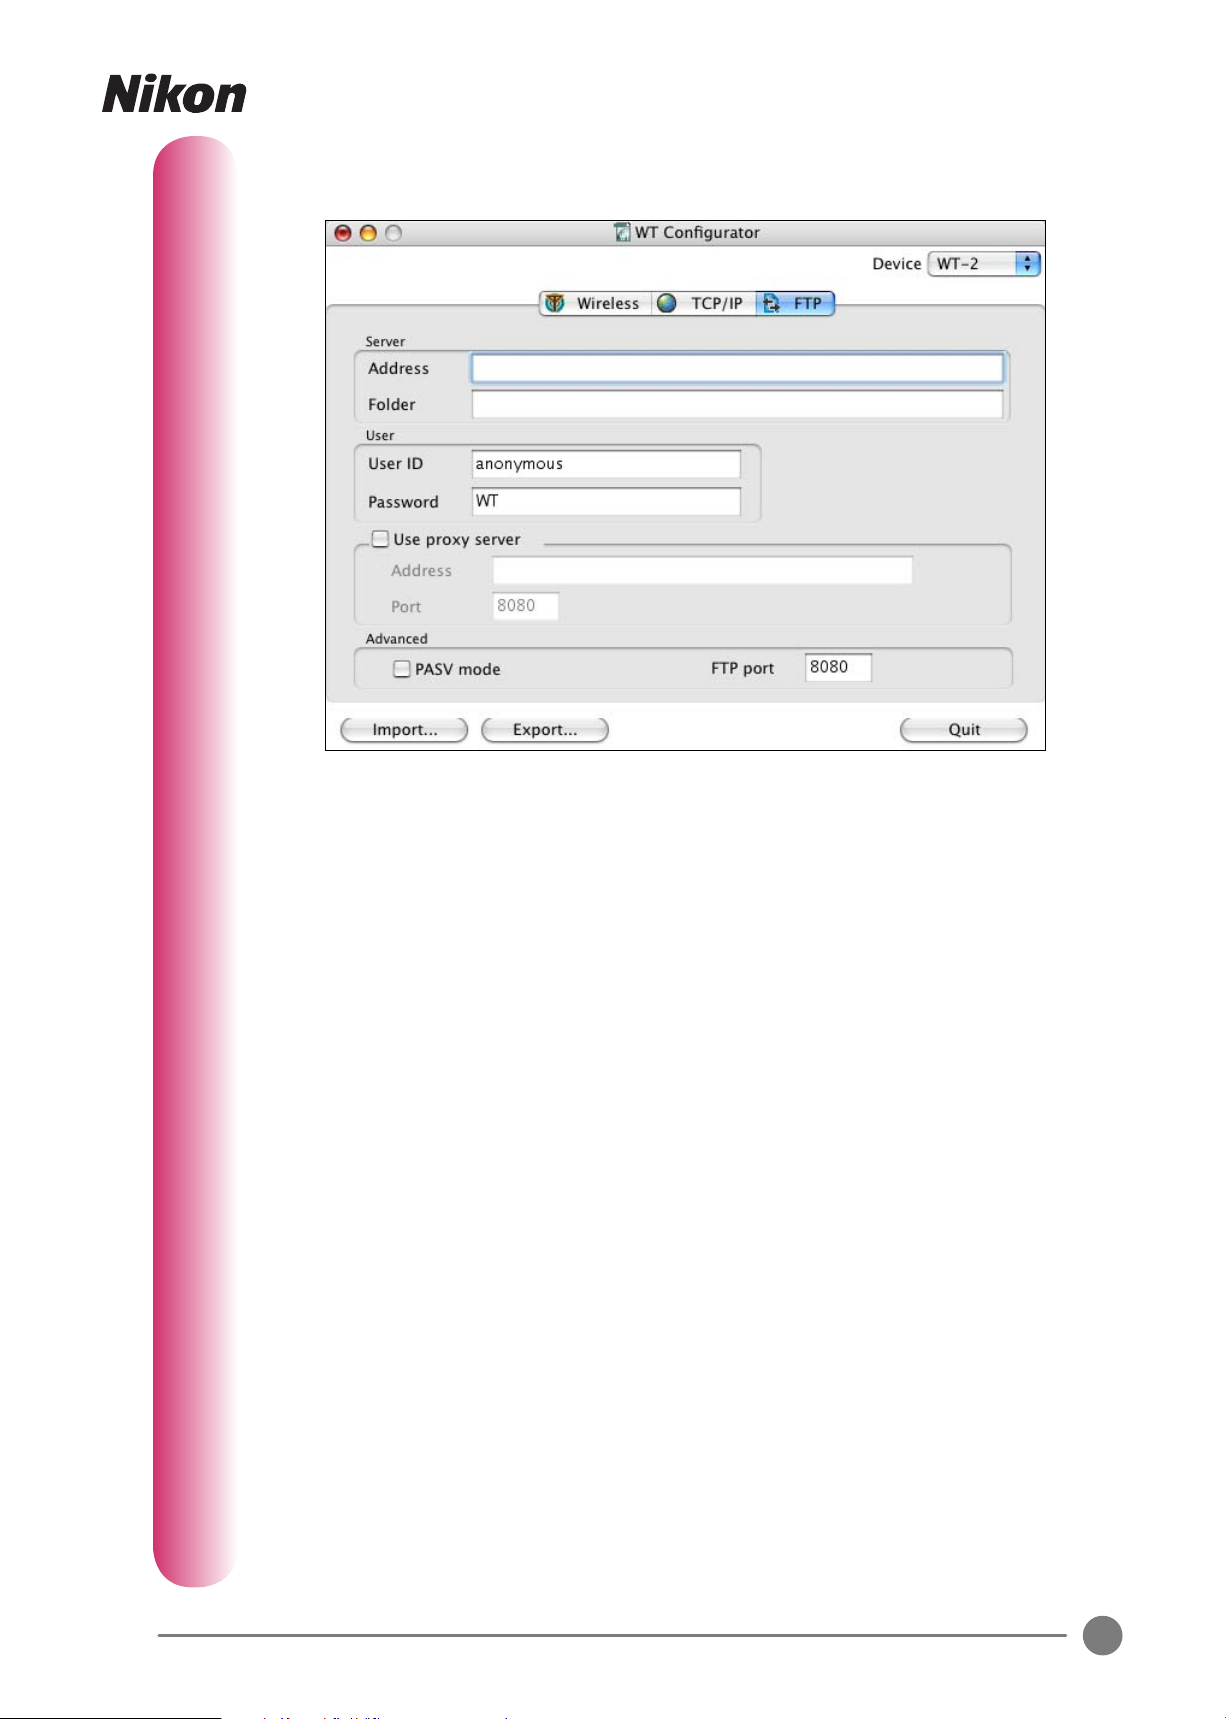
The “FTP” Tab: FTP Settings
These settings can be ignored when connecting in PTP/IP mode.
Server: Enter the address of the ftp server in the Address fi eld and the destination
folder in the Folder fi e l d .
User: Enter a user name and password for login to the ftp server in the User ID and
Password fi elds.
Use proxy server: If a proxy server is required for ftp, check Use proxy server and
enter a proxy server address and port number in the Address and Port fi elds.
Advanced: To instruct the ftp server to use PASV mode, check PASV mode (be sure
that the server supports PASV mode before checking this option). Enter the port number supplied by the server administrator in the FTP port fi eld.
5
Page 6
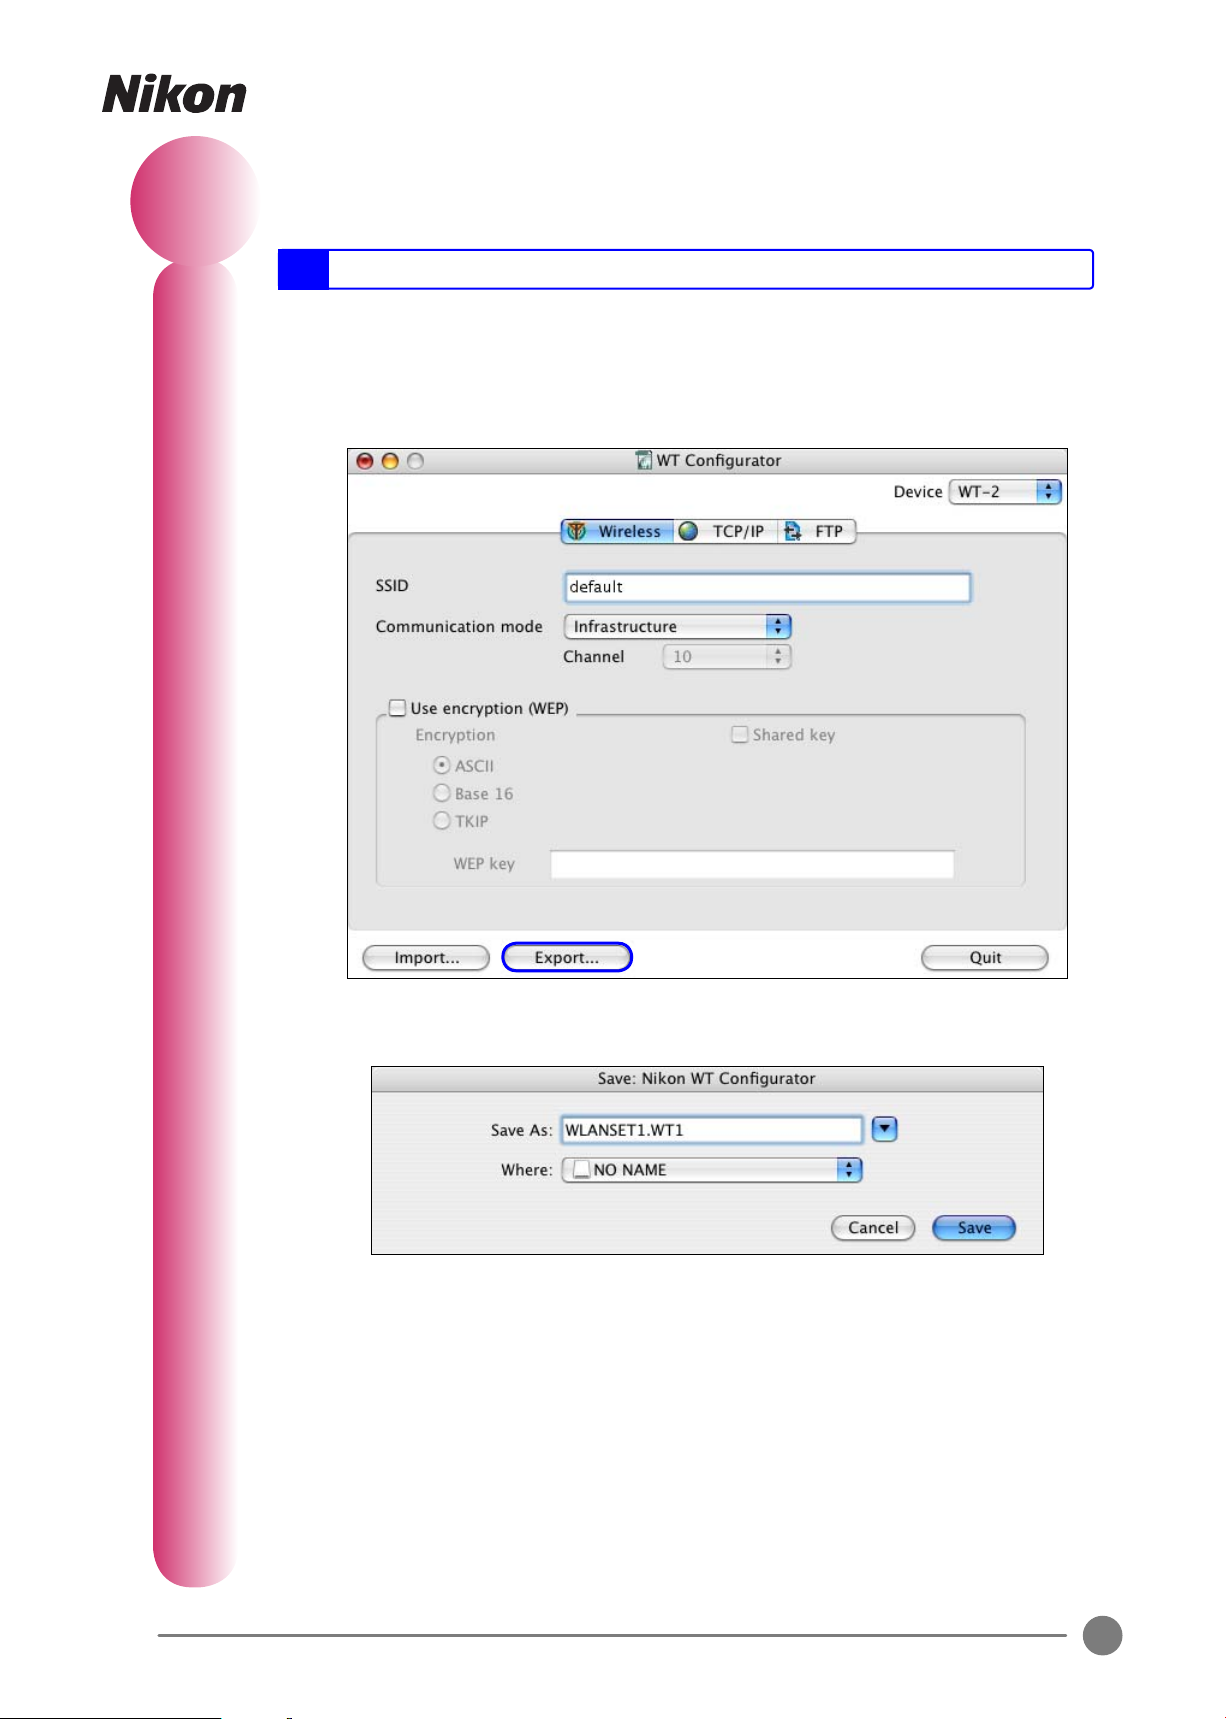
3
Save Settings to the Memory Card
Follow the steps below to save the settings in the Confi gurator window to the camera
memory card.
Note:
Use a memory card that was last formatted in the camera.
Insert the camera memory card in a CompactFlash card reader, or insert the mem-
1
ory card into a CompactFlash card adapter and insert the adapter into a PC card
slot.
Click Export….
2
The following dialog will be displayed. Select the volume corresponding to the
3
camera memory card from the Where menu.
(Settings can also be saved to another location on the computer for editing at a
later date. Navigate to the desired volume and folder before proceeding to the
following step.)
Enter a fi le name and click Save. The default fi le name is “WLANSET1”; the ex-
4
tension (“.WT1”) can not be changed. When creating settings fi les for use by the
camera, be sure to save the fi les to the root directory of the memory card. The root
directory should contain no more than one settings fi le at a time.
6
Page 7
4
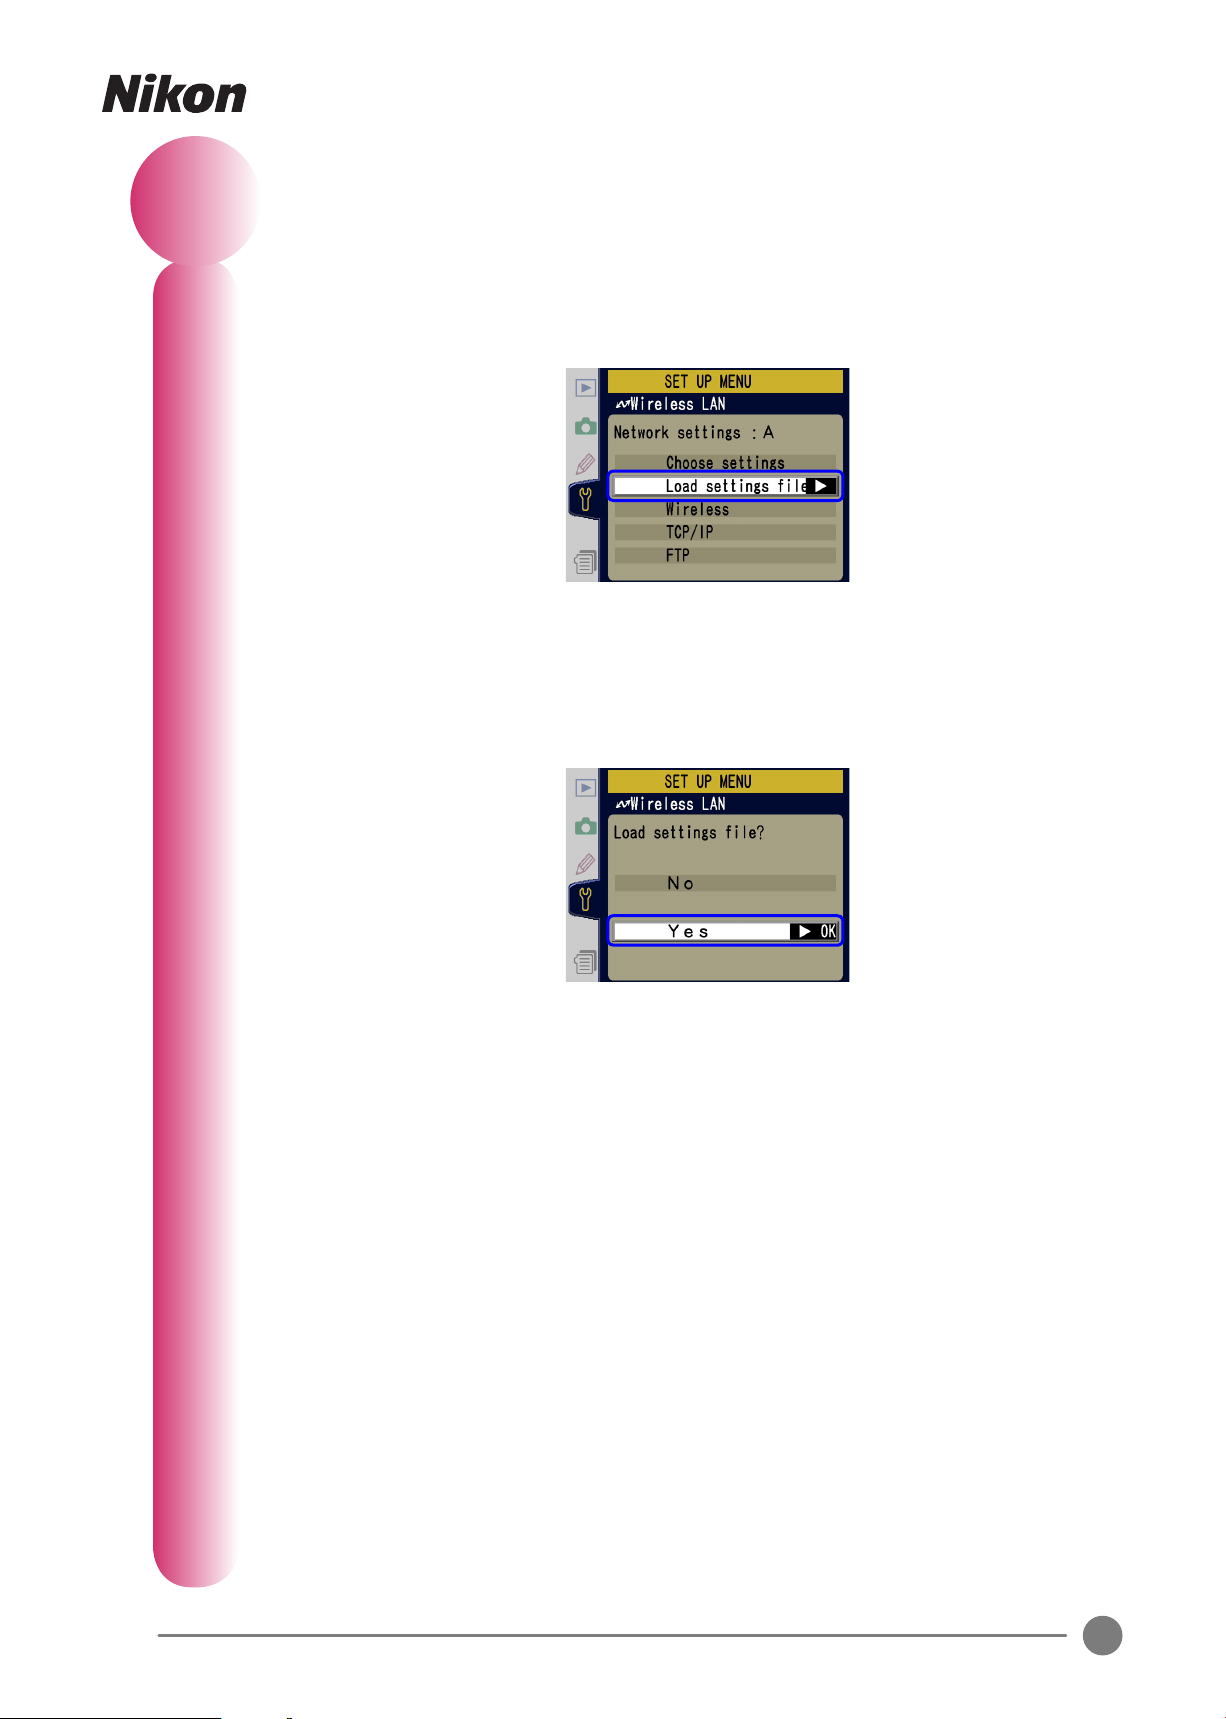
Load Settings into the Camera
After turning the camera off , insert the memory card containing the settings fi le
1
and connect the wireless transmitter.
Turn the camera on and select Wireless LAN > Network settings > Load settings
2
fi le? (WT-1) or Wireless LAN > Settings > Network settings > Load settings fi le?
(WT-2) in the camera setup menu.
If the memory card contains no settings fi le or the settings fi le is not in the root
directory, the camera will not detect the settings fi le and the Load settings fi le?
option will not be available. Check that the settings fi le is in the root directory of
the memory card.
The dialog shown below will be displayed. Select Yes to load settings.
3
Confi rm that the settings are correct using the Wireless, TCP / IP, and FTP options
in the Network settings menu.
7
 Loading...