

Page 1

COOLPIX 900 Companion Software
Contents
Overview
Before You Begin
System Requirements
Installation
Getting Started
First Steps
Notes on Using the Camera as a Drive
Working with Images
Nikon View 900
for Macintosh
Reference Manual
Viewing the Items in the Camera’s Memory
Copying Images to Disk
Opening Images in Another Application
Nikon View Browser
Browsing Images
Browsing Compact Flash-Memory Cards
Browsing Images on Disk
Viewing Images with the Built-in Viewer
Deleting Images
Printing Images
Changing the Appearance of Thumbnails
Copying Images to Disk
Opening Images in Another Application
- 1 -- 1 -
Page 2
Nikon View 900 Reference
The CoolPix 900 Control Panel
The CoolPix 900 Folder
The Browser Window
Image Windows
Trademark Information
Apple, the Apple logo, Macintosh, and Quick Time are registered trademarks of Apple Computer, Inc. Finder, Macintosh PC Exchange, Power
Macintosh and PowerBook are trademarks of Apple Computer, Inc.
Adobe and PhotoDeluxe are registered trademarks, and Photoshop a
trademark, of Adobe Systems Inc.
ActiveWire™©1994-1998 by PicoStar, LLC, Palo Alto, CA, All Rights
Reserved.
CompactFlash is a trademark of SanDisk Corporation.
Internet is a trademark of Digital Equipment Corporation.
Internet Explorer is a product of Microsoft Corporation.
Cautions
• The reproduction of this manual in whole or in part is prohibited save where Nikon’s prior permission has been obtained.
• The information contained in this manual is subject to change
without notice.
• Nikon has made every effort to produce a perfect manual,
but should you find any mistakes, we would be grateful if you
would kindly let us know. The address of the Nikon representative in your area is provided separately.
• Nikon is not liable for damages resulting from the use of this
product.
Warning!
The CD-ROMs on which the software and manuals are distributed should not be played back on audio CD equipment.
Playing CD-ROMs on an audio CD player could cause hearing
loss or damage the equipment.
Netscape and Netscape Navigator are registered trademarks of Netscape
Communications Corporation.
PowerPC is a trademark of International Business Machines Corporation,
used under license.
Slides & Sound Plus is a trademark of InMedia Presentations, Inc.
All other brand or product names mentioned in this manual are the
trademarks or registered trademarks of their respective holders.
- 2 -
Page 3

Notice concerning prohibition of copying or
reproduction
Note that simply being in possession of material which has been
copied or reproduced by means of a digital camera may be
punishable by law.
Items prohibited by law from being copied or
reproduced
Do not copy or reproduce paper money, coins, securities,
government bonds, or local government bonds, even if such
copies or reproductions are stamped “Sample.”
Cautions on certain copies and reproductions
The government has issued cautions on copies or reproductions
of securities issued by private companies (shares, bills, checks,
gift certificates, etc.), commuter passes, or coupon tickets,
except when a minimum of necessary copies are to be provided for business use by a company. Also, do not copy or
reproduce passports issued by the government, licenses issued
by public agencies and private groups, ID cards, and tickets, such
as passes and meal coupons.
Comply with copyright notices
The copying or reproduction of paper money, coins, or securities which are circulated in a foreign country is prohibited.
The copying or reproduction of unused postage stamps or post
cards issued by the government without obtaining approval
from the government is prohibited.
The copying or reproduction of stamps issued by the government and certified documents stipulated by law is prohibited.
The copying or reproduction of works such as books, music,
paintings, woodcut prints, maps, drawings, movies, and photographs which are copyrighted creative works is prohibited
except when it is done for personal use at home or for similar
restricted and non-commercial use.
- 3 -
Page 4

Overview
Welcome to Nikon View 900 for Macintosh, a companion
program for the COOLPIX 900. Nikon View 900 allows you to
connect your camera to a Macintosh for quick retrieval and
browsing of the images stored in your camera. Once Nikon
View is installed on your Macintosh, the camera can be used like
any other drive, allowing free access to images in the camera via
standard Mac OS file operations. A Nikon View Browser is also
provided, making it possible to display the contents of the
camera’s memory as thumbnail images. Once you have installed Nikon View 900 and mastered its simple operation, you’ll
be able to distribute your digital photographs by disk or electronic mail, or include them in your home page and other
documents you create for business or personal use.
Nikon View 900’s features include those listed below.
• a driver function that supports connection to your camera
and allows you to operate your camera’s memory like any
other drive
• images can be opened in any application that supports JPEG
for retouching or to be saved in another format, allowing
you to use images as desktop pictures or distribute them by
electronic mail
• if you have a compact flash-memory reader or a PCMCIA
card slot and card adapter, the COOLPIX 900’s compact
flash-memory cards can be browsed even when not inserted
in the camera
• thumbnails viewed in the Nikon View Browser can be copied
to disk or opened in other applications using drag and drop
• images in the camera’s memory can be handled using standard Mac OS file operations
Overview
- 4 -
Page 5

This manual will guide you, step-by-step, through the process of
setting up and using Nikon View 900 with your COOLPIX 900.
The contents of each chapter are outlined below.
Overview
Describes Nikon View 900’s features and outlines the contents of this manual
Before You Begin
Explains how to install Nikon View 900 on your Macintosh
Getting Started
A tutorial introduction to Nikon View 900
Working with Images
Explains how to access images stored in the camera’s memory,
open them in other applications for editing, and copy them
to disk
Nikon View Browser
Describes how to display images as thumbnails, view images,
and copy them to disk using Nikon View Browser
Note: The illustrations and explanations in this manual are for
Mac OS 8.0. Display and operation may differ slightly in other
versions of Mac OS. Refer to the System Software manual for the
version you are using.
Nikon View 900 Reference
A handy reference guide to Nikon View 900’s main windows
Overview
- 5 -
Page 6

Before You Begin
System Requirements
This chapter gives the system requirements for Nikon View 900
for Macintosh and guides you through the process of installing
Nikon View 900 to your computer’s hard disk.
Note: This manual assumes a basic understanding of common
Mac OS operations. If you are in doubt about the meaning of
terms used here, refer to your Mac OS manual.
To run Nikon View 900 for Macintosh, you will need system
hardware and software which meet the following minimum
requirements:
• a Macintosh or Power Macintosh with a Power PC601 or
later, or a 68040 or later CPU
• System Software 7.5.1 or later
• at least 8 MB of free RAM
(12 MB or more is recommended)
• 5 MBs of free space on your hard-disk for installation, with an
additional 20 MBs of free space when Nikon View 900 is
running
• a monitor with a resolution of 640 × 480 pixels or higher,
capable of displaying 256 colors, 32000 colors or 16.7 million
colors
• a CD-ROM drive for installation
• a modem or printer port for connection to the COOLPIX
900
Before You Begin: System Requirements
- 6 -
Page 7
Installation
The installation disk provided with this product contains the Nikon
View 900 browser software and drivers which handle the exchange
of information between your Macintosh and the COOLPIX
900. Before starting the installation program, check to be sure
that you have enough space on your hard disk to complete
installation (a minimum of 25 MBs of free disk space is required), and that no other applications are running.
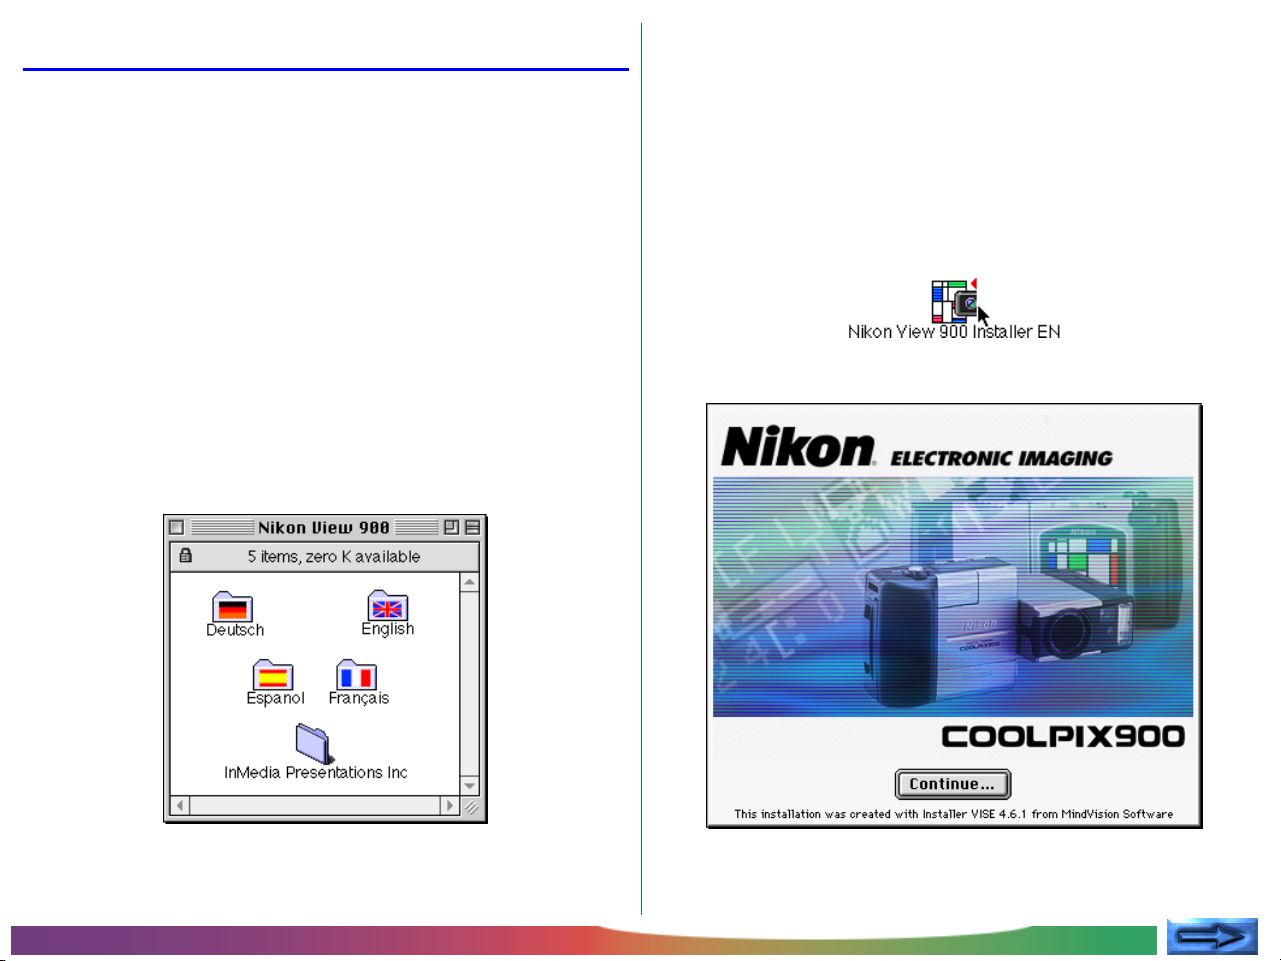
Step 1 — Launch the Nikon View 900 installer
When the Nikon View 900 CD-ROM is inserted in the CDROM drive, a window containing folders for each of the languages in which Nikon View 900 is available will appear on the
desktop.
Note: The “InMedia Presentations Inc” folder
for Slides & Sound Plus, QuickTime,
Information on these products may be found in the README file.
Open the folder containing the installer for the language of your
choice and double-click the Nikon View 900 Installer icon.
Note that the illustrations in this manual are for the English version
of Nikon View 900.
The following dialog box will appear on the desktop.
and other applications.
contains installers
Note: The CD packaged with cameras sold in the U.S.A. does
not include the French and German versions of Nikon View 900.
Before You Begin: Installation
- 7 -
Page 8
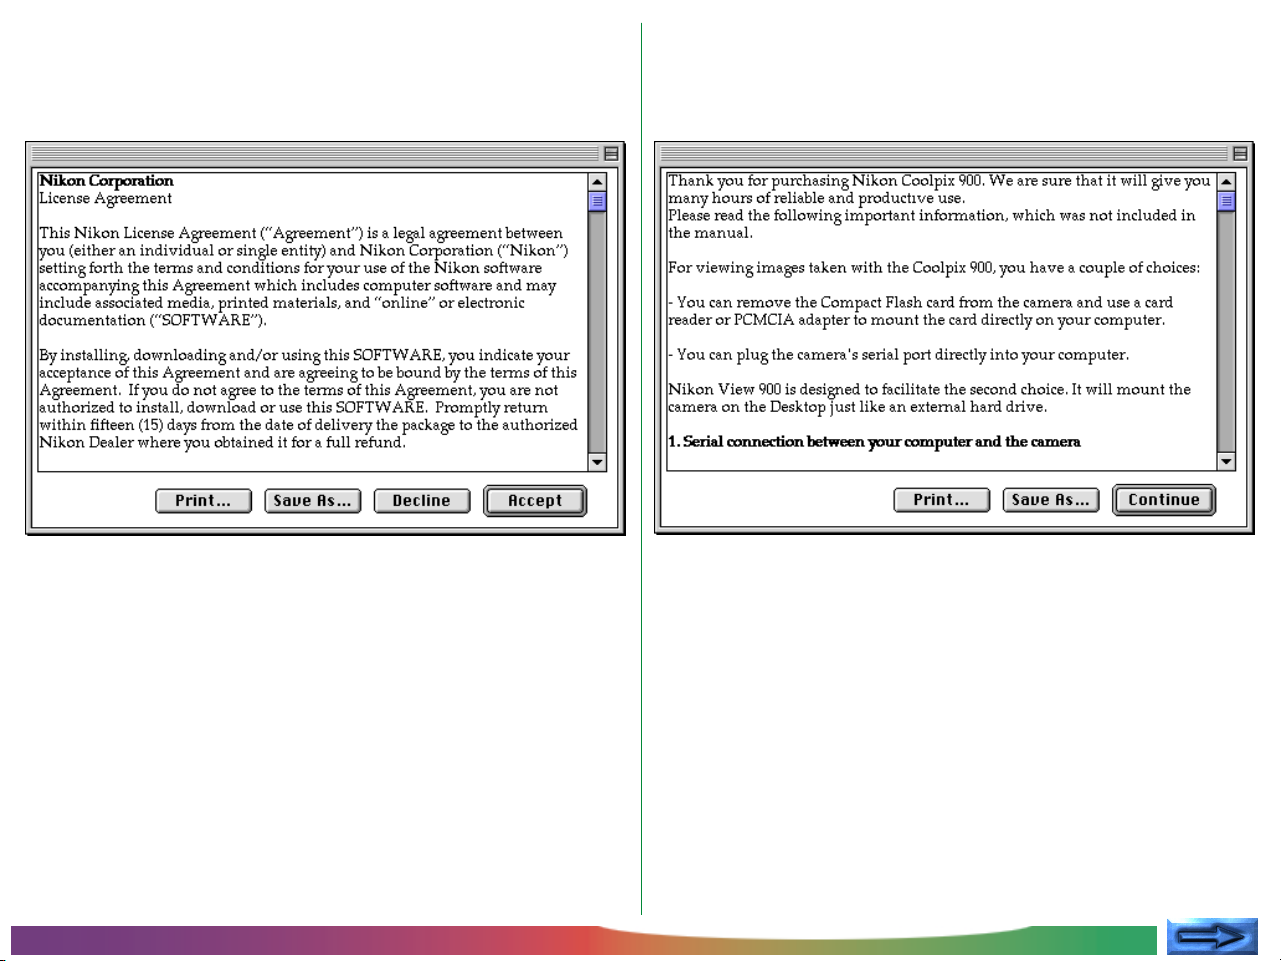
Step 2 — Accept the license agreement
Step 3 — View the README file
Clicking Continue… displays the following license agreement
dialog.
If, after reading the agreement carefully, you accept its contents,
click Accept to continue installation. Clicking Decline will
terminate installation. Installation can be begun again at any
time by repeating the installation process from Step 1.
The license agreement can be saved as a text file in the location
of your choice by clicking the Save As… button. A copy will
also be saved automatically in the same folder as Nikon View
900 when installation is complete. Click Print… to print the
license agreement.
Clicking Accept in the license agreement dialog displays the
Nikon View 900 README file.
It is recommended that you take a few moments to print or
view the contents of this file, as it may contain important information that could not be included in this manual. When you
have finished, click the Continue button to bring up the Nikon
View 900 Installer dialog box shown in Step 4.
When installation is complete, a copy of the README file will
be saved in the folder to which you have installed Nikon View
900.
Before You Begin: Installation
- 8 -
Page 9
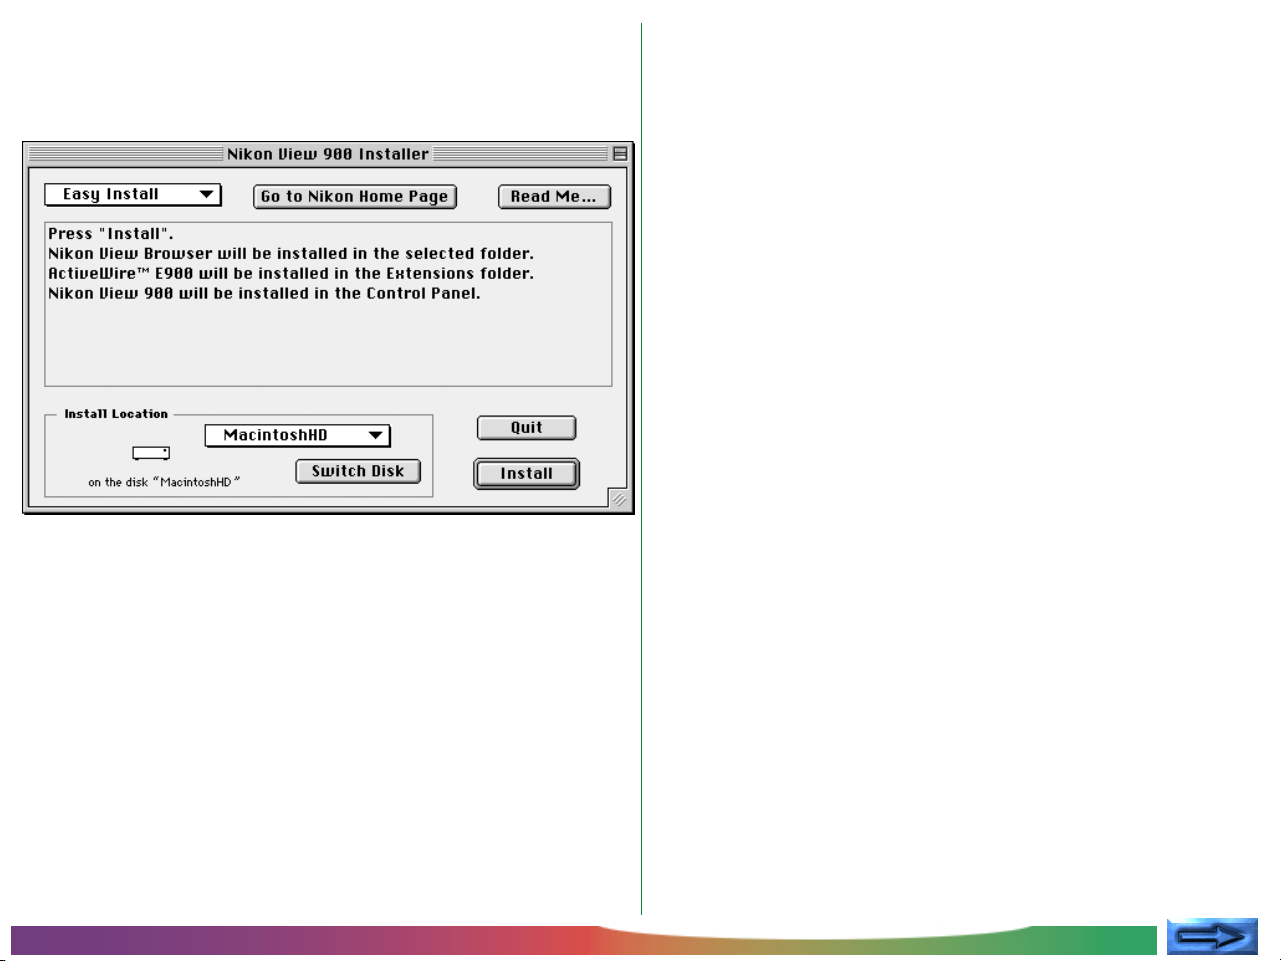
Step 4 — Choose an installation type
The pop-up menu at the top left corner of the installer dialog
offers a choice of “Easy Install” and “Remove” options.
Choose “Easy Install” to install Nikon View 900, Nikon View
Browser, and ActiveWire™ E900. Choosing “Remove” allows
you to delete existing copies of Nikon View 900 or any of its
components.
The Go to Nikon Home Page and Read Me… buttons are
explained below.
Go to Nikon Home Page
If you have a connection to the Internet, clicking this button
will start your Web browser and take you to the user support page for your region. One of Netscape Navigator 3.0 or
later or Internet Explorer 3.0 or later is required.
Read Me…
Returns you to the README dialog shown in the previous
step.
Before You Begin: Installation
- 9 -
Page 10
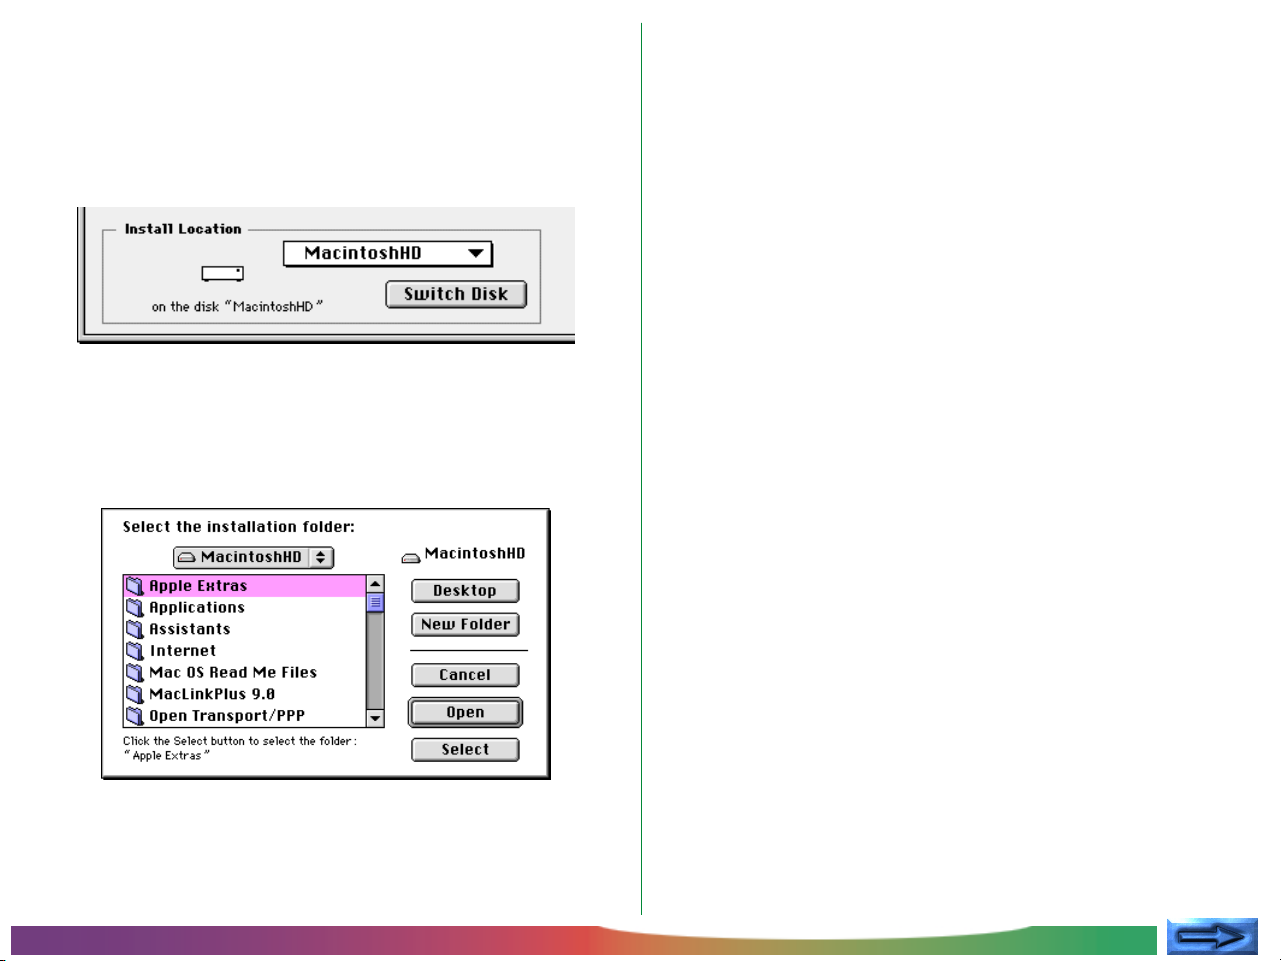
Step 5 — Select a install location of Nikon View Browser
Use the Switch Disk button in the Nikon View 900 Installer
dialog box to choose the disk to which you will install Nikon
View Browser. A different disk will be displayed each time the
button is clicked.
The destination disk can also be selected from the pop-up menu
above the Switch Disk button. Choosing Select Folder…
from this menu displays a dialog that allows you to navigate to
the folder to which you wish to install Nikon View Browser.
Click the destination folder once to select it and then click
Select to choose it as the destination folder. Clicking Cancel
returns you to the installer dialog without changing the destination disk and folder. Nikon View Browser will be installed in a
“Nikon Software|Nikon View 900” folder within the selected disk
and folder.
Before You Begin: Installation
- 10 -
Page 11
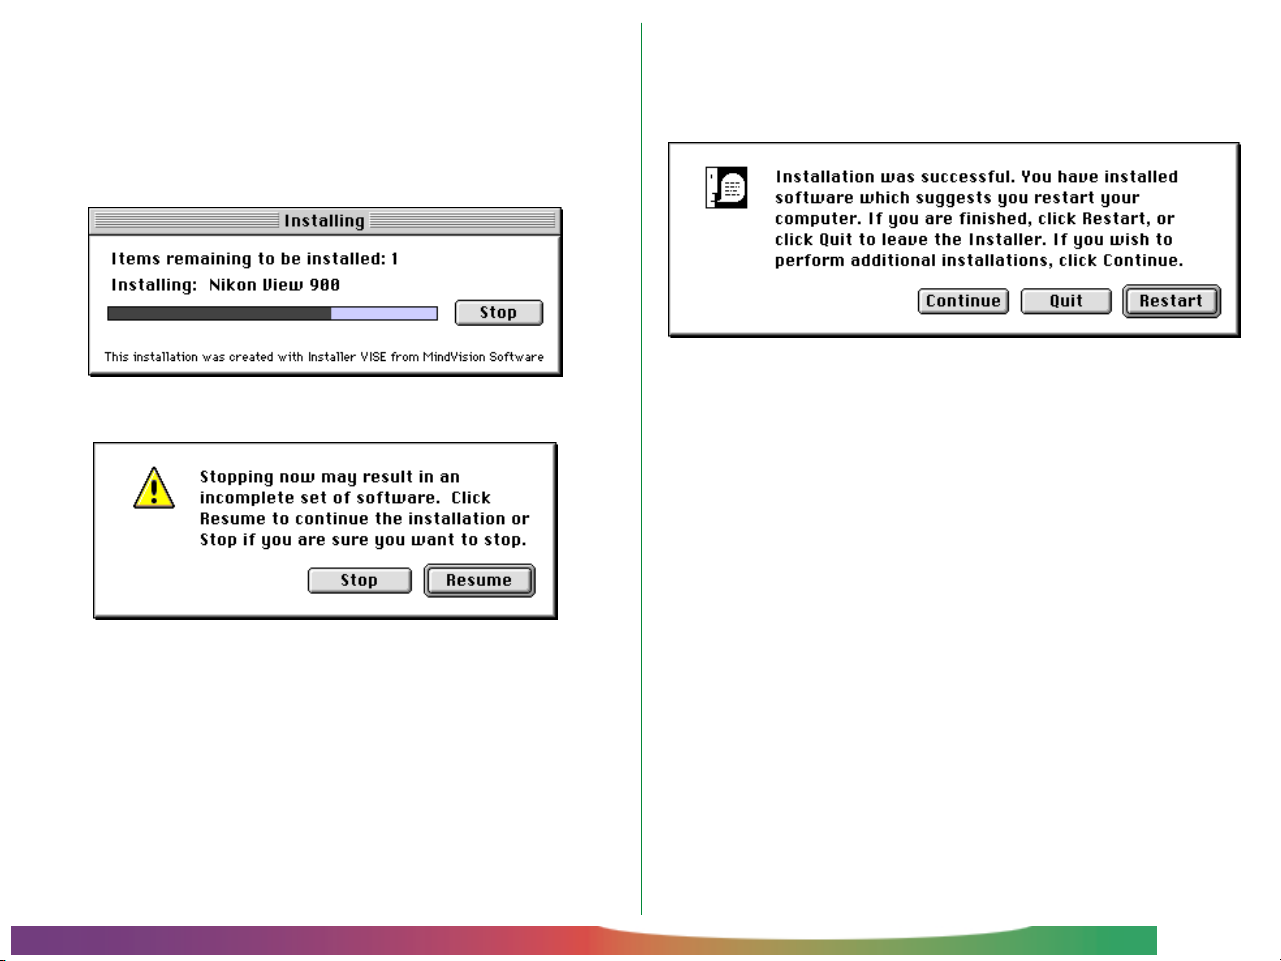
Step 6 — Install Nikon View 900
Step 7 — Complete installation
Click Install in the Nikon View 900 Installer dialog to begin
installation. While the program’s components are being installed to your hard disk, the following progress indicator will be
displayed.
Clicking Stop will display the message shown below.
Click Resume to continue the installation from the point it was
interrupted. Clicking Stop will halt the installation without
installing Nikon View 900. Should you choose to abandon the
installation, you can still install Nikon View 900 at a later date by
repeating the installation process from Step 1.
When installation is complete, the following dialog box will be
displayed.
The buttons in this dialog box are explained below.
Continue
Returns you to the Nikon View 900 Installer dialog box
shown in Step 4.
Quit
Ends installation and returns you to the Finder. You will
need to restart your computer before you will be able to
use Nikon View 900.
Restart
Ends installation and restarts your computer.
Note: ActiveWire™ E900 will be installed in the Extensions
folder. When installing the software for the first time or re-installing ActiveWire™ E900, it will be necessary to restart your
computer.
Before You Begin: Installation
- 11 -
Page 12

Getting Started
Once you have installed the Nikon View 900 software as described in “Before You Begin,” you are ready to use your computer to view the contents of your COOLPIX 900’s memory or
to copy images to your computer for editing and storage. This
chapter provides a brief introduction to Nikon View 900’s
functions, and outlines the steps you will take when using the
program with your COOLPIX 900.
First Steps
This section guides you step-by-step through the basics of using
Nikon View 900 to access the images stored in your camera’s
memory, copy them to disk, and open them in other applications. It also introduces you to using Nikon View Browser to
view images in your camera as thumbnail previews and fullresolution images, and copy them to disk. More detailed information can be found in the following chapters, “Working with
Images”and “Nikon View Browser .” An overview of the
program’s windows and menus may be found in “Nikon View
900 Reference.”
Step 1 — Connect the COOLPIX 900 to Your Computer
Connect the camera to your Macintosh as described in the
COOLPIX 900 User’s Guide.
✔Caution: When running the camera on battery power,
check the battery level before connecting the camera. If the
battery level is low or critical, replace the batteries or use the AC
adapter (sold separately). If battery level falls to low or critical
while the camera is connected, disconnect the camera and replace
the batteries or connect the AC adapter. Operating the camera at
low battery levels could result in communication problems.
Getting Started: First Steps
- 12 -
Page 13
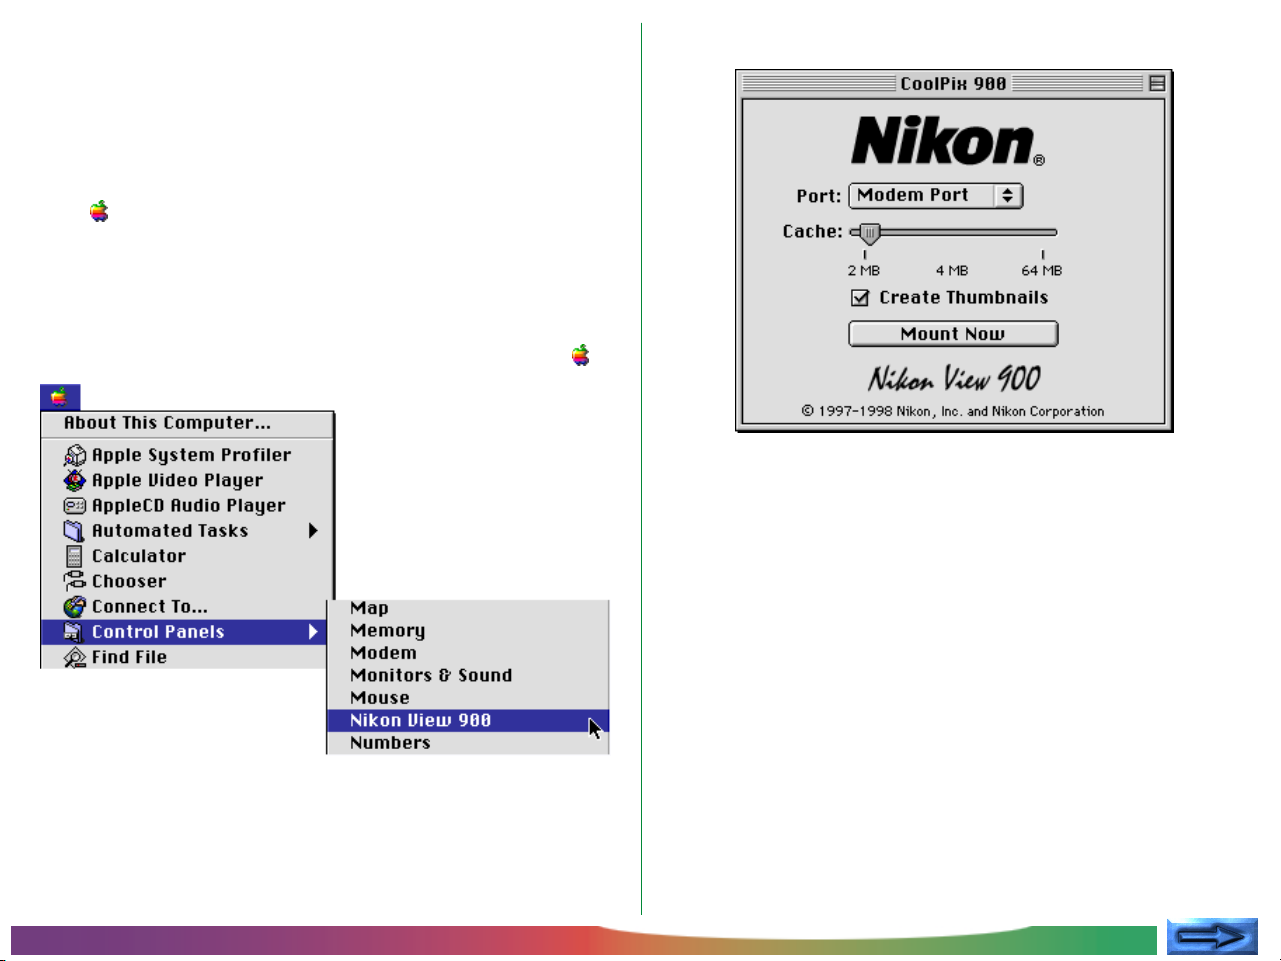
Step 2 — Choose the camera as a drive
The first time you connect to the camera from your Macintosh,
choose a port and cache memory size from the CoolPix 900
control panel. The next time you connect to the camera, you
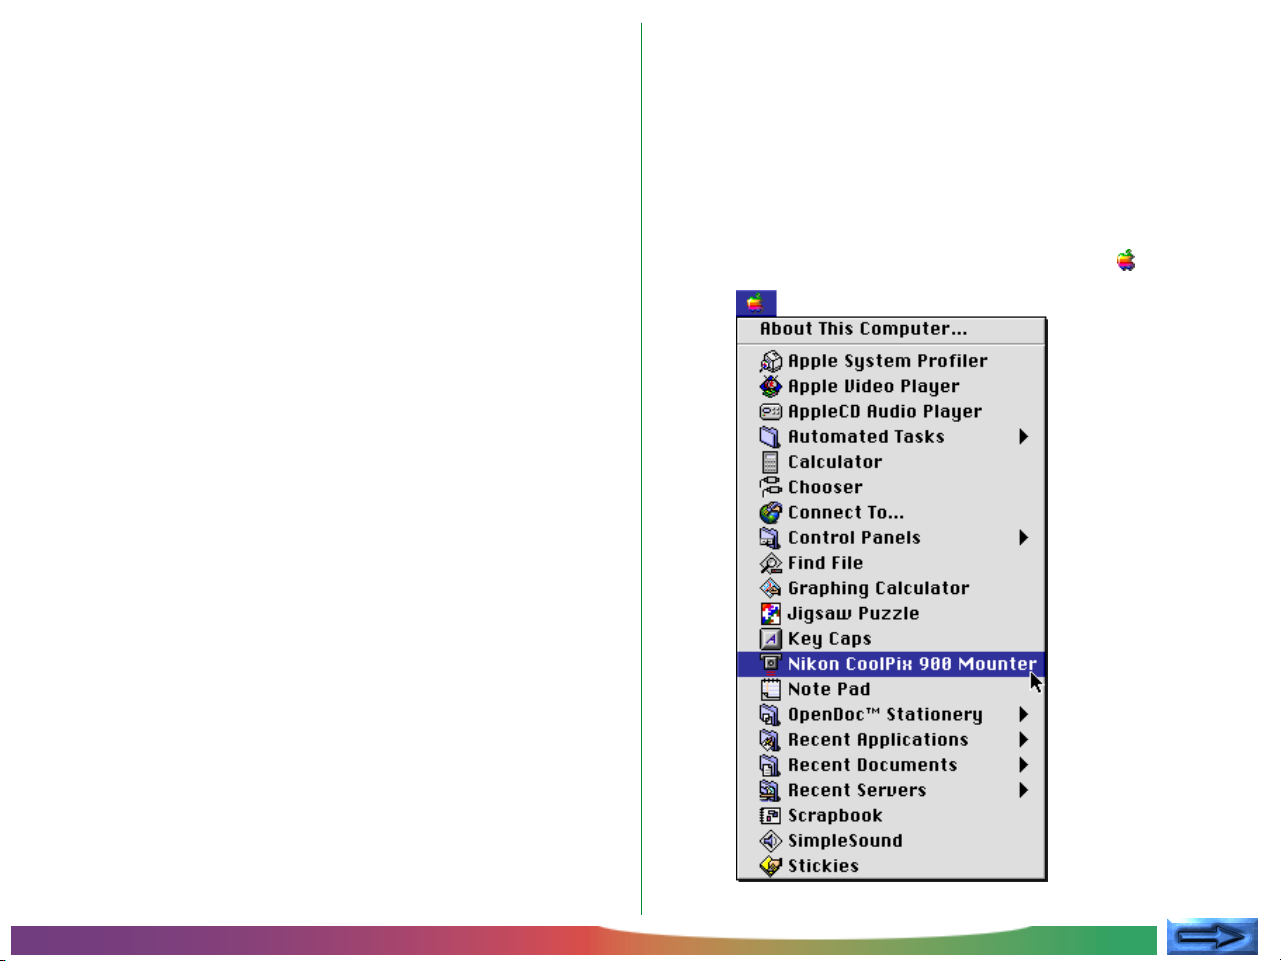
can choose Nikon CoolPix 900 Mounter from the Apple
menu ( ) to connect without making changes to port and
cache settings.
Specifying a port and cache memory size
After turning on your Macintosh, choose Nikon View 900
from the Control Panels submenu of the Apple menu ( ).
The CoolPix 900 control panel will be displayed.
The communications port and cache memory size can be
specified using the following options.
Port
Click the arrow button to the right of this option to choose
a port from a pop-up menu. The following choices are
available:
Modem Port Select the camera connected to the mo-
dem port
Printer Port Select the camera connected to the
printer port
Getting Started: First Steps
If you have two cameras, one connected to the modem port
and the other to the printer port, you can switch between
camera’s on different ports.
- 13 -
Page 14
Note: PowerBook users who have connected the camera to
the printer/external modem port should turn AppleTalk off and
then select “Modem Port” in the CoolPix 900 control panel.
Cache
Choose a cache memory size using this slider. When the
camera is first connected as a drive, image data from the
camera are stored temporarily in cache memory. When
thumbnails are displayed or images copied from the camera
to disk or opened in other applications, data will be read
from the memory cache, speeding processing. The larger
the size of the cache, the more noticeable the effect will be.
It is recommended that you specify as large a cache as your
computer’s free memory will allow.
The data-transfer icon in the camera’s control panel will flash,
indicating that the computer has initiated communications with
the camera.
✔Caution: The data-transfer icon ( ) will continue to flash
for up to sixty seconds after transfer of data is complete. Do not
disconnect the camera while the icon is flashing.
Create Thumbnails
When this box is checked, thumbnail previews of the images
in the camera will be created when the camera is first connected as a drive. These thumbnails will be displayed in
Nikon View Browser and in the Open dialog box when viewing images in the CoolPix 900 folder.
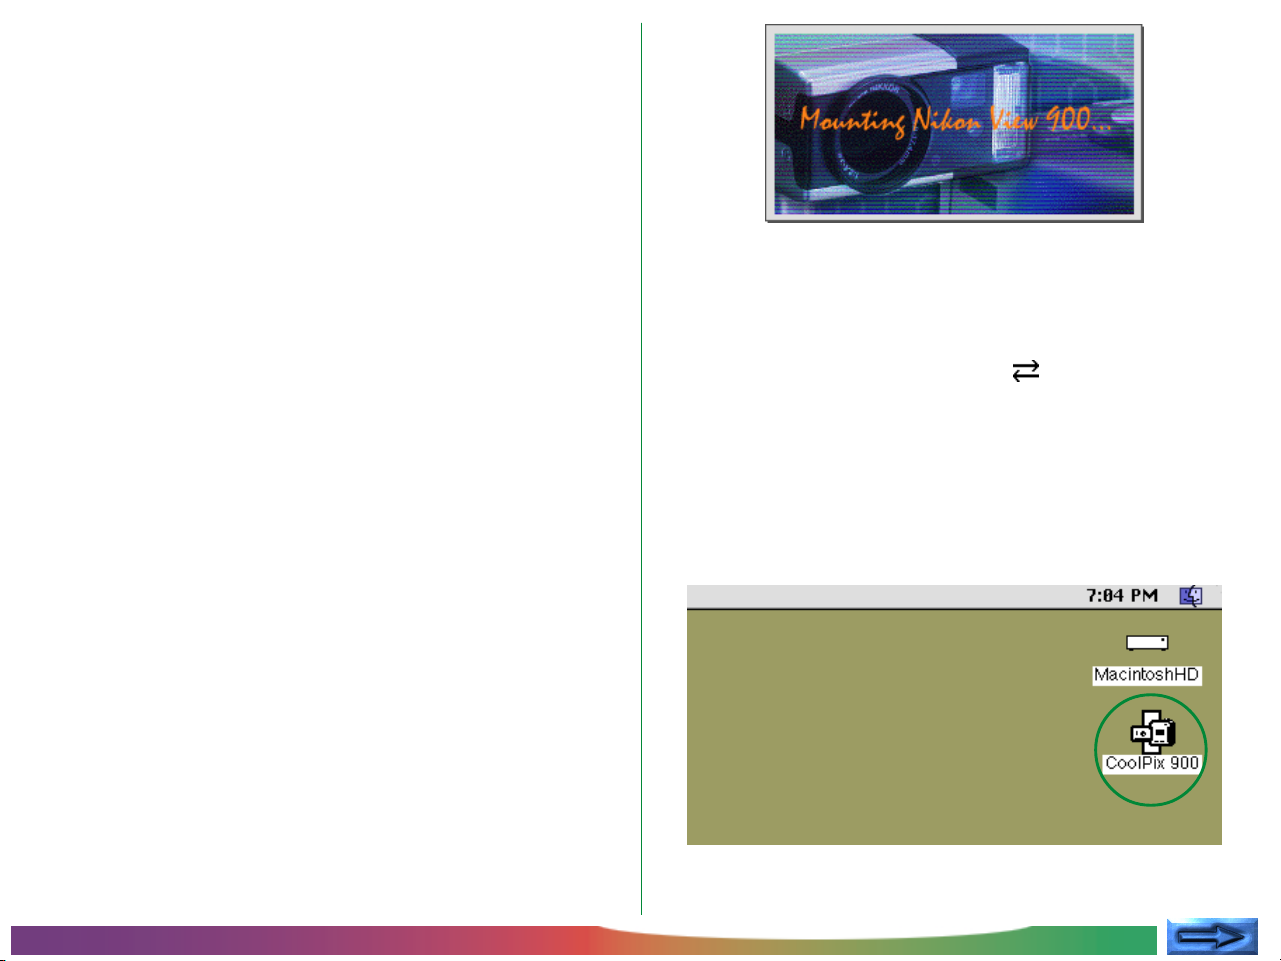
Once any changes to settings have been made, click Mount
Now to connect the camera. The following message will be
displayed while the computer connects to the camera.
Getting Started: First Steps
Once the camera has been selected as a drive, a CoolPix 900
icon will appear at the right side of the desktop with the computer’s other drives.
- 14 -
Page 15
Note: If Nikon View 900 is unable to locate the camera, an
alert dialog will appear. After clicking OK in the dialog, check that
the camera and computer are connected and that the camera’s
selector dial is not set to OFF. If the data transfer icon is not
showing in the camera’s control panel, check whether the serial
cable is properly connected and that the batteries are properly
inserted and are not dead. If you are using the AC adapter, be
sure that it is properly connected.
Connecting to the camera without changing port and
cache settings
Once you have connected to the camera using the CoolPix 900
control panel to specify a port and cache size, the next time
you want to connect to your camera using the same settings
you can connect directly without using the CoolPix 900 control
panel. To connect directly to the camera, choose Nikon
CoolPix 900 Mounter from the Apple menu ( ).
Getting Started: First Steps
- 15 -
Page 16

Step 3 — View the contents of the camera’s memory
To view the contents of the camera’s memory, double-click the
CoolPix 900 icon.
The CoolPix 900 folder will appear on the desktop. The images in the camera’s memory will be displayed as icons (if no
images are in memory, the window will be empty).
If there are a large number of images in the camera, not all can
be displayed at once in the CoolPix 900 folder. You can view
hidden icons by dragging the scroll boxes at the right and bottom of the window, or by clicking the scroll bars or scroll arrows. Alternatively, you can enlarge the window itself dragging
the size box at its lower left corner.
Scroll bar
Scroll box
Scroll arrow
Size box
Note: When images are read directly from the camera, the
creator program is set to Adobe PhotoDeluxe. If Adobe
PhotoDeluxe is installed on your system, icons in the CoolPix 900
folder will appear as shown above. If Adobe PhotoDeluxe is not
installed on your system, a blank document icon will be used.
Getting Started: First Steps
- 16 -
Page 17

Step 4 — Select images
Step 5 — Copy selected images to disk
Images in the CoolPix 900 folder can be printed or copied to
disk. The images on which such operations are to be performed can be selected by clicking the associated icon once.
The icon will be highlighted to indicate that it has been selected.
Selected image
Multiple images can be selected by holding down the Shift key
on the keyboard while clicking each image in turn. All images in
the camera can be selected by choosing Select All from the
Edit menu.
Before copying images to disk, locate or create the destination
folder. Selected images can be copied to a new location by
dragging any of the images into the destination folder and
releasing the mouse button (to “drag” an item means to click it
and move it while holding down the mouse button). This is
known as “drag and drop.” If multiple images are selected, all
will be copied to the new location.
Getting Started: First Steps
Note: The CoolPix 900 folder is locked. Images dragged to
another location will always be copied rather than moved, even if
the option key is not held down.
Note: It is recommended that you change the filename of images after copying them to disk to make file management easier
and to avoid accidentally overwriting an image file with another
image of the same name.
- 17 -
Page 18

Displaying image files as a list
To view information on the image’s date of recording, a list-style
display can be chosen by selecting as List from the View
menu.
The list-style display is shown below.
Step 6 — Open images in another application
In the CoolPix 900 folder, double-click any of the selected
icons.
Adobe PhotoDeluxe will start and the selected images will be
opened in windows within the application.
To view the images as icons once more, select as Icons from
the View menu.
Getting Started: First Steps
- 18 -
Page 19

Images can also be opened by choosing Open from the File
menu.
Note: If Adobe PhotoDeluxe is not installed, when you attempt
to open a image a dialog will appear prompting you to choose the
application to be used. Choose a JPEG-capable application from
the dialog box.
Step 7 — Display thumbnails with Nikon View Browser
Nikon View Browser allows you to browse the contents of the
camera’s memory and select thumbnails for printing or copying
to disk. You can also use the browser’s built-in viewer to open
images for viewing.
To start Nikon View Browser, double-click the Show Thumb-
nails icon in the CoolPix 900 folder.
Getting Started: First Steps
- 19 -
Page 20

Nikon View Browser will start and a browser window will open showing the contents of the camera’s memory as large thumbnail
previews.
Thumbnails not visible in the window can
be viewed by dragging the scroll boxes at
Scroll box
the right and bottom of the window, or
by clicking the scroll bars or scroll arrows.
Alternatively, you can enlarge the window
itself dragging the size box at its lower left
Scroll bar
Scroll arrow
Size box
corner.
Getting Started: First Steps
- 20 -
Page 21

Basic operations in the browser window are described below.
Selecting images
Click the image you wish to use. Selected images are highlighted.
Selected image
Multiple images can be selected by holding down the Shift key
on the keyboard while clicking each image in turn.
Viewing images with the built-in viewer
Nikon View Browser provides a built-in viewer for viewing images
at full resolution. Images can be opened in the built-in viewer if
it has been chosen in the Preferences dialog box. To open the
Preferences dialog, choose Preferences… from the browser’s
Edit menu.
The Preferences dialog box will be displayed. Click the Viewer
tab.
Getting Started: First Steps
Select Open images with built-in viewer and click OK.
- 21 -
Page 22

Once the built-in browser has been selected in the Preferences
dialog, images can be opened by double-clicking the associated
thumbnail in the browser window or selecting the thumbnail
and choosing Open from the File menu.
The selected images will be opened in image windows at full
resolution.
To close an image window, choose Close Window from the
File menu or click the close box at the left end of the window’s
title bar.
Getting Started: First Steps
Note: If Open images with their normal application is
selected in the Viewer tab of the Preferences window, images will
be opened in Adobe PhotoDeluxe.
- 22 -
Page 23

Copying images to disk
Selected images can be copied to disk by dragging their thumbnails to a new location and releasing the mouse button.
Note: The “CoolPix 900” camera drive is always locked. Images
dragged to another location will always be copied rather than
moved, even if the option key is not held down.
Exit Nikon View Browser
To exit Nikon View Browser and close the browser window,
choose Close Window or Quit from the File menu, or click
the close box at the left end of the title bar.
Step 8 — Unmounting the camera
When you turn off your Macintosh, the camera will be unmounted automatically. To unmount the camera without
turning off the computer, use one of the methods given below.
Drag the CoolPix 900 icon into the Trash
The camera can be unmounted by dragging the CoolPix 900
icon into the Trash.
The CoolPix 900 folder will close and the CoolPix 900 icon
will disappear from the desktop.
Getting Started: First Steps
- 23 -
Page 24

Select Nikon View 900 Mounter from the Apple menu
Select Nikon CoolPix 900 Mounter from the Apple menu
( ). The following message will be displayed.
Notes on Using the Camera as a Drive
Nikon View 900 allows the camera’s memory to be used in
much the same way that you would use any other drive. Note
however that certain limitations apply as listed below.
Only one camera is supported at a time:
If two cameras are connected, one to the modem port and the
other to the printer port, you can switch between cameras
using the Nikon View 900 control panel.
The CoolPix 900 folder will close and the CoolPix 900 icon
will disappear from the desktop.
Alternatively, you can choose Nikon View 900 from the
Control Panels submenu of the Apple menu ( ) and click
Unmount Now in the CoolPix 900 control panel.
The camera cannot be shared over a network:
The camera will not function as a network drive. Consequently
the CoolPix 900 icon will not be visible to other computers.
The camera’s memory is locked:
The camera’s memory is treated as locked when viewed from
the CoolPix 900 folder or the browser window. Files cannot
be copied from other folders to the CoolPix 900 folder or
browser window, nor can files be saved to the camera after
editing in another application. Because the camera functions as
a locked drive, images can not be deleted from the computer.
Delete images using the camera’s delete function. The file
names displayed in the CoolPix 900 folder and browser window cannot be changed. Should you wish to change a file
name do so after copying the image to disk.
Getting Started: First Steps
- 24 -
Page 25

Working with Images
Nikon View 900 enables the camera to be used much as you
would any other disk under Mac OS. Images in the camera’s
memory can be manipulated using the Finder. This chapter
describes how to copy images taken with the COOLPIX 900 to
disk and how to open them for editing in other applications.
These operations are much the same as standard Finder operations; consult your Mac OS manual for details.
Finder
Menu bar
Viewing the Items in the Camera’s Memory
Once the camera has been connected as a drive as described in
the previous chapter, double-clicking the CoolPix 900 icon
opens the CoolPix 900 folder, where the contents of the
camera’s memory are displayed much as files are displayed
when you open any other folder in the Finder.
Images can be copied to disk or opened for editing in another
application using standard Finder operations, described below.
Note: When the camera functions as a drive, it is treated as a
locked disk. Files cannot be copied or saved to the camera, nor
can images in the camera be dragged into the Trash. Use the
camera’s delete option to delete images from the camera. Similarly, the Finder commands New Folder, Move to Trash,
Duplicate, Make Alias, Put Away, Eject, and Erase Disk
cannot be used on the camera or the images it contains.
Working with Images: Viewing the Camera’s Memory
- 25 -
Page 26

Copying Images to Disk
Opening Images in Another Application
Images selected in the CoolPix 900 folder can be copied to disk
by dragging any of the selected icons over the destination folder
and releasing the mouse button.
Note: Because the camera functions as a locked drive, images
can only be copied, not moved, even if the option key is held
down.
The images in the CoolPix 900 folder can be opened in Adobe
PhotoDeluxe either by double-clicking its icon or by selecting
Open from the Finder’s File menu. Images can also be
opened directly from any application that can handle JPEG
(“.JPG”) files.
Opening selected images from the CoolPix 900 folder
In the CoolPix 900 folder, select the images the images you
wish to open by clicking their icons (multiple images can be
selected by holding down the shift key while clicking each image
in turn), then double-click any of the selected thumbnails or
choose Open from the File menu.
Working with Images: Copying Images to Disk
- 26 -
Page 27

Adobe PhotoDeluxe will start and the selected images will be
opened in windows within the application.
Opening selected images by drag and drop
Images selected in the CoolPix 900 folder can be opened in any
JPEG-capable application by dragging their thumbnails over the
application’s icon or alias and releasing the mouse button.
The application will start and the selected images will be opened
in windows within the application.
Note: If Adobe PhotoDeluxe is not installed, when you attempt
to open an image a dialog will appear prompting you to choose the
application to be used. Choose a JPEG-capable application from
the dialog box.
Working with Images: Opening Images in Another Application
- 27 -
Page 28

Opening images from the application’s Open dialog
Images in the camera can be opened from any application that
supports JPEG by choosing Open… or Open File… from the
application’s File menu. In the Open dialog, navigate to the
Desktop, select “CoolPix 900,” and click Open. The contents
of the camera’s memory will be displayed. If the application’s
Open dialog supports preview display, a preview of the image
currently selected will appear in the dialog box.
Select the image you wish to open and click the Open button
to open the image in the application.
Note: Previews will not be displayed in the Open dialog box if
Create Thumbnails has not been selected in the Nikon View
900 control panel.
Working with Images: Opening Images in Another Application
- 28 -
Page 29

Nikon View Browser
Nikon View Browser is a utility that allows you to browse the
images in the camera’s memory as thumbnail previews. It also
incorporates many Finder functions, making it easy to copy or
open images while viewing them in preview. This chapter
describes how to browse images using Nikon View Browser, how
to display images in the browser’s built-in viewer, how to copy
images to disk, and how to open images for editing in other
applications.
Browsing Images
To start Nikon View Browser and view thumbnail previews of the
images in the camera’s memory, double-click the Show Thumb-
nails icon in the CoolPix 900 folder.
The browser window will open on the desktop and the images
in the camera’s memory will appear as thumbnails.
From the browser window, you can select images to be opened
in another application, printed, or copied to disk. You can also
use the built-in viewer to view images at full resolution. These
operations are detailed in the sections that follow.
Nikon View Browser: Browsing Images
To exit Nikon View Browser and close the browser window,
choose Close Window or Quit from the File menu or click
the close box at the left end of the browser window’s title bar.
- 29 -
Page 30

Another way of starting Nikon View Browser
Drag the CoolPix 900 icon over the Nikon View Browser
icon, which may be found in the folder to which you installed
“Nikon View 900,” and release the mouse button.
Nikon View Browser will start and the browser window will show
thumbnail previews of the images in the camera.
Note: “Nikon View Browser” may be found in the path “(Instal-
lation Disk)|(Installation Folder)|Nikon Software|Nikon View
900|Nikon View Browser.”
Nikon View Browser can also be started by
Nikon View Browser icon.
A dialog will appear prompting you to select a folder to browse.
Select “CoolPix900” in the desktop folder and click Select.
double-clicking the
Nikon View Browser: Browsing Images
- 30 -
Page 31

Browsing Compact Flash-Memory Cards
If your computer has a Type II PCMCIA card drive, you can
read compact flash-memory cards using a flash-memory adapter
(available separately from Nikon). Compact flash memory can
also be read using a compact flash card-reader. If a card containing images recorded by the COOLPIX 900 is inserted in
either device, its contents can be browsed from the CoolPix
900 folder. If another card is inserted in the camera and the
camera connected to your computer, you can simultaneously
browse images on the card and images in the camera.
To browse images in a compact flash-memory card after inserting the card in a card slot or card reader, double-click the card
icon on the desktop.
The drive folder will open on the desktop. In the case of cards
formatted by the COOLPIX 900, this folder will contain a
“IM01E900” folder.
The “IM01E900” folder contains images recorded by the
COOLPIX 900. Drag this folder “Nikon View 900” over the
Nikon View Browser icon and release the mouse button.
Note: “Nikon View Browser” may be found in the path “(Instal-
lation Disk)|(Installation Folder)|Nikon Software|Nikon View
900|Nikon View Browser.”
Nikon View Browser: Browsing Memory Cards
- 31 -
Page 32

The browser window will open, showing the images recorded
on the card as thumbnail previews.
To exit Nikon View Browser and close the browser window,
choose Close Window or Quit from the File menu or click
the close box at the left end of the browser window’s title bar.
Another way of starting Nikon View Browser
Nikon View Browser can also be started by
Nikon View Browser icon.
A dialog will appear prompting you to select a folder to browse.
Navigate to the drive containing the compact flash-memory
card, select the “IM01E900” folder, and click Select.
double-clicking the
Nikon View Browser: Browsing Memory Cards
Nikon View Browser will start and the browser window will show
thumbnails of the images on the flash-memory card.
Note: If you copy the Show Thumbnails icon from the
CoolPix 900 folder to the “IM01E900” folder, you can start Nikon
View Browser by double-clicking the copy of the Show
Thumbnails icon.
- 32 -
Page 33

Browsing Images on Disk
Nikon View Browser can also be used to browse JPEG images on
disk. Select the folder containing the images you wish to browse,
drag it over the Nikon View Browser icon in the “Nikon
View 900” folder, and release the mouse button.
The browser window will open, showing the images in the
folder as thumbnail previews.
Note: “Nikon View Browser” may be found in the path “(Instal-
lation Disk)|(Installation Folder)|Nikon Software|Nikon View
900|Nikon View Browser.”
Nikon View Browser: Browsing Images on Disk
To exit Nikon View Browser and close the browser window,
choose Close Window or Quit from the File menu or click
the close box at the left end of the browser window’s title bar.
- 33 -
Page 34

Another way of starting Nikon View Browser
Nikon View Browser can also be started by
Nikon View Browser icon.
A dialog will appear prompting you to select a folder to browse.
Select the desired folder and click Select.
double-clicking the
Viewing Images with the Built-in Viewer
Images previewed in Nikon View Browser can be viewed at full
resolution using the browser’s built-in viewer. The viewer also
offers zoom-in, zoom-out, and scroll functions. To select the
built-in viewer as the application used when opening images
from the browser, choose Preferences… from the browser
Edit menu.
The Preferences dialog will appear. Click the Viewer tab.
Nikon View Browser will start and the browser window will show
thumbnails of the images in the selected folder.
Note: If you copy the Show Thumbnails icon from the
CoolPix 900 folder to a folder containing JPEG images, you can
start Nikon View Browser to view the images in the folder by
double-clicking the copy of the Show Thumbnails icon.
Nikon View Browser: Browsing Images on Disk
Select Open images with built-in viewer and click OK.
- 34 -
Page 35

In the browser window, select the images you wish to view and
double click any of the images or choose Open from the File
menu to start the built-in viewer.
The selected images will be opened at full resolution in separate
image windows.
Zooming the image in and out
When moved over an image window with the command ( )
key held down, the cursor takes the shape of a magnifying glass
( ). Click anywhere on the image with the command ( ) key
held down to zoom the image in. Pressing the option key on
the keyboard changes the cursor to a magnifying glass with
containing a minus sign ( ). Clicking anywhere in the image
while holding down the option key will zoom the image out.
The image can also be zoomed in and out by clicking the zoomin and zoom-out buttons at its lower left corner. Clicking the
zoom-out button zooms the image out and reduces the size of
the window to fit the image. Clicking the zoom-in button
zooms the image in and enlarges the window to fit the image.
Nikon View Browser: Viewing Images
Zoom-in button
Zoom-out button
Note: Zoom operations have no effect on the thumbnails in the
browser window.
- 35 -
Page 36

Scrolling and resizing image windows
When the entire image does not fit in the image window, you
can view the hidden portion by dragging the scroll boxes at the
right and bottom of the window, or by clicking the scroll bars or
scroll arrows. If you move the cursor over the image, the
cursor will take the shape of a hand ( ), and the image can be
scrolled by dragging it.
Zoom box
Scroll box
Scroll bar
If there is enough space on the desktop, the entire image can
be viewed at its current zoom ratio by clicking the zoom box at
the top right corner of the image window. The image window
will be either enlarged to show the entire image or, if the image
is larger than the desktop, enlarged to fill the desktop.
Closing image windows
The active image window can be closed by choosing Close
Window from the File menu or clicking the close box at the
left end of the title bar.
Scroll arrow
Size box
Alternatively, you can enlarge the window itself dragging the size
box at its lower right corner.
Nikon View Browser: Viewing Images
- 36 -
Page 37

Deleting Images
When browsing images on disk or on a compact flash-memory
card, you can delete images by moving their associated thumbnails to the trash.
Note: Because the camera functions as a locked disk, images in
the camera can not be deleted from the browser. Use the
camera’s delete option to delete images stored in the camera’s
memory.
Using the Move to Trash
Images can also be moved to the Trash by selecting their thumbnails in the browser window and choosing Move to Trash
from the File menu.
Dragging images into the Trash
Images can be moved to the Trash by dragging their associated
thumbnails over the Trash icon and releasing the mouse button.
To permanently delete the images, select Empty Trash from
the Special menu.
Nikon View Browser: Deleting Images
- 37 -
Page 38

Printing Images
Changing the Appearance of Thumbnails
Images in the browser window can be printed in Adobe
PhotoDeluxe or other applications to which the DOS file suffix
“.JPG” has been linked. To print images, select the associated
thumbnails and choose Print from the File menu.
If you are opening images currently stored in or that have been
copied from the camera’s memory, Adobe PhotoDeluxe will
start and the Print dialog will be displayed. Make such changes
to printer settings as you desire and print the images.
Note: In order to open images in compact flash-memory cards,
you will need to use Macintosh PC Exchange or a similar control
panel to associate the DOS file suffix (extension) “.JPG” with an
application capable of opening JPEG files. See “Opening Images
in Another Application,” below.
By default, thumbnail previews in the browser window are
displayed in a “film-strip” style frame. You can choose to
display images in a document-style frame or with no frame at all
by choosing Preferences… from the Edit menu.
The Preferences dialog will be displayed. Click the Appear-
ance tab.
Nikon View Browser: Printing Images
- 38 -
Page 39

Choose a frame from the list of Thumbnail Border radio
buttons.
(No border)
When this button is selected,
thumbnails will be displayed
without a frame.
(Document border)
When this button is selected,
thumbnails will be displayed in a
document-style frame, as shown
at right.
(Film-strip border)
When this button is selected,
thumbnails will be displayed in a
film-strip frame.
Copying Images to Disk
Selected images in the browser window can be copied to disk
by dragging any of the selected thumbnails over the destination
folder and releasing the mouse button.
After choosing the desired style, click OK. The thumbnails in
the browser window will be displayed in the selected frame.
Clicking Cancel closes the Preferences dialog without changing
the frame style.
Nikon View Browser: Thumbnail Appearance
Note: Because the camera functions as a locked drive, images
can only be copied, not moved, even if the option key is held
down.
- 39 -
Page 40

Opening Images in Another Application
The images in the browser window can be opened in Adobe
PhotoDeluxe either by double-clicking the associated thumbnail
or by selecting Open from the browser File menu. Images
can also be opened directly from any application that can
handle JPEG (“.JPG”) files.
Note: When images are read directly from the camera, the
creator program is set to Adobe PhotoDeluxe. If Adobe
PhotoDeluxe is installed on your system, double-clicking images in
the camera will open them in Adobe PhotoDeluxe. When read
directly from the camera’s flash-memory cards, however, images
are treated as DOS files with no creator. In order to open such
images with a double click, you will need to use Macintosh PC
Exchange or a similar control panel to associate the DOS file suffix
(extension) “.JPG” with Adobe PhotoDeluxe or another application
capable of opening JPEG images.
Opening selected images from the browser
Before opening images from the browser, you must choose
Open images with their normal application in the Nikon
View Browser Preferences dialog. To open the Preferences
dialog, choose Preferences… from the Edit menu.
The Preferences dialog will appear. Click the Viewer tab.
The same restriction applies to images copied directly from flashmemory cards.
Nikon View Browser: Opening Images in Another Application
Select Open images with their normal application and
click OK.
- 40 -
Page 41

In the browser window, select the images the images you wish
to open by clicking their thumbnails (multiple images can be
selected by holding down the shift key while clicking each image
in turn), then double-click any of the selected thumbnails or
choose Open from the File menu.
Adobe PhotoDeluxe will start and the selected images will be
opened in windows within the application.
Nikon View Browser: Opening Images in Another Application
Note: If Adobe PhotoDeluxe is not installed, when you attempt
to open an image a dialog will appear prompting you to choose the
application to be used. Choose a JPEG-capable application from
the dialog box.
- 41 -
Page 42

Opening selected images by drag and drop
Selected images can be opened in any application that supports
JPEG by dragging their thumbnails over the application’s icon or
alias and releasing the mouse button.
The application will start and the selected images will be opened
in windows within the application.
Nikon View Browser: Opening Images in Another Application
- 42 -
Page 43

Opening images from the application’s Open dialog
Images in the camera can be opened from any application that
supports JPEG by choosing Open… or Open File… from the
application’s File menu. In the Open dialog, navigate to the
Desktop, select “CoolPix 900,” and click Open. The contents
of the camera’s memory will be displayed. If the application’s
Open dialog supports preview display, a preview of the image
currently selected will appear in the dialog box.
Select the image you wish to open and click the Open button
to open the image in the application.
Note: Previews will not be displayed in the Open dialog box if
Create Thumbnails has not been selected in the Nikon View
900 control panel.
Nikon View Browser: Opening Images in Another Application
- 43 -
Page 44

Nikon View 900 Reference
This chapter provides a brief reference guide to Nikon View
900’s main windows and menus. Refer to this guide when you
want to know the meaning of a command or button. Window
operations are detailed in “Getting Started,” “Working with
Images,” and “Nikon View Browser.”
The CoolPix 900 Control Panel
The CoolPix 900 control panel allows you to specify a port for
camera connection, connect the camera as a drive, and set the
cache memory size. To open the control panel, select Nikon
View 900 from the Control Panels submenu of the Apple
menu ( ).
Menu bar
The functions of the CoolPix 900 control panel are described
below.
The Menu Bar
The commands available in each menu are outlined below.
The Apple Menu ( )
In addition to the usual Apple menu items, the Apple menu
contains an About Nikon View 900… option when the
CoolPix 900 control panel is open.
About Nikon View 900…
Gives copyright information for Nikon View 900. Click
anywhere within the About dialog box to clear it from
the screen.
Reference: The CoolPix 900 Control Panel
The File Menu
Quit ( Q)
Cancels any changes to port and cache settings and
returns you to the finder.
- 44 -
Page 45

The Help Menu
About Balloon Help…
Provides an explanation of the Finder’s “Balloon Help”
function.
Show Balloons/Hide Balloons
Turns Balloon Help on or off.
Cache
Choose a cache memory size using this slider. When the
camera is first connected as a drive, image data from the
camera are stored temporarily in cache memory. When
thumbnails are displayed or images copied from the camera
to disk or opened in other applications, data will be read
from the memory cache, speeding processing. The larger
the size of the cache, the more noticeable the effect will be.
It is recommended that you specify as large a cache as your
computer’s free memory will allow.
Options
The options in the CoolPix 900 control panel are listed below.
Port
Click the arrow button to the right of this option to choose
a port from a pop-up menu. The following choices are
available:
Modem Port Select the camera connected to the mo-
dem port
Printer Port Select the camera connected to the
printer port
Note: PowerBook users who have connected the camera to
the printer/external modem port should turn AppleTalk off and
then select “Modem Port” in the CoolPix 900 control panel.
Reference: The CoolPix 900 Control Panel
Create Thumbnails
When this box is checked, thumbnail previews of the images
in the camera will be created when the camera is first connected as a drive. These thumbnails will be displayed in
Nikon View Browser and in the Open dialog box viewing
images in the CoolPix 900 drive.
Mount Now
Clicking this button causes the camera connected to the
selected port to appear on the desktop as a drive, indicated
by the CoolPix 900 icon. When the camera is displayed
on the desktop, this button changes to Unmount Now.
Clicking this button removes the camera from the desktop.
- 45 -
Page 46

The CoolPix 900 Folder
The CoolPix 900 folder shows the contents of the camera’s
memory in the Finder. Images can be handled in the same way
as files on an ordinary locked disk. To open the folder, doubleclick the CoolPix 900 icon.
Finder
Menu bar
Note: When the camera functions as a drive, it is treated as a
locked disk. Files cannot be copied or saved to the camera, nor
can images in the camera be dragged into the Trash. Use the
camera’s delete option to delete images from the camera. Similarly, the Finder commands New Folder, Move to Trash,
Duplicate, Make Alias, Put Away, Eject, and Erase Disk
cannot be used on the camera or the images it contains.
Double-clicking the Show Thumbnails icon in the CoolPix
900 folder starts Nikon View Browser.
Reference: The CoolPix 900 Folder
- 46 -
Page 47

The Browser Window
This is the Nikon View Browser window. The browser window shows JPEG image files in the camera’s memory, compact flashmemory cards, or any other drive or folder as thumbnail previews.
Menu bar
Thumbnail
Reference: The Browser Window
- 47 -
Page 48

To open the browser window, double-click the Show Thumbnails icon in the CoolPix 900 folder or drag and drop the
CoolPix 900 onto the Nikon View Browser icon.
The browser window offers the functions listed below.
Browsing images
Thumbnail previews of the images in the CoolPix 900 folder are
shown in the browser window. The browser window can also
be used to browse other folders, as described in “Nikon View
Browser.”
File handling
Images can be opened by double-clicking a thumbnail or copied
to disk by drag-and-drop.
Displaying images with the built-in viewer
Images can be displayed at full resolution using the built-in
viewer.
The functions of the various parts of the browser windows are
described below.
The Menu Bar
The menus in the menu bar allow you to manage images in the
camera’s memory or in other folders. The commands available
in each menu are outlined below. A more complete description of the tasks that may be performed using the menu commands may be found in the chapter, “Nikon View Browser.”
The Apple Menu ( )
In addition to the usual Apple menu items, the Apple menu
contains an About NikonView Browser… option when
the browser window is active.
Reference: The Browser Window
About Nikon View Browser…
Gives copyright information for Nikon View Browser. Click
anywhere within the About dialog box to clear it from
the screen.
- 48 -
Page 49

The File Menu
New Folder ( N)
Creates a new folder. Note however that as the camera
is locked, this command is not available for images in the
CoolPix 900 folder.
Open ( O)
Opens selected images in the built-in viewer or in the
creating application, depending on what settings have
been chosen in the Preferences dialog box.
Print ( P)
Selected images will be opened in the creating application,
and the application’s Print dialog will be opened allowing
you to make changes to printer settings and print the image.
Move to Trash
Moves selected images to the Trash. Note however that
as the camera is locked, this command is not available for
images in the CoolPix 900 folder.
Close Window ( W)
Closes the browser window and ends your current
session of Nikon View Browser. Clicking the close box at
the left end of the title bar has the same effect.
Get Info ( I)
Displays information on the selected files or folders.
Label
Changes the label for the selected files.
Sharing…
This command cannot be selected from the browser
window.
Duplicate ( D)
Creates copies of the selected files or folders. Note
however that as the camera is locked, this command is
not available for images in the CoolPix 900 folder.
Make Alias ( M)
Creates an alias for the selected files or folders. Note
however that as the camera is locked, this command is
not available for images in the CoolPix 900 folder.
Reference: The Browser Window
- 49 -
Page 50

Put Away ( Y)
Returns files that have been placed on the desktop to the
browser window. This command can be used when you
have selected items on the desktop in the Finder. Note
however that as the camera is locked, this command is
not available for images in the CoolPix 900 folder.
Find… ( F)
Displays Find File dialog box.
Show Original ( A)
This command cannot be selected from the browser
window.
Page Setup…
Brings up a dialog box which allows you change printer
settings such as paper size and orientation.
Print Window…
Prints the browser window.
Quit ( Q)
Closes the browser window and ends your current
session of Nikon View Browser.
The Edit Menu
Can’t Undo ( Z)
Cut ( X) / Copy ( C) / Paste ( V) / Clear
These commands are not available in the browser window.
Select All ( A)
Selects all the images in the browser window for copying,
printing, or deletion.
Show Clipboard
Displays the contents of the clipboard.
Reference: The Browser Window
- 50 -
Page 51

Preferences…
Opens the Preferences dialog box, where you can choose
whether to open images in the built-in browser or in
another application and set the appearance of the thumbnails in the browser window.
The View Menu
as Icons / as Buttons / as List
as Window / as Pop-up Window / Clean Up
These commands cannot be accessed from the browser
window.
Arrange
Orders the thumbnails is the browser by “Name”,“ Date
Modified”,“ Date Created”,“ Size”,“ Kind”, or “Label.”
View Options…
Opens the View Options dialog for the browser window.
Reference: The Browser Window
- 51 -
Page 52

The Special Menu
Empty Trash…
Deletes all items in the Trash.
Eject Disk
This command is not available in the browser window.
Erase Disk…
This command is not available in the browser window.
Sleep
Puts the system into sleep mode. Normal operation can
be restored by pressing any key on the keyboard.
Restart
Ends the current session of Nikon View Browser and any
other open applications and restarts the system.
The Help Menu
About Balloon Help…
Provides an explanation of the Finder’s “Balloon Help”
function.
Show Balloons/Hide Balloons
Turns Balloon Help on or off.
Shut Down
Ends the current session of Nikon View Browser and any
other open applications and turns off the computer.
Reference: The Browser Window
- 52 -
Page 53

Image Windows
I
mage windows are where images opened in Nikon View Browser’s
If Open images with built-in viewer is selected in the browser window Preferences dialog, images will be opened at full
resolution in image windows when a selected thumbnail is double-clicked in the browser, or when Open is chosen from the
browser-window File menu. Any number of image windows may be open simultaneously.
Menu bar
Image area
built-in viewer are displayed.
Reference: Image Windows
- 53 -
Page 54

The functions of the image window are described below.
The Menu Bar
The commands available in each menu are outlined below. A
more complete description of the tasks that may be performed
using the menu commands may be found in the chapter,
“Nikon View Browser.”
The Apple Menu ( )
In addition to the usual Apple menu items, the Apple menu
contains an About NikonView Browser… option when
an image window is active.
About Nikon View Browser…
Gives copyright information for Nikon View Browser. Click
anywhere within the About dialog box to clear it from
the screen.
The File Menu
New Folder ( N) / Open ( O) / Print ( P)
Move to Trash
These commands are always grayed out and unavailable.
Close Window ( W)
Closes the active image window.
Reference: Image Windows
Get Info ( I) / Label / Sharing… / Duplicate ( D)
Make Alias ( M) / Put Away ( Y)
Find ( F) / Show Original ( R)
These commands are always grayed out and unavailable.
- 54 -
Page 55

Page Setup…
Brings up a dialog box which allows you change printer
settings such as paper size and orientation.
Print Window…
This command is always grayed out and unavailable.
Quit ( Q)
Ends your current session of Nikon View Browser.
The Edit Menu
Can’t Undo ( Z) / Cut ( X) / Copy ( C)
Paste ( V) / Clear / Select All ( A)
Show Clipboard
These commands are always grayed out and unavailable.
The View Menu
The View menu is always grayed out and unavailable.
The Special Menu
The Special menu is always grayed out and unavailable.
The Help Menu
About Balloon Help…
Provides an explanation of the Finder’s “Balloon Help”
function.
Show Balloons/Hide Balloons
Turns Balloon Help on or off.
Preferences…
Opens the browser window Preferences dialog shown in
“The Browser Window,” above.
Reference: Image Windows
- 55 -
Page 56

The Image Area
Images are displayed at full resolution in the image area. When
the cursor is moved over the image area, the shape of the
cursor will change as described below.
This is the cursor displayed when the mouse is over
the image window. Drag to scroll the image.
This cursor is displayed when the command ( ) key is
held down. Click to zoom in on the image.
This cursor is displayed when the option key is held
down. Click to zoom the image out.
Note: Zoom operations have no effect on the thumbnail in the
browser window.
Reference: Image Windows
- 56 -
 Loading...