


COOLPIX 300 Companion Software
and Browser Plug-in
Nikon View
Macintosh
User’s Manual
i
Cautions
• The reproduction of all or part of this manual without our permission is
prohibited.
• The information contained in this manual is subject to change without
notice.
• We have made every effort to produce a perfect manual, but should you
find any mistakes, we would be grateful if you would kindly let us
know.
• We shall take no responsibility for consequences resulting from the
operation of this product, despite the terms mentioned above.
Warning!
The CD-ROM on which this software is distributed should not be played
back on audio CD equipment. Playing CD-ROMs on an audio CD player
could cause hearing loss or damage the equipment.
Trademark Information
Apple, the Apple logo, Macintosh, and Quick Time are registered
trademarks of Apple Computer, Inc.
Adobe and Adobe Photoshop are trademarks of Adobe Systems
Incorporated.
All other brand or product names mentioned in this manual are the
trademarks or registered trademarks of their respective holders.
ii

Notice concerning prohibition of copying or reproduction
Note that simply being in possession of material which has been copied or
reproduced by means of a digital camera may be punishable by law.
Items prohibited by law from being copied or reproduced
Do not copy or reproduce paper money, coins, securities, government
bonds, or local government bonds, even if such copies or reproductions are
stamped “Sample.”
The copying or reproduction of paper money, coins, or securities which are
circulated in a foreign country is prohibited.
The copying or reproduction of unused postage stamps or post cards issued
by the government without obtaining approval from the government is
prohibited.
The copying or reproduction of stamps issued by the government and
certified documents stipulated by law is prohibited.
Cautions on certain copies and reproductions
The government has issued cautions on copies or reproductions of
securities issued by private companies (shares, bills, checks, gift
certificates, etc.), commuter passes, or coupon tickets, except when a
minimum of necessary copies are to be provided for business use by a
company. Also, do not copy or reproduce passports issued by the
government, licenses issued by public agencies and private groups, ID
cards, and tickets, such as passes and meal coupons.
Comply with copyright notices
The copying or reproduction of works such as books, music, paintings,
woodcut prints, maps, drawings, movies, and photographs which are
copyrighted creative works is prohibited except when it is done for
personal use at home or for similar restricted and non-commercial use.
iii

Contents
Overview ......................................................................1
Before You Begin ......................................................... 3
System Requirements .................................................................... 3
Installation ....................................................................................... 4
Getting Started .......................................................... 11
First Steps ....................................................................................... 11
A Closer Look at Nikon View ...................................................... 18
The Menu Bar ......................................................................... 20
The Main Tool Palette............................................................ 25
Document Windows ............................................................. 28
The Browser Window .............................................................31
Using the Browser ......................................................35
Preferences .................................................................................. 36
Opening the Browser Window ................................................... 44
Previewing Documents ...............................................................48
Taking Photographs ..................................................................... 53
Transferring Documents to other Applications ......................... 56
Saving Documents to Disk .......................................................... 57
Deleting Documents ................................................................... 59
Working with Documents..........................................61
Acquiring Documents from the Camera .................................. 61
Zoom ............................................................................................. 62
Scrolling and Resizing the Document Window ........................ 63
Rotating Images .......................................................................... 65
Flipping Images ............................................................................ 67
iv

Playing Back and Saving Sound Recordings............................69
Getting Information about a Document ..................................71
Opening Documents in other Applications.............................. 73
Saving Images .............................................................................. 75
Reading Documents from Disk................................................... 78
The About Dialog Box ...............................................80
Index .......................................................................... 81
v

vi

Overview
Welcome to Nikon View Macintosh, a companion program for the
COOLPIX 300. Nikon View offers a combination of browser, simple
editing, and file-transfer capabilities. Using these three functions, you can
play back images and audio data from your camera’s memory, edit them in
Nikon View or any other application which supports Photoshop-compatible
acquire plug-ins, and save them to your computer for use in other
applications or for long-term storage. Once you have installed Nikon View
and mastered its simple tool buttons and menus, you’ll be able to distribute
your digital photographs by disk or electronic mail, or include them in your
home page and other documents you create for business or personal use.
Nikon View’s features include:
• a browser function which allows you to preview at a glance all the
images and recordings stored in your camera’s memory, and to select
items for editing, transfer to disk, or deletion
• compatibility with Adobe Photoshop version 2.0 plug-in specifications,
making it possible to launch the browser from any application which
supports acquire plug-ins compatible with this standard
• support of drag-and-drop, allowing rapid transfer of photographs,
memos, and audio data to your computer or to other applications
• playback of audio data using either the camera’s built-in speaker or
your computer’s audio system, and the capacity to save audio
recordings as System 7 sound files
• simple editing of image data using Nikon View’s one-touch tool palettes
and menus
• support of TIFF, JPEG and PICT image formats, giving you added
flexibility when using images created with your COOLPIX 300 in other
applications or when distributing photographs by diskette or electronic
mail
Overview
1

This manual will guide you, step-by-step, through the process of setting up
and using Nikon View with your COOLPIX 300. The next section, “Before
You Begin,” gives details of how to install Nikon View on your Macintosh.
It is followed by “Getting Started,” which introduces you to the basics of
using Nikon View to preview the contents of your camera’s memory, select
items for editing or playback, and save images and recordings to disk.
Refer to “Using the Browser” and “Working with Documents” for detailed
information on using Nikon View’s browsing and editing functions.
2
Overview

Before You Begin
This section gives the system requirements for Nikon View Macintosh and
guides you through the process of installing Nikon View to your computer’s
hard disk.
System Requirements
To run Nikon View Macintosh, you will need system hardware and
software which meet the following minimum requirements:
• a Power Macintosh, or a Macintosh with a 68030 or better CPU
• System Software 7.1 or later
• at least 8 MB of free RAM (12 MB or more is recommended)
• 5 MBs of free space on your hard-disk for installation, with an
additional 20 MBs of free space when Nikon View is running
• a monitor with a resolution of 640 × 400 dots or higher capable of
displaying 16.7 million colors
• a CD-ROM drive
• a serial or SCSI port for connection to the COOLPIX 300 (note that the
optional SCSI Kit is required for connection to a SCSI port)
Before You Begin : System Requirements
3
Installation
The installation disk provided with this product contains Nikon View’s
editor and the browser plug-in which handles the exchange of information
between your Macintosh and the COOLPIX 300. Before starting the
installation program, check to be sure that you have enough space on your
hard disk to complete installation (a minimum of 25 MBs of free disk
space is required), and that no other applications are running.
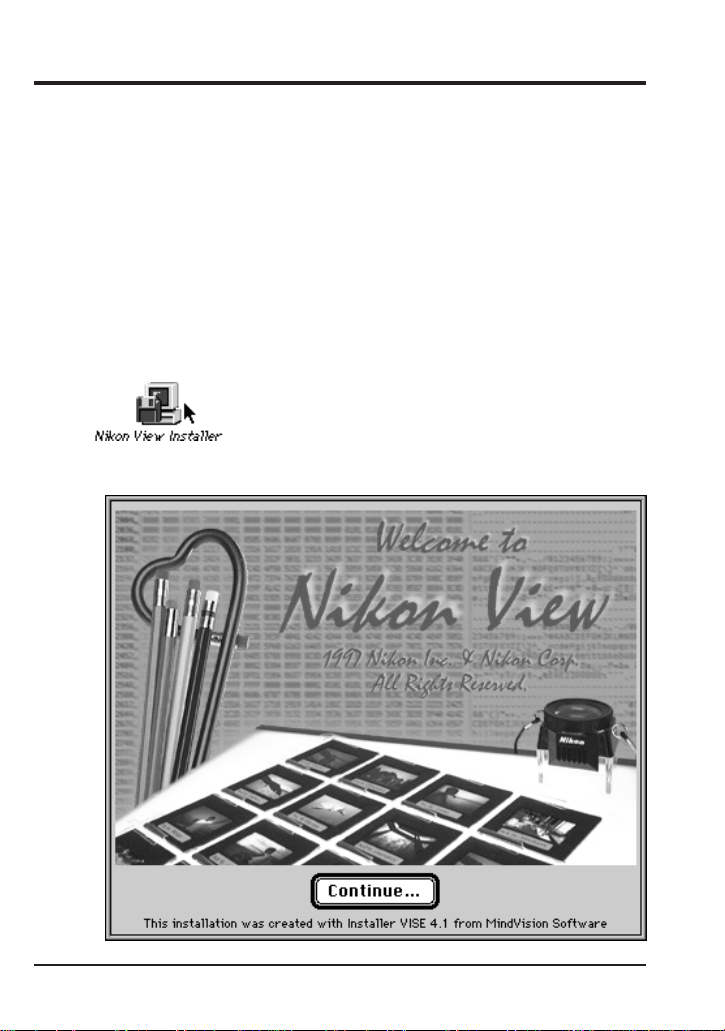
Step 1 — Launch the
Insert the installation disk in the drive and double-click the installer’s icon.
The following dialog box will appear.
Nikon View
installer
4
Before You Begin : Installation
Step 2 — View the README file
Clicking Continue… will cause the dialog box shown above to be
replaced by the Nikon View README file. It is recommended that you
take a view moments to print or view the contents of this file, as it may
contain important information that could not be included in this manual.
When you have finished, click the Continue button to bring up the
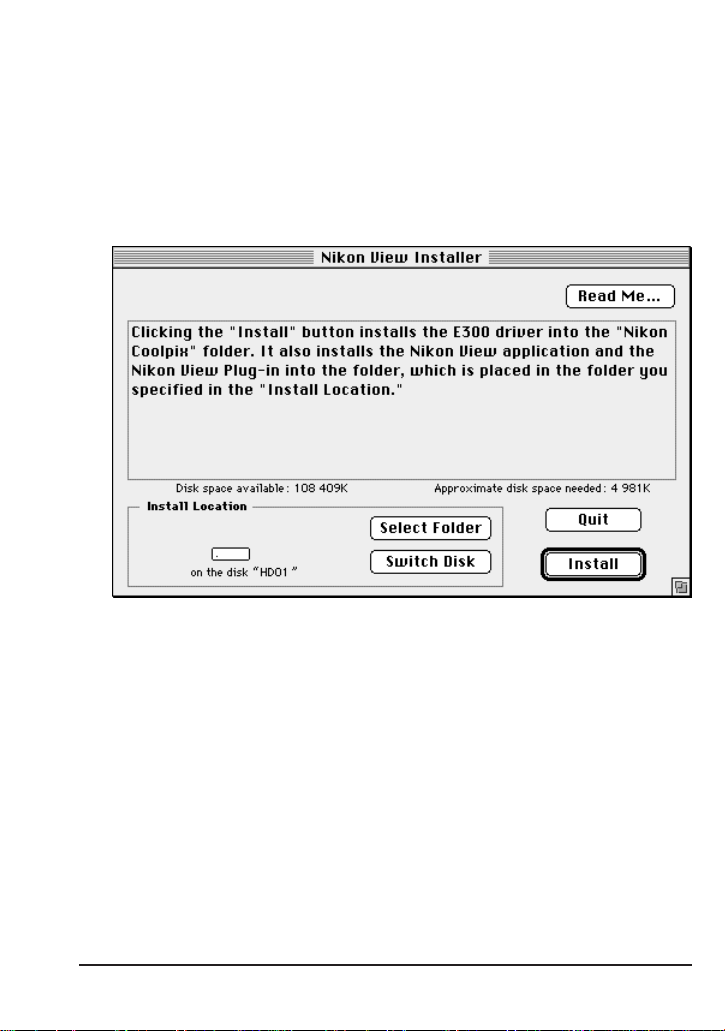
Installer dialog shown below.
You can return to the README file by clicking the Read Me… button at
the top right corner of the Installer dialog. When installation is complete, a
copy of the README file will be saved in the directory to which you have
installed Nikon View.
Before You Begin : Installation
5
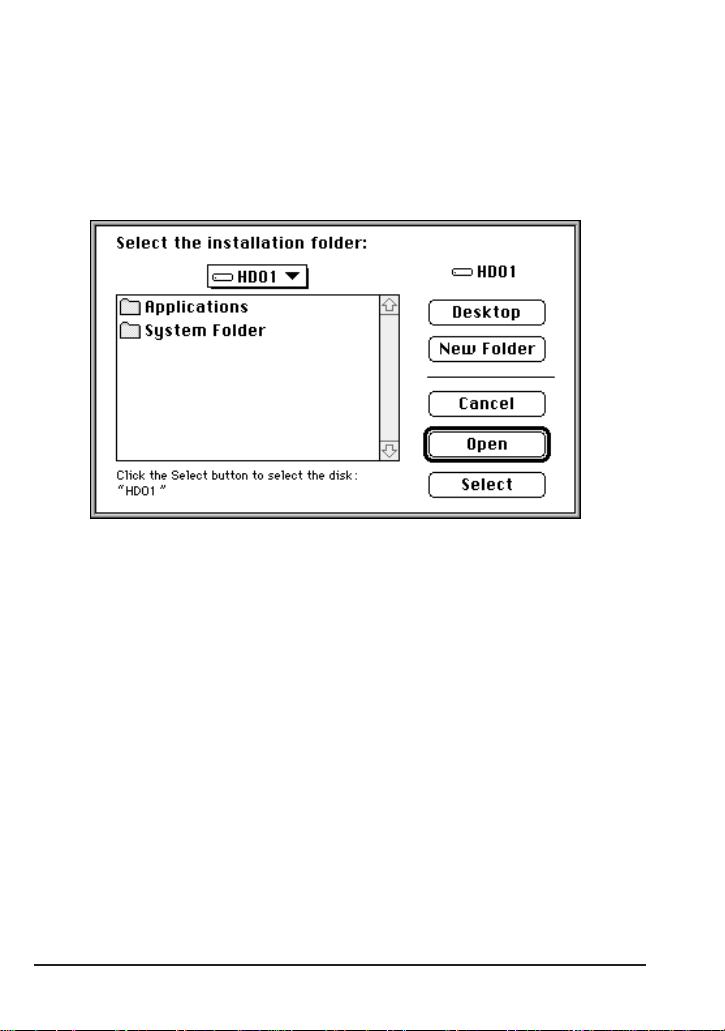
Step 3 — Select a destination folder
Use the Switch Disk button in the Installer dialog to choose the disk to
which you will install Nikon View and the Nikon View browser plug-in (the
drivers for your COOLPIX 300 will be installed to the Preferences folder
in the System folder). To select a folder for installation, click the Select
Folder button. This will bring up the dialog box shown below.
Specify the folder to which you would like to install the software and then
click Select. This will return you to the Installer dialog.
6
Before You Begin : Installation
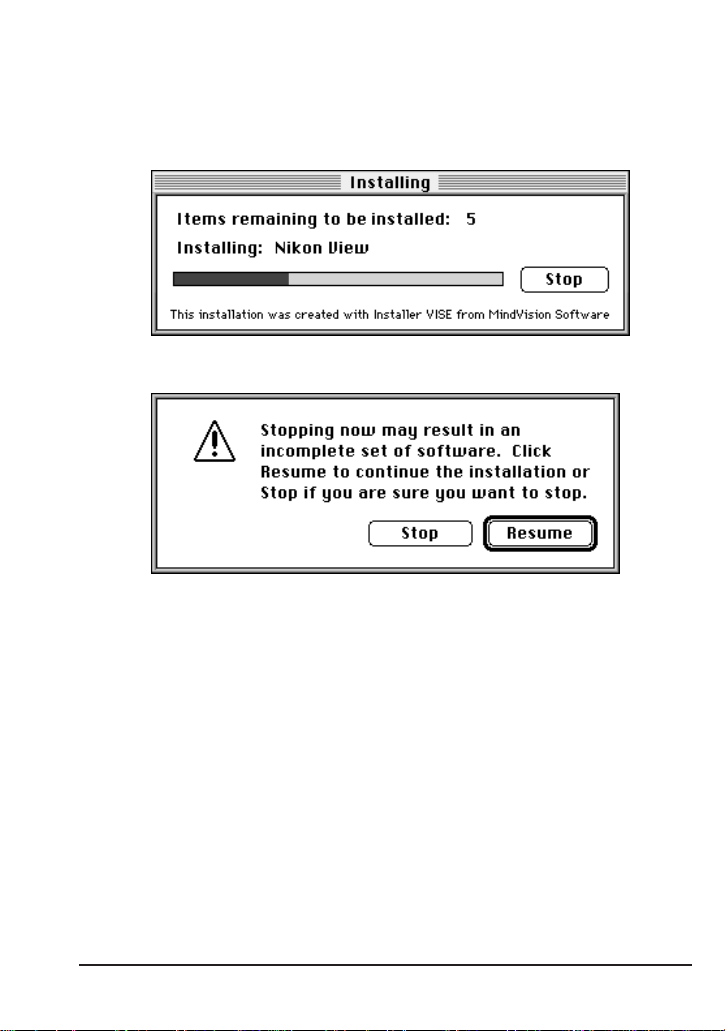
Step 4 — Install
Clicking the Install button in the Installer dialog starts the installation
process. While the program’s components are being installed to the
selected directory, the following progress indicator will be displayed.
Clicking Stop will bring up the message shown below.
Click Resume to continue the installation from the point it was
interrupted. Clicking Stop will halt the installation without installing
Nikon View. Should you choose to abandon the installation, you can still
install Nikon View at a later date by repeating the installation process from
Step 1.
Nikon View
Before You Begin : Installation
7

Step 5 — Check the memory available to
Nikon View
When installation is complete, the following dialog box will be displayed.
Click Quit to exit the installer. Once you have returned to the Finder,
locate the Nikon View folder in the directory you chose in Step 3. Open
the folder and click the Nikon View icon once to select it.
Nikon View
icon
Then choose Get Info ( I) from the File menu in the Finder.
8
Before You Begin : Installation
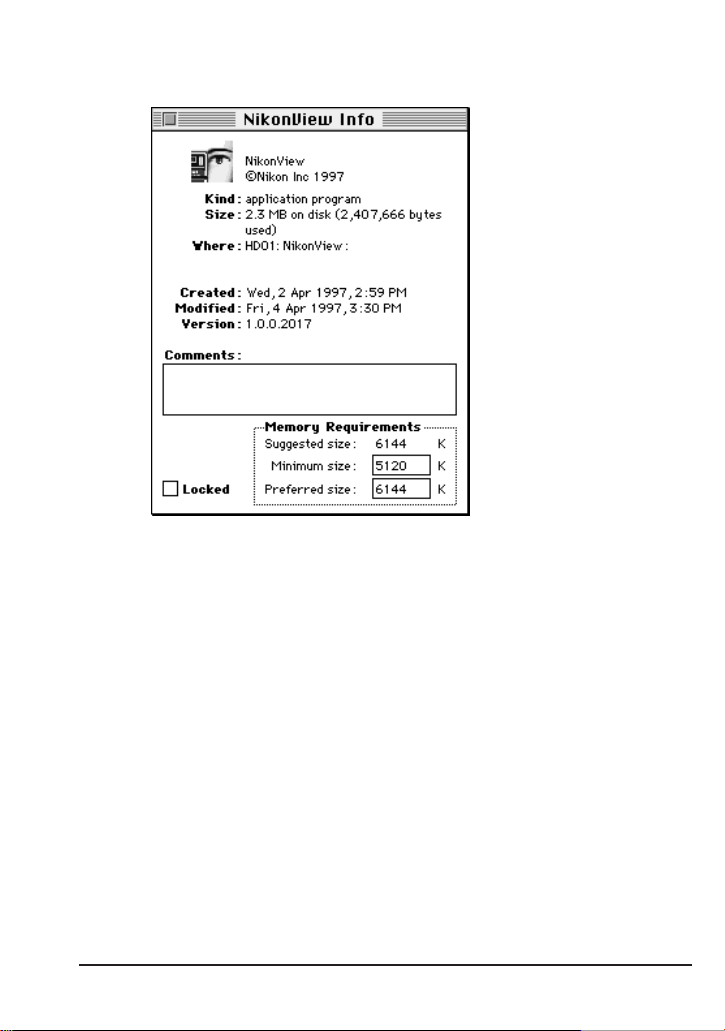
If possible, in the “Preferred size” text box enter a value equal to or greater
than the suggested size value.
Before You Begin : Installation
9

Step 6 — Copy the
(optional)
If you will be using Nikon View’s browser with another application that
supports Adobe Photoshop plug-ins, you will need to copy the Nikon View
acquire plug-in into the application’s plug-ins folder. In the directory to
which you installed Nikon View, click the plug-in’s icon once to select it.
Then, holding down the option key on the keyboard, drag the icon into the
desired plug-in folder. Repeat this task for each of the applications you
plan to use when acquiring documents from your COOLPIX 300.
Nikon View
plug-in into the plug-ins folder
10
Before You Begin : Installation

Getting Started
Once you have installed the Nikon View software as described in “Before
You Begin,” you are ready to use your computer to view the contents of
your COOLPIX 300’s memory or to transfer images and recordings to your
computer for editing and storage. This chapter provides a brief
introduction to Nikon View’s menus and buttons, and outlines the steps you
will take when using the program with your COOLPIX 300. More detailed
information may be found in the following chapters, “Using the Browser”
and “Working with Documents.”
First Steps
This section guides you step-by-step through the basics of using Nikon
View to acquire documents (images and audio recordings) from your
camera, modify them, and save them to disk. An overview of the
program’s menus and tool palettes may be found in the following section,
“A Closer Look at Nikon View.” More detailed information on using Nikon
View to browse the contents of your camera’s memory or play back images
and sound recordings can be found in the following chapters, “Using the
Browser” and “Working with Documents.”
Step 1 — Connect the COOLPIX 300 to Your Computer
After making sure that both your camera and computer are off, connect the
devices as described in the COOLPIX 300 User’s Manual. Turn on the
camera and any other peripheral devices, then turn on your Macintosh.
Getting Started : First Steps
11
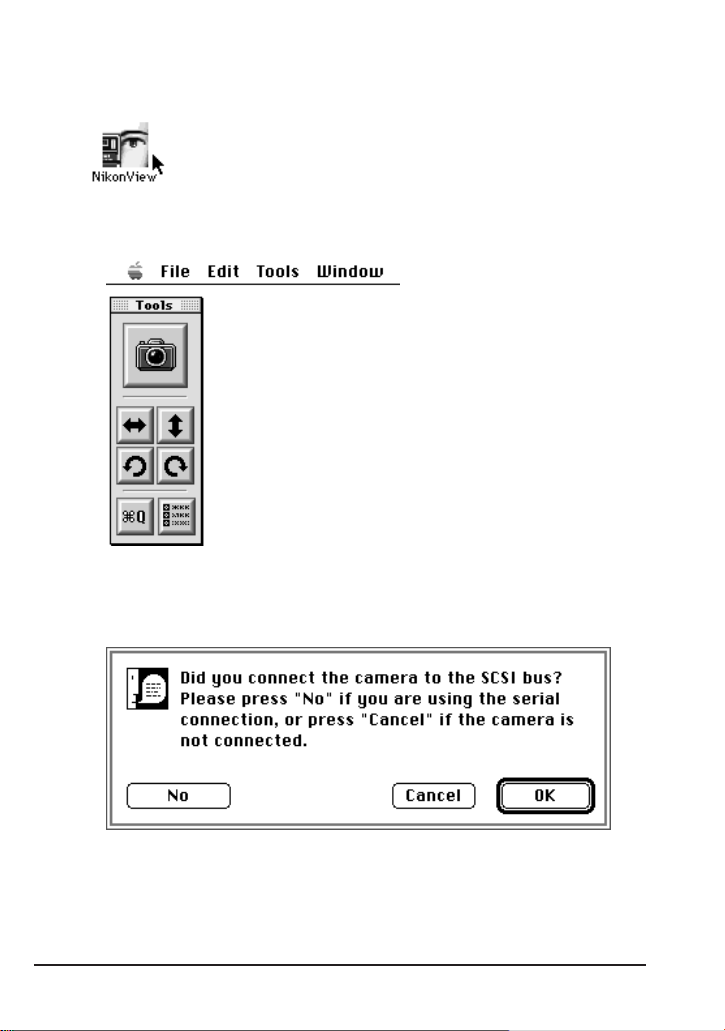
Step 2 — Start Nikon View
Start Nikon View by double-clicking the program’s icon.
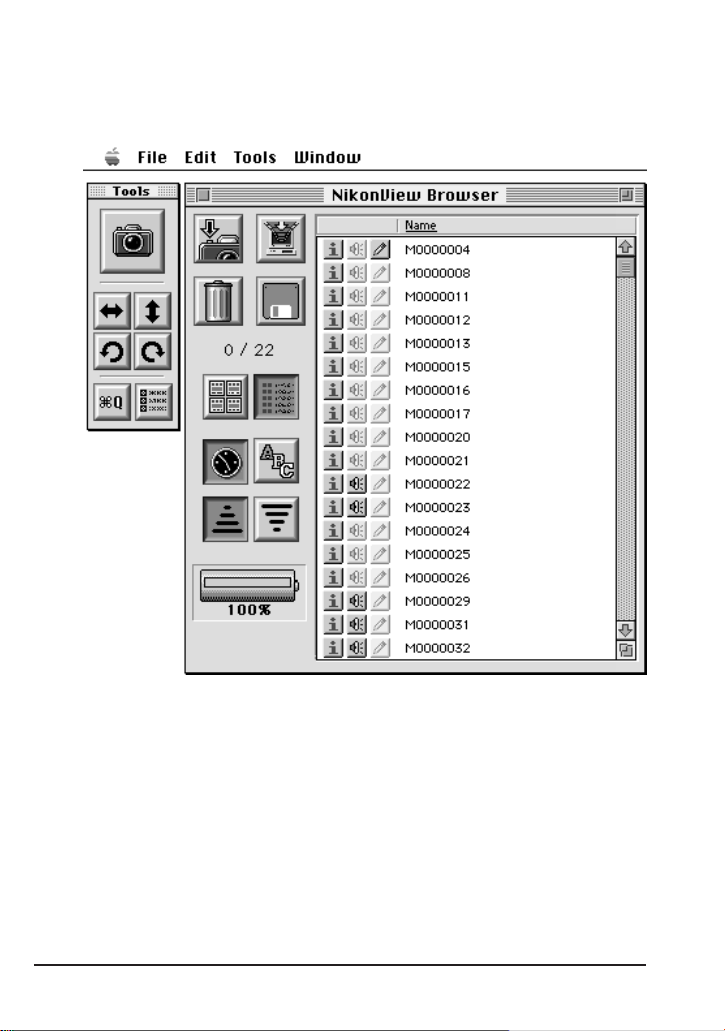
Nikon View’s main tool palette will appear on the desktop and the File,
Edit, Tools, and Window menus will appear in the menu bar.
The first time you start Nikon View after installing the program or changing
the port used to connect your camera to the computer, the following
message will be displayed.
12
Getting Started : First Steps
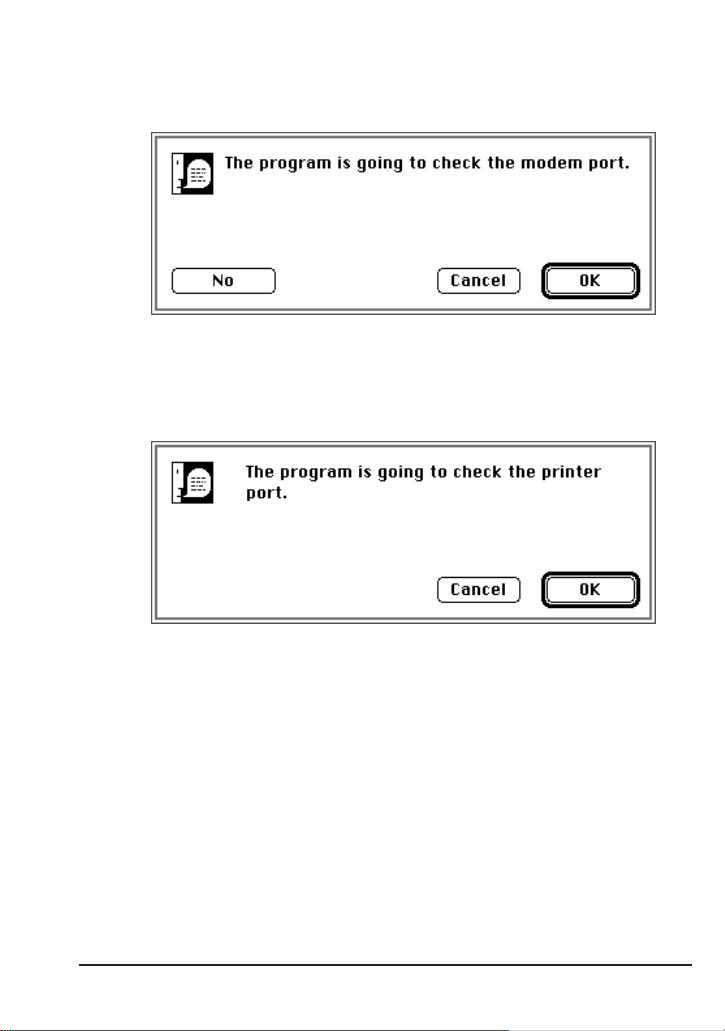
If you have connected your camera to the computer’s SCSI chain, click
OK and proceed to Step 3. Clicking No will bring up the message shown
below.
If you have connected your camera to the modem port, click OK and
proceed to Step 3. If you have connected your camera to the printer port,
click No. When the message shown below appears, click OK to select the
printer port as the port used by the camera.
Getting Started : First Steps
13
Step 3 — Acquire Documents from the Browser
Once Nikon View has located the camera, the browser window will appear
on the desktop.
14
Getting Started : First Steps
The browser shows a list of documents, which may each contain a single
image or recording or a combination of photographs, recordings or memos.
You can select a document for acquisition from the browser by clicking its
name, or select multiple documents by holding down the command key
while clicking each additional document in turn, or by dragging the mouse
to select a group of documents. When you have chosen the documents you
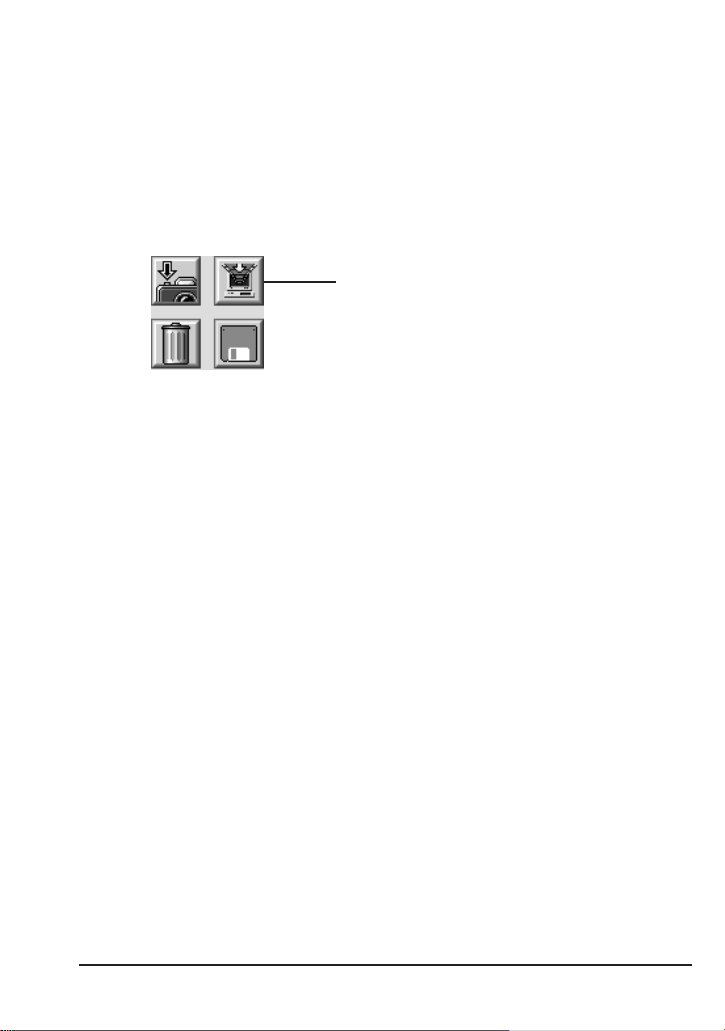
want, click the Acquire an Image button in the browser window tool
palette.
Acquire an Image
The selected documents will be opened in individual document windows,
where they can be flipped or rotated using the buttons on the main tool
palette or document window tool bar. You can also zoom in on an image
by clicking it or zoom the image out by clicking it while holding the
option key down on the keyboard (when the mouse pointer is over an
image, the cursor will change to the shape of a magnifying glass).
Getting Started : First Steps
15
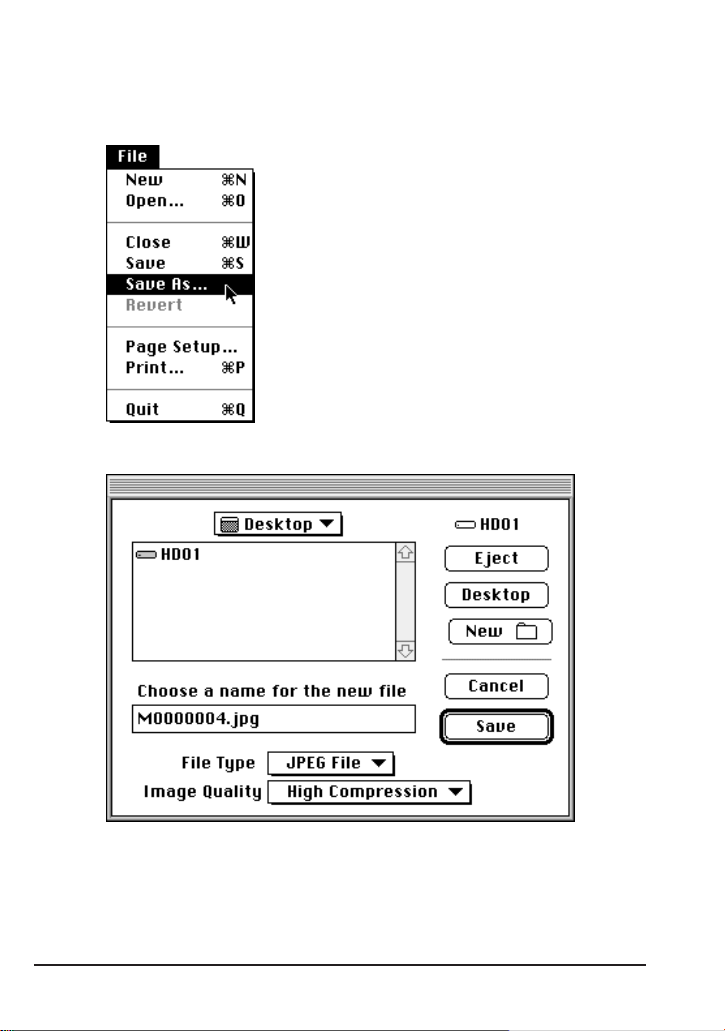
Step 4 — Save the Documents to Disk
When you have finished playing back and editing a document, you can
select Save As… from the File menu to save it to disk.
The following dialog will appear.
After specifying the file type, name, and folder for the recording, click
Save. The image will be saved in the specified location.
16
Getting Started : First Steps
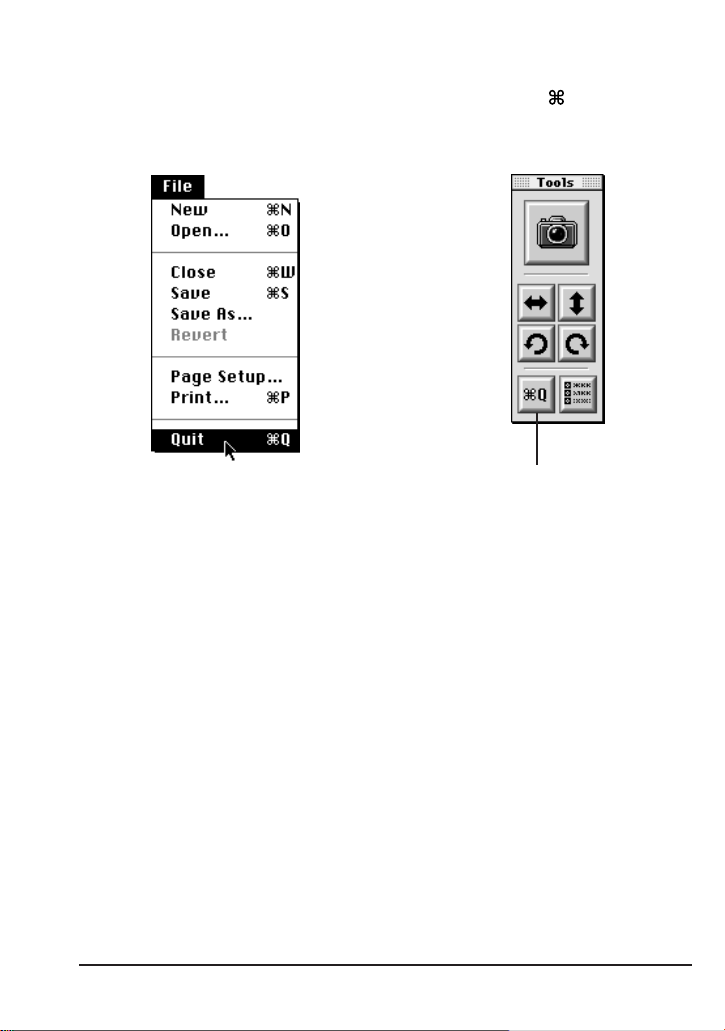
Step 5 — Quit Nikon View
To end your current session of Nikon View, select Quit ( Q) from the
File menu or click the “Quit Application” button in the main window tool
palette.
Quit Application
Getting Started : First Steps
17

A Closer Look at
This section introduces you to Nikon View’s main windows and briefly
describes the program’s menus and buttons. Nikon View’s functions are
shared between two types of window: the browser window, which acts as
an interface between the COOLPIX 300 and your computer, and
document windows, where images and sounds acquired from your camera
can be played back and edited. Most of the operations that can be
performed on acquired images are available from the menus in the menu
bar when Nikon View is the active application. In addition, buttons on the
main tool palette allow you to perform such tasks as opening the browser
window and rotating and flipping selected images in the browser and
document windows. The functions of Nikon View’s menus and buttons are
outlined below.
Nikon View
18
Getting Started : A Closer Look at
Nikon View
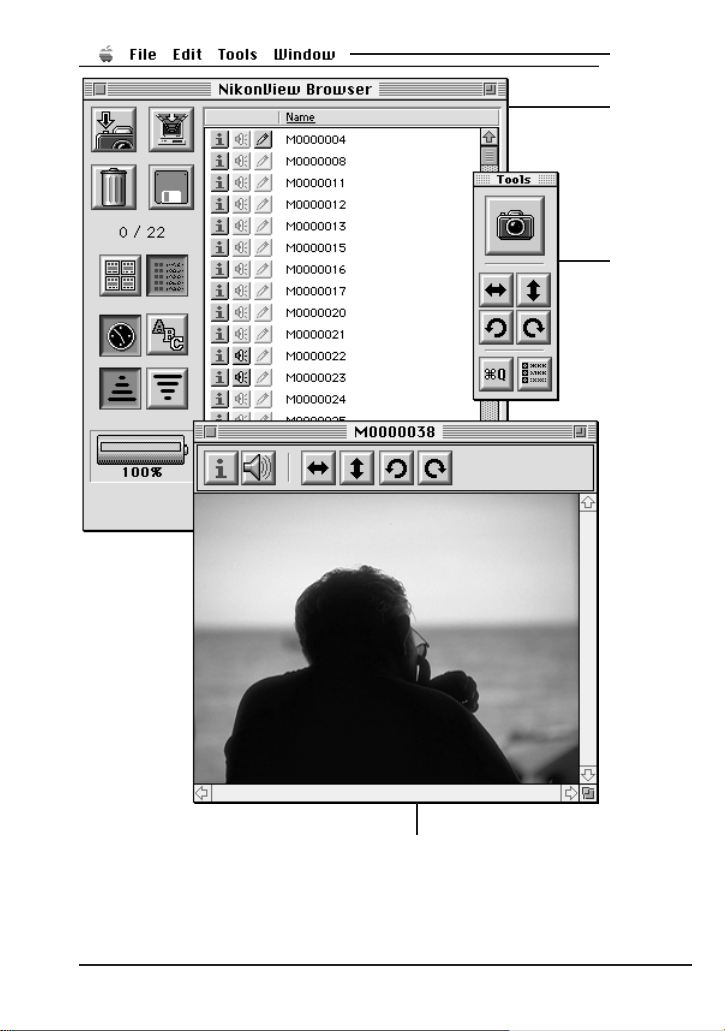
Menu bar
Browser
window
Main tool
palette
Document window
Getting Started : A Closer Look at
Nikon View
19
The Menu Bar
The menus in the menu bar allow you to manage documents (images and
sounds) that have been acquired from the COOLPIX 300 or saved to disk.
The commands available in each menu are outlined below. A more
complete description of the tasks that may be performed using the menu
commands may be found in the following chapters, “Working with
Documents” and “Using the Browser.”
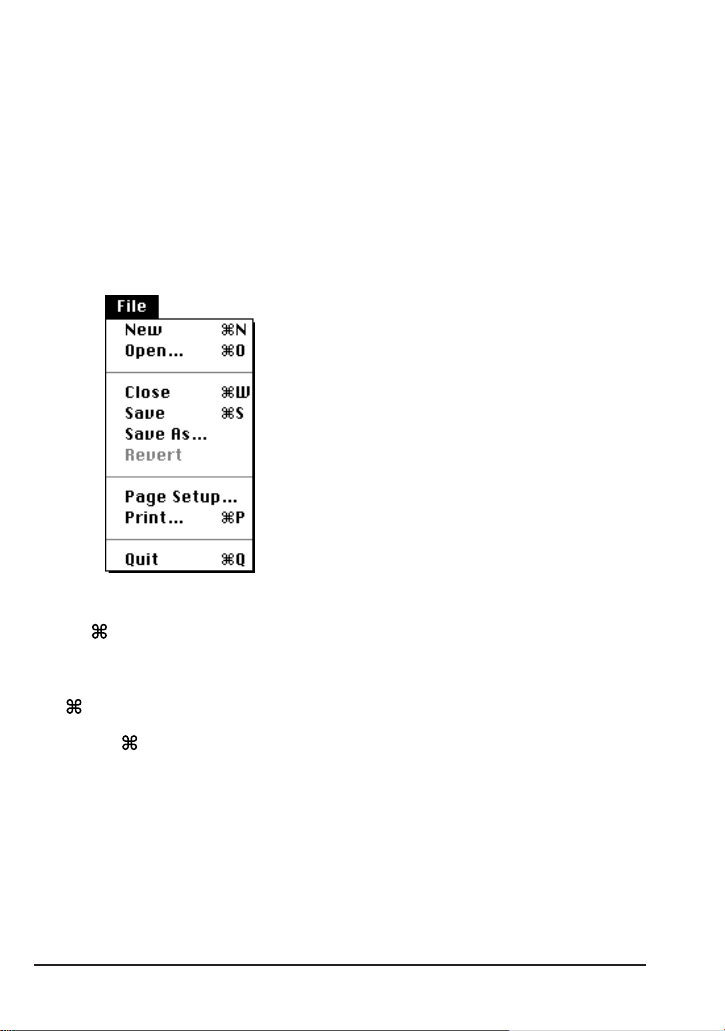
The File Menu
The commands that can be accessed from the File menu are listed below.
New ( N)
This command is only available in a dialog which contains a “New
Folder” option, when it allows you to create a new folder using the
N shortcut.
Open… ( O)
Allows you to specify the name of an image or sound file that has
previously been saved to disk and to then open it in a new document
window.
20
Getting Started : A Closer Look at
Nikon View
 Loading...