

Page 1
Removing older versions of Nikon View - Windows computer systems
Before upgrading to a newer version of Nikon View the older version must first be completely
removed from the system. To completely uninstall Nikon View please follow these steps:
1) Uninstall Nikon View
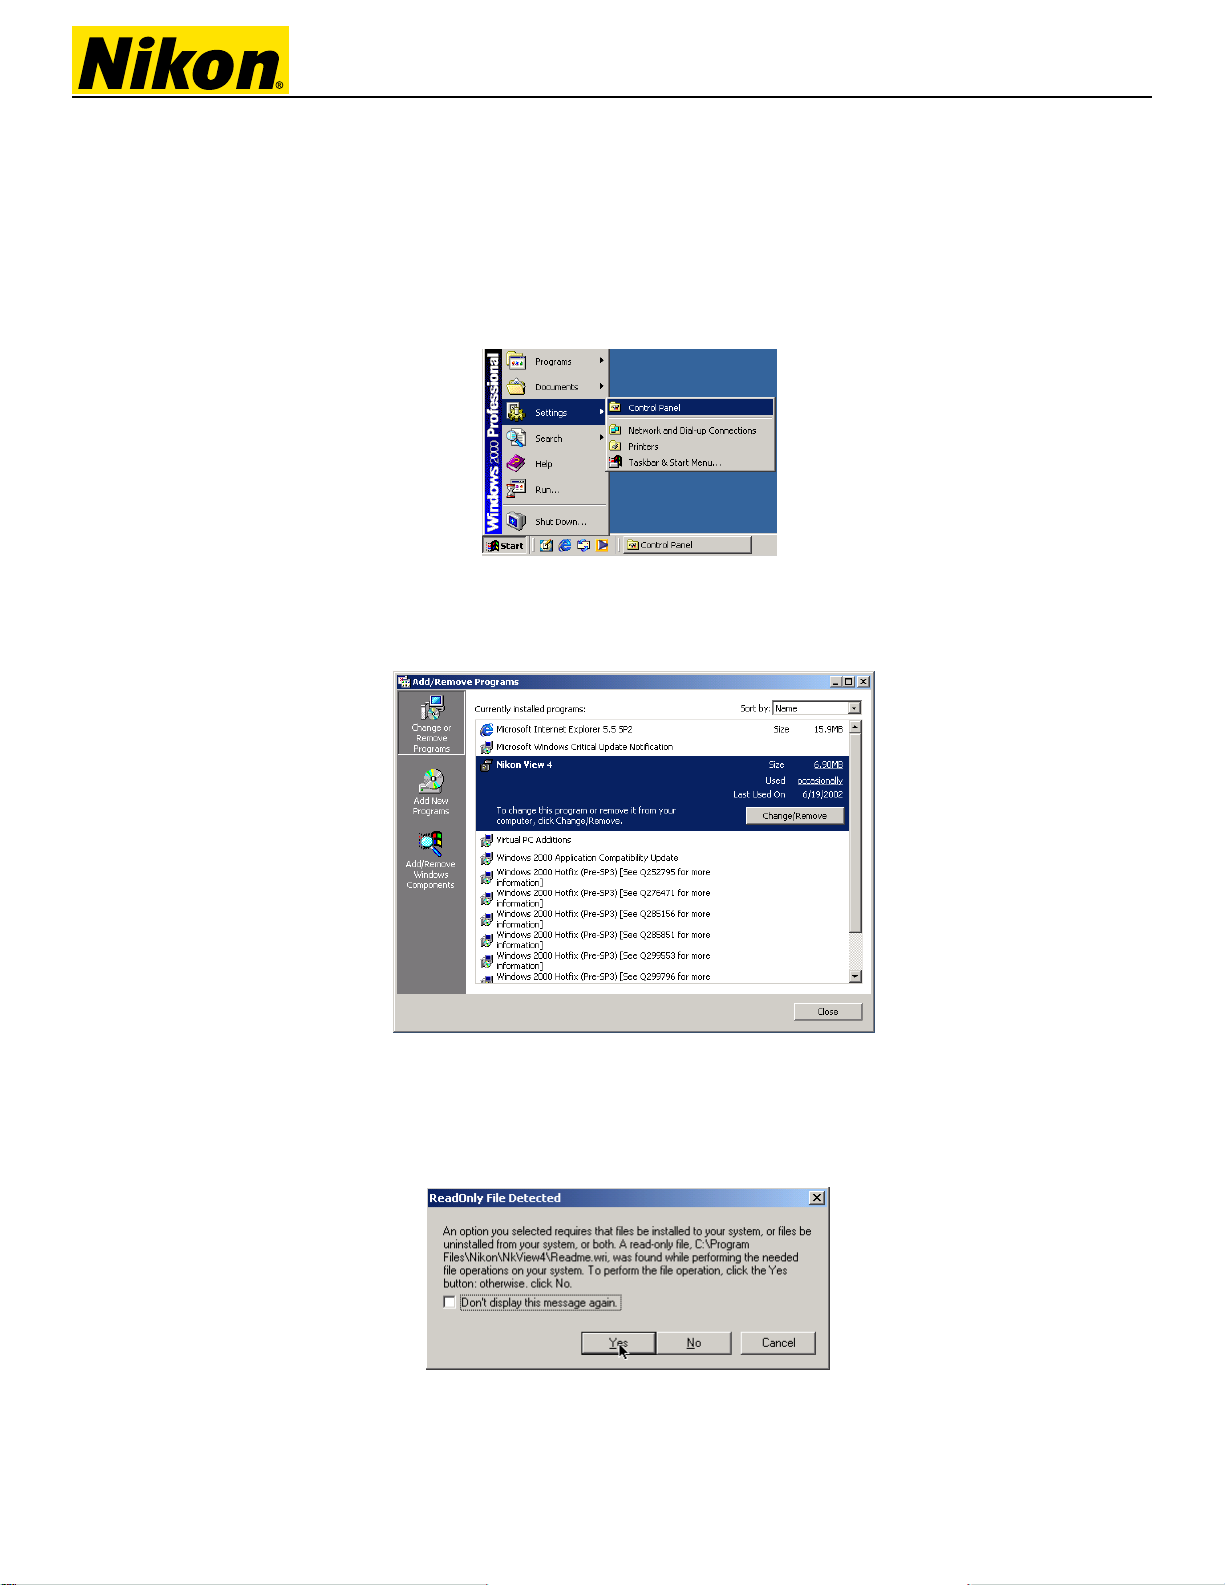
From the “Start” menu choose “Settings” and then “Control Panels”.
Double click “Add/Remove Programs” from the window that appears and find the version of Nikon
software you wish to remove in the list. Select the item (with a single click) and click
“Change/Remove”
2) Uninstall All Components
The uninstaller will ask if you want to delete shared files and “Read Only” files. Click “Yes” to
allow the uninstaller to delete all of the files.
Technical Note
Page 1 of 3
Page 2
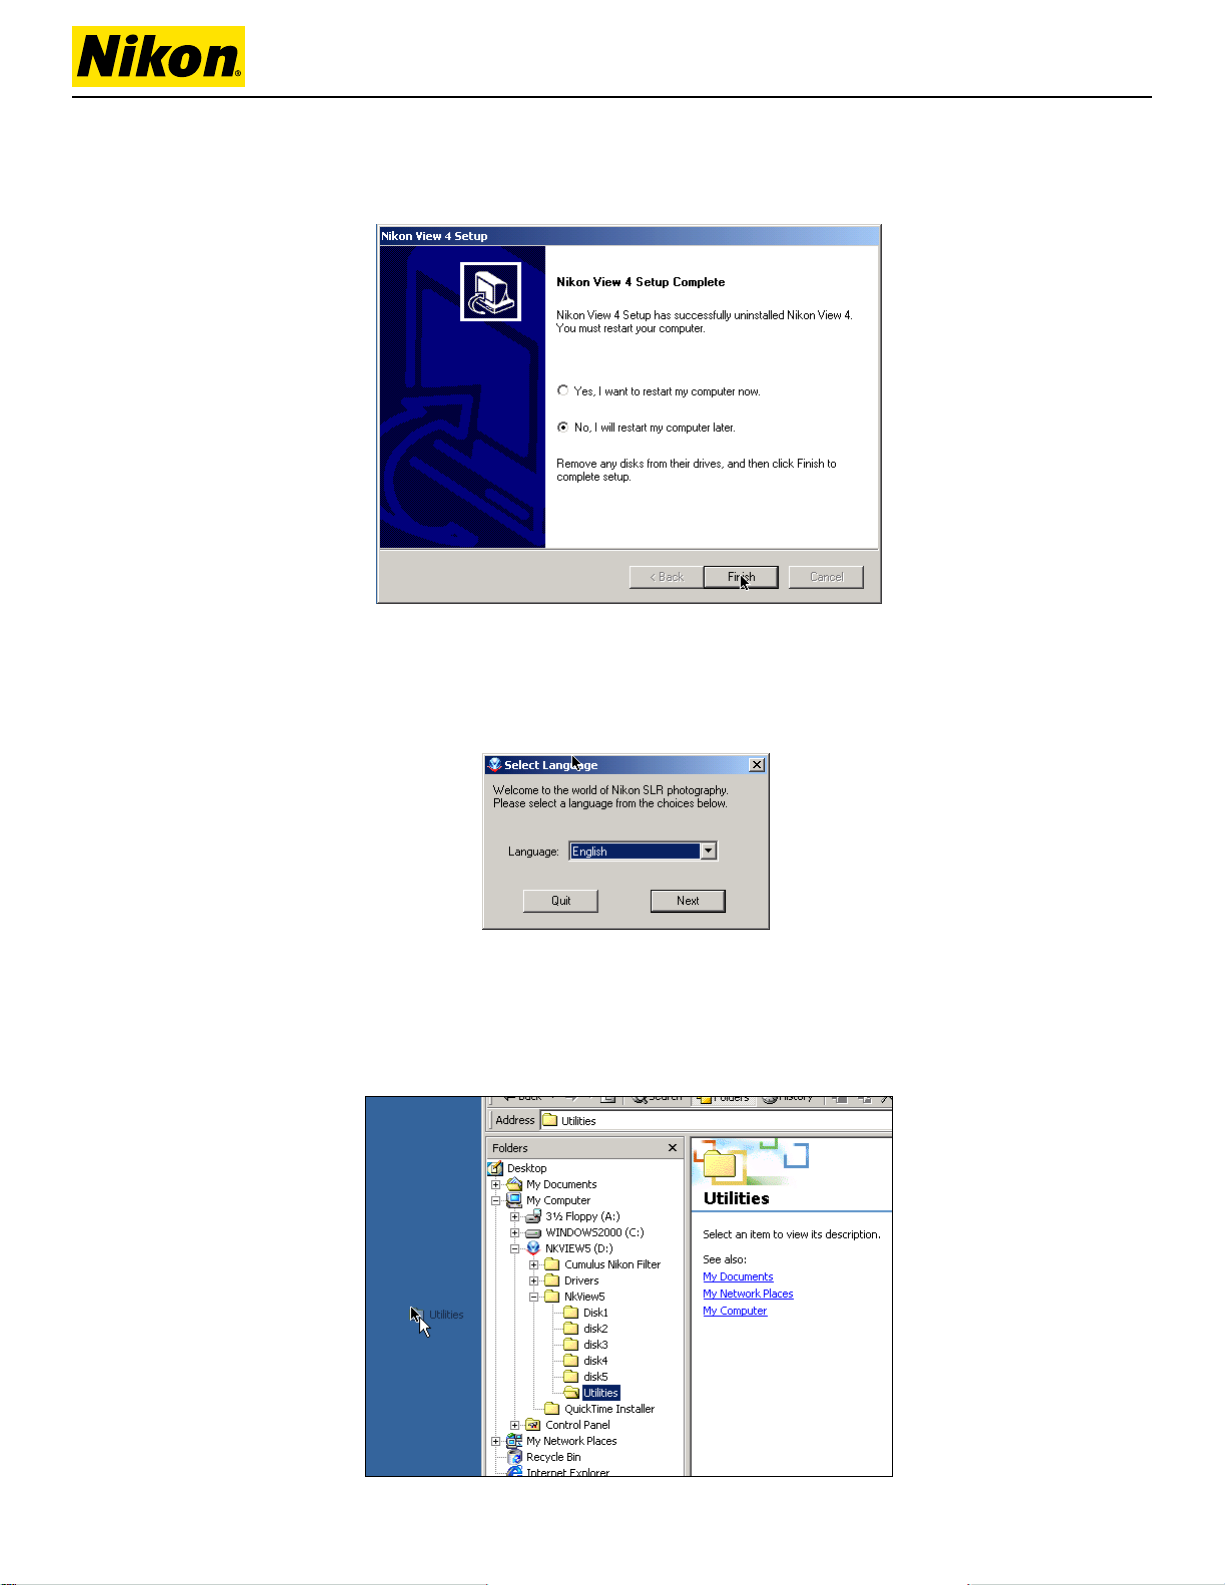
3) Restart Computer
At the end of the uninstall the program will ask if you wish to restart to complete the uninstall.
Choose “No” as we will restart after installing the new version. Click “Finish” to end.
4) Insert new version CD
Insert the CD containing the newer software version into the CD drive. If you have downloaded
the newer version this step is skipped. If the CD begins to AutoRun (by displaying the window
below) click “Quit” to end the process.
5) Copy the Utilities directory to the desktop
Open the CD and Navigate to the “NKView5” directory. Inside this directory is a directory called
“Utilities” which needs to be copied to the desktop. To copy it, simply drag it to the desktop. This
is an important step, as the next step can not be run from the CD.
Technical Note
Page 2 of 3
Page 3

6) Run the “RegSweeper” Program
Open the “Utilities” folder you previously copied to the desktop (Not the one on the CD) and double-click the “RegSweeper” program
7) Follow the prompts
Follow the on-screen prompts continuing through the cleaning process. Allow RegSweeper to
delete all Nikon keys. At the end of the process you will be informed that the key was deleted.
8) Restart the computer
You have now successfully uninstalled the older version of Nikon View and deleted all registry
keys. Restart the computer and begin the installation process from the new CD or download.
Technical Note
Page 3 of 3
 Loading...