

Nikon DX-1, DE-2, DA-2, DW-3, DW-4 Quick Manual
ACCESSORIES
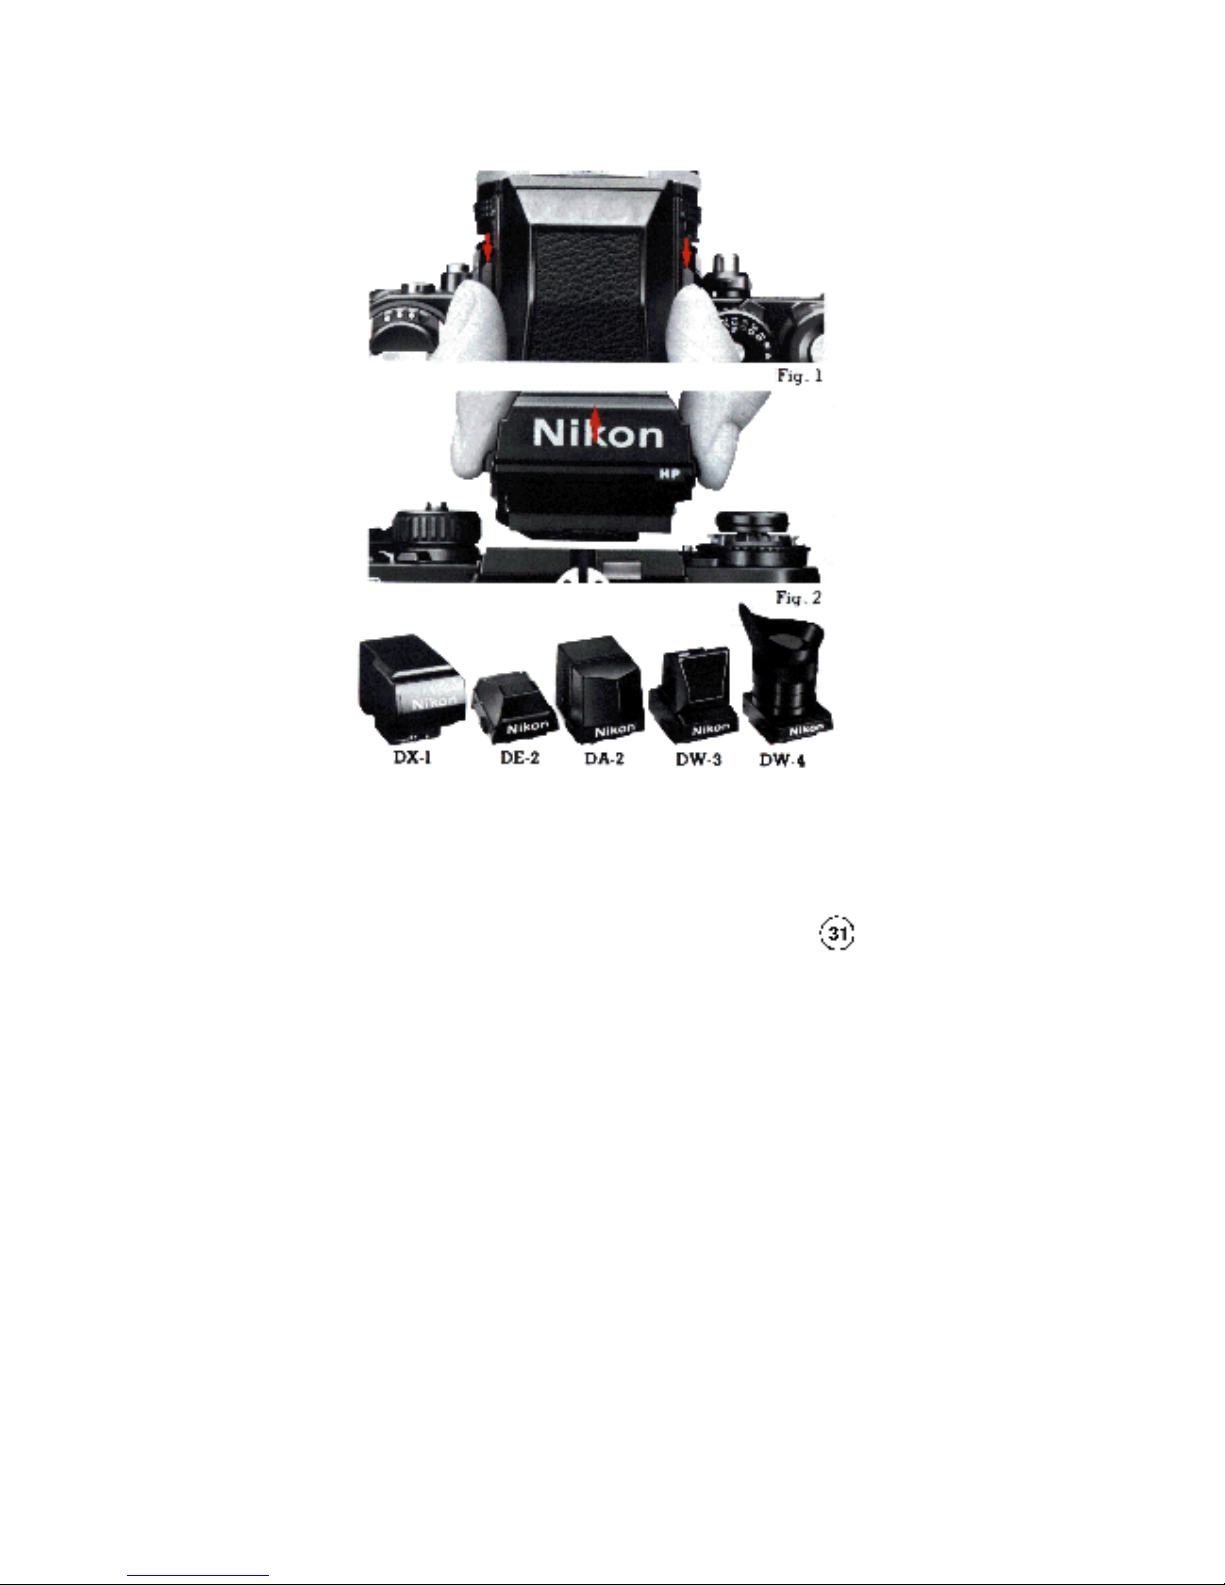
Interchangeable viewfinders
In addition to the DE-3 High-Eyepoint Finder, the F3 High-Eyepoint camera accepts various other
interchangeable viewfinders. To remove the finder, slide the finder release levers with your thumb and
finger towards the back of the camera (Fig. 1), and lift the finder out (Fig. 2). The DX-1 AF Finder provides an
electronic focus-aid indication as you manually rotate the lens to obtain correct focus.
The DE-2 Eyelevel Finder offers regular eyelevel viewing and is recommended for photographers who don't
wear glasses. The DW-3 Waist Level Finder is ideal when you want to use the camera at a low angle or upside
down over your head for shooting over crowds. The DA-2 Action Finder works well for those situations when
you can't bring your eye close to the finder, such as when you are wearing a helmet or goggles or when the
camera is enclosed in a waterproof underwater housing. The DW-4 6X Magnification Finder is for critical high
magnification close-up work or photomicrography. Regardless of which finder is attached, you still have full
automatic exposure control because the meter is built not into the finder but the body.
When using the DA-2 or DW-3, be careful that stray light does not enter from the top and cause an inflated meter
reading.
Caution: Before attaching the DX-1, the focusing screen inside the comera body must be removed (refer to
the next poge).
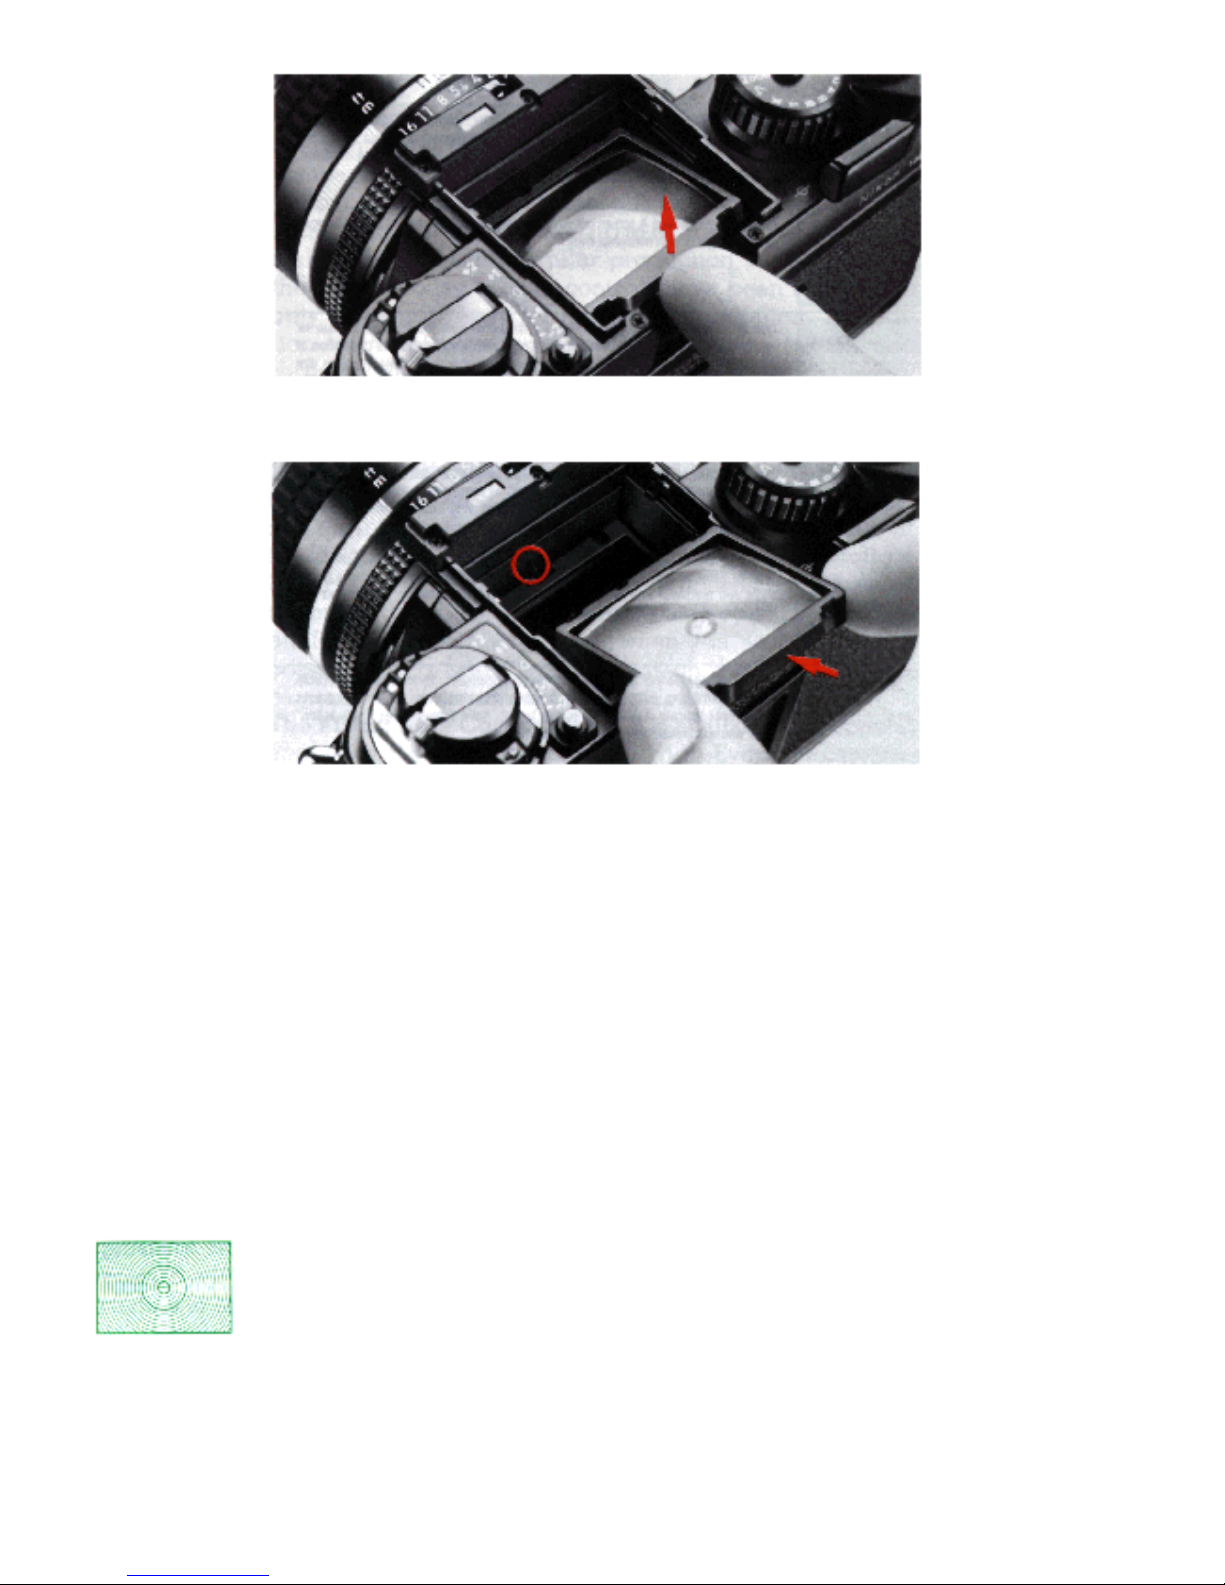
Fig. 1
Fig. 2
Interchangeable focusing screens
Nikon offers you a choice of 21 interchangeable focusing screens: A–U. The type K screen comes with the
camera as standard equipment. On the following page is a chart listing all the screens.
To take out the focusing screen, first remove the finder, then insert your fingernail under the rear edge of the
screen and lift it out (Fig. 1).
To install another screen, simply insert the front edge (the edge with the slot in the middle) under the pin and push
the rear edge of the screen down into place (Fig. 2).
Note: For more information on which screens are compatible with which lenses, consult the instruction sheet
supplied with the lens.
Focusing Screen Selector Guide
Type A: Matte/Fresnel field with 3mm¢ circular split-image rangefinder spot and 12mm¢ reference circle. Rapid
and accurate focusing. Excellent for general photography.
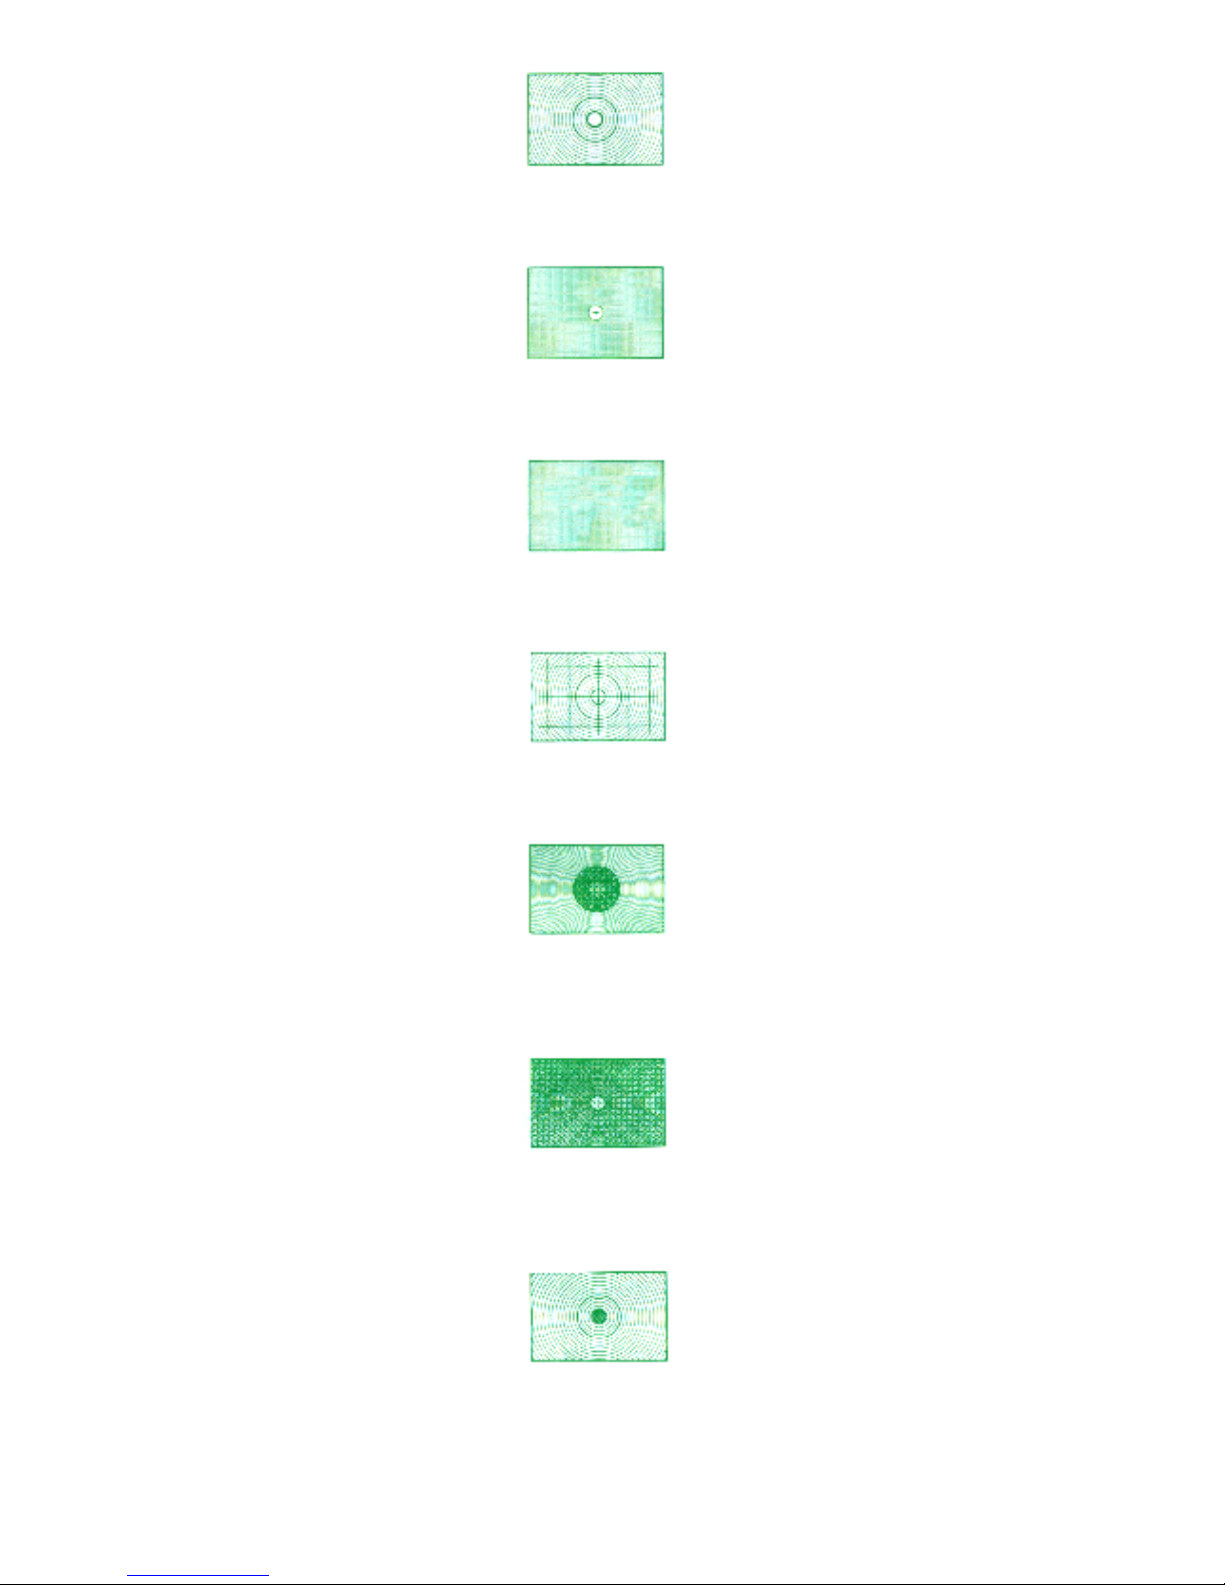
Type B: Matte/Fresnel field with 3mm¢ fine-ground matte focusing spot and 12mm¢ reference circle. Good for
general photography, especialy with long lenses.
Type C: Fine-ground matte field wth 4mm¢ clear spot and cross hair. For photomicrography, astrophotography
and other high-magnification applications, using parallax focusing on aerial images.
Type D: Overall fine-ground matte field Full specialized close up photography and for use with long lenses.
Type E: Matte/Fresnel field with 3mm¢ fine-ground matte spot, 12mm¢ reference circle, and etched horizontal
and vertical lines. Ideal for architectural photography.
Type G: Clear Fresnel field with extra-bright 12mm¢ microprism focusing spot for viewing and focusing in
poor light. Four models (Gl - G4) are available corresponding to specific focal length lenses. Depth of field
cannot be observed.
Type H: Clear Fresnel field with microprism focusing pattern over the entire screen area. Permits rapid focusing
on any part of the screen with optimum edge-to-edge brightness in poor light. Available in four models (H1 - H4)
corresponding to particular focal length lenses.
Type J: Matte/Fresnel field with central microprism focusing spot and 12mm¢ circle. Good for general
photography.
 Loading...