


1
Contents
Quick Start . . . . . . . . . . . . . . . . . . . . . . . . . . . . . . . . . . . . . . . . . . . . . . . . . . . . . . . . . . . . . . . . . . . . . . . . 2
Set-Up . . . . . . . . . . . . . . . . . . . . . . . . . . . . . . . . . . . . . . . . . . . . . . . . . . . . . . . . . . . . . . . . . . . . . . . . . . . . 4
Calibration . . . . . . . . . . . . . . . . . . . . . . . . . . . . . . . . . . . . . . . . . . . . . . . . . . . . . . . . . . . . . . . . . . . . . . . . . 5
Water Resistance . . . . . . . . . . . . . . . . . . . . . . . . . . . . . . . . . . . . . . . . . . . . . . . . . . . . . . . . . . . . . . . . . . . 6
Mode Limits . . . . . . . . . . . . . . . . . . . . . . . . . . . . . . . . . . . . . . . . . . . . . . . . . . . . . . . . . . . . . . . . . . . . . . . 6
Material Specifications . . . . . . . . . . . . . . . . . . . . . . . . . . . . . . . . . . . . . . . . . . . . . . . . . . . . . . . . . . . . . . . 6
Battery . . . . . . . . . . . . . . . . . . . . . . . . . . . . . . . . . . . . . . . . . . . . . . . . . . . . . . . . . . . . . . . . . . . . . . . . . . . . 6
Troubleshooting . . . . . . . . . . . . . . . . . . . . . . . . . . . . . . . . . . . . . . . . . . . . . . . . . . . . . . . . . . . . . . . . . . . . 6
Service Centers . . . . . . . . . . . . . . . . . . . . . . . . . . . . . . . . . . . . . . . . . . . . . . . . . . . . . . . . . . . . . . . . . . . . . 7
Warranty . . . . . . . . . . . . . . . . . . . . . . . . . . . . . . . . . . . . . . . . . . . . . . . . . . . . . . . . . . . . . . . . . . . . . . . . . . 7
This document with updates is available online at
www.nike.com/manuals
2
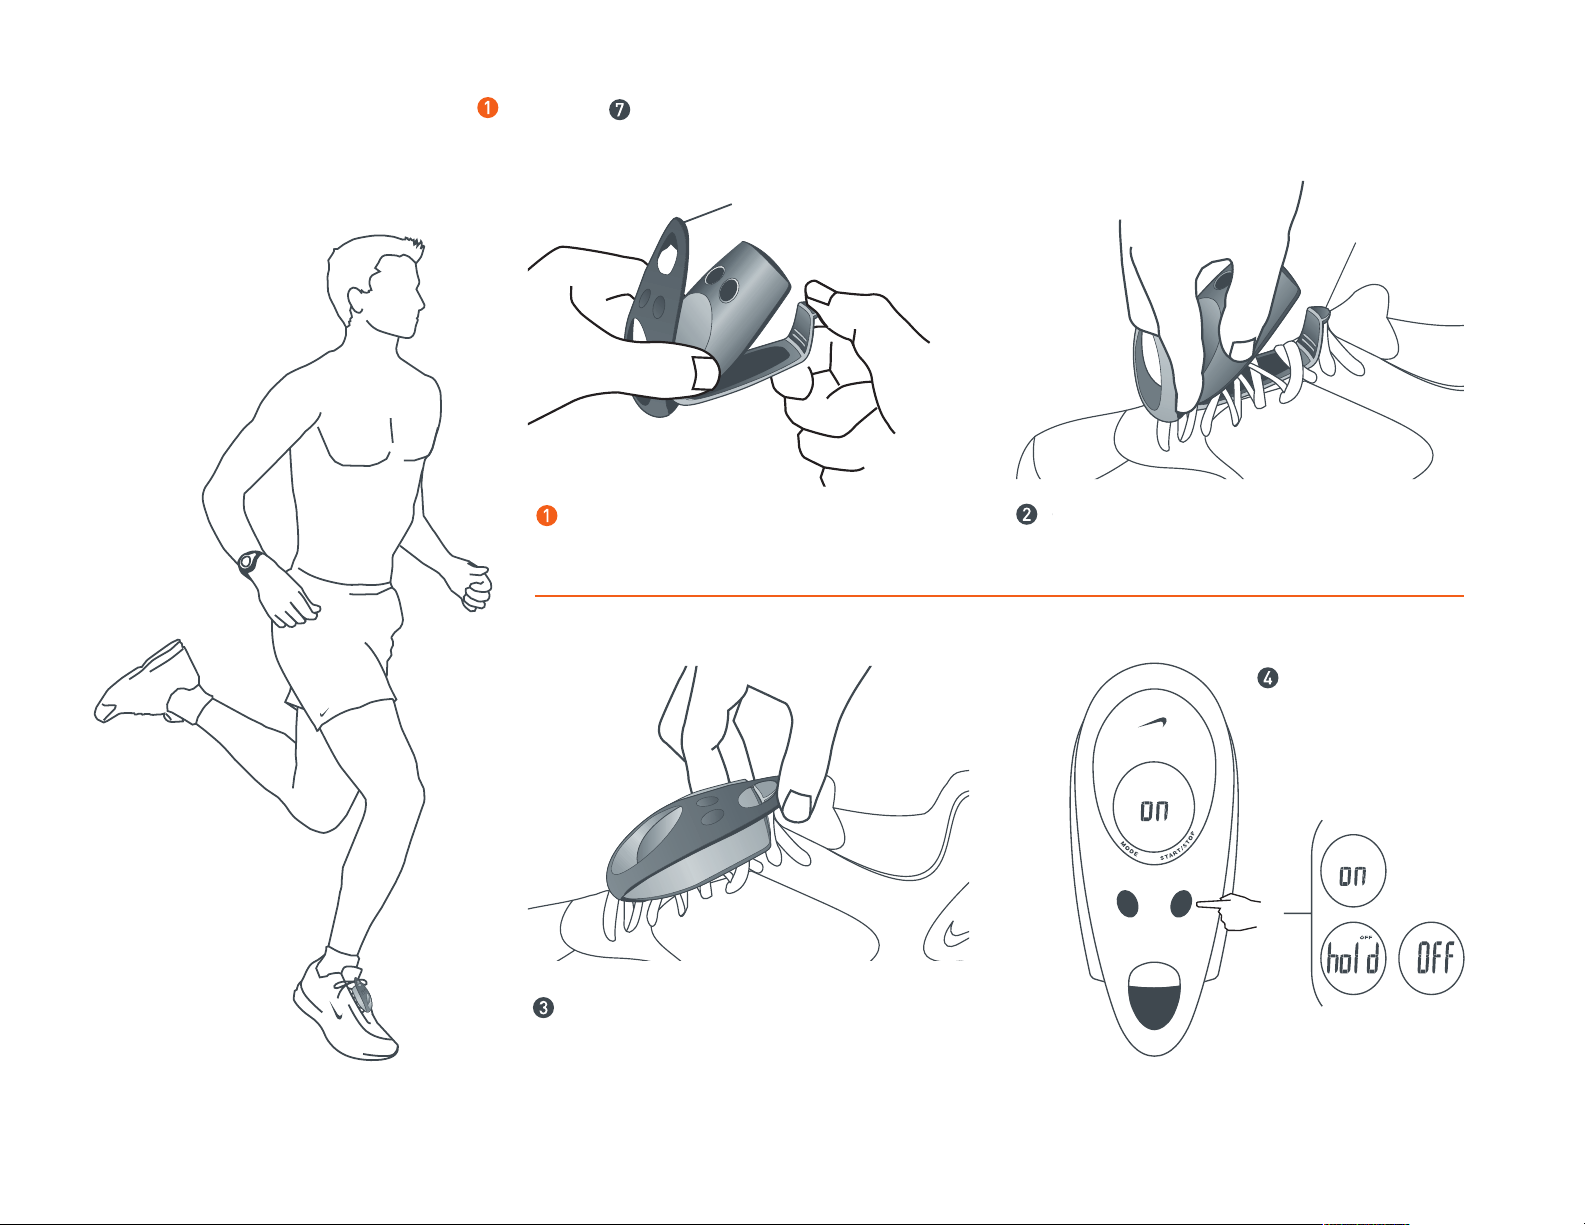
Quick Start Follow steps through to position the SDM tailwind and go for a run.
1.5 SEC
SECURING STRAP
Unfasten the securing strap and lift
hinged speed sensor from base.
Slide base under laces, then press speed
sensor until it clicks into place.
BASE
CLIP
Fasten securing strap over speed sensor.
Power ON/OFF

3
6
5
7
Total
Time
Accumulated
Distance
Distance Average
Pace
Calories
Burned
Clear or Reset
in any Mode
Start/Stop
in any Mode
4
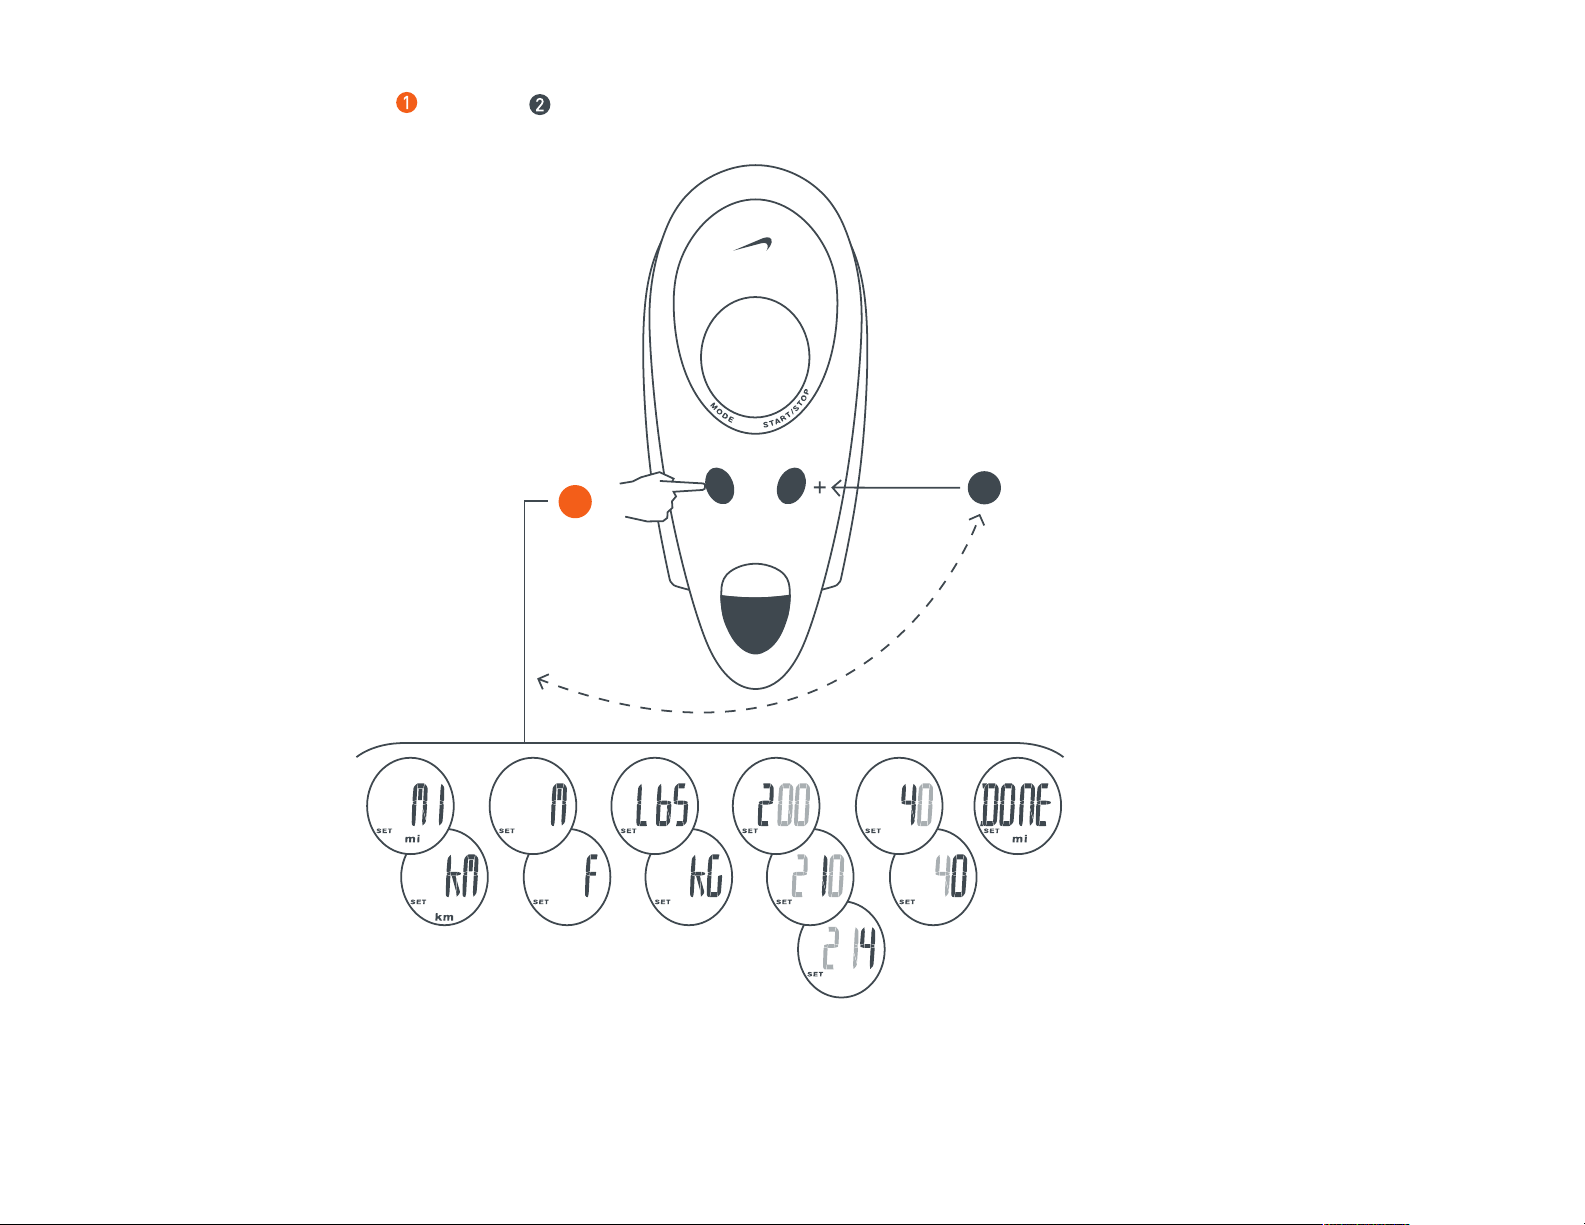
Set-Up Follow steps through to personalize your SDM tailwind.
1.5 SEC
1
2
weightdistance
units
gender weight
units
age

5
Calibration Go to a 400 meter marked track and follow steps through to calibrate SDM tailwind.
5
6
2 3 4
400 meter
Run at your usual pace on the inside lane.
Complete 1-2 laps (400-800 meters).
If your ran 400 meters,
adjust displayed
distance to 400M
Go to a 400 meter marked track.
1.5 SEC
Push start button
Push stop button
when you finish
the lap.
5 SEC 5 SEC
11

6
Water Resistance
Splash Proof
ATTENTION: Water damage
will occur if watch buttons
are pressed while underwater!
Mode Limits
Chronograph: 23:59’59”
Material Specifications
Crystal: Polycarbonate
Strap: Polyurethane
Case: Plastic Resin
Clip: Plastic Resin
Troubleshooting:
Attachment to shoe: make sure SDM tailwind is attached to the
laces securely enough that there is no “wobble” when you are
running. Finally, it should be aligned with the foot and secured
well enough that the alignment does not change during a run.
Orthotics:
People who wear orthotics or have extreme pronation or
supination in their stride may experience reduced accuracy.
Try re-calibrating for improved accuracy.
Varying Paces:
People who run at varying paces within a run may
experience reduced accuracy. Try calibrating at the
speed you usually run.
Battery
Battery Type: 1 AAA
Battery Life: About 70 hours
Battery Replacement: Follow the steps below to replace your
SDM tailwind battery. For best results, you can have Nike’s authorized
service center change the SDM tailwind battery. See page 7 for service
center information.
AAA battery
Open the battery
lid on the pod
with a coin by
turning counterclockwise.
Replace the
battery lid.
Insert a AAA
battery with the
+ mode facing
you.
 Loading...