

Page 1

Safety Precautions
Do not subject the device to severe impac t or drop it from heights.
Do not use the device in extreme hot or cold, dusty or damp conditions. Do not
expose it to direct sunlight.
Avoid using the device near strong magnetic fields.
Normal functioning of the product may be disturbed by ESD. If so, simply reset
and restart the device following the instruction manual. During file transmission,
please handle with care and operate in a static-free e nvironment.
Keep the device away from water and other liquids. In the event that water or
other liquids enter the device, power off the product immediately and clean the
device.
Do not use chemicals to clean the device in order to avoid corrosion. Clean it
with a dry cloth.
Do not install this equipment in a confined space such as a book case or similar
unit. The ventilation should not be impeded by covering the ventilation openings
with items such as newspaper, table-cloths, curtains etc.
No naked flame sources, such as lighted candles, should be placed on the
apparatus.
Attention should be drawn to environmental aspects of battery disposal.
Use the apparatus in moderate climates.
We are not responsible for damage or lost data caused by malfunction, misuse,
modification of the device or batte ry replacement.
Do not attempt to disassemble, repair or modify the product. This will invalidate
the warranty.
If the device will not be used for an extended period of time, please charge the
battery at least once per month to maintain battery life.
Charge the battery if:
a) The battery level icon displays (An empty battery)
b) The device powers off automatically when restarted.
c) There is no response when pressing key s w ith key s unlocked and battery full.
Do not interrupt the connection when the device is being formatted or
transferring files. Otherwise, data may be corrupted or lost.
When the device is used as a portable HD, please use only per the instructions.
Otherwise, permanent data loss could occur.
Please use and install data using th e attachm ents/acc essorie s provided and only
according to the manufacturer’s instr uct i o n.
Please refer to the information on the bottom of the device for electrical and
safety information before installing data or operating the device.
To reduce the risk of fire or electric shock, do not expose this device to rain or
moisture. The device should not be exposed to dripping or splashing. Never
place objects filled with liquids, such as vases, on the device.
There is danger of explosion if the battery is replaced incorrectly. Replace only
with the same or equivalent type.
1
Page 2
The battery (battery or batteries or battery pack) should not be exposed to
excessive heat such as sunlight, fire or the like.
Please follow responsible procedures for battery disposal.
If the power adaptor disconnected from the device, the device will remain
operable as long as the battery has sufficient charge.
The power adaptor is a CLASS II apparatus with double insulation, and no
external ground is provided.
Safety symbol explanation:
- The lightning flash with arrowhead symbol within an equilateral triangle is
intended to alert the user to the presence of non-insulated “dangerous
voltage” within the product’s enclosure that may be of sufficient magnitude
to constitute a risk of electric shock.
- To reduce the risk of electric shock, do not remove the cover (or b ack) as
there are no user-serviceable parts inside. Refer servicing to qualified
personnel.
- The exclamation point within an equilateral triangle is intended to alert the
user to the presence of import ant o pera ting an d maint enanc e inst ructi ons i n
the literature accompanying the device.
- Correct Disposal of this product. This marking indicates that this
product should not be disposed of w ith other ho usehol d waste in the EU. To
prevent possible harm to the environment or human health from
uncontrolled waste disposal, recycle it responsibly to promote the
sustainable reuse of material resources. To dispose of your used device,
please use the return and collection systems available in your area or
contact the retailer where the product was purchased. They can take this
product for safe environmental recycling.
This equipment should be installed and operated with minimum distance 20cm
between the radiator & your body.
CE in which countries where the product may be use d freel y: G ermany, UK, Italy,
Spain, Belgium, Netherlands, Portugal, Greece, Ireland, Denmark, Luxembourg,
Austria, Finland, Sweden, Norway and Iceland.
2
Page 3

Listening Cautions
This product respects the current regulations for limiting the output volume of
consumer audio devices to a safe level. By listening to your device with
headphones or earbuds at high volumes, you run the risk of permanent damage
to your ears. Even if you get used to listening at high volumes and it seems
normal to you, you still risk the possibility of damaging your hearing. Reduce the
volume of your device to a reasonable level to avoid p erm a ne nt he ari ng dama ge.
If you hear ringing in your ears, reduce the volume or shut off your device. This
device has been tested with the supplied earphones. In order to preserve your
hearing, it is advised that you use only the following headphone models: the
earphones supplied with your device, or any other headphones that respect the
current regulations. Other types of headphones may produce higher volume
levels.(At full power ,the p rolonge d l isteni ng of the w alkm an ca n dam age t he e ar
of the use)
Do not use while operating a motorized vehicle. It may create a traffic hazard
and is illegal in many areas.
You should use extreme caution or temporarily discontinue use in potentially
hazardous situations created by obstructed hearing.
Even if your headphones or earphones are the open-air type designed to let you
hear outside sounds, don’t turn up the volume so high that you can’t hear what’s
around you.
Sound can be deceiving. Over time your hearing “comfort level” adapts to higher
volumes of sound. What sounds “normal” can actually be loud and harmful to
your hearing. Guard against this by setting the volume of your device at a safe
level BEFORE your hearing adapts.
To establish a safe volume level:
a. Start your volume control at a low setting.
b. Slowly increase the sound until you can hear it comfortably and clearly,
and without distortion. Once you have established a comfortable sound
level, leave it there.
This manual may not reflect your actual device’s operation. All information is su bject to change
without prior notification. Please follow your actual device’s operational procedures.
3
Page 4

Table of Content
Safety Precautions ........................................................................... 1
Listening Cautions ............................................................................ 3
Packing Contents ............................................................................. 5
Features & Functionality ..................................................................... 5
Basic Connections ........................................................................... 6
Basic Operation ............................................................................... 9
Maintenance ................................................................................. 13
Major Specifications ....................................................................... 14
FCC Statement ............................................................................. 15
4
Page 5

Feature
Functionality
1. microSD card slot
Reads and writes files stored on a microSD card.
2. Charging indicator
Indicates the battery-charge status.
3. HDMI port
4. Micro-USB port
Connect USB devices, via an optional USB conversion
on.
5. DC-In socket
Connect the supplied power adapter for charging the battery.
6. Microphone
Records sounds.
Provides sound input while making calls using web-based
apps.
or make web phone calls.
8. Sustaining port (female)
9. Pogo pin connector
(female)
10.Front-facing camera
Use while making video calls.
11.Rear camera
Captures pictures or videos.
Packing Contents
When you get your Nextbook device, be sure to check the following items are
included in the package:
Main Unit ● Power Adaptor ● Keyboard
User’s Manual ● Quick Start Guide
Features & Functionality
Overview
Connect HD television via optional HDMI cable, for
switching the display to wider screen.
cable, for transferring dat a, music, photos, videos, and so
7. Audio port (3.5 mm)
Connect a headset, headphones, microphones, or other
audio equipment to listen to stereo sound, record audio,
Fix and sustain the connection to external keyboard.
Connect external keyboard
Capture a front view picture or record videos.
5
Page 6
Press for quick access to the most recently used app or
most recently viewed screen.
13.Volume+/- buttons
Press to increase/decrease volume
15. Speaker
Provides audio output.
Note:
1. Both cameras do not support zoom, face tracking.
2. User can connect a keyboard and USB mouse to this tablet if necessary.
Note:
battery has been fully charged, the LED indicator lights orange.
12.Windows button
14.Power button
Press to open the Windows Start screen.
Press and hold to turn the tablet on or off.
Press to turn the display on or off.
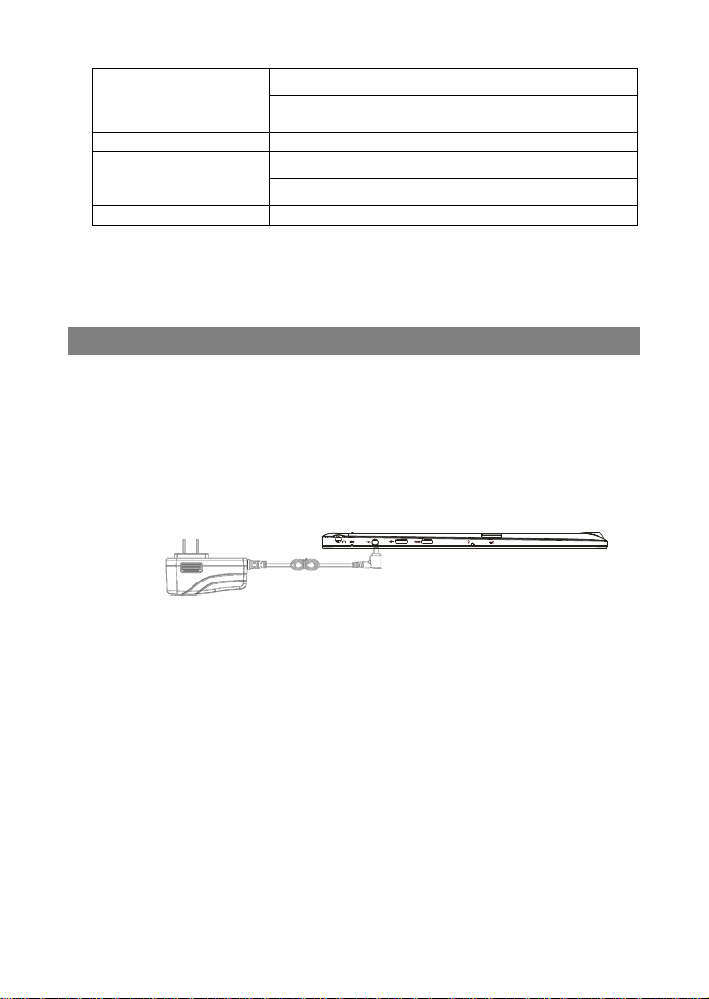
Basic Connections
Charging the tablet
Note: If using the tablet for the first time, or after a long period of idle time, charge the
battery for more than half an hour before turning it on, to ensure system stability.
The tablet has a built-in rechargeable battery. Charge the device when the battery
level is low.
1. Plug the power adapter into the DC-In socket.
2. Connect the power adapter to an electrical outlet and charge the tablet until the
battery is fully charged.
Caution:
1. Charge the battery in an ambient temperature of 0 °C to 35 °C.
2. Use only the supplied power adapter to charge your tablet. Using
unauthorized power adapters may severely damage your tablet.
1. The battery is not fully charged when you unpack your tablet.
2. A fully discharged battery takes about 5 hours to fully charg e.
3. When the battery is being charged, the LED indicator lights red, and when the
Turning On the Tablet
Note: This Nextbook device has been equipped with Windows 8.1 system at the
factory, so use r ne ed not perform Windows setup again befo re using for the first time.
1. Press and hold the Power button for 2 seconds to turn on your tablet. The lock
screen appears.
2. Swipe-up your finger from the bottom of the display to switch to the login screen,
and then enter password to log in to Windows.
6
Page 7

1. Pick up a microSD card.
2. Align the microSD card so that the pins are pointe d t oward the card slot.
3. Push the microSD card into the card slot until it locks into place.
Now the tablet is ready for use when the Windows Start screen is displayed.
Note: If the login screen is not enabled in Windows 8.1, you will be taken directly from
the lock screen to the Start screen.
Turning Off the Tablet
You can turn off the tablet in two ways:
Using the Power button:
1. Press and hold the Power button for at least 4 seconds.
2. Swipe-down the shutdown confirmation screen to the bottom edge of the display
to turn off the tablet.
Using Charms:
1. Swipe-in from the right edge of the display to access Charms.
2. Touch Settings → Power → Shut down to turn off the tablet.
Tu r ning On/Off screen
Usually, user can press once the power button to turn on/ off the screen display.
Optionally, user can also use the Charms:
1. Swipe-in from the right edge of the display to access Charms.
2. Touch Settings → Power → Sleep to turn off the screen.
Inserting a microSD card
Removing a microSD card
Caution: Removing the microSD card while it is in use may cause data loss or result
in application errors. Make sure all save operations to the microSD card are complete
before removing the microSD card.
7
Page 8

to display all icons in the notificati on area.
1. Touch the Desktop tile to enter Desktop mode.
2. Touch Safely Remove Hardware in the notification area at the bottom-right
corner of the screen.
Note: If you do not see Safely Remove Hardware , touc h Show H idden Icons
3. Touch Eject SD Memory Card. A message appears confirming that the microSD
card can be safely removed. If a warning message appears stating the microSD
card cannot be removed, ensure all data tran sf e rs involving the microSD ca rd are
complete.
4. Press on the microSD card to release it.
5. Slide the card out after it pops out from the microSD card slot.
Using Headphones
You can connect a headset or headphones to the audio port of your tablet.
Warning: Listening to loud music for an extended period of time can lead to
hearing loss.
1. Connect headphones to the audio port (3.5 mm) on the tablet.
2. Insert the earphones in your ears and adjust the volume level to a comfortable
level.
Note: When you connect an audio device to the 3.5 mm audio jack, the integrated
speakers on your tablet are muted automatically
Caution: To prevent damage to the headphones when disconnecting it from the
tablet, pull the connector instead of the cable.
.
Connecting the Keyboard
For the sake of using conv eni e nc e, this device is designed to be equipped with a
dedicated keyboard. Follow these steps to connect the keyboard to your tablet:
1. Place the dedicated keyboard on an even and stable plane (e.g. desk);
2. Hold your tablet with two hands, align the connector and the two magnetic
contacts on the keyboard to the jack and positioning slot s at th e bot t om of the
8
Page 9

FN+ F1
Switch off the screen display
FN+F5
Decrease the volume
FN+F2
Bring up Settings menu
FN+F6
Increase the volume
FN+F3
Decrease the display brightness
FN+F7
Mute the tablet.
FN+F4
Increase the display brightness
FN+F8
switch display on tablet/HD TV.
FN+F9
Lock or unlock the touch area on
the keyboard
FN+F12
Capture screenshot
FN+Nu
mLk
Lock or unlock numeric keys on the keyboard.
tablet.
3. As soon as the keyboard is connected to the tablet, it is ready for use.
4. You can rotate the tablet to overlap the keyboard as you do with a laptop.
Note:
1.This keyboard is a plug-and-play device; you can connect/disconnect it anytime.
2. There is no notification or indicati on for th e keyboard connection, except for
appearance of the mouse icon (arrow) as you pu t you r hand onto the touch area.
3. When the tablet overl ap s on the keyboard, the display will be turned off; as soon as
it is erect, the display will be turned on agai n .
4. Since the keyboard is powered by the tablet, it has no built-in batte ry inside.
Warning:
The maximum angle betwe en the tablet and t he k eyboard i s 120 degree s, so DO NOT
rotate the tablet greater than that angle; otherwise, it may cause damage to t he ta bl e t
and the keyboard.
Instructions for using the cool function keys:
Note: The numeric keys are those with blue printings on the top-right corner.
To remove the keyboard from tablet, you need to push down the button at the top
center of the keyboard with one hand, then lift it up with the other hand gently.
Basic Operation
Wi-Fi Setting
Turning On/Off Wi-Fi:
1. Swipe-in from the right edge of the display to access Charms.
2. Touch Settings → Network icon .
3. Swipe Wi-Fi icon left or right to turn Wi-Fi on or off.
Connecting to a network:
1. Swipe-in from the right edge of the display to access Charms.
2. Touch Settings → Available .
3. Select an available network from the list and touch Connect.
Gestures
9
Page 10

Finger Gesture
You can do
Drag
drop the item in the desired
Zoom in
Your tablet has a multi-touch display. You can touch the screen to operate the tablet.
Touch
Tap gently on the display with your
fingertip.
Touch and Hold
Touch and hold your finger on the
display.
1. Touch and hold your finger on
an item on the screen.
2. Keeping your finger in contact
with the display, move your fingertip
to the desired location.
3. Take your finger off the display to
location.
Swipe or Slide
Move your finger in a vertical or
horizontal direction on the display.
Touch the display with two fingers
and then move the fingers apart.
Select items on the screen, including options, entries,
images, and icons.
Start apps.
Touch buttons on the screen.
Input text using the on-screen keyboard.
Display detailed information about an item.
Open the context menu of an item to perform further
actions.
Move items such as images and icons on the screen.
Scroll through the Start screen, web pages, lists,
entries, photos, contacts, and so on.
Close an app. (Swipe the app to the bottom of the
display.)
Enlarge the view of an image or web page.
Zoom out
Touch the display with two fingers
and then move the fingers closer.
Screen Orientation
Reduce the view of an image or web page.
10
Page 11

Note: Some apps may not support automatic screen rotation and are designed to
work only in one orientation.
For optimal viewing experience, the screen orientation changes automatically to
portrait or landscape format depe nding on how you hold the tablet. You can disable
automatic screen rotation and lock the sc r e en in portrait or landscape mode.
Locking the screen orientation
1. Change the screen to the desired orientati o n.
2. Swipe-in from the right edge of the display to access Charms.
3. Touch Settings → Screen .
4. Touch toggle to lock the screen orientation, or touch toggle to unlock
the screen orientation.
Windows 8.1 Start Screen
The Windows 8.1 Start screen displays a list of default and custom Live Tiles, which
act as a shortcut to Mail, Windows Explorer, Weather app, Calendar, Windows Store,
Internet Explorer, and other installed apps.
Live Tiles on your Start screen change an d upd ate in real time to show news and
sports updates, weather updates, social-networking feed s, an d so on.
The tile-based user interfac e gives you direct access to your most recently used apps,
emails, photos, music, videos, contacts, updates from social-networking sites, and
frequently viewed websites. Y ou ca n pin y our favorite apps as tiles to customize the
Start screen.
You also can personalize the Start screen by setting your favorite picture as the
wallpaper.
Note: Live Tiles can be added or removed by using Pi n to taskbar , Pin to Start
or Unpin from Start options.
Accessing the Start screen
When you computer boots into Windows, the Start screen appears by default. To
access the start screen from any other window or app, use any of the following
methods.
Press the Windows button.
Swipe-in from the right edge of the display to access Charms, and then touch the
Start icon .
11
Page 12

If you are at the Start screen, pressing the Start icon takes you to the most
recently used app or most recently viewed screen.
Note: The functionality of the Start icon is same as Windows button
.
Swipe left
1. Swipe-in from the right edge of the display to show the charms. Charms provide
access to the system commands, such as Start, Search, Share, Devices, and
Settings options.
2. From the Start screen, swiping left until you reach the end of the tile view will
bring up the Apps icon. Touch Apps icon to show an alphabetical list of all
apps installed on your tablet.
Swipe right
1. Swipe-in quickly from the left edge of the display to switch the currently running
apps.
2. Swipe-in slowly from the left edge of the displ ay to sho w thum bnails of o pen ap ps.
3. Swipe-in and out on the left edge of the display to show a list of the most recently
used apps.
Swipe up/down
1. From Start screen, swipe-in from the bottom or top edge of the display to show
the Customize icon . Touch Customize to organize the til e s on y our Start
screen.
2. Swipe-in from the top to the bottom of an app to dock or close the app.
Synchronizing Your Tablet
Using a Microsoft account
If your computer has Microsoft Windows 8 installed, you can synchronize user
12
Page 13

Note: The Micro-USB to standard USB conversion cable is sold separately and is
not shipped with the tablet. See the picture below for referenc e.
settings of your tablet w ith y our comput er usi ng a Mi crosoft acco unt. When you si gn in
with your Microsoft account on your tablet, your settings, including internet browser
history, app settings, and personal files etc., are synchronized with other Windows 8
PCs and tablets computers.
1. On the tablet, access Charms and click Settings → Change PC Settings
→ Accounts → Your account → Connect to a Microsoft Account to switch
your computer local account to your M icro soft account.
2. Click Settings → Change PC Settings → OneDrive → Sync settings to
see the options for synchronizing y our dat a and settings.
Copy music, photos, and videos
1. Connect your tablet to a USB storage device with a Micro-USB to standard USB
conversion cable, then transfer files to or from the USB storage device.
2. After transferring files, use the Safely Remove Hardware wizard to remove the
USB storage device.
Maintenance
Cleaning Your Tablet
Caution:
Before you clean your tablet, disconnect all the cables and turn off the tablet. Clean
your tablet with a soft cloth dampened with water. Do not use liquid or aerosol
cleaners, which may contain flamm a bl e su bs t a nc es.
1. Turn off your tablet. For more information on turning off your tablet,
2. Disconnect any attached devices, headphones, and speakers from the tablet and
from their electrical outlets.
3. Moisten a soft, lint-free cloth with either water or a display cleaner, and wipe the
surface of the tablet until it is clean. Do not allow water from the cloth to seep
down to the tablet ports or buttons.
Caution:
1. To avoid damaging the tablet or dis play, do not spray cleaning solution dir ect l y
onto the display. Only use products specifically designed for cleaning displays
and follow the instructions included with the product.
2. Do not clean the keyboard with a moist cloth.
13
Page 14

Note:
Apps installed from th e Wi nd ow s S tore are automatically r einstalled after the refr es h
created on the desktop after the process is complete.
the required data before you proceed.
Item
Descriptions
Intel BayTrail-T CR, Quad core/1.8GHz (Z3735G)
Refreshing your tablet
Refreshing your tablet w ill re store Window s to or iginal factory sett ings w ithout d eleti ng
any of your personal files, installed apps from Windows Store, or personalization
settings.
To restore your tablet:
1. Swipe-in from the right edge of the display to access Charms.
2. Touch Settings → Change PC settings→ Update and recovery→
Recovery.
3. Touch Get started under Refresh your PC without affecting your files.
4. Read the warning and touch Next after you read the warning.
is complete. Apps installed from sour ces othe r th an the Windows S to re ar e rem oved
and have to be manually installed. A list of apps removed during this process is
Resetting your tablet
Resetting your tablet will return the system to original factory settings.
1. Swipe-in from the right edge of the display to access Charms.
2. Touch Settings → Change PC settings→ Update and recovery→
Recovery.
3. Touch Get started under Remove everything and reinstall Wi ndows.
4. Read the warning and touch Next after you read the warni n g.
In shutdown status, user can press and hold Power & Vol- keys at the same time to
boot the device and enter Recovery mode, for the purpose of repairing or resetting
the system.
Caution:
Resetting your tablet erases all dat a fr om your tablet, including your account
configuration, apps, music, pictures, files, and so on. Make sure that you back up all
Major Specifications
CPU
14
Page 15

Operation system
Windows 8.1 with Bing
DDR
1GB
Internal Memory
EMMC: 32 GB
Expandable Memory
Micro SD card: up to 64 GB
Interfaces
USB 2.0 high speed /Micro SD (compatible SDHC, up to 64GB) card
3.5mm Earphone
Connection Agreement
WiFi (802.11 b/g/n); BT4.0
Front Webcam
Front camera, 2.0 Mega Pixels; rear camera, 2.0 Mega Pixels
Bluetooth
Support
Display
Resolution,1280*800 Pixels, 10.1 inch LCD IPS
Rechargeable lithium battery, 7000mAh;
AC Adapter: DC-Out 5V/2.5 A
Storage T emp.
-20℃ ~ +65℃
Ambient T emp.
0℃ ~ +40℃
Operation RH
20% ~ 90% (40℃)
Storage RH
20% ~ 93% (40℃)
Power Supply
IC Caution.
FCC Statement
RSS-Gen Issue 4 November 2014"&"CNR-Gen 4e edition Novembre 2014:
- English:
This device complies with Industry Canada licence-exempt RSS standard(s).
Operation is subject to the following two conditions: (1) This device may not cause
interference, and (2) This device m u st ac ce pt any interference, including int e rference
that may cause undesired operation of the device.
- French:
Le présentappareilestconforme aux CNR d'Industrie Canada applicables aux
appareils radio exempts de licence. L'exploitationestautorisée aux deux conditions
suivantes:
(1) l'appareil ne doit pas produire de brouillage, et
(2) l'utilisateur de l'appareildoit accepter tout brouillageradioélectriquesubi, mêmesi le
brouillageest susceptible d'encompromettre le fonctionnement.
FCC Caution.
This device complies with part 15 of the FCC Rules. Operation is subject to the
following two conditions: (1) This device may not cause harmful interference, and (2)
this device must accept any interference received, including interference that may
cause undesired operation.
Any Changes or modifications not expressly approved by the party responsible for
compliance could void the user's author i ty to operate the equipment.
Note: This equipment has been tested and found to comply with the limits for a Class
B digital device, pursuant to part 15 of the FCC Rules. These limits are designed to
provide reasonable prot e ction against harmful int erference in a residential installation.
This equipment generates uses and can radiate radio frequency energy and, if not
installed and used in accordance with the instructions, may cause harmful
15
Page 16

interference to radio communications. However, there is no guarantee that
interference will not occur in a particular installation. If this equipment does cause
harmful interference to radio or tele vision reception, which can be determ ine d by
turning the equipment off and on, the user is encouraged to try to correct the
interference by one or more of the following measures:
-Reorient or relocate the receiving a nt e nn a.
-Increase the separation between t hee qu i pment and receiver.
-Connect the equipment into an outlet on a circuit different from that to which the
receiver is connected.
-Consult the dealer or an experienced radio/TV technician for help.
The device has been evaluated to meet general RF exposure requirement. The devic
e can be used in portable exposure condition without restriction.
This manual was correct and complete at the time of printing. However, new
specifications and updates ca n occur at any time without prior notice. No part of this
manual may be copied, r epu bli shed , rep ro duce d, tran sm itte d or di stri but ed i n any w ay
without prior written consent of E Fun. Any unauthorized distribution of this manual is
expressly forbidden.
E Fun may find it necessary to modify, amend or otherwise change or update this
manual. We reserve the right to do this at any time, without any prior notice. All
specifications and features are subject to change without notice. All screen shots
shown are simulated and may not represent the actual screen on production units
sold to consumers.
For instruction manuals, updated drivers or other information, be sure to visit our
website at:
www.nextbookusa.com
Or write to us at:
E Fun
West Covina, CA 91791
USA
Copyright © 2015
EFMW101T
16
Page 17

FAQ
(Frequently Asked Questions)
Q: Why the battery does not charge. What to do?
A: There are 3 main possible reasons for this problem: bad connection, improper
temperature condition, damaged battery or adapter.
As for bad connection, user should:
1. Check all connectors to ensure proper connectivity.
2. Unplug the supplied AC power adapter from the wall and verify that the outlet is
functioning.
3. Check all cable connections, plug the adapter back into the tablet, and then plug back
into the wall outlet.
And for improper temperature condition, i.e. the tablet's temperature is below 0 °C or
17
Page 18

higher than 35 °C, user should change the location and charge the battery in an ambient
temperature between 0 °C to 35 °C.
And if the battery or adapter has been damaged, contact an authorized reseller to rep lac e
the battery or power adapter.
Q: My battery drains quickly even when the tablet is in Standby mode. What’s the
matter?
A: If the tablet is not in the range of a network it can connect to, the tablet continues to
send out signals to locate a base station and drains the battery. So, just temporarily turn
off the tablet, or move the tablet in range of a network it can conne ct to, or tem porarily turn
off the wireless connection on your tablet.
In addition, if the tablet keeps checking for Windows updates even in Standby mode, the
battery will drain quickly too. It is normal in this case. User can disable it by selecting
“Never check for update”. However, it is not recommended. User should be cautious
before doing this.
Q: Tablet does not turn on, what to do?
A: It may be because the battery is completely discharged. Charge the tablet for at least 4
hours, and then press and hold the Power button for 3 seconds to turn on the tablet.
Q: Tablet is connected to the power adapter for charging, but still fail s to tur n on.
Why?
A: If the tablet has been idle for a long period of time, or has just been purchased and
used for the first time, its battery might be completely discharged. In this case it is
suggested that user should charge the battery for over half an hour before turning it on, so
as to guarantee the stability of its system
Q: Tablet does not turn off, what to do?
A: Press and hold the Power button for 10 s to perform a hard shut down.
Note: User will have to wait for about 8 seconds before turning on the tablet again after it
shuts down.
Q: Why the software or feature is not working as expected?
A: Software updates may have been downloaded in the background. Restart your tablet by
swiping-in from the right edge of the display to access Charms and touch Settings→
Power→ Restart to restart the tablet.
Q: The device crashes, or the screen turns blue after startup. What can I do?
A: It may be because the system of the tablet has been damaged to some extent for
improper shut-down actions. In shutdown status, press and hold the Power and Volbutton together to reboot the device and enter the Recovery mode, so as to repair or reset
the system.
After entering the Recovery mode, user will have to choose an option from the menu
before going on:
● Continue – Exit without doing anything and continue to Windo ws 8.1 system.
● Use a device- Refresh the system by using a USB device, network connection, or
Windows recovery DVD.
● Troubleshoot- Refresh or reset your PC or use advanced tools.
● Turn off your PC- do nothing and turn off the tablet.
Q: Tablet locks up, what should I do?
A:1. Press and hold the Power button for 10 seconds to perform a hard shut down;
2.In shutdown status, press and hold the Power and Vol- button together to reboot the
18
Page 19

device and enter the Recovery mode;
3.Select “Troubleshooting- Refresh or reset your PC or use advanced tools”.
Q: How to deal with the case that my tablet is not responding or behaving as
expected?
A:1. Reboot the tablet;
2. If it still not works, try refreshing the system.
3. If the problem remains unsettled, contact the vendor’s support service.
Q: Tablet cannot boot into Windows, what should I do?
A:1. Reboot the tablet;
2. If it still not works, try refreshing the system.
3. If the problem remains unsettled, contact the vendor’s support service.
Q: Touchscreen responds slowly or improperly, what’s wr ong?
A: Perhaps the screen is dirty, and sometimes the protective cover prevents the tablet from
recognizing your inputs.
1. Moisten a soft, lint free cloth with either water or a display cleaner, and wipe the surface
of the tablet until it is clean. Do not allow water from the cloth to seep down to the tablet
ports or buttons.
2. Remove any protective covers from the touchscreen.
Q: No wireless connection, how to set it up?
A:1. Check if the wireless radio is on. See Wi-Fi setting.
2.Try to get closer to the wireless access point.
3. Reset the wireless router if using a private network; open the browser to view the
landing page if using a public network.
Q: Slow Internet connections. How to make it faster?
A: The signal strength is not strong enough. Move your tablet to a different location for
better signal reception.
Q: Why the touch pad of the keyboard does not function?
A: There are two possible reasons for this problem. One is that the keyboard has not been
connected properly. If so, not only the touch pad, but also the other keys will not function.
For this case, reconnect the keyboard.
The second reason is that the touch pad has been deactivated. Press function keys to
activate it.
Q: When entering my password, I can’t input the characters I want. What’s the reason?
And in some area of the keyboard, letters can not be input, only numbers, why?
A: Once the FN+NumLk keys are pressed, the numeric keys will be locked or unlocked.
If they are locked, user can use them to enter numbers; if they are unlocked, user can
only use them to enter letters.
Q: The screen of the tablet PC turns completely dark suddenly. What’s wr ong
with it? What can I do?
A: Once the remaining capacity of the battery is less than 3 %, the screen will turn black
automatically. It enters S4 mode (i.e. hibernating status). All running data will be saved
on the HDD. Under such circumstance, user can recharge the battery with the supplied
power adapter for about 5 minutes before rebooting it again.
19
Page 20

EFMW101T
Warranty Card
20
Page 21

21
Page 22

22
 Loading...