

Page 1
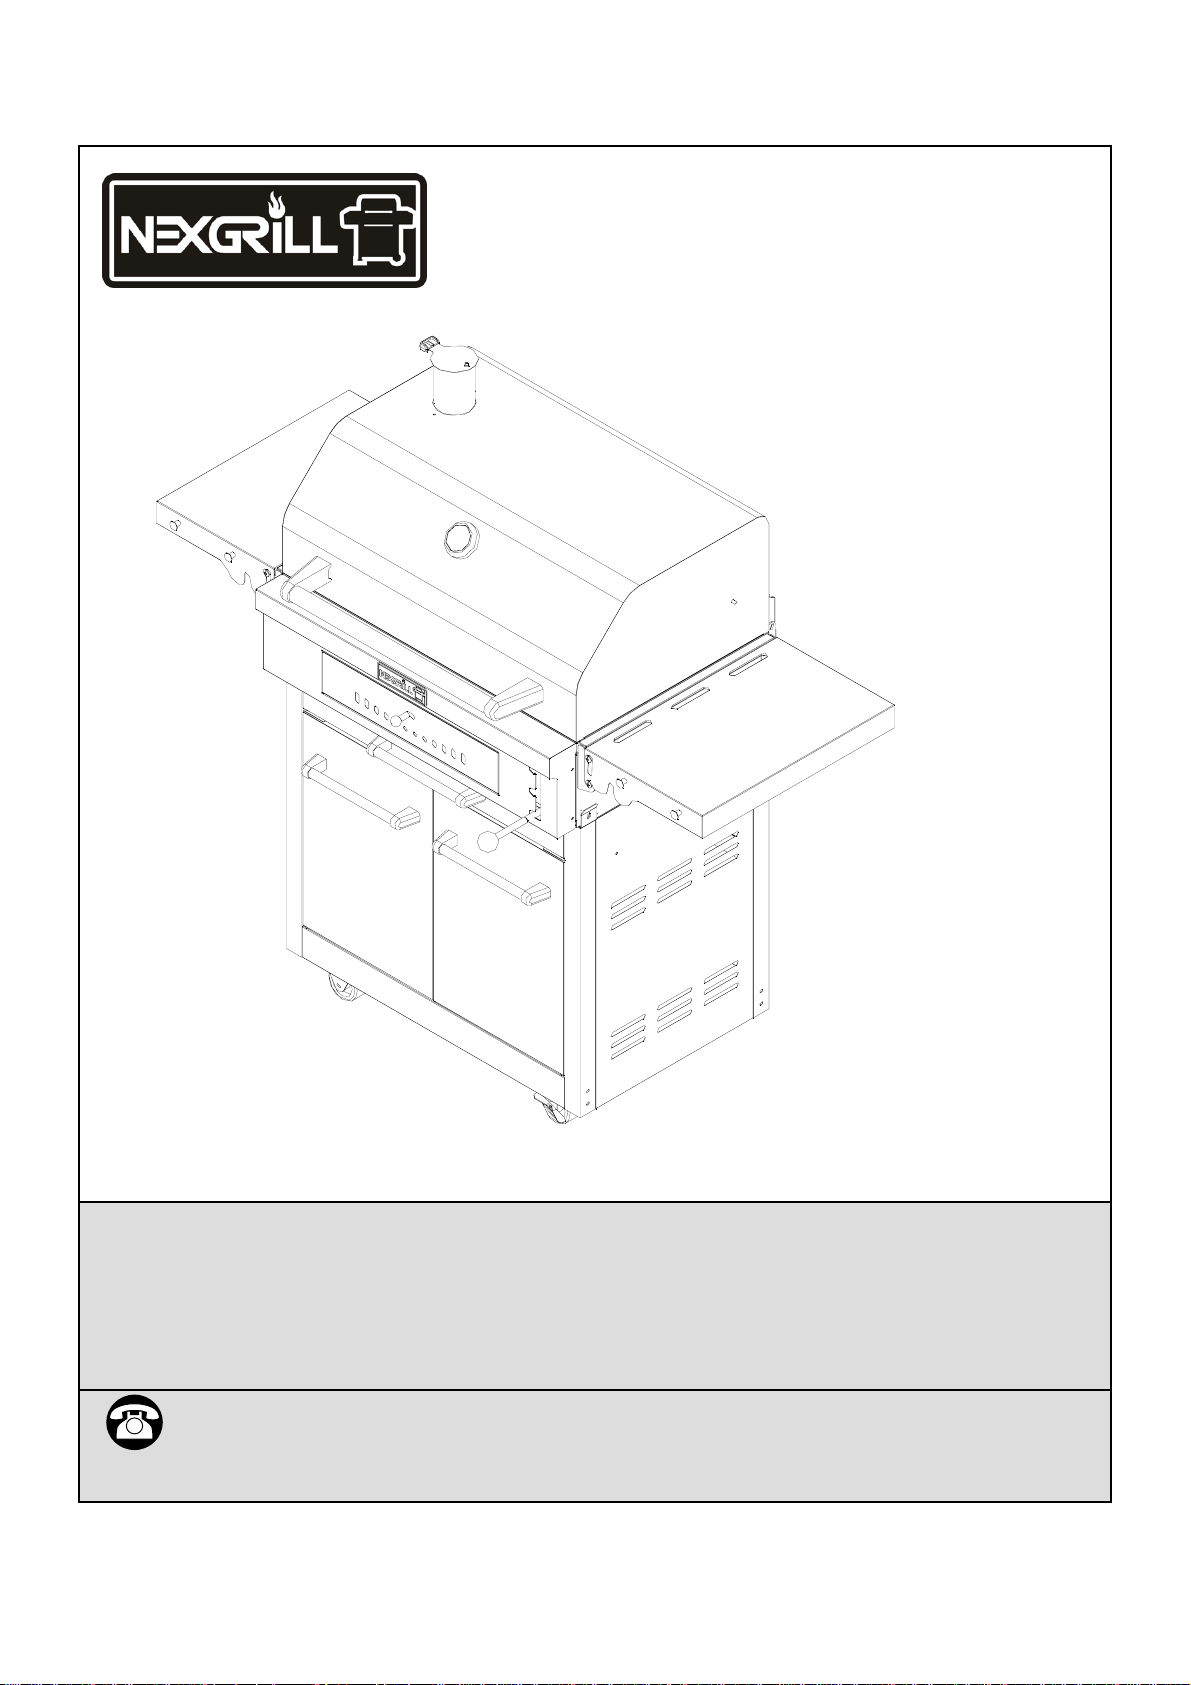
OUTDOOR CHARCOAL GRILL
MODEL #810-0018
SERIAL # ____________________ MFG. DATE _____________ PURCHASE DATE: _________ ___
• This instruction manual contains important information necessary for the proper
assembly and safe use of the appliance.
• Read and follow all warnings and instructions before assembling and using the
appliance.
• Keep this manual for future reference.
Questions, problems, missing parts? Before returning to your retailer, call our custom er service
department at UK:02392-322880, 8 a.m.-5 p.m. Monday - Friday.
19000401A0
Page 2
Table of Contents
Safety Instruction . . . . . . . . . . . . . . . . . . . . .
Hardware Contents . . . . . . . . . . . . . . . . .
Preparation . . . . . . . . . . . . . . . . . . . .
Packaging Content s ………………………..
Exploded View . . . . . . . . . . . . . . . . . . . . . . . .
Part List . . . . . . . . . . . . . . . . . . . . . . . . . . . .
2-3
4
4
5-6
7
8-9
Assembly Instructions . . . . . . . . . . . . . . . . . .
Lighting instruction . . . . . . . . . . . . . .. . . . . .
Operating and cooking instructions. . . . . . . .
Proper care & maintenance . . .. . . . . . . . . . .
Ordering parts . . . . . . . . . . . . . . . . . . .
Limited warranty . . . . . . . . . . . . . . . .
10-21
22
23-24
25
25
26
Safety Instruction
ATTENTION: This barbecue will
become very hot while in use. Do not
move it during operation.
Do not use indoors.
WARNING
Do not burn more than 10lbs of charcoal in this unit at one time.
Keep a fire extinguisher nearby at all times.
This grill is for outdoor use only, in well-ventilated areas.
The use of alcohol, prescription or non-prescription drugs may impair the user’s ability
to properly assemble and safely operate this unit.
Use caution when lifting and moving the unit to avoid back strain or back injury. Two
people are recommended to lift or move the unit. Do not move the unit while it is in use.
DO NOT operate the unit near or under flammable or combustible materials such as
decks, porches or carports. A minimum clearance of 36 in. (92cm) is required from all
combustible materials. DO NOT operate the unit under overhead construction or
combustible materials.
CAUTION: Do not use spirit, petrol or
comparable fluids for lighting or re-lighting!
WARNING: Keep children and pets away.
2
Page 3
Safety Instruction
WARNING
This product is not to be used as a heater.
Operate the unit on a stable, level, non-flammable surface such as asphalt, concrete or
solid ground. DO NOT operate the unit on flammable material such as carpet or a wood
deck.
Use caution when assembling and operating this unit to avoid cuts and scrapes from
edges.
DO NOT use this product in a manner other than its intended purpose. It is NOT
intended for commercial use. It is not intended to be installed or used in or on a
recreational vehicle and/or boats.
DO NOT Store this unit near gasoline or other combustible liquids or where other
combustible vapors may be present.
DO NOT store or operate this product in an area accessible to children or pets. Store
this unit in a dry, protected location.
DO NOT leave the unit unattended while in use.
DO NOT leave hot ashes unattended until the grill cools completely.
DO NOT move the unit while in use or while ashes are still hot. Allow the unit to cool
completely before moving or storing.
NEVER use gasoline or other highly volatile fluids as a starter.
Always wait for any charcoal flames to subside before placing food on cooking grid.
Dispose of cold ashes by wrapping them in a heavy-duty aluminum foil and placing in a
noncombustible container. Make sure that there are no other combustible materials in
or near the container.
Allow the unit to cool completely before conducting any routine cleaning or
maintenance.
Failure to comply with these instructions could result in a fire or explosion that
could cause serious bodily injury, death, or property damage.
Combustion by products produced when using this product contain chemicals
known to the States of California to cause cancer, birth defects, or other reproductive
harm.
Your grill will be very hot. Never lean over the cooking area while using your grill.
Do not touch cooking surfaces, grill housing, lid or any other grill parts while the grill
is in operation, or until the gas grill has cooled down after use.
3
Page 4

Hardware Contents
Item Description Size Extra hardware Quantity
1/4-in. x 15-mm Truss head screws with locking
AA
BB
CC
DD
washers
5/32-in. x 10-mm Truss head screws with locking
washers
1/4 –in. nuts
1/4- in. x 15-mm stage screws
28 2 30
16 2 18
51 6
41 5
EE
FF
GG
II
5/32-in. x 10-mm
¼-in. Flat washers
Flat washer for utensil hooks
Chimney lid springHH
ST4.2 x 10-mm Self-tapping screws
Flat Head Screws
4
25
15
227
514
101
514
Preparation
Before beginning assembly, make sure all parts are present. Compare parts with package contents list and
diagram above. If any part is missing or damaged, do not attempt to assemble the product. Contact customer
service for replacement parts.
•Tools required for assembly (not included).
-Phillips Screwdriver
-Wrench
• Note: The grill right and left sides are on your right and left as you face the front of the grill.
Phillips Screwdriver Wrench
4
Page 5
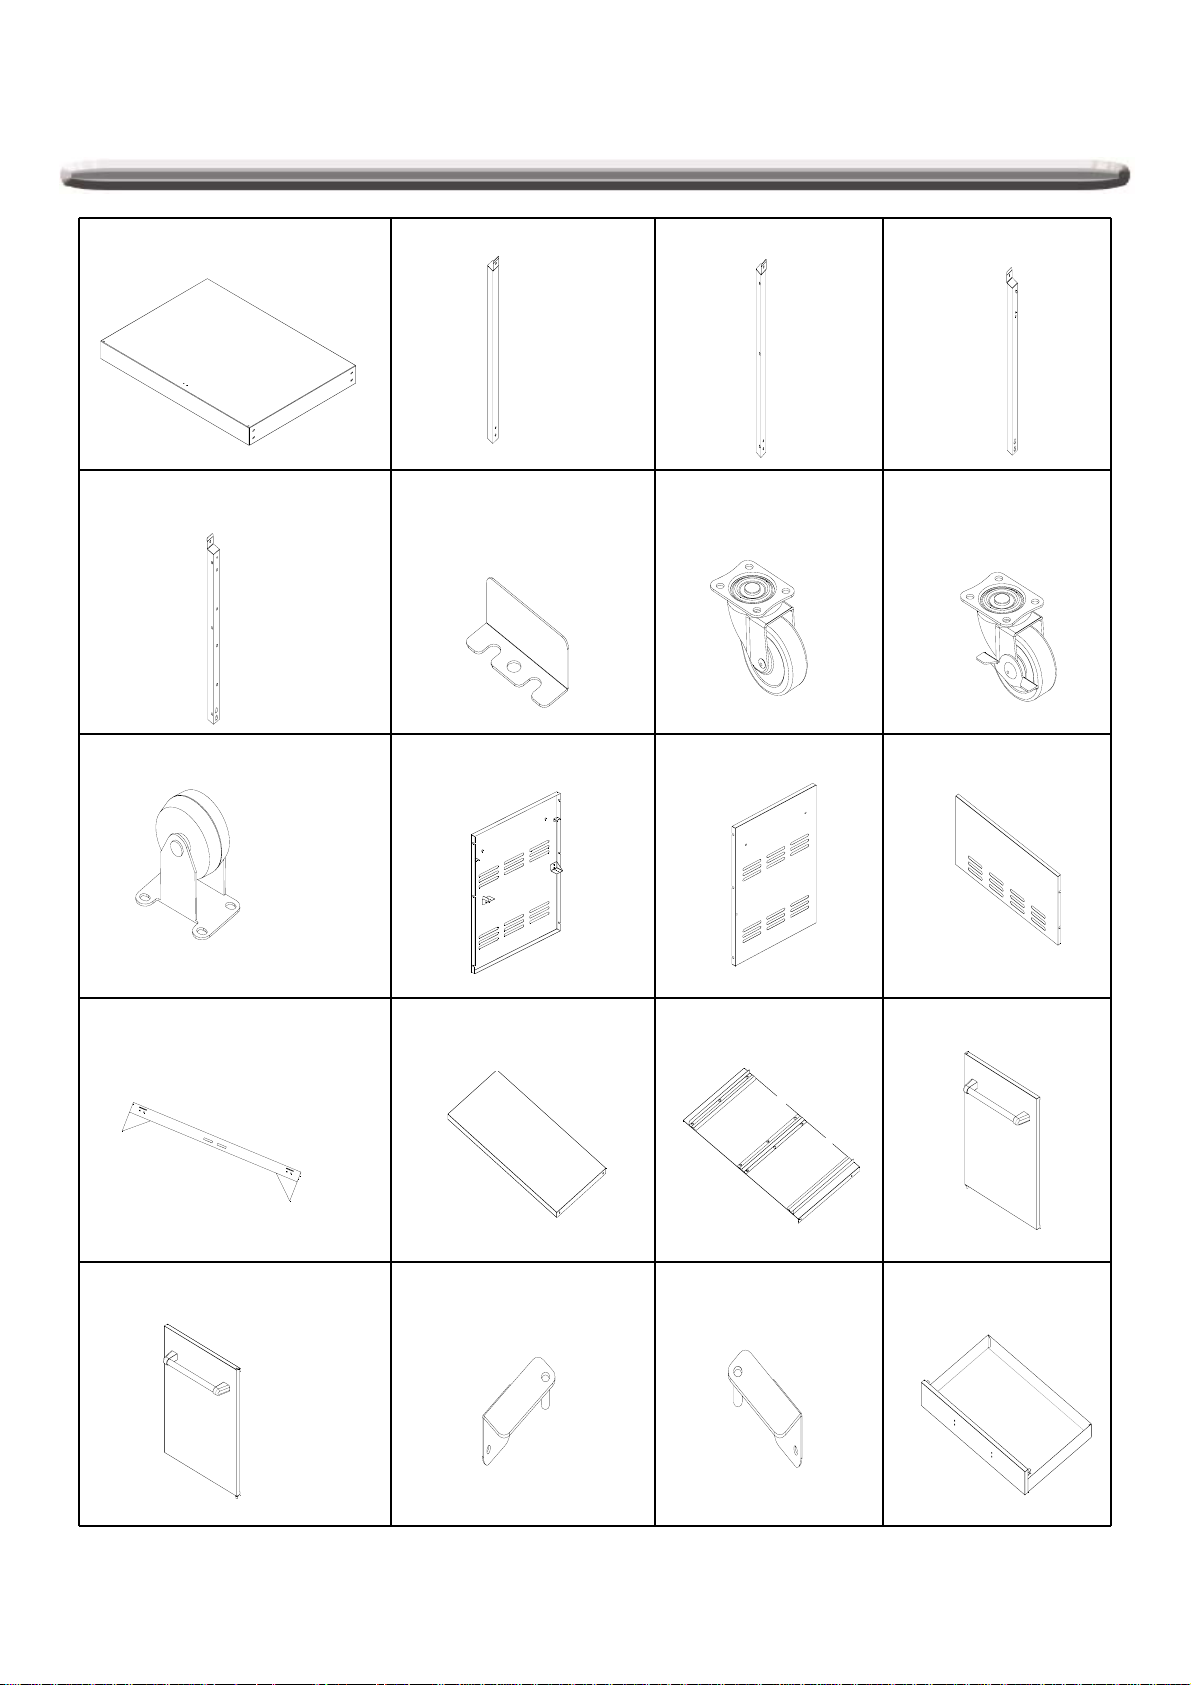
Package Contents
A. Bottom panel-1 pc
E. Left Cart leg, back-1 pc F. Door iron piece-1 pc
I. Stationary caster-2 pcs J. Side panel, left -1 pc K. Side panel, right -1 pc L. Back panel - 2 pcs
B. Right cart leg, front-1pc C. Right cart leg, back--
---1 pc
G. Swivel caster-1 pc
D. Left cart leg, front--1
pc
H. Swivel caster
with brake-1 pc
M. Cart frame - 1 pc N. Cart central panel – 1 pc O. Cart top panel – 1 pc
Q. Door, right – 1 pc R. Door hinge plate, left-
1pc
S. Door hinge plate, right
–1 pc
5
P. Door, left – 1 pc
T. Charcoal ash tray- 1
pc
Page 6
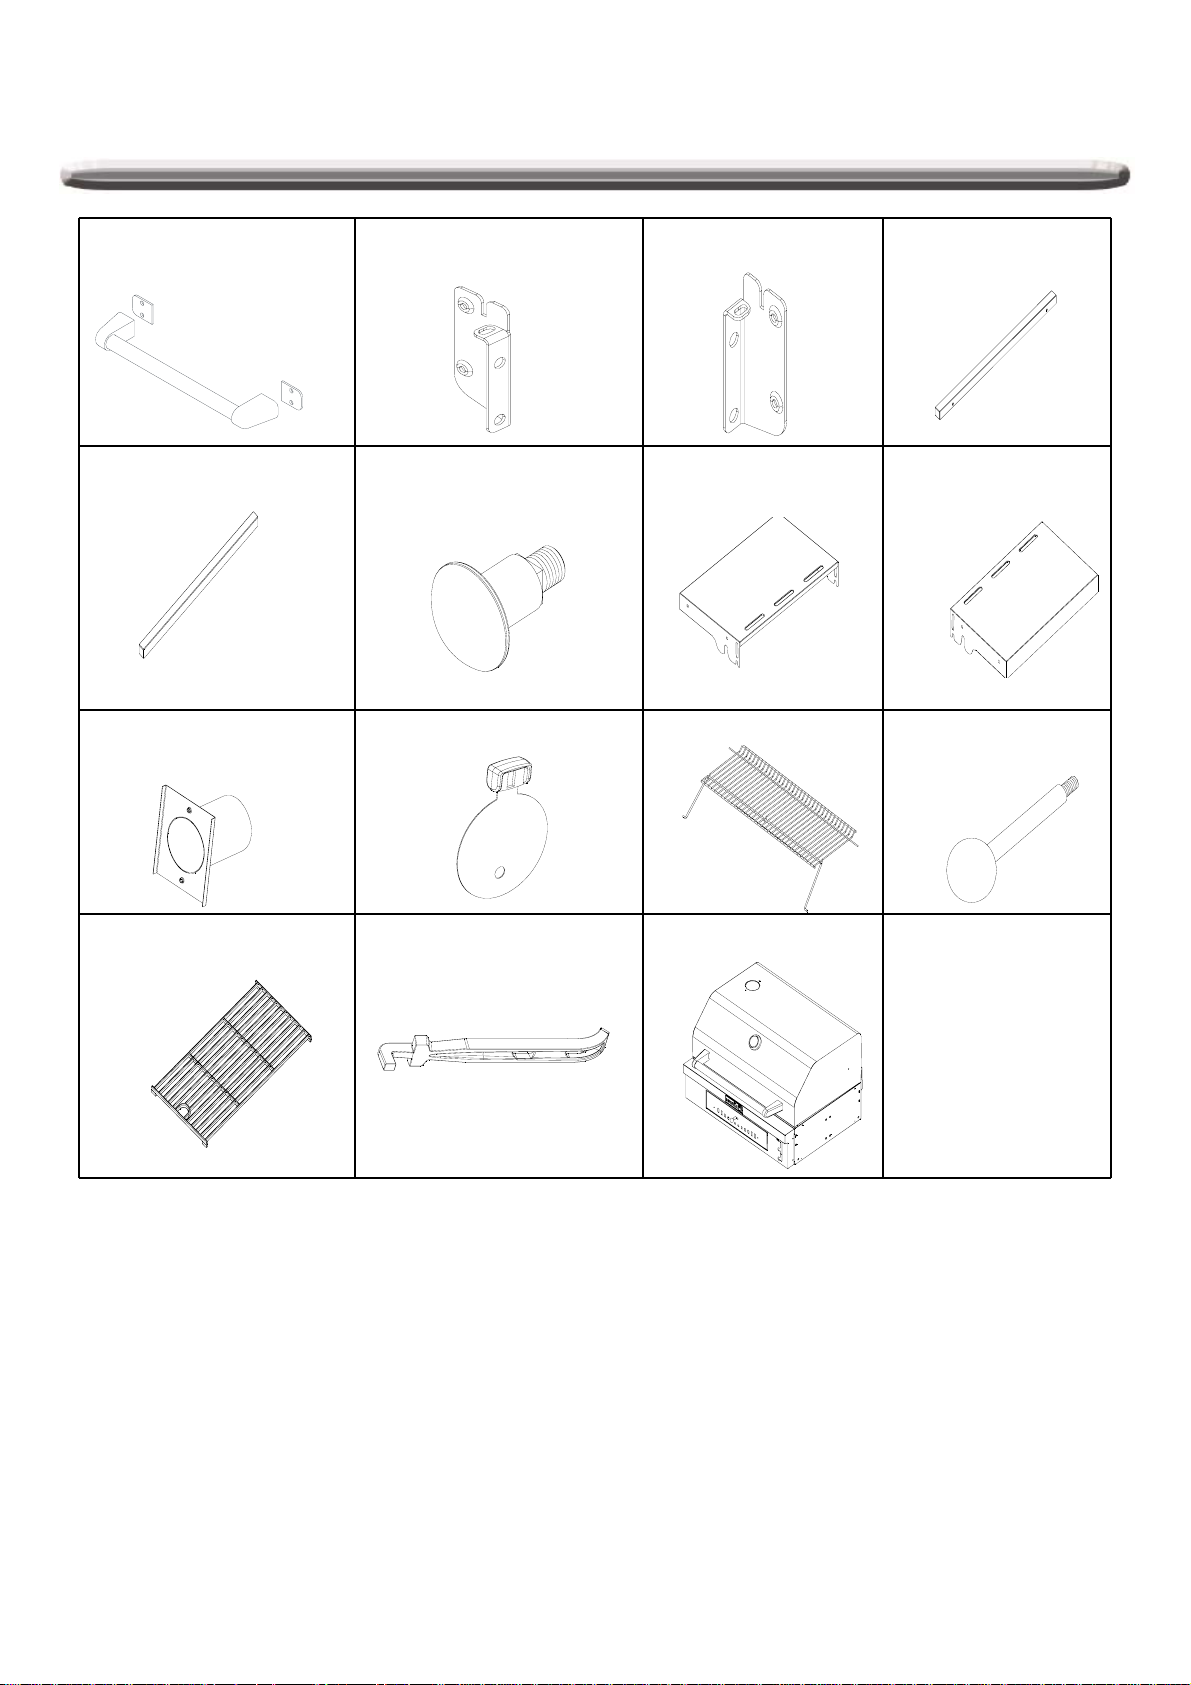
Package Contents
U. Charcoal ash tray
handle assembly– 1 pc
Y. Side shelf trim piece,
right-1 pc
AD. Charcoal Chimney -1 pc AE. Chimney lid -1 pc AF. Warming rack -1 pc AG. Charcoal pan
V. Side shelf support
bracket A -2pcs
Z. Side shelf hook-4pcs AB. Side shelf, left-1 pc AC. Side shelf, right-1 pc
W. Side shelf support
bracket B -2pcs
X. Side shelf trim piece,
left-1 pc
control knob -1 pc
AH. Cooking grid with hole 3 pcs
AI. Cooking grid lifter -1 pc AJ. Firebox assembly ----
---1 pc
6
Page 7

29
30
28
08
06
09
05
02
28
10
27
26
45
20
21
25
44
19
22
23
24
18
43
03
04
01
02
07
20
14
15
36
39
17
32
34
27
14
32
12
28
Explode view
11
13
31
33
34
35
38
37
49
56
53
50
37
51
55
25
28
52
29
54
57
41
16
42
40
46
47
48
7
Page 8

Part List
No. Part (Description)
1 Main lid 1 1 27 Side shelf support bracket B 1 2
2 Main lid hinge 1 2 28 Side shelf stage screw 1 8
3 Chimney lid 1 1 29
4
Charcoal Chimney 1 130Side shelf, left 1 1
5 Temperature gauge 1 1 31 Charcoal pan 1 1
Temperature gauge
6
housing
Charcoal ash tray handle
7
assembly
8 Main lid handle seat, left 1 1 34
9 Main lid handle tube 1 1 35
10 Main lid handle seat, right 1 1 36 Charcoal ash tray 1 1
11 Warming rack 1 1 37 Door handle assembly 1 2
Warranty
coverage
1132
1 1 33 Charcoal pan support 1 2
QTY No. Part (Description)
Side shelf hook 1 4
Charcoal pan support
bracket
Charcoal pan control knob
pin assembly
Charcoal pan adjustment
assembly
Warranty
coverage
12
12
11
QTY
12 Cooking grid lifter 1 1 38 Back panel 1 2
13 Cooking grid with hole 1 3 39 Cart top panel 1 1
Charcoal pan support
14
bracket with pin
15 Side shelf trim piece, right 1 1 41 Swivel caster 1 1
16 Side shelf, right 1 1 42 Bottom panel 1 1
17 Charcoal bowl assembly
18 Main control panel 1 1 44 Side panel, left 1 1
Ventilation adjustment
19
bracket
Ventilation door screw pin
20
assembly
21 Logo 1 1 47 Side panel, right 1 1
Ventilation door control
22
knob
23 Ventilation panel 1 1 49 Door magnet 1 2
1 2 40 Swivel caster with brake 1 1
Non-
replaceable
1 1 45 Left cart leg, front 1 1
1246
1 1 48 Right cart leg, front 1 1
1 43 Left cart leg, back 1 1
Right cart leg, back
11
24 Charcoal pan control knob 1 1 50 Cart frame 1 1
Side shelf support bracket
25
A
26 Side shelf trim piece, left 1 1 52 Stationary caster 1 2
1 2 51 Cart central panel 1 1
8
Page 9

Part List
No. Part (Description)
53 Door, left 1 1 57
54 Door, right 1 1 KD assembly hardware pack 1 1
55 Door hinge plate, right 1 1 Manual 1 1
Warranty
coverage
QTY No. Part (Description)
Door iron piece
Warranty
coverage
11
QTY
11Grill cover11Door hinge plate, left56
9
Page 10

Assembly Instructions
Tool Required: Philips Screwdriver
1. Caster Assembly
a). Mount the casters onto the bottom panel (A) using
sixteen 1/4-in. x 15-mm truss head screws with
locking washers (AA) and sixteen ¼-in flat washers
(FF).
b). The swivel caster with brake (H) should be
positioned under the left rear of the cart bottom
and the swivel caster (G) should be positioned
under left front as shown in Fig. 1.
d). The two stationary casters (I) should be positioned
under the right side.
e). Turn over the bottom panel for assembling casters.
Step 2. L shape bracket assembly
a). Loosen, but do not remove the screws that are
pre-assembled on the bottom panel (A), align
the holes on the bottom panel (A), then attach
the L shape bracket (F) onto the bottom panel
(A) by aligning the holes.
Fig.1
I
A
16x AA
16x FF
G
H
Fig. 2
F
b). Tighten the two screws that were
loosened above. As shown in Fig. 2.
Step 3. Cart leg assembly
Note: The back legs are the two that have 4 side
screws on the inside of each leg and the front legs
have two screws the face to the back of the grill
for attaching the side panels.
a). Loosen, but do not remove the 4 screws that
are pre-assembled on the bottom panel (A),
align the holes on the left cart leg, front (D) and
left cart leg, back (E), then place the cart legs
onto the bottom panel by aligning the screws
that were loosened in the bottom panel (A) as
shown in Fig. 3.
b). Tighten the screws that were loosened above.
A
Fig. 3
E
D
A
10
Page 11

c). Loosen, but do not remove the 4 screws that
are pre-assembled on the bottom panel (A),
align the holes on the right cart leg, front
(B) and right cart leg, back (C), then
place the cart legs onto bottom panel (A) by
aligning the screws that were loosened on the
bottom panel as shown in Fig. 4.
d). Tighten the screws that were loosened above.
Assembly Instructions
Fig. 4
E
C
A
D
B
Step 4: Side panel assembly
a). Loosen the 12 screws which are pre-
assembled on the left and right side legs,
toward to inside (6 screws on each side).
b). Attach the side panel, left (J) by aligning the
holes on the side panel with the loosened
screws on the inner side of cart leg. Tighten
the six screws that were loosened to secure
the panel as shown in Fig. 5.
c). Repeat step a) and b) for the side panel,
right (K) assembly.
Fig. 5
J
E
C
K
D
B
11
Page 12

Assembly Instructions
Step 5. Back panel assembly
a). Loosen, but do not remove 7 screws
which are pre-assembled on the bottom cart
legs and bottom panel(4 screws on the left
and right back cart legs and 3 screws on the
bottom panel).
b). Attached back panel ( L) by aligning the
holes on the back panel with screws in the
leg, then tighten the 7 screws that were
loosened in step a). As shown in Fig. 6.
Fig. 6
D
E
A
c). Loosen, but do not remove the 4 screws
which are pre-assembled on the upper cart
legs as shown in Fig. 7.
d). Attach the other piece of back panel ( L)
by aligning the holes in the back panel with
screws in the leg, then tighten the four screws
that were loosened in step c). As shown in Fig.
7.
B
L
C
Fig. 7
D
E
B
L
C
12
Page 13

Assembly Instructions
Step 6. Cart frame assembly
a). Loosen, but do not remove the four screws
which are pre-assembly on the left and right
cart leg, front (D/B), At tach the cart frame (M)
to the left cart leg, front ( D) and right cart leg,
front (B). then tighten the screws which
loosened above. As shown in Fig. 8.
b). Attach the left and right triangle brackets of
cart frame (M) by using two 5/3 2 -in . x 10-mm
truss head screws with locking washers (BB) .
As shown in Fig. 8.
Fig. 8
D
M
2 x BB
B
Step 7. Cart central panel assembly
Place cart central panel (N) upon the four
lower brackets on the left and right side
panels as shown in Fig. 9.
Fig. 9
N
13
Page 14

Assembly Instructions
Step 8. Door assembly
a). Insert the bottom hinge of door, left (P)
into the hole of bottom panel (A) and
insert the door hinge plate, left (R) into
the hole on the top of door, left top (P).
As shown in Fig.10.
Fig.10
R
P
A
b). Attach the door hinge plate, left (R) to
cart frame (M) by using two 5/3 2-in. x
10- mm flat head screws (EE) as
shown in Fig.11.
c). Repeat step a) and b) for the right
door (Q) and door hinge plate, right (S).
Fig. 11
R
2 x EE
M
P
14
Page 15

Assembly Instructions
Fig.12Step 9. Cart top panel assembly
a). Place the cart top panel (O) upon upper
four brackets of the left and right side
panels. As shown in Fig. 12.
O
b). Attached the cart top panel (O) to the
side panel, left (J) by using and two
5/32-in. x10-mm truss head screws with
locking washers (BB) as show n i n Fig.
13.
c). Repeat step b) to attach the side
panel, right (K).
The screws should be screwed from
Note:
outside of left and right side panels to inside.
Fig. 13
O
2x BB
J
15
Page 16

Step 10. Firebox Assembly
a). Remove the firebox assembly (AJ) from the
carton and carefully place ont o the grill cart, at
the same time keeping the top door hinge in
place as shown in Fig. 14.
CAUTION The firebox assembly is heavy
and will require two or more people to lift
and position onto grill cart. Failure to do
so may result in injury.
Note: Take care when moving the firebox
assembly as the bottom flanges can be bent,
which would misalign the holes.
Assembly Instructions
Fig. 14
AJ
1 x AA
1 x AA
1 x AA
b). Then secure the firebox assembly (AJ) by
using four 1/4-in. x 15-mm truss head screws
with locking washers (AA) as shown in Fig. 14.
Note: Two screws for each side of cart as
shown in Fig. 14.
Step 11. Side shelf assembly
a). Attach the side shelf support bracket A and B (V/W)
onto the firebox by using four 1/4-in. x 15-mm truss
head screws with locking washers (AA) and four
¼-in flat washers (FF) as shown in Fig 15.
1 x AA
Grill cart
Fig. 15
4x FF
4 x AA
W
V
16
Page 17

side shelf bracket A and B (V/W) by using four
5/32-in. x 10-mm truss head screws with locking
washers (BB) as shown in Fig. 16.
Assembly Instructions
Fig. 16b). Attach the side shelf trim piece, right (Y) into the
Note: Two screws should be screwed at front and
back of trim piece from inside of the firebox to outside,
and two screws should be screwed front and back
from the bottom of side shelf trim piece to the top.
c). Attach the two side shelf hooks (Z) into the right
side shelf by using two ¼-in nuts (CC) and
two side shelf hook flat washers (GG). (The nuts
should be screwed at inside of side shelf. As shown
in Fig. 17.
W
V
Y
4 x BB
Fig. 17
d). Attach the right side shelf (AC) to the side shelf
support bracket A and B (V/W) by using two ¼-in x
15 mm stage screws (DD) as shown in Fig. 17.
e). Repeat step a), b), c) and d) to assemble the left
side shelf (AB).
17
AC
2 x GG
2 x CC
2 x DD
Z
V
Page 18

Assembly Instructions
Step 12. Chimney Assembly
a). Insert the Charcoal Chimney (AD)
from lid inner to outside, the chimney seat is
closed to the lid inner, then attach it onto the
hood by using two 5/32-in. x 10-mm truss
head screws with locking washers (BB) as
shown in Fig. 18.
Fig. 18
AD
2 x BB
b). Attach the chimney lid (AE) onto the
Charcoal Chimney (AD) by using one chimney
lid spring (HH), one ¼-in flat washer (FF) and
one ¼-in nut (CC). As shown in Fig. 19.
Note: ¼-in flat washer (FF) goes between ¼-in
nut (CC) and Chimney lid spring (HH).
Fig. 19
× HH
1
× FF
1
1
× CC
AD
AE
18
Page 19

Assembly Instructions
Step 13. Warming rack assembly
Insert 4 legs of the warming rack (AF) into the
firebox and lid’s hole as shown Fig. 20.
Fig. 20
AF
Step 14. Charcoal pan handle Assembly
Place the charcoal pan control knob (AG) into
charcoal pan control rod which located behind of
control panel and tighten the charcoal pan control
knob (AG) in clockwise to secure it as show in
Fig.21.
Fig. 21
19
Charcoal pan control rod
AG
Page 20

Assembly Instructions
Step 15. Cooking grid and cooking grid lifter
installation
a). Place the cooking grid (AH) as shown in Fig. 22.
b). Place the cooking grid lifter (AI) onto the
cooking grid as shown in Fig. 23.
Fig. 22
AH
Fig. 23
AI
20
Page 21

Assembly Instructions
Step 16. Charcoal ash tray assembly
a). Insert the charcoal ash tray handle tube
into the charcoal ash tray handle seat as
shown in Fig. 24.
b). Attach the charcoal ash tray handle
assembly (U) with two heat insulating
spacers onto the charcoal ash tray by
aligning holes and using four ST4.2 x
10-mm Self-tapping screws (II). As
shown in Fig. 24.
c). Slide the charcoal ash tray (T) i nto the grill
cart as shown in Fig. 25.
Fig. 24
Charcoal ash tray
handle tube
Heat insulating spacer
Charcoal ash tray handle seat
Fig. 25
4 x II
U
Heat insulating spacer
T
21
T
Page 22

Lighting Instructions
READ ALL SAFTY WARNINGS AND
INSTRUCTIONS CAREFULLY BEFORE
OPERATING YOUR GRILL.
Charcoal Lighting instructions:
1. Open grill lid.
2. Lift the charcoal tray handle to adjust charcoal pan
to middle height position.
3. Pour regular charcoal briquettes, not exceeding 10
pounds into charcoal pan and arrange into a pile. Make
sure charcoal does not go above the Charcoal Grid.
4. Light charcoal briquettes.
5. Adjust the charcoal pan handle to low position. Wait
for charcoal flames to subside.
6. Once briquettes are glowing, use the charcoal pan
handle to adjust charcoal pan to desired cooking
position.
ADJUSTING TEMPERATURE
To control the cooking temperature, shift the
ventilation knob at the front of the grill to open and
close the ventilation. To increase temperature,
open the ventilation. To dampen temperature,
close the ventilation.
NOTE: The temperature should not exceed 500
The temperature can be checked using the
temperature gauge on the grill lid.
WARNING
Always wear oven mitts/glovers when adjusting
cooking levels to protect your hands from burn.
WARNING
Do not use grill without charcoal ash drawer in
place. DO NOT attempt to remove charcoal ash
tray while drawer contains hot coals.
°F,
Charcoal pan
Charcoal pan
Low Level
Middle Level
High Level
Charcoal pan
22
Page 23

Operating Tips
Charcoal Grid Lifter
When the grill is completely cooled, use a glove to
remove Charcoal Grid to add charcoal to the Charcoal
Pan. Do not leave the grid lifter inside the grill as it will
get too hot to handle safely.
Charcoal grid lifter
Charcoal Tray Handle Operation
By lifting the charcoal pan handle, the charcoal pan
can be raised or lowered to adjust the cooking heat at
any time during cooking. Raising the pan increases
direct heat. Lowering the pan reduces direct heat.
Raise the tray after unit has cooled down completely to
make it easier to brush left over ash into the ash tray.
Do not raise the tray higher than halfway when fully
loaded with fresh charcoal.
Operating and Cooking Instructions
READ ALL SAFTY WARNINGS AND
INSTRUCTIONS CAREFULLY BEFORE
OPERATING YOUR GRILL.
Grilling/Searing
1.Follow the instructions below carefully to build a fire.
You may use charcoal and /or wood as fuel in the
Professional Grill (See “Adding Charcoal/Wood During
Cooking” section of this manual).
WARNING:
Never use charcoal that has been pre-treated with
lighter fluid. Use only a high grade plain charcoal or
charcoal wood mixture.
If using a Charcoal Chimney Starter, follow all
manufacturer’s warnings and instructions regarding the
use of their product. Start with 8-10 pounds of charcoal.
This should be enough charcoal to cook with, once the
curing process has been completed. Pull the front air
ventilator to the left halfway. When charcoal is burning
strong, carefully place hot coals in center of charcoal
pan.
WARNING:
DO NOT use grill without charcoal ash tray in place.
DO NOT attempt to remove charcoal ash tray while
tray contains hot coals.
Ventilation Door Control Knob Operation
To open the ventilation door, pull the ventilation knob.
To adjust ventilation, move the ventilation knob to the
right or left.
Charcoal ventilation
control knob
Charcoal
tray handle
NOTE: To extend the life of your grill, make sure that
hot coals and wood do not to uc h th e walls of g rill.
IF USING CHARCOAL CHIMNEY STARTER,
PROCEED TO STEP 4
If you choose to use charcoal lighting fluid, ONLY use
charcoal lighting fluid approved for lighting charcoal.
Do not use gasoline, kerosene, alcohol or other
flammable material for lighting charcoal. Follow all
manufacturer’s warnings and instructions regarding the
use of their product. Start with 8-10 pounds of charcoal.
Placed the charcoal in center of charcoal pan.
2. Saturate charcoal with lighting fluid. With open wait
2 to 3 minutes to allow lighting fluid to soak into
charcoal. Store charcoal lighting fluid sa fely away from
the grill.
3. With grill lid open, stand back and carefully light
charcoal and allow to burn covered with a lighting ash
(approximately 20 minutes).
23
Page 24

Operating and Cooking Instructions
WARNING:
Charcoal lighting fluid must b e allowed to
completely burn off prior to closing g rill lid
(approximately 20 minutes). Failure to do this
could trap fumes from charcoal lightin g fluid in grill
and may result in a flash-fire or explosion when lid
is opened.
4. Place cooking grill on grill support lips. Use
charcoal pan to desired cooking level.
WARNING:
Always wear oven mitts/gloves when adjusting
cooking levels to protect your hands from burns.
5. Place food on cooking grill and close grill lid. By
closing the front air ventilation more, the burning
intensity is slowed. Always use a meat
thermometer to ensure food is fully cooked before
removing from grill.
6. Allow grill to cool completely, then follow
instructions in the ”After-Use Safety” and “Pro p er
Care & Maintenance” section of this manual.
Regulating Heat
To increase heat, more charcoal may be needed or
an adjustment to charcoal height. Follow
instructions in “Adding Charcoal During Cooking”
section of this manual.
To maintain the temperature, more charcoal may
need to be added or an adjustment may be
necessary during the cooking cycle to charcoal
height.
Add Charcoal/Wood During Cooking
Additional charcoal and/or wood may be required to
maintain or increase cooking temp erat ure.
1. Stand back and carefully open grill lid. Use
caution since flames can flare-up when fresh air
suddenly comes in contact with fire.
WARNING:
Wear protective gloves or oven mitts when adjusting
cooking grill or charcoal pan height.
2. Wearing oven mitts/gloves, use charcoal pan
handle to adjust the charcoal pan to the low position.
Remove the food from cooking grid, then remove
the cooking grid.
3. Stand back a safe distance and use long cooking
tongs to lightly brush aside ashes on hot coals. Use
cooking tongs to add charcoal and/or wood to
charcoal pan, being careful not to stir-up ashes and
sparks. If necessary, use your charcoal chimney
starter to light additional charcoal and/or wood and
add to existing fire.
WARNING:
Never add charcoal lighting fluid to hot or even
warm coals as flashback may occur causing severe
burns.
4. When the charcoal is burning strong again, wear
oven mitts/gloves and carefully return charcoal pan
to desired cooking level.
5. Close the grill lid and door. Allow food to continue
cooking.
After-Use Safety
WARNING:
Always allow grill and all components to cool
completely before handling.
Never leave coals and ashes in grill unattended.
Make sure coals and ashes are completely
extinguished before removing.
Before grill can be left unattended, remaining coals
and ashes must be removed from grill. Use caution to
protect yourself and property. Place remaining coals
and ashes must be removed from grill. Use caution to
protect yourself and property. Place remaining coals
and ashes in a non-combustible metal container and
completely saturate with water. Allow coals and water
to remain in metal container 24 hours prior to
disposing.
Extinguished coals and ashes should be placed a
safe distance from all structures and combustible
materials.
With a garden hose, completely wet surface beneath
and around the grill to extinguish any ashes, coals or
embers which may have fallen during the cooking or
cleaning process.
Cover and store grill in a protected are away from
children and pets.
24
Page 25

Proper Care & Maintenance
To protect your grill from excessive rust, the unit must be properly cleaned and covered at all times when not
in use.
Wash cooking grill and charcoal grate with hot, soapy water, rinse well and dry.
Clean inside and outside of grill by wiping off with a damp cloth. Apply a light coat of vegetable oil or vegetable
oil spray to the interior surface to prevent rusti ng . Do not co at cha rcoal tray or charco al ash tray.
If rust appears on the exterior surface of your grill, clean and buff the affected area with steel wool or fine frit
emery cloth, Touch-up with a good quality high-temperature resistant paint.
Never apply paint to the interior surface. Rust spots on the interior surface can be buffed, cleaned, then lightly
coated with vegetable oil or vegetable oil spray to minimize rusting.
Ordering Parts
HOW TO ORDER REPLACEMENT PARTS
To make sure you obtain the correct replacement part (s)
for your gas grill, please refer to the parts list on pages
8-9. The following information is re q uired to assure
getting the correct part. Please note the shipping cost for
the delivery of any replacement part s will be at your co st.
•Gas grills model number (see data sticke r on grill).
•Part number of replacement part needed.
•Description of replacement part needed.
•Quantity of parts needed.
To obtain replacement parts, contact
service
hotline UK: 02392 -322880
our customer
IMPORTANT
Use only factory authorized parts. The use of any part
that is not factory authorized can be da n gero us . This will
also void your warranty.
Keep this assembly and operating instruction manual for
convenient referral, and for replacement parts ordering.
25
Page 26

Limited Warranty
The manufacturer warrants to the original consumer-purchaser only
and materials after correct assembly and under normal and reasonable home use for the periods indicated below beginning on the date of
purchase. The manufacturer reserves the right to require photographic evidence of damage, or that defective parts be returned, postage and/or
freight pre-paid by the consumer, f or review an d e xamin atio n .
.
•ALL PARTS: 1 year LIMITED warranty (Includes, but not limited to frame, housing, cart, control panel) *Does not cover chipping, scratching,
cracking surface corrosion, scratches or rust.
Upon consumer supplying proof of purchase as provided herein, Manufacturer will repair or replace the parts which are proven defective during the
applicable warranty period. Parts required to complete such repair or replacement shall be free of charge to you except for shipping costs, as long
as the purchaser is within the warranty period from th e origin al date of purchase. The origin al cons u mer-p urch as er will be res p o nsible for all
shipping charges of parts replaced under the terms of this limited warranty. This limited warranty is applicable in the United States and Canada
only, is only available to the original owner of the product and is not transferable. Manufacturer requires reasonable proof of your date of purchase.
Therefore, you should retain your sales receipt and/or invoice. If the unit was received as a gift, please ask the gift-giver to send in the receipt on
your behalf, to the below address. Defective or missing parts subject to this limited warranty will not be replaced without registration or proof of
purchase. This limited warranty applies to the functionality of the product ONLY and does not cover cosmetic issues such as scratches, dents,
corrosions or discoloring by heat, abrasive and chemical cleaners or any tools used in the assembly or installation of the appliance, surface rust, or
the discoloration of stainless steel surfaces. Surface rust, corrosion, or powder paint chipping on metal parts that does not affect the structural
integrity of the product is not considered a defect in workmanship or material and is not covered by this warranty. This limited warranty will not
reimburse you for the cost of any inconvenience, food, personal injury or property damage. If an original replacement part is not available, a
comparable replacement part will be sent. You will be responsible for all shipping charges of parts replaced under the terms of this limited warranty.
MANUFACTURER WILL NOT PAY FOR:
•Service calls to your home.
•Repairs when your product is used for other than normal, single-family household or residential use.
•Damage resulting from accident, alteration, misuse, lack of maintenance/cleaning, abuse, fire, flood, acts of God, improper installation, and
installation not in accordance with electrical or plumbing codes or misuse of product..
•Any food loss due to product failures.
•Replacement parts or repair labor costs for units operated outside the United States or Canada.
•Pickup and delivery of your product.
•Postage fees or photo processing fees for photos sent in as documentation.
•Repairs to parts or systems resulting from unauthorized modifications made to the product.
•The removal and/or reinstallation of your product.
•Shipping cost, standard or expedited, for warranty/non warranty and replacement parts.
LIMITED WARRANTY (Model # 810-0018)
that this product (Model #810-0018)shall be free from defects in workmanship
DISCLAIMER OF IMPLIED WARRANTIES; LIMITATION OF REMEDI ES
Repair or replacement of defective parts is your exclusive remedy under the terms of this limited warranty. Manufacturer will not be responsible for
any consequential or incidental damages arising from the breach of either this limited warranty or any applicable implied warranty, or for failure or
damage resulting from acts of God, improper care and maintenance, grease fire, accident, alteration, replacement of parts by anyone other than
manufacturer, misuse, transportation, commercial use, abuse, hostile environments (inclement weather, acts of nature, animal tampering), improper
installation or installation not in accordance with local codes or printed manufacturer instructions.
THIS LIMITED WARRANTY IS THE SOLE EXPRESS WARRANTY GI VEN B Y THE MANUFACTURER. NO PRODUCT PERFORMANCE
SPECIFICATION OR DESCRIPTION WHEREVER APPEARING IS WARRANTED BY MANUFACTURER EXCEPT TO THE EXTENT SET FORTH
IN THIS LIMITED WARRANTY. ANY IMPLIED WARRANTY PROTECTION ARISING UNDER THE LAWS OF ANY STATE, INCLUDING IMPLI E D
WARRANTY OF MERCHANTABILITY OR FITNESS FOR A PA RTICUL AR PURPOSE OR USE, IS HEREBY LIMITED IN DURATION TO THE
DURATION OF THIS LIMITED WARRANTY.
Neither dealers nor the retail establishment selling this product has any authority to make any additional warranties or to promise remedies in
addition to or inconsistent with those stated above. Manufacturer's maximum liability, in any event, shall not exceed the documented purchase price
of the product paid by the original consumer. This warranty only applies to units purchased from an authorized retailer and or re-seller. NOTE:
Some states do not allow an exclusion or limitation of incidental or consequential damages, so some of the above limitations or exclusions may not
apply to you; this limited warranty gives you specific legal rights as set for herein. You may also have other rights which vary from state to state.
If you wish to obtain performance of any obligation under this limited warranty, you should write to:
All consumer returns, parts orders, general questions, and troubleshooting
assistance can be acquired by calling UK: 02392 -322880
Nexgrill Customer Relations
5270 Edison Avenue,
Chino, CA 91710
26
 Loading...