

Page 1
Cordless Internet Phone
with Skype
TM
Model
SPH200D User Manual
NETGEAR, Inc.
4500 Great America Parkway
Santa Clara, CA 95054 USA
202-10216-01
November 2006
Page 2

© 2006 by NETGEAR, Inc. All rights reserved.
Trademarks
NETGEAR , the NETGEAR logo, and Auto Uplink are trademarks or registered trademarks of NETGEAR, Inc. Skype,
SkypeIn, SkyeOut, SkypeMe, Skype Voicemail, the Skype logo, and the S logo are trademarks of Skype Limited.
Microsoft, Windows, and Wi ndows NT are registered trademarks of Microsoft Corporation. Other brand and product
names are registered trademarks or trademarks of their respective holders. Portions of this document are copyright
Intoto, Inc.
November 2006
Statement of Conditions
In the interest of improving internal design, operational function, and/or reliability, NETGEAR reserves the right to
make changes to the products described in this document without notice.
NETGEAR does not assume any liability that may occur due to the use or application of the product(s) or circuit
layout(s) described herein.
Certificate of the Manufacturer/Importer
It is hereby certified that the Cordless Internet Phone with Skype has been suppressed in accordance with the conditions
set out in the BMPT-AmtsblVfg 243/1991 and Vfg 46/1992. The operation of some equipment (for example, test
transmitters) in accordance with the regulations may, however, be subject to certain restrictions. Please refer to the notes
in the operating instructions.
The Federal Office for Telecommunications Approvals has been notified of the placing of this equipment on the market
and has been granted the right to test the series for compliance with the regulations.
Bestätigung des Herstellers/Importeurs
Es wird hiermit bestätigt, daß dasCordless Internet Phone with Skype gemäß der im BMPT-AmtsblVfg 243/1991 und
Vfg 46/1992 aufgeführten Bestimmungen entstört ist. Das vorschriftsmäßige Betreiben einiger Geräte (z.B. T e stsender)
kann jedoch gewissen Beschränkungen unterliegen. Lesen Sie dazu bitte die Anmerkungen in der Betriebsanleitung.
Das Bundesamt für Zulassungen in der Telekommunikation wurde davon unterrichtet, daß dieses Gerät auf den Markt
gebracht wurde und es ist berechtigt, die Serie auf die Erfüllung der Vorschriften hin zu überprüfen.
Regulatory Compliance Information
This section includes user requirements for operating this product in accordance with National laws for usage of radio
spectrum and operation of radio devices. Failure of the end user to comply with the applicable requirements may result
in unlawful operation and adverse action against the end user by the applicable National regulatory authority.
NOTE: This product's firmware limits operation to only the channels allowed in a particular Region or Country.
Therefore, all options described in this user's guide may not be available in your version of the product.
Europe – EU Declaration of Conformity
Marking by the above symbol indicates compliance with the Essential Requirements of the R&TTE Directive of the
European Union (1999/5/EC). This equipment meets the following conformance standards:
EN 301 406, EN 301 489
ii
v1.0, November 2006
Page 3

Europe – Declaration of Conformity in Languages of the European Community
Cesky [Czech] NETGEAR Inc. tímto prohlašuje, že tento Radiolan je ve shode se základními
požadavky a dalšími príslušnými ustanoveními smernice 1999/5/ES..
Dansk
[Danish]
Deutsch
[German]
Eesti
[Estonian]
English Hereby, NETGEAR Inc., declares that this Radiolan is in compliance with the essential
Español
[Spanish]
Ελληνική
[Greek]
Français
[French]
Italiano [Italian] Con la presente NETGEAR Inc. dichiara che questo Radiolan è conforme ai requisiti
Latviski
[Latvian]
Undertegnede NETGEAR Inc. erklærer herved, at følgende udstyr Radiolan overholder
de væsentlige krav og øvrige relevante krav i direktiv 1999/5/EF.
Hiermit erklärt NETGEAR Inc., dass sich das Gerät Radiolan in Übereinstimmung mit
den grundlegenden Anforderungen und den übrigen einschlägigen Bestimmungen der
Richtlinie 1999/5/EG befindet.
Käesolevaga kinnitab NETGEAR Inc. seadme Radiolan vastavust direktiivi 1999/5/EÜ
põhinõuetele ja nimetatud direktiivist tulenevatele teistele asjakohastele sätetele.
requirements and other relevant provisions of Directive 1999/5/EC.
Por medio de la presente NETGEAR Inc. declara que el Radiolan cumple con los
requisitos esenciales y cualesquiera otras disposiciones aplicables o exigibles de la
Directiva 1999/5/CE.
ΜΕ ΤΗΝ ΠΑΡΟΥΣΑ NETGEAR Inc. ΔΗΛΩΝΕΙ ΟΤΙ Radiolan ΣΥΜΜΟΡΦΩΝΕΤΑΙ
ΠΡΟΣ ΤΙΣ ΟΥΣΙΩΔΕΙΣ ΑΠΑΙΤΗΣΕΙΣ ΚΑΙ ΤΙΣ ΛΟΙΠΕΣ ΣΧΕΤΙΚΕΣ ΔΙΑΤΑΞΕΙΣ ΤΗΣ
ΟΔΗΓΙΑΣ 1999/5/ΕΚ.
Par la présente NETGEAR Inc. déclare que l'appareil Radiolan est conforme aux
exigences essentielles et aux autres dispositions pertinentes de la directive 1999/5/CE.
essenziali ed alle altre disposizioni pertinenti stabilite dalla direttiva 1999/5/CE.
Ar šo NETGEAR Inc. deklarē, ka Radiolan atbilst Direktīvas 1999/5/EK būtiskaj
prasībām un citiem ar to saistītajiem noteikumiem.
ām
Lietuvių
[Lithuanian]
Nederlands
[Dutch]
Malti [Maltese] Hawnhekk, NETGEAR Inc., jiddikjara li dan Radiolan jikkonforma mal-htigijiet
Magyar
[Hungarian]
Polski [Polish] Niniejszym NETGEAR Inc. oświadcza, że Radiolan jest zgodny z zasadniczymi
Šiuo NETGEAR Inc. deklaruoja, kad šis Radiolan atitinka esminius reikalavimus ir kitas
1999/5/EB Direktyvos nuostatas.
Hierbij verklaart NETGEAR Inc. dat het toestel Radiolan in overeenstemming is met de
essentiële eisen en de andere relevante bepalingen van richtlijn 1999/5/EG.
essenzjali u ma provvedimenti ohrajn relevanti li hemm fid-Dirrettiva 1999/5/EC.
Alulírott, NETGEAR Inc. nyilatkozom, hogy a Radiolan megfelel a vonatkozó alapvetõ
követelményeknek és az 1999/5/EC irányelv egyéb elõírásainak.
wymogami oraz pozostałymi stosownymi postanowieniami Dyrektywy 1999/5/EC.
v1.0, November 2006
iii
Page 4

Português
[Portuguese]
NETGEAR Inc. declara que este Radiolan está conforme com os requisitos essenciais
e outras disposições da Directiva 1999/5/CE.
Slovensko
[Slovenian]
Slovensky
[Slovak]
Suomi
[Finnish]
Svenska
[Swedish]
Íslenska
[Icelandic]
Norsk
[Norwegian]
NETGEAR Inc. izjavlja, da je ta Radiolan v skladu z bistvenimi zahtevami in ostalimi
relevantnimi določili direktive 1999/5/ES.
NETGEAR Inc. týmto vyhlasuje, _e Radiolan spĺňa základné po_iadavky a všetky
príslušné ustanovenia Smernice 1999/5/ES.
NETGEAR Inc. vakuuttaa täten että Radiolan tyyppinen laite on direktiivin 1999/5/EY
oleellisten vaatimusten ja sitä koskevien direktiivin muiden ehtojen mukainen.
Härmed intygar NETGEAR Inc. att denna Radiolan står I överensstämmelse med de
väsentliga egenskapskrav och övriga relevanta bestämmelser som framgår av direktiv
1999/5/EG.
Hér með lýsir NETGEAR Inc. yfir því að Radiolan er í samræmi við grunnkröfur og aðrar
kröfur, sem gerðar eru í tilskipun 1999/5/EC.
NETGEAR Inc. erklærer herved at utstyret Radiolan er i samsvar med de
grunnleggende krav og øvrige relevante krav i direktiv 1999/5/EF.
FCC Requirements for Operation in the United States
FCC Information to User
This product does not contain any user serviceable components and is to be used with approved antenn as only. Any
product changes or modifications will invalidate all applicable regulatory certifications and approvals
FCC Guidelines for Human Exposure
This equipment complies with FCC radiation exposure limits set forth for an uncontrolled environment. This equipment
should be installed and operated with minimum distance of 20 cm between the radiator and your body.
This transmitter must not be co-located or operating in conjunction with any other antenna or transmitter.
FCC Declaration Of Conformity
We NETGEAR, Inc., 4500 Great America Parkway, Santa Clara, CA 95054, declare under our sole responsibility that
the model SPH200D Cordless Internet Phone with Skype complies with Part 15 of FCC Rules. Operation is subject to
the following two conditions:
• This device may not cause harmful interference, and
• This device must accept any interference received, including interference that may cause undesired operation.
FCC Radio Frequency Interference Warnings & Instructions
This equipment has been tested and found to comply with the limits for a Class B digital device, pursuant to Part 15 of
the FCC Rules. These limits are designed to provide rea sonable protection against harmful interference in a residential
installation. This equipment uses and can radiate radio frequency energy and, if not installed and used in accordance
with the instructions, may cause harmful interference to radio communications. However, there is no guarantee that
iv
v1.0, November 2006
Page 5

interference will not occur in a particular installation. If this equipment does cause harmful interference to radio or
television reception, which can be determined by turning the equipment off and on, the user is encouraged to try to
correct the interference by one or more of the following methods:
• Reorient or relocate the receiving antenna
• Increase the separation between the equipment and the receiver
• Connect the equipment into an electrical outlet on a circuit different from that which the radio receiver is connected
• Consult the dealer or an experienced radio/TV technician for help.
Cordless Internet Phone with Skype
Tested to Comply
with FCC Standards
FOR HOME OR OFFICE USE
Modifications made to the product, unless expressly approved by NETGEAR, Inc., could void the user's right to operate
the equipment.
D
Equipment Compliance Information
Your telephone equipment is approved for connection to the Public Switched Telephone Network and is in compliance
with Part 68 of FCC Rules and Regulations, and the T echnical Requirements for Telephone Terminal Equipment adopted
by ACT A
Notification to the Local Telephone Company
On the bottom of this equipment is a label indicating, among other information, the US number and Ringer Equivalence
Number (REN) for the equipment. You must, upon request, provide this information to your telephone company.
The REN is useful in determining the number of devices you may connect to your telephone line and still have all of
these devices ring when your telephone number is called. In most (but not all) areas, the sum of the RENs of all devices
connected to one line should not exceed 5. To be certain of the number of devices you may connect to your line as
determined by the REN, you should contact your local telephone company.
The REN number is located on the bottom of the Base unit.
A plug and jack used to connect this equipment to the premise wiring and telephone network must comply with the
applicable FCC Part 68 rules and requirements adopted by the ACTA. A compliant telephone cord and modular plug is
provided with this product. It is designed to be connected to a compatible modular jack that is also compliant. See
installation instructions for details.
Notes
• This equipment may not be used on coin service provided by the telephone company.
• Party lines are subject to state tariffs. Therefore, you may not be able to use your own telephone equipment if you
are on a party line. Check with your local telephone company.
• Notice must be given to the telephone company upon permanent disconnection of your telephone from your line.
• If your home has specially wired alarm equipment connected to the telephone line, ensure the installation of this
product does not disable your alarm equipment. If you have questions about what will disable alarm equipment,
consult your alarm equipment supplier or a qualified installer.
v1.0, November 2006
v
Page 6

Rights of the Telephone Company
Should your equipment cause trouble on your line that may harm the telephone network, the telephone company shall,
where practicable, notify you that temporary discontinuance of service may be required. Where prior notice is not
practicable and the circumstances warrant such action, the telephone company may temporarily discontinue service
immediately. In case of such temporary discontinuance, the telephone company must: (1) promptly notify you of such
temporary discontinuance; (2) afford you the opportunity to correct the situation; and (3) inform you of your right to
bring a complaint to the Commission pursuant to procedures set forth in Subpart E of Part 68, FCC Rules and
Regulations.
THE TELEPHONE COMP ANY MAY MAKE CHANGES IN ITS COMMUNICATIONS FACILITIES, EQUIPMENT,
OPERATIONS, OR PROCEDURES WHERE SUCH ACTION IS REQUIRED IN THE OPERATION OF ITS
BUSINESS AND NOT INCONSISTENT WITH FCC RULES AND REGULATIONS. IF THESE CHANGES ARE
EXPECTED TO AFFECT THE USE OR PERFORMANCE OF YOUR TELEPHONE EQUIPMENT, THE
TELEPHONE COMPANY MUST GIVE YOU ADEQUATE NOTICE, IN WRITING, TO ALLOW YOU TO
MAINT A IN UNINTERRUPTED SERVICE.
Privacy of Communications
Privacy of communications may not be ensured when using this telephone.
Industry Canada Notice
Terminal Equipment
This equipment meets the applicable Industry Canada Terminal Equipment Technical Specifications.
This is confirmed by the registration number, which is the same as the certification number for Radio Equipment. The
abbreviation, IC before the registration number signifies that registration was performed based on a Declaration of
Conformity indicating that Industry Canada technical specifications were met. It does not imply that Industry Canada
approved the equipment.
Radio Equipment
The term “IC:” before the radio certification number signifies that Industry Canada technical specifications RSS-213 and
ICES-003 were met.
RF Radiation Exposure Statement
The equipment has been evaluated and found compliant in accordance with Industry Canada RSS-102 with respect to
Health Canada Code 6 for Exposure of Humans to RF Fields.
The electrical network is classified as dangerous according to criteria in the standard EN 60950-1.
Telephone Connections
The voltage on the network is classified as TNV-3 (Telecommunication Network Voltages, as defined in the standard IE
C 60950-1).
vi
v1.0, November 2006
Page 7

Equipment Compliance Information
Your telephone equipment is certified for connection to the Public Switched Telephone Network and is in compliance
with Part 68 of the FCC Rules and Regulations, and the technical requirements for telephone terminal equipment
adopted by ACT A .
Product and Publication Details
Model Number: SPH200D
Publication Date: November 2006
Product Family: Cordless Internet Phone
Product Name: Cordless Internet Phone with Skype
Home or Business Product: Home
Language: English
Publication Part Number: 202-10216-01
Publication Version Number: 1.0
v1.0, November 2006
vii
Page 8

viii
v1.0, November 2006
Page 9

Contents
About This Manual
Conventions, Formats, and Scope ..................................................................................xiii
How to Use This Manual .................................................................................................xiv
How to Print this Manual ..................................................................................................xiv
Chapter 1
Getting Started
Important Safety Information ..........................................................................................1-1
Digital Security System ...................................................................................................1-2
Hearing Aid Compatibility (HAC) ....................................................................................1-2
Package Contents ..........................................................................................................1-3
About Your Phone ...........................................................................................................1-4
Handset Light and Controls ......................................................................................1-4
Powering Your Handset On and Off .........................................................................1-5
Handset Icons ..........................................................................................................1-6
Using the Menus ......................................................................................................1-6
Locking and Unlocking the Handset Keypad ...........................................................1-7
Base Unit ..................................................................................................................1-8
Paging Missing Handsets .........................................................................................1-9
Chapter 2
Installation
Requirements .................................................................................................................2-1
Charging the Batteries ....................................................................................................2-2
Connecting the Base Unit ...............................................................................................2-3
Setting up the Handset ...................................................................................................2-4
Signing In to Skype .........................................................................................................2-4
Creating a Skype Name and Password ...................................................................2-5
Standby Display ..............................................................................................................2-5
Linking to the Base Unit ..................................................................................................2-6
v1.0, November 2006
ix
Page 10

Chapter 3
Skype Calling
Skype Features ..............................................................................................................3-1
Assigning a Preferred Line for a SkypeOut Contact ................................................3-1
Making a Skype Call .......................................................................................................3-2
Calling a Contact ......................................................................................................3-2
Making a SkypeOut Call ...........................................................................................3-3
Redialing the Last Number .......................................................................................3-4
Receiving Calls ...............................................................................................................3-4
Answering a Call ......................................................................................................3-4
Rejecting a Skype Call .............................................................................................3-4
Auto Answer .............................................................................................................3-4
Answering a Second Skype Call During a Call ........................................................3-5
Call Forwarding ........................................................................................................3-5
Skype Voicemail .............................................................................................................3-6
My Greeting ..............................................................................................................3-7
Skype Tools ....................................................................................................................3-7
Privacy .....................................................................................................................3-7
Your Skype Profile ....................................................................................................3-8
Signing in Automatically ...........................................................................................3-9
Viewing or Changing Your Skype Status ..................................................................3-9
Changing Your Skype Password ............................................................................3-10
Updating Skype Software ....................................................................................... 3-11
Chapter 4
Landline Calling
Making a Landline Call ...................................................................................................4-1
Direct Dialing ............................................................................................................4-1
Selecting the Landline Option ..................................................................................4-2
Redialing the Last Number .......................................................................................4-2
Making a Second Landline Call During a Call ..........................................................4-2
Receiving Calls ...............................................................................................................4-3
Auto Answer .............................................................................................................4-3
Turning off the Ringer During a Call .........................................................................4-3
Answering a Second Landline Call during a Call .....................................................4-3
Landline Voicemail ..........................................................................................................4-4
x
v1.0, November 2006
Page 11

Chapter 5
Contacts
Entering Text and Numbers ............................................................................................5-1
Contact Options ..............................................................................................................5-2
Adding Contacts .......................................................................................................5-3
Finding a Contact .....................................................................................................5-3
Searching for a Skype User .....................................................................................5-4
Blocking a Contact ...................................................................................................5-4
Unblocking a Contact ...............................................................................................5-4
Chapter 6
Advanced Features
Call History .....................................................................................................................6-1
Call History Options .................................................................................................6-1
Viewing Call Records ...............................................................................................6-2
Making a Call from the Call History ..........................................................................6-3
Adding a Call Record to Your Contact List ...............................................................6-3
Deleting a Call Record .............................................................................................6-4
Deleting All Records of a Call List ............................................................................6-4
Intercom and Conference Calls ......................................................................................6-4
Calling Another Handset ..........................................................................................6-4
Transferring a Call ....................................................................................................6-5
Making a 3-Way Conference Call ............................................................................6-5
Predialing ........................................................................................................................6-6
Personalizing Your Handset Display ...............................................................................6-7
Setting the Language ...............................................................................................6-7
Changing the Screen Settings .................................................................................6-7
Personalizing Your Phone’s Sound ................................................................................6-7
Adjusting the Sound Settings ...................................................................................6-7
Setting the Ring Tones .............................................................................................6-8
Turning Off All the Ringers with Silent Status ...........................................................6-9
Chapter 7
Settings and Maintenance
Settings ...........................................................................................................................7-1
Country Code ...........................................................................................................7-1
Area Code ................................................................................................................7-2
v1.0, November 2006
xi
Page 12

Time and Date ..........................................................................................................7-2
Changing the System PIN ........................................................................................7-3
Resetting to Default Settings ..........................................................................................7-3
Registering Your Handset ...............................................................................................7-4
Registering Your Handset(s) with an Additional Base ..............................................7-5
Selecting a Base Unit ...............................................................................................7-5
Deleting a Handset ...................................................................................................7-5
Advanced Landline Calling Features ..............................................................................7-6
Dial Mode .................................................................................................................7-6
Recall Selection .......................................................................................................7-6
Setting a Pause ........................................................................................................7-7
Category Number .....................................................................................................7-7
Network Settings ............................................................................................................7-8
Viewing Network Settings ........................................................................................7-8
Changing Network Settings ......................................................................................7-8
Web Page Configuration ................................................................................................7-9
Accessing the Web Page .........................................................................................7-9
Troubleshooting ............................................................................................................7-10
Appendix A
Default Factory Settings and Technical Specifications
Default Factory Settings ................................................................................................ A-1
Technical Specifications ................................................................................................. A-2
Power and Safety .......................................................................................................... A-3
Appendix B
Related Documents
xii
v1.0, November 2006
Page 13
About This Manual
The NETGEAR® Cordless Internet Phone with Skype® Model SPH200D User Manual describes
how to install, configure, and troubleshoot the Cordless Internet Phone with Skype Model
SPH200D. The information in this manual is intended for readers with intermediate computer and
Internet skills.
Conventions, Formats, and Scope
The conventions, formats, and scope of this manual are described in the following paragraphs:
• Typographical Conventions. This manual uses the following typographical conventions:
Italics Emphasis, books, CDs, URL names
Bold User input
Fixed Screen text, file and server names, extensions, commands, IP addresses
• Formats. This manual uses the following formats to highlight special messages:
Note: This format is used to highlight information of importance or special interest.
Tip: This format is used to highlight a procedure that will save time or resources.
Warning: Ignoring this type of note may result in a malfunction or damage to the
equipment.
Danger: This is a safety warning. Failure to take heed of this notice may result in
personal injury or death.
v1.0, November 2006
xiii
Page 14
Cordless Internet Phone with Skype Model SPH200D User Manual
• Scope. This manual is written for the Cordless Internet Phone with Skype Model SPH200D
according to these specifications:
Product Version Cordless Internet Phone with Skype Model SPH200D
Manual Publication Date November 2006
For information about using Skype, see www.skype.com. For more information about network,
Internet, firewall, and VPN technologies, see the links to the NETGEAR website in Appendix B,
“Related Documents”.
Note: Product updates are available on the NETGEAR, Inc. website at
http://kbserver.netgear.com/products/SPH200D.asp.
How to Use This Manual
The HTML version of this manual includes the following:
• Buttons, and , for browsing forward or backward through the manual one page
at a time
• A button that displays the table of contents and button that displays the index.
Double-click on a link in the table of contents or index to navigate directly to where the topic
is described in the manual.
• A button to access the full NETGEAR, Inc. online knowledge base for the product
model.
• Links to PDF versions of the full manual and individual chapters.
How to Print this Manual
To print this manual you can choose one of the following several options, according to your needs.
• Printing a Page in HTML View.
Each page in the HTML version of the manual is dedicated to a major topic. Use the Print
button on the browser toolbar to print the page contents.
xiv
v1.0, November 2006
Page 15
Cordless Internet Phone with Skype Model SPH200D User Manual
• Printing a Chapter.
Use the PDF of This Chapter link at the top left of any page.
– Click the PDF of This Chapter link at the top left of any page in the chapter you want to
print. The PDF version of the chapter you were viewing opens in a browser window.
– Your computer must have the free Adobe Acrobat reader installed in order to view and
print PDF files. The Acrobat reader is available on the Adobe Web site at
http://www.adobe.com.
– Click the print icon in the upper left of the window.
Tip: If your printer supports printing two pages on a single sheet of paper, you can
save paper and printer ink by selecting this feature.
• Printing the Full Manual.
Use the Complete PDF Manua l link at the top left of any page.
– Click the Complete PDF Manual link at the top left of any page in the manual. The PDF
version of the complete manual opens in a browser window.
– Click the print icon in the upper left of the window.
Tip: If your printer supports printing two pages on a single sheet of paper, you can
save paper and printer ink by selecting this feature.
xv
v1.0, November 2006
Page 16

Cordless Internet Phone with Skype Model SPH200D User Manual
xvi
v1.0, November 2006
Page 17
Chapter 1
Getting Started
Important Safety Information
Warning: No emergency calling. The Cordless Internet Phone requires a base station
and power. Without them, you cannot make any landline or Internet calls.
Warning: Follow basic safety precautions to reduce the risk of fire, electric shock
and injury .
• Read and follow all warnings and instructions marked on the product.
• Do not use this product near water, a laundry tub, in a wet basement, or near a swimming pool.
• Do not place this product on an unstable table. The product may fall and be damaged.
• This product should never be placed near or over a radiator or heat register.
• This product should be operated only from the type of power source indicated on the label.
• Do not allow anything to rest on the power cord. Do not locate this product where the cord will
be abused by people walking on it.
• Do not overload wall outlets and extension cords as this can result in the risk of fire or electric
shock.
• Avoid using a telephone during a storm or severe weather with lightning. There may be a risk
of electric shock from lightning.
• Do not use this product to report a gas leak in the vicinity of the leak.
• Do not use this product near intensive care medical equipment or by any people with
pacemakers.
1-1
v1.0, November 2006
Page 18
Cordless Internet Phone with Skype Model SPH200D User Manual
• Due to the radio signals between base station and handset, wearers of hearing aids may
experience interference in the form of a humming noise.
• Use only the battery type provided in the box. Do not use lithium or non-rechargeable
batteries. For more information about battery safety, see “Batteries” in Appendix A.
Digital Security System
Your cordless phone uses a digital security system to protect against false ringing, unauthorized
access, and charges to your phone line.
There is a unique digital security code programmed into each unit. When the base and the handset
are powered up the first time, the handset automatically links with the base ready for normal and
secure use. If you have also purchased additional accessory handsets, you will need to follow the
registration procedure in “Registering Your Handset” in Chapter 7. This will help maintain the
digital security.
Hearing Aid Compatibility (HAC)
This telephone system meets FCC and Industry Canada standards for Hearing Aid Compatibility.
Note: This telephone works by sending radio signals between the base unit and the
handset. These signals may interfere with some hearing aids, causing a humming
noise.
1-2 Getting Started
v1.0, November 2006
Page 19

Cordless Internet Phone with Skype Model SPH200D User Manual
Package Contents
Unpack the box and make sure that you have all the items listed below. If there are missing items,
contact your dealer.
base unit handset charger
base power adapter charger power adapter
NiMH AAA batteries
Figure 1-1
telephone line cord
Ethernet cable
with RJ45 connector
• Base unit
• Phone (also called a handset)
•Charger
• Power adapter for base
• Power adapter for char ge r
• Two rechargeable NiMH batteries, size AAA 1.2V 750mAh (HR11/45)
• Telephone line cord
• Ethernet cable (with RJ45 connector)
• NETGEAR CD, which includes this User Manual and links to product registration and
support.
• Cordless Internet Phone with Skype Model SPH200D Quick Installation Guide
Getting Started 1-3
v1.0, November 2006
Page 20
Cordless Internet Phone with Skype Model SPH200D User Manual
About Your Phone
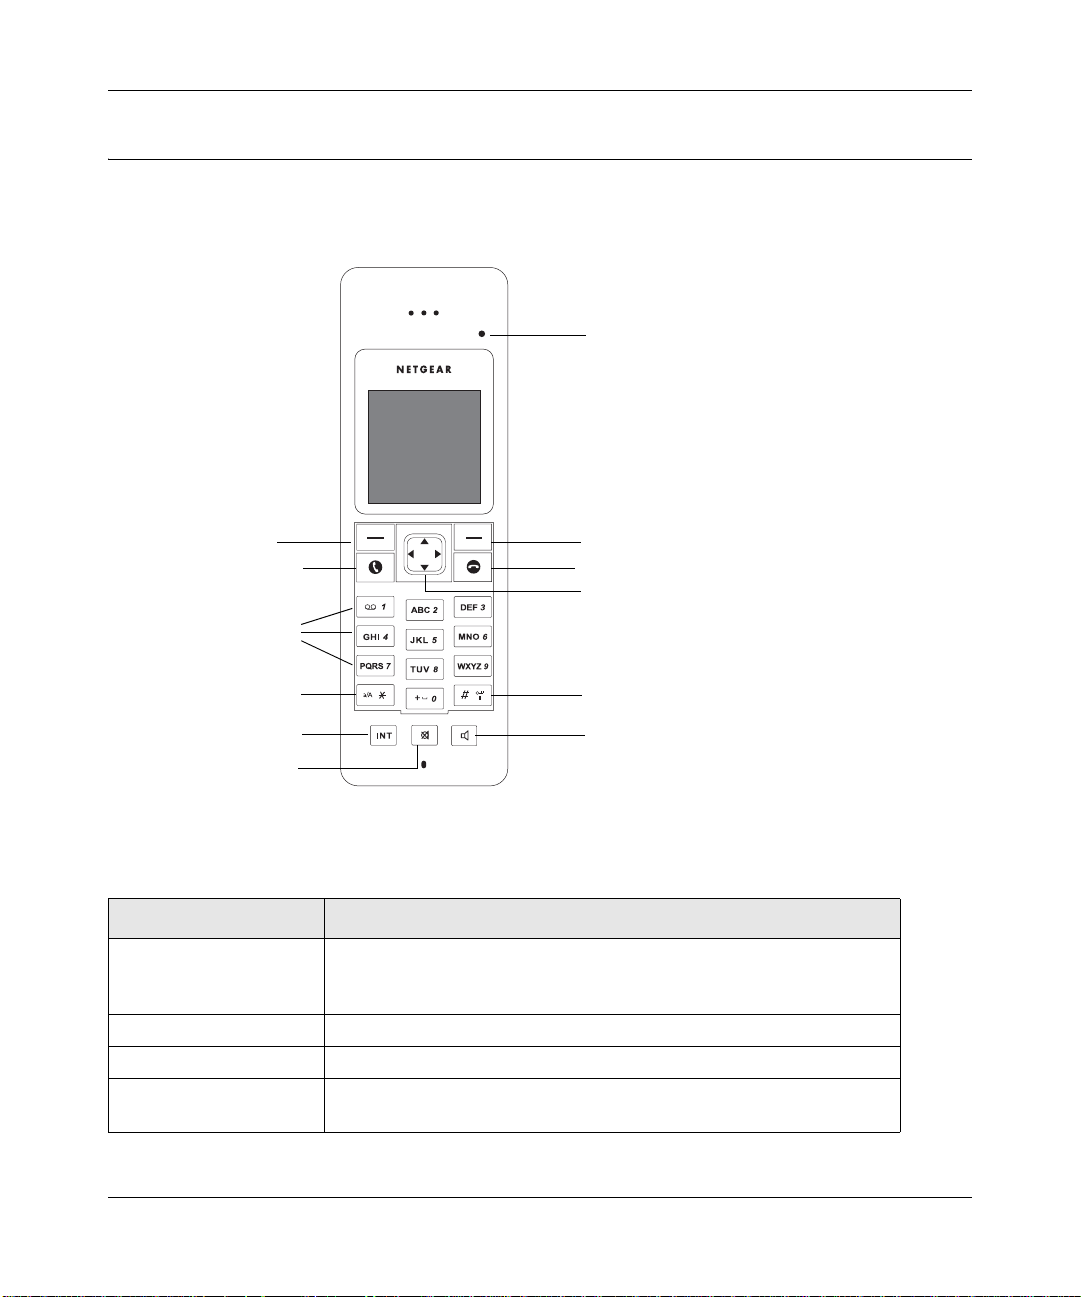
Handset Light and Controls
handset light
Menu, Select, or OK
call and recall
alphanumeric
star and ringer off
intercom
mute
Back or Cancel
end call and on/off
navigation
(left, right,
up, and down)
#, keylock, and pause
speaker
Figure 1-2
Table 1-1. Handset Light and Controls
Light and Controls Action
Handset light • Lit when a call is in progress.
• Blinks when receiving a call.
• Blinks if there is voicemail.
Menu, Select or OK Use this button to press Menu, Select, or OK displayed on the screen.
Back or Cancel Use this button to press Back or Cancel displayed on the screen.
Talk and recall • Make and receive calls.
• Send flash signal for landline calls.
1-4 Getting Started
v1.0, November 2006
Page 21
Cordless Internet Phone with Skype Model SPH200D User Manual
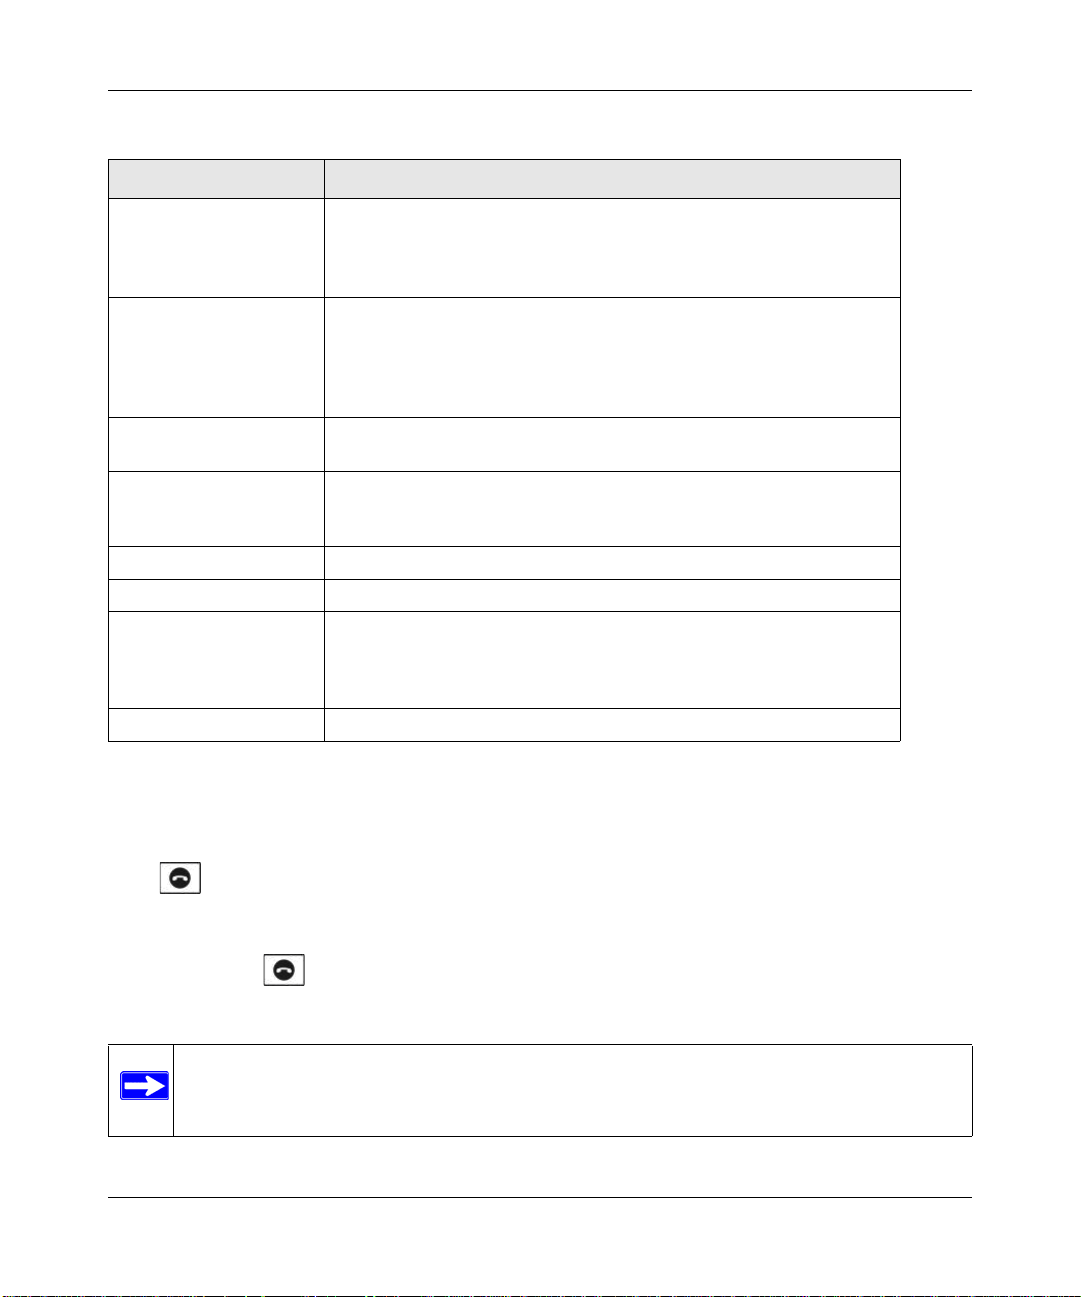
Table 1-1. Handset Light and Controls (continued)
Light and Controls Action
End call and on/off • End a call.
• Exit menus.
• Power on the handset.
• Enter the power menu.
Navigation
(up, down, left, and right)
Alphanumeric • Dial digits.
Star and ringer off • Dial *.
Intercom Make an intercom call.
Mute Mute/un-mute the microphone.
#, keylock, and pause • Dial #.
Speaker Turn the speaker on or off.
• Scroll to menu items.
• Move the cursor and change the selection
• Up: Shortcut to Skype Change Status menu. Increase ringer and
receiver volume.
• Down: Shortcut to All Calls list. Decrease ringer and receiver volume.
• Enter characters or numbers.
• Enter alphanumeric mode during standby.
• Change text entry mode (a/A/1).
• Enter a pause.
• Lock the keypad.
• Display the symbols matrix.
Powering Your Handset On and Off
Powering On Your Handset
Press . The handset may take a few seconds to power up.
Powering Off Your Handset
1. Press and hold for two seconds. The power menu is displayed.
2. Scroll to Switch Off. Press Select. The handset is switched off.
Note: Your handset cannot receive any calls if the power is switched off.
Getting Started 1-5
v1.0, November 2006
Page 22
Cordless Internet Phone with Skype Model SPH200D User Manual
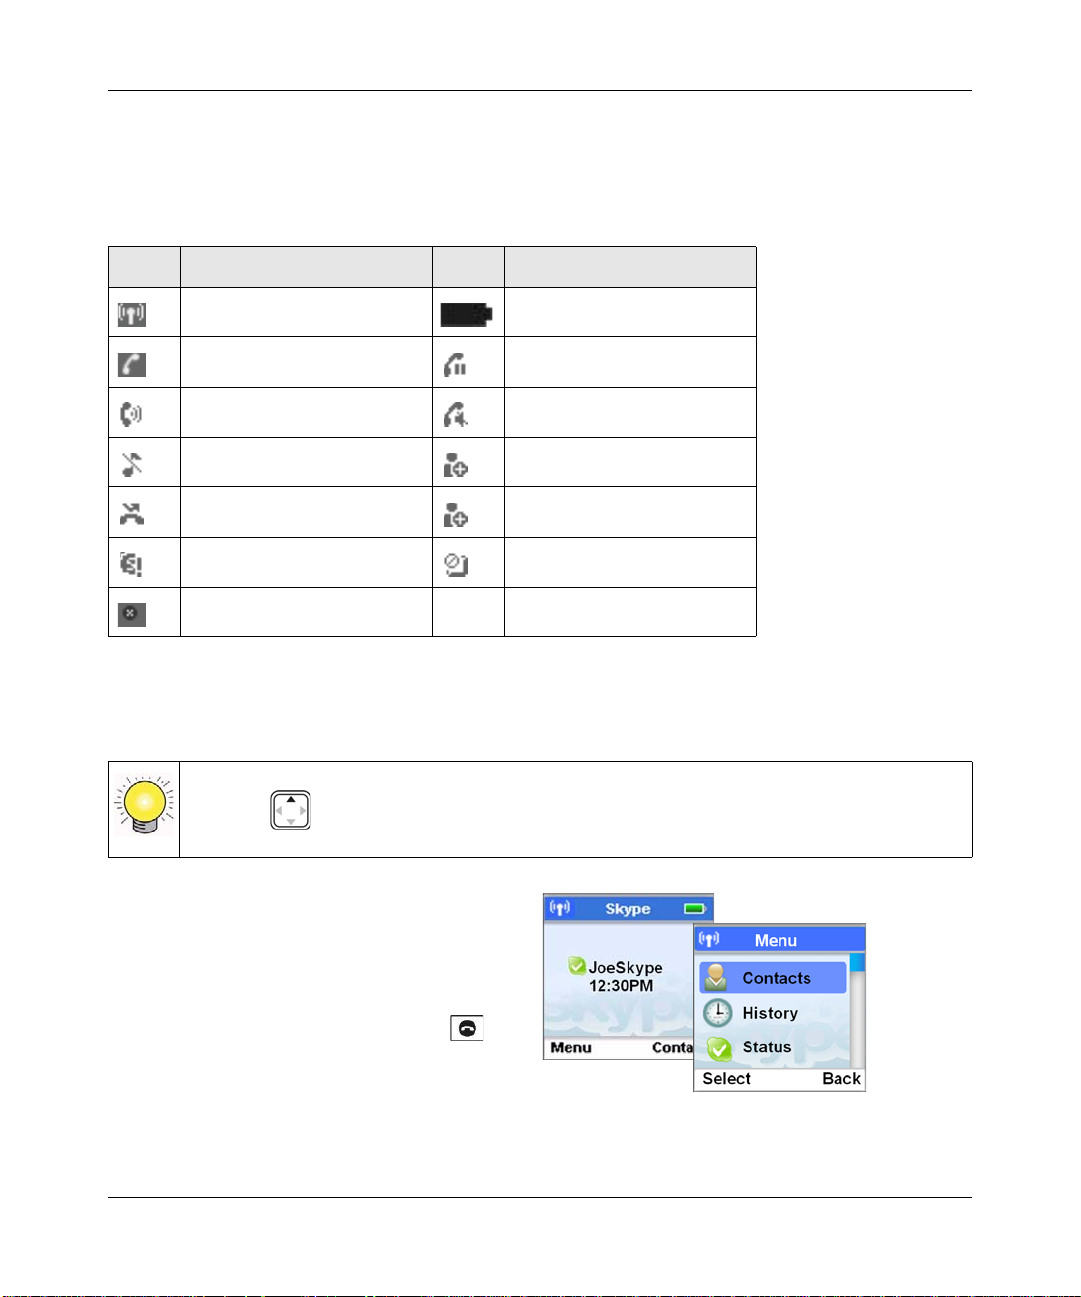
Handset Icons
Each icon gives you a visual message of what is happening on your handset.
Table 1-2. Handset Icons
Icon Meaning Icon Meaning
Signal strength Battery level
Call in progress Line on hold
Speaker on Mute
Ringer off New voicemail
New missed call New request waiting
Skype network alert Keypad locked
handset lost link
Using the Menus
Your phone offers a variety of features and functions grouped in the menus.
Tip: Use (Up or down) to navigate the menus.
1. From the standby display, press Menu to go
to the main menu.
2. You can select Contacts, History, or Status,
or scroll to select the All Calls list.
To exit from any menu instantly, press . All
unconfirmed changes will not be saved.
Figure 1-3
1-6 Getting Started
v1.0, November 2006
Page 23
Cordless Internet Phone with Skype Model SPH200D User Manual
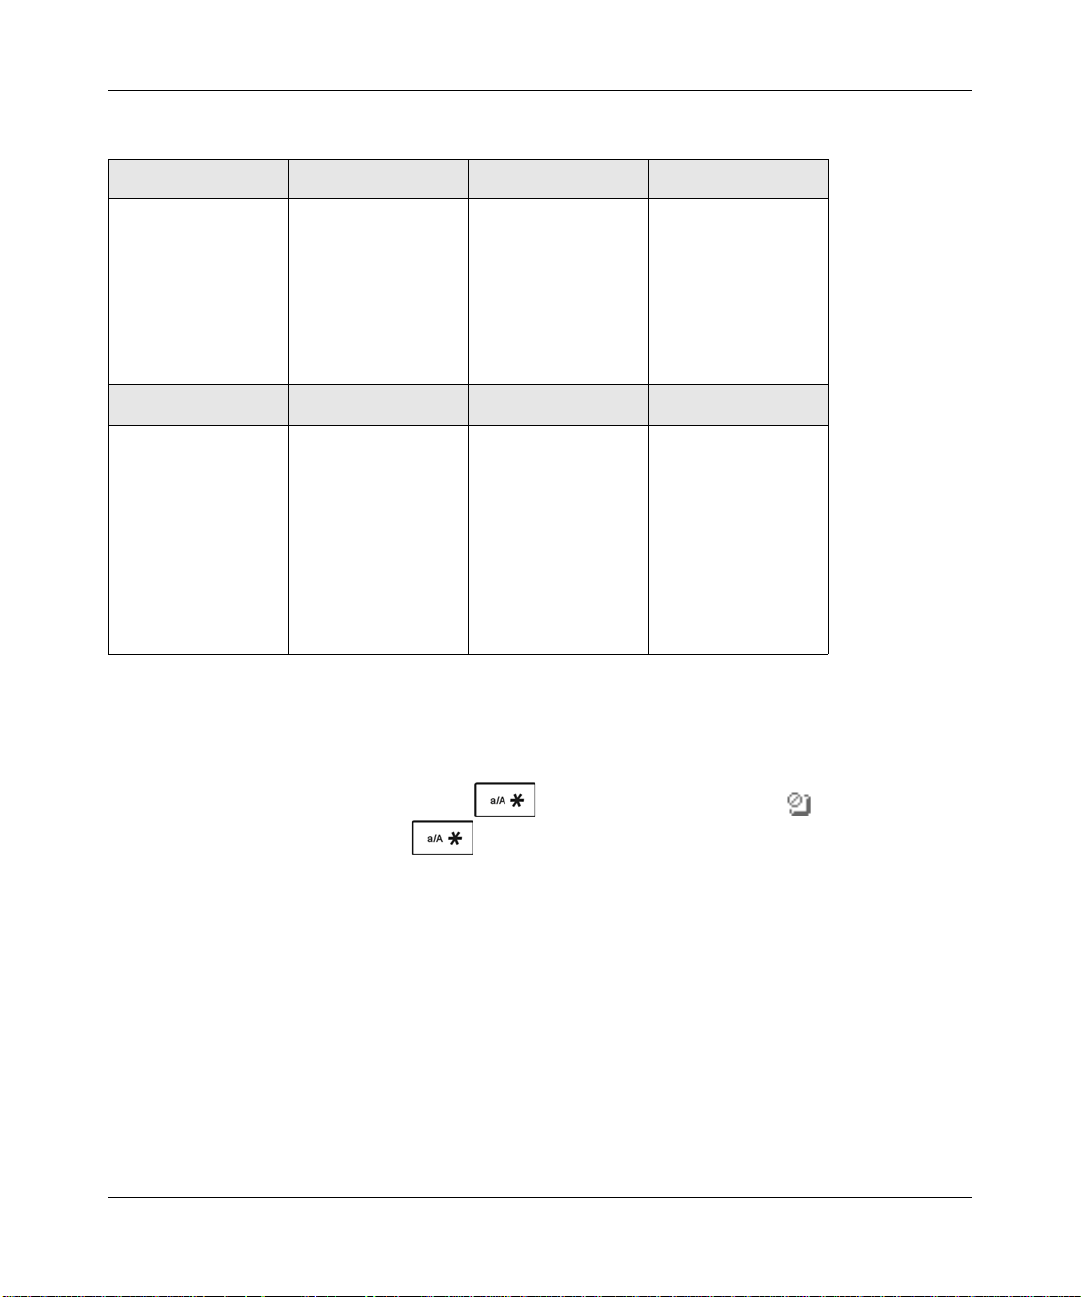
Table 1-3. Menus
Contacts History Status Add Contact
Options
Call
Send Voicemail
View profile
Rename
Remove
Block
Request detail
Search Services Settings
Enter name or e-mail Skype credit
All calls
Missed calls
Incoming calls
Outgoing calls
Voicemails
New contact
SkypeIn
Voicemail
Change status
My profile
Sign out
General
Call settings
Privacy
Tones
Screen
Time & Date
Network
Handset
Information
Advanced
Skype
SkypeOut
Locking and Unlocking the Handset Keypad
You can lock the handset keypad to prevent accidental button presses.When you want to make a
call you can unlock the keypad.
• Locking the keypad. Press and hold . The keypad is locked, and is displayed.
• Unlocking the keypad. Press to unlock. The keypad is unlocked.
Getting Started 1-7
v1.0, November 2006
Page 24

Cordless Internet Phone with Skype Model SPH200D User Manual
Base Unit
Skype line indicator
Landline indicator
Page button
Reset button
Telephone (landline) jack
Ethernet connector
Power connector
Figure 1-4
The following table describes the keys and connectors on the base unit.
Table 1-4. Base Unit Keys and Connectors
Indicators, Buttons, and
Connectors
Skype line indicator • Blinks when receiving a Skype line call.
Landline indicator Blinks when receiving a landline call.
Page button • Find handsets.
Reset button • Push and release to reset the power.
Telephone (landline) jack Connect to the landline.
Ethernet jack Connect to the Internet.
Power connector Connect to the power adapter.
1-8 Getting Started
Description
• Lit when the Skype line is in use.
• Register handsets.
• Push and hold for 5 seconds, and then release to reset to
factory default settings.
v1.0, November 2006
Page 25

Cordless Internet Phone with Skype Model SPH200D User Manual
Paging Missing Handsets
You can use the Page button on the base unit to locate missing handsets.
1. Press on the base unit. All the handsets connected to this base unit ring.
2. To stop paging, press on the base unit again OR
Press any key on the handset to stop the paging of that handset.
Getting Started 1-9
v1.0, November 2006
Page 26

Cordless Internet Phone with Skype Model SPH200D User Manual
1-10 Getting Started
v1.0, November 2006
Page 27

Chapter 2
Installation
The Cordless Internet Phone with Skype Model SPH200D can connect to Skype through your
broadband Internet connection, or it can work with a landline as an ordinary cordless phone. You
can use the phone to make and receive calls and to manage Skype.
To set up and use your Cordless Internet Phone:
1. Check the package contents.
See “Package Contents” in Chapter 1.
2. Charge the batteries.
See “Charging the Batteries” on page 2-2.
3. Connect the base unit.
See “Connecting the Base Unit” on page 2-3.
4. Set up your handset.
See “Setting up the Handset” on page 2-4.
5. Sign in to Skype.
See “Signing In to Skype” on page 2-4.
Requirements
To install the Cordless Internet Phone with Skype Model SPH200D, you need the following:
• Power as specified in “Power and Safety” in Appendix A.
• For Internet calling:
– Broadband Internet connection with ADSL or cable modem.
• For landline calling:
– Telephone line with landline service.
v1.0, November 2006
2-1
Page 28

Cordless Internet Phone with Skype Model SPH200D User Manual
Charging the Batteries
Danger: There is a risk of explosion if the battery is replaced by an incorrect type. Never
use non-rechargeable batteries. Use the rechargeable NiMH batteries, size AAA
1.2V 750mAh (HR11/45) that are supplied with this product.
Figure 2-1
To charge the batteries, follow these steps:
1. Connect the power adapter of the charger to the charger and a standard wall outlet.
2. Place the two rechargeable batteries (provided) into the battery compartment of the handset.
3. Slide the battery door firmly into place.
4. Place the handset on the charger.
Note: Charge for 14 hours before initial use.
2-2 Installation
v1.0, November 2006
Page 29

Cordless Internet Phone with Skype Model SPH200D User Manual
Battery Level
The battery icon displays the current battery level.
100% full 60% full 30% full Empty
(charging
required)
Your handset may power down if it is not charged after the battery is empty. If you are on the
phone while the battery is nearly empty, you will hear warning tones. Your call maybe cut off
shortly after the warning.
Connecting the Base Unit
telephone
line cord
Figure 2-2
Ethernet
power
To connect the base unit, follow these steps:
1. Connect one end of the power adapter to the base unit, and the other to a standard wall outlet.
2. You can connect the Ethernet cable, the telephone line cord, or both.
• For Internet calling, use the provided Ethernet cable to connect the base unit to your
gateway, router, or modem (ADSL or cable).
• For landline calling, connect the telephone line cord to the base unit and the wall phone
socket.
Installation 2-3
v1.0, November 2006
Page 30

Cordless Internet Phone with Skype Model SPH200D User Manual
Setting up the Handset
The first time you use the handset, you must set it up. To set up the handset, follow these steps:
1. Remove the handset from the charger.
The handset displays set up questions.
2. Use the arrow buttons to scroll, and press Select to confirm. For numbers, press Clear to make
corrections. Press OK when you are done.
• Language. Select the language.
• Agreement. Read the entire Skype agreement and accept it.
• Country code. This is the international calling code for your country (for example, 1 for
US, 44 for UK, or 33 for France).
• Area code. You need this to return local, national, or international calls received on the
landline.
3. Your phone resets and updates itself. It powers up automatically after a few seconds.
Signing In to Skype
After the phone resets itself, it powers up and links to the base unit. If the phone does not find the
base unit, see “Linking to the Base Unit” on page 2-6. The phone shows the Sign In display.
Follow these steps:
1. Sign in to Skype, or create a new Skype Name if you do not
have one. (See “Creating a Skype Name and Password” on
page 2-5.)
If you have Skype contacts, they are downloaded to your
phone. Depending on Internet traffic and the number of
contacts, this can take several minutes.
2. If you want the phone to automatically sign you in, select
Yes for Automatic Sign In.
3. Use the phone to make and receive calls.
For Skype calling, see Chapter 3, “Skype Calling”. For
landline calling, see Chapter 4, “Landline Calling”.
2-4 Installation
Figure 2-3
v1.0, November 2006
Page 31

Cordless Internet Phone with Skype Model SPH200D User Manual
Creating a Skype Name and Password
Each Skype account has a unique Skype Name with a password. If your Skype Name is the same
as another Skype user it will not be accepted. Follow these guidelines:
• Characters: You can use uppercase and lowercase characters, numbers, and punctuation
marks. You cannot use spaces. You cannot start your Skype Name or password with a number
or punctuation mark.
• Length: You can use 6-30 characters for your Skype Name, and 4-20 characters for your
password.
• Unique Password: You cannot use your Skype Name as a password.”
Note: After you have created your Skype Name, it is strongly recommended that you
register an email address for your Skype Name on the Skype website. This will
allow Skype to generate a new password for you in the event that you lose your
password. Go to www.skype.com and sign in to your account. Then, follow the
provided instructions for registering an email address for your account.
Standby Display
Your phone is in standby mode when it is idle. It shows your
Skype status icon, your Skype Name, the handset number, the
system time, the signal icon, and the battery icon.
Figure 2-4
Installation 2-5
v1.0, November 2006
Page 32

Cordless Internet Phone with Skype Model SPH200D User Manual
Linking to the Base Unit
The signal icon on the handset shows the link status between your handset and the base unit.
Note: If your handset does not link, you will cannot make or receive any calls; and you
will not be able to use many of the phone features.
• Link icon. Your handset and base unit are linked. They can communicate.
• Lost Link icon . Your handset is not linked to the base unit. They cannot communicate.
Make sure that the base unit is plugged in. Take your handset closer to the base unit to
reconnect the link.
• Unregistered. This handset is not registered to the base unit. It may have been purchased
separately. You must register the handset before it can link to the base unit. See “Registering
Your Handset” in Chapter 7.
If you move too far away from the base unit while you are on the phone, you will hear warning
tones notifying you that your handset is almost out of range (the link is lost). Take your handset
closer to the base unit or your call will be cut off shortly after the warning.
2-6 Installation
v1.0, November 2006
Page 33

Chapter 3
Skype Calling
Skype Features
After you have created your Skype account, you can call other people with Skype accounts for
free. Skype also offers additional features, including:
• SkypeOut™. Allows you to place calls to traditional landline and mobile phones.
• SkypeIn™. A subscription feature that provides you with a traditional phone number for
receiving Skype calls from traditional landlines and mobile phones.
• Skype Voicemail. Skype Voicemail allows you to send and receive voicemail me ssages and
record a greeting.
For more information on these features, go to www.skype.com.
Assigning a Preferred Line for a SkypeOut Contact
Before you begin making Skype or SkypeOut calls, it is a good idea to assign a preferred line.
After setting the preferred line, all SkypeOut contacts (except those on the outgoing call list) will
always be dialed out from the preferred line when you press .
To assign a preferred line for a SkypeOut contact, follow these steps:
1. Press Menu>Settings>Call Settings>Preferred line.
2. Scroll and select the setting that you want.
SkypeOut. Use SkypeOut to dial this number.
Landline. Use the Landline to dial this number.
Always Ask. Ask which line to use when this number is dialed.
The new setting is saved.
v1.0, November 2006
3-1
Page 34

Cordless Internet Phone with Skype Model SPH200D User Manual
Making a Skype Call
You can make SkypeOut calls, call a contact, or call from the Call History (“Viewing Call
Records” in Chapter 6).
Calling a Contact
After your contacts are downloaded, or you create contacts, you can place Skype or SkypeOut
calls to contacts.
Figure 3-1
To call a contact, follow these steps:
1. Press Menu>Contacts>Select.
2. Highlight a contact and then press .
Wait for the call to connect, ring, and be answered.
Note: The number is dialed out on the preferred line. For information about setting up
a preferred line for a contact, see “Assigning a Preferred Line for a SkypeOut
Contact” on page 3-1.
3. Press End to end the call.
3-2 Skype Calling
v1.0, November 2006
Page 35

Cordless Internet Phone with Skype Model SPH200D User Manual
Making a SkypeOut Call
You can call a traditional landline or mobile phone using SkypeOut.
Note: Depending on your service, you might need Skype credit to make SkypeOut calls.
Your phone alerts you when your Skype credits are low.
Figure 3-2
To make a SkypeOut call, follow these steps:
1. Use the keypad to dial the number.
SkypeOut numbers (even local numbers) must be entered in the following format:
“00” + “country code” + “area code” + “number”.
2. Press Options>SkypeOut.
3. Press .
4. Wait for the call to connect, ring, and be answered.
Note: During a call, the call timer displays the talk time of your call.
5. Press End to end the call.
Skype Calling 3-3
v1.0, November 2006
Page 36

Cordless Internet Phone with Skype Model SPH200D User Manual
Redialing the Last Number
Press twice within one second. The last number that you called is dialed out using the same
line as before.
Receiving Calls
When you receive a call, your phone rings. You can answer the call, reject the call, or answer a
second call that you receive during a phone call.
Answering a Call
Press to answer the call.
Tip: When a call is missed, your phone displays You have Missed Calls. Press View for
more options.
Rejecting a Skype Call
When a Skype call comes in, you can reject the call.
Press Reject. The handset returns to standby.
Auto Answer
With Auto Answer you can answer an incoming call by simply picking up the handset from the
charging cradle. You do not need to press a button to answer the call.
To set up Auto Answer, follow these steps:
1. Press Menu>Settings>General>Auto Answer.
2. Scroll and select On.
The new setting is saved.
3-4 Skype Calling
v1.0, November 2006
Page 37

Cordless Internet Phone with Skype Model SPH200D User Manual
Answering a Second Skype Call During a Call
During a Skype call, your phone sounds a short beep periodically to notify you of another
incoming Skype call.
To answer a second Skype call during a call, follow these steps:
1. Press to put the first call on hold and answer the new call.
Your phone rings to notify you that a caller is on hold.
2. Press to toggle between the two callers OR
Press to end the current call and return to standby.
Call Forwarding
You can redirect Skype calls to a landline or mobile number when you are away from your home
or office. You can change the call forwarding number, and stop call forwarding when it is no
longer needed.
• You can enter a Skype account name and forward to that account.
• If you want to forward your calls to a SkypeOut number, check your Skype credit.
• When entering the SkypeOut number, you must enter a + before the number. To enter + press
and hold 0 (zero).
• Only calls unanswered will be forwarded. The phone will ring for 15 seconds before
forwarding the call.
Note: If you use Call Forwarding, your Skype Voicemail is turned off. All your calls are
sent to the forwarded number. If you do not answer calls, callers cannot leave a
message at your Skype Voicemail until you have stopped call forwarding.
To go to Call Forwarding, follow these steps:
1. Press Menu>Settings>Call Settings>Call Forward.
The display shows the call forwarding setting:
• No. Call forwarding is not used.
• Forward To. Call forwarding is turned on, and calls are routed to this number.
Skype Calling 3-5
v1.0, November 2006
Page 38

Cordless Internet Phone with Skype Model SPH200D User Manual
2. Enter the setting that you want.
• Start Call Forwarding. Answer Yes to Forward un-answered calls, and then enter the
phone number.
• Edit the Forward To number. Scroll and select Forward To, and then edit the number.
• Stop Call Forwarding. Select No.
3. Press OK when finished.
Your calls will be forwarded to the number you entered.
Skype Voicemail
You can use landline voicemail service and Skype Voicemail.
Note: For information about Skype Voicemail, go to www.skype.com. For information
about landline voicemail, contact your service provider.
A voicemail icon shows when there is a voicemail waiting for you.
To go to the Skype Voicemail menu, follow these steps:
1. Press Menu> History> Voicemails> Skype VM.
2. Scroll to the voicemail that you want.
3. Scroll and select one of these choices:
• Play. Plays the selected voicemail.
• Call. Returns a call to the voicemail sender .
• Send Voicemail. Record and send voicemail. Start recording after the beep.
• Delete. Deletes a Skype voicemail. A confirmation request is displayed. Press Yes to
confirm and the voicemail will be deleted.
3-6 Skype Calling
v1.0, November 2006
Page 39

Cordless Internet Phone with Skype Model SPH200D User Manual
My Greeting
My Greeting is the message people hear before leaving you a voicemail. You use the Vo icemail
menu to work with this greeting.
To work with the My Greeting voicemail message, follow these steps:
1. Press Menu> Settings>Call Settings>Voicemail>My Greeting.
2. The first time you do this, the default My Greeting is automatically downloaded to your
phone.
3. Press Options and then select Play, Record New, or Reset Default.
• Play. Select Play, and then “My Greeting” starts playing.
• Record New. Select Record New, and then start recording.
• Reset Default. You can reset “My Greeting” to the default Skype Voicemail greeting.
Select Reset Default, press Yes to confirm, and then “My Greeting” is reset.
Skype Tools
This section describes the Skype tools that you can access from this phone.
Privacy
The privacy feature lets you choose which contacts can call you: anyone, only contacts, or only
authorized users.
1. Press Menu>Settings>Privacy.
2. Scroll and select the kind of calls that you want to modify:
• Skype Calls. You can allow calls from Anyone, My
Contacts, or Authorized.
• SkypeIn Calls. Calls from other Skype users.
• Blocked Users. Calls from blocked users.
3. Scroll and select the new setting to save it.
Skype Calling 3-7
To go to your privacy settings, follow these steps:
Figure 3-3
v1.0, November 2006
Page 40

Cordless Internet Phone with Skype Model SPH200D User Manual
Your Skype Profile
Your Skype profile stores information about you such as your name, gender, birthdate, phone
numbers, and so on. Your profile has public and private details. Public details can be viewed by
other Skype users, but private details cannot. You are not required to enter any information into
your profile. However, it is a good idea to put in some details, such as your location, to make it
easier for other users to locate you.
To view details and go to My Profile, follow these steps:
1. Press Menu>Status>My Profile.
2. Scroll and select the type of details that you want to view:
• Public Detail. Information displayed to others such as
Skype Name and Full Name.
• Private Detail. This lets you work with up to three
email addresses used by Skype. Y ou can edit, remove, or
add email addresses. Your friends can easily find you on
the Skype network if they know your email address.
The current setting is displayed.
Figure 3-4
3. You can modify the settings. Press OK or Select when finished. The new setting is saved.
Adding an Email Address
To add an email address, follow these steps:
1. Press Menu>Status>My Profile>Private Detail>Options>Add.
2. Enter the new email address.
3. Press OK when finished to save the new setting.
Editing an Email Address
To edit an email address, follow these steps:
1. Press Menu>Status>My Profile>Private Detail.
2. Scroll to the email address that you want. Press Options.
3. Scroll to Edit. Press Clear to make corrections.
4. Press Enter when finished to save the new setting.
3-8 Skype Calling
v1.0, November 2006
Page 41

Cordless Internet Phone with Skype Model SPH200D User Manual
Deleting an email address
To delete an email address, follow these steps:
1. Press Menu>Status>My Profile>Private Detail.
2. Scroll to the email address that you want. Press Options.
3. Scroll to Remove.
4. Press Yes to confirm and the email address is deleted.
Signing in Automatically
The first time that you use the phone, you are asked if you want to sign in to your Skype account
automatically. If you selected no, you can select Auto Sign in to use this feature.
To sign in automatically, follow these steps:
1. Press Menu>Settings>General>Auto Sign In.
The screen shows these choices:
• Auto Sign In. Automatically sign in to the Skype
account that you used when you set up your phone.
• Ask Password. Enter a password when you sign in to
Skype.
2. Select the new setting that you want, and press OK to save
the new setting.
Figure 3-5
Viewing or Changing Your Skype Status
You can view or change your Skype status from the Status menu.
Tip: For a shortcut to the Status menu, press (Up) during standby.
Skype Calling 3-9
v1.0, November 2006
Page 42

Cordless Internet Phone with Skype Model SPH200D User Manual
The following table describes the Skype Status icons.
Table 3-1. Skype Status Icons
Silent Turn off the telephone ringer.
Offline Call
forwarding
Voicemail
Online This is the automatic status setting when you are on Skype
Skype Me Invite users who are not in your contacts list to contact you.
Away You are logged in to Skype, but probably will not answer a call.
Not Available You are logged in to Skype, but are not available to answer
DND (Do not disturb) All ringers are turned off for Skype and SkypeIn calls. Your
Invisible You are online, but do not want other Skype users to know.
You are not logged into Skype. When you are offline you can
choose to have your calls forwarded to another phone, or be
redirected to Skype Voicemail.
and shows you are available.
your phone.
handset will not ring when it receives Skype calls
You appear to be offline to other Skype users.
To change your Skype status, follow these steps:
1. Press Menu>Status>Change Status.
2. Scroll and select the new setting. The new setting is saved.
Changing Your Skype Password
Your password provides security to your Skype account, and it ensures no one can access your
account. This password is different from the system PIN of this phone.
To change your Skype password, follow these steps:
1. Press Menu>Settings>General>Change Passwd.
2. Type your password and press OK.
3. Type your new password and press OK.
4. Retype your new password for verification.
5. Press OK. The new setting is saved.
Figure 3-6
3-10 Skype Calling
v1.0, November 2006
Page 43

Cordless Internet Phone with Skype Model SPH200D User Manual
Updating Skype Software
Skype provides periodic updates on its software. You can choose to check for updates manually, or
to have your phone notify you when an update is available.
Note: Some updates are optional and can be downloaded at anytime. Note that some
updates are required and must be accepted immediately in older to continue using
the phone.
To update Skype software, press Menu>Settings>Advanced>SW Update.
You can choose:
• SW Update. Check for updates manually. If an update is available, follow the onscreen
instructions
• Auto Update. Set the phone to notify you of new Skype software updates. This takes less time
than checking for new updates manually.
Note: W ith Auto Update, you r phone displays a message when there is a new update. You
will be able to choose to update the software right away or to have your phone
remind you again at a later time.
Skype Calling 3-11
v1.0, November 2006
Page 44

Cordless Internet Phone with Skype Model SPH200D User Manual
3-12 Skype Calling
v1.0, November 2006
Page 45

Chapter 4
Landline Calling
You can use your phone to make Skype calls over the Internet or to make landline calls with your
regular phone line.
Note: Your phone stores the outgoing, incoming, and missed calls. For information about
calling from the Call History, see “Personalizing Your Handset Display” in
Chapter 6.
Making a Landline Call
There are two ways that you can make a landline call. You can use direct dialing, or select the
landline option.
Direct Dialing
To use direct dialling, follow these steps:
1. Press
2. Listen for a dial tone.
3. Use the keypad to dial the number.
4. Wait for the call to connect, ring, and be answered.
5. Press End to end the call.
.
v1.0, November 2006
4-1
Page 46

Cordless Internet Phone with Skype Model SPH200D User Manual
Selecting the Landline Option
To select the landline option,
follow these steps:
1. Use the keypad to dial the
number.
2. Press Options>Landline, and
then press .
3. Wait for the call to connect,
ring, and be answered.
4. Press End to end the call.
Figure 4-1
Redialing the Last Number
Press twice within one second. The last number that you called is dialed out using the same
line as before.
Tip: Last Landline Number. Press , and then press Redial. The last number that you
called using the landline will be dialed out.
Making a Second Landline Call During a Call
Note: Second call service only applies to calls using the landline. Toggling between calls
may not be available in all countries. Consult and subscribe from your landline
service provider.
1. Press .
The current caller is put on hold.
2. Dial the number that you want.
The number displays on the screen and is dialed out.
3. If your landline allows toggling, press to toggle between the two callers OR
Press to end the current call and return to the other caller.
4-2 Landline Calling
v1.0, November 2006
Page 47

Cordless Internet Phone with Skype Model SPH200D User Manual
Receiving Calls
When you receive a call, your phone rings. Press to answer the call. For caller ID service,
contact your landline service provider.
Tip: Missed Call Alert. When a call is missed, your phone displays You have Missed
Calls. Press View for more options.
Auto Answer
With Auto Answer you can answer an incoming call by simply picking up the handset from the
charging cradle. You do not need to press a button to answer the call.
To set up Auto Answer:
1. Press Menu>Settings>General>Auto Answer.
2. Scroll and select On.
The new setting is saved.
Turning off the Ringer During a Call
When a landline call comes in, you can turn off the ringer during the current call.Press to turn
off the ringer for the current incoming landline call.
Answering a Second Landline Call during a Call
Note: For second call service, contact your landline service provider.
During a landline call, your phone sounds a short beep periodically to notify you of another
incoming landline call.
1. Press to answer the call. You have put the first call on hold, and you are now connected
to the second call.
2. Press to toggle between the two callers OR
Press to end the current call and return to the other caller.
Landline Calling 4-3
v1.0, November 2006
Page 48

Cordless Internet Phone with Skype Model SPH200D User Manual
Landline Voicemail
You can use landline voicemail service and Skype Voicemail.
Note: For information about landline voicemail service or to find out your service
provider’s phone number, consult your service provider. For information about
Skype Voicemail, go to www.skype.com.
A voicemail icon shows when there is a voicemail waiting for you.
You can call your landline voicemail, edit the phone number for the service provider, or delete the
phone number for the service provider.
To go to the Landline Voicemails menu:
1. Press Menu>History>Voicemails>Landline VM.
You can work with two landline voicemail phone numbers, VM Number 1 and VM Number 2.
2. Scroll to the service provider that you want.
3. Press Options. You can use Call, Edit, or Delete.
• Call. Call your voicemail service provider to retrieve your voicemails. Wait for voice
instructions
• Edit. Edit the landline voicemail service provider phone number. Edit the number and
press Enter.
• Delete. Delete a phone number for a landline voicemail service provider. Press Yes to
confirm.
4-4 Landline Calling
v1.0, November 2006
Page 49

Chapter 5
Contacts
Entering Text and Numbers
You can use the alphanumeric keys on your phone to enter text and numbers.You can enter
lowercase, uppercase, numeric characters, and symbols.
To enter text, numbers, or symbols:
1. Press to change to uppercase, lowercase, or numeric entry.
The lower right corner displays the method you have currently selected. A for uppercase; a for
lowercase; 1 for numeric mode.
2. Find the button with the character that you want.
3. Press it as many times as needed for the character to display on the screen.
The preview area shows the available characters of the button.
Tip: Use (Left or Right) to move the cursor. To enter symbols, press .
• To erase a single character, press Cancel.
• To erase all characters, press and hold Cancel.
v1.0, November 2006
5-1
Page 50

Cordless Internet Phone with Skype Model SPH200D User Manual
Contact Options
The Contacts screen shows your contacts in alphabetical order.
To view or work with contacts, follow these steps:
1. Press Menu>Contacts.
For a description of status, see “Viewing or Changing
Your Skype Status” on page 3-9.
2. You can select Options to call a contact, see more detail,
or work with contacts.
Figure 5-1
On the Contacts screen, the following features are available:
• Call. Choose the type of call that you want to make: Skype, SkypeOut or Landline.
• Send Voicemail. You can send Skype Voicemail or landline voicemail. See “Skype
Voicemail” in Chapter 3 and “Landline Voicemail” in Chapter 4.
• View Pr ofiles. View the Skype profile of a contact.
• Rename. Change the display name of a contact. Edit the name and press OK. Your edited
contact is saved.
• Remove. Remove a contact from the list. A confirmation request is displayed. Press Yes to
confirm. The contact is removed.
• Block. Block a user from contacting you. You will always appear as offline to the user that you
have blocked. See “Blocking a Contact” on page 5-4 and “Unblocking a Contact” on page 5-4.
• Request Auth. Request authorization from a Skype Contact.
5-2 Contacts
v1.0, November 2006
Page 51

Cordless Internet Phone with Skype Model SPH200D User Manual
Adding Contacts
Note: Your phone can store a total of 500 Skype and SkypeOut contacts. If you try to add
more, the phone displays a Memory Full message. Delete unnecessary contacts
before adding new ones.
To add a Skype or SkypeOut Contact, follow these steps:
1. Press Menu>Add Contact>Skype.
2. Choose Skype or SkypeOut:
• Skype. Enter the Skype name or full name. To let
this contact see when you are online, select Yes.
• SkypeOut. Enter the name and phone number
(including international calling code and area code).
3. Press OK.
Note: Contacts with identical numbers cannot be saved. Press to change to
upper case, lower case, or numeric entry
The new contact is added to the contact list. For Skype contacts, the phone sends a request to
the contact for authorization.
Figure 5-2
Finding a Contact
You can search the contact list by scrolling or by quick filtering.
• Scrolling. While at the contact list, press (Up or Down) to scroll.
• Quick filtering contacts. While at the contact list, press the button with the letter that you
want to search. For example, if you want to search a contact starting with N, press [6] twice.
Contacts that begin with the letter N display in alphabetical order.
Contacts 5-3
v1.0, November 2006
Page 52

Cordless Internet Phone with Skype Model SPH200D User Manual
Searching for a Skype User
You can search for a Skype user that is not on your contact list. After finding the user, you can
make a call, view the profile or add the user to your contact list.
To search for a Skype user, follow these steps:
1. Press Menu>Search.
2. Enter the Skype name or full name and press OK.
A list of matching names is displayed.
3. Scroll to the user that you want, and then press Options
for more functions.
Figure 5-3
Blocking a Contact
You can block a user from contacting you. You will always appear as offline to the user that you
have blocked. You can unblock the contact if you change your mind.
To block a contact, follow these steps:
1. Press Menu>Contacts.
2. Scroll and select the contact.
3. Press Options>Block.
4. Press Yes to confirm.
Unblocking a Contact
To unblock a contact, follow these steps:
1. Press Menu>Settings>Privacy>Blocked Users.
2. Scroll to the contact that you want to unblock.
3. Press Options>Unblock.
The contact is unblocked.
5-4 Contacts
v1.0, November 2006
Page 53

Chapter 6
Advanced Features
Your phone supports both Skype line and landline calls. A Skype call is a call using the Skype
line. A landline call is a call using your regular phone line.
Call History
Your phone stores the call history of all the missed, outgoi ng, an d i ncoming calls. The call history
includes the caller name, number, call time, and date. Your phone also saves a history of received
Skype Voicemail, new requests, and landline voicemail. our phone will not store any call history if
you are not signed in to Skype.
Note: When you sign out of Skype, your phone clears all the call history, voicemails, and
new requests saved under your account. When you or another user signs in to
Skype again, your phone starts saving the new call history under the signed-in
account.
Call History Options
From the Call History screen, you can press Options to use these features:
• Call. Return a call in the call history. See “Viewing Call Records” on page 6-2.
• Send Voicemail. Send voicemail to a call in the call history.
• Details. View details about a caller.
• Delete. Delete a call from the call history.
• View Profile. View the Skype profile for a caller.
• Add to Contact. Add a phone number from the call history to your Contact list. See “Adding
a Call Record to Your Contact List” on page 6-3.
• Clear List. Delete all records of a call list. See “Deleting All Records of a Call List” on
page 6-4.
6-1
v1.0, November 2006
Page 54

Cordless Internet Phone with Skype Model SPH200D User Manual
Viewing Call Records
To view call records, follow these steps:
1. Press Menu>History.
Figure 6-1
2. Scroll and select the call list that you want.
Call List Description
All Calls All missed, incoming, and outgoing calls.
Missed Calls Calls that you received but did not answer.
Incoming Calls that you received and answered.
Outgoing Calls that you made.
3. Scroll to the call record that you want.
4. To view call record details, press Options>Details.
6-2 Advanced Features
v1.0, November 2006
Page 55

Cordless Internet Phone with Skype Model SPH200D User Manual
Making a Call from the Call History
Your phone stores the outgoing, incoming, and missed calls.
To call from the Call History, follow these steps:
1. Press Menu>History.
2. Scroll and select the call list that you want.
3. Scroll to the record that you want.
4. Press to dial the number on the preferred line.
5. To end a call, press or place the handset on the charger.
Adding a Call Record to Your Contact List
Adding a Skype Contact
To add a Skype contact, follow these steps:
1. Select a call record.
Figure 6-2
2. Press Options>Add To Contact and your record is saved.
Adding a SkypeOut Contact
To add a SkypeOut contact, follow these steps:
1. Select a call record.
2. Press Options>Add to Contact.
3. Edit the name if necessary. Press OK.
4. Edit the number if necessary.
5. Press OK and your record is saved.
Advanced Features 6-3
v1.0, November 2006
Page 56

Cordless Internet Phone with Skype Model SPH200D User Manual
Deleting a Call Record
To delete a call record, follow these steps:
1. Select a call record.
2. Press Options>Delete.
3. Press Yes to confirm. The record is deleted.
Deleting All Records of a Call List
To delete all records of a call list, follow these steps:
1. Press Menu>History.
2. Go to the call list that you want.
3. Press Options>Clear List.
4. Press Yes to confirm. All records are deleted.
Intercom and Conference Calls
An intercom call is a call to another handset that shares the same base unit. A conference call
involves conversation between other handset(s) and outside caller(s).
Tip: Use (Up or Down) to navigate the menus.
Calling Another Handset
Note: An intercom call can only involve two handsets that share the same base unit.
To call another handset, follow these steps:
1. Press .
2. Scroll to the handset that you want.
6-4 Advanced Features
v1.0, November 2006
Page 57

Cordless Internet Phone with Skype Model SPH200D User Manual
3. Press Call. Wait for the other party to answer your call.
4. Press to cancel or end the intercom call.
Tip: To customize your intercom ringer, see “Personalizing Your Phone’s Sound” on
page 6-7.
While You Are on the Phone
While talking on the phone on the Skype line or landline, you can call another handset.
1. Press during the call.
2. Scroll to the handset that you want.
3. Press Call. Wait for the other party to answer your call.
Returning to the Outside Caller
Press End during the intercom call.You are now connected to the outside caller.
Transferring a Call
To transfer a call, follow these steps:
1. Press during a call.
2. Scroll to the handset that you want. Press Call.
3. Press after the other party answers your call. The outside call is now transferred to the
other handset.
Making a 3-Way Conference Call
A 3-way conference call is a call between you, an outside caller, and another handset in your
house. Use this feature when you are talking on the phone with an outside caller, and you want to
involve someone using another handset in this conversation.
Note: A 3-way conference call requires two handsets that share the same base unit.
Advanced Features 6-5
v1.0, November 2006
Page 58

Cordless Internet Phone with Skype Model SPH200D User Manual
To make a 3-way conference call, follow these steps:
1. Press during your call with the outside caller.
2. Scroll to the handset that you want.
3. Press Call. Wait for the other person to answer your call.
4. Press Conf.
You are now on a 3-way conference call.
5. Press to end the conference call.
Predialing
You can enter a phone number or Skype contact name before pressing the Call button. For Skype
contacts, the number will be dialled out on the preferred line.
Tip: SkypeOut Shortcut. Press twice to call from SkypeOut. The preferred line
setting will be ignored.
To predial, follow these steps:
1. Enter the phone number or Skype contact name.
• Press and hold to enter a pause after a digit has been entered. P displays on the
screen.
• Press Clear to erase a digit.
• Use left or right to move the cursor.
2. Press . The number is dialed out on the preferred line. For details on preferred line, see
“Assigning a Preferred Line for a SkypeOut Contact” in Chapter 3.
6-6 Advanced Features
v1.0, November 2006
Page 59

Cordless Internet Phone with Skype Model SPH200D User Manual
Personalizing Your Handset Display
You can change the display of the handset to suit your needs and preferences.
Setting the Language
The first time that you use the phone, you set the language shown on the phone display. To change
the language, follow these steps:
1. Press Menu>Settings>General>Language.
2. Scroll to the new setting.
3. Press OK when finished to save the new setting.
Changing the Screen Settings
You can change the brightness, backlight, and contrast of the screen.To go to the Screen settings,
follow these steps:
1. Press Menu>Settings>Screen.
2. Scroll and select the setting that you want to change:
• Brightness. This settings specifies the timeout period for the display backlight. Press
(left or right) to adjust the brightness.
• Backlight. Scroll to the new setting.
• Contrast. Press (left or right) to adjust the contrast.
Press OK when finished and the new setting is saved.
Personalizing Your Phone’s Sound
You can adjust the sound settings, change the ring tones for your phone, or turn off ringers.
Adjusting the Sound Settings
The Cordless Internet Phone has several sound settings that you can adjust.
• Earpiece volume. Press (up or down) to adjust the volume during a call.
Advanced Features 6-7
v1.0, November 2006
Page 60

Cordless Internet Phone with Skype Model SPH200D User Manual
• Muting and Un-muting. The mute feature turns off the microphone in the phone so that the
caller cannot hear you. You will still be able to hear the caller.
– To mute the microphone, press during a call.
– When the microphone is muted, press . The caller can now hear you again.
• Hands Free Speaker. You can talk on the phone without holding the handset.
– To turn on the hands free speaker, press during a call. Start talking.
– Press again to turn off the speaker.
• Headset (not included). If you have a headset, you can plug it into the headset jack at the side
of your handset.
Setting the Ring Tones
You can personalize your phone’s sound by setting the ringer melody, keypad tone, and ringer
volume on the Tones menu.
To go to the Tones menu, press Menu>Settings>Tones.
You can change these settings:
• Ring Type. Your handset has four ring types: Skype,
SkypeIn, Landline, and Intercom. Select the ring type that
you want. Scroll and select a melody, and then press OK.
The new settings is saved.
• Ring Tone. Scroll and select a melody, and then press OK.
The new settings is saved.
Figure 6-3
• Ring Volume. Press (Up or Down) to scroll to a
volume level, and then press Select.
• Notification. Scroll to the new setting, and then press Select
when finished.
• Keypad Tone. The keypad tone is the sound you hear when
you press a button on your handset. Scroll and select the new
setting.
• Confirmation. You hear the confirmation tone when you
place the handset on the charger, or after certain events.
6-8 Advanced Features
v1.0, November 2006
Page 61

Cordless Internet Phone with Skype Model SPH200D User Manual
Turning Off All the Ringers with Silent Status
You can turn off the ringers for all the incoming calls including Skype, landline, and intercom
calls.
Tip: For a shortcut to the Status menu, press (up) during standby.
To turn off all ringers, follow these steps:
1. Press Menu>Status>Change Status>Silent.
All the ringers are turned off.
Note: To turn the ringers back on, go to Change Status>Sounds On>Select. For details on
the ringer setting, see “Personalizing Your Phone’s Sound” on page 6-7.
Advanced Features 6-9
v1.0, November 2006
Page 62

Cordless Internet Phone with Skype Model SPH200D User Manual
6-10 Advanced Features
v1.0, November 2006
Page 63

Chapter 7
Settings and Maintenance
Settings
Use the Settings menu to change call settings and settings for the handset.
Figure 7-1
Country Code
The country code is the international calling code for a country (for example, ‘1’ for Canada).
When you first set up the handset, you entered a country code.
To change the country code:
1. Press Menu>Settings>Call Settings>Country Code.
2. Edit the country code. Press Clear to make corrections.
3. Press OK when finished. The new setting is saved.
Note: After you set up your country code, your handset’s power switches off. It will
switch back on in a few seconds after updating the country settings.
v1.0, November 2006
7-1
Page 64

Cordless Internet Phone with Skype Model SPH200D User Manual
Area Code
The area code feature automatically adds or removes the area code of an outgoing call based on the
country setting for the handset. You can define an area code up to five digits.
Note: The country code must be correct for the area code feature to work properly. See
“Setting up the Handset” in Chapter 2.
To set the area code follow these steps:
1. Press Menu>Settings>Call Settings>Area Code.
2. Enter your area code, or press Clear to erase it.
3. Press OK when finished.
The new setting is saved.
Time and Da te
Set the time zone before initial use of the phone. Once you have connected to the Internet, your
phone updates the clock automatically according to your time zone setting. After resetting the
phone, you may have to set the time zone again.
Note: If you use this menu to set the time or date manually, your phone will use this new
setting. It will stop automatic update until your base power is reset.
To set the time and date, follow these steps:
1. Press Menu>Settings>Time & Date.
You can adjust these settings:
• Time. You do not need to set the time. If you set the Time Zone, then the phone will
automatically find the time on the Internet.
•Time Zone. GMT (Greenwich Mean Time), or the number of hours + or - for GMT.
• Daylight Time. Choose Standard or Daylight Time (Daylight Savings Time).
• Time Format. Choose 12 hour or 24 hour.
• Time Separator. The time separator is a symbol such as a colon that separates the hour
and minute (i.e. 18:30). Your phone supports two styles: colon and period (: .).
7-2 Settings and Maintenance
v1.0, November 2006
Page 65

Cordless Internet Phone with Skype Model SPH200D User Manual
• Date Format (Month/Day/Year). The default is MM/DD/YYYY.
• Date Separator. The date separator is a symbol such as a slash that separates the month,
day and year (for example, 08/25/2006). Your phone supports three styles: slash, colon,
and period (/ : .).
2. Press OK when finished.
The new setting is saved.
Note: Automatic Update. Once you have connected to the Internet, your phone updates
the clock automatically according to your time zone setting.
Changing the System PIN
The system PIN is used for regi stering, deleting handsets, and protecting the access rights to some
of the other menus. The default system PIN is 0000. You can personalize the PIN for greater
security.
1. Press Menu>Settings>Handset>Change PIN.
2. Enter the system PIN. Press Enter to confirm. Press Clear to make corrections.
3. Enter the new system PIN. Press Enter.
4. Re-enter the new system PIN again for verification.
5. Press Enter. The new setting is saved.
Note: Write down yo ur PIN and save it for future use. If you have forgotten the PIN, call
your manufacturer for assistance.
Resetting to Default Settings
The default settings are the original factory settings of your phone. You can reset your phone
settings to factory default. These settings are shown in “Default Factory Settings” in Appendix A.
You can reset all the settings, but keep the network settings.
1. Press Menu>Settings>Advanced>Reset Device.
2. Scroll and select either Reset All or Keep Network.
Settings and Maintenance 7-3
v1.0, November 2006
Page 66

Cordless Internet Phone with Skype Model SPH200D User Manual
• Reset All. Reset all the settings including the network settings.
• Keep Network. Reset all the settings except the network settings.
3. Enter the system PIN. Press Clear to make corrections.
4. Press Yes to confirm.
5. The settings will reset.
seconds after updating all the settings.
Your handset’s power switches off. It will switch back on in a few
Registering Your Handset
Registration lets your base unit and handsets communicate. Your handset must be linked to the
base in order to make calls and to use many of features on the phone.
Your handset is already registered unless you have bought an extra handset individually, or you
have de-registered a handset. For additional handsets, see “Registering Your Handset(s) with an
Additional Base” on page 7-5. If the handset is not registered, it displays “Unregistered.”
Note: Your base unit can register up to four handsets. After registering four handsets,
your base unit registration memory is full. If you try to register an additional
handset, the registration process will not complete.
Follow the steps below to register your handset.
1. Press Menu>Settings>Handset>Register.
2. Enter the system PIN (Default: 0000). Press Clear to make corrections.
3. Press Enter to confirm. Your handset starts searching for the base.
4. Press on the base unit until the LED starts flashing.
5. The handset registers to the particular base unit, and shows the signal icon .
7-4 Settings and Maintenance
v1.0, November 2006
Page 67

Cordless Internet Phone with Skype Model SPH200D User Manual
Registering Your Handset(s) with an Additional Base
Note: Make sure that you have configured the language, country code, and area code of
you phone before registering extra handsets.
This section shows you how to register your handset to additional base units. If your handset
displays Unregistered, see to “Registering Your Handset” on page 7-4.
1. Press Menu>Settings>Handset>Register.
2. Enter the system PIN (Default: 0000). Press Clear to make corrections.
3. Press Enter to confirm. Your handset starts searching for the base.
4. Press on the base unit until the LED starts flashing.
Selecting a Base Unit
You can switch your handset between different base units if your handset has registered to these
base units. You can set up the handset to automatically connect to the closest base unit. You can
also set up the handset to only connect to a fixed base unit you have specified.
Note: Your handset must be registered to a base unit before you can select that base unit.
1. Press Menu>Settings>Handset>Base.
2. Scroll to the base unit that you want, or select Auto if you want your handset to automatically
connect to the closet base unit.
3. Press Select.
The new setting is saved.
Deleting a Handset
Use one handset to delete (de-register) another handset that shares the same base unit.
1. Press Menu>Settings>Handset>De-register.
Settings and Maintenance 7-5
v1.0, November 2006
Page 68

Cordless Internet Phone with Skype Model SPH200D User Manual
2. Scroll to the handset (number) that you want to delete. Press Enter.
Tip: The handset number displays beside the word “Skype” during standby. For
example, Skype (1)
3. Enter the system PIN. Press Clear to make corrections.
4. Press Enter.
The handset is deleted.
Advanced Landline Calling Features
This section describes the call-related features that apply to the landline only.
Dial Mode
Dial mode is the telephone signal used in your country. Your phone supports tone (DTMF) and
pulse (rotary) dialing. During installation, you set up your phone for use in your country. For
details, consult your service provider.
To go to dial mode, follow these steps:
1. Press Menu>Settings>Advanced> Landline>Dial Mode.
2. Scroll to the new setting.
3. Press OK.
The new setting is saved.
Tip: If your phone is set to pulse dialing, press and hold during a call for temporary
tone mode. The display shows d. Digits entered after the d are sent out as tone
signals (on this call only).
Recall Selection
Recall is a signal that is sent when using some of the calling features such as making or answering
a second call. Your phone supports different recall signals. You can make changes depending on
the requirements. Your phone is already set up for use in your country. For details, consult your
service provider.
7-6 Settings and Maintenance
v1.0, November 2006
Page 69

Cordless Internet Phone with Skype Model SPH200D User Manual
To select recall duration, follow these steps:
1. Press Menu>Settings>Advanced>Landline>Recall.
2. Scroll to the new setting and press OK.
The new setting is saved.
Setting a Pause
A pause is a break you can enter when making a call. A pause is used for calls such as PABX and
operator services. Your phone supports different pause durations. For details, consult your service
provider.
To set the pause, follow these steps:
1. Press Menu>Settings>Advanced>Landline>Pause.
2. Scroll to the new setting.
3. Press OK.
The new setting is saved.
Category Number
This section only applies to models with Category number support. Some telephone providers
send a category number along with the CallerID. Consult your service provider on category
number handling.
To call back from the history properly, change setting to Yes if your telephone service provider
sends out a category number, or change setting to No if the category number is not sent.
To set the category number, follow these steps:
1. Press Menu>Settings>Advanced>Landline>Cat. Number.
2. Scroll to the new setting and press OK.
The new setting is saved.
Settings and Maintenance 7-7
v1.0, November 2006
Page 70

Cordless Internet Phone with Skype Model SPH200D User Manual
Network Settings
This section describes the information on viewing and changing the Internet network settings of
your phone. You do not need to configure the network after setting up the phone. This section is
recommended for advanced users who want to configure the network with their static IP (Internet
Protocol) address.
Note: Incorrect network settings will affect Skype usage on this phone. Consult your
network administrator or service provider before making any changes to the
network settings.
Viewing Network Settings
To view the network settings, follow these steps:
1. Press Menu>Settings>Information.
2. Scroll to view the information.
Changing Network Settings
To change the network settings, follow these steps:
1. Press Menu>Settings>Network.
2. Scroll and select the setting that you want, and follow the onscreen instructions.
• DHCP. The Cordless Internet Phone uses Dynamic Host Configuration Protocol (DHCP)
by default, which is correct for most customers. If you configure a static IP, this disables
DHCP. Press Back when finished.
• PPPoE. If your Internet service provider requires you to use Point-to-Point Protocol over
Ethernet (PPPoE), you can configure your user name and password for the PPPoE
connection.
• Static IP. You can configure the network to use a static IP.
• Reset Network. This resets the network with the changes that you made.
7-8 Settings and Maintenance
v1.0, November 2006
Page 71

Cordless Internet Phone with Skype Model SPH200D User Manual
Web Page Configuration
You can configure some of the network settings, Skype settings, system upgrade, and
administrative settings from the Web page. You do not need to configure most of these settings
after setting up the phone. This section is recommended for advanced users only.
Note: Incorrect network settings will affect Skype usage on this phone. Consult your
network administrator or service provider before making any changes to the
network settings.
Accessing the Web Page
Minimum System Requirements
The minimum system requirements to access the Web page are:
• SPH200D set
•Router
• Computer with a Web browser
• Internet connection
Make sure that your phone is properly connected and set up sharing the same network with your
computer as shown below.
phone (landline)
socket
Internet
Figure 7-2
Settings and Maintenance 7-9
router
computer
power supply
base unit
v1.0, November 2006
Page 72

Cordless Internet Phone with Skype Model SPH200D User Manual
Accessing the Web Page
To access the Web page, follow these steps:
1. Open a Web browser.
2. Enter your phone’s IP address at the address bar. An authentication window pops up.
Tip: To find your phone’s IP address, see “Viewing Network Settings” on page 7-8.
3. Enter the user name and password. The default user name is admin and the default password
is password.
After verifying your user name and password, you will see the configuration home page.
• Home page. The home page shows your current system and network settings.
• Network page. The network page shows your current Internet connection type and Ethernet
speed. You can make changes to these settings on this page.
• Skype page. The Skype page shows your current Skype status. You can create a new Skype
account or sign in to Skype from this page.
• System page. You can upgrade your phone’s operating system from this page. You will first
need to download the latest software from the NETGEAR Web page, at www.netgear.com.
•Administration page. You can change the Web page access password on this page. You can
also reset your phone to factory default feature and network settings.
Troubleshooting
Table 7-1. Troubleshooting Tips
Problem Tip
No dial tone on landline. • Check the phone and power connections.
• The handset may be out of range. Move closer.
• The battery capacity may be low. Charge battery.
Signal icon flashing. • The handset may be out of range. Move closer.
• If the handset displays Unregistered, it is not registered. Register the
handset. See “Registering Your Handset” on page 7-4.
7-10 Settings and Maintenance
v1.0, November 2006
Page 73

Cordless Internet Phone with Skype Model SPH200D User Manual
Table 7-1. Troubleshooting Tip s (continued)
No parking tone. • Check the power connections of the charger.
• The handset may not be placed properly. Try again.
• Charging contacts may be dirty. Clean contacts with a damp cloth.
• Turn on the handset tone. See “Personalizing Your Handset Display”
in Chapter 6.
• Switch on the handset’s power. See “Powering Your Handset On and
Off” in Chapter 1.
Handset on the charger does not
charge.
No display. • Check that the battery is charged.
Bad audio (crackles, echo). • The handset may be nearly out of range. Move closer.
Handset does not ring. Check that the handset ringer is turned on. See “Personalizing Your
Caller ID does not display. • Caller ID service may not be activated. Check with your service
Cannot make or answer a second
call.
• The battery may be defective. Purchase new batteries from your
dealer.
• Check that the batteries are inserted correctly.
• Make sure that the handset is placed properly on the charger. The
battery icon is animated while charging.
• Check the connections.
• The phone may be interfered by nearby electrical appliance. Move
the base unit to a different location.
• The phone may be at a location with thick walls. Move the base unit
to a different location.
Handset Display” in Chapter 6.
provider.
• The caller’s information may be withheld or unavailable.
• Second call service may not be activated. Check with your service
provider.
• For landline calling, check that the recall selection is correct. See
“Recall Selection” on page 7-6.
Settings and Maintenance 7-11
v1.0, November 2006
Page 74

Cordless Internet Phone with Skype Model SPH200D User Manual
7-12 Settings and Maintenance
v1.0, November 2006
Page 75

Default Factory Settings and Technical
Default Factory Settings
Table A-1. Default Factory Settings
Item Default Setting
General Settings Time Zone: GMT
Date: 1 Jan 2006
Time: 12:00
Date Format: MM-DD-YYYY or DD-MM-YYYY
Time Format: 12 hour
Date Separator: Time separator: :
Auto Answer: No
LCD Contrast: Mid Level
LCD Brightness: Mid Level
Preferred Line: Always Ask
Auto Sign in: Yes
Dial Mode: Tone
Recall Duration: Recall 1
Pause Selection: Pause 1
Area Code number: Empty
Skype User Name: Empty
Skype Password: Empty
Appendix A
Specifications
Sounds Setting Skype Ring Melody: Melody 2
Landline Ring Melody: Melody 1
SkypeIn Ring Melody: Melody 1
Intercom Ring Melody: Melody 1
Ring Volume: 3
Receiver Volume: 3
Ring Type: Ringing
Notification Tone: On
Keypad Tone: On
Confirmation Tones: On
Default Factory Settings and Technical Specifications A-1
v1.0, November 2006
Page 76

Cordless Internet Phone with Skype Model SPH200D User Manual
Table A-1. Default Factory Settings
Item Default Setting
System Setting PIN Code: 0000
Country: Empty
Network Setting DHCP: Enabled
Network Proxy Option: Auto
Network Proxy Host: Auto
Network Proxy Port: Auto
Proxy Authentication: Disabled
Authentication User Name: Empty
Authentication Password: Empty
Application Port: Skype default
Alternate Application Ports: Skype defaults
Technical Specifications
Technical Specific ations
Antenna Internal
Frequency • DECT (1.8 GHz)
• UPCS (1.9 GHz) North America
Emissions FCC, CE
Interface • Ethernet (RJ-45)
• PSTN (RJ-11)
Weight with battery • base station: 235g
• handset: 130g with batteries
Dimensions
(H x W X D)
Operating temperature 32°–104°F (0°–40°C)
• base station: 137 x 126.5 x 70 mm
• handset: 141.5 x 46 x 26 mm
A-2 Default Factory Settings and Technical Specifications
v1.0, November 2006
Page 77

Cordless Internet Phone with Skype Model SPH200D User Manual
Power and Safety
Power Requirements
To install the Cordless Internet Phone with Skype Model SPH200D, you need the following:
• North America:
— 120 volts, single-phase AC.
— This product requires an electrical supply of 120 volts, single-phase alternating current,
excluding IT installations defined in standard UL 60950-1.
•Europe:
— 220-230 volts, single-phase AC.
— This product requires an electrical supply of 220-230 volts, single-phase alternating
current, excluding IT installations defined in standard EN 60950-1.
Warning: The electrical network is classified as dangerous according to criteria in the
standard EN 60950-1. The only way to power down this product is by
unplugging the power supply from the electrical outlet. Ensure the electrical
outlet is located close to apparatus and is always easily accessible.
Warning: Use only the adapter supplied with this equipment. Incorrect adapter polarity
or voltage can seriously damage the unit.
Table A-2.
North America Europe
Handset Charger Adapter
Input: 120VAC 60Hz
Output: 7.5VDC 150mA
OR
Base Unit Adapter
Input: 120VAC 60Hz
Output: 7.5VDC 500mA
Default Factory Settings and Technical Specifications A-3
Handset Charger Adapter
Input: 230VAC 50Hz
Output: 7.5VDC 150mA
Base Unit Adapter
Input: 230VAC 50Hz
Output: 7.5VDC 500mA
v1.0, November 2006
Page 78

Cordless Internet Phone with Skype Model SPH200D User Manual
Batteries
Danger: NIMH batteries must be disposed of in accordance with the applicable waste
disposal regulations.
• Do not dispose of the batteries in a fire, as they can explode.
• Do not open or mutilate the battery. Released electrolyte is corrosive and can cause damage to
the eyes or skin. It can be toxic if swallowed.
• Avoid contact with metal objects when handling the battery. These objects could make short
circuit across the battery terminals that could cause the batteries or conductor to overheat
resulting in burns.
• Do not attempt to recharge the battery cell by heating it. Sudden release of battery electrolyte
can cause burns or irritation to the eyes or skin.
• Observe the proper polarity, or direction, of any battery. Reverse insertion of the battery cell
can result in leakage or explosion.
• Remove the battery cells if you do not plan to use the product for several months at a time.
• Discard any “dead” batteries because they are likely to leak into the product.
• Do not store this product or the battery in a high temperature area. Battery stored in a freezer
or refrigerator should be protected from condensation during storage and defrosting. Battery
should be stabilized at room temperature before using.
• Your battery is rechargeable and can be recycled once it outlives its usefulness. Depending
upon your local and state law, it might be illegal to dispose of this battery into a municipal
waste system. Check with your local solid waste company for more information on your
recycling options for the battery cells.
A-4 Default Factory Settings and Technical Specifications
v1.0, November 2006
Page 79

Appendix B
Related Documents
This appendix provides links to reference documents you can use to gain a more complete
understanding of the technologies used in your NETGEAR product.
Document Link
Internet Networking and TCP/IP
Addressing
Wireless Communications
Preparing a Computer for
Network Access
Virtual Private Networking (VPN)
Glossary
http://documentation.netgear.com/reference/enu/tcpip/index.htm
http://documentation.netgear.com/reference/enu/wireless/index.htm
http://documentation.netgear.com/reference/enu/wsdhcp/index.htm
http://documentation.netgear.com/reference/enu/vpn/index.htm
http://documentation.netgear.com/reference/enu/glossary/index.htm
Related Documents B-1
v1.0, November 2006
Page 80

Cordless Internet Phone with Skype Model SPH200D User Manual
B-2 Related Documents
v1.0, November 2006
 Loading...