

Page 1
NETCOMM VELOCITY™ SERIES
Wireless N Extender
Page 2
1
Use as a Wireless Repeater
To use the NP124 as a wireless repeater, you must have an existing wireless network.
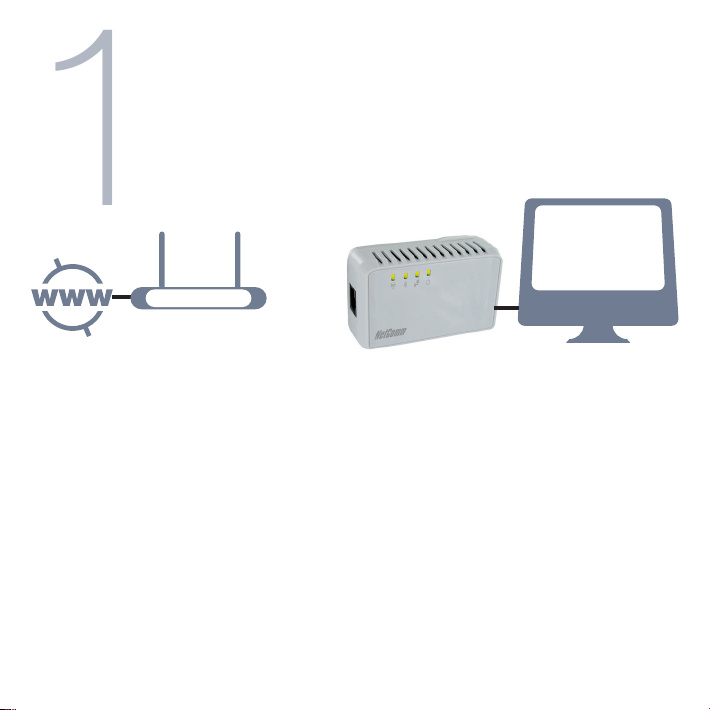
1. To initially setup the product, we recommend you plug the NP124 into a power
socket near both your existing router and a computer.
2. Plug the supplied Ethernet cable into your NP124 and connect the other end to
the computer
3. You can connect your devices through the web user interface. Open a web
browser (Internet Explorer, Firefox, Safari etc) and type 192.168.20.1 into the
address bar and hit Enter/Return.
4. When prompted enter the username/password as admin/admin.
5. Navigate to the Quick Setup icon and select the Operation Mode as Repeater.
Page 3
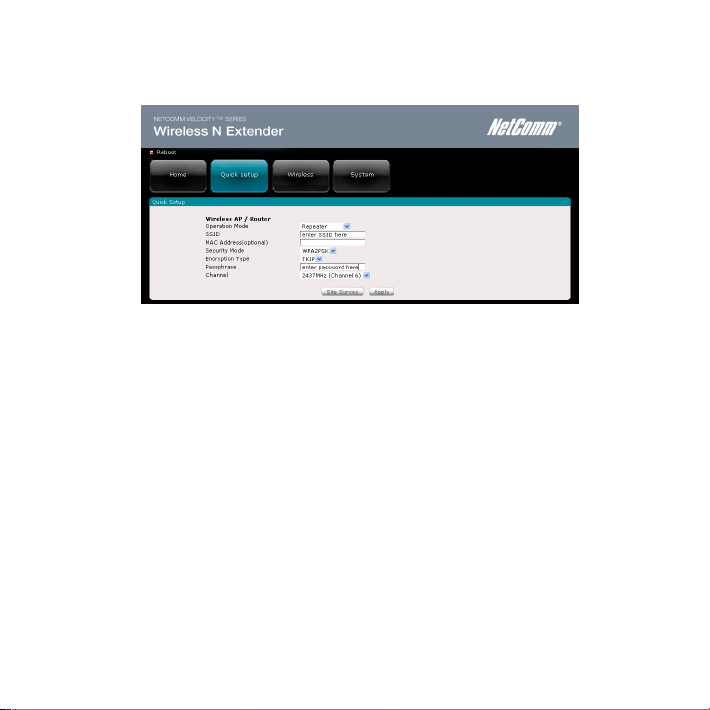
6. You have the option of entering the wireless settings of your existing wireless
network manually or using the Site Survey to select the wireless network
• When using the Site Survey, click Connect on the SSID you wish to
connect to. When prompted, enter the relevant Passphrase.
7. Once complete click on Apply. You can check the connection status by
clicking on the Home tab
8. Once connected you can move your NP124 to a more convenient location
where it will be able to take the existing wireless signal and redistribute it to
locations where it was previously inaccessible. There is no specied place for
this and trial and error may need to be exercised
Page 4

2
Use as a Wireless Access Point
Default SSID: NetCommWireless
Default Security Passphrase: a1b2c3d4e5
To use the NP124 as a wireless access point, you must have a current and active
Internet connection.
1. Plug the NP124 into a power point near your modem/router and connect the
supplied Ethernet cable between the two.
2. The NP124 will automatically detect your Internet settings and begin
transmitting a wireless signal.
3. Simply connect wirelessly using the default SSID and security passphrase.
4. You can change the wireless default settings on the Quick Setup section of
the web user interface. Access this section as previously described and select
Access Point as the Operation Mode.
Page 5

3
Use as a Wireless Bridge
To use the NP124 as a Wireless Bridge, you must have an existing wireless network and
active Internet connection.
1. To initially setup the product, we recommend you plug the NP124 into a power
socket near both your existing router and a computer.
2. Plug the supplied Ethernet cable into your NP124
3. Open web browser (Internet Explorer, Firefox, Safari etc, and type 192.168.20.1
into the address bar and hit Enter/Return.
4. When prompted enter username/password as admin/admin
5. Navigate to the Quick Setup icon and select the Operation Mode as
Wireless Bridge
Page 6

6. You have the option of entering the wireless setting of your existing wireless
network manually or using the site survey to select the wireless network
• When entering the setting manually, ensure you enter the correct SSID,
security mode, security passphrase and wireless channel.
• When using the Site Survey, select from the list of available wireless
networks and click Connect on the one you wish to connect to.
When prompted, enter the relevant Passphrase.
7. Once complete click on Apply. You can check the connection status by
clicking on the Home tab
Page 7

8. Once connected you can move your NP124 to a more convenient location
where it will be able to take the existing wireless signal and redistribute it to
locations where it was previously inaccessible. There is no specied place for
this and trial and error may need to be exercised
NOTE: If you connect in wireless bridge mode, only the wired LAN connection will be active. The wireless function will be
disabled. This function is mainly suited to gaming or multimedia applications
Page 8

4
Establishing Wireless
Connection
You can connect multiple wireless devices, including laptops, desktops and PDA’s to
your NP124 by following these two basic steps.
1. Using your wireless device, scan the wireless networks in your area.
2. If operating as a wireless repeater the SSID and security key will be the same as
your existing wireless network
3. If operating as an access point, select the network called NetCommWireless,
then click connect.
NOTE: If you changed the wireless network name during set-up, select the new name
4. Enter the following default security key: a1b2c3d4e5
NOTE: If you changed the wireless security password during set-up, you will have to use the new passwordTo ensure wireless security, we recommend
that you change the default settings through the web Interface.
Page 9

5
Troubleshooting
?
What Is This Product Set To Operate As By Default?
• Out of the box, the NP124 is set to operate as a wireless access point
Cannot establish a wireless connection
• Make sure the wireless switch on your laptop is in the on position
• Ensure your NP124 and wireless client are using the same wireless security settings
Changing the operation mode
• To change the operation mode of your NP124 between access point, wireless
repeater or wireless bridge, use the web user interface as described in the setup
steps previously
Page 10

For more help or further information on all advanced settings, please
consult the user guide which can be found on the NetComm website.
Please visit www.netcomm.com.au and navigate to the
NP124 Wireless N Extender product page.
 Loading...