

Page 1
NetCommWireless
QUICK START GUIDE
Wireless
N300 WiFi Gigabit Router
NetComm
NF7
Page 2
Wireless
THANKS FOR PURCHASING NETCOMM WIRELESS
This quick start guide is designed to get you up and running quickly with your new router. More
advanced set up instructions can be found in the user manual which can be downloaded from
www.netcommwireless.com
SET UP YOUR ROUTER
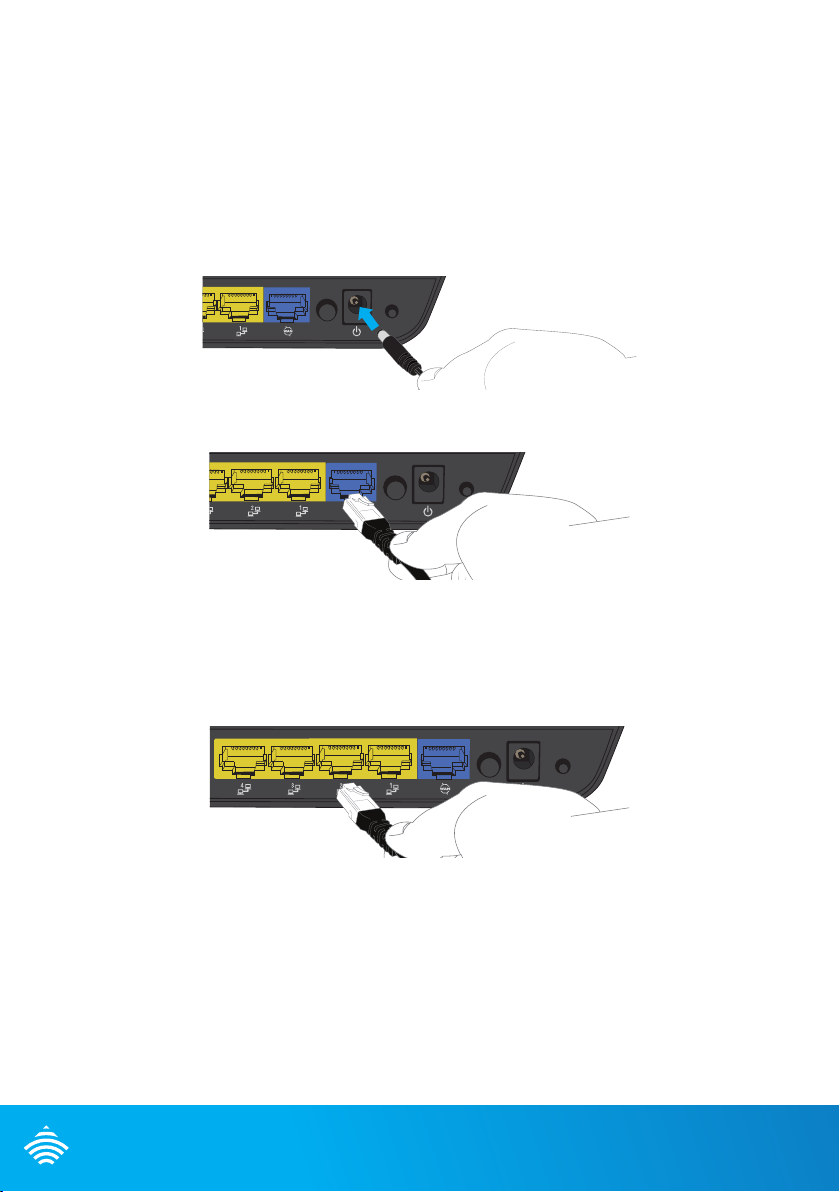
1. Take the supplied power adapter and attach it to the Power socket on the rear of the
router and connect the other end of it to a wall plug power source.
ON/OFF
WPS/
RESET
2. Attach the Ethernet cable provided to the blue WAN port on the back of the router.
Attach the other end to your xed line modem.
ON/OFF
WPS/
RESET
CONNECTING VIA AN ETHERNET CABLE
1. Connect an Ethernet cable to one of the yellow LAN ports on the back of the
NF7 router.
ON/OFF
2. Connect the other end of the Ethernet cable to your computer.
NOTE: There is only one Ethernet cable supplied. If you require more than one Ethernet cable, any standard Ethernet cable is suitable.
WPS/
RESET
NetComm
Page 3
CONNECTING VIA WIFI
1. Ensure WiFi is enabled on your device (e.g. computer/smartphone/gaming console).
2. Scan for wireless networks in your area and connect to the network name that matches the
Wireless Network Name found on the Wireless Security Card (included in the box).
3. When prompted for your wireless security settings, enter the Wireless Security Key
listed on your Wireless Security Card.
CONNECTING THE ROUTER TO THE INTERNET
1. After establishing a connection using the previous steps, open your Web browser and
type http://192.168.20.1 into the address bar at the top of the web browser window and
press Enter.
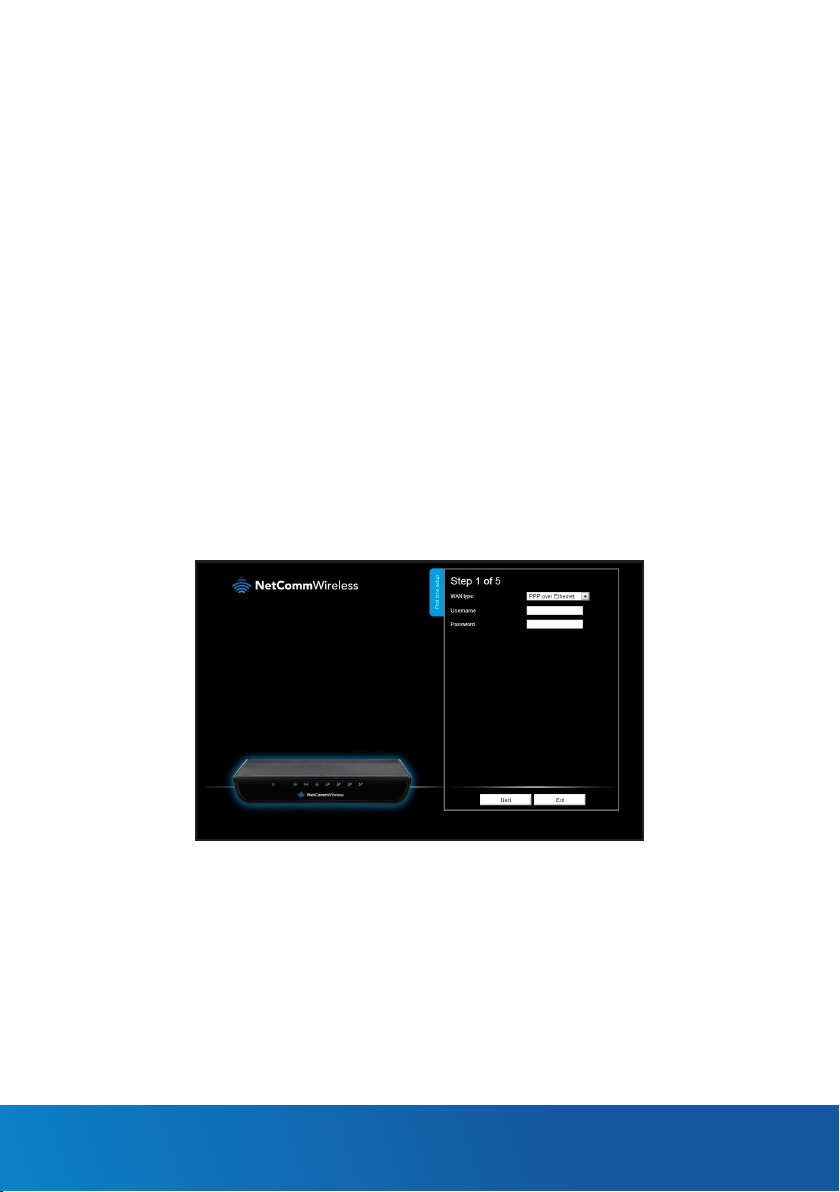
2. Enter admin into both the username and password elds and click Login. The First-Time
Setup Wizard is displayed.
3. Click the Yes, Let’s get started with the wizard button to congure your NetComm
Wireless Router.
4. Select the Ethernet WAN type and enter details as supplied by your Internet Service
Provider. After entering the required details, click Next.
N300 WiFi Gigabit Router - NF7
Page 4
Wireless
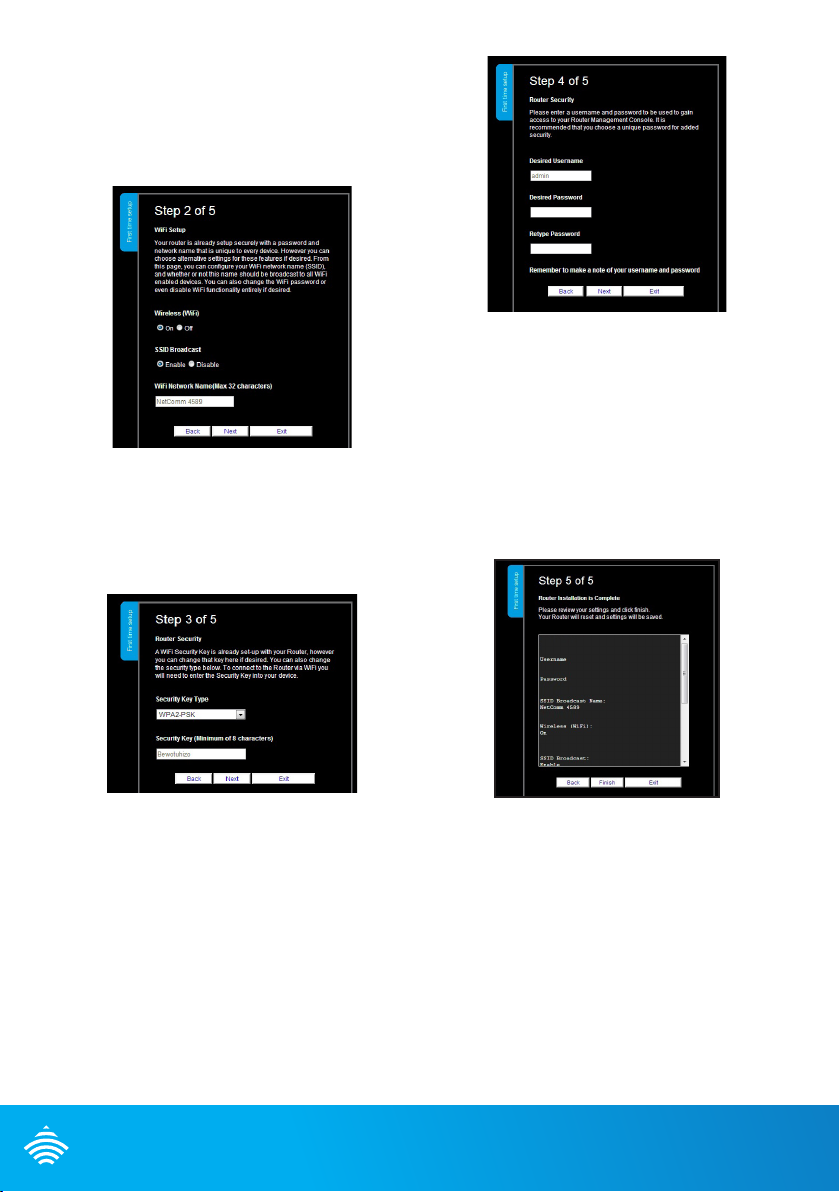
5. Choose whether to enable or disable
your wireless network, show or hide your
wireless network name (Hide SSID) or
change the wireless network name. After
making any desired changes, click Next.
6. Select the wireless security type and
wireless security key you would like to
use on your wireless network and click
Next. To use the default settings, just
click Next.
Note: We highly recommend that you change the username
and password used to gain access to the Router
Management Console for added security.
8. Review your selected settings and click
Finish. If you would like to change any
of the settings, click Back until you
reach the required page and adjust your
settings accordingly. Click Next until you
reach the summary page again and then
click Finish.
7. Enter the username and password you
would like to use when logging into the
web based user interface. Conrm the
new password by entering it a second
time in the Retype Password eld and
click Next. To use the default settings,
just click Next.
NetComm
The NetComm Wireless Router will attempt
to connect using the details you have
entered. This can take up to 2 minutes.
When a connection is successfully made, the
Internet Connection LED on the front of the
unit illuminates.
QSG-00048-rev1
 Loading...