

NF18ACV FAQs – USB Storage Setup Guide
1 of 5
FQ01108 v. 1.1 February 2019
© NetComm Wireless 2019
USB Storage Setup Guide
NF18ACV FAQs
Storage Service
The Storage Service options enable you to manage attached USB Storage devices and create accounts to access
the data stored on the attached USB device.
This guide has been revised to include the latest changes and updates from the NF18ACV's new NC2 web user
interface.
Storage Device Info
The storage device info page displays information about the attached USB Storage device.
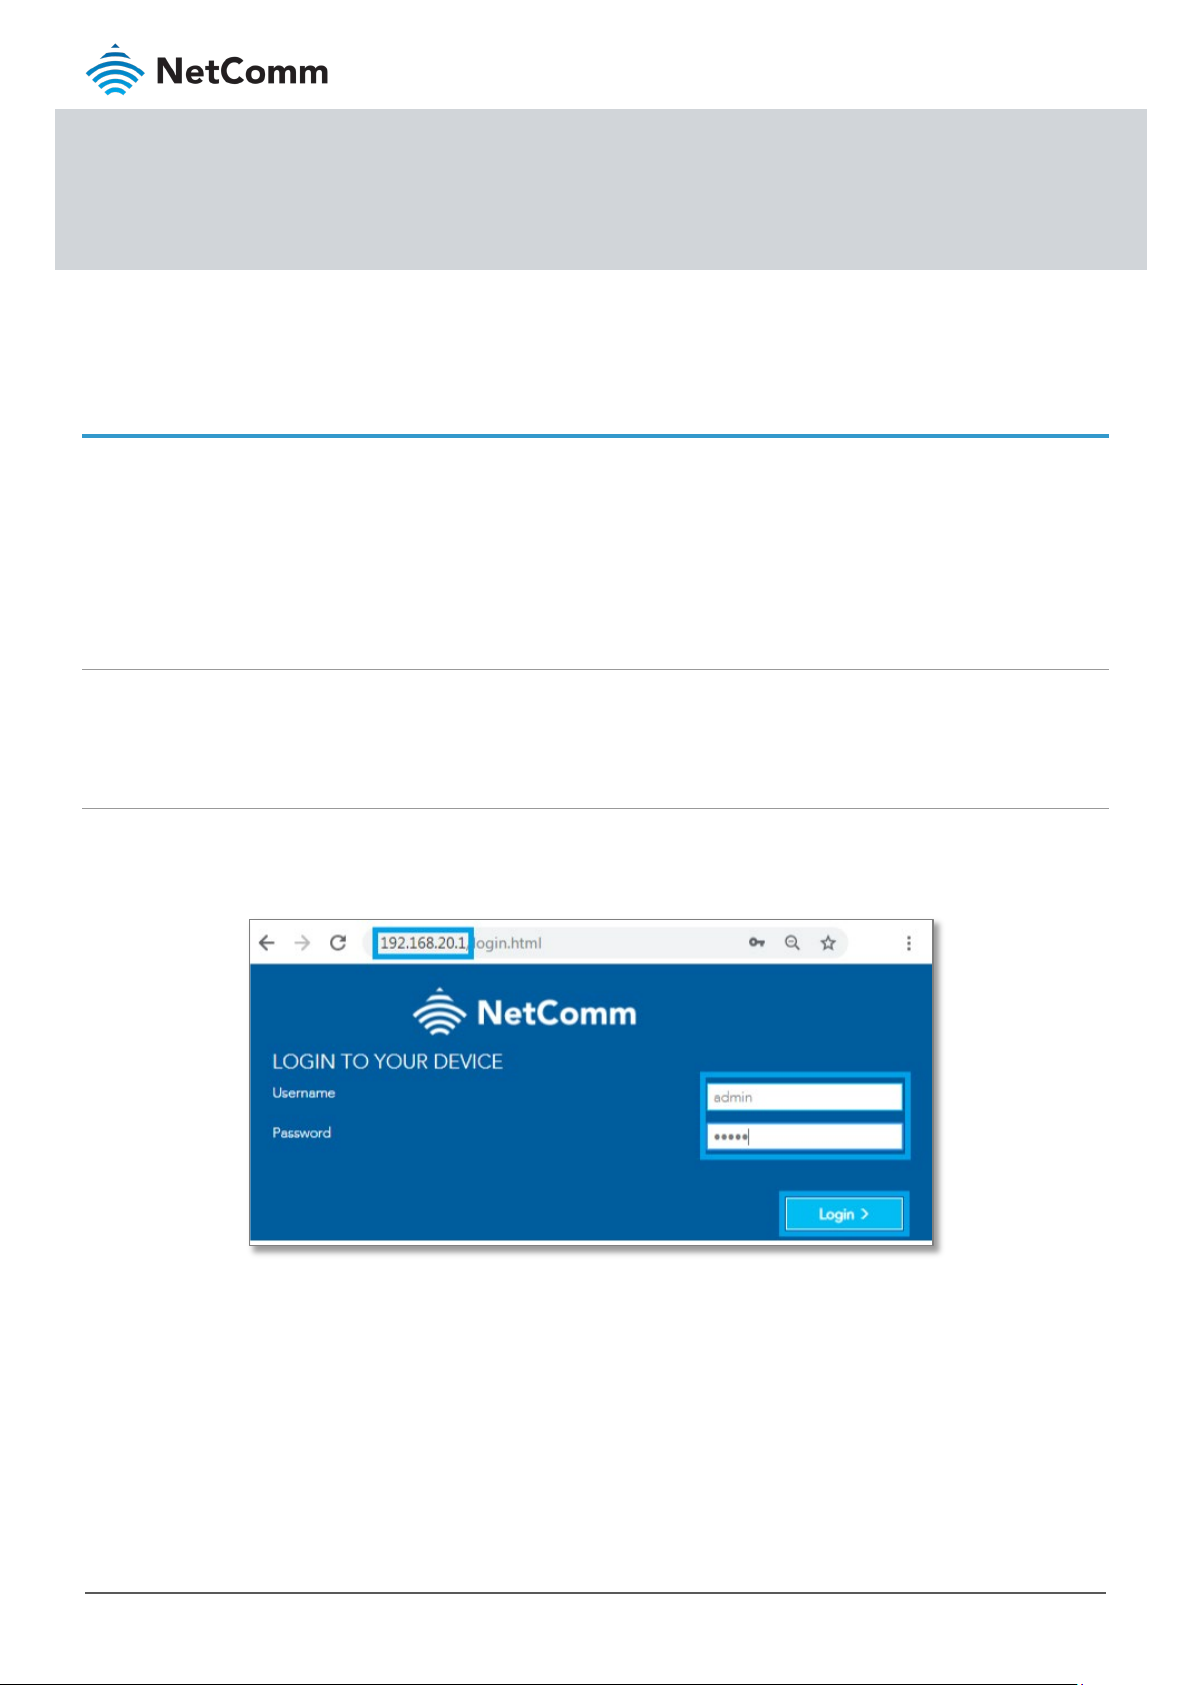
Log in to the web interface
1 Open a web browser (such as Internet Explorer, Google Chrome or Firefox), type http://192.168.20.1 into the
address bar and press
2 At the login screen, type
enter.
admin into both the User Name and the Password fields and click Log In.
NF18ACV FAQs – USB Storage Setup Guide
2 of 5
FQ01108 v. 1.1 February 2019
© NetComm Wireless 2019
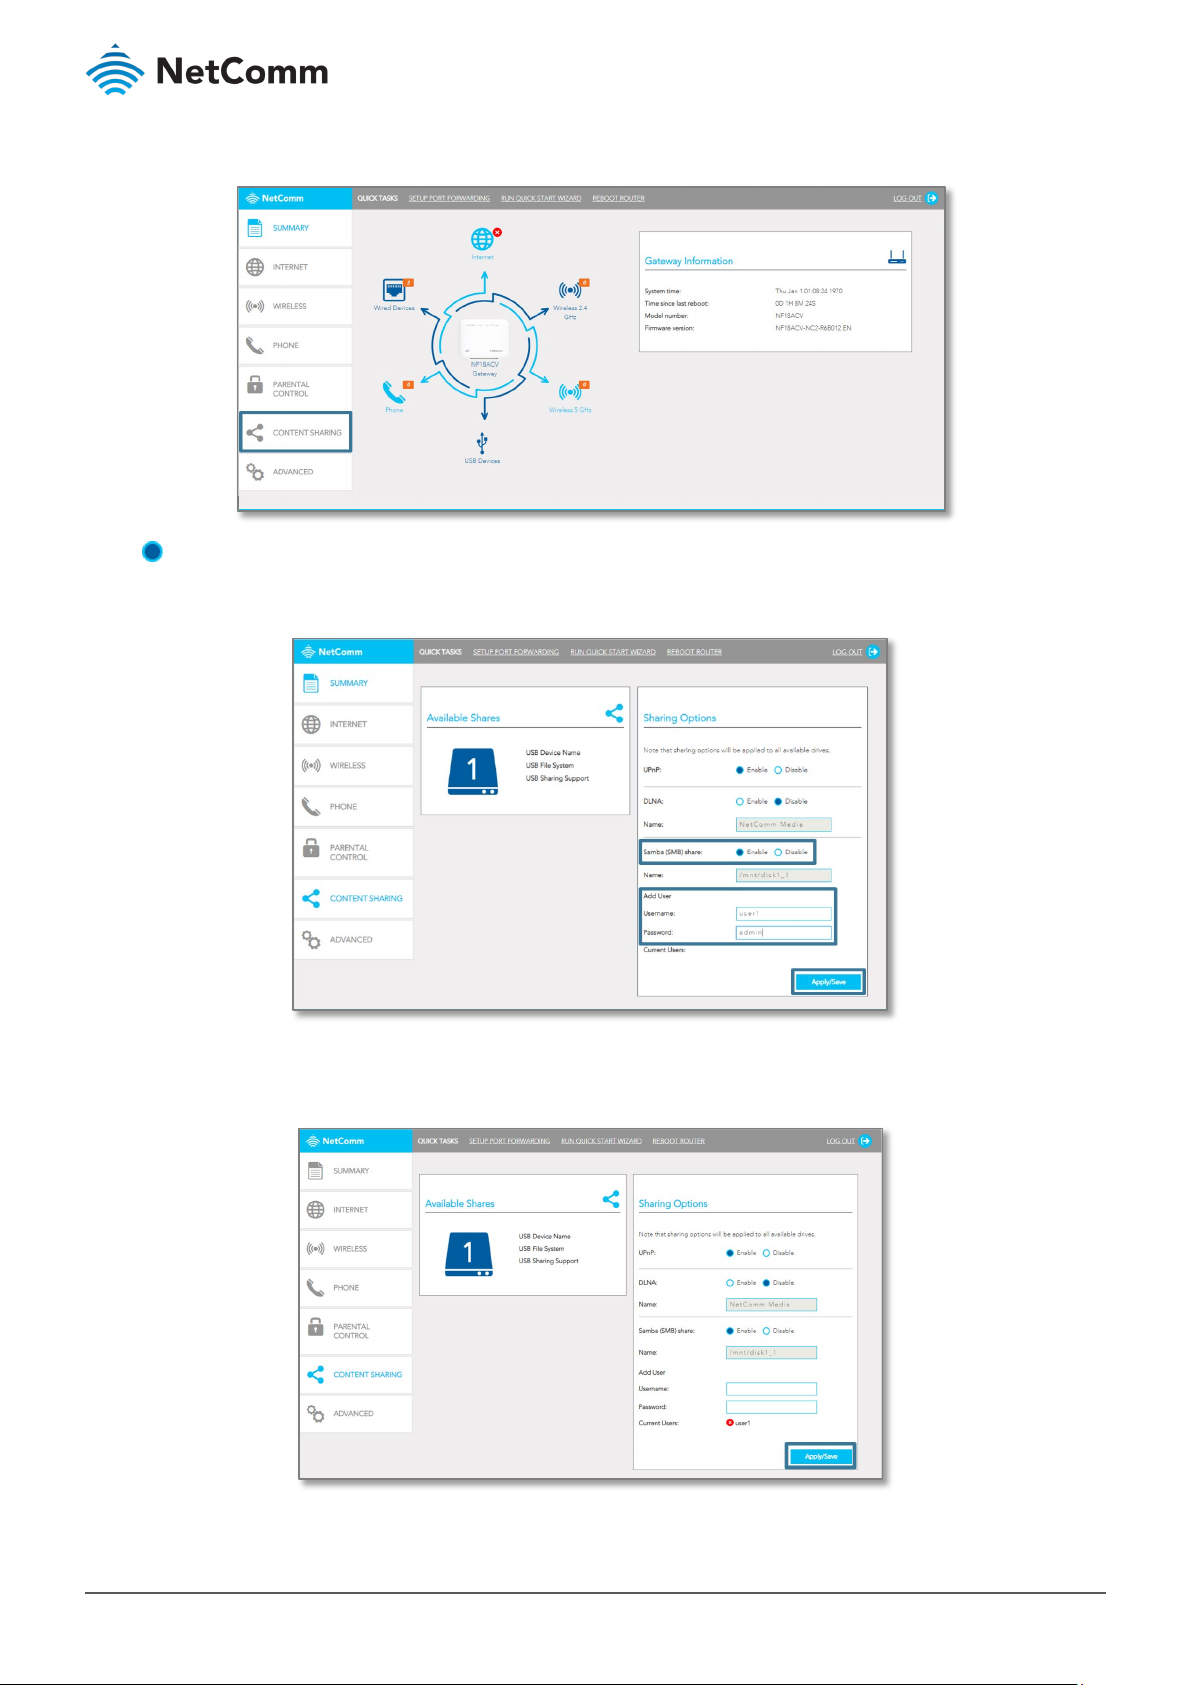
3 Click on the Content Sharing menu at the left of the page.
4 Enable
Samba (SMB) Share and provide user account details.
Click the
Apply/Save button to create a user account.
5 Adding an account allows the creation of specific user accounts with a password to further control access
permissions.

NF18ACV FAQs – USB Storage Setup Guide
3 of 5
FQ01108 v. 1.1 February 2019
© NetComm Wireless 2019
Note
Important
Accessing USB hard drive Connected to NF18ACV using a Windows PC
1 Exit out from the NetComm router’s WEB Interface page and open “Windows Explorer” and type
\\192.168.20.1 on the top address bar.
– Windows Explorer is different from the Internet Explorer. You can open a Windows Explorer by opening Computer or Documents.
2 When prompted for login details, type the Storage User Account Username and Password. The example
below uses “
3 Once you have
– Turn off firewall/ antivirus firewall if it has no connection to USB storage through Wireless.
user1” as the username.
logged in, you will be able to view and edit the contents of the USB storage device.

NF18ACV FAQs – USB Storage Setup Guide
4 of 5
FQ01108 v. 1.1 February 2019
© NetComm Wireless 2019
Accessing USB hard drive Connected to NF18ACV using a Mac PC
1 On you Mac click on Go >Connect to a Server.
2 Enter the path to the network drive you want to map, ie:
smb://192.168.20.1 then click Connect.

NF18ACV FAQs – USB Storage Setup Guide
5 of 5
FQ01108 v. 1.1 February 2019
© NetComm Wireless 2019
3 Enter your Storage User Account user Name and Password as shown below and click the Connect button to
mount the network drive.
4 The drive will now appear on your
finder window sidebar.
 Loading...