

Page 1
QUICK START GUIDE
NetCommWireless
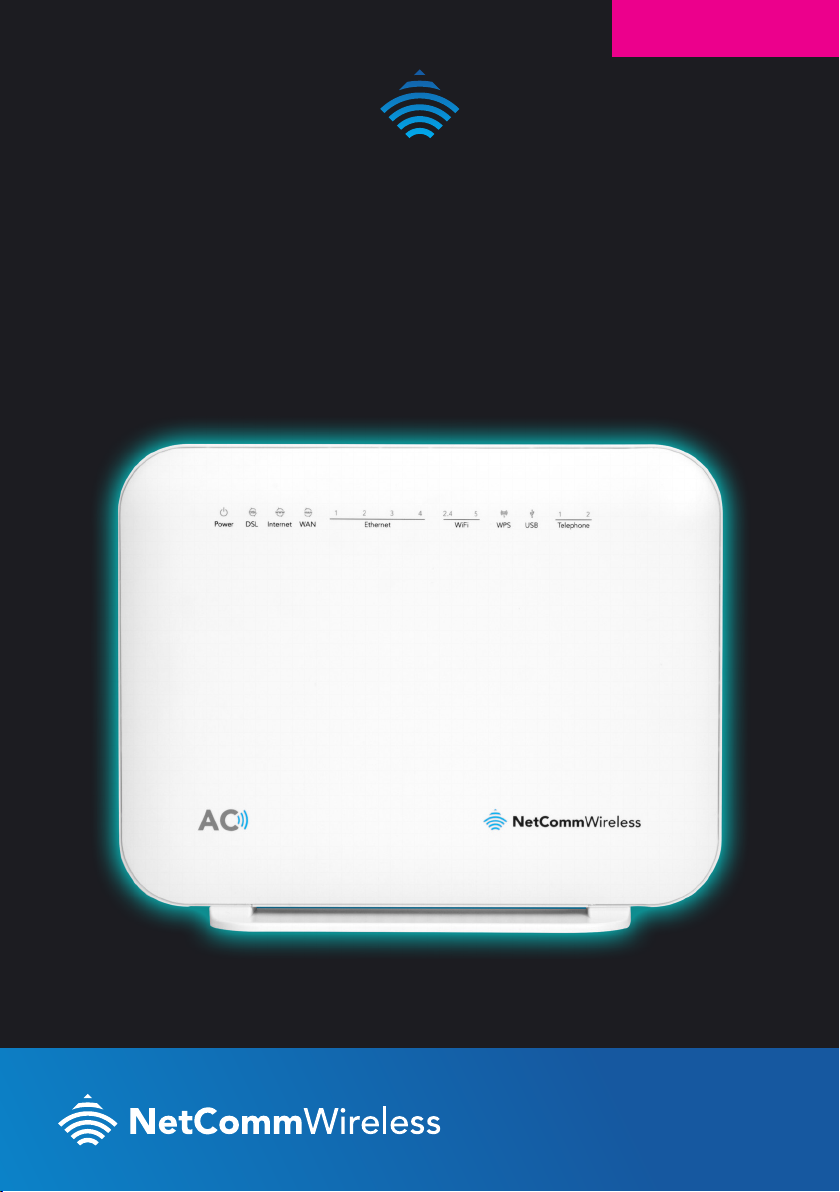
VDSL2 / ADSL2+ Dual Band
AC1600 Gigabit Gateway
with VoIP
NF18ACV
Page 2
WELCOME
Thank you for choosing a NetComm Wireless VDSL2 / ADSL2+ Dual Band AC1600 Gigabit
Gateway with VoIP (NF18ACV). This guide will help you set up, connect and congure your
device quickly and easily.
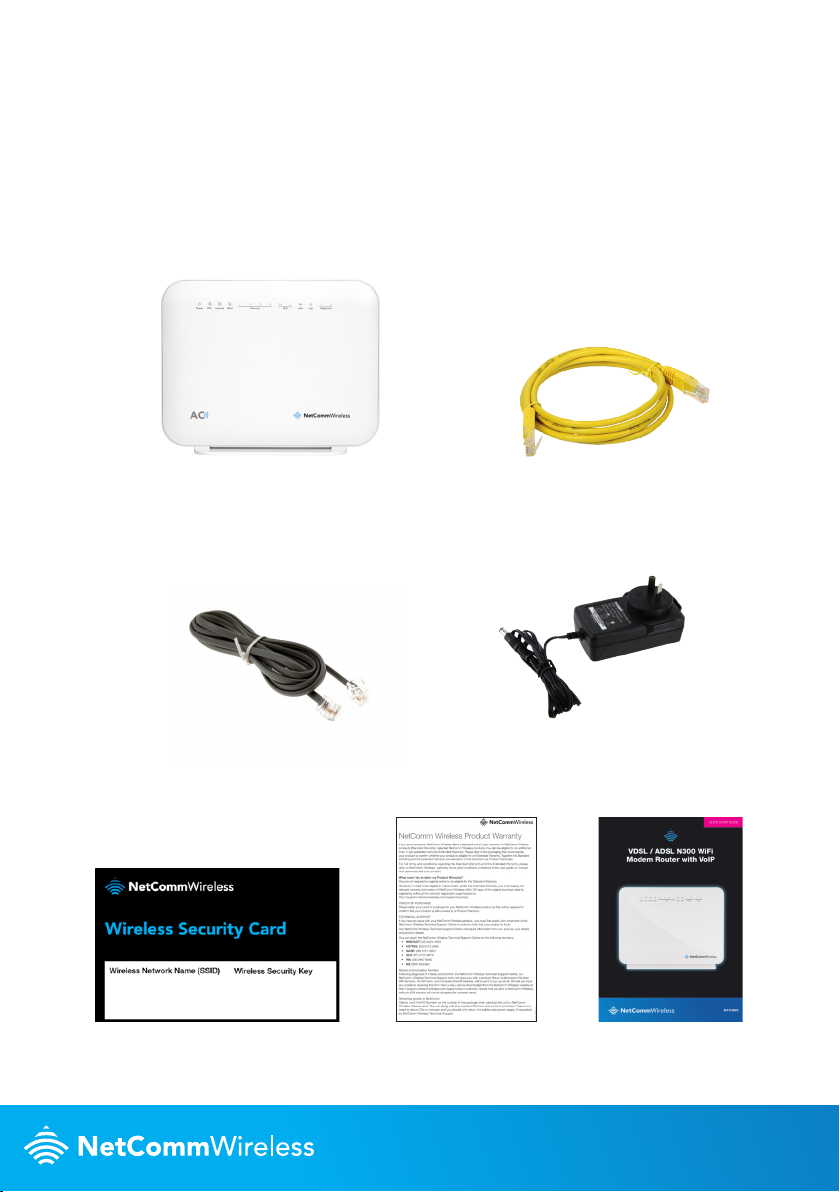
PACKAGE CONTENTS
This package includes:
VDSL2/ADSL2+ Dual Band
AC1600 Gigabit Gateway
with VoIP
(NF18ACV)
RJ11 Telephone cable
2.4GHz - 2.4GHz -
5GHz - 5GHz -
WiFi security card
RJ45
Ethernet cable
Power supply (12V/2A)
Warranty card Quick Start Guide
Page 3
PRE-REQUISITES
If you are using a voice service on the same line as the DSL service, you will need a DSL line
lter for each handset or back-to-base home alarm system on the line. If you have a Naked
DSL service, line lters are not required.
INSTALLING THE DEVICE
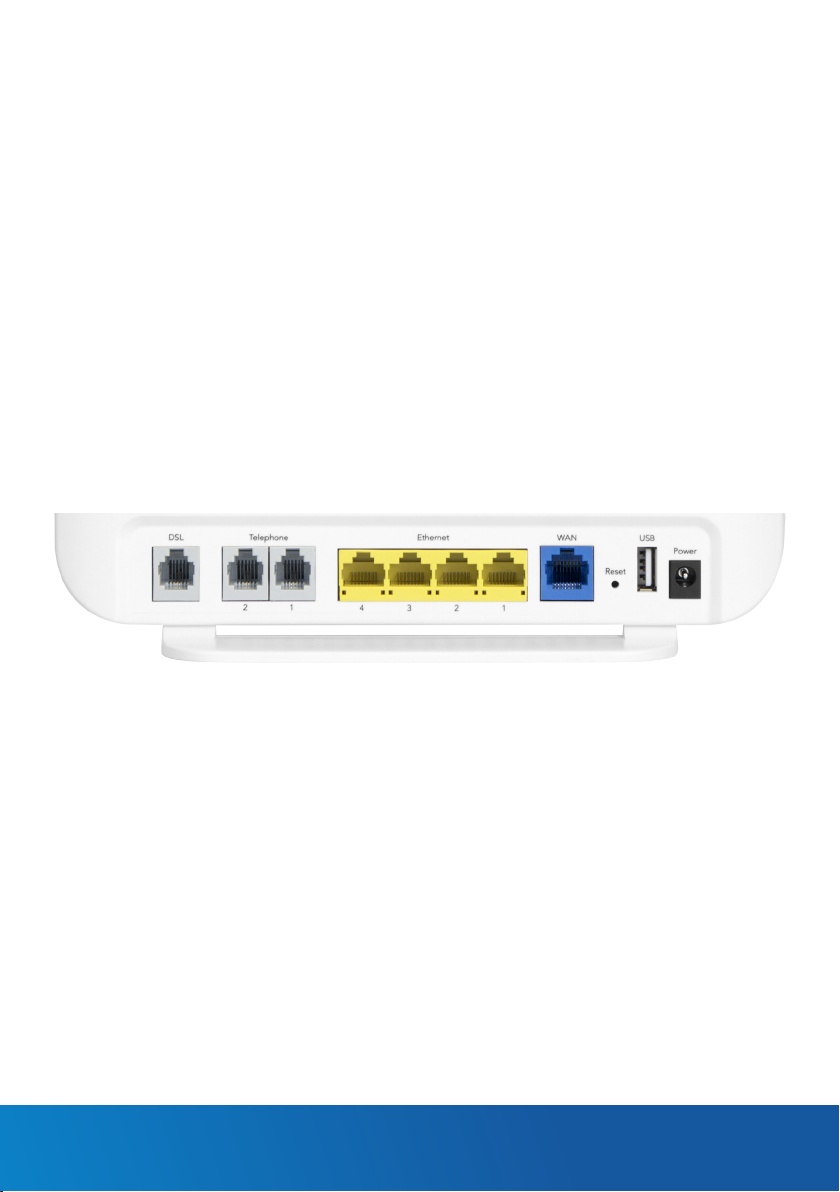
1. Connect the supplied RJ11 cable to the “modem” port of your DSL line lter and then
connect the other end to the DSL port on the back of the NF18ACV. Connect the DSL
line lter (not included) to the wall socket and then connect your handset to the “phone”
port of the lter. If you have a Naked DSL service, simply connect the included RJ11 cable
from the DSL port of the NF18ACV to the wall socket. If you have a VoIP service, connect
your handset to one of the Telephone ports on the back of the router.
2. Connect the supplied RJ45 Ethernet cable from one of the yellow Ethernet ports (1-4) on
the back of the NF18ACV to your computer.
3. Connect the included power adapter to the Power jack of the NF18ACV and then plug it into
an available wall socket. Press the ON/OFF button to power the router on. The Power light
illuminates in red. When the NF18ACV has nished booting up, the Power light turns green.
VDSL2 / ADSL2+ Dual Band AC1600 Gigabit Gateway with VoIP - NF18ACV
Page 4
LOGGING IN TO THE WEB INTERFACE
1. Open a web browser (such as Internet Explorer®, Mozilla Firefox® or Google Chrome™),
type http://192.168.20.1 into the address bar and press Enter.
2. At the login screen, type admin into both the Username and the Password elds, then
click the OK button.
CONFIGURING THE DEVICE FOR USE WITH
AN INTERNET SERVICE
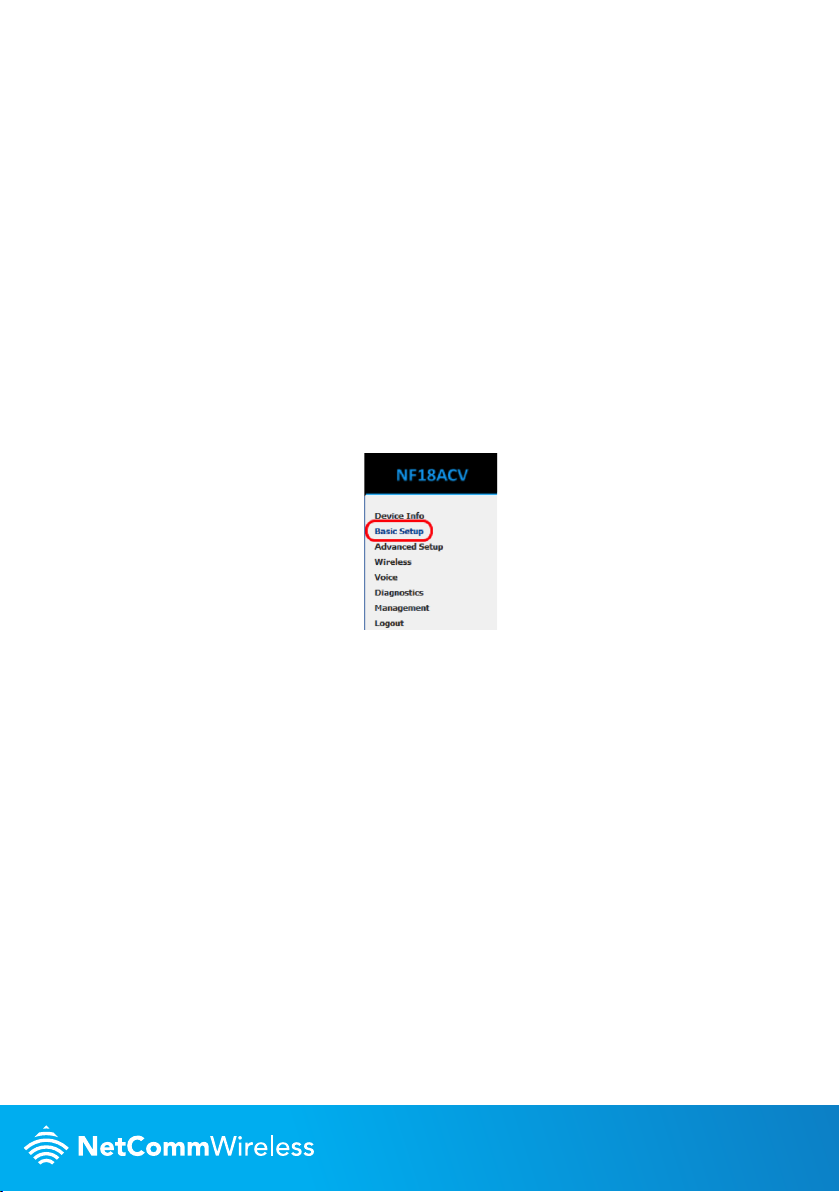
Click on the Basic Setup menu item on the left side of the screen.
Follow the instructions for your connection type.
Page 5
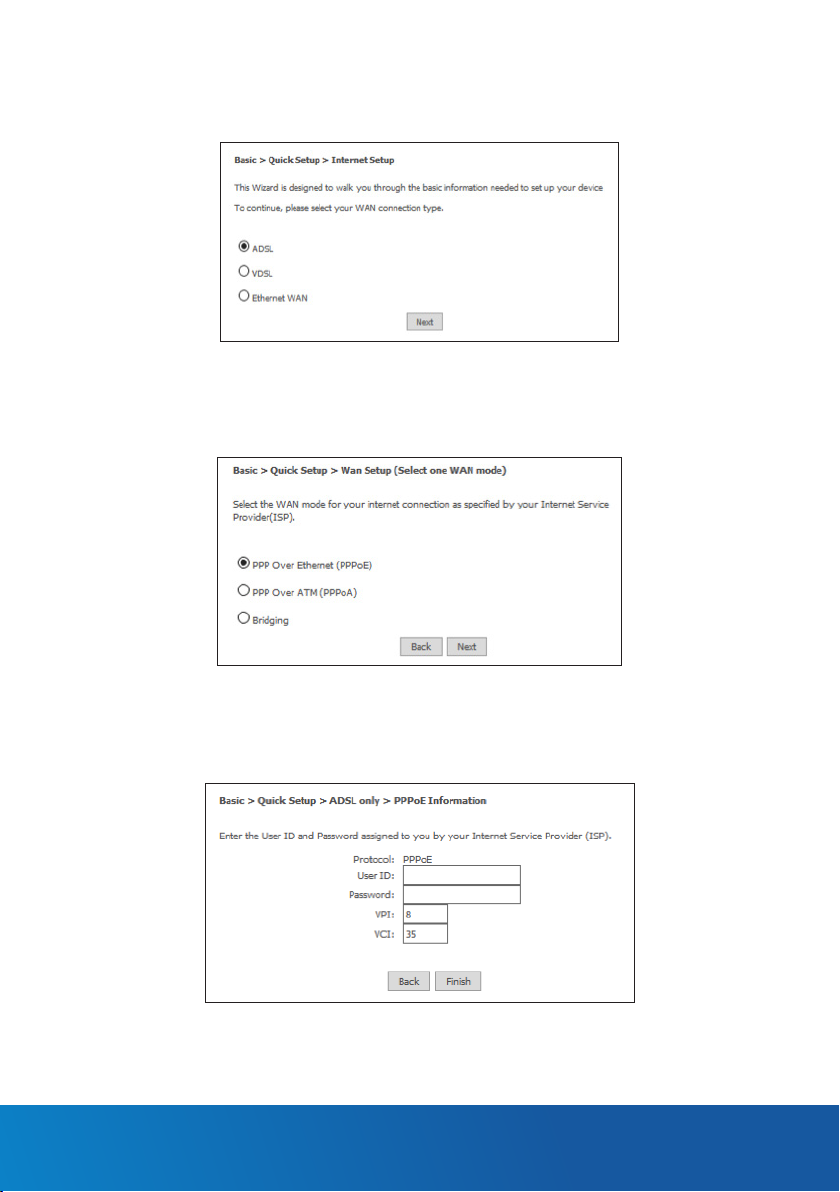
ADSL
a. Select ADSL and click the Next button.
b. Select either the PPPoE, PPPoA or Bridging for your internet connection as specied by
your Internet Service Provider (ISP). Click the Next button.
c. In the User ID and Password elds, enter the username and password assigned to you
by your Internet Service Provider (ISP). Click the Finish button.
The account settings are saved and the NF18ACV connects to the internet.
VDSL2 / ADSL2+ Dual Band AC1600 Gigabit Gateway with VoIP - NF18ACV
Page 6
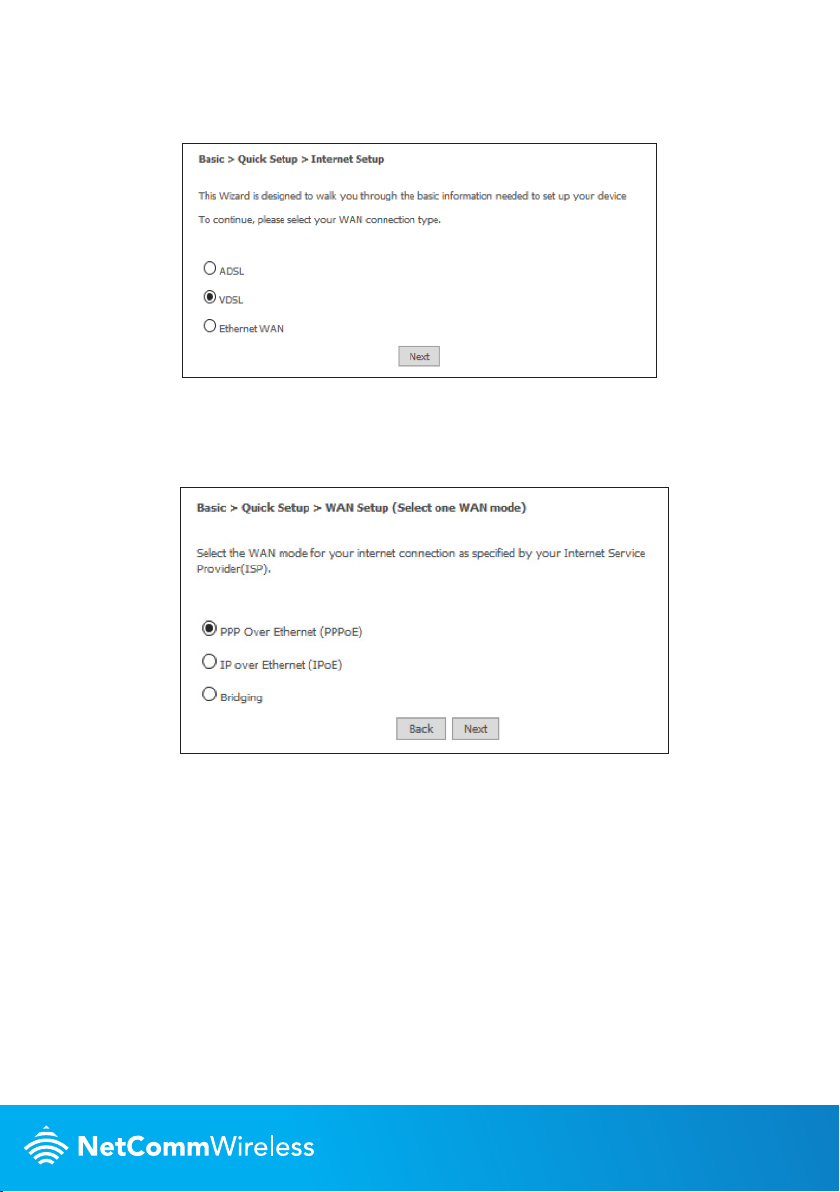
VDSL
a. Select VDSL and click the Next button.
b. Select the WAN mode for your internet connection as specied by your Internet Service
Provider (ISP). Click the Next button.
Page 7
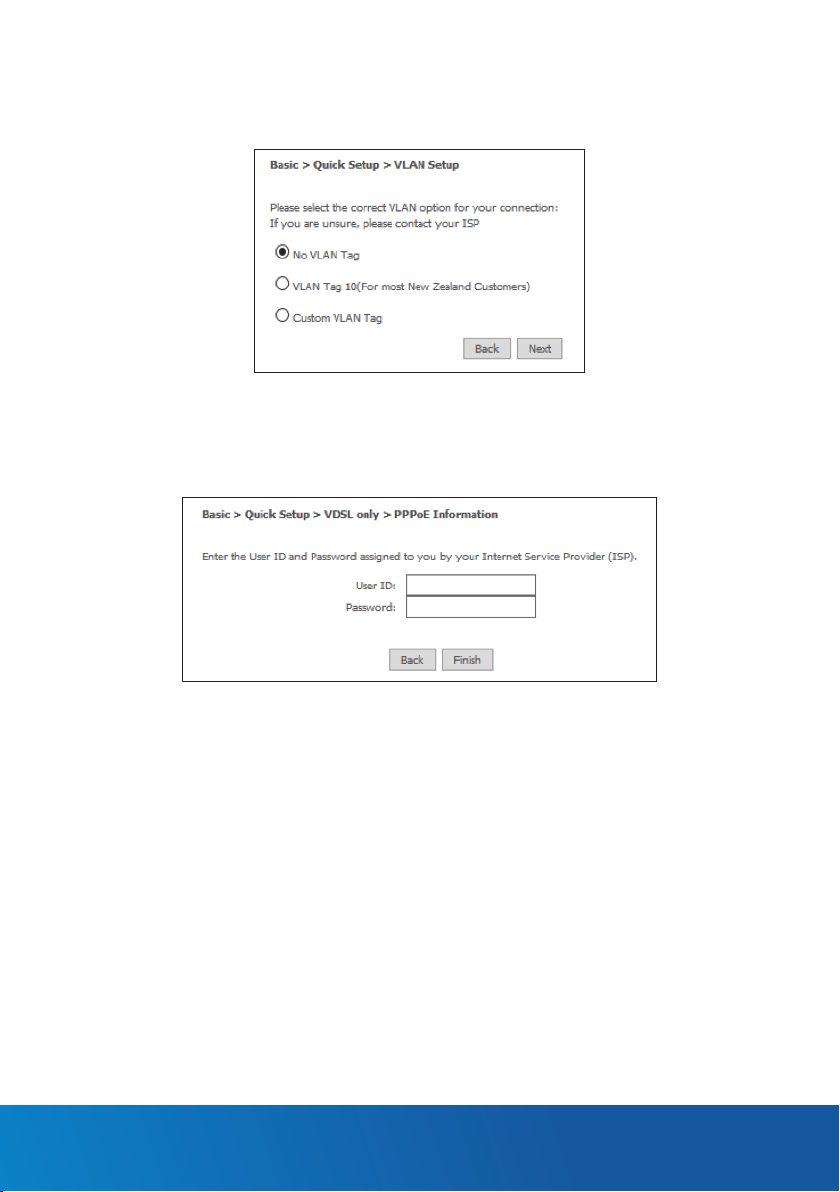
c. Select the correct VLAN option for your connection. For New Zealand customers, the
requirement for VDSL is VLAN tag 10. If you are not sure of the tagging requirement for
your connection, please contact your ISP. Click the Next button.
d. In the User ID and Password elds, enter the username and password assigned to you
by your Internet Service Provider (ISP).
e. Click the Finish button when you have entered the required details. The account settings
are saved and the NF18ACV connects to the internet.
VDSL2 / ADSL2+ Dual Band AC1600 Gigabit Gateway with VoIP - NF18ACV
Page 8

Ethernet WAN
a. Connect an RJ45 Ethernet cable to the WAN port on the NF18ACV. Connect the other
end of the cable to your WAN service.
b. Select Ethernet WAN then click the Next button.
c. Select the WAN mode for your internet connection as specied by your Internet Service
Provider (ISP). Click the Next button.
Page 9

d. Select the correct VLAN option for your connection. For New Zealand customers, the
requirement for VDSL is VLAN tag 10. If you are not sure of the tagging requirement for
your connection, please contact your ISP. Click the Next button.
e. If your ISP has supplied a static IP address, select Use the following Static IP address
and enter the details, otherwise select Obtain an IP address automatically. Click the
Next button.
VDSL2 / ADSL2+ Dual Band AC1600 Gigabit Gateway with VoIP - NF18ACV
Page 10

f. The settings are displayed in a summary. Click Apply/Save to save them.
The account settings are saved and the NF18ACV connects to the internet.
Page 11
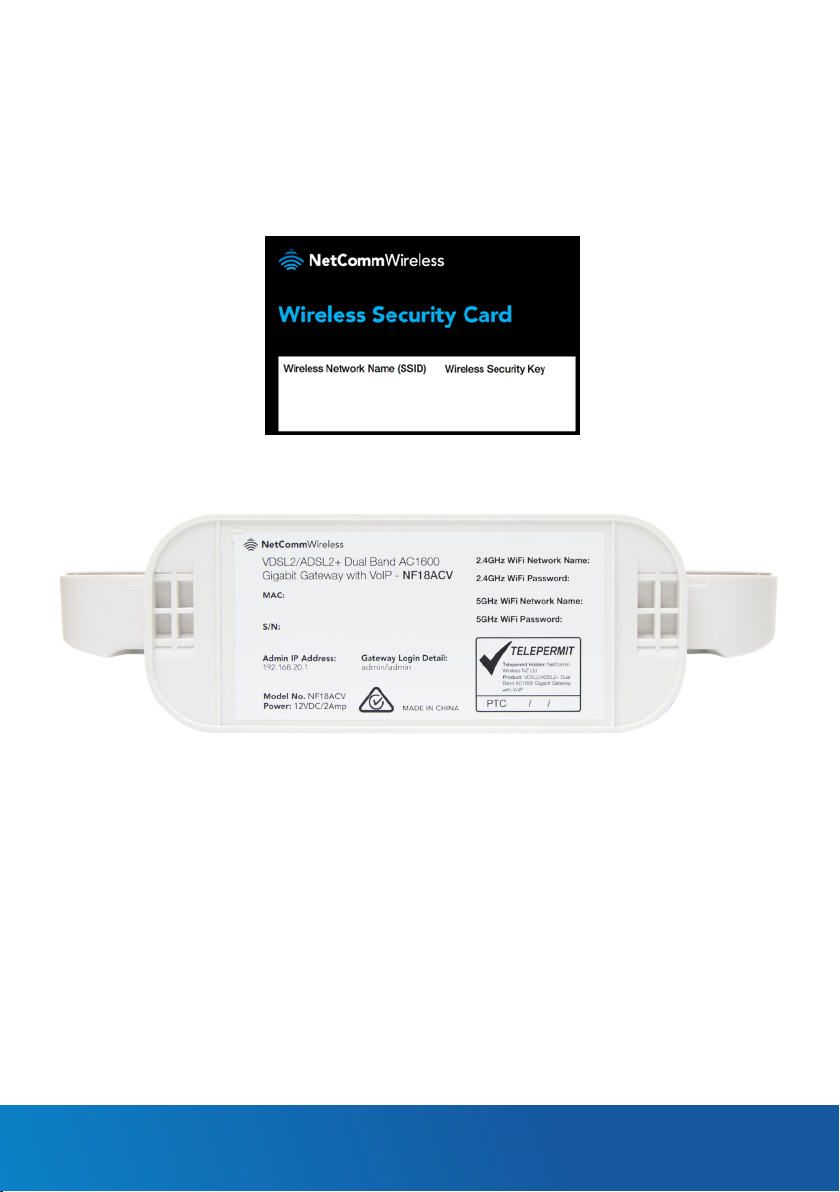
CONNECTING WIRELESS DEVICES
The default settings of the router have the wireless function enablsed so there is no
conguration necessary to use the wireless function, simply connect to the SSID (network
name) listed on the WiFi security card or on the label located under your router. When
prompted, enter the password that is also printed on the card or router label.
2.4GHz - 2.4GHz -
5GHz - 5GHz -
VDSL2 / ADSL2+ Dual Band AC1600 Gigabit Gateway with VoIP - NF18ACV
Page 12

CHANGING THE WIRELESS PASSWORD
The security settings of the 2.4GHz and 5GHz bands are congured separately. If you would
like to change the wireless password to something easier to remember, follow these steps for
each band that you would like to change.
1. From the menu on the left side of the screen, select Wireless-> {2.4GHz or 5GHz} ->
Security. The Wireless Security page for the chosen band is displayed.below it. The
Wireless Security page is displayed.
2. In the WPA/WAPI passphrase eld, enter the desired password to use for the wireless
network. When choosing a password, try to ensure that it
• is unique;
• is sufciently long (at least 8 characters in length);
• uses a mix of letters, numbers and symbols;
• does not contain any personal information or common words.
3. Click the Apply/Save button.
QSG-00102 rev1
 Loading...