

Page 1

NB8WVPN – Quick Install Guide
Unpack your NB8WVPN ADSL2+ Wireless VPN Modem Router and
check you have the following items
• 1 x NB8WVPN ADSL 2+ Wireless Modem Router
• 1 x 18VDC 1 Amps power supply
• 1 x RJ -11 ADSL Line connection cable
• 1 x RJ -45 10/100 Ethernet cable
• 1 x Driver/Manual & Utility Software CD
• This printed Quick Start Guide
If you have all the items listed above please turn over for instructions on
getting started with your new Gateway.
Let’s get started >
Page 2
NB8WVPN – Quick Install Guide
YML893_Rev2
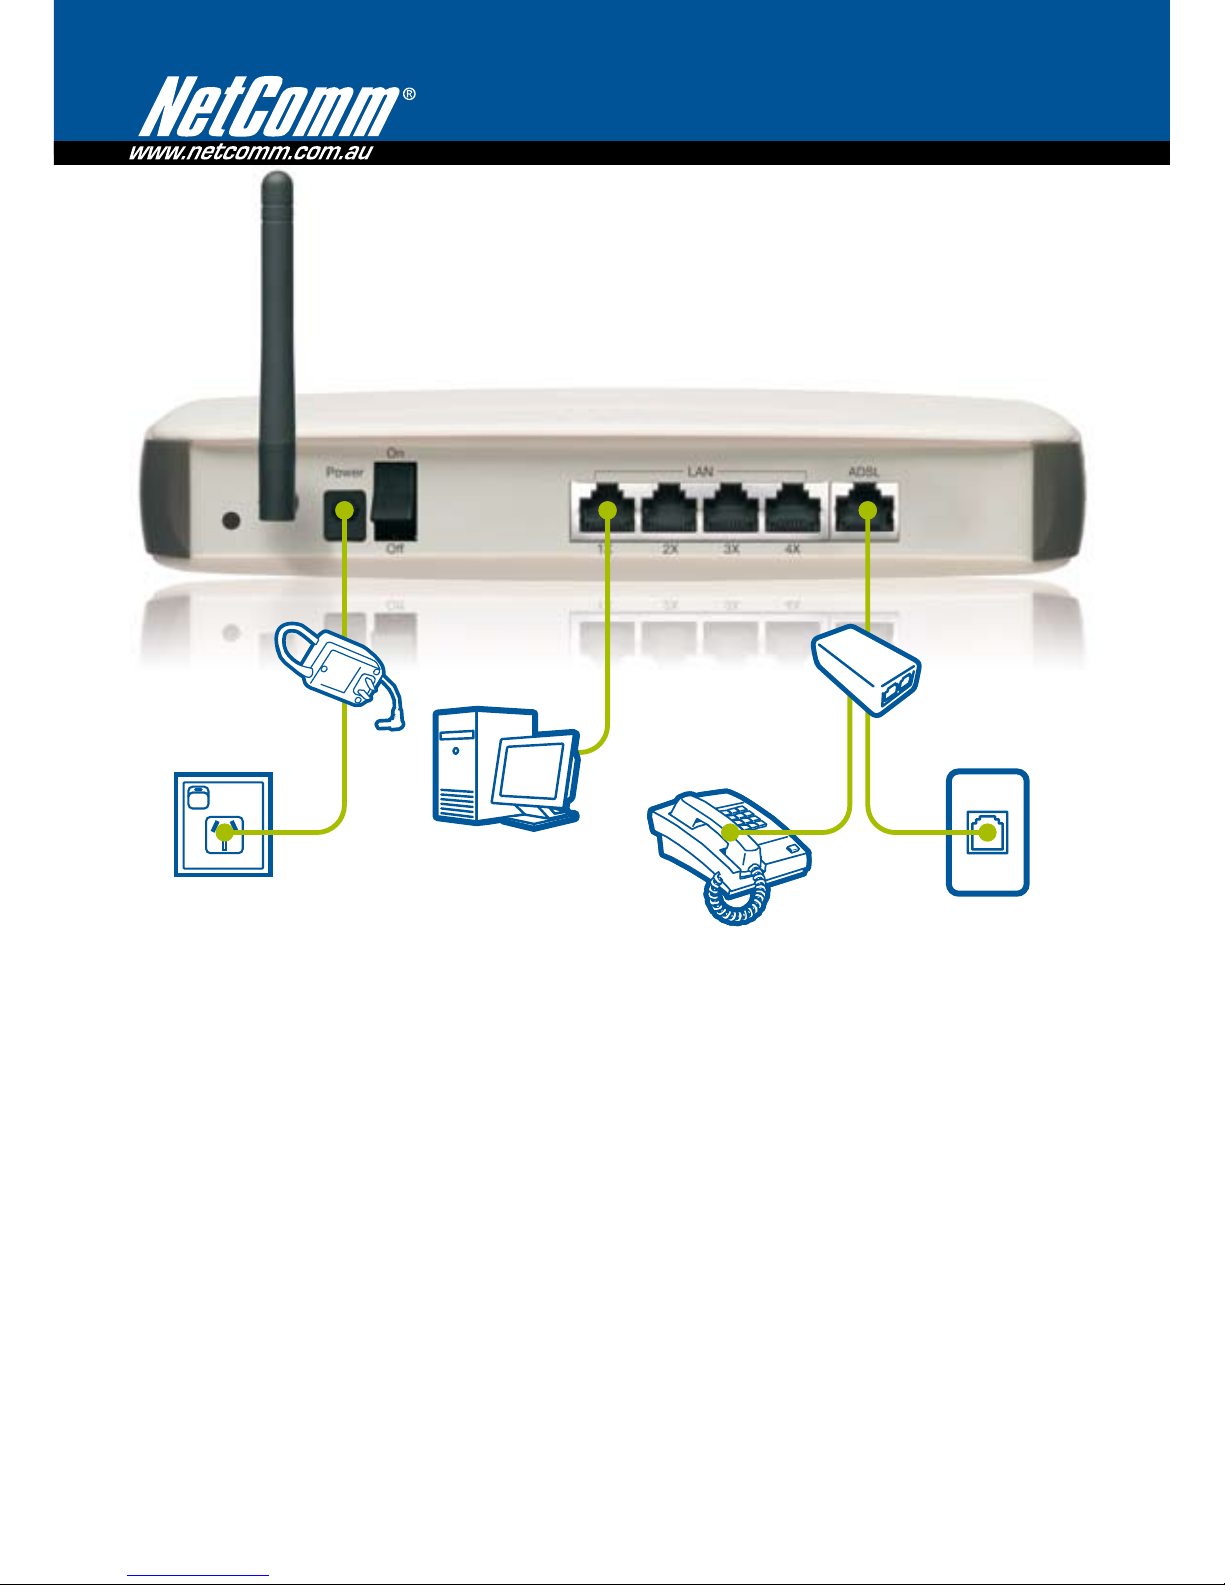
Connecting your device
1. With the supplied Ethernet cable, connect your PC to the LAN port
2. With the RJ-11 cable connect your telephone wall socket to the ADSL port of your NB8WVPN
Note: If you intend on using your NB8WVLAN on the same socket that your telephone is connected to you must use an ADSL Splitter Filter
suitable for your connection speed, we recommend the Telstra certified NetComm EM1550
3. Connect the power cable
4. Power on your PC and turn on power to your NB8WVPN
5. Open a web browser to check your connection
Establishing a Wireless Connection
You can connect multiple wireless devices, including laptops, desktops and PDA’s to your NB8WVPN by following
the 2 basic steps
1. Using your wireless device, scan the wireless networks in your area and select the network called wireless.
Then click connect
2. Enter the following default security key: a1b2c3d4e5
Note: To ensure wireless security, we recommend you change the default settings through the User Interface. For more detail, please consult
your User Guide
Desktop Computer
Powerpoint
ADSL Splitter/Filter
(Optional)
Telephone
Telephone
Wall Socket
Power Adapter
 Loading...