

Page 1
Rev.3 - YML2003 www.netcomm.com.au
Mega-i-Modem 56 Page 1
QUICK START GUIDE - Mega-i-Modem 56
Step 1 - Hardware Installation
Before beginning, please turn your
computer off.
■ Connect the serial port on the back
of the modem (marked RS-232) to
aCOM port on your PC using the
serial cable.
■ Connect the power pack to a power
point and connect the other end to
the modem power socket (marked
POWER).
■ Connect the telephone cord to the
line socket on the back of the
modem (marked LINE) and the
other end to a phone socket.
■ Turn on your modem.
■ The hardware installation is
complete. Turn on your computer
and refer to the approprite operating
system in Step 2 - Driver
Installation to continue.
Step 2 - Driver Installation
Your modem comes with a NetComm CD
and a BVRP PhoneTools CD. The BVRP
PhoneTools CD contains your Modem
Drivers and User Guide, as well as
PhoneTools 2000 facsimile software. The
NetComm CD contains information on other
NetComm products and applications. Use
the BVRP PhoneTools CD to continue
with Step 2 - Driver Installation and Step 3
- Software Installation.
Windows XP
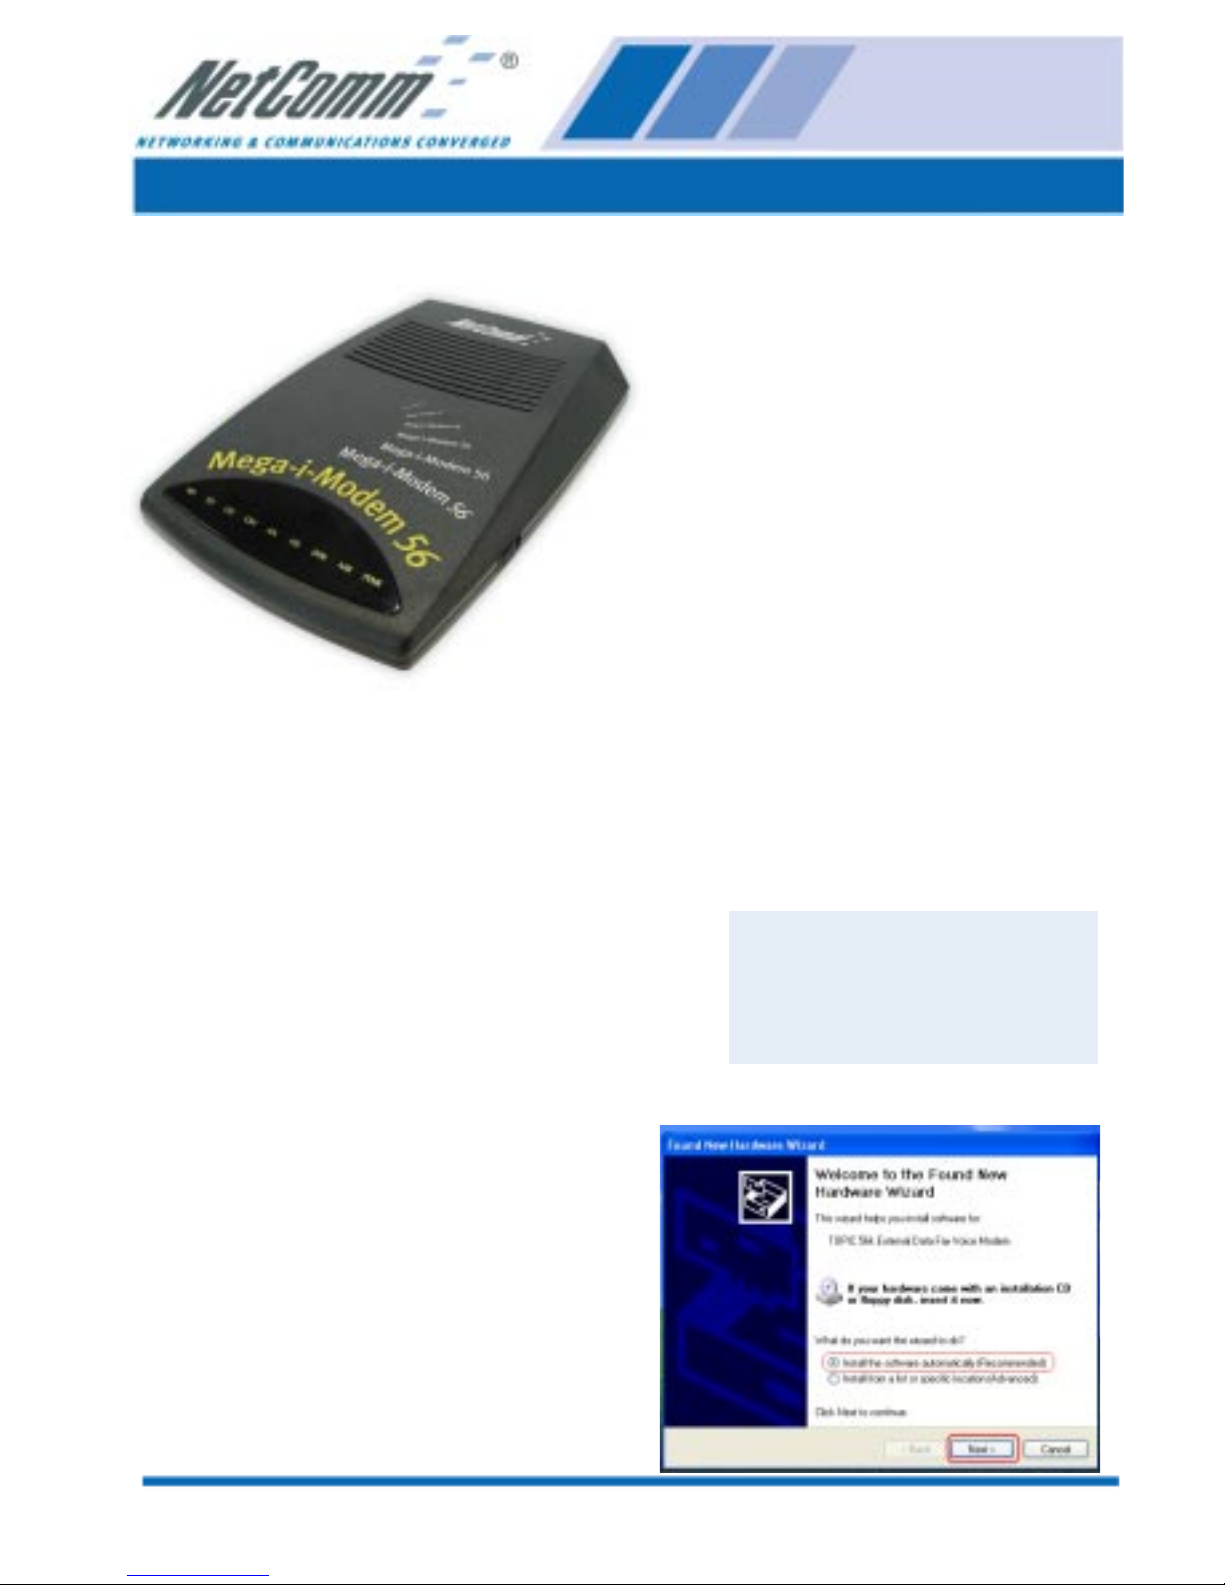
1. After you have installed Windows XP,
you will have the appropriate drivers for
this product. The “Found New Hardware
Wizard” recognises the new hardware.
Select “Install the software
automatically. [Recommended]”, and
then click “Next”
Caution/Warning
Avoid connecting your
modem to a digital
telephone line or PABX.
Page 2
www.netcomm.com.au Rev.3 - YML2003
Page 2 Mega-i-Modem 56
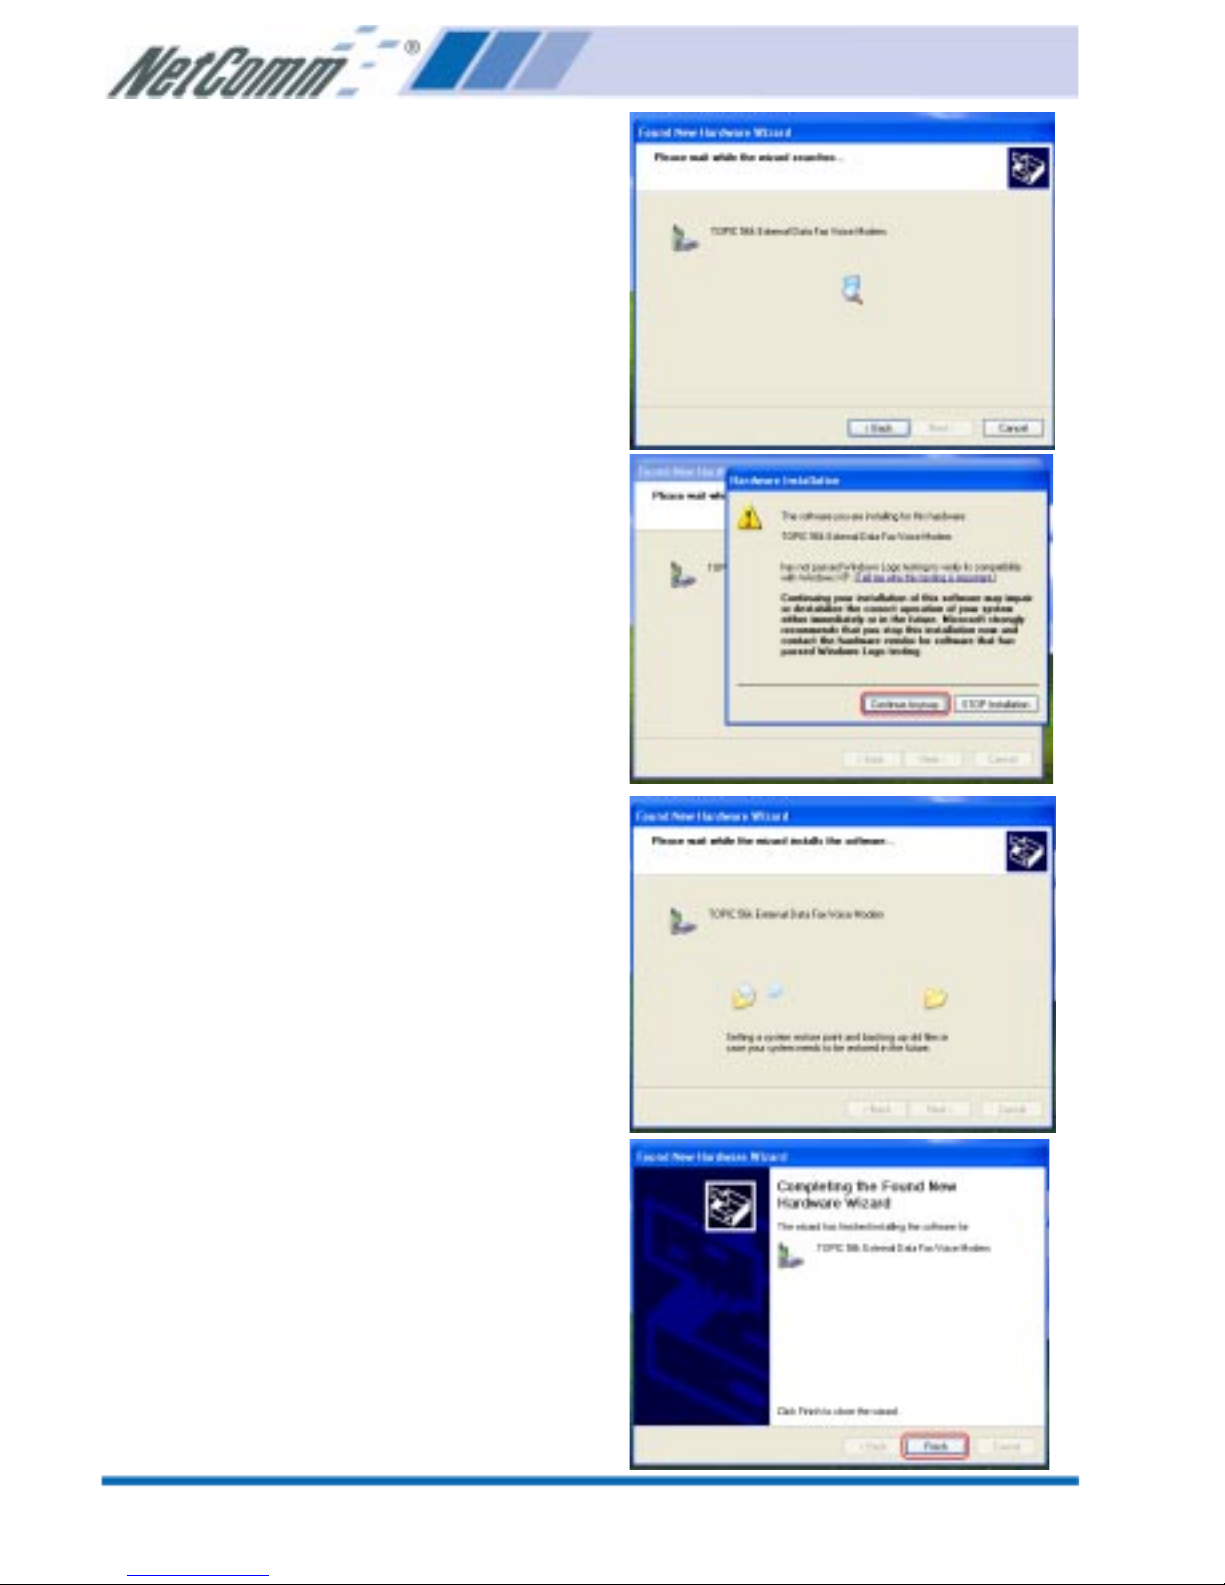
2. Windows will now search for drivers
and display the “Found New Hardware
Wizard”. Click “Next”.
3. The drivers that Windows XP uses are
not digitally signed by Microsoft and the
following message will be displayed.
Click “Continue Anyway” .
4. Windows XP will now copy the required
files.
5. Once all files have been copied, click
“Finish”, and the installation is
complete.
Page 3
Rev.3 - YML2003 www.netcomm.com.au
Mega-i-Modem 56 Page 3
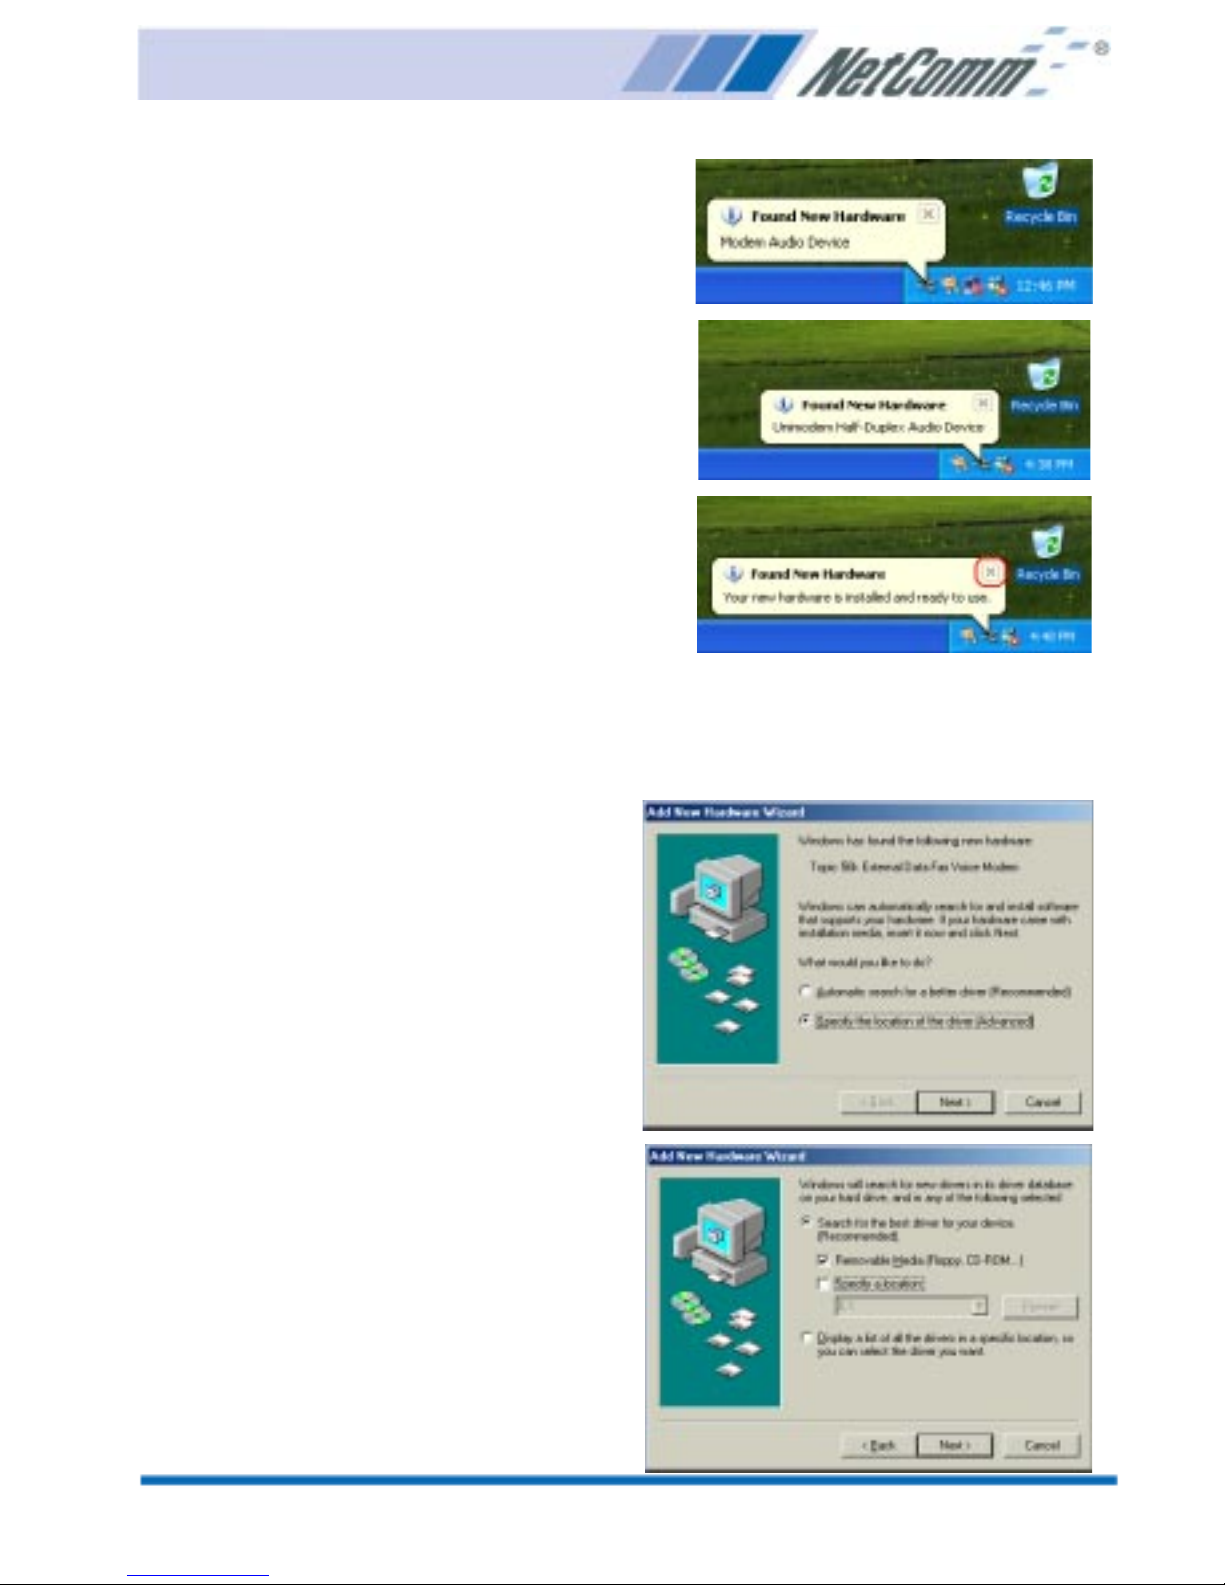
6. To verify installation, you should find a
new icon on your bottom task bar. And
when you place your cursor there it will
identify the new icon as “Modem Audio
Device”. Once identified, the modem is
ready to use.
Windows ME
1. Please insert the BVRP PhoneTools CD
supplied and, when the “Found New
Hardware Wizard” recognises the new
Modem, select “Specify the location of
the driver [Advanced]” and click “Next”
to search for the driver.
You will see the modem as a Topic 56k
External Data Fax Voice Modem.
2. Select the “Search for the best driver for
your device.[Recommended]” option and
choose the “Removable Media ( Floppy,
CD-ROM…)” or “Specify a location”
and type the letter of your CD-ROM
drive (e.g. D:\ where D is the letter of
the CD-ROM drive). Then click “Next”
to continue.
Page 4

www.netcomm.com.au Rev.3 - YML2003
Page 4 Mega-i-Modem 56
5. The “Add New Hardware Wizard” will
now install the Wave Device for Voice
Modem driver. Select “Specify the
location of the driver [Advanced]” and
click “Next” to install the wave device.
6. Select the “Search for the best driver for
your device.[Recommended]” option and
choose the “Removable Media ( Floppy,
CD-ROM…)” or “Specify a location”
and type the letter of your CD-ROM
drive (e.g. D:\ where D is the letter of
your CD-ROM drive). Then click
“Next” to continue.
3. Click “Next” to start the installation.
4. Click “Finish” to end this installation
procedure.
Page 5

Rev.3 - YML2003 www.netcomm.com.au
Mega-i-Modem 56 Page 5
7. Click “Next” to start the installation.
8. Click “Finish” to end this procedure.
Windows NT4.0
1. Please insert the BVRP PhoneTools CD supplied and go to Start>My Computer>Control
Panel, then double-click on “Modems” icon to install a new modem.
2. Select “Don't detect my modem; I will select it from a list” and then click “Next” to
continue.
3. Click “Have Disk…” to install from the installation disk.
4. Select the location of your CD-ROM drive and click OK to continue. (e.g. D:/ may be the
letter of your CD-ROM drive).
5. Select “Topic 56K External Data Fax Voice Modem” from the list of Models and click
“Next” to continue.
6. Select “Selected ports” choose the appropriate COM port. Click “Next” to start installing
the selected modem.
7. Click “Finish” to complete the installation.
Page 6

www.netcomm.com.au Rev.3 - YML2003
Page 6 Mega-i-Modem 56
3. Select “CD-ROM drives” and click
“Next”.
4. Windows will find the correct driver for
your modem. Click “Next” to continue.
Windows 2000
1. Windows will detect the modem
automatically. Please insert the BVRP
PhoneTools CD supplied and click
“Next”.
2. Select “Search for a suitable driver for
my device [recommended]”, and then
click “Next”.
Page 7

Rev.3 - YML2003 www.netcomm.com.au
Mega-i-Modem 56 Page 7
5. Click “Yes” to continue.
6. Click “Finish” to end this procedure.
Windows 98
1. Please insert the driver CD supplied and,
when the “Found New Hardware
Wizard” recognises the new Modem,
click Next to search for the driver.
You will see the modem as a Topic 56k
External Data Fax Voice Modem.
2. Select the “Search for the best driver for
your device. [Recommended]” and click
“Next” to continue.
Page 8

www.netcomm.com.au Rev.3 - YML2003
Page 8 Mega-i-Modem 56
5. Click “Finish”.
6. The “Add New Hardware Wizard” will
now install the Wave Device for Voice
Modem driver. Select “Specify the
location of the driver [Advanced]” and
click “Next” to install the wave device.
3. Select the “CD-ROM drive” option and
click “Next” to start the search for your
driver.
4. Click “Next” to start the installation.
Page 9

Rev.3 - YML2003 www.netcomm.com.au
Mega-i-Modem 56 Page 9
7. Select the “Search for the best driver for
your device. [Recommended]” option
and click “Next” to continue.
8. Select the “CD-ROM drive” and click
“Next” to start the search.
9. Click “Next” to start the installation.
10. Click “Finish” to end this procedure.
Step 3 - Software Installation
1. Insert the BVRP PhoneTools CD in your
CD-ROM drive. The CD should
autostart, however, if it doesn’t go to the
Start Menu and click on Run. Type in
D:\SETUP.EXE where D: is the letter of
your CD-ROM drive.
2. Enter and select a language.
3. Select PhoneTools and follow the
instructions to install the PhoneTools
2000 software.
Refer to the PhoneTools 2000 manual
on the CD for further information.
Page 10

www.netcomm.com.au Rev.3 - YML2003
Page 10 Mega-i-Modem 56
Appendix A - Diagnostics
Windows XP
1. To test and verify that the modem is
working properly, go to “Control Panel”.
2. If “Category view” is selected (by
default) select “Switch to Classic View”.
3. Double click on the
“Phone and Modem
options” icon.
4. Select the “Modem” tab and select your
new modem. Click on the “Properties”
button.
5. Select the “Diagnostics” tab and click on
the “Query Modem” button.
6. The following information should be
displayed. If any error is reported during
this procedure please restart your PC and
repeat the test procedure.
Page 11

Rev.3 - YML2003 www.netcomm.com.au
Mega-i-Modem 56 Page 11
Windows 98/ME
1. Please go to Start / Settings /
Control Panel and doubleclick on the “Modems” icon.
2. To test the modem by
clicking on the “Diagnostics”
tab. Then select the COM Port where
Topic Modem is setting and click on the
“More Info…” button to start the test.
3. If your modem is responding to AT
commands and functioning correctly, it
means that your modem is working
properly. Click “OK” to end this
procedure.
Windows 2000
1. Move your cursor as
following sequence
Start\Settings\Control Panel
and click “Control Panel”.
Then double-click on the
“Phone and Modem
Options” icon.
2. Click “Modems” tab, select “Topic 56k
External Data Fax Voice Modem” and
click on the “Properties” button.
3. Click “Diagnostics” tab and then click
on the “Query Modem” button.
4. If your modem is responding to AT
commands and functioning correctly, it
means that your modem is working
properly. Click “OK”.
Page 12

www.netcomm.com.au Rev.3 - YML2003
Page 12 Mega-i-Modem 56
Appendix B - Uninstalling
Windows 98/ME
1. Please go to Start / Settings /
Control Panel and doubleclick on the “Modems” icon.
2. Select Topic 56k External Data Fax
Voice Modem” and then click
“Remove”.
3. Click “Close”.
Windows NT4.0
1. Please go to Start>My
Computer>Control Panel, then doubleclick on Modems icon to install a new
modem.
2. Select “Topic 56k External Data Fax
Voice Modem and then click “Remove”.
3. Click “Yes”.
4. Click “Close”.
Windows 2000
1. Move your cursor as
following sequence Start \
Settings \ Control Panel
and then double-click on
the “Add/Remove
Hardware” icon.
2. The “Add/Remove Hardware Wizard”
will launch. Click “Next” to continue.
Page 13

Rev.3 - YML2003 www.netcomm.com.au
Mega-i-Modem 56 Page 13
3. Select “Uninstall/Unplug a device”, and
click “Next” to continue.
4. Select “Uninstall a device” and click
“Next” to continue.
5. Select “TOPIC 56k External Data Fax
Voice Modem” and click “Next” to
continue.
6. Select “YES, I want to uninstall this
device”, then click “Next” to continue.
7. Click “Finish” to end this procedure.
Page 14

www.netcomm.com.au Rev.3 - YML2003
Page 14 Mega-i-Modem 56
Windows XP
1. Move your cursor as following sequence Start \ Control Panel. Click on the “System”
icon.
2. Click on the “Hardware” tab and select the modem. Click on the “Device Manager”.
3. Click on the “Modems” tab and select the modem. Then double-click on the “TOPIC 56k
External Data Fax Voice Modem”.
4. Click on the “Driver” tab and then click “Uninstall”.
5. Click “OK” to end this procedure.
Thank you for purchasing a genuine NetComm™ product. If you have any technical
difficulties with the modem, please do not hesitate to contact NetComm’s Customer Support
Department.
Fax: (02) 9424-2010
Email:
support@netcomm.com.au
Web: http://www.netcomm.com.au
Page 15

Rev.3 - YML2003 www.netcomm.com.au
Mega-i-Modem 56 Page 15
Appendix C - Warranty
The warranty is granted on the following conditions:
1. This warranty extends to the original purchaser (you) and is not transferable;
2. This warranty shall not apply to software programs, batteries power supplies, cables or other
accessories supplied in or with the product;
3. The customer complies with all of the terms of any relevant agreement with NetComm and any
other reasonable requirements of NetComm including producing such evidence of purchase as
NetComm may require;
4. The cost of transporting product to and from NetComm’s nominated premises is your
responsibility; and,
5. NetComm does not have any liability or responsibility under this warranty where any cost, loss,
injury or damage of any kind, whether direct, indirect, consequential, incidental or otherwise
arises out of events beyond NetComm’s reasonable control. This includes but is not limited to:
acts of God, war, riot, embargoes, acts of civil or military authorities, fire, floods, electricity
outages, lightning, power surges, or shortages of materials or labour.
The warranty is automatically voided if:
1. You, or someone else uses the product, or attempts to use it, other than as specified by
NetComm;
2. The fault or defect in your product is the result of a voltage surge subjected to the modem either
by power supply or communication line, whether caused by thunderstorm activity or any other
cause(s);
3. The fault is the result of accidental damage or damage in transit, including but not limited to liquid
spillage;
4. Your modem has been used for any other purposes than that for which it is sold, or in any way
other than in strict accordance with the user manual supplied;
5. Your modem has been repaired or modified or attempted to be repaired or modified, other than
by a qualified person at a service centre authorised by NetComm; and,
6. The serial number has been defaced or altered in any way or if the serial number plate has been
removed.
Page 16

www.netcomm.com.au Rev.3 - YML2003
Page 16 Mega-i-Modem 56
Limitations of Warranty:
The Trade Practices Act 1974 and corresponding State and Territory Fair Trading Acts or legalisation of
another Government (“the relevant acts”) in certain circumstances imply mandatory conditions and
warranties which cannot be excluded. This warranty is in addition to and not in replacement for such
conditions and warranties. To the extent permitted by the Relevant Acts, in relation to your product and
any other materials provided with the product (“the Goods”) the liability of NetComm under the Relevant
Acts is limited to, at the option of NetComm to:
■ Replacement of the Goods; or
■ Repair of the Goods; or
■ Payment of the cost of replacing the Goods; or
■ Payment of the cost of having the Goods repaired.
All NetComm ACN 002 490 486 products have a standard 12 months warranty from date of purchase.
However some products have an extended warranty option (refer to packaging). To be eligible for the
extended warranty you must supply the requested warranty information to NetComm within 30 days of
the original purchase by registering on-line via the NetComm web site at www.netcomm.com.au.
NetComm reserves the right to request proof of purchase upon any warranty claim.
 Loading...