

Nesco Stainless Steel Toaster User Manual
Stainless Steel Toaster
User Manual
Grille-pain en acier Inoxydable
Manuel de l’utilisateur
Tostadora de acero inoxidable
Manual de usuario
“NESCO®” is a registered trademark of The Metal Ware Corporation.
The Metal Ware Corporation
1700 Monroe St., P.O. Box 237
Two Rivers, WI 54241-0237
Phone: 1-(800) 288-4545
Table of Contents
Important Safeguards .....................................................................................1
Parts ...............................................................................................................2
Before rst time use .......................................................................................3
Operating Instructions ....................................................................................3
Tips, Care and Cleaning .................................................................................4
One Year Limited Warranty ............................................................................5
Table des matières
Mesures de précaution importantes ...............................................................7
Pièces .............................................................................................................8
Avant la première utilisation ..........................................................................9
Mode d’emploi ...............................................................................................9
Conseils, Entretien et Nettoyage ..................................................................10
Garantie restreinte d’un an ...........................................................................11
Índice
Salvaguardas importantes .............................................................................13
Piezas ............................................................................................................14
Antes del primer uso.....................................................................................15
Instrucciones de uso .....................................................................................15
Consejos, Cuidado y Limpiezaa ...................................................................16
Garantía limitada de un año..........................................................................17
For accessories and additional products, go to
www.nesco.com

1
English
IMPORTANT SAFEGUARDS
- This product is designed for household use only -
When using electrical appliances, basic safety precautions should always be
followed, including the following:
1. READ ALL INSTRUCTIONS.
2. Do not touch hot surfaces. Use handles or knobs.
3. To protect against electrical shock and personal injury, do not immerse this
appliance, including cord and plug, in water or other liquid.
4. Close supervision is necessary when any appliance is used by or near
children.
5. Unplug from outlet when not in use and before cleaning. Allow to cool
completely before putting on or taking off parts, and before cleaning.
6. Do not operate any appliance with a damaged cord or plug or after the
appliance malfunctions or has been damaged in any manner. To avoid
hazards, return appliance to NESCO® Factory Service Department for
examination, repair or adjustment.
7. The use of accessory attachments not recommended by the manufacturer
may result in re, electric shock or injury to persons.
8. Do not use outdoors.
9. Do not let cord hang over edge of table or counter, or touch hot surfaces.
10. Do not place on or near a hot gas or electrical burner or in a heated oven.
11. Do not use appliance for other than its intended use, as described in this
manual.
12. Do not use metal scouring pads on the exterior surface of the appliance.
13. This appliance is not intended for use by persons (including children) with
reduced physical sensory or mental capabilities, unless they have been
given supervision or instruction concerning use of the appliance by a person
responsible for their safety.
14. Oversize foods, metal foil packages, or utensils must not be inserted in a
toaster as they may involve a risk of re or electric shock.
15. A re may occur if toasters are covered or touching ammable material,
including curtains, draperies, walls, and the like, when in operation.
16. Do not attempt to dislodge food when toaster is plugged in.
SAVE THESE INSTRUCTIONS
Polarized Plug: This appliance has a polarized plug (one blade is wider than the
other). To reduce risk of electric shock, plug is intended to t into polarized outlet
only one way. If the plug does not t fully into the outlet, reverse the plug. If it still
does not t, contact a qualied electrician. Do not try to modify the plug in any way.
Short Cord Instructions: A short power supply cord is provided to reduce the risk
resulting from becoming entangled in or tripping over a longer cord. Extension
cords may be used if care is exercised in their use. If an extension cord is used, the
marked electrical rating of the cord should be at least as great as the electrical rating
of the appliance. The longer cord should be arranged so that it will not drape over the
tabletop where it can be pulled on by children or tripped over unintentionally.

2
English
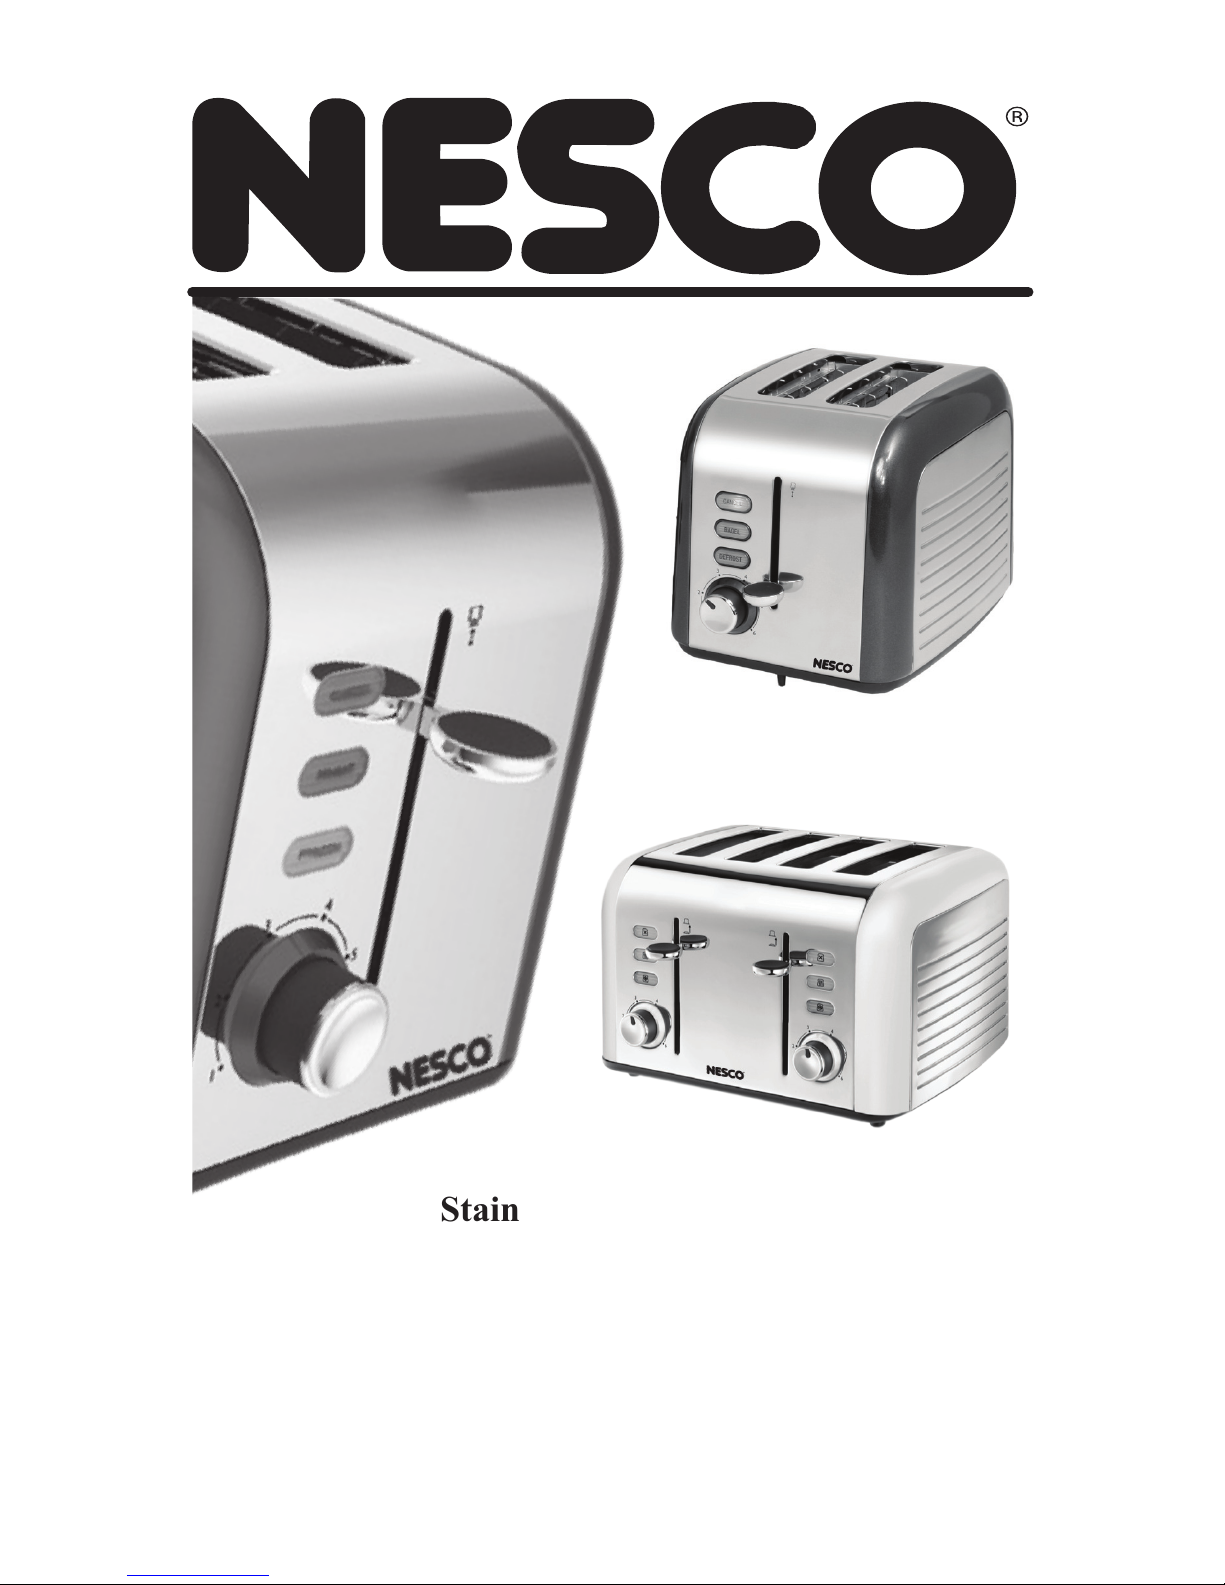
Parts
Browning
Control
Cancel
Button
Defrost
Button
Loading
Handle
Crumb Tray
Bagel
Button
Bread Slots
Cancel Button
The toasting process can be stopped at any time by pressing the cancel button.
Bagel Button
Automatically sets toaster settings to perfectly brown the cut side of Bagels or English
mufns
Defrost Button
The defrost function allows you to toast bread straight from the freezer. Insert the bread
into your toaster, press the loading handle down and then press the defrost button. Your
toaster will extend the toasting time to allow the bread time to defrost. Keep a careful eye
on the toast to ensure that it doesn’t burn.
Browning Control
The browning control regulates how the bread is toasted, in other words, the color of the
toast. Lower settings produce lighter toast and higher settings produce darker toast. When
setting the browning control, remember that dry or thin slices of bread will toast quicker and
require a lower setting. Moist or thick slices of bread will require a higher setting.
Lift-and-Look feature
The lift-and-look feature allows you to check the progress of the toast without cancelling
the toasting process. Just lift the loading handle up at any time during toasting and lower
it again to resume toasting.

3
English
Before using your Toaster the rst time
• Carefully remove your toaster from its box. Remove all packaging from inside the
bread slots.
• Position your toaster on a stable, secure, dry and level work surface away from the edge.
• Bread may burn therefore do not use the appliance near or below combustible materials
such as curtains. Never use the toaster below wall cupboards or shelves.
• Before connecting to a power source, make sure your supply voltage is the same as the
one indicated on the appliance. Connect the plug to a suitable power outlet and make
sure that the power cord does not overhang the work surface.
• When you rst use your toaster, there may be a slight odor as the heating elements
warm up for the rst time. This is quite normal and not a cause for concern. To remove
the odour, simply operate your toaster for the rst time without any bread in it.
Operating Instructions
• Never force bread into the toasting slots. Bread should t easily into the toasting slots.
• Never toast slices of bread or food items that have been buttered or that contain sugar,
or products such as jam or preserves.
• Do not use bent, damaged or broken bread in your toaster as it may cause it to jam.
• Set the level of toasting using the browning control. The higher the number selected,
the darker the toast will be.
• Place the bread into the toasting slots. You can toast one or two slices of bread but only
place a single slice in each slot. Press the loading handle down until it latches.
• The bread will be lowered into the toaster and toasting will begin.
• The loading handle will not latch if your toaster is not connected to the power supply,
and may not latch if the browning control is set to its minimum or lowest setting.
• Don’t forget, you can use the lift-and-look feature during toasting to check your toast.
• Simply lift the loading handle up to examine your toast and lower it again to resume
toasting. If you nd your toast is cooked to your preference, press the cancel button to
stop further toasting.
• When toasting has nished, the loading handle will rise and the toasted bread can be
removed. You can lift the loading handle upwards beyond its rest position to help you
remove the toast.
• If the toast is not done enough it can be toasted again. Turn the browning control to a
lower setting and keep a careful eye on the toast to ensure that it doesn’t burn.
• Toasting can be stopped at any time by pressing the cancel button.

4
English
Toasting tips
• Toasting is a combination of drying and cooking the bread and, because moisture
levels differ from one bread to another, toasting times can vary.
• For slightly dry bread, use a lower setting than normal.
• For fresh bread or whole wheat bread, use a higher setting than normal.
• Bread which has a very uneven surface will require a higher setting.
• Thicker cut pieces of bread (including crumpets) will take longer to toast -
sometimes signicantly longer. This is because more moisture must be evaporated
from the bread before toasting can occur. Very thick pieces of bread may require two
toasting cycles.
• When toasting raisin or other fruit breads, remove any loose raisins or fruit from the
surface of the bread before putting it into your toaster. This will help prevent fruit
pieces from falling into your toaster or sticking to the guard wires in the toasting
slot.
• Single slice toasting - If you are toasting a single slice of bread, set the browning
control to a lower setting than normal. By using a lower setting when toasting a
single slice of bread, it will not be over toasted.
• If your toaster jams:
• Never use a knife or any other utensil or implement to remove jammed bread.
• Never insert your ngers into the bread slots.
• Switch the toaster off at the power supply socket and unplug it.
• Allow the toaster to completely cool down.
• Carefully ease the bread out of the toaster being careful not to damage the
heating element.
Care and Cleaning Instructions
• Always switch off, unplug and allow the toaster to cool down before moving, cleaning
or storing. Never immerse the toaster or power cord and plug in water or any other
liquid.
• Clean the outside of your toaster with a damp cloth then dry thoroughly.
• Never use harsh, abrasive or caustic cleaners.
• Crumb removal
• It is important that crumbs are not allowed to build up inside your toaster. Excess
crumbs are unhygienic and could catch re.
• Crumbs can be removed by sliding the crumb tray out from the bottom of your
toaster.
• You can then tip the crumbs out. Always make sure that your toaster has completely
cooled down and is disconnected from the power supply before removing crumbs.
• Never use your toaster without the crumb tray tted. Always replace the crumb tray
before using your toaster.
 Loading...