

Page 1
6L Digital Pressure Cooker (Model PC6-13)
Instruction Manual
6L Autocuiseur Numérique (Modèle PC6-13)
Manuel d’utilisateur
6L Olla de Presión Digital
(Modelo PC6-13)
Manual de Instrucción
Page 2

Table of Contents
Important Safeguards ................................................................................1-3
Parts ............................................................................................................4
Functions .....................................................................................................5
Operation ..................................................................................................6-8
Care and Cleaning .........................................................................................9
Tips and Hints, Troubleshooting ...................................................................10
Recipes ................................................................................................. 11-14
One Year Limited Warranty .......................................................................... 15
Table des Matières
Mesures de Précaution Importantes ....................................................... 16-18
Pièces ........................................................................................................19
Functions ...................................................................................................20
Fonctionnement ..................................................................................... 21-24
Entretien et de Nettoyage ............................................................................ 25
Consiels et Astuces, Dépannage .............................................................. 26-27
Garantie Limitée d’un an ..............................................................................28
Tabla de Contenido
Salvaguardas Importantes ...................................................................... 29-31
Partes ........................................................................................................32
Funcciones .................................................................................................33
Funcionmiento ....................................................................................... 34-37
Cuidado y Limpieza ..................................................................................... 38
Consejos Prácticos, Problemos ..................................................................... 39
Garantía limitada de un Año .........................................................................40
Technical Specications
Specication / Caractéristiques / Especicaciones: 1000 W., 120 VAC, 60Hz
For accessories and additional products, go to
www.nesco.com
Page 3

1
English
Caution Marks and Symbols
This is the safety alert symbol. This symbol is placed in the manual to
alert you to the potential for bodily injury or death.
UNDERSTANDING SIGNAL WORDS:
Signal words are used to identify safety information within the text of this
manual.
DANGER
Indicates an imminently hazardous situation which, if not voided,
will result in death or serious personal injury.
WARNING
Indicates a potential hazard or unsafe situation which, if not
avoided, could result in death or serious personal injury or product
damage.
CAUTION
Indicates a potential hazard or unsafe practice, which if not
avoided may result in minor personal injury or product damage.
NOTICE
This display is used to address practices not related to physical
injury.
Page 4

2
English
- This product is designed for household use only -
When using electrical appliances, basic safety precautions should always be followed,
including the following:
IMPORTANT SAFEGUARDS
1. READ ALL INSTRUCTIONS BEFORE USE.
2. Do not touch hot surfaces. Use handles or knobs.
3. To protect against electrical shock and personal injury, do not immerse this
appliance, including cord and plug, in water or other liquid.
4. This appliance is not intended for use by persons (including children) with
reduced physical, sensory or mental capabilities, or lack of experience and
knowledge, unless they have been given supervision or instruction concerning
use of the appliance by a person responsible for their safety.
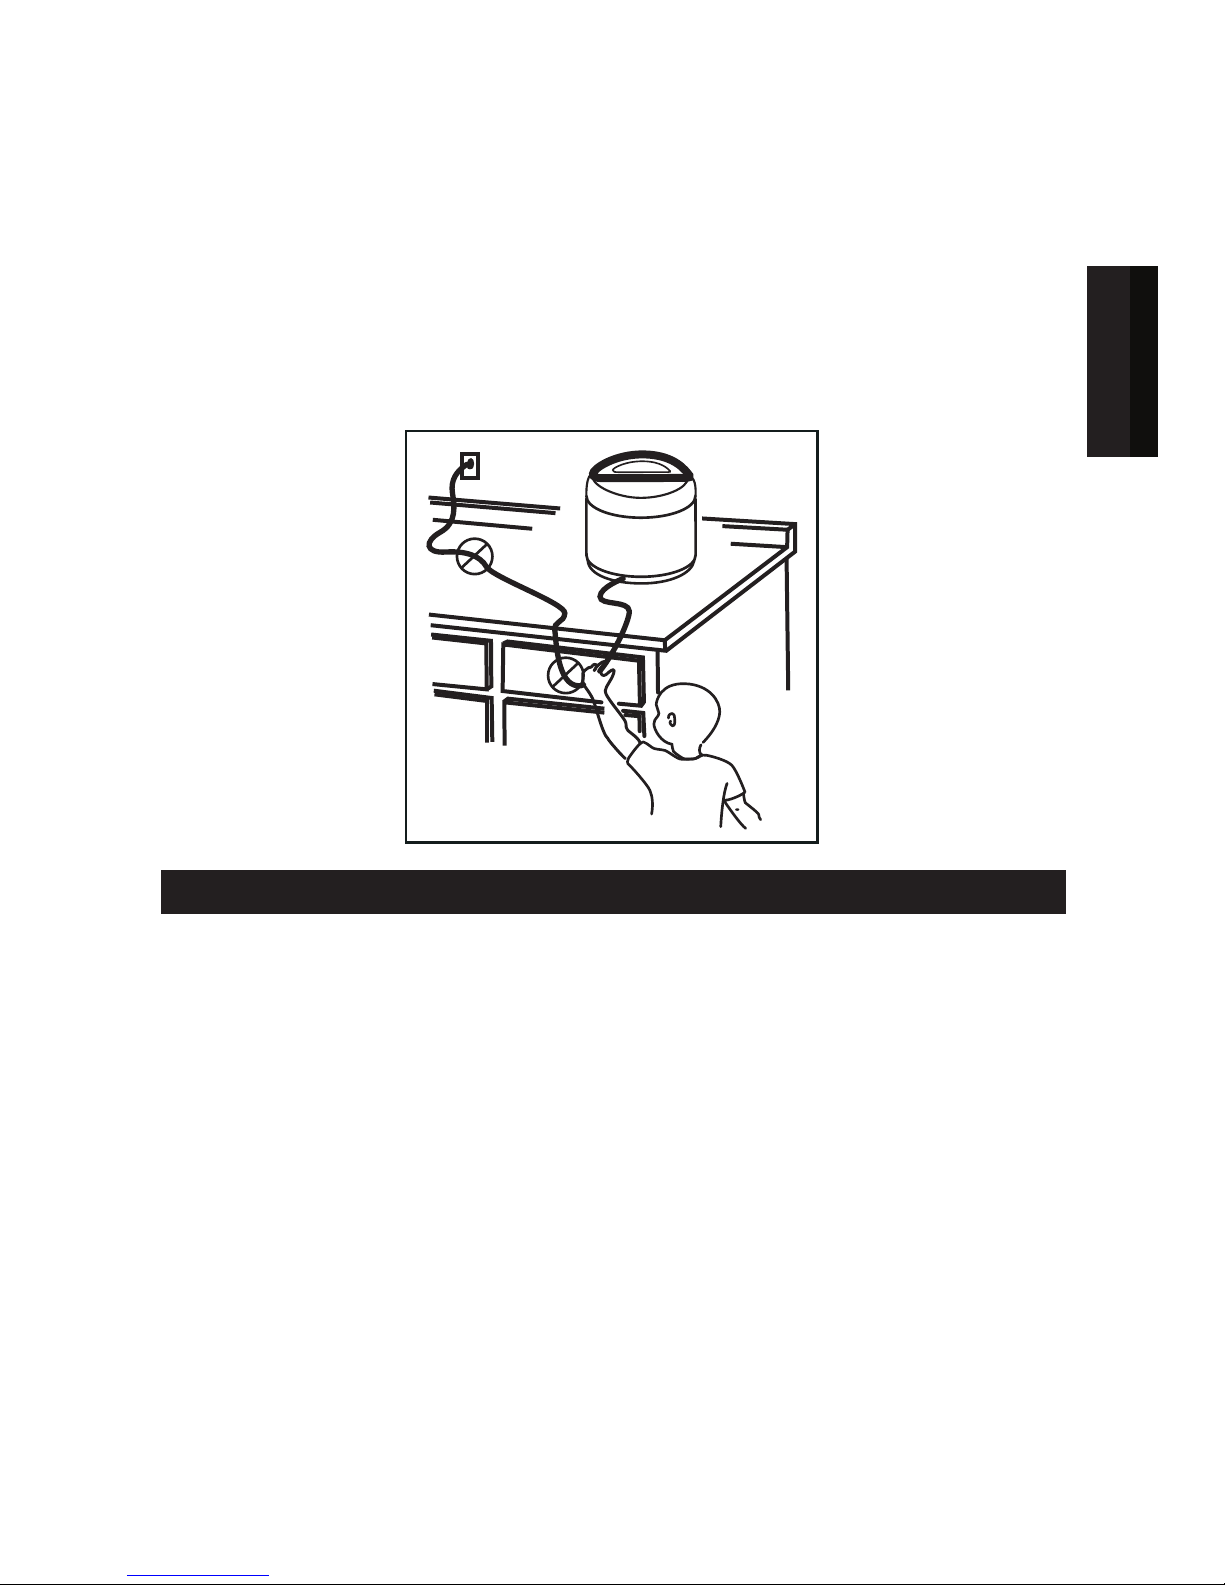
5. Close supervision is necessary when any appliance is used by or near children.
6. Unplug from outlet when not in use and before cleaning. Allow to cool completely
before putting on or taking off parts, and before cleaning.
7. Do not operate any appliance with a damaged cord or plug or after the appliance
malfunctions or has been damaged in any manner. To avoid hazards, return appliance
to NESCO
®
Factory Service Department for examination, repair or adjustment.
8. The use of accessory attachments not recommended by the manufacturer may
result in re, electric shock or injury to persons.
9. Do not use outdoors.
10. Do not let cord hang over edge of table or counter, or touch hot surfaces.
11. Do not place on or near a hot gas or electrical burner or in a heated oven.
12. Intended for counter top use only,
do not use for other than its intended use
.
13. Operate appliance only when all parts are fully engaged and secured.
14. It is recommended that appliance not be moved when it contains hot oil or other
hot liquid. If it must be moved, use extreme caution.
15. Use extreme caution when releasing pressure or while removing the lid. Serious
burns can result from escaping steam.
16. While the unit is in operation, never attempt to remove the lid or bypass safety
features.
17. To reduce the risk of electrical shock, cook only in the removable cooking pot.
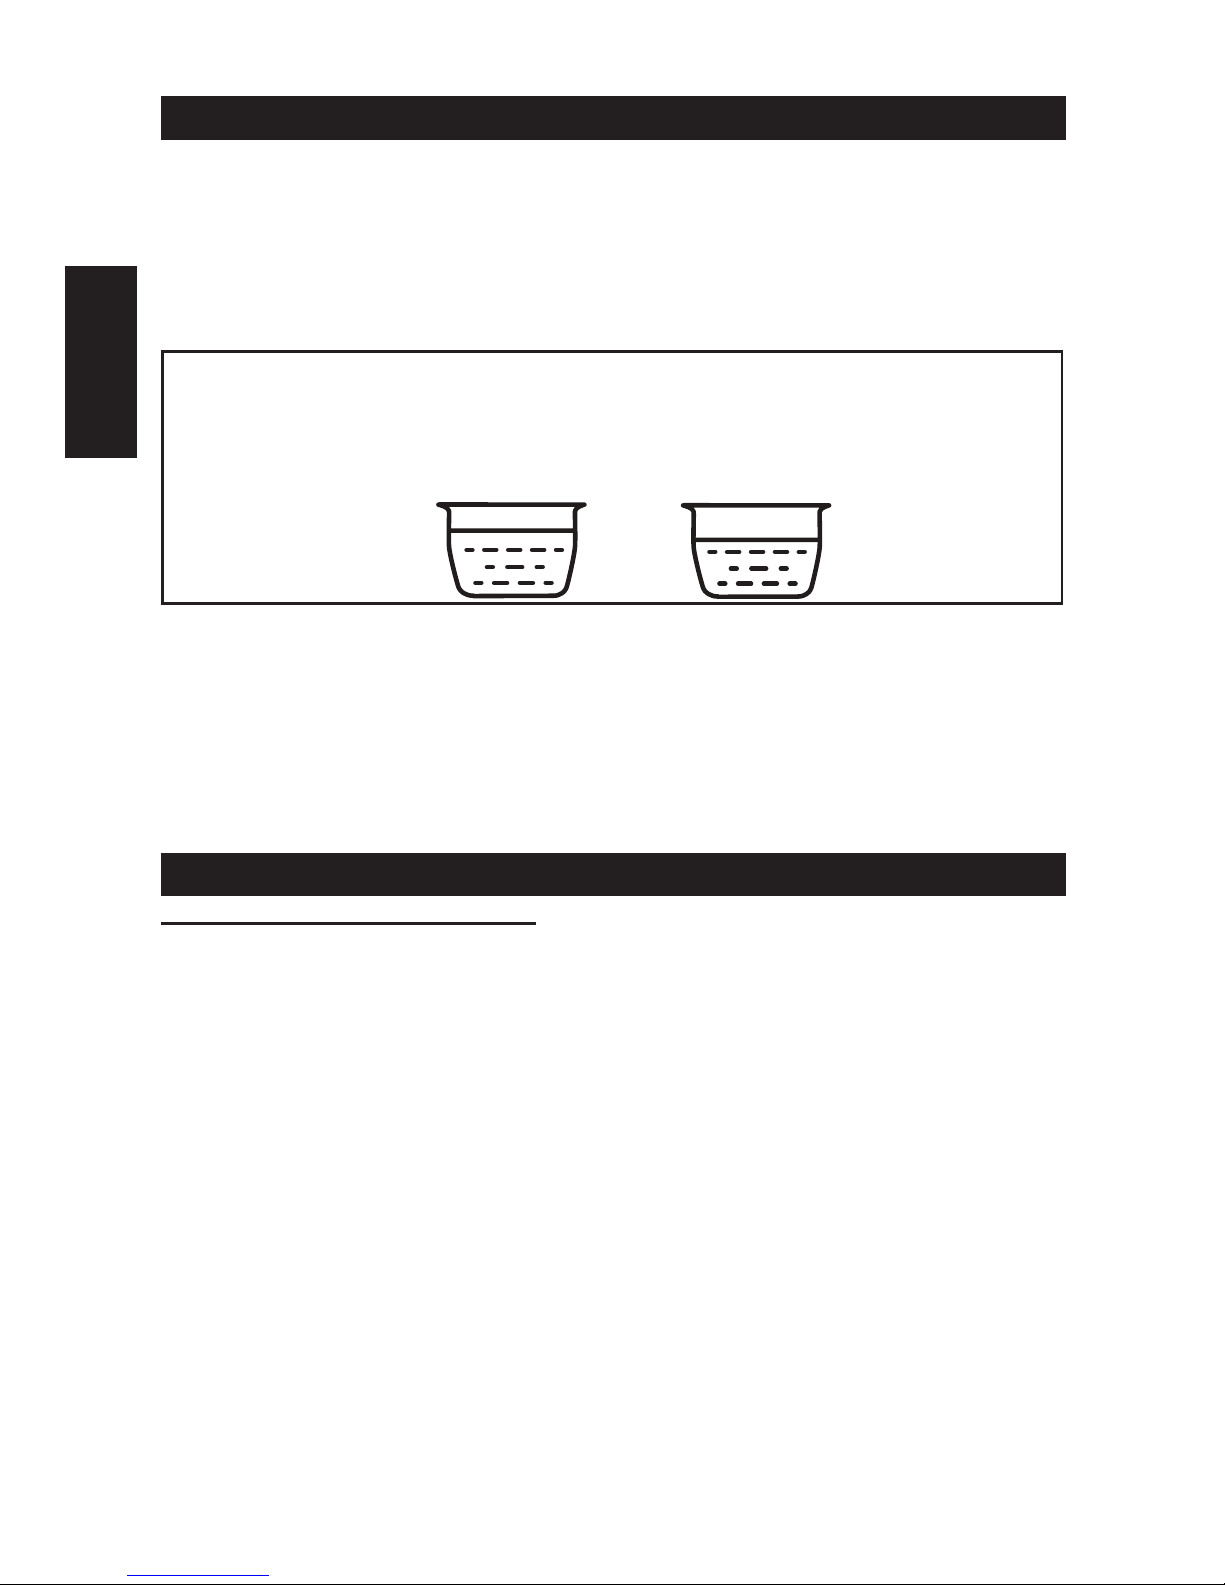
18. Do not ll the cooking pot more than 50% full with food or 60% full with liquid.
When cooking foods that expand during cooking do not ll the unit over 50% full.
19. Foods such as applesauce, cranberries, pearl barley, oatmeal or other cereals,
split peas, noodles and pasta, or rhubarb should not be cooked under pressure in
the pressure cooker. These foods tend to foam, froth and sputter, and may block
the oating valve.
20. Caution should be used when moving appliances containing hot food or liquid.
21. WARNING: Never deep fry or pressure fry in the pressure cooker. It is dangerous
and may cause a re, serious damage or injury.
22. WARNING: Spilled foods can cause serious burns. Keep appliance and cord away
from children. Never drape cord over edge of counter top, never use outlet below
counter top and never use with an extension cord.
23. Do not cover the appliance or have it near ammable material including curtains,
draperies or walls while in use.
24. Never cover the regulator knob while in use. Severe injury or damage may result.
25. When cooking food under pressure, a minimum 2 cups (0,5 L) of liquid must be used.
26. Do not lift the appliance by the cover handle, always use side handles.
SAVE THESE INSTRUCTIONS
Page 5
3
English
Grounded 3 prong plug: This appliance has a 3-prong (grounding) plug for use
in a 3-prong (grounding) outlet to minimize the possibility of electric shock. This
applance should only be used with a 120V, 60 Hz grounded outlet. Failure to follow
these instructions could result in re, electrical shock, serious injury or death.
If the plug does not fully t into the outlet, contact a qualied electrician to inspect
and repair the problem. Do NOT attempt to modify the plug in any way. Do NOT use
an adapter. Failure to follow these instructions could result in re, electrical shock,
serious injury or death.
Short Cord Instructions: A short power supply cord is provided to reduce the risk
resulting from becoming entangled in or tripping over a longer cord.
BEFORE FIRST USE
1. Read and follow all instructions and save for reference. Remove all packaging and labels.
2. Clean all parts following instructions in the ‘Care and Cleaning’ section.
3. Wipe the base with a damp cloth and dry completely. Never use abrasive cleaners
or scouring pads to clean parts of this appliance.
4. TO REDUCE RISK OF ELECTRICAL SHOCK HAZARD NEVER IMMERSE
THE BASE OR CORD IN WATER OR ANY OTHER LIQUID.
Page 6

4
English
Parts
1 Pressure Regulator Knob 7 Power Cord
2 Locking Lid 8 Cooking Rack
3 Control Panel 9 Serving Spoon and Measuring Cup
4 Condenstion Cup (not shown) 10 Sealing Gasket
5 Base 11 Regulator Filter
6 Cooking Pot 12 Floating Valve
8
5
12
2
3
4
1
11
9
10
6
7
Page 7
5
English
FUNCTIONS
1. Pressure Regulator Knob - Align marks on knob. Position to “PRESSURE”
for pressurized cooking and position to “STEAM” to release pressure or cooking
without pressure.
2. Locking Lid - A mechanical safety feature that locks the lid until pressure in the
cooker is reduced to safe levels.
3. Control Panel - Buttons that control the functions of the unit.
• KEEP WARM - Reheats food or keeps food warm for serving.
• STEAM - Quickly boils water to steam foods like vegetables or rice.
• SLOW COOK - Cooks recipes slowly (12 hour timer) and at a low heat (180°F)
to retain the natural avors and tenderness.
• SAUTÉ/BROWN - To brown/sauté meat before pressure cooking for better results.
• TIME DELAY - Allows you to delay the cooking process by up to 8 hours.
• RICE - One touch setting for cooking rice.
• LOW PRESSURE - Controls cooking pressure at 5 pounds above atmospheric pressure.
• HIGH PRESSURE - Controls cooking pressure at 10 pounds above atmospheric pressure.
• START /STOP - Controls power to the control board.
4. Condensation Cup - Collects excess condensation during cooking process. Pull
down to remove and push up to lock.
5. Base - Do not immerse in water! Contains the electronic controls and heater.
6. Cooking Pot - Features 6 liters capacity, removable with non-stick coating for
easy cleanup and durable aluminum alloy for even heating.
7. Power Cord - Removable for easy storage. Be sure plug is attached to the base
securely.
8. Cooking Rack - Use when cooking multiple food items or steaming.
9. Serving Spoon / Measuring Cup - Use to stir or serve. Protects the surface of
the cooking pot. 6 oz. cup to measure ingredients or to remove excess liquid.
10. Sealing Gasket - Creates air tight seal necessary for pressure cooking and is
removable for easy cleaning.
11. Regulator Filter - Protects regulator valve from larger pieces of food that could
cause blocking. Check that it is clean and in place.
12. Floating Valve - Safety valve engages when pressure is built in the cooker and
will not allow lid to be removed.
FUNCTION TIME SETTINGS
FUNCTION SETTING DEFAULT TIME TOTAL TIME
HIGH AND LOW PRESSURE 1 MINUTE 1 MIN. TO 2 HRS
RICE 10 MINS. 5 TO 30 MINS.
TIME DELAY 30 MINS. 8 HRS.
SAUTÉ/BROWN
N 30 MINS. 1 TO 30 MINS.
SLOW COOK 4 HRS. 30 MINS. TO 12 HRS.
STEAM 15 MINS. 1 MIN. TO 2 HRS.
KEEP WARM NONE NONE
Page 8
6
English
OPERATION
1. Place the appliance on a at, heat resistant and stable surface.
2. Before using your appliance, always check the lid to be sure the sealing gasket
and regulator lter are clean and positioned correctly. (see Care and Cleaning
section). Ensure gasket is not damaged or broken. If damaged, do not use the
pressure cooker and contact customer service 1-800-288-4545 for replacement.
3. To open the lid, grasp handle and turn until it stops, then lift to remove.
4. Place desired foods into cooking pot.
NOTE: The total volume of food and liquid must not exceed 60% of the
capacity of the cooking pot. For foods such as dried vegetables and beans, or rice
and grains, the total volume must not exceed 50% capacity. Overlling may clog
the pressure limit valve, which can cause excess pressure to develop. Always use
at least 2 cups liquid when pressure cooking.
5. Check inside the cooker base where the heating plate and sensor are located to
be sure this area is clean and dry before inserting cooking pot.
6. Replace lid and turn until it locks into position.
7. Insert plug into 120 volt electrical outlet.
8. Set desired cooking function and time setting, then press START to begin.
NOTE: Cooker will begin countdown when the desired pressure is reached. Cooker
will automatically switch to KEEP WARM function after cooking times out, except
when using BROWN/SAUTE function which will automatically turn off.
FUNCTIONS
PRESSURE COOKING SETTING:
Before using, check to be sure that the sealing gasket and the pressure regulator
knob are clean and positioned properly (see Care and Cleaning section).
1. Plug the cord into an electrical wall outlet.
2. Position the cooking pot into the cooker base.
3. Place food in the cooking pot according to the recipe. NOTE: When cooking most
foods under pressure, unless stated otherwise add (16 oz.) of liquid to pot.
4. Place the lid on the cooker base and turn until it locks into place. (The locking pin
will click into place.)
5. Set regulator knob to PRESSURE.
6. Choose the desired cooking mode by pressing either the HIGH or LOW pressure
button on the control panel. The light on the button will ash and the digital
display will show 0:01 (This equals 1 minute cooking time.)
7. Set the desired time by pressing the button once for each additional minute or by
continuously holding the button down. The longest cooking time is 2 hours.
8. Press the START button to begin cooking. The indicator light will stop ashing.
9. The unit will begin to count down in minutes, after the pressure has been
reached. (The oating valve will rise when pressure is building up.) This ensures
the lid is locked and cannot be removed.
10. When nished cooking, allow pressure to release by using the ‘natural method’ or
‘quick release method’.
(continued on next page)
60% 50%
Page 9

7
English
Natural Method: CAUTION
KEEP HANDS AND FACE AWAY FROM ESCAPING
STEAM AS IT IS HOT AND CAN CAUSE INJURY.
After cooking, press the ‘STOP’ button and unplug cord. Let appliance stand and
allow pressure to drop naturally which takes from 10 to 20 minutes. After 20
minutes, using oven mitts or tongs, set the pressure regulator knob to ‘STEAM’ and
allow pressure to be released.
Quick Release Method:
CAUTION
KEEP HANDS AND FACE AWAY FROM
ESCAPING STEAM AS IT IS HOT AND CAN CAUSE INJURY.
After cooking, press the ‘STOP’ button and unplug cord. Using oven mitts or tongs,
move the pressure regulator knob to ‘STEAM’ and allow the pressure to be released.
WARNING:
• Do not touch the pressure regulator knob while in use to avoid burn injury from
steam.
• Keep hands and face away at all times. Use oven mitts when removing the
cooking pot or making adjustments to the regulator knob.
• Lid cannot be removed under pressure. Remove pressure by the NATURAL or
QUICK RELEASE methods. Remove the lid by turning to unlock and lifting it
away from you to avoid being burned by the steam.
NOTE:
• When full pressure is reached, cooking will begin and the timer will start to
count down. The raised oat indicates you are cooking under pressure. The lid
is double-locked and cannot be opened while under pressure.
KEEP WARM SETTING:
This function can be used to keep recently cooked foods warm or to reheat.
1. Turn the pressure regulator knob to STEAM.
2. Press the KEEP WARM button.
Press the START button to begin the program.
3. The cooker will automatically switch to the KEEP WARM function after cooking
when using any program setting, except
SAUTÉ/
BROWN.
SAUTÉ/
BROWN SETTING:
This program allows you to sauté/brown your food before cooking it under pressure.
Brown meat or poultry for the best avor and texture, unless otherwise indicated in
the recipe.
For best results, food should be patted dry with a paper towel before browning and
make sure the oil is hot before adding your meat or poultry.
1. Position the cook pot into the pressure cooker base.
2. Add small amount of oil as per recipe to the cooking pot. Do not use the lid.
3. Press the SAUTÉ/BROWN button. The light on the button will ash and the
display will read “0:30”.
4. Press the START button to begin heating.
5. After about one minute of preheating, add food and begin cooking.
6. NOTE: Do not leave pressure cooker unattended while cooking foods.
(continued on next page)
Page 10

8
English
STEAM SETTING:
This program quickly brings liquid to a boil for steaming food or cooking rice.
1. Position the cook pot into the pressure cooker base.
2. Place the rack in the bottom of the removable cooking pot.
3. Add at least 16 oz. of water so that the bottom of the rack is above the liquid.
4. Add the food. Do not ll the pot more than two-thirds full. Note: If steaming rice,
put the rice in a smaller bowl and place on the rack. See “OPERATION” section.
5. Place lid onto the pressure cooker and turn to lock. Set the pressure regulator
knob to STEAM.
6. Press the STEAM button. The light on the button will ash and the digital display
will read ”0:15”.
7. Set the desired time by pressing the button once for each additional minute or
press and hold for rapid increase. The longest steaming time is 2 hours.
8. Press the START button to begin cooking.
CAUTION:
• The lid can be opened while cooking to check the food during the STEAM
cooking mode. Use caution and never place face over the pressure cooker when
removing the lid. Tilt lid away when lifting. Steam escapes as soon as the lid is
opened and can cause serious burns.
RICE SETTING:
1. Place ingredients into the cook pot. Do not ll cook pot more than 50% full.
When cooking rice, the maximum amount of rice is 1-1/2 cups uncooked white
rice plus 3 cups liquid.
2. Place lid on pressure cooker and turn it to lock. Then press RICE button. Default
time is 10 minutes, press button to adjust time.
3. When time is nished, allow the pressure to release by the “Natural” method,
which means to let it sit for about 15 minutes or until the oating valve releases
and the lid can be opened and removed.
SLOW COOK SETTING:
1. Place the cooking pot into the pressure cooker.
2. Place the food to be slow cooked in the cooking pot.
3. Place lid onto the pressure cooker and turn it to lock. Set the pressure regulator
knob to STEAM.
4. Press the SLOW COOK button. The light on the button will ash and the digital
display will read “4:00” (This equals 4 hours of cooking time).
5. Set the desired time by pressing the button once for each additional half hour or
by continuously holding the button down. The longest cooking time is 12 hours
with a temperature of 180°F.
6. Press the START button to begin cooking. The indicator light will stop ashing.
7. The unit will begin to count down in one minute increments, when the cooking
pot temperature reaches about 180°F.
(continued on next page)
Page 11
9
English
TIME DELAY SETTING:
This function allows you to begin cooking food up to 8 hours later in half hour
increments. You can use the delayed time setting with slow cook, steam, high and
low pressure. CAUTION: Perishable foods such as meat and poultry products, sh,
cheese and dairy products cannot be left at room temperature for more than 2 hours.
(No longer than 1 hour when the room temperature is above 90°F).
1. Select the desired cooking mode and time.
2. Press the DELAY TIME button for the delayed time setting. Press button to adjust
the time to delay. Default time :30 minutes, maximum time 8 hours.
3. Press the START button. Cooking will begin after delayed time has elapsed.
CARE AND CLEANING
Do not wash any parts of the pressure cooker in the dishwasher. Always
clean the pressure cooker after every use or if it has not been used for an extended
period of time.
1. Press STOP button and remove power cord from electrical outlet. Let cool before
cleaning.
2. Lid - Remove and wash in warm soapy water. Rinse and dry.
3. Gasket - Removed for cleaning and inspection (see instructions below).
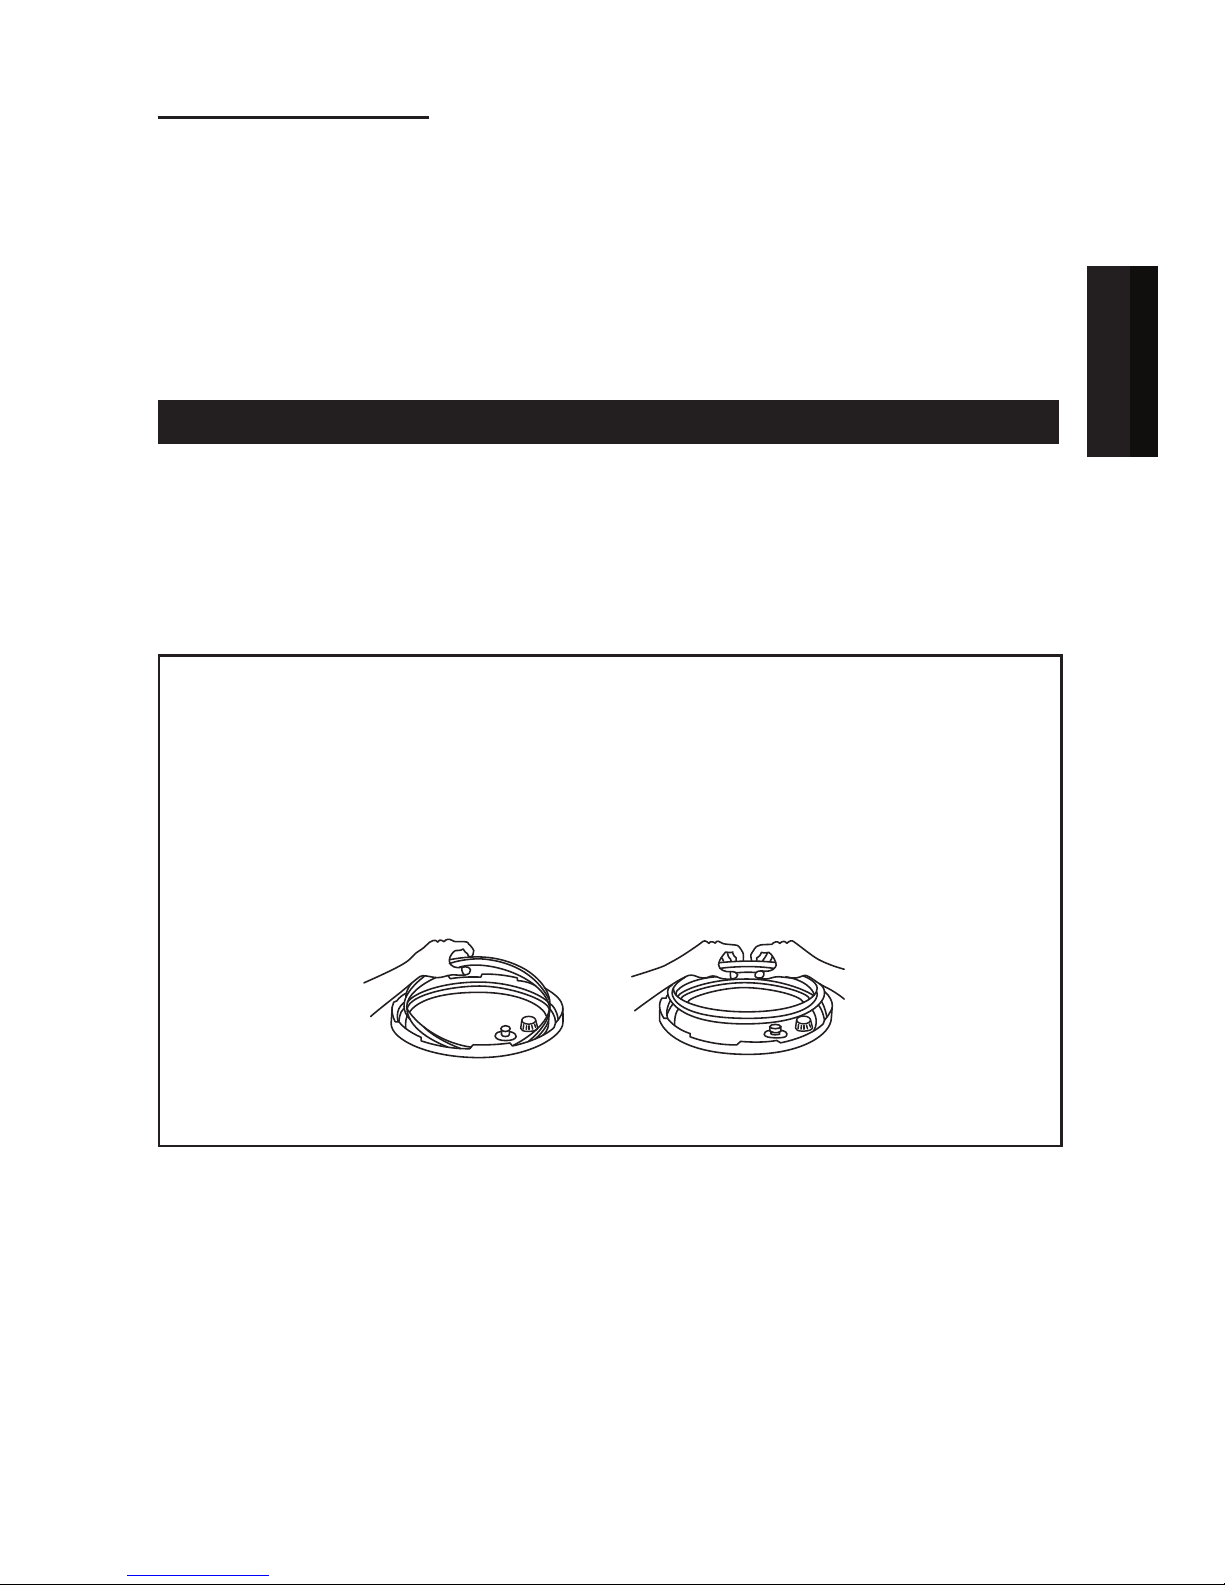
How to remove and assemble sealing gasket.
1. Always check gasket for cracks or damage when cleaning.
2. Turn lid upside down and grasp gasket with thumb and index nger and pull
gently to remove from metal ring. Continue until gasket is fully removed
from metal ring.
3. Clean and inspect gasket for any cracks, scratches or is broken.
4. Install gasket by starting in one section and feed the gasket edge around the
metal ring located to the underside of the lid. Repeat this until the gasket is
fully wrapped around the metal ring with edges being even.
WARNING: Do not use gasket if damaged. Contact our customer support
representative. www.NESCO.com or toll free 1-800-288-4545
3. Cooking Pot - Wash the cooking pot with warm soapy water and dry. Do not put
into dishwasher as detergents may ruin the nonstick surface.
4. Base - Wipe the outer housing of base with a clean damp cloth. Do not
immerse base in water or any other liquid!
5. Condensation Cup - Remove the condensation cup by pulling down away from
base. Clean with warm, soapy water. Rinse and dry. Replace by pushing up until
it locks.
6. Power Cord - Wipe clean and inspect cord and plug for damage. Do not use if
damaged and contact us for replacement.
NOTE: Store the pressure cooker with the lid resting upside down on cooking
pot. This allows the gasket to keep shape and
keep stale odors from forming.
LIFT TO
REMOVE
PRESS TO
INSERT
(continued on next page)
Page 12

10
English
Cleaning the Pressure Regulator Knob and Floating Valve:
Check that the regulator knob and oating valve are in good working order before
each use. Regulator knob will turn freely and the oating valve will slide easy with a
push of your nger. Be sure the small seal is in place around the oating valve.
Wash oating valve by following these directions.
1. After the unit has cooled, remove the lid.
2. Lift up the regulator knob to remove. Wipe knob with a cloth, rinse and dry.
3. Turn the lid over and use a brush to clean around the valve and lter. Make sure
the small rubber gasket is in-tact on bottom of oating valve. Do not cover small
holes with gasket.
4. Replace the regulator knob by aligning the knob in the hole and push to lock.
HINTS AND TIPS
• To ensure the best cooking performance when cooking under pressure, always
use at least 16 oz. of water or liquid in your recipes to enable enough steam to
be created to produce pressure.
• When using HIGH or LOW pressure settings the timer will not begin counting
down until full pressure is reached. It takes about 10 mins. to reach pressure.
• Pressure cooking is quicker than oven cooking, if you are unsure of the cooking
time, it is better to under cook and use the quick release method to check for
doneness. If not ready, continue cooking until nished.
• Perishable foods, such as meat, poultry and sh cannot be left out at room
temperature for no more than 2 hours. Therefore, when cooking perishable foods
do not set delay timer for longer than 2 hours (1 hr. if above 90°F/32C).
• Tougher, less expensive cuts of meat are better suited for the pressure cooker
because cooking under pressure breaks down the bers for tender results.
• Fresh fruit should be cooked on low pressure.
• Add a tablespoon of oil to the water when cooking beans to reduce foaming.
TROUBLESHOOTING
• If the oating valve has not risen, but the timer is counting down,
perform the following steps:
1. Stop the pressure cooker by pressing the STOP button.
2. Turn the pressure regulator knob to STEAM, using oven mitts or tongs, release
in short bursts, until the pressure is fully released. Also referred to as the “quick
release method”.
3. Remove the lid and add liquid to have approximately 16 oz. of liquid in cooking
pot. Stir food to disperse liquid. Replace the lid and lock into position.
4. Press desired cooking function button and set desired cooking time.
5. Press the START button to resume cooking.
• If steam is leaking from under the cover, follow these steps:
1. Stop the pressure cooker by pressing the STOP button.
2. Turn the pressure regulator knob to STEAM, using short bursts, until the
pressure is fully released, also known as the quick release method.
3. Remove the cover and gasket. Check for tears or cracks. Do not use cooker if
any parts are damaged.
4. Check to be sure the gasket is positioned properly.
5. Check the contents of the cooking pot do not exceed 60% full.
6. If the cover still will not seal, call customer service at 1-800-288-4545.
Page 13

11
English
Recipes
BBQ RIBS
1 Rack of Ribs, cut into pieces
1 (28 oz.) bottle of Barbeque sauce
2 C. Ginger ale
Pour ginger ale in cooking pot. Add: Cut rack of rib and your favorite rub or just salt
and pepper. Set regulator knob to PRESSURE. Place lid on cooker and lock it. Set
regulator knob to PRESSURE. Press the HIGH pressure button for 45 minutes. Press
start, the oating valve will rise when cooking pressure is reached and timer will
begin to countdown When nished, press STOP button and use the quick release
method to release the pressure by turning the regulator knob to STEAM in short
bursts. Pour out the ginger ale. Add the barbeque sauce and serve.
BEEF POT ROAST
3 lb. Beef pot roast 2 Tbsp Vegetable oil
1 medium Onion, chopped 3 C Beef broth
1 C Water
Salt and Pepper to taste
1 Bay leaf
Heat oil in cooker, using the BROWN setting to brown roast on both sides. Place meat
on wire rack and add remaining ingredients. Cover and lock lid in place. Set regulator
knob on SEAL. Program for HIGH pressure and cook for 45 minutes. Release pressure
by using the natural release method. Cooker will beep and switch automatically to the
warm setting when cooking time is completed.
BUFFALO CHICKEN SLIDERS
2 lbs. boneless chicken breasts 3 C. hot or mild wing sauce
1 C. Water 3 pkgs. dinner rolls
1 (18 oz.) bottle Blue Cheese dressing Celery and Carrot sticks
Put chicken in cooking pot with 2 cups Hot sauce and water. Place lid on cooker and
lock it and set regulator knob to PRESSURE. Press the HIGH pressure button for 15
minutes. When nished, press STOP button and use the quick release method to
release the pressure by turning the regulator knob to STEAM in short bursts. Drain
excess juice and toss with remaining hot sauce.
To serve, shred chicken to each roll and top with dressing. Add side of celery and
carrot sticks.
Page 14

12
English
Recipes
CHICKEN STOCK
1 Tbsp. vegetable oil 2 lbs. chicken thighs
1/2 celery stalk, chunked (set aside leaves) 1 lb. carrots, cut 1”to 3” lengths
1 lbs. onions, quartered 1/2 bundle Parsley,
1/2 tsp. black peppercorn 1/2 Bay leaf
1 Tbsp. chicken avored soup base 10 C. water or 2/3 full
Add oil, chicken thighs and celery leaves into the cooking pot. Select BROWN button
and press the START button, brown until meat is lightly golden brown. Add the rest of
the ingredients. Place lid on cooker and lock it and set regulator knob to PRESSURE.
Press the HIGH pressure button for 30 minutes. Use the natural release method to
release the pressure. Strain the stock using a seive or cheesecloth.
CHOCOLATE CHEESECAKE
Crust:
1 C. Chocolate wafer cookie crumbs 2 Tbsp butter, melted
Mix crumbs and butter together. Press into bottom of 7” spring form pan and set aside.
Filling:
2 C. water 2 eggs, large
2 (8 oz.) pkg. cream cheese, softened 2/3 C. packed brown sugar
3/4 C. chocolate wafer cookie crumbs
Topping:
1 C. heavy whipping cream 3/4 C. maple sryup
1/2 C. chopped pecans, toasted
(Variation: Add 1 tsp. instant coffee to melted chocolate chips for a mocha
cheesecake.)
Blend cream cheese in bowl with mixer until smooth. Gradually add sugar. Mix
thoroughly. Adding one egg at a time, mix until cheese is smooth.
Fold in melted chocolate until thoroughly blended. Add remaining 3/4 cup of cookie
crumbs into mixture. Pour into spring form pan over crust.
Add water and rack to cook pot. Tear off a 6” piece of aluminum foil and fold in half,
lengthwise. This helps to remove pan after cooking cycle is complete. Place spring
form pan on foil and lower onto cooking rack. Cover and lock lid in place.
Turn regulator knob to SEAL. Program for high pressure and cook for 20 minutes.
Release pressure by using the quick release method. Unlock and remove lid.
Remove cheesecake from cooker by lifting up the ends of foil swing. Let cool to room
temperature before refrigerating. For best results, refrigerate overnight.
Page 15

13
English
Recipes
COUNTRY BOIL
1-1/2 lbs. Kielbasa, cut into pieces 1-1/2 lbs. extra large shrimp, peel/devein
1 lbs. baby red potatoes 2 corn on the cob, cut in half
3 C. water 1/2 C. Old Bay seasoning
1 Bay leaves
Place all ingredients into cooking pot and place lid on cooker and lock it. Set regulator
knob to PRESSURE. Press the HIGH pressure function for 15 minutes. Press start,
the oating valve will rise when cooking pressure is reached and timer will begin to
countdown.
When nished, press STOP button and use the quick release method to release the
pressure by turning the regulator knob to STEAM in short bursts.
PINTO BEANS
2 lbs. Pinto beans, washed 9 C. water
1/2 Tbsp. Canola oil 1/3 C. garlic powder, to taste
Place all ingredients into cooking pot and place lid on cooker and lock it. Set regulator
knob to PRESSURE. Press the HIGH pressure function for 35 minutes. Press start,
the oating valve will rise when cooking pressure is reached and timer will begin to
countdown.
When nished, press STOP button and use the quick release method to release the
pressure by turning the regulator knob to STEAM in short bursts.
PORCINI RISOTTO
1 Tbsp. olive oil 1 small yellow onion, peeled and chopped
1-1/2 cups Arborio rice 1/2 C. white wine
4 C. chicken stock 1 oz. dried porcini mushrooms, crushed
1 C. frozen peas 1/2 C. grated Parmesan cheese
Add oil and SAUTE onions for 2 to 3 minutes or just until soft. Add the rice and cook,
stirring for 1 to 2 minutes. Add the wine and continue to stir until all the wine has
been absorbed. Stir in the chicken stock and mushrooms. Add cover and lock into
position. Press RICE setting for 7 minutes with the regulator knob in STEAM position.
When nished, press STOP button and use the quick release method to release
the pressure by turning the regulator knob to STEAM in short bursts! Check the
tenderness of rice and stir until it has thickened.
Fold in the peas and cheese, and stir until well blended.
Page 16

14
English
Recipes
ROOT BEER PULLED PORK SANDWICHES
2-1/2 lbs. boneless country ribs 1-1/2 C. root beer
3/4 C. water 1 (18 oz.) bottles of barbeque sauce
4 hamburger buns
Add pork, root beer and water into cooking pot and place lid on cooker and lock it.
Set regulator knob to PRESSURE. Press the HIGH pressure function for 30 minutes.
When nished, press STOP button and use the quick release method to release the
pressure by turning the regulator knob to STEAM in short bursts.
Remove lid and check meat for tenderness, If meat does not shred with a fork, add
ve more minutes on HIGH. Drain excess liquid, shred and mix in barbeque sauce.
Serve on a bun with side of coleslaw or salad.
TURKEY CHILI
3 Tbsp. vegetable oil 1/2 lb. turkey sausage, chunked
2 lbs. ground turkey 1-1/2 C. onions, chopped
1 large green peppers, diced 2 large red bell peppers, diced
2 (16 oz.) cans stewed tomatoes 1/2 Tbsp. cinnamon
1/8 C. whole cumin seeds 5 C. chicken or turkey stock
1/4 C. chili powder 3 cloves garlic, pressed
1/4 C. cornmeal (optional) Salt and Pepper to taste
Add oil, turkey sausage and ground turkey into the cooking pot. Select BROWN
button and press the START button, brown meat is brown. Add the onions and cumin
seeds, continue to brown for 1 minute, stirring frequently. Add remaining ingredients,
except garlic and stir to mix. Place lid on cooker and lock it. Set regulator knob to
PRESSURE. Press the HIGH pressure function for 5 minutes.
When nished, press STOP button and use the quick release method to release the
pressure by turning the regulator knob to STEAM in short bursts. Stir in garlic and more
seasonings if desired. If chili is too thin stir in small amounts of cornmeal to thicken.
VIDALIA ONION & POTATO SOUP
3 large Russet potatoes, peeled, cubed 3 C. Vidalia onions, chopped, sliced
2 celery stalks, chopped 3 Tbsp. butter
4 C. chicken broth 1-1/2 tsp. kosher salt
Pepper to taste 2-1/2 Tbsp. parsley, chopped
Preheat cooker on WARM. Heat butter and saute onions and celery for 3 minutes.
Add remaining ingredients and stir to mix. Place lid on cooker and lock it. Set
regulator knob to PRESSURE. Press the HIGH pressure function for 6 minutes.
When nished, press STOP button and use the quick release method to release the
pressure by turning the regulator knob to STEAM in short bursts.
Purée about 1-1/2 cups of the soup and return to cooking pot. Press WARM button to
reheat and serve.
Page 17

15
English
ONE YEAR LIMITED WARRANTY
This appliance is warranted for one year from date of original purchase against
defects in material and workmanship. This warranty does not cover transportation
damage, misuse, accident or similar incident. This warranty gives you specic legal
rights and you may have other rights, which vary from state to state. This product
is intended for household use only, not for commercial use. Warranty does not
cover commercial use.
Your new NESCO
®
appliance comes equipped with numerous safety features.
Any attempt to interfere with the operation of these safety features makes this
warranty null and void. In the event we receive an appliance for service that has
been tampered with, we reserve the right to restore it to its original state and
charge for the repair.
For service in warranty - Defective products may be returned, postage prepaid, with
a description of the defect to: The Metal Ware Corporation, 1700 Monroe Street,
Two Rivers, Wisconsin 54241, for no-charge repair or replacement at our option.
Must include proof of purchase or copy of original bill of sale when
returning product for warranty service.
Please call Customer Satisfaction at 1-800-288-4545 to obtain a Return Authorization
before shipping.
• For service in warranty, follow instructions set forth in warranty. When ordering
new parts, make sure that you always mention the model number of the
product.
• Call us on our toll free number, 1-800-288-4545 and tell us about your
problem.
• If we instruct you to send all or part of your appliance to us for repair or
replacement, our Customer Satisfaction representative will provide a Return
Authorization number (this number noties our receiving department to
expedite your repair). Pack your unit carefully in a sturdy carton with sufcient
padding to prevent damage because any damage caused in shipping is not
covered by the warranty.
• Print your name, address and Return Authorization number on the carton.
• Write a letter explaining the problem. Include the following: your name,
address and telephone number and a copy of the original bill of sale.
• Attach the sealed envelope containing the letter inside the carton. Insure the
package for the value of the NESCO
®
appliance and ship prepaid to:
Attn: Factory Service Dept.
The Metal Ware Corporation
1700 Monroe Street
Two Rivers, WI 54241
Page 18

16
Français
Pictogrammes et Symboles de Danger
Ceci est un symbole de danger. Il est placé dans le manuel pour vous
alerter des dangers de dommages corporels ou de mort potentiels.
COMPRENDRE LES MOTS-INDICATEURS:
Les mots indicateurs identifient les informations relatives à la sécurité dans
ce manuel.
DANGER
Indique un danger imminent qui, s’il n’est pas circonscrit,
entraînera la mort ou de graves blessures corporelles.
AVERTISSEMENT
Indique un danger potentiel ou une situation dangereuse qui, s’ils
ne sont pas circonscrits, pourraient entraîner la mort, de graves
blessures corporelles ou un grave endommagement du produit.
ATTENTION
Indique un danger potentiel ou une pratique dangereuse, qui, s’ils
ne sont pas circonscrits, sont susceptibles d’entraîner de légères
blessures corporelles ou l’endommagement du produit.
AVIS
Attire l’attention sur des pratiques sans lien avec les blessures
corporelles.
Page 19

17
Français
- Ce produit est conçu exclusivement pour une utilisation domestique Lorsque vous utilisez des appareils électriques, il est essentiel de toujours respecter les mesures
de sécurité suivantes:
MESURES DE PRÉCAUTION IMPORTANTES
1. LIRE TOUTES LES INSTRUCTIONS UTILISATION AVANT.
2. Ne touchez pas les surfaces chaudes. Utilisez la poignée.
3. Pour vous protéger contre les décharges électriques et les blessures, ne pas immerger cet
appareil, le cordon, ou la prise dans l’eau ou dans un autre liquide.
4. Cet appareil n’a pas destiné à être utilisé par des personnes (y compris les enfants) ayant
un handicap physique réduite, sensorielles ou mentales, ou le manque d’expérience et de
connaissance, sauf si elles ont été encadrées pour l’utilisation de l’appareil donnée par une
personne responsable de leur sécurité.
5. Ne laissez jamais des enfants utiliser cet appareil sans surveillance.
6. Débranchez l’appareil lorsque vous ne l’utilisez pas et avant de le nettoyer. Laissez-le
refroidir complètement avant d’ajouter ou de retirer des pièces et avant le nettoyage.
7. N’utilisez jamais un appareil dont le cordon ou la prise de courant sont endommagés, ou si
l’appareil a mal fonctionné ou qu’il a été endommagé de quelque façon que ce soit. Pour
éviter tout danger, retournez l’appareil à NESCO® au département de service d’entretient
pour vérication, réparation ou ajustement.
8. L’utilisation des attachements accessoires non recommandés par le fabricant peut avoir
comme conséquence le feu, la décharge électrique ou les dommages aux personnes.
9. Ne pas utiliser à l’extérieur.
10. Ne pas laisser le cordon pendre sur le bord d’une table ou d’un comptoir ou entrer en
contact avec des surfaces chaudes.
11. Ne pas placer sur ou près d’une source de gaz chaud, d’un brûleur électrique ou dans un four chaud.
12. Ne pas utiliser cet appareil pour un autre emploi que celui qui est décrit dans le présent manuel.
13. Utilisez l’appareil uniquement lorsque toutes les pièces sont bien enclenchées et xées.
14. Il est recommandé de ne pas déplacer l’appareil lorsqu’il contient de l’huile ou tout autre
liquide chaud. S’il doit absolument être déplacé, faites preuve d’une extrême prudence.
15. Soyez extrêmement prudent Lorsque vous relâchez la pression ou tout en enlevant le
couvercle. Brûlures graves peuvent résulter d’échapper à la vapeur.
16. Lorsque l’appareil est en fonctionnement, ne jamais essayer d’enlever les dispositifs de
sécurité couvercle ou dérivation.
17. Pour réduire le risque de choc électrique, faire cuire seulement dans le pot de cuisson amovible.
18. Ne remplissez pas la cuve de cuisson au-delà de 50% capacité avec des aliments ou des
60% avec du liquide. Pour la cuisson d’aliments dont le volume augmente avec la cuisson,
ne dépassez pas la moitié de la capacité de la cuve.
19. Les aliments tels que la compote de pommes, les canneberges, l’orge perlé, les ocons
d’avoine ou autres céréales, les pois cassés, les nouilles et les pâtes ou la rhubarbe ne
doivent pas être cuits sous pression dans l’autocuiseur. Ces aliments ont tendance à
générer de la mousse et à crachoter et peuvent bloquer la soupape à otteur.
20. Une extrême prudence doit-il être utilisé appareil Lors du déplacement de récipient
contenant des aliments chauds ou liquide.
21. AVERTISSEMENT: N’utilisez jamais l’autocuiseur pour la friture. Il est dangereux et peut
provoquer un incendie, des dommages ou des blessures graves.
22. AVERTISSEMENT: Versé aliments peuvent causer des brûlures graves. Gardez l’appareil
et le cordon loin des enfants. Jamais draperie cordon sur le bord du comptoir, ne jamais
utiliser la sortie et ne jamais utiliser en dessous de comptoir Avec une rallonge.
23. Ne couvrez pas l’appareil ou le faire à proximité de matières inammables, y compris
rideaux, tentures, murs en cours d’utilisation.
24. Ne jamais couvrir la vanne de régulation en cours d’utilisation. Blessures ou des dommages
graves peuvent entraîner.
25. Lors de la cuisson d’aliments sous pression, un minimum de 2 tasses (0,5 L) de liquide doit être utilisé.
26. Ne pas soulever l’appareil par le couvercle de la poignée, utilisez les poignées latérales.
CONSERVER CES DIRECTIVES
Page 20

18
Français
Grounded che à 3 broches: Cet appareil a une broche 3 (terre) pour une
utilisation dans une prise à 3 broches (mise à la terre) pour minimiser le risque de
choc électrique. Cette applance ne doit être utilisé avec un 120V, 60 Hz prise de
terre. Le non-respect des instructions Ces pourrait provoquer un incendie, un choc
électrique, des blessures graves ou la mort.
Si la che ne rentre pas complètement dans la prise, contactez un électricien qualié
pour inspecter et réparer le problème. Ne tentez pas de modier la che en aucune
façon. Ne pas utiliser un adaptateur. Le non-respect des instructions Ces pourrait
provoquer un incendie, un choc électrique, des blessures graves ou la mort.
Directives relatives au cordon court: Un cordon d’alimentation court est fourni dans le but
de réduire le risque de s’y empêtrer ou de trébucher. Des rallonges ne doit pas être utilisé.
AVANT LA PREMIÈRE UTILISATION
1. Lisez et suivez toutes les instructions et conservez-les pour vous y reporter
ultérieurement. Ôtez tous les emballages et étiquettes.
2. Nettoyez toutes les pièces en vous reportant aux instructions de la section
«Entretien et nettoyage».
3. Essuyez la base à l’aide d’un chiffon humide et séchez soigneusement. N’utilisez jamais
de détergents abrasifs ou de tampons à récurer pour nettoyer les pièces de cet appareil.
4. POUR RÉDUIRE LE RISQUE DE CHOC ÉLECTRIQUE, NE PLONGEZ JAMAIS
LA BASE OU LE CORDON DANS L’EAU OU AUCUN AUTRE LIQUIDE.
Page 21

19
Français
Parts
1 Bouton régulateur de pression 7 Cordon d’alimentation
2 Couvercle avec verrouillage de
sécurité
8 Grille de cuisson
3 Panneau de commande 9 Cuiller de service/Tasse à mesurer
4 Réservoir de condensation 10 Joint d’étanchéité
5 Base 11 Filtre régulateur
6 Cuve de cuisson 12 Soupape ottante
8
5
12
2
3
4
1
11
9
10
6
7
Page 22

20
Français
FONCTIONS
1. Bouton régulateur de pression - Alignez les marques du bouton avec le point
du couvercle. Mettez en position « PRESSURE » pour cuire sous pression et en
position « STEAM » pour relâcher la pression de l’unité ou cuire sans pression.
2. Couvercle avec verrouillage de sécurité - Comporte un mécanisme de
sécurité qui empêche l’ouverture du couvercle tant que la pression n’est pas
redescendue à un niveau sécuritaire.
3. Panneau de commande - Les boutons commandent les fonctions de l’unité.
• KEEP WARM (MAINTIEN AU CHAUD) - Réchauffe les aliments ou les maintient
au chaud pour le service.
• STEAM (VAPEUR) - Fait rapidement bouillir l’eau pour cuire à la vapeur les
aliments comme les légumes ou le riz.
• SLOW COOK (CUISSON LENTE) - Cuit les recettes lentement (minuteur de 9
½ heures) et à basse température (180°F/82 C) pour conserver les arômes
naturels et la tendreté.
• SAUTE/BROWN (SAUTER/BRUNIR) - Pour faire sauter/brunir la viande avant de
la cuire sous pression pour de meilleurs résultats.
• TIME DELAY (DÉPART DIFFÉRÉ) - Vous permet de différer le processus de
cuisson jusqu’à 8 heures. ATTENTION : Les aliments périssables ne doivent
pas être laissés à température ambiante plus de 2 heures (1 heure si la
température est supérieure à 90 °F/82 ˚C).
• RICE (RIZ) - Fonction 1 touche pour la cuisson du riz. Réglé par défaut sur 12
minutes à haute pression.
• LOW PRESSURE (BASSE PRESSION) - Contrôle la pression de cuisson à 5 livres
au-dessus de la pression atmosphérique.
• HIGH PRESSURE (HAUTE PRESSION) - Contrôle la pression de cuisson à 10
livres au-dessus de la pression atmosphérique.
• START/STOP (MARCHE/ARRÊT) - Contrôle l’alimentation vers le tableau de
commande.
4. Réservoir de condensation - Collecte l’excès de condensation pendant le
processus de cuisson. Tirez-le vers le bas pour l’ôter et poussez-le vers le haut
pour l’enclencher.
5. Base - Ne la plongez pas dans l’eau! Contient les commandes électroniques et
l’élément chauffant.
6. Cuve de cuisson - 7 pintes (6 L), amovible, avec revêtement antiadhésif pour
un nettoyage facile et un alliage aluminium durable pour une répartition uniforme
de la chaleur.
7. Cordon d’alimentation - Amovible pour un rangement facile. Assurez-vous que
la che est correctement xée à la base.
8. Grille de cuisson - À utiliser pour la cuisson d’aliments multiples ou pour la
cuisson à la vapeur.
9. Cuiller de service/Tasse à mesurer -
Pour mélanger ou servir. Ne rayera pas la
surface de la cuve de cuisson. Pour mesurer les ingrédients ou ôter l’excès de liquide.
10. Joint d’étanchéité- Crée un joint hermétique nécessaire à la cuisson sous
pression. Amovible pour un nettoyage facile.
11. Filtre régulateur- Protège la soupape des débris de nourriture susceptibles de
la bloquer. Vériez qu’il est propre et bien en place.
12. Soupape ottante-
La soupape de sécurité s’enclenche lorsque la pression
monte dans l’autocuiseur et empêche l’ouverture du couvercle
.
Page 23

21
Français
PARAMÈTRES DE TEMPS DE FONCTION
RÉGLAGES DES FONCTIONS TEMPS PAR DÉFAUT TEMPS TOTAL
HIGH AND LOW PRESSURE 1 MINUTE 1 MIN. TO 2 HRS
RICE 10 MINS. 5 TO 30 MINS.
TIME DELAY 30 MINS. 8 HRS.
BROWN 30 MINS. 1 TO 30 MINS.
SLOW COOK 4 HRS. 30 MINS. TO 12 HRS.
STEAM 15 MINS. 1 MIN. TO 2 HRS.
KEEP WARM NONE NONE
FONCTIONNEMENT
1. Placez l’appareil sur une surface plane, stable et résistante à la chaleur.
2. Avant d’utiliser votre appareil, vériez toujours le couvercle pour vous assurer que
le joint d’étanchéité et le ltre sont propres et bien positionnés. (Reportez-vous à la
section « Entretien et nettoyage »). Assurez-vous que le joint n’est pas endommagé
ou déchiré. En cas de problème, n’utilisez pas l’autocuiseur et contactez le service à
la clientèle au 1-800-288-4545 pour obtenir une pièce de rechange
.
3. Pour ouvrir le couvercle, saisissez la poignée, tournez jusqu’à ce qu’il bute puis
soulevez-le pour l’ôter.
4. Placez les ingrédients souhaités dans la cuve de cuisson.
REMARQUE: Le volume total d’ingrédients solides et liquides ne doit pas
dépasser 60% de la capacité de la cuve de cuisson. Pour les aliments comme
les légumes secs et les haricots ou le riz et les graines, le volume total ne doit
pas dépasser 50% de la capacité. Le surremplissage est susceptible d’obstruer la
soupape de limitation de pression, pouvant entraîner un excès de pression. Utilisez
toujours au moins 2 tasses de liquide pour la cuisson à l’autocuiseur.
5. Vériez l’intérieur de la base à l’endroit où se situent la plaque chauffante et les capteurs,
pour être sûr que la zone est propre avant d’insérer la cuve de cuisson amovible.
6. Remettez le couvercle et tournez-le jusqu’à ce qu’il se verrouille.
7. Branchez l’appareil dans une prise électrique de 120 volts.
8. Sélectionnez la fonction de cuisson et le temps de cuisson souhaités puis appuyez sur
START pour démarrer. REMARQUE: L’autocuiseur commencera le compte à rebours une
fois la pression souhaitée atteinte. Il se mettra automatiquement en fonction de maintien
au chaud (KEEP WARM) à la n du temps de cuisson sauf lors de l’utilisation de la
fonction de brunissage (BROWN/SAUTE) où il s’arrêtera automatiquement.
(Suite à la page suivante)
60% 50%
Page 24

22
Français
FONCTIONS
FONCTION DE CUISSON SOUS PRESSION:
Avant chaque utilisation de l’autocuiseur, assurez-vous que le joint d’étanchéité et la
soupape de régulation de pression sont propres et qu’ils sont positionnés correctement.
1. Branchez le cordon d’alimentation dans une prise murale.
2. Placez la cuve de cuisson dans l’appareil.
3. Placez les aliments dans la cuve de cuisson en suivant la recette. REMARQUE: Sauf
indication contraire, la cuisson sous pression de la plupart des aliments nécessite
l’ajout de 2 tasses (16 oz) de liquide dans la cuve de cuisson.
4. Remettez le couvercle et tournez-le jusqu’à ce qu’il se verrouille. (La goupille de
verrouillage s’enclenchera).
5. Mettez le bouton régulateur de pression sur PRESSURE.
6. Choisissez le mode de cuisson souhaité en appuyant sur le bouton de pression
HIGH ou LOW du panneau de commande. Le voyant sur le bouton clignotera et
l’afchage numérique indiquera 1. (Cela correspond à 1 minute de cuisson.)
7. Sélectionnez le temps souhaité en appuyant une fois pour chaque minute
supplémentaire ou en maintenant le bouton enfoncé. Le temps de cuisson
maximal est de 2 heures.
8. Appuyez sur le bouton START (marche) pour démarrer la cuisson. Le voyant
indicateur cessera de clignoter.
9. L’unité commencera à décompter les minutes une fois que la pression adéquate
aura été atteinte. (La soupape ottante montera avec la pression.) Cela assure
que le couvercle est verrouillé et qu’il ne peut pas être ôté.
10. Une fois la cuisson terminée, relâchez la pression en utilisant la « méthode
naturelle » ou la « méthode de relâchement de pression rapide ».
Méthode naturelle:
AVERTISSEMENT ÉLOIGNEZ VOS MAINS ET VOTRE
VISAGE DE LA SOUPAPE DE RÉGULATION DE PRESSION, CAR LA VAPEUR
BRULANTE QUI S’ÉCHAPPE POURRAIT CAUSER DES BLESSURES.
Une fois la cuisson terminée, appuyez sur le bouton STOP et débranchez l’unité. Laissez
reposer pour permettre à la pression de descendre naturellement, ce qui prendra de 10
à 20 minutes. Après 20 minutes, à l’aide de gants anti-chaleur ou de pinces, mettez le
bouton régulateur de pression en position STEAM et relâchez la pression
.
Méthode de relâchement rapide:
AVERTISSEMENT! ÉLOIGNEZ VOS
MAINS ET VOTRE VISAGE DE LA SOUPAPE DE RÉGULATION DE PRESSION,
CAR LA VAPEUR BRULANTE QUI S’ÉCHAPPE POURRAIT CAUSER DES
BLESSURES.
Une fois la cuisson terminée, appuyez sur le bouton STOP et débranchez l’unité. À
l’aide de gants anti-chaleur ou de pinces, mettez le bouton régulateur de pression en
position STEAM et relâchez la pression.
(Suite à la page suivante)
Page 25

23
Français
AVERTISSEMENT:
• Pour prévenir les blessures causées par la vapeur, ne touchez pas au bouton
régulateur de pression pendant que l’appareil est en cours d’utilisation.
• Tenez toujours vos mains et votre visage éloignés de l’appareil. Utilisez des gants
pour ôter la cuve intérieure ou pour changer le réglage du bouton régulateur.
• Le couvercle ne peut pas être ôté lorsque l’unité est sous pression. Relâchez-
la en choisissant la méthode NATURELLE ou RAPIDE. Ôtez le couvercle en le
tournant pour le déverrouiller et soulevez-le en l’éloignant de vous pour ne pas
être brûlé par la vapeur.
REMARQUE:
• Lorsque la pression maximale est atteinte, la cuisson et le compte à rebours
démarrent. La position haute du otteur indique que vous cuisez sous pression.
Le couvercle est verrouillé et ne peut pas être ôté.
• N’essayez jamais d’ouvrir le couvercle lorsque l’appareil est en cours d’utilisation
FONCTION DE MAINTIEN AU CHAUD:
Cette fonction permet de réchauffer ou de garder au chaud les aliments venant
d’être cuits.
1. Tournez le bouton régulateur de pression sur STEAM.
2. Appuyez sur le bouton WARM. Appuyez sur le bouton START pour lancer le
programme.
3. L’autocuiseur passera automatiquement en fonction de maintien au chaud.
FONCTION SAUTER/BRUNIR:
Ce programme vous permet de brunir vos aliments avant de les faire cuire sous
pression. Faites brunir la viande ou la volaille pour une texture et un goût optimaux,
sauf indication contraire dans la recette.
Épongez les aliments à l’aide d’une serviette en papier avant de les faire brunir. Pour
des résultats optimaux, assurez-vous que l’huile soit chaude avant d’ajouter votre
viande ou votre volaille.
1. Placez la cuve de cuisson dans la base de l’autocuiseur.
2. Ajoutez la quantité d’huile précisée dans la recette. N’utilisez pas le couvercle.
3. Appuyez sur le bouton SAUTÉ/BROWN. Le voyant sur le bouton clignotera et
l’afchage indiquera « 0:30 ».
4. Appuyez sur le bouton START pour commencer à chauffer.
5. Après environ une minute de préchauffage, ajoutez les aliments et commencez
la cuisson. REMARQUE: Ne laissez pas l’autocuiseur sans surveillance pendant la
cuisson des aliments.
Page 26

24
Français
FONCTION VAPEUR:
Ce programme porte rapidement les liquides à ébullition pour la cuisson à la vapeur
ou la cuisson du riz.
1. Placez la cuve de cuisson dans l’autocuiseur.
2. Placez la grille au fond de la cuve de cuisson.
3. Ajoutez au moins 500 mL/16 oz d’eau en veillant à ce que le fond de la grille soit
au-dessus du liquide.
4. Ajoutez les aliments. Ne remplissez pas la cuve au-delà de 60% de sa capacité.
Remarque : Pour la cuisson du riz à la vapeur, mettez le riz dans un bol plus petit
et placez-le sur la grille. Voir la section « FONCTIONNEMENT ».
5. Placez le couvercle sur l’autocuiseur et tournez le bouton régulateur de pression
sur STEAM.
6. Appuyez sur le bouton STEAM. Le voyant sur le bouton clignotera et l’afchage
numérique indiquera « 0:15 ».
7. Réglez le temps souhaité en appuyant sur le bouton une fois pour chaque minute
supplémentaire ou en le maintenant enfoncé. La durée de cuisson maximale est
de 2 heures.
8. Appuyez sur le bouton START pour démarrer la cuisson.
ATTENTION
:
• En mode vapeur, il est possible d’ouvrir le couvercle pour surveiller la cuisson
des aliments. Faites preuve de prudence et ne mettez jamais le visage au-
dessus de l’autocuiseur lorsque vous ôtez le couvercle. Soulevez-le en l’inclinant
et en l’éloignant de vous. De la vapeur s’échappe dès l’ouverture et peut
entraîner des brûlures graves.
FONCTION RIZ:
1. Placez les ingrédients dans la cuve de cuisson. Ne dépassez pas de 50% de sa
capacité de remplissage. Pour la cuisson du riz, la quantité maximale est d’1
tasse et demie de riz cru et de 3 tasses de liquide.
2. Placez le couvercle sur l’autocuiseur et tournez-le pour le verrouiller. Appuyez sur
le bouton RICE. Le temps par défaut est de 10 minutes. Appuyez sur le bouton
pour modier le temps.
3. Lorsque le temps est écoulé, laissez la pression redescendre en utilisant la
méthode « naturelle », c’est-à-dire en laissant reposer pendant environ 15
minutes ou jusqu’à ce que la soupape ottante bouge librement et que le
couvercle puisse être ouvert et ôté.
FONCTION CUISSON LENTE:
1. Placez la cuve de cuisson amovible dans l’autocuiseur.
2. Placez les aliments à faire cuire lentement dans la cuve de cuisson.
3. Placez le couvercle sur l’autocuiseur et tournez-le pour le verrouiller. Mettez le
bouton régulateur de pression sur STEAM.
4. Appuyez sur le bouton SLOW COOK. Le voyant sur le bouton clignotera et
l’afchage numérique indiquera « 4:00 » (Cela correspond à 4 heures de temps
de cuisson).
5. Réglez le temps souhaité en appuyant sur le bouton une fois pour chaque
demi-heure supplémentaire ou en le maintenant enfoncé. Le temps de cuisson
maximal est de 12 heures à une température de 180 ˚F/82 ˚C.
6. Appuyez sur le bouton START pour démarrer la cuisson. Le voyant cessera de clignoter
.
7. L’unité commencera le décompte par intervalles d’une minute lorsque la
température aura atteint 180 ˚F/82 ˚C.
(Suite à la page suivante)
Page 27

25
Français
(Suite à la page suivante)
DÉMARRAGE EN DIFFÉRÉ:
Cette fonction vous permet de démarrer la cuisson des aliments jusqu’à 8 heures plus
tard par intervalle d’une demi-heure. Vous pouvez utiliser le démarrage en différé
pour la cuisson lente, la cuisson à la vapeur, les cuissons à haute et basse pressions.
ATTENTION: Les aliments périssables comme la viande et la volaille, le poisson, le
fromage et les produits laitiers ne peuvent pas rester à température ambiante plus de
2 heures. (Pas plus d’1 heure lorsque la température est supérieure à 32 ˚C.).
1. Sélectionnez le mode de cuisson et le temps souhaités.
2. Appuyez sur le bouton DELAY TIME pour le démarrage en différé. Appuyez sur
le bouton pour régler le temps du différé. Temps par défaut: 30 minutes, temps
maximal 8 heures.
3. Appuyez sur le bouton START. L’appareil démarrera la cuisson une fois le temps
de différé écoulé.
ENTRETIEN ET NETTOYAGE
Ne lavez aucune pièce de l’autocuiseur dans le lave-vaisselle. Lavez toujours
l’autocuiseur soigneusement après chaque utilisation ou s’il n’a pas été utilisé
pendant une période prolongée.
1. Débranchez le cordon d’alimentation de la base de l’appareil et de la prise
murale. Laissez l’unité refroidir avant de procéder au nettoyage.
2. Couvercle – Ôtez le couvercle et nettoyez-le ainsi que le joint d’étanchéité à l’eau
savonneuse tiède. Rincez-le et séchez-le soigneusement. Il est possible d’ôter le
joint pour le nettoyer et vérier son état.
Comment ôter et mettre le joint d’étanchéité.
1. Vériez toujours l’absence de ssure et le bon état du joint lors de son
nettoyage.
2. Placez le couvercle à l’envers, saisissez le joint entre le pouce et l’index et
tirez-le doucement pour le sortir de l’anneau métallique. Continuez jusqu’à ce
que le joint soit entièrement ôté.
3. Nettoyez le joint et vériez l’absence de ssures, griffures ou coupures.
4. Mettez le joint en place en insérant le bord à un endroit et en continuant à
l’insérer sur toute la longueur autour de l’anneau métallique situé sous le
couvercle. Veillez à ce que les bords soient réguliers.
AVERTISSEMENT: En cas d’endommagement, n’utilisez pas le joint.
Contactez notre représentant du service à la clientèle à www.NESCO.com ou
au numéro sans frais 1-800-288-4545
3. Cuve de cuisson – Lavez la cuve de caisson à l’eau savonneuse tiède. Pour assurer
la longévité de votre autocuiseur, lavez bien le dessous de la cuve amovible dans
la zone du capteur après chaque utilisation. Essuyez-la à l’aide d’un chiffon doux
humide et séchez-la soigneusement.
4. Base – Essuyez l’extérieur de la base à l’aide d’un chiffon humide. Avertissement :
Ne plongez jamais la base dans l’eau ou aucun autre liquide!
SOULEVER
POUR
ENLEVER
PRESSE POUR
INSÉRER
Page 28

26
Français
5. Réservoir de condensation – Ôtez le réservoir de condensation en le tirant vers
le bas. Lavez-le à l’eau savonneuse tiède. Rincez-le et séchez-le soigneusement.
Remettez-le en place en poussant vers le haut jusqu’à ce qu’il s’enclenche.
6. Cordon d’alimentation – Essuyez-le et vériez son bon état ainsi que celui de la
prise. Ne l’utilisez pas s’il est endommagé et contactez-nous pour obtenir une pièce
de rechange.
REMARQUE: Rangez votre autocuiseur avec le couvercle posé à l’envers sur la
cuve de cuisson. Cela évite de déformer le joint et prévient l’apparition d’odeurs
de renfermé.
Nettoyage du bouton régulateur de pression et de la soupape ottante:
Vériez le bon état de marche du bouton régulateur et de la soupape ottante avant
chaque utilisation. Le bouton tournera librement et la soupape glissera facilement si
vous la poussez du doigt. Assurez-vous que le petit joint est bien positionné autour
de la soupape ottante. Vériez la soupape ottante en suivant ces instructions.
1. Une fois l’unité refroidie, ôtez le couvercle.
2. Soulevez le bouton régulateur pour l’ôter.
3. Retournez le couvercle et placez-le sur une table. À l’aide d’une brosse, nettoyez
autour de la soupape et du ltre.
4. Remettez le bouton régulateur en place en alignant le bouton dans le creux et en
le poussant pour le verrouiller.
CONSEILS ET ASTUCES
• Pour une performance optimale lors de la cuisson sous pression, utilisez toujours
au moins 500 mL/16 oz d’eau ou de liquide dans vos recettes pour générer
sufsamment de vapeur et produire la pression.
• Lors de l’utilisation des fonctions haute et basse pressions, le minuteur ne
commencera pas le décompte avant que le niveau de pression souhaité soit
atteint.
• Lorsque vous cuisez sous pression et que vous n’êtes pas certain du temps
nécessaire, il est préférable de ne pas trop cuire et d’utiliser la méthode de
relâchement de pression rapide pour vérier l’avancement de la cuisson. Si c’est
trop juste, poursuivez la cuisson sous pression.
• Les aliments périssables tels que la viande, la volaille et les poissons ne peuvent pas
être laissés à température ambiante pendant plus de 2 heures. Par conséquent, ne
différez pas la cuisson des denrées périssables de plus de 2 heures
.
• Il est recommandé de placer l’autocuiseur sur un circuit électrique séparé.
• Les morceaux de viande plus durs et meilleur marché sont mieux adaptés à la
cuisson sous pression car celle-ci casse les bres et attendrit la viande.
• Les fruits frais doivent êtres cuits à basse pression.
• Ajoutez une cuillère de table d’huile à l’eau pour réduire la quantité de mousse
produite par les haricots.
(Suite à la page suivante)
Page 29

27
Français
DÉPANNAGE
Si vous remarquez que la soupape ottante n’est pas montée mais que le minuteur a
commencé son décompte, procédez comme suit :
1. Arrêtez l’autocuiseur en appuyant sur le bouton STOP.
2. Mettez le bouton régulateur de pression sur STEAM à l’aide d’un gant anti-
chaleur ou de pinces et relâchez la vapeur en procédant par courts jets jusqu’à
ce que la pression soit complètement retombée. Cette méthode est également
connue sous le nom de la méthode de relâchement rapide.
3. Retirez le couvercle et ajoutez environ 16 onces/500 mL de liquide. Remuez pour
disperser le liquide. Remettez le couvercle et verrouillez-le.
4. Appuyez sur la touche de fonction désirée et réglez le temps souhaité.
5. Appuyez sur le bouton START pour reprendre la cuisson.
Si de la vapeur s’échappe par le dessous du couvercle, procédez comme suit :
1. Arrêtez l’autocuiseur en appuyant sur le bouton STOP.
2. Mettez le bouton régulateur de pression sur STEAM, en procédant par courts
jets jusqu’à ce que la pression soit complètement relâchée. Cette méthode est
également connue sous le nom de la méthode de relâchement rapide.
3. Retirez le couvercle, la doublure de couvercle et le joint. Vériez qu’il n’y
a ni déchirures ni ssures. N’utilisez pas l’autocuiseur si des pièces sont
endommagées.
4. Vériez que le joint est correctement positionné.
5. Vériez que le contenu de la cuve ne dépasse pas 60% de la capacité maximale.
6. Si le couvercle ne se ferme pas hermétiquement, appelez le service à la clientèle
au 1-800-288-4545.
Page 30

28
Français
GARANTIE LIMITÉE D’UN (1) AN
Le présent appareil est garanti pendant un an suivant la date de l’achat initial
contre les défauts de matériau ou de fabrication. La présente garantie ne couvre
pas les dommages causés par le transport, l’usage abusif, les accidents ou incidents
semblables. La présente garantie vous confère des droits juridiques précis et vous
pouvez disposer d’autres droits, qui peuvent varier selon l’État ou la province. Ce
produit est conçu pour usage domestique seulement et n’est pas destiné à des ns
commerciales. La garantie ne couvre pas l’usage commercial.
Votre nouvel appareil NESCO® est équipé de nombreuses caractéristiques de
sécurité. Toute tentative d’entrave au fonctionnement de ces dispositifs de sécurité
rend la présente garantie nulle et sans effet. En cas de réception d’un appareil aux
ns de réparation ayant été traqué, nous nous réservons le droit de le remettre
dans son état d’origine et de facturer la réparation au client.
Pour une réparation en vertu de la garantie - Veuillez retourner les produits
défectueux, par courrier affranchi, avec une description du défaut à l’adresse
suivante : The Metal Ware Corporation, 1700 Monroe Street, Two Rivers, Wisconsin
54241, pour une réparation ou un remplacement sans frais à notre choix.
Veuillez inclure une preuve d’achat ou une copie de la facture originale
lors du retour d’un produit aux ns de réparation en vertu de la garantie.
Appelez le service de satisfaction du client au 1-800-288-4545 pour obtenir une
autorisation de retour avant d’expédier le produit.
• Pour une réparation en vertu de la garantie, suivez les directives indiquées dans
la garantie. Lors de la commande de nouvelles pièces, assurez-vous de toujours
mentionner le numéro de modèle du produit.
• Appelez-nous au numéro sans frais 1-800-288-4545 pour nous faire part du
problème.
• Si nous vous indiquons de nous envoyer votre appareil en tout ou en partie aux
ns de réparation ou de remplacement, notre représentant de la satisfaction du
client vous fournira un numéro d’autorisation de retour (ce numéro avise notre
service de la réception d’accélérer votre réparation). Emballez votre appareil avec
soin dans une boîte robuste avec une quantité sufsante de rembourrage, étant
donné que les dommages causés lors de l’expédition ne sont pas couverts par la
garantie.
• Inscrivez vos nom, adresse et numéro d’autorisation de retour en caractères
d’imprimerie sur la boîte.
• Rédigez une lettre expliquant le problème. Veuillez inclure les éléments suivants:
vos nom, adresse et numéro de téléphone, ainsi qu’une copie de la facture
originale.
• Mettez l’enveloppe scellée à l’intérieur de la boîte. Assurez le colis pour la valeur
de l’appareil NESCO® et envoyez-le port payé à l’adresse suivante:
Attn: Factory Service Dept.
The Metal Ware Corporation
1700 Monroe Street
Two Rivers, WI 54241
Page 31

Español
29
Símbolos y Marcas de Precaución
Este es el símbolo de alerta de seguridad. Este símbolo se encuentra en
el manual para avisarle de la posibilidad de lesiones corporales o la muerte.
ENTENDIENDO LAS PALABRAS DE ADVERTENCIA:
Las palabras de advertencia se utilizan para identificar la información de
seguridad en el texto de este manual.
PELIGRO
Indica una situación inminentemente peligrosa que, de no
evitarse, podría provocar la muerte o lesiones graves.
ADVERTENCIA
Indica un peligro o situación insegura que, si no se evita, podría
resultar en la muerte, lesiones personales graves o un daño al
producto.
PRECAUCIÓN
Indica un peligro o situación insegura que, si no se evita, podría
resultar en lesiones personales menores, o un daño al producto.
AVISO
Indica un peligro o situación insegura que, si no se evita, podría
resultar en lesiones personales menores, o un daño al producto.
Page 32

Español
30
- Este producto está diseñado para uso doméstico solamente -
Al usar productos electrodomésticos siempre se deben seguir precauciones de seguridad básicas
como las siguientes:
SALVAGUARDAS IMPORTANTES
1. LEA TODAS LAS INSTRUCCIONES ANTES DE USO.
2. No toque las supercies calientes. Use las asas o perillas.
3. Para protegerse contra un choque eléctrico y lesiones físicas, no sumerja este
electrodoméstico, incluyendo su cable y enchufe, en agua u otro líquido.
4. Este aparato no está diseñado para ser utilizado por personas (incluidos niños) con capacidades
físicas, sensoriales o mentales, o la falta de experiencia y conocimiento, a menos que sean
supervisados o instruidos acerca del uso del aparato por una persona responsable de su seguridad.
5. Supervisar de cerca cuando se usa un electrodoméstico en presencia de niños.
6. Desenchufe del toma-corriente cuando no use el aparato y antes de limpiarlo. Deje enfriar
completamente antes de colocar o sacar piezas y antes de limpiar.
7. No use los electrodomésticos cuyo cable o enchufe está dañado o si el aparato funciona
mal o si se dañó de alguna manera. Para evitar peligros, devuelva el electrodoméstico al
Departamento de servicio de fábrica de NESCO® para su revisión, reparación o ajuste.
8. El uso de los accesorios no recomendados por el fabricante puede dar lugar a fuego, a
descarga eléctrica o a lesión a las personas.
9. No usar en el exterior.
10. No permitir que el cable cuelgue de la mesa o encimera, ni que esté en contacto con
supercies calientes.
11. No colocar el aparato sobre o cerca de un quemador caliente, eléctrico o a gas, o dentro de
un horno caliente.
12. No usar el electrodoméstico para un uso que no sea para el cual se lo diseño, tal como se
describe en este manual.
13. Utilice el aparato solamente cuando todas las partes se encuentren completamente
enganchadas y aseguradas.
14. Se recomienda que el aparato no sea movido cuando contenga aceite caliente u otro líquido
caliente. Si se debe mover, use extremo cuidado.
15. Tenga mucho cuidado al dejar de presionar mientras que el oro Extracción de la tapa.
Quemaduras graves pueden resultar de vapor que se escapa.
16. Mientras la unidad está en funcionamiento, no intente retirar la tapa o las características de
seguridad de bypass.
17. Para reducir el riesgo de descarga eléctrica, cocinar sólo en la olla de cocción removible.
18. No llene la olla más de la 50% de su capacidad con alimentos o 60% con líquido. Cuando cocine
alimentos que tienden a extenderse, no llene la unidad más de la mitad.
19. Alimentos como el puré de manzana, arándanos, cebada perlada, harina de avena u otros
cereales, guisantes partidos, deos y pastas, o el ruibarbo no deben cocinarse a presión en
la olla a presión. Estos alimentos tienden a formar espuma, burbujear y desparramarse, y
podrían bloquear la válvula otante.
20. La precaución extrema deberías ser usado que contiene aparato Al mover los alimentos o
líquidos calientes.
21. ADVERTENCIA: Nunca fría en abundante aceite o fría con abundante aceite a presión en la olla
a presión. Es peligroso y mayo debido a un incendio, lesiones graves o daños.
22. ADVERTENCIA: Alimentos derramado puede causa quemaduras graves. Mantenga el aparato
y el cable alejado de los niños. Nunca cable de la pañería del borde de la encimera, nunca use
debajo de la salida encimera y nunca utilice un cable de extensión con.
23. No cubra el aparato o lo tiene cerca de material inamable, incluyendo las cortinas, las paredes
mientras está en uso.
24. Nunca cubra la válvula reguladora mientras está en uso. Lesiones graves o daños que pudieran resultar.
25. Cuando la cocción de alimentos bajo presión, se debe utilizar un mínimo de 2 tazas (0,5 litros)
de líquido.
26. No levante el aparato por la cubierta de la manija, utilice las asas laterales.
GUARDE ESTAS INSTRUCCIONES
Page 33

Español
31
Enchufe con conexión a tierra de 3 terminales: Este aparato: tiene una de
3 patas (conexión a tierra) para su uso en un tomacorriente de 3 patas (aterrado)
para minimizar la posibilidad de una descarga eléctrica. Este applance deberes sólo
se pueden utilizar con una de 120 V, 60 Hz conectados a tierra. Si no se siguen las
instrucciones tesis podría provocar un incendio, descargas eléctricas, lesiones graves
o la muerte.
Si el enchufe no encaja completamente en la toma, póngase en contacto con un
electricista calicado para inspeccionar y reparar el problema. No intente modicar
el enchufe de ninguna manera. NO utilice un adaptador. Si no se siguen las
instrucciones tesis podría provocar un incendio, descargas eléctricas, lesiones graves
o la muerte.
Instrucciones para el cable corto: Este aparato tiene un cable de suministro de
energía corto para reducir el riesgo de que se enrosque o de que alguien se tropiece
con él.
ANTES DE USAR POR PRIMERA VEZ
1. Lea y siga todas las instrucciones y conserve para futura referencia. Elimine todo
el empaque y las etiquetas.
2. Limpie todas las partes siguiendo las instrucciones en la sección de “Cuidado y Limpieza”.
3. Limpie la base con un paño húmedo y seque completamente. Nunca utilice
limpiadores abrasivos o estropajos para limpiar las partes de este aparato.
4. PARA REDUCIR EL RIESGO DE DESCARGA DE CORRIENTE NUNCA SUMERJA
LA BASE O EL CABLE EN EL AGUA O EN CUALQUIER OTRO LÍQUIDO.
Page 34

Español
32
Parts
1 Regulador de presión 7 Cable de alimentación
2 Tapa de bloqueo 8 Estante de cocina
3 Panel de control 9 Cuchara de servir / Taza de
medición
4 Copa de Condensación 10 Junta de sellado
5 Base 11 Filtro regulador
6 Ollas de cocina 12 Válvula otante
8
5
12
2
3
4
1
11
9
10
6
7
Page 35

Español
33
FUNCCIONES
1. Regulador de presión- Controla la función de cocción. Alinear los puntos de
ajuste deseado. PRESSURE para cocinar a presión alta o baja y el ajuste de arroz.
STEAM para mantener el calor, vapor y para liberar la presión de la unidad.
2. Tapa de bloqueo - Tiene una característica de seguridad que no le deja abrir la
tapa hasta que la presión haya caído a un nivel seguro.
3. Panel de control - Los botones controlan las funciones de la unidad.
• KEEP WARM - Recalienta los alimentos o los mantiene calientes para servir.
• STEAM - Hierve el agua rápidamente para cocinar al vapor alimentos como
vegetales o arroz.
• SLOW COOK - cocina las recetas lentamente (temporizador 12 horas) y a calor
bajo (180°F) para retener los sabores naturales y la ternura.
• SAUTE/BROWN - Para saltear/caramelizar la carne antes de cocinarla a presión
para obtener mejores resultados.
• TIME DELAY - Le permite demorar el proceso de cocinar por hasta 8 horas.
• RICE -
Ajuste táctil para cocinar arroz. El valor predeterminado de 10 minutos a alta
presión.
• LOW PRESSURE - Controla la presión de cocción a 5 libras por encima de la
presión atmosférica.
• HIGH PRESSURE - Controla la presión de cocción a 10 libras por encima de la
presión atmosférica.
• START /STOP - Controla la alimentación de la tarjeta de control.
4. Copa de Condensación -
Recolecta el exceso de condensación durante el proceso
de cocción. Tire hacia abajo para eliminar y empuje hacia arriba para cerrar
.
5. Base -
¡No la sumerja en agua! Contiene los controles electrónicos y el calentador
.
6. Ollas de cocina -
6 L. Extraíble, con revestimiento antiadherente para una limpieza
más fácil y aleación de aluminio resistente para un calentamiento uniforme.
7. Cable de alimentación- Desmontable para un fácil almacenamiento. Asegúrese
de que el enchufe esté bien sujeto a la base.
8. Estante de cocina - Se utiliza cuando se cocinan múltiples alimentos o el vapor.
9. Cuchara de servir / Taza de medición - Se utiliza para mover o servir. No
rayará la supercie de la olla extraíble. Se utiliza para medir los ingredientes o
para eliminar el líquido excesivo.
10. Junta de sellado - Crea un cierre hermético necesario para cocinar a presión y
es desmontable para una fácil limpieza.
11. Filtro regulador - Protege la válvula reguladora a partir de piezas más grandes
de alimentos que podrían causar el bloqueo. Compruebe que está limpio y en su
lugar.
12. Válvula otante- La válvula de seguridad se activa cuando se haya acumulado
presión en la olla y no permite quitar la tapa. Se desactivará cuando se reduzca
la presión, la tapa se puede quitar sin peligro.
(Continúa en la siguiente página)
Page 36

Español
34
FUNCIÓN DE CONFIGURACIÓN DE LA HORA
FUNCIÓN DE CONFIGURACIÓN TIEMPO PREDETERMINADO TIEMPO TOTAL
HIGH AND LOW PRESSURE 01 MINUTE 01 MIN. TO 2 HRS
RICE 10 MINS. 5 TO 30 MINS.
TIME DELAY 30 MINS. 8 HRS.
SAUTÉ/BROWN 30 MINS. 1 TO 30 MINS.
SLOW COOK 4 HRS. 30 MINS. TO 12 HRS.
STEAM 15 MINS. 01 MIN. TO 2 HRS.
KEEP WARM NONE NONE
OPERACIÓN
1. Coloque el aparato en una supercie plana, estable y resistente al calor.
2. Antes de usar su aparato, siempre asegúrese que la junta no esté dañada o rota.
Si está dañado, no utilice la olla a presión y en contacto con el servicio al cliente
1-800-288-4545 para el reemplazo.
3. Para abrir la tapa, gire hacia hasta que se detenga, luego levante y quite.
4. Coloque los alimentos deseados en la olla de cocción.
NOTA: El volumen total de alimentos y líquidos no debe exceder el 60% de
la capacidad de la olla. Para los alimentos tales como las hortalizas y los frijoles
secos, o el arroz y los granos, el volumen total no debe exceder la capacidad del
50%. El llenado excesivo puede obstruir la válvula de límite de presión, lo que
puede provocar que se produzca un exceso de presión. Utilice siempre al menos 2
tazas de líquido cuando se cocinan a presión.
5. Mire dentro de la base donde se encuentra el plato de calentamiento y el sensor
para asegurarse de que esta área esté limpia antes de insertar la olla de cocció.
6. Vuelva a colocar la tapa y gire hacia la izquierda hasta que se trabe en la posición.
7. Insertar el enchufe en una toma de corriente de 120 voltios.
8. Presione la función de cocción deseada y luego, presione START para comenzar.
NOTA: La olla comenzará con el temporizador en cuenta regresiva cuando se
haya alcanzado el valor de presión deseado. La olla automáticamente cambiará
a la función de KEEP WARM después que la función haya nalizado, excepto
cuando se utiliza la función
BROWN/SAUTE
, que automáticamente la apagará.
FUNCIONAMIENTO
AJUSTE DE LA PRESIÓN DE COCCIÓN:
Antes de usar la olla a presión cada vez, verique que la junta de goma y la válvula
reguladora de presión estén limpias y posicionadas adecuadamente.
1. Enchufe el cable en la toma de corriente de la pared.
2. Posicione la olla de presión removible en el aparato.
3. Coloque los alimentos en la olla de cocción de acuerdo con la receta o el gráco.
NOTA: Cuando se cocinan la mayoría de los alimentos a presión, (500mL) de
líquido debe agregarse.
(Continúa en la siguiente página)
60% 50%
Page 37

Español
35
4. Coloque la tapa en la olla a presión y gire en sentido contrario a las agujas del
reloj hasta que se cierre en su lugar. (La traba de cierre hará clic al colocarse en
posición).
5. Gire el mando regulador de presión hacia PRESSURE.
6. Escoja el modo de cocción deseado al presionar el botón de presión ALTA o
BAJA en el panel de control. La luz en el botón parpadeará y la pantalla digital
mostrará 1. (Esto es igual a 1 minuto de tiempo de cocción).
7. Establezca el tiempo deseado al presionar el botón una vez por cada minuto
adicional o apretando el botón hacia debajo de forma continua. El tiempo más
prolongado de cocción es 2 horas.
8. Presionar el botón de START para comenzar a cocinar. La luz de indicación dejará
de parpadear.
9. La unidad comenzará con la cuenta regresiva en minutos, después de que la
presión adecuada se haya alcanzado. (La válvula otante se elevará cuando la
presión se está acumulando.) La olla a presión emitirá tres pitidos al nalizar el
tiempo de cocción.
10. Cuando termine de cocinar, permitir que la presión para liberar mediante el
“método natural” o “método de liberación rápida ‘(véase más adelante).
Método Natural:
PRECAUCIÓN! MANTENGA LAS MANOS Y LA CARA ALEJADAS DEL VAPOR
QUE SE ESCAPA YA QUE ESTÁ EXTREMADAMENTE CALIENTE Y PUEDE
OCASIONAR LESIONES.
Después de cocinar, presione el botón ‘STOP’ para asegurar que la unidad esté
completamente apagada. Deje reposar el aparato y permita que baje la presión de
forma natural, lo cual tarda entre 10 y 20 minutos. Después de 20 minutos, gire la
perilla reguladora de presión hacia ´STEAM´ para asegurar que toda la presión se
haya liberado.
Método de Liberación Rápida:
PRECAUCIÓN! MANTENGA LAS MANOS Y LA CARA ALEJADAS DEL VAPOR
QUE SE ESCAPA YA QUE ESTÁ EXTREMADAMENTE CALIENTE Y PUEDE
OCASIONAR LESIONES.
Después de cocinar, presione el botón ‘STOP’ para asegurar que la unidad esté
completamente apagada. Gire la perilla reguladora de presión hacia ‘STEAM’
(liberar) y permita que se libere la presión.
ADVERTENCIA
:
• No toque la perilla del regulador de presión mientras esté en uso para evitar
quemaduras por el vapor.
• Mantenga las manos y la cara en todo momento. Utilice guantes para horno
cuando retire la olla o haga ajustes en la perilla del regulador.
• La tapa no se puede quitar bajo presión. Eliminar la presión mediante
los métodos NATURAL o QUICK RELEASE. Retire la tapa girándola para
desbloquearla y levantarla lejos de usted para evitar ser quemada por el vapor.
NOTA:
• Cuando se alcanza la presión máxima, la cocción comenzará y el temporizador
comenzará a contar hacia abajo. El otador elevado indica que usted está
cocinando bajo presión. La tapa es de doble bloqueo y no se puede abrir
mientras está bajo presión.
Page 38

Español
36
AJUSTE MANTENER CALIENTE:
Esta función se puede utilizar para mantener los alimentos cocinados recientemente
caliente o para recalentar.
1. Gire el mando regulador de presión de vapor.
2. Pulse el botón KEEP WARM. Presione el botón START para iniciar el programa.
3. La olla cambiará automáticamente a la función KEEP WARM después de la
cocción al usar cualquier ajuste del programa, excepto SAUTÉ / BROWN.
AJUSTE SALTEAR/DORAR:
Este programa le permitirá dorar sus alimentos antes de cocinarlos a presión. Carne
dorada o aves para un mejor sabor y textura, a menos que se indique lo contrario
en la receta. La comida debe secarse con una toalla de papel antes de dorar. Para
mejores resultados, asegúrese que el aceite esté caliente antes de agregar su carne
o aves. Dorar en lotes para mantener la temperatura correcta.
1. Posicionar la olla de cocción extraíble en la olla a presión.
2. Agregar la cantidad adecuada de aceite según la receta.
3. Presionar el botón SAUTÉ/BROWN. La luz del botón parpadeará y en la pantalla
digital se leerá “0:30”. La tapa debe permanecer fuera.
4. Presione el botón de START. La luz indicadora dejará de parpadear.
5. Después de un minuto de precalentamiento, agregue los alimentos y comience a dorar.
6. NOTA: No deje la olla de presión desatendida mientras dora los alimentos.
AJUSTE DE VAPOR:
Este programa permite que el líquido de cocción rápidamente hierva para cocinar al
vapor los alimentos o cocinar arroz.
1. Posicione la olla de cocción extraíble en la olla a presión.
2. Coloque una rejilla o canasta pequeña, resistente al calor al fondo de la olla de
cocción extraíble.) en el fondo de la olla de cocción extraíble.
3. Agregar al menos 500mL. De agua para que el fondo de la rejilla esté por encima
del líquido.
4. Añadir los alimentos. No llene la olla más de 60%. Nota: Si está cociendo al
vapor el arroz, coloque el arroz en un tazón pequeño y colóquelo sobre la rejilla.
5. Coloque la tapa en la olla a presión y girar el mando regulador de presión en STEAM.
6. Presione el botón de STEAM. La luz en el botón parpadeará y en la pantalla
digital se leerá 0:15.
7. Establezca el tiempo deseado al presionar el botón una vez por cada minuto
adicional o presionando de forma continua el botón hacia abajo. El tiempo de
cocción más prolongado es 2 horas.
8. Presione el botón START para comenzar a cocinar.
PRECAUCIÓN
:
• La tapa se puede abrir mientras se cocina para comprobar la comida durante el
modo de cocción al STEAM. Tenga precaución y nunca coloque la cara sobre la olla
a presión al quitar la tapa. con inclinación hacia afuera cuando se levanta. El vapor
se escapa tan pronto como la tapa se abre y puede causar quemaduras graves.
Page 39

Español
37
AJUSTE DE ARROZ:
1. Coloque los ingredientes en la olla de cocción removible. No llene la olla más de
50% lleno. A cuantía máxima de arroz es de 1-1/2 tazas de arroz crudo blanco y
3 vasos de líquidos.
2. Coloque la tapa sobre la olla a presión y pulse el botón RICE. El tiempo
predeterminado es de 10 minutos, pulse el botón para ajustar el tiempo.
3. Cuando se acaba el tiempo, permitir que la presión para liberar mediante el
método “natural”, que signica dejar que repose durante unos 15 minutos o
hasta que se suelte el perno de seguridad y la tapa se pueden abrir y eliminados.
AJUSTE DE COCCIÓN LENTA:
1. Coloque la olla de presión extraíble en la olla de presión.
2. Coloque los alimentos a cocinar lentamente en la olla de cocción.
3. Coloque la tapa autobloqueante en la olla de cocción extraíble y gire el mando
regulador de presión a STEAM.
4. Presione el botón de SLOW COOK. La luz del botón parpadeará y en la pantalla
digital se leerá “4:00” (Esto equivale a 4 hora de tiempo de cocción).
5. Establezca el tiempo de cocción deseado al presionar el botón una vez por cada
media hora adicional o presionando de forma continua el botón hacia abajo. El
tiempo de cocción más prolongado es de 12 horas y temperatura de 82C.
6. Presione el botón START para comenzar a cocinar. La luz indicadora dejará de
parpadear.
7. La unidad comenzará con la cuenta regresiva en incrementos uno de minute,
cuando la temperatura alcance cerca de los 82C.
AJUSTE DE TIEMPO DE DEMORA:
Esta función le permite comenzar a cocinar la comida hasta 8 horas después en
incrementos de media hora. Usted puede utilizar el tiempo de demora con cocción
lenta, vapor, presión alta o baja. PRECAUCIÓN: Los alimentos perecederos tales
como los productos de carnes y aves, pescado, queso y productos lácteos no
pueden dejarse a temperatura ambiente por más de dos horas (No más de una hora
cuando la temperatura ambiente está por encima de los 32 C.) Cuando se cocinan
estos alimentos, no ajuste la función de tiempo de demora por más de 1-2 horas.
1. Seleccione el modo de cocción deseado y el tiempo al presionar el botón de
demora hasta que alcance el tiempo adecuado.
2. Presione el botón de DELAY TIME para ajustar el tiempo de demora. El tiempo
predeterminado: 30 minutos, el tiempo máximo de 8 horas.
3. Presione el botón START. El aparato comenzará a cocinar después de que haya
transcurrido el tiempo establecido. NOTA: No utilice la función de tiempo de
demora cuando cocine alimentos que podrían echarse a perder si se los deja
afuera, a temperatura ambiente.
Page 40

Español
38
CUIDADO Y LIMPIEZA
No lave cualquier parte de la olla a presión en el lavaplatos. Siempre lave la
olla a presión completa luego de cada uso o si no ha sido usada por un largo período
de tiempo. Si es necesario, desenchufe y deje enfriar la unidad antes de limpiar.
1. Retire el cable de alimentación de la base de la cocina y toma corriente eléctrica.
Deje que la unidad se enfríe antes de limpiarla.
2. Tapa - Retire la tapa y límpiela, conjuntamente con la junta de sellado, con agua
jabonosa caliente. Enjuague y seque completamente. El sello puede retirarse
para su limpieza e inspección.
Cómo quitar y montar la junta de sellado.
1. Compruebe siempre buscando en la junta grietas o daños durante la limpieza.
2. Girar la tapa boca abajo y la junta de agarre con los dedos pulgar e índice y
tire suavemente para quitar del anillo de metal. Continúe hasta que la junta
este totalmente retirada del anillo de metal.
3. Limpiar e inspeccionar la junta para detectar posibles grietas, arañazos o roturas.
4. Instale la junta iniciando en una sección y alimentar al borde de la junta
alrededor del anillo de metal situada debajo de la tapa. Repita este
procedimiento hasta que la junta está totalmente enrollada alrededor del
anillo de metal incluso con bordes.
ADVERTENCIA:
No utilice la junta en caso de daños. Póngase en contacto con nuestro
representante de atención al cliente. www.NESCO.com o gratis al 1-800-288-4545
3. Olla de cocción - Lavar la olla de cocción removible con agua tibia y jabón. Para
mantener un buen rendimiento de la olla a presión, el fondo de la olla de cocción
removible, en la zona de la almohadilla de detección, debe limpiarse después de cada
uso. Limpie con un paño suave y húmedo y asegúrese de secar completamente
.
4. Base - Limpie la carcasa exterior de la base con un paño limpio y húmedo.
Advertencia: ¡No sumerja la base en agua o cualquier otro líquido!
5. La condensación de la copa - Quitar la copa de condensación tirando hacia
abajo fuera de la base. Limpiar con agua tibia y jabón. Enjuague y seque
completamente. Vuelva a colocar empujando hacia arriba hasta que encaje.
6. Cable de alimentación - Limpiar e inspeccionar si el cable y el enchufe están
dañados. No utilice si está dañado y póngase en contacto con nosotros para el
reemplazo. NOTA: Guarde la olla a presión con la tapa descansando boca abajo
sobre la olla. Esto permite mantener la forma de la junta y la formación de los
olores rancios.
Limpieza de la Perilla Reguladora de Presión
Verique que la presión de la perilla reguladora de presión y las válvulas de
seguridad de la presión estén en buen funcionamiento antes de cada uso.
1. Después de que la unidad se haya enfriado, retire la tapa.
2. Levante la perilla del regulador de eliminar.
3. Gire la tapa y coloque sobre una mesa. Extraiga el forro tapa. Use un cepillo,
limpia alrededor de la válvula. Vuelva a colocar la tapa de revestimiento
4. Vuelva a colocar el mando del regulador mediante la alineación de la rueda en el
agujero y empujar para bloquear.
LEVANTE
PARA QUITAR
PRESIONE
PARA INSERTAR
Page 41

Español
39
CONSEJOS PRÁCTICOS
• Para asegurar el mejor rendimiento de cocción bajo presión, siempre utilice al
menos (500mL) de agua o líquido en sus recetas para permitir una cantidad
suciente de vapor para producir presión.
• Cuando usa los ajustes de presión alta y baja, el temporizador no debe comenzar
con la cuenta regresiva hasta que haya suciente presión.
• Cuando cocina a presión, si no está seguro del tiempo de cocción, es mejor
cocinar menos y utilizar el método de liberación rápida y vericar la cocción. Si
no está cocido, siga cocinando a presión.
• Los alimentos perecederos, como la carne, las aves de corral y peces no pueden
dejarse a temperatura ambiente por más de 2 horas. Al cocinar los alimentos
tesis no se establece el temporizador de retardo de largo de 2 horas.
• Si un circuito eléctrico está sobrecargado con otros aparatos, su aparato no
funcionará. La olla a presión debe operarse en un circuito eléctrico separado.
• Los cortes de carnes más duras, menos costosas son mejores para la olla de
presión porque la cocción a presión rompe las bras para obtener resultados más
tiernos.
• Las frutas frescas deben cocinarse a baja presión.
• Agregue una cucharada de aceite al agua para reducir la cantidad de espuma
que las arvejas producen.
PROBLEMAS
• Si no ha añadido suciente líquido y ha notado que la válvula otante no se
ha levantado, pero el temporizador está contando regresivamente, realice
los siguientes pasos:
1. Detener la olla a presión presionando el botón STOP.
2. Gire el mando regulador de presión a vapor, utilizando ráfagas cortas, hasta que
la presión esté completamente liberado, también conocido como el método de
liberación rápida.
3. Retire la tapa y añadir aproximadamente 16 oz de líquido. Revolver la comida
para dispersar líquido. Vuelva a colocar la tapa y bloquee en su posición.
4. Presione botón de función deseada y ajustar la hora deseada.
5. Pulse el botón START para comenzar a cocinar de nuevo.
• Si la espuma se está ltrando por debajo de la cobertura debido a que la
misma no está adecuadamente cerrada, siga estos pasos
:
1. Detener la olla a presión presionando el botón STOP.
2. Gire el mando regulador de presión a STEAM, utilizando ráfagas cortas, hasta que la
presión esté completamente liberado, también conocido como el método de liberación
rápida.
3. Retire la cubierta, revestimiento de tapa y la junta. Compruebe si hay grietas o roturas.
Nunca utilizar la olla si hay piezas dañadas.
4. Compruebe que la junta está colocada correctamente en el forro de la tapa y montado a
la tapa.
5. Compruebe el contenido de la olla no exceda 60% lleno.
6. Si la cubierta todavía no sellará, llame al servicio al cliente al 1-800-288-4545
Page 42

Español
40
UN AÑO DE GARANTÍA LIMITADA
Este aparato está garantizado para un año de la fecha de compra original contra
defectos de material y fabricación. Esta garantía no cubre daños transporte,
mal uso, accidente o incidente similar. Esta garantía le da derechos legales
especícos y es posible que tenga otros derechos que varían de estado a estado.
Este producto está destinado exclusivamente a un uso doméstico, no para uso
comercial. Garantía no cubre uso comercial.
Su nuevo NESCO® aparato viene equipada con numerosas características
de seguridad. Cualquier intento de interferir con el funcionamiento de estas
características de seguridad hace que esta garantía nula y sin valor. En el caso
que recibimos un aparato para el servicio que se ha alterado, nos reservamos el
derecho a restaurarlo a su estado original y de cargos para la reparación..
Para servicio en garantía - productos defectuosos pueden ser devueltos, portes
pagados, con una descripción del defecto a: The Metal Ware Corporation, 1700
Monroe Street, Two Rivers, Wisconsin 54241, En caso de no cobrar reparación o
sustitución en nuestra opción.
Debe incluir el comprobante de compra o copia del original del
proyecto de ley de venta cuando devuelva el producto por un servicio
de garantía.
Satisfacción del Cliente Por favor llame al 1-800-288-4545 para obtener una
Autorización de Devolución antes de su envío.
• Para el servicio durante el período de garantía, siga las instrucciones
establecidas durante el período de garantía. Al ordenar piezas nuevas,
asegúrese de que usted siempre menciona el número de modelo del producto.
• Llame a nuestro número gratuito, 1-800-288-4545 y cuéntenos acerca de su
problema.
• Si queremos darle instrucciones para enviar a todos o parte de su aparato a
nosotros para la reparación o reemplazo de Satisfacción del Cliente, nuestro
representante le proporcionará un número de Autorización de Devolución
(este número notica a nuestro departamento receptor para acelerar la
reparación). Service Pack su unidad cuidadosamente en una caja de cartón
resistente con suciente margen para evitar daños porque los daños causados
en el envío no está cubierto por la garantía.
• Imprimir su nombre, dirección y número de Autorización de Devolución de los
envases de cartón.
• Escribir una carta explicando el problema. Incluyen los siguientes: su nombre,
dirección y número de teléfono y una copia de la factura original de venta.
Adjuntar el sobre sellado con la carta dentro de la caja
• Asegurar el paquete para el valor de la NESCO® aparato y buque de prepago:
Atención: Repare el departamento
The Metal Ware Corporation
1700 Monroe Street
Two Rivers, WI 54241, USA
Page 43

Page 44

Part No. 67938 ©2016 The Metal Ware Corporation
All Rights reserved, including the right of reproduction in whole or part
1 - 800 - 288 - 4545
 Loading...