

Nektar Panorama P1, Panorama P4, Panorama P6 User Manual
www.nektartech.com
www.nektartech.com Using Panorama with Logic
Logic Integration Setup and Configuration
Panorama Logic Integration is compatible with Logic 9 and Logic X. These instructions assume you have one of these
programs installed and running on OS X 10.6 or later.
Installation
There are two components required for Panorama and Logic integration.
- Installation of firmware and drivers for Panorama, allowing it to communicate with OSX.
- Installation of Logic integration files.
Follow these steps to get Logic up and running with your Panorama:
Panorama Driver and Firmware Installer
Installing the Panorama driver and updating Panorama’s firmware, is required to get Panorama up and running with
Logic. If you have previously completed this part, jump straight to the installation of the Apple Logic files.
1. Run the Panorama_Px_OSX_1.2.3.5.dmg installer (part of the zip file you downloaded with this guide. Version
number may be higher) and follow the onscreen instructions until complete. This installs the Panorama driver and
firmware updater.
2. Update your Panorama’s firmware as described here
Note: Avoid running the Panorama driver installer multiple times without uninstalling first.
Install Panorama Integration for Apple Logic
With the Panorama Integrated Installer complete, here are the steps required to get your Panorama successfully up and
running with Logic:
1. Locate “Panorama_Apple_Support” installer in the zip file you downloaded and run it.
2. If the installer displays a “can’t be opened because it’s from an un-identified developer” dialog, right-click on the
Installer and select 'Open'. You will see the same warning but you will be given the option to continue anyway.
3. With installation complete, make sure your Panorama is connected to your
computer and switched on.
4. Launch Logic.
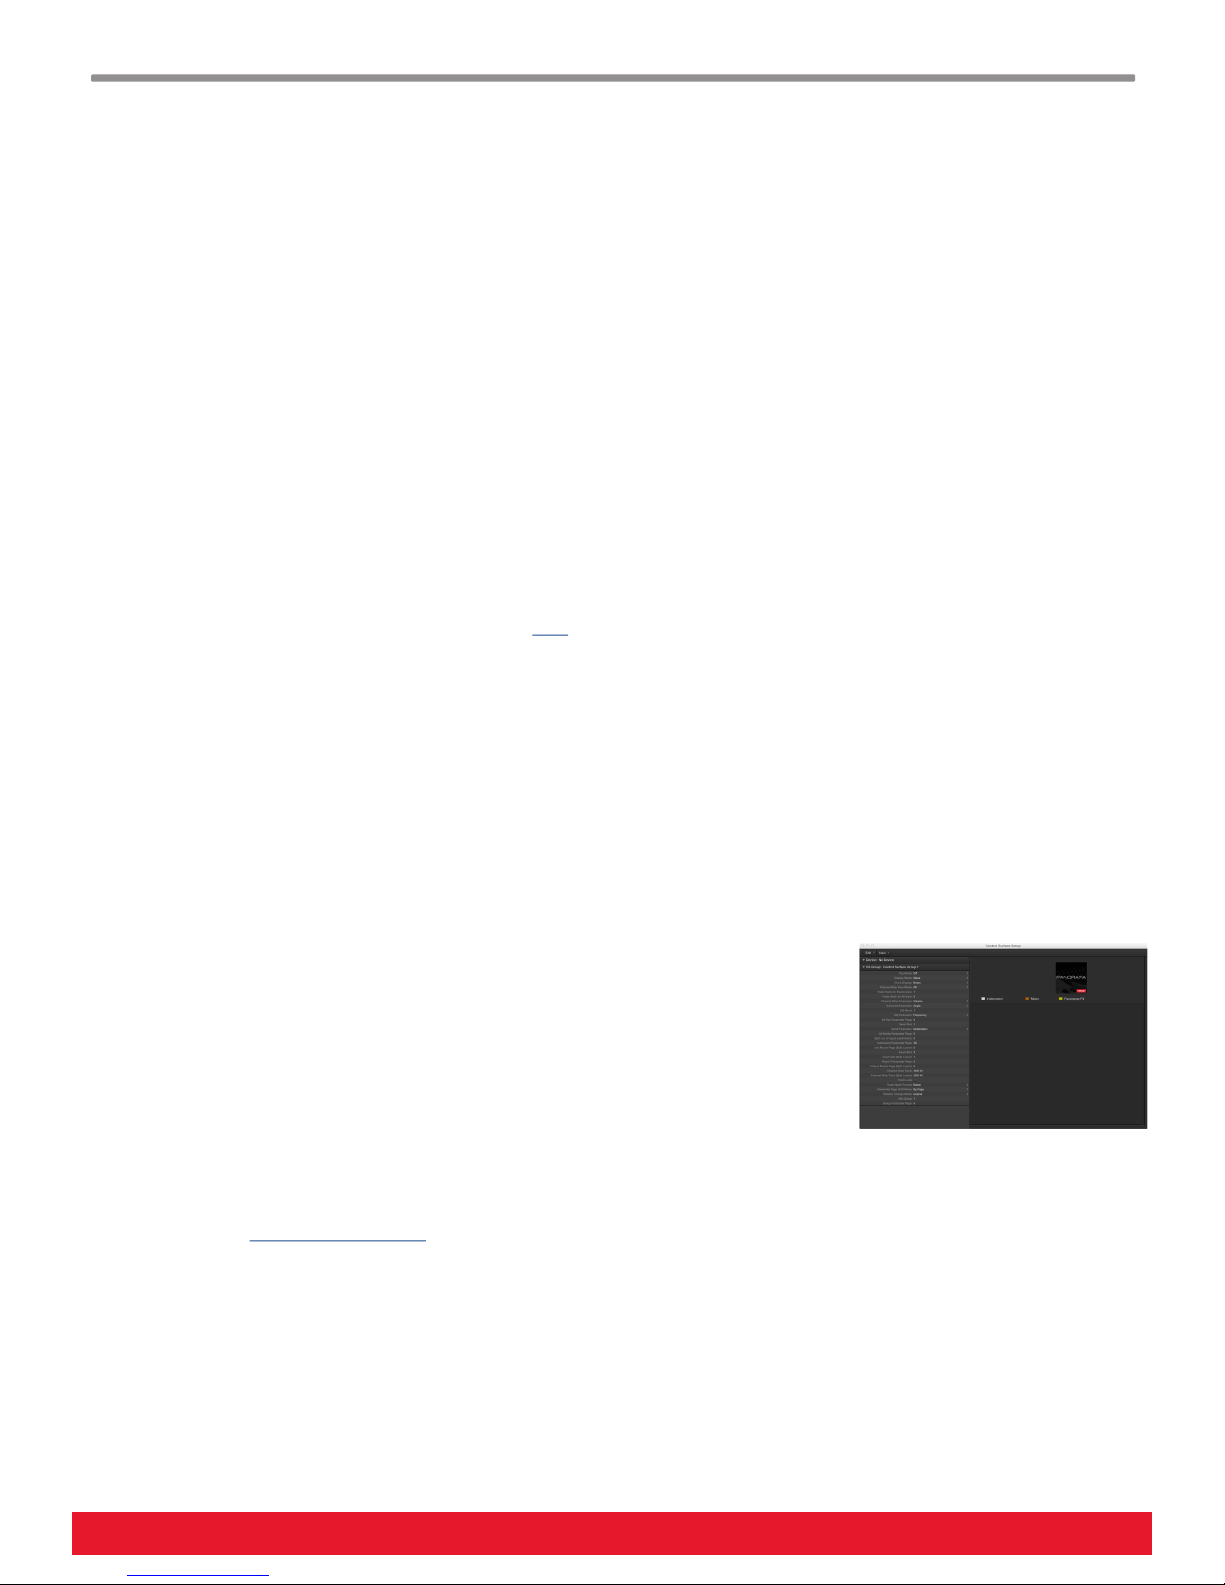
5. The first time you run Logic you will see a control surface page as per the image on the
right. Close this window.
6. Navigate to Logic Pro/Control Surfaces and select “Rebuild Defaults”
That’s it! Setup is now complete and you can move on to the fun part, learning how it all
works.
Troubleshooting: If Panorama Logic integration is not working after following the above steps,
please check the trouble shooting page.
The suggestions on this page solves 95% of issues related to Logic setup.
2 Using Panorama with Logic www.nektartech.com

Navigation & Transport
This section, and following sections, discuss the ways Logic and Panorama work together to enhance your workflow. Our aim
is to provide a fundamental understanding of how Panorama interfaces with Logic. From time to time, you may need to
consult the Logic documentation for additional information.
Let’s start by taking a look at the main panel buttons and then go deeper into the Panorama menus from there.
Navigation
The six buttons pictured above navigate important parts of Logic. These functions are available at any time, regardless of the
active Panorama mode.
Shift: Hold to activate secondary operating functions for other buttons.
Track - / +: Select the next or previous track in Logic’s sequencer. This is the same as using the arrow up/down
keys on your computer keyboard .
Patch - / +: Select the previous or next mixer channel preset in the Logic Library browser window, when in focus. If a
plugin is in focus, these buttons select the previous or next plugin patch.
View: Toggle the Logic Mixer window open/close. [Shift]+[View] close/open the plugin window in focus.
Bank < >: Moves the current selection of eight mixer channels in Mixer mode so the fader group assignments are
changed from channels 1-8 to channels 9-16, for example. Hold [Shift] and press one of the [Track -/+]
buttons to view an adjacent bank of channels.
Zoom < >: Control Logic horizontal zoom. Hold [Shift] and press one of the [Patch -/+] buttons to adjust the
horizontal zoom level.
Transport Buttons
The transport buttons activate or deactivate important transport functions as listed in the table. They also provide further
options when combined with the Panorama Transport mode. These buttons can be used at any time, regardless of the active
Panorama mode.
The transport buttons can also operate in an alternative "Function Keys" mode, accessed with the [F-Keys] button.
Key Combination Description
[F-Keys] Press and hold this button to use the transport buttons as F-keys. F-keys can be used
[ ] Goto the Left locator
[ ] Goto the Right locator
[Shift]+[ ] Set Left locator to the current song position
[Shift]+[ ] Set Right locator to the current song position
[Undo] Same as Undo in Logic
[Click] Switch the metronome/click on or off
[Mode] Toggle Record Arm on/off for the selected track
[Shift]+[Mode] Toggle automation options “Read” and “Latch”
[Cycle] Switch the loop/cycle between the Left and Right locators on/off
[Rewind] Rewind in steps of 1 bar. Press and hold for fast rewind
[Forward] Forward in steps of 1 bar. Press and hold for fast forward
[Stop] Stop playback. Press twice to goto zero
[Play] Activate play
[Record] Activate record
to trigger QWERTY macro’s. Macro’s can be used to create tracks or open windows
www.nektartech.com Using Panorama with Logic 3
Modes and Display
The Mode Buttons
These buttons switch Panorama between different Logic control operating modes. Each mode re-maps the Panorama
encoders, faders, buttons, and pads to perform different operations in Logic. The display updates to reflect the parameters
and assignments of the active mode.
Mixer: Assigns all controls to Logic Mixer parameters and provides access to control menus.
Instrument : Assigns all controls to Instrument plugins. Only active if an instrument plugin is present.
Transport : Assigns all controls to transport functions.
Internal: Uses Panorama internal MIDI controller functions enabling you to switch between Panorama Logic
control protocol and use Panorama as a traditional MIDI controller.
What the Display Tells You
The top line of the display is the current parameter line, showing you the name and value of the parameter you are currently
controlling.
The display Info-Bar is the top Red/Gray/Red area and it provides the following status information:
Mixer & Transport:
Instrument:
Below the Info-Bar, the display indicates the status of current assignments, which varies depending on what menu you have
selected.
TRACK NAME MIXER CH NUMBER PRIMARY PLUGIN
TRACK NAME MIXER CH NUMBER CURRENT MENU
Display Buttons
The five display buttons are used to navigate menus, activate functions and control parameters. A display label above each
button, indicates what it controls.
In Mixer mode for example, the display button labels are [EQ], [Inserts], [Sends], [Smart] and [Instrument] on a gray
background. This indicate that none of them are active. Press the [Smart] button and the Smart menu will open. Press
[Mixer] to navigate back to the Mixer home page. This time the “Smart” label is red indicating the [Smart] menu is still active
and parameters can still be tweaked using the 2x4 encoders.
Pressing the [EQ], [Inserts], [Sends] or [Instrument] button will change the assignments of the 2x4 encoders as well as show
you what each of the controls are now assigned to. We will go through all of this in more detail on the following pages.
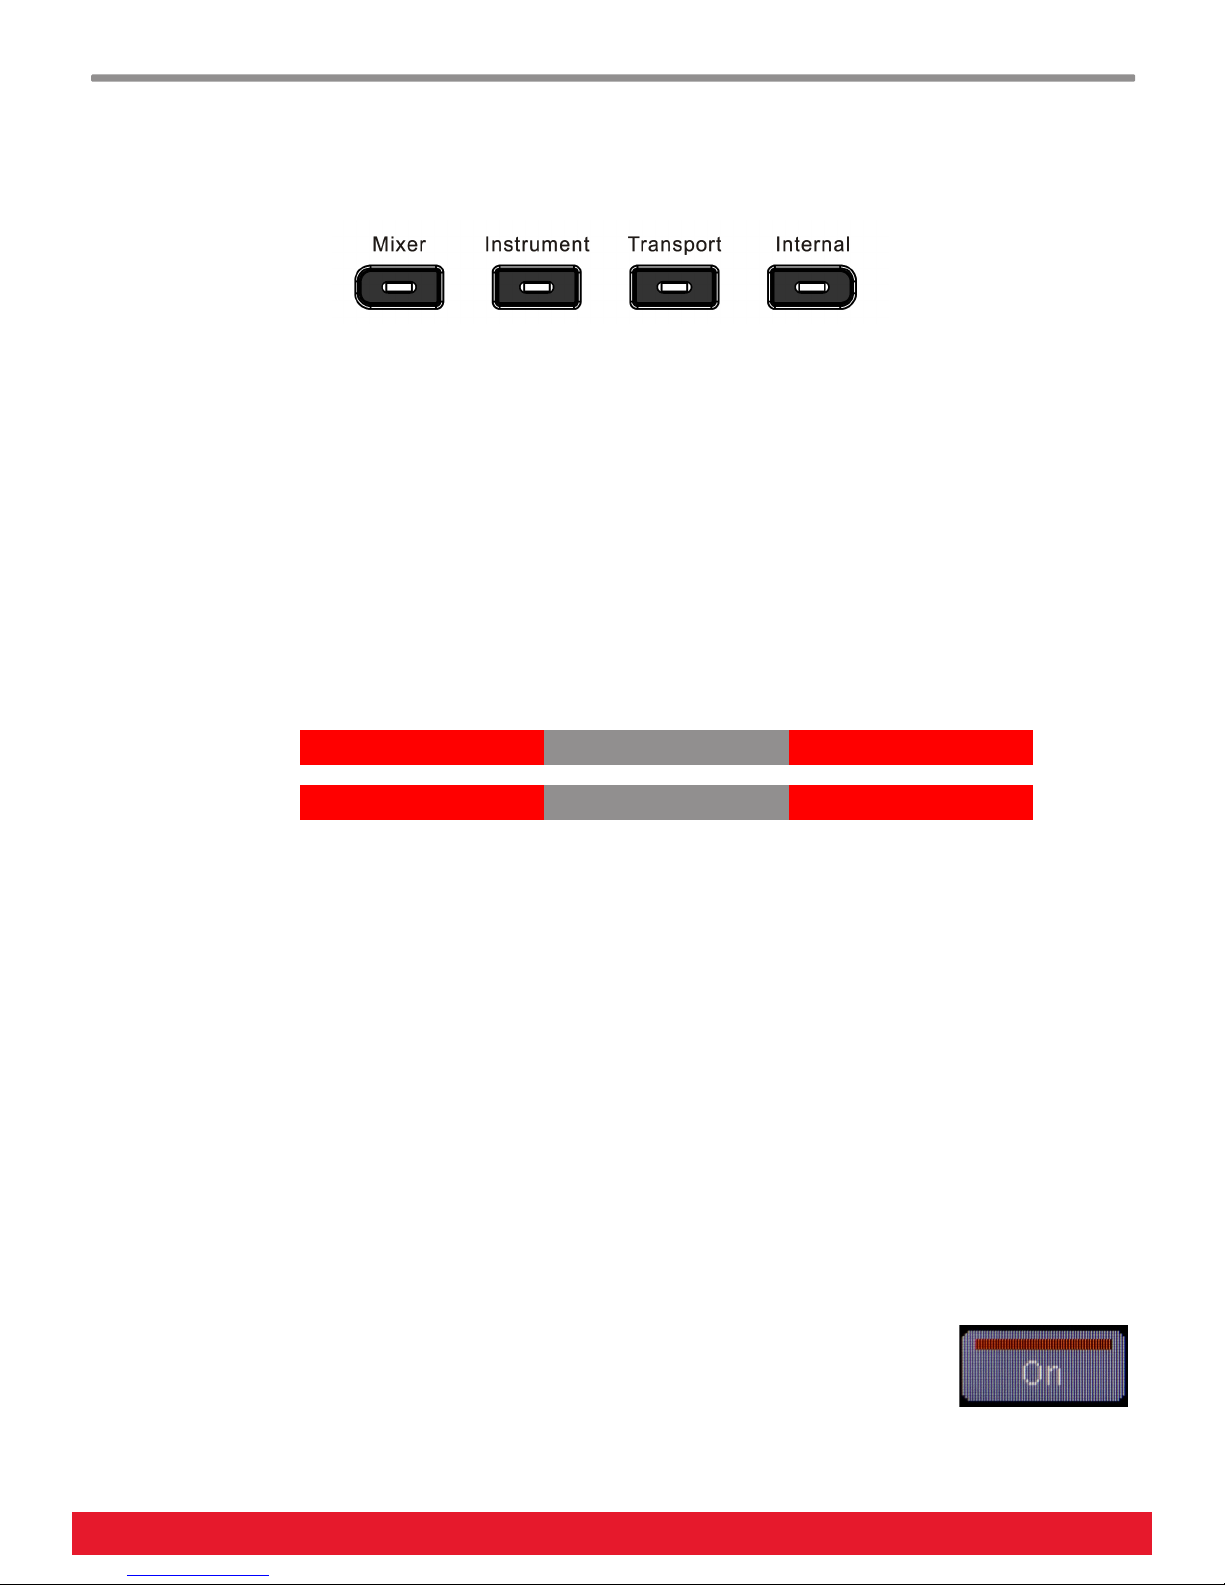
If a button is used to control a parameter (instead of a function a menu), you will see a line above that’s either white or red
to indicate the current status of the button. The image on the right shows you an example where a
parameters status is “On”.
To exit any page, press a Mode button and navigate to whatever page you would like to edit next.
4 Using Panorama with Logic www.nektartech.com
Logic Mixer Control
This section is designed as a tutorial that introduces you to the way Panorama and Logic interact. We encourage you to follow
the tutorial the first time through to get a feel for the way things work. Once you have a handle on the workflow options that
Panorama provides, you may want to consider setting up a default project template that is optimized for your use of Logic
with Panorama.
Mixer Mode Home Page
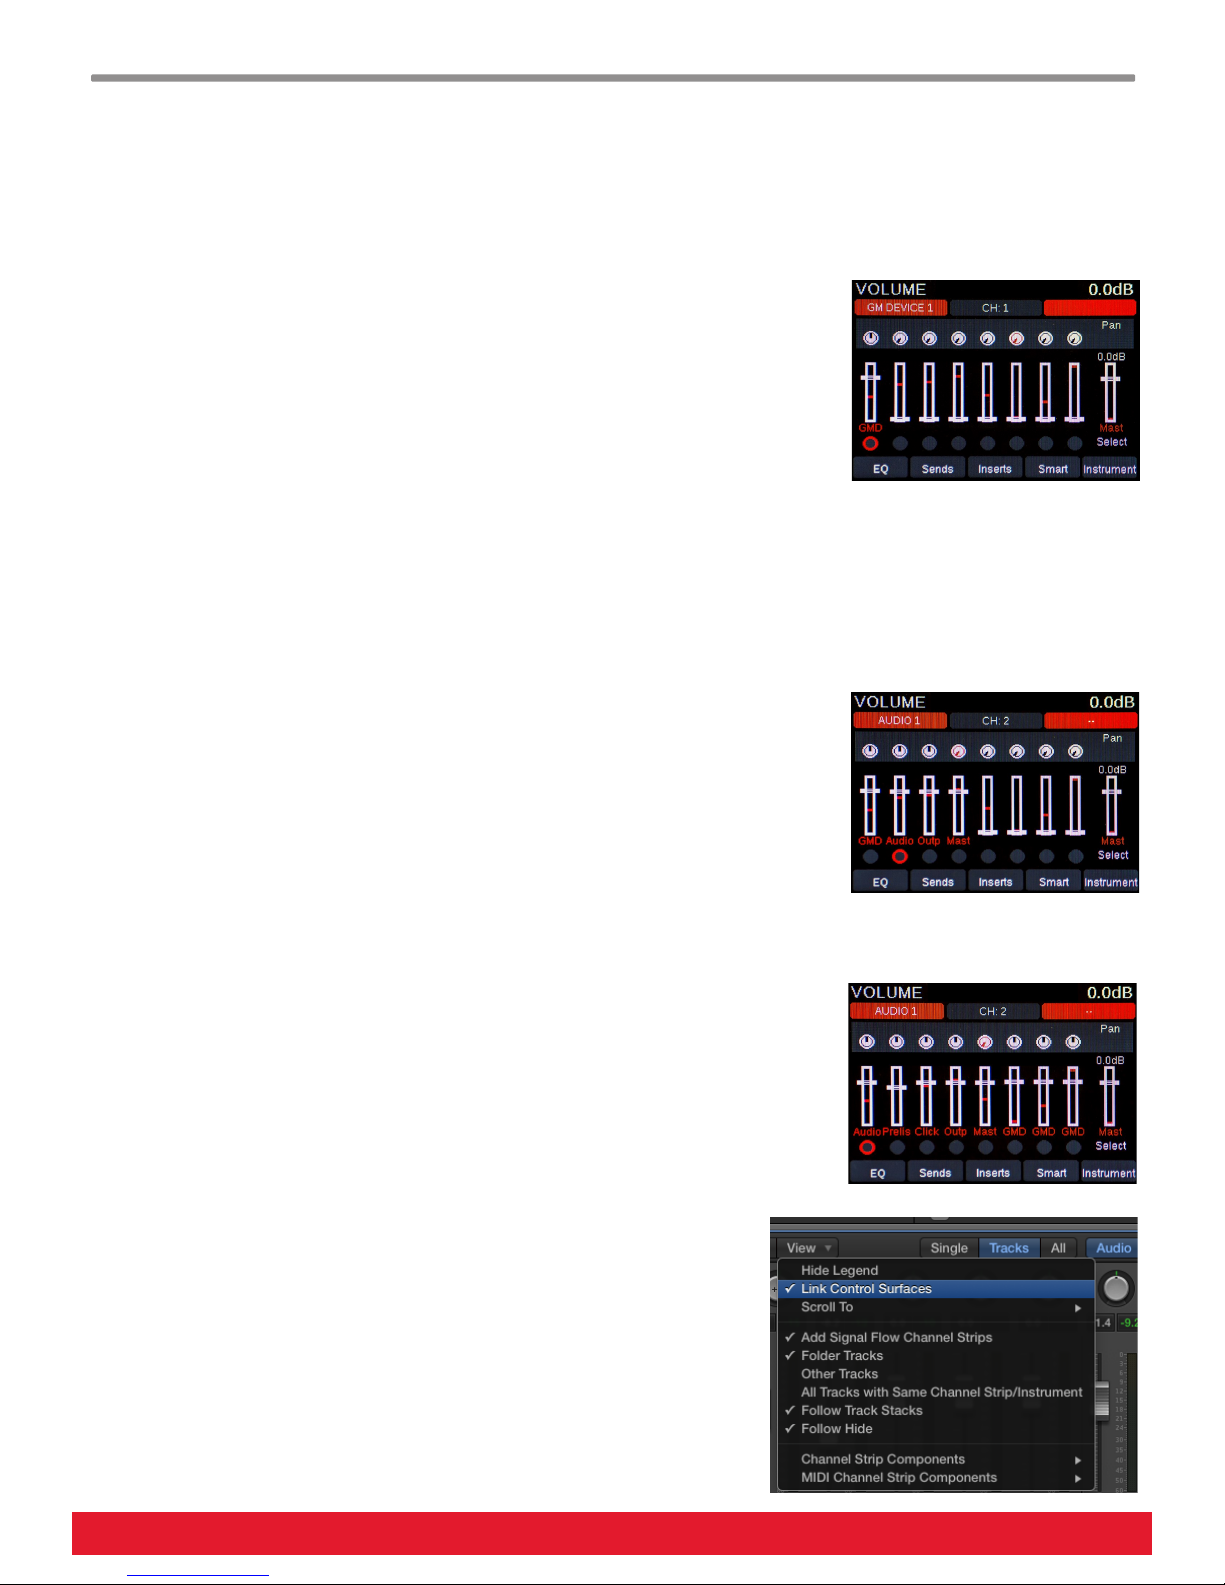
To start, create an empty Logic project, then create a single External MIDI Track.
The Panorama display shows 9 faders corresponding to the 9 physical 45mm faders and
looks similar to the image on the right.
The first red field in the Panorama Info Bar indicates the track name, which should now
show “GM Device 1” for the track you just created. Try changing the track name in Logic
and you will see it update on Panorama. You may need to change track, to see the red
name field update on the Panorama display.
The first fader (of the group of 9) on Panorama now controls the mixer channel volume of the track you created. Moving the
fader doesn’t change the volume immediately because the physical fader position first has to match the position of the
corresponding fader in the Logic mixer. This approach ensures that there is a smooth change to the Logic channel volume
setting, rather than an abrupt jump to the current Panorama fader value.
Keep an eye on the Panorama display and move the physical fader towards the virtual fader position (indicated by a white
horizontal line). Note that once the red line (the Panorama physical fader position) and the virtual fader position match, the
fader cap graphic follows the fader movement and adjusts the volume setting of the mixer channel in Logic.
Next create an Audio Track in Logic. This action will also create an Output and a Master
mixer channel in the Logic mixer so now you can see 4 channels in the Panorama display.
Press the [View] button on Panorama to open the Logic mixer and that it corresponds with
the Panorama display.
Using the Logic View Filters
Panorama can follow the mixer filter view settings in the Logic Mixer. Click on the “View”
button at the top of the Logic Mixer window and make sure “Link Control Surfaces” is ticked.
To the right of the Logic ‘View’ button you have the option to select “Single”, “Tracks” or “All”.
First select “Single” and press the [Track -/+] buttons on Panorama, to navigate back and
forth between the two tracks. Notice that the Panorama display updates to show only the
currently selected track and associated channels. The Logic mixer window mirrors this
view.
In Logic, select “Tracks”. The display updates to show the two tracks and their associated
mixer channels (4 in total now). Finally click “All” shows all channels whether they are
associated with a track or not. In our example here, this shows a mixer channel for each of
the 16 MIDI channels on the External MIDI Track. Click the “MIDI” button in the Logic
mixer to hide the MIDI channels from view.
Creating Separate Panorama and Logic Views
Logic allows you to create a separate view settings for your control surface. First
set up the view you would like on Panorama.
We prefer to simply select the “Tracks” option. Now un-tick “Link Control
Surfaces”.
The view settings can be saved to a template so you only have to set this up
once. Next create an additional 6 tracks (audio or instrument) so you have a
complete bank of 8 tracks to control.
www.nektartech.com Using Panorama with Logic 5
Logic Mixer Control
Control Select, Mute, Solo, and Record Arm
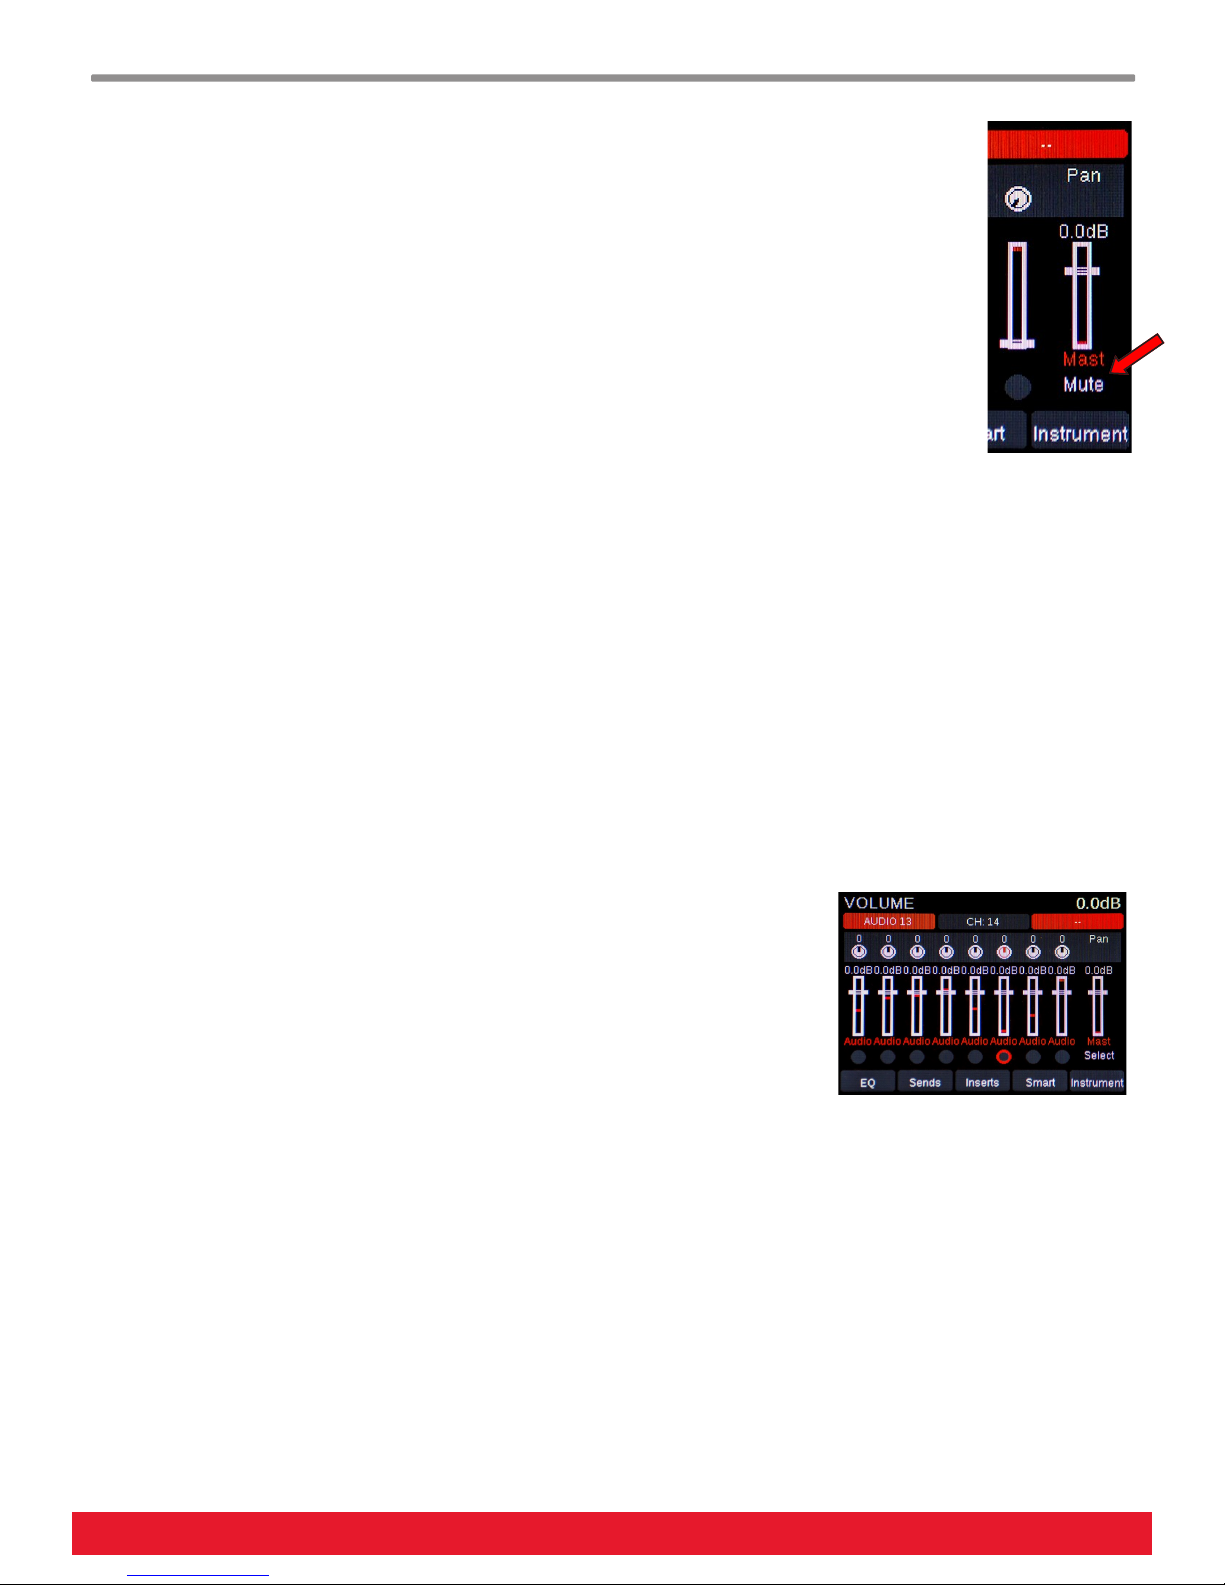
The 8 LED buttons below the faders are assigned to Select by default. Press LED button 1, then press LED
button 8 and note how this lets you quickly jump from one track to another. You can also use these buttons
to select mixer channels that don’t have a track associated with them (such as aux or output channels).
Press the [Toggle/Mute] button to change the assignment of all LED buttons to Mute. Repeatedly press the
[Toggle/Mute] button to cycle through LED button assignments as follows: Select, Mute, Solo, Record Arm,
then back to Select, a.s.o.
Panorama also features an option to scroll through the buttons assignment options. Press and hold [Toggle/
Mute], then rotate the [Data Control] encoder until the parameter you want to control, is selected.
The image to the right shows the location of the label that indicates the current assignment mode of the 8
LED buttons.
Navigating Tracks & Channels
Now create an additional 8 tracks in the Logic project. At this point, you should have a total of 16 tracks to navigate.
Repeatedly press the [Track+] button to navigate to channel 14.
We're sure you'd agree that's a lot of button presses, but thankfully there's a quicker way to navigate between channels.
Press and hold the [Shift] button on Panorama, then press the [Track-] button. This button combination activates the second
menu layer on Panorama (in this case [<Bank]) and updates the display to show channels 1-8. Make sure the LED buttons
are assigned to Select, then press the LED button that corresponds to channel 6.
You have now learned how to navigate Logic channels and tracks from Panorama using three different methods:
[Track-] and [Track+] buttons go to previous or next track (or channel) in Logic
[Shift]+[<Bank] or [Bank>] moves to the previous or next group of 8 channels
controlled in Mixer mode
Press an [LED button] when assigned to "Select" for quick channel selection within
the bank of 8 channels you are currently controlling from Panorama
Multi-track Control of Pan and Sends
The encoders above the faders are by default assigned to Pan for each of the 8 channels
within the current bank. Rotate each encoder to update the Pan value on the display and to update the corresponding pan
parameter value in Logic. The Panorama encoders automatically mirror the current values of the Logic mixer’s Pan knobs, so
your changes are reflected immediately.
The encoders can also be used to control any of the mixer sends across 8 channels. To change the assignment, press the
[Toggle/View] button, just to the right of the encoders.
Press [Toggle/View] repeatedly to assign the encoders to the next assigned send destination. Continue until you cycle back to
controlling Pan.
Panorama also features an option to scroll through sends. Press and hold [Toggle/View], then rotate the [Data Control]
encoder until the send you want to use is selected.
6 Using Panorama with Logic www.nektartech.com
 Loading...