

Page 1
NEC Versa® VXi
Hard Disk Drive
Congratulations on purchasing an NEC Versa VXi hard disk drive. Your new drive lets you take
advantage of the latest in high-capacity storage and superior drive organization while using a
compact notebook computer.
The NEC Versa VXi hard disk drive comes in the following models:
!
6-GB hard disk drive — Option Kit OP-220-73001
!
10-GB hard disk drive — Option Kit OP-220-73002
!
12-GB hard disk drive — Option Kit OP-220-73003
!
20-GB hard disk drive — Option Kit OP-220-73005
In addition to describing the features of the NEC Versa VXi hard disk drive, this do cument
describes how to remove and install a hard drive in the NEC Versa VXi computer.
Tools
You will need a small Phillips-head screwdriver to remove an existing drive and install your
NEC Versa VXi hard disk drive.
Removing a Hard Disk Drive
Before you install your new NEC Versa VXi hard di sk drive, you must remove the existing ha rd
drive from your computer. Follow these steps to remove the existing hard disk drive.
1.
Power off your computer. If the system is connected to an AC power source, disconnect it.
2.
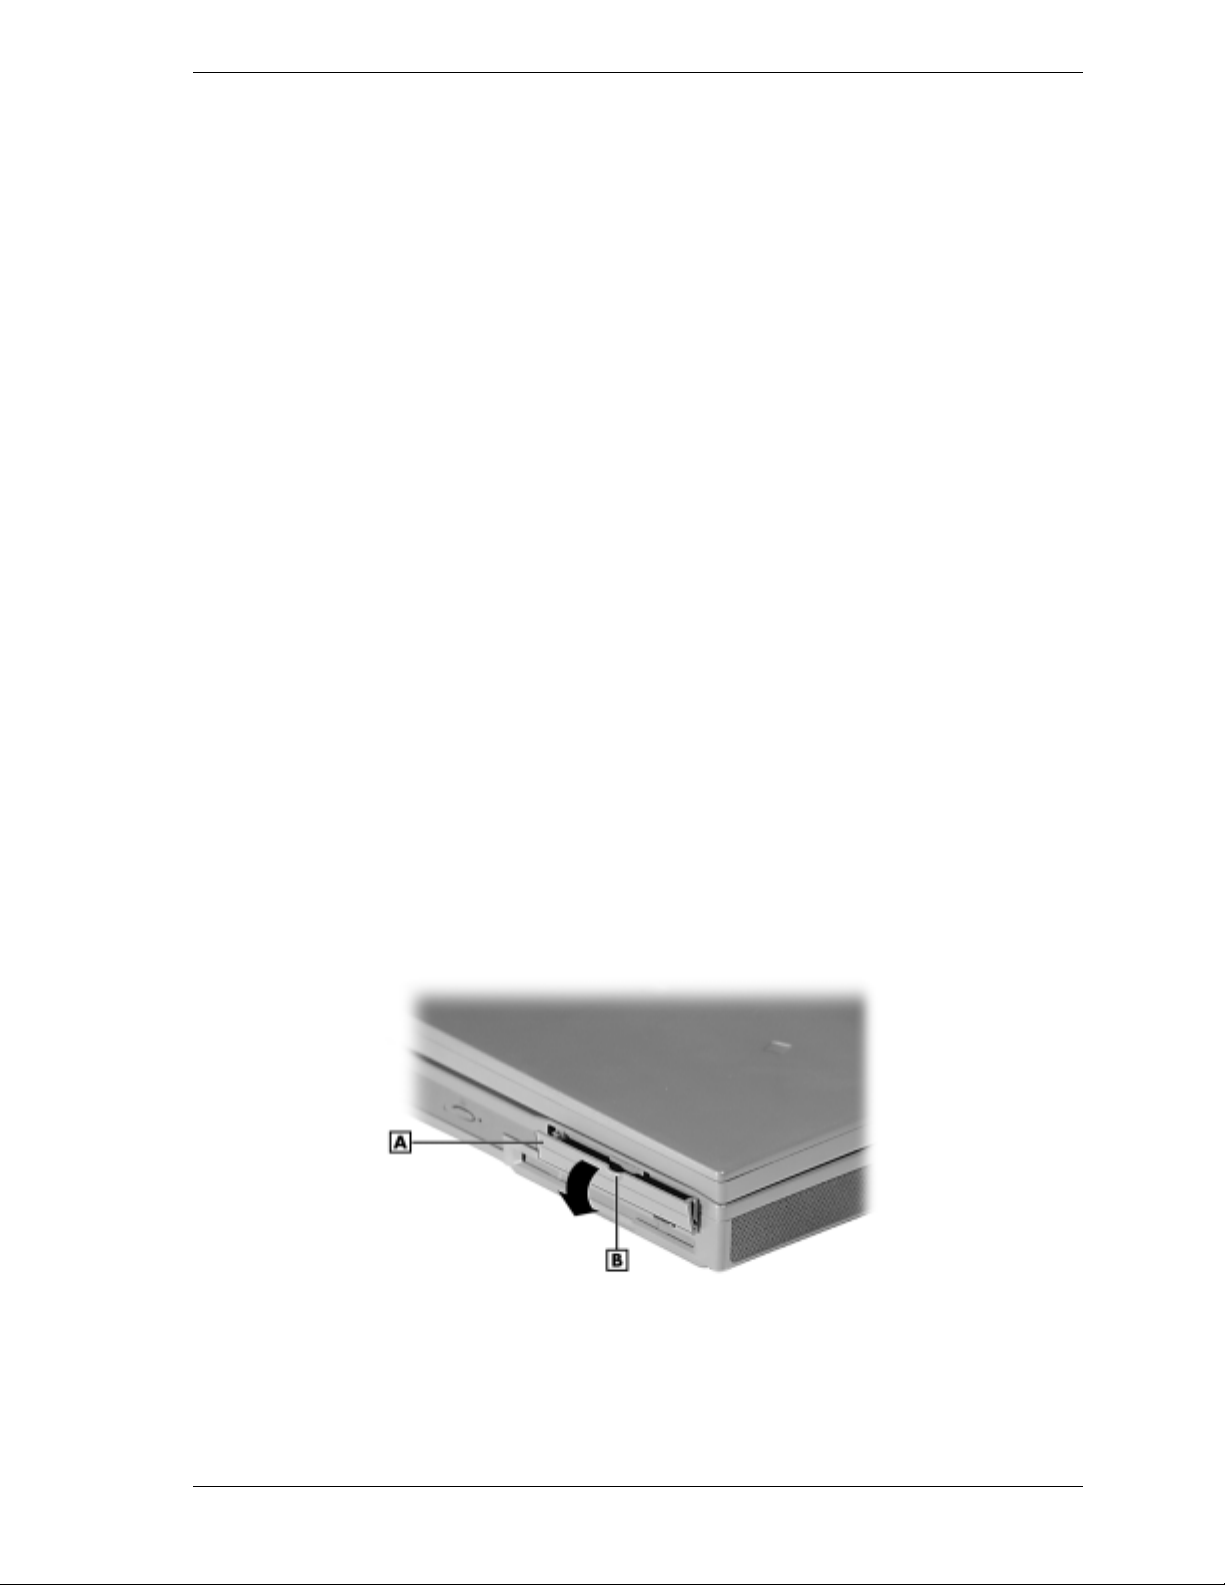
Locate the drive access panel on the left side of the system. Open the panel using the notch.
A – Drive Access Panel B – Notch
Opening the panel
NEC Versa VXi Hard Disk Drive 1
Page 2

3.
Remove the screw that secures the hard disk drive in the system.
Removing the screw
A – Screw
4.
Slide the hard disk drive out of the system.
Removing the disk drive
Installing the NEC Versa VXi Hard Disk Drive
Follow these steps to install the new NEC Versa VXi hard disk drive.
1.
If necessary, remove the existing hard drive from your computer. See the section,
“Removing a Hard Disk Drive.”
2.
Slide the NEC Versa VXi hard disk drive into the drive bay on the left side of the system.
2 NEC Versa VXi Hard Disk Drive
Page 3

Inserting the disk drive
3.
Replace the screw to secure the hard disk in the system.
Securing the screw
A – Screw
4.
Close the panel to protect the drive.
Closing the panel
A – Drive Access Panel
You are now ready to begin using your NEC Versa VXi hard disk drive.
For information on configuring the drive, see your NEC Versa VXi User’s Guide.
NEC Versa VXi Hard Disk Drive 3
Page 4

Specifications
Internal, 2.5 inch, IDE, in 6.0 GB, 10 GB, 12 GB, or 20 GB
Hitachi: 6 GB, 10 GB, 12 GB, 20 GB
!
logical cylinders — 16,383
!
logical heads — 16
!
logical sectors/track — 63
!
average seek — 12 ms
!
rotation speed — 4200 RPM
!
buffer size — 512 KB
!
interface — PC-AT (ATA5)
Fujitsu: 6 GB, 12 GB, 20 GB
!
logical cylinders — 12,416
!
logical heads — 15
!
logical sectors/track — 63
!
average seek — 13 ms
!
rotation speed — 4200 RPM
!
buffer size — 512 KB
!
interface — PC-AT (ATA4)
Toshiba: 6 GB
!
logical cylinders — 13,424
!
logical heads — 15
!
logical sectors/track — 63
!
average seek — 13 ms
!
rotation speed — 4200 RPM
!
buffer size — 512 KB
!
interface — PC-AT (ATA4)
IBM: 6 GB, 10 GB, 12 GB, 20 GB
!
logical cylinders — 16,383
!
logical heads — 16
!
logical sectors/track — 63
!
average seek — 14 ms
!
rotation speed — 4200 RPM
!
buffer size — 512 KB
!
interface — PC-AT (ATA4)
4 NEC Versa VXi Hard Disk Drive
819-200688-000
08/2000
*819-200688-000*
 Loading...