

Page 1
Empowered by Innovation
Introduction Features System
Features
IntraMail
1001-1702
2101-2501
Station
3101-3715
Line
Voice Mail
4101-4231
Maintenance
9001-9042
For additional resources, visit our Technical Support site on the web at
Software Manual
P/N 1093100
Rev 3, June 2006
http://www.necdsx.com
Printed in U.S.A
01.00.00
.
.
Page 2

This manual has been developed by NEC Unified Solutions, Inc. It is intended for the use of its customers and service
personnel, and should be read in its entirety before attempting to install or program the system. Any comments or suggestions
for improving this manual would be appreciated. Forward your remarks to:
NEC Unified Solutions, Inc.
4 Forest Parkway
Shelton, CT 06484
www.necunifiedsolutions.com
Nothing contained in this manual shall be deemed to be, and this manual does not constitute, a warranty of, or representation
with respect to, any of the equipment covered. This manual is subject to change without notice and NEC Unified Solutions,
Inc. has no obligation to provide any updates or corrections to this manual. Further, NEC Unified Solutions, Inc. also reserves
the right, without prior notice, to make changes in equipment design or components as it deems appropriate. No
representation is made that this manual is complete or accurate in all respects and NEC Unified Solutions, Inc. shall not be
liable for any errors or omissions. In no event shall NEC Unified Solutions, Inc. be liable for any incidental or consequential
damages in connection with the use of this manual. This document contains proprietary information that is protected by
copyright. All rights are reserved. No part of this document may be photocopied or reproduced without prior written consent
of NEC Unified Solutions, Inc.
©2006 by NEC Unified Solutions, Inc. All Rights Reserved.
Printed in U.S.A.
Page 3

Table of Contents
Table of Contents
Table of
Contents
Introduction . . . . . . . . . . . . . . . . . . . . . . . . . . . . . . . . . . . . . . . . . . . . . . . . . . . . . . . . . . 1
Using the DSX Software Manual . . . . . . . . . . . . . . . . . . . . . . . . . . . . . . . . . . . . . . . . . . . 1
Default Feature Setup . . . . . . . . . . . . . . . . . . . . . . . . . . . . . . . . . . . . . . . . . . . . . . . . . . . . 2
Charts . . . . . . . . . . . . . . . . . . . . . . . . . . . . . . . . . . . . . . . . . . . . . . . . . . . . . . . . . . . . . . . . . 5
Telephone Illustrations. . . . . . . . . . . . . . . . . . . . . . . . . . . . . . . . . . . . . . . . . . . . . . . . . . . . 9
Features . . . . . . . . . . . . . . . . . . . . . . . . . . . . . . . . . . . . . . . . . . . . . . . . . . . . . . . . . . . . 13
Introduction . . . . . . . . . . . . . . . . . . . . . . . . . . . . . . . . . . . . . . . . . . . . . . . . . . . . . . . . . . . 13
Account Codes . . . . . . . . . . . . . . . . . . . . . . . . . . . . . . . . . . . . . . . . . . . . . . . . . . . . . . . . . 14
Optional (Unforced) Account Codes . . . . . . . . . . . . . . . . . . . . . . . . . . . . . . . . . . . . . . 14
Forced Account Codes . . . . . . . . . . . . . . . . . . . . . . . . . . . . . . . . . . . . . . . . . . . . . . . . . 14
Verified Account Codes . . . . . . . . . . . . . . . . . . . . . . . . . . . . . . . . . . . . . . . . . . . . . . . . 14
Using Account Codes and Speed Dial . . . . . . . . . . . . . . . . . . . . . . . . . . . . . . . . . . . . . 14
Using Account Codes with Last Number Redial and Save . . . . . . . . . . . . . . . . . . . . . 14
Account Codes and Emergency Calls. . . . . . . . . . . . . . . . . . . . . . . . . . . . . . . . . . . . . . 15
DSS Console Account Code Key . . . . . . . . . . . . . . . . . . . . . . . . . . . . . . . . . . . . . . . . . 15
Alphanumeric Display . . . . . . . . . . . . . . . . . . . . . . . . . . . . . . . . . . . . . . . . . . . . . . . . . . . 21
Attendant Call Queuing . . . . . . . . . . . . . . . . . . . . . . . . . . . . . . . . . . . . . . . . . . . . . . . . . . 22
Operator Call Key. . . . . . . . . . . . . . . . . . . . . . . . . . . . . . . . . . . . . . . . . . . . . . . . . . . . . 22
Attendant Position . . . . . . . . . . . . . . . . . . . . . . . . . . . . . . . . . . . . . . . . . . . . . . . . . . . . . . 24
Auto Redial . . . . . . . . . . . . . . . . . . . . . . . . . . . . . . . . . . . . . . . . . . . . . . . . . . . . . . . . . . . 28
Automatic Handsfree . . . . . . . . . . . . . . . . . . . . . . . . . . . . . . . . . . . . . . . . . . . . . . . . . . . . 30
Automatic Ring Down . . . . . . . . . . . . . . . . . . . . . . . . . . . . . . . . . . . . . . . . . . . . . . . . . . . 32
Automatic Slot Configuration . . . . . . . . . . . . . . . . . . . . . . . . . . . . . . . . . . . . . . . . . . . . . 33
Background Music . . . . . . . . . . . . . . . . . . . . . . . . . . . . . . . . . . . . . . . . . . . . . . . . . . . . . . 34
Barge In (Intrusion) . . . . . . . . . . . . . . . . . . . . . . . . . . . . . . . . . . . . . . . . . . . . . . . . . . . . . 36
Battery Backup. . . . . . . . . . . . . . . . . . . . . . . . . . . . . . . . . . . . . . . . . . . . . . . . . . . . . . . . . 38
Brightness Control . . . . . . . . . . . . . . . . . . . . . . . . . . . . . . . . . . . . . . . . . . . . . . . . . . . . . . 39
DSX Software Manual
Table of Contents ◆ i
Page 4

ii ◆
Table of Contents
Call Coverage Keys . . . . . . . . . . . . . . . . . . . . . . . . . . . . . . . . . . . . . . . . . . . . . . . . . . . . . 40
Call Forwarding . . . . . . . . . . . . . . . . . . . . . . . . . . . . . . . . . . . . . . . . . . . . . . . . . . . . . . . . 44
Call Forwarding Off Premises . . . . . . . . . . . . . . . . . . . . . . . . . . . . . . . . . . . . . . . . . . . . . 51
Call Timer . . . . . . . . . . . . . . . . . . . . . . . . . . . . . . . . . . . . . . . . . . . . . . . . . . . . . . . . . . . . 55
Call Waiting / Camp-On . . . . . . . . . . . . . . . . . . . . . . . . . . . . . . . . . . . . . . . . . . . . . . . . . 58
Callback . . . . . . . . . . . . . . . . . . . . . . . . . . . . . . . . . . . . . . . . . . . . . . . . . . . . . . . . . . . . . . 61
Caller ID. . . . . . . . . . . . . . . . . . . . . . . . . . . . . . . . . . . . . . . . . . . . . . . . . . . . . . . . . . . . . . 63
Caller ID Logging . . . . . . . . . . . . . . . . . . . . . . . . . . . . . . . . . . . . . . . . . . . . . . . . . . . . . . 68
Central Office Calls, Answering . . . . . . . . . . . . . . . . . . . . . . . . . . . . . . . . . . . . . . . . . . . 74
Central Office Calls, Placing . . . . . . . . . . . . . . . . . . . . . . . . . . . . . . . . . . . . . . . . . . . . . . 78
Check Key . . . . . . . . . . . . . . . . . . . . . . . . . . . . . . . . . . . . . . . . . . . . . . . . . . . . . . . . . . . . 86
Class of Service . . . . . . . . . . . . . . . . . . . . . . . . . . . . . . . . . . . . . . . . . . . . . . . . . . . . . . . . 88
Conference . . . . . . . . . . . . . . . . . . . . . . . . . . . . . . . . . . . . . . . . . . . . . . . . . . . . . . . . . . . . 89
Conference, Meet-Me . . . . . . . . . . . . . . . . . . . . . . . . . . . . . . . . . . . . . . . . . . . . . . . . . . . 91
Conference, Unsupervised . . . . . . . . . . . . . . . . . . . . . . . . . . . . . . . . . . . . . . . . . . . . . . . . 92
Contrast Controls . . . . . . . . . . . . . . . . . . . . . . . . . . . . . . . . . . . . . . . . . . . . . . . . . . . . . . . 93
Cordless Telephone . . . . . . . . . . . . . . . . . . . . . . . . . . . . . . . . . . . . . . . . . . . . . . . . . . . . . 94
Delayed Ringing . . . . . . . . . . . . . . . . . . . . . . . . . . . . . . . . . . . . . . . . . . . . . . . . . . . . . . . 95
Dial Number Preview . . . . . . . . . . . . . . . . . . . . . . . . . . . . . . . . . . . . . . . . . . . . . . . . . . . 96
Dial Tone Detection. . . . . . . . . . . . . . . . . . . . . . . . . . . . . . . . . . . . . . . . . . . . . . . . . . . . . 98
Direct Inward Dialing . . . . . . . . . . . . . . . . . . . . . . . . . . . . . . . . . . . . . . . . . . . . . . . . . . . 99
Call Coverage Guard Timer . . . . . . . . . . . . . . . . . . . . . . . . . . . . . . . . . . . . . . . . . . . . . 40
User Programmable Feature . . . . . . . . . . . . . . . . . . . . . . . . . . . . . . . . . . . . . . . . . . . . . 43
Call Forwarding Chaining . . . . . . . . . . . . . . . . . . . . . . . . . . . . . . . . . . . . . . . . . . . . . . 44
Call Forwarding Cancel . . . . . . . . . . . . . . . . . . . . . . . . . . . . . . . . . . . . . . . . . . . . . . . . 44
Call Forwarding Key . . . . . . . . . . . . . . . . . . . . . . . . . . . . . . . . . . . . . . . . . . . . . . . . . . 44
Call Forwarding Toggle in a Personal Speed Dial Bin. . . . . . . . . . . . . . . . . . . . . . . . . 45
Call Forwarding Confirmation Tone . . . . . . . . . . . . . . . . . . . . . . . . . . . . . . . . . . . . . . 45
Call Forwarding Timers . . . . . . . . . . . . . . . . . . . . . . . . . . . . . . . . . . . . . . . . . . . . . . . . 46
User Programmable Feature . . . . . . . . . . . . . . . . . . . . . . . . . . . . . . . . . . . . . . . . . . . . . 50
Call Forwarding Off Premises Example. . . . . . . . . . . . . . . . . . . . . . . . . . . . . . . . . . . . 51
Single and Multiple Message Format Compatibility . . . . . . . . . . . . . . . . . . . . . . . . . . 63
Caller ID on the SMDR Report . . . . . . . . . . . . . . . . . . . . . . . . . . . . . . . . . . . . . . . . . . 63
Caller ID Integration with Voice Mail . . . . . . . . . . . . . . . . . . . . . . . . . . . . . . . . . . . . . 63
Second Call Caller ID (Extension Level Call Waiting Caller ID) . . . . . . . . . . . . . . . . 63
Third Party Caller ID Check. . . . . . . . . . . . . . . . . . . . . . . . . . . . . . . . . . . . . . . . . . . . . 64
Caller ID Display Separator . . . . . . . . . . . . . . . . . . . . . . . . . . . . . . . . . . . . . . . . . . . . . 64
Caller ID to Single Line Telephones . . . . . . . . . . . . . . . . . . . . . . . . . . . . . . . . . . . . . . 64
Types of Calls that are Logged . . . . . . . . . . . . . . . . . . . . . . . . . . . . . . . . . . . . . . . . . . . 69
Caller ID and Answering Machines . . . . . . . . . . . . . . . . . . . . . . . . . . . . . . . . . . . . . . . 69
Answering Priority . . . . . . . . . . . . . . . . . . . . . . . . . . . . . . . . . . . . . . . . . . . . . . . . . . . . 74
Overflow . . . . . . . . . . . . . . . . . . . . . . . . . . . . . . . . . . . . . . . . . . . . . . . . . . . . . . . . . . . . 74
Single Ring Option for Single Line Sets . . . . . . . . . . . . . . . . . . . . . . . . . . . . . . . . . . . 74
User Programmable Feature . . . . . . . . . . . . . . . . . . . . . . . . . . . . . . . . . . . . . . . . . . . . . 77
Dial Buffering . . . . . . . . . . . . . . . . . . . . . . . . . . . . . . . . . . . . . . . . . . . . . . . . . . . . . . . . 78
Store and Forward. . . . . . . . . . . . . . . . . . . . . . . . . . . . . . . . . . . . . . . . . . . . . . . . . . . . . 78
Access Code Options . . . . . . . . . . . . . . . . . . . . . . . . . . . . . . . . . . . . . . . . . . . . . . . . . . 81
Setting Up Store and Forward . . . . . . . . . . . . . . . . . . . . . . . . . . . . . . . . . . . . . . . . . . . 82
ANI/DNIS Support . . . . . . . . . . . . . . . . . . . . . . . . . . . . . . . . . . . . . . . . . . . . . . . . . . . 100
Basic DID Call Handling . . . . . . . . . . . . . . . . . . . . . . . . . . . . . . . . . . . . . . . . . . . . . . 101
Table of Contents
DSX Software Manual
Page 5

Table of Contents
How Call Forwarding and Extension Hunting Interact with DID Calls. . . . . . . . . . . 102
DID Call Handling with Call Forwarding and Extension Hunting . . . . . . . . . . . . . . 103
DID Station Intercept and Line Overflow . . . . . . . . . . . . . . . . . . . . . . . . . . . . . . . . . 105
DID Overflow, Camp-On, and Intercept Options. . . . . . . . . . . . . . . . . . . . . . . . . . . . 107
Direct Inward Line. . . . . . . . . . . . . . . . . . . . . . . . . . . . . . . . . . . . . . . . . . . . . . . . . . . . . 109
Night Mode Control . . . . . . . . . . . . . . . . . . . . . . . . . . . . . . . . . . . . . . . . . . . . . . . . . . 109
Overflow for Direct Inward Lines . . . . . . . . . . . . . . . . . . . . . . . . . . . . . . . . . . . . . . . 109
Direct Line Access. . . . . . . . . . . . . . . . . . . . . . . . . . . . . . . . . . . . . . . . . . . . . . . . . . . . . 115
Direct Station Selection (DSS) . . . . . . . . . . . . . . . . . . . . . . . . . . . . . . . . . . . . . . . . . . . 117
User Programmable Feature . . . . . . . . . . . . . . . . . . . . . . . . . . . . . . . . . . . . . . . . . . . . 119
Direct Station Selection (DSS) Console . . . . . . . . . . . . . . . . . . . . . . . . . . . . . . . . . . . . 120
Default DSS Console Key Assignments. . . . . . . . . . . . . . . . . . . . . . . . . . . . . . . . . . . 121
DSS Console Feature Key Assignments. . . . . . . . . . . . . . . . . . . . . . . . . . . . . . . . . . . 123
User Programmable Feature . . . . . . . . . . . . . . . . . . . . . . . . . . . . . . . . . . . . . . . . . . . . 128
Directed Call Pickup . . . . . . . . . . . . . . . . . . . . . . . . . . . . . . . . . . . . . . . . . . . . . . . . . . . 129
Directory Dialing . . . . . . . . . . . . . . . . . . . . . . . . . . . . . . . . . . . . . . . . . . . . . . . . . . . . . . 131
Display, Alphanumeric . . . . . . . . . . . . . . . . . . . . . . . . . . . . . . . . . . . . . . . . . . . . . . . . . 134
Distinctive Ringing . . . . . . . . . . . . . . . . . . . . . . . . . . . . . . . . . . . . . . . . . . . . . . . . . . . . 135
The Distinctive Ringing Hierarchy. . . . . . . . . . . . . . . . . . . . . . . . . . . . . . . . . . . . . . . 135
Understanding Ring Types . . . . . . . . . . . . . . . . . . . . . . . . . . . . . . . . . . . . . . . . . . . . . 136
When Multiple Calls Ring an Extension . . . . . . . . . . . . . . . . . . . . . . . . . . . . . . . . . . 136
Do Not Disturb. . . . . . . . . . . . . . . . . . . . . . . . . . . . . . . . . . . . . . . . . . . . . . . . . . . . . . . . 143
Do Not Disturb BLF for Hotline and Call Coverage Keys. . . . . . . . . . . . . . . . . . . . . 143
Do Not Disturb Override . . . . . . . . . . . . . . . . . . . . . . . . . . . . . . . . . . . . . . . . . . . . . . . . 146
Door Box . . . . . . . . . . . . . . . . . . . . . . . . . . . . . . . . . . . . . . . . . . . . . . . . . . . . . . . . . . . . 147
Door Box Relays. . . . . . . . . . . . . . . . . . . . . . . . . . . . . . . . . . . . . . . . . . . . . . . . . . . . . 147
Door Box Alerts . . . . . . . . . . . . . . . . . . . . . . . . . . . . . . . . . . . . . . . . . . . . . . . . . . . . . 147
Equal Access Compatibility. . . . . . . . . . . . . . . . . . . . . . . . . . . . . . . . . . . . . . . . . . . . . . 152
Extended Ringing. . . . . . . . . . . . . . . . . . . . . . . . . . . . . . . . . . . . . . . . . . . . . . . . . . . . . . 153
Extension Hunting . . . . . . . . . . . . . . . . . . . . . . . . . . . . . . . . . . . . . . . . . . . . . . . . . . . . . 154
Circular Hunting . . . . . . . . . . . . . . . . . . . . . . . . . . . . . . . . . . . . . . . . . . . . . . . . . . . . . 154
Terminal Hunting . . . . . . . . . . . . . . . . . . . . . . . . . . . . . . . . . . . . . . . . . . . . . . . . . . . . 155
Uniform Call Distribution (UCD) Hunting . . . . . . . . . . . . . . . . . . . . . . . . . . . . . . . . 155
Extension Locking . . . . . . . . . . . . . . . . . . . . . . . . . . . . . . . . . . . . . . . . . . . . . . . . . . . . . 166
Walking Class of Service and Extension Locking . . . . . . . . . . . . . . . . . . . . . . . . . . . 166
Feature Keys . . . . . . . . . . . . . . . . . . . . . . . . . . . . . . . . . . . . . . . . . . . . . . . . . . . . . . . . . 169
Extension Feature Key Assignments . . . . . . . . . . . . . . . . . . . . . . . . . . . . . . . . . . . . . 170
User Programmable Feature . . . . . . . . . . . . . . . . . . . . . . . . . . . . . . . . . . . . . . . . . . . . 176
Flash. . . . . . . . . . . . . . . . . . . . . . . . . . . . . . . . . . . . . . . . . . . . . . . . . . . . . . . . . . . . . . . . 177
Flash for Single Line Extensions . . . . . . . . . . . . . . . . . . . . . . . . . . . . . . . . . . . . . . . . 177
Flexible Numbering Plan . . . . . . . . . . . . . . . . . . . . . . . . . . . . . . . . . . . . . . . . . . . . . . . . 179
Forced Line Disconnect . . . . . . . . . . . . . . . . . . . . . . . . . . . . . . . . . . . . . . . . . . . . . . . . . 182
Group Call Pickup . . . . . . . . . . . . . . . . . . . . . . . . . . . . . . . . . . . . . . . . . . . . . . . . . . . . . 184
User Programmable Feature . . . . . . . . . . . . . . . . . . . . . . . . . . . . . . . . . . . . . . . . . . . . 186
Group Listen . . . . . . . . . . . . . . . . . . . . . . . . . . . . . . . . . . . . . . . . . . . . . . . . . . . . . . . . . 187
Group Ring. . . . . . . . . . . . . . . . . . . . . . . . . . . . . . . . . . . . . . . . . . . . . . . . . . . . . . . . . . . 189
Overflow for Group Ring Calls . . . . . . . . . . . . . . . . . . . . . . . . . . . . . . . . . . . . . . . . . 189
Handsfree and Handsfree Answerback . . . . . . . . . . . . . . . . . . . . . . . . . . . . . . . . . . . . . 195
Handsfree . . . . . . . . . . . . . . . . . . . . . . . . . . . . . . . . . . . . . . . . . . . . . . . . . . . . . . . . . . 195
Handsfree Answerback and Forced Intercom Ringing. . . . . . . . . . . . . . . . . . . . . . . . 195
DSX Software Manual
Table of Contents ◆ iii
Page 6

Table of Contents
Headset Compatibility . . . . . . . . . . . . . . . . . . . . . . . . . . . . . . . . . . . . . . . . . . . . . . . . . . 198
Hold . . . . . . . . . . . . . . . . . . . . . . . . . . . . . . . . . . . . . . . . . . . . . . . . . . . . . . . . . . . . . . . . 202
Hotline . . . . . . . . . . . . . . . . . . . . . . . . . . . . . . . . . . . . . . . . . . . . . . . . . . . . . . . . . . . . . . 207
Interactive Soft Keys . . . . . . . . . . . . . . . . . . . . . . . . . . . . . . . . . . . . . . . . . . . . . . . . . . . 210
Intercom . . . . . . . . . . . . . . . . . . . . . . . . . . . . . . . . . . . . . . . . . . . . . . . . . . . . . . . . . . . . . 211
Key Ring . . . . . . . . . . . . . . . . . . . . . . . . . . . . . . . . . . . . . . . . . . . . . . . . . . . . . . . . . . . . 214
Language Selection . . . . . . . . . . . . . . . . . . . . . . . . . . . . . . . . . . . . . . . . . . . . . . . . . . . . 217
Last Number Redial . . . . . . . . . . . . . . . . . . . . . . . . . . . . . . . . . . . . . . . . . . . . . . . . . . . . 219
Line Group Routing . . . . . . . . . . . . . . . . . . . . . . . . . . . . . . . . . . . . . . . . . . . . . . . . . . . . 223
Line Groups . . . . . . . . . . . . . . . . . . . . . . . . . . . . . . . . . . . . . . . . . . . . . . . . . . . . . . . . . . 225
Line Keys . . . . . . . . . . . . . . . . . . . . . . . . . . . . . . . . . . . . . . . . . . . . . . . . . . . . . . . . . . . . 227
Line Queuing / Line Callback . . . . . . . . . . . . . . . . . . . . . . . . . . . . . . . . . . . . . . . . . . . . 230
Loop Keys . . . . . . . . . . . . . . . . . . . . . . . . . . . . . . . . . . . . . . . . . . . . . . . . . . . . . . . . . . . 233
Meet-Me Conference . . . . . . . . . . . . . . . . . . . . . . . . . . . . . . . . . . . . . . . . . . . . . . . . . . . 236
Message Waiting . . . . . . . . . . . . . . . . . . . . . . . . . . . . . . . . . . . . . . . . . . . . . . . . . . . . . . 238
Microphone Mute. . . . . . . . . . . . . . . . . . . . . . . . . . . . . . . . . . . . . . . . . . . . . . . . . . . . . . 241
Monitor / Silent Monitor . . . . . . . . . . . . . . . . . . . . . . . . . . . . . . . . . . . . . . . . . . . . . . . . 243
Multiple Directory Numbers . . . . . . . . . . . . . . . . . . . . . . . . . . . . . . . . . . . . . . . . . . . . . 245
Music on Hold . . . . . . . . . . . . . . . . . . . . . . . . . . . . . . . . . . . . . . . . . . . . . . . . . . . . . . . . 246
Names for Extensions and Lines . . . . . . . . . . . . . . . . . . . . . . . . . . . . . . . . . . . . . . . . . . 249
Night Service / Night Ring . . . . . . . . . . . . . . . . . . . . . . . . . . . . . . . . . . . . . . . . . . . . . . 252
iv ◆
User Programmable Feature . . . . . . . . . . . . . . . . . . . . . . . . . . . . . . . . . . . . . . . . . . . . 197
Headset Key . . . . . . . . . . . . . . . . . . . . . . . . . . . . . . . . . . . . . . . . . . . . . . . . . . . . . . . . 199
Off-Hook Signaling and Headsets . . . . . . . . . . . . . . . . . . . . . . . . . . . . . . . . . . . . . . . 199
User Programmable Feature . . . . . . . . . . . . . . . . . . . . . . . . . . . . . . . . . . . . . . . . . . . . 201
System (Regular) Hold . . . . . . . . . . . . . . . . . . . . . . . . . . . . . . . . . . . . . . . . . . . . . . . . 202
Exclusive Hold . . . . . . . . . . . . . . . . . . . . . . . . . . . . . . . . . . . . . . . . . . . . . . . . . . . . . . 202
Automatic Hold. . . . . . . . . . . . . . . . . . . . . . . . . . . . . . . . . . . . . . . . . . . . . . . . . . . . . . 202
Intercom Hold . . . . . . . . . . . . . . . . . . . . . . . . . . . . . . . . . . . . . . . . . . . . . . . . . . . . . . . 202
Distinctive Flash Rate on Recall. . . . . . . . . . . . . . . . . . . . . . . . . . . . . . . . . . . . . . . . . 202
Hold Recall Display . . . . . . . . . . . . . . . . . . . . . . . . . . . . . . . . . . . . . . . . . . . . . . . . . . 203
Hotline Automatic Transfer . . . . . . . . . . . . . . . . . . . . . . . . . . . . . . . . . . . . . . . . . . . . 207
User Programmable Feature . . . . . . . . . . . . . . . . . . . . . . . . . . . . . . . . . . . . . . . . . . . . 209
Handsfree Answerback and Forced Intercom Ringing. . . . . . . . . . . . . . . . . . . . . . . . 211
User Programmable Feature . . . . . . . . . . . . . . . . . . . . . . . . . . . . . . . . . . . . . . . . . . . . 213
Overflow for Key Ring Calls . . . . . . . . . . . . . . . . . . . . . . . . . . . . . . . . . . . . . . . . . . . 214
Language Selection and SMDR . . . . . . . . . . . . . . . . . . . . . . . . . . . . . . . . . . . . . . . . . 217
Enhanced Last Number Redial . . . . . . . . . . . . . . . . . . . . . . . . . . . . . . . . . . . . . . . . . . 219
Answering Priority . . . . . . . . . . . . . . . . . . . . . . . . . . . . . . . . . . . . . . . . . . . . . . . . . . . 227
User Programmable Feature . . . . . . . . . . . . . . . . . . . . . . . . . . . . . . . . . . . . . . . . . . . . 229
Line Queuing . . . . . . . . . . . . . . . . . . . . . . . . . . . . . . . . . . . . . . . . . . . . . . . . . . . . . . . 230
Line Callback . . . . . . . . . . . . . . . . . . . . . . . . . . . . . . . . . . . . . . . . . . . . . . . . . . . . . . . 230
Line Queuing Priority . . . . . . . . . . . . . . . . . . . . . . . . . . . . . . . . . . . . . . . . . . . . . . . . . 230
Switched Loop Keys. . . . . . . . . . . . . . . . . . . . . . . . . . . . . . . . . . . . . . . . . . . . . . . . . . 233
Fixed Loop Keys. . . . . . . . . . . . . . . . . . . . . . . . . . . . . . . . . . . . . . . . . . . . . . . . . . . . . 233
Answering Priority . . . . . . . . . . . . . . . . . . . . . . . . . . . . . . . . . . . . . . . . . . . . . . . . . . . 233
Single Line Telephone Message Waiting . . . . . . . . . . . . . . . . . . . . . . . . . . . . . . . . . . 238
Handsfree Reply Soft Key . . . . . . . . . . . . . . . . . . . . . . . . . . . . . . . . . . . . . . . . . . . . . 241
Name Programming Chart . . . . . . . . . . . . . . . . . . . . . . . . . . . . . . . . . . . . . . . . . . . . . 251
Night Service Keys . . . . . . . . . . . . . . . . . . . . . . . . . . . . . . . . . . . . . . . . . . . . . . . . . . . 252
Table of Contents
DSX Software Manual
Page 7

Table of Contents
Basic Night Service Types . . . . . . . . . . . . . . . . . . . . . . . . . . . . . . . . . . . . . . . . . . . . . 252
Off-Hook Signaling . . . . . . . . . . . . . . . . . . . . . . . . . . . . . . . . . . . . . . . . . . . . . . . . . . . . 255
Off-Hook Signaling for Outside Calls . . . . . . . . . . . . . . . . . . . . . . . . . . . . . . . . . . . . 255
Off-Hook Signaling for Intercom Calls . . . . . . . . . . . . . . . . . . . . . . . . . . . . . . . . . . . 255
Off-Hook Signaling for Hotline Calls . . . . . . . . . . . . . . . . . . . . . . . . . . . . . . . . . . . . 255
User Programmable Feature . . . . . . . . . . . . . . . . . . . . . . . . . . . . . . . . . . . . . . . . . . . . 257
One-Touch Keys . . . . . . . . . . . . . . . . . . . . . . . . . . . . . . . . . . . . . . . . . . . . . . . . . . . . . . 258
Paging . . . . . . . . . . . . . . . . . . . . . . . . . . . . . . . . . . . . . . . . . . . . . . . . . . . . . . . . . . . . . . 259
Internal Paging . . . . . . . . . . . . . . . . . . . . . . . . . . . . . . . . . . . . . . . . . . . . . . . . . . . . . . 259
External Paging. . . . . . . . . . . . . . . . . . . . . . . . . . . . . . . . . . . . . . . . . . . . . . . . . . . . . . 259
Page Relay Control . . . . . . . . . . . . . . . . . . . . . . . . . . . . . . . . . . . . . . . . . . . . . . . . . . . 259
Outside Call Ringing Over External Page . . . . . . . . . . . . . . . . . . . . . . . . . . . . . . . . . 260
Intercom Ring Over External Page. . . . . . . . . . . . . . . . . . . . . . . . . . . . . . . . . . . . . . . 260
Door Chime Over External Page . . . . . . . . . . . . . . . . . . . . . . . . . . . . . . . . . . . . . . . . 260
Background Music Over External Page . . . . . . . . . . . . . . . . . . . . . . . . . . . . . . . . . . . 260
Ring Over Page Volume Adjustment . . . . . . . . . . . . . . . . . . . . . . . . . . . . . . . . . . . . . 260
User Programmable Feature . . . . . . . . . . . . . . . . . . . . . . . . . . . . . . . . . . . . . . . . . . . . 264
Paging, Meet-Me Conference . . . . . . . . . . . . . . . . . . . . . . . . . . . . . . . . . . . . . . . . . . . . 265
Park . . . . . . . . . . . . . . . . . . . . . . . . . . . . . . . . . . . . . . . . . . . . . . . . . . . . . . . . . . . . . . . . 266
Distinctive Flash Rate on Recall. . . . . . . . . . . . . . . . . . . . . . . . . . . . . . . . . . . . . . . . . 266
Personal Park Orbit Recall Display . . . . . . . . . . . . . . . . . . . . . . . . . . . . . . . . . . . . . . 267
System Park Orbit Recall Display . . . . . . . . . . . . . . . . . . . . . . . . . . . . . . . . . . . . . . . 267
PBX / Centrex Compatibility. . . . . . . . . . . . . . . . . . . . . . . . . . . . . . . . . . . . . . . . . . . . . 270
PBX/Centrex Access Codes . . . . . . . . . . . . . . . . . . . . . . . . . . . . . . . . . . . . . . . . . . . . 270
PBX/Centrex Access Codes and Toll Restriction. . . . . . . . . . . . . . . . . . . . . . . . . . . . 270
PBX/Centrex Access Codes and Account Codes . . . . . . . . . . . . . . . . . . . . . . . . . . . . 270
PBX/Centrex Access Codes and SMDR . . . . . . . . . . . . . . . . . . . . . . . . . . . . . . . . . . 271
PC Program (System Administrator) . . . . . . . . . . . . . . . . . . . . . . . . . . . . . . . . . . . . . . . 272
Prime Line Preference . . . . . . . . . . . . . . . . . . . . . . . . . . . . . . . . . . . . . . . . . . . . . . . . . . 274
Idle Prime Line . . . . . . . . . . . . . . . . . . . . . . . . . . . . . . . . . . . . . . . . . . . . . . . . . . . . . . 274
Intercom Prime Line . . . . . . . . . . . . . . . . . . . . . . . . . . . . . . . . . . . . . . . . . . . . . . . . . . 274
Prime Line vs. Ringing Line Preference. . . . . . . . . . . . . . . . . . . . . . . . . . . . . . . . . . . 274
User Programmable Feature . . . . . . . . . . . . . . . . . . . . . . . . . . . . . . . . . . . . . . . . . . . . 276
Privacy . . . . . . . . . . . . . . . . . . . . . . . . . . . . . . . . . . . . . . . . . . . . . . . . . . . . . . . . . . . . . . 277
Privacy Release Groups . . . . . . . . . . . . . . . . . . . . . . . . . . . . . . . . . . . . . . . . . . . . . . . . . 278
Privacy Release Guard Timer . . . . . . . . . . . . . . . . . . . . . . . . . . . . . . . . . . . . . . . . . . . 278
Private Line . . . . . . . . . . . . . . . . . . . . . . . . . . . . . . . . . . . . . . . . . . . . . . . . . . . . . . . . . . 280
Programmable Idle Menu Soft Keys (Super Display) . . . . . . . . . . . . . . . . . . . . . . . . . . 282
User Programmable Feature . . . . . . . . . . . . . . . . . . . . . . . . . . . . . . . . . . . . . . . . . . . . 284
Pulse to Tone Conversion . . . . . . . . . . . . . . . . . . . . . . . . . . . . . . . . . . . . . . . . . . . . . . . 285
Regional Defaults. . . . . . . . . . . . . . . . . . . . . . . . . . . . . . . . . . . . . . . . . . . . . . . . . . . . . . 286
Removing Lines and Extensions from Service . . . . . . . . . . . . . . . . . . . . . . . . . . . . . . . 287
Reverse Voice Over . . . . . . . . . . . . . . . . . . . . . . . . . . . . . . . . . . . . . . . . . . . . . . . . . . . . 289
Ring Groups . . . . . . . . . . . . . . . . . . . . . . . . . . . . . . . . . . . . . . . . . . . . . . . . . . . . . . . . . . 292
Ringdown Extension . . . . . . . . . . . . . . . . . . . . . . . . . . . . . . . . . . . . . . . . . . . . . . . . . . . 293
Ringing Line Preference . . . . . . . . . . . . . . . . . . . . . . . . . . . . . . . . . . . . . . . . . . . . . . . . 295
Prime Line vs. Ringing Line Preference. . . . . . . . . . . . . . . . . . . . . . . . . . . . . . . . . . . 296
User Programmable Feature . . . . . . . . . . . . . . . . . . . . . . . . . . . . . . . . . . . . . . . . . . . . 297
Save Number Dialed . . . . . . . . . . . . . . . . . . . . . . . . . . . . . . . . . . . . . . . . . . . . . . . . . . . 298
Selectable Display Messaging . . . . . . . . . . . . . . . . . . . . . . . . . . . . . . . . . . . . . . . . . . . . 300
DSX Software Manual
Table of Contents ◆ v
Page 8

Table of Contents
Silent Monitor . . . . . . . . . . . . . . . . . . . . . . . . . . . . . . . . . . . . . . . . . . . . . . . . . . . . . . . . 304
Single Line Telephones . . . . . . . . . . . . . . . . . . . . . . . . . . . . . . . . . . . . . . . . . . . . . . . . . 305
Soft Keys . . . . . . . . . . . . . . . . . . . . . . . . . . . . . . . . . . . . . . . . . . . . . . . . . . . . . . . . . . . . 314
Speed Dial . . . . . . . . . . . . . . . . . . . . . . . . . . . . . . . . . . . . . . . . . . . . . . . . . . . . . . . . . . . 315
Split (Alternate) . . . . . . . . . . . . . . . . . . . . . . . . . . . . . . . . . . . . . . . . . . . . . . . . . . . . . . . 323
Station Key Telephones . . . . . . . . . . . . . . . . . . . . . . . . . . . . . . . . . . . . . . . . . . . . . . . . . 325
Station Message Detail Recording. . . . . . . . . . . . . . . . . . . . . . . . . . . . . . . . . . . . . . . . . 328
System Administrator (PC Program) . . . . . . . . . . . . . . . . . . . . . . . . . . . . . . . . . . . . . . . 333
System Identification . . . . . . . . . . . . . . . . . . . . . . . . . . . . . . . . . . . . . . . . . . . . . . . . . . . 334
System Programming Backup and Restore . . . . . . . . . . . . . . . . . . . . . . . . . . . . . . . . . . 335
System Programming Password Protection . . . . . . . . . . . . . . . . . . . . . . . . . . . . . . . . . . 336
T1 Lines . . . . . . . . . . . . . . . . . . . . . . . . . . . . . . . . . . . . . . . . . . . . . . . . . . . . . . . . . . . . . 338
Tandem Calls / Unsupervised Conference. . . . . . . . . . . . . . . . . . . . . . . . . . . . . . . . . . . 341
Tie Lines . . . . . . . . . . . . . . . . . . . . . . . . . . . . . . . . . . . . . . . . . . . . . . . . . . . . . . . . . . . . 344
Time and Date . . . . . . . . . . . . . . . . . . . . . . . . . . . . . . . . . . . . . . . . . . . . . . . . . . . . . . . . 349
Toll Restriction . . . . . . . . . . . . . . . . . . . . . . . . . . . . . . . . . . . . . . . . . . . . . . . . . . . . . . . 351
Transfer . . . . . . . . . . . . . . . . . . . . . . . . . . . . . . . . . . . . . . . . . . . . . . . . . . . . . . . . . . . . . 358
Unsupervised Conference . . . . . . . . . . . . . . . . . . . . . . . . . . . . . . . . . . . . . . . . . . . . . . . 367
User Programmable Features. . . . . . . . . . . . . . . . . . . . . . . . . . . . . . . . . . . . . . . . . . . . . 368
vi ◆
Name Programming Chart . . . . . . . . . . . . . . . . . . . . . . . . . . . . . . . . . . . . . . . . . . . . . 303
Message Waiting. . . . . . . . . . . . . . . . . . . . . . . . . . . . . . . . . . . . . . . . . . . . . . . . . . . . . 305
Ringing For Incoming Calls . . . . . . . . . . . . . . . . . . . . . . . . . . . . . . . . . . . . . . . . . . . . 305
Ringer Equivalence Number (REN) Considerations . . . . . . . . . . . . . . . . . . . . . . . . . 305
System Speed Dial . . . . . . . . . . . . . . . . . . . . . . . . . . . . . . . . . . . . . . . . . . . . . . . . . . . 315
Personal Speed Dial . . . . . . . . . . . . . . . . . . . . . . . . . . . . . . . . . . . . . . . . . . . . . . . . . . 315
Unique Speed Dial Entries . . . . . . . . . . . . . . . . . . . . . . . . . . . . . . . . . . . . . . . . . . . . . 315
Storing Line Routing in a Speed Dial Bin . . . . . . . . . . . . . . . . . . . . . . . . . . . . . . . . . 315
Centrex Compatibility. . . . . . . . . . . . . . . . . . . . . . . . . . . . . . . . . . . . . . . . . . . . . . . . . 315
Chaining Bins for Dialing Long Numbers . . . . . . . . . . . . . . . . . . . . . . . . . . . . . . . . . 316
Manually Dialing After Speed Dial on T1 Lines . . . . . . . . . . . . . . . . . . . . . . . . . . . . 316
Answer Supervision . . . . . . . . . . . . . . . . . . . . . . . . . . . . . . . . . . . . . . . . . . . . . . . . . . 316
User Programmable Features . . . . . . . . . . . . . . . . . . . . . . . . . . . . . . . . . . . . . . . . . . . 321
Name Programming Chart . . . . . . . . . . . . . . . . . . . . . . . . . . . . . . . . . . . . . . . . . . . . . 322
Ring/Message Lamp . . . . . . . . . . . . . . . . . . . . . . . . . . . . . . . . . . . . . . . . . . . . . . . . . . 326
Call Duration Independent of System Clock . . . . . . . . . . . . . . . . . . . . . . . . . . . . . . . 328
ANI/DNIS Support . . . . . . . . . . . . . . . . . . . . . . . . . . . . . . . . . . . . . . . . . . . . . . . . . . . 338
FSK Caller ID . . . . . . . . . . . . . . . . . . . . . . . . . . . . . . . . . . . . . . . . . . . . . . . . . . . . . . . 338
E1 Lines . . . . . . . . . . . . . . . . . . . . . . . . . . . . . . . . . . . . . . . . . . . . . . . . . . . . . . . . . . . 338
User Programmable Feature . . . . . . . . . . . . . . . . . . . . . . . . . . . . . . . . . . . . . . . . . . . . 350
The Toll Restriction Tables . . . . . . . . . . . . . . . . . . . . . . . . . . . . . . . . . . . . . . . . . . . . 351
Toll Restriction Overview . . . . . . . . . . . . . . . . . . . . . . . . . . . . . . . . . . . . . . . . . . . . . 352
Default Toll Restriction Configuration. . . . . . . . . . . . . . . . . . . . . . . . . . . . . . . . . . . . 353
Long Distance Dialing Restrictions . . . . . . . . . . . . . . . . . . . . . . . . . . . . . . . . . . . . . . 355
Some Common Toll Restriction Examples . . . . . . . . . . . . . . . . . . . . . . . . . . . . . . . . 356
Distinctive Flash Rate on Recall. . . . . . . . . . . . . . . . . . . . . . . . . . . . . . . . . . . . . . . . . 358
Transfer Recall Display . . . . . . . . . . . . . . . . . . . . . . . . . . . . . . . . . . . . . . . . . . . . . . . 358
Handsfree Transfer . . . . . . . . . . . . . . . . . . . . . . . . . . . . . . . . . . . . . . . . . . . . . . . . . . . 358
Hotline Automatic Transfer . . . . . . . . . . . . . . . . . . . . . . . . . . . . . . . . . . . . . . . . . . . . 358
Interaction Between Call Forwarding, Extension Hunting, and Transfer Recall . . . . 359
Table of Contents
DSX Software Manual
Page 9

Table of Contents
Voice Mail . . . . . . . . . . . . . . . . . . . . . . . . . . . . . . . . . . . . . . . . . . . . . . . . . . . . . . . . . . . 372
Call Forwarding to Voice Mail. . . . . . . . . . . . . . . . . . . . . . . . . . . . . . . . . . . . . . . . . . 372
Leaving a Message . . . . . . . . . . . . . . . . . . . . . . . . . . . . . . . . . . . . . . . . . . . . . . . . . . . 372
Transferring to Voice Mail . . . . . . . . . . . . . . . . . . . . . . . . . . . . . . . . . . . . . . . . . . . . . 372
Conversation Record. . . . . . . . . . . . . . . . . . . . . . . . . . . . . . . . . . . . . . . . . . . . . . . . . . 372
Conversation Record Key for a Co-worker’s Mailbox. . . . . . . . . . . . . . . . . . . . . . . . 372
Personal Answering Machine Emulation . . . . . . . . . . . . . . . . . . . . . . . . . . . . . . . . . . 373
Voice Mail Overflow . . . . . . . . . . . . . . . . . . . . . . . . . . . . . . . . . . . . . . . . . . . . . . . . . 373
Message Center Mailbox . . . . . . . . . . . . . . . . . . . . . . . . . . . . . . . . . . . . . . . . . . . . . . 373
Interactive Soft Key Shows New Messages . . . . . . . . . . . . . . . . . . . . . . . . . . . . . . . . 373
Call Forwarding Timers and Voice Mail . . . . . . . . . . . . . . . . . . . . . . . . . . . . . . . . . . 374
User Programmable Features . . . . . . . . . . . . . . . . . . . . . . . . . . . . . . . . . . . . . . . . . . . 383
Voice Over . . . . . . . . . . . . . . . . . . . . . . . . . . . . . . . . . . . . . . . . . . . . . . . . . . . . . . . . . . . 385
Volume, Brightness, and Contrast Controls . . . . . . . . . . . . . . . . . . . . . . . . . . . . . . . . . 388
Volume Control Presets . . . . . . . . . . . . . . . . . . . . . . . . . . . . . . . . . . . . . . . . . . . . . . . 388
Display Brightness and Contrast Control . . . . . . . . . . . . . . . . . . . . . . . . . . . . . . . . . . 388
Display Brightness and Contrast Control Presets . . . . . . . . . . . . . . . . . . . . . . . . . . . . 388
Walking Class of Service. . . . . . . . . . . . . . . . . . . . . . . . . . . . . . . . . . . . . . . . . . . . . . . . 392
Walking Class of Service and Extension Locking . . . . . . . . . . . . . . . . . . . . . . . . . . . 392
DSX Software Manual
Table of Contents ◆ vii
Page 10

Table of Contents
IntraMail Features . . . . . . . . . . . . . . . . . . . . . . . . . . . . . . . . . . . . . . . . . . . . . . . . . . . 395
Introduction . . . . . . . . . . . . . . . . . . . . . . . . . . . . . . . . . . . . . . . . . . . . . . . . . . . . . . . . . . 395
Start-Up Programming. . . . . . . . . . . . . . . . . . . . . . . . . . . . . . . . . . . . . . . . . . . . . . . . . . 396
Specifications. . . . . . . . . . . . . . . . . . . . . . . . . . . . . . . . . . . . . . . . . . . . . . . . . . . . . . . . . 398
Application Examples . . . . . . . . . . . . . . . . . . . . . . . . . . . . . . . . . . . . . . . . . . . . . . . . . . 399
IntraMail Feature Glossary . . . . . . . . . . . . . . . . . . . . . . . . . . . . . . . . . . . . . . . . . . . . . . 402
Announcement Mailbox. . . . . . . . . . . . . . . . . . . . . . . . . . . . . . . . . . . . . . . . . . . . . . . . . 412
Announcement Message . . . . . . . . . . . . . . . . . . . . . . . . . . . . . . . . . . . . . . . . . . . . . . . . 417
Answer Schedule Override . . . . . . . . . . . . . . . . . . . . . . . . . . . . . . . . . . . . . . . . . . . . . . 418
Answer Tables . . . . . . . . . . . . . . . . . . . . . . . . . . . . . . . . . . . . . . . . . . . . . . . . . . . . . . . . 420
Answering Machine Emulation . . . . . . . . . . . . . . . . . . . . . . . . . . . . . . . . . . . . . . . . . . . 425
Auto Attendant Do Not Disturb. . . . . . . . . . . . . . . . . . . . . . . . . . . . . . . . . . . . . . . . . . . 427
Auto Erase or Save. . . . . . . . . . . . . . . . . . . . . . . . . . . . . . . . . . . . . . . . . . . . . . . . . . . . . 429
Auto Time Stamp. . . . . . . . . . . . . . . . . . . . . . . . . . . . . . . . . . . . . . . . . . . . . . . . . . . . . . 431
Automated Attendant . . . . . . . . . . . . . . . . . . . . . . . . . . . . . . . . . . . . . . . . . . . . . . . . . . . 433
Automated Attendant, Built-In . . . . . . . . . . . . . . . . . . . . . . . . . . . . . . . . . . . . . . . . . . . 436
Automated Attendant Transfer . . . . . . . . . . . . . . . . . . . . . . . . . . . . . . . . . . . . . . . . . . . 441
Automatic Routing for Rotary Dial Callers . . . . . . . . . . . . . . . . . . . . . . . . . . . . . . . . . . 442
Bilingual Voice Prompts . . . . . . . . . . . . . . . . . . . . . . . . . . . . . . . . . . . . . . . . . . . . . . . . 443
Call Forward to a Mailbox. . . . . . . . . . . . . . . . . . . . . . . . . . . . . . . . . . . . . . . . . . . . . . . 447
Call Routing Mailbox . . . . . . . . . . . . . . . . . . . . . . . . . . . . . . . . . . . . . . . . . . . . . . . . . . 450
Call Screening . . . . . . . . . . . . . . . . . . . . . . . . . . . . . . . . . . . . . . . . . . . . . . . . . . . . . . . . 453
Caller ID and Voice Mail. . . . . . . . . . . . . . . . . . . . . . . . . . . . . . . . . . . . . . . . . . . . . . . . 456
Caller ID with Return Call. . . . . . . . . . . . . . . . . . . . . . . . . . . . . . . . . . . . . . . . . . . . . . . 458
Calling the Automated Attendant . . . . . . . . . . . . . . . . . . . . . . . . . . . . . . . . . . . . . . . . . 459
Centrex Transfer . . . . . . . . . . . . . . . . . . . . . . . . . . . . . . . . . . . . . . . . . . . . . . . . . . . . . . 460
Conversation Record . . . . . . . . . . . . . . . . . . . . . . . . . . . . . . . . . . . . . . . . . . . . . . . . . . . 462
Dial Action Table. . . . . . . . . . . . . . . . . . . . . . . . . . . . . . . . . . . . . . . . . . . . . . . . . . . . . . 465
Directory Dialing . . . . . . . . . . . . . . . . . . . . . . . . . . . . . . . . . . . . . . . . . . . . . . . . . . . . . . 469
Directory Dialing Mailbox. . . . . . . . . . . . . . . . . . . . . . . . . . . . . . . . . . . . . . . . . . . . . . . 475
Erasing All Messages. . . . . . . . . . . . . . . . . . . . . . . . . . . . . . . . . . . . . . . . . . . . . . . . . . . 476
Exiting a Mailbox . . . . . . . . . . . . . . . . . . . . . . . . . . . . . . . . . . . . . . . . . . . . . . . . . . . . . 477
Extension Hunting to Voice Mail . . . . . . . . . . . . . . . . . . . . . . . . . . . . . . . . . . . . . . . . . 478
The Next Call Routing Mailbox Options . . . . . . . . . . . . . . . . . . . . . . . . . . . . . . . . . . 412
The Default Mailbox and Routing Hierarchy . . . . . . . . . . . . . . . . . . . . . . . . . . . . . . . 421
Customizing an Answer Table . . . . . . . . . . . . . . . . . . . . . . . . . . . . . . . . . . . . . . . . . . 421
Handling Partially Reviewed Messages . . . . . . . . . . . . . . . . . . . . . . . . . . . . . . . . . . . 429
Upgrading from the Built-In Automated Attendant . . . . . . . . . . . . . . . . . . . . . . . . . . 434
Upgrading from the Built-In Automated Attendant . . . . . . . . . . . . . . . . . . . . . . . . . . 437
How the System Handles Language Priority . . . . . . . . . . . . . . . . . . . . . . . . . . . . . . . 443
Call Forwarding a Subscriber’s Direct Inward Line to their Mailbox . . . . . . . . . . . . 447
Logging Onto a Subscriber Mailbox while Listening to the Greeting . . . . . . . . . . . . 447
Call Screening and Group Mailboxes. . . . . . . . . . . . . . . . . . . . . . . . . . . . . . . . . . . . . 453
Automatic Call Screening. . . . . . . . . . . . . . . . . . . . . . . . . . . . . . . . . . . . . . . . . . . . . . 453
Conversation Record Key for a Co-worker’s Mailbox. . . . . . . . . . . . . . . . . . . . . . . . 462
User Programmable Feature . . . . . . . . . . . . . . . . . . . . . . . . . . . . . . . . . . . . . . . . . . . . 464
Dialing Options Available while Entering a Name . . . . . . . . . . . . . . . . . . . . . . . . . . 473
Dialing Options Available when more than one Employee has the Entered Name . . 474
Extension Hunting to Voice Mail Routing Charts . . . . . . . . . . . . . . . . . . . . . . . . . . . 479
viii ◆ Table of Contents
DSX Software Manual
Page 11

Table of Contents
External Transfer . . . . . . . . . . . . . . . . . . . . . . . . . . . . . . . . . . . . . . . . . . . . . . . . . . . . . . 483
Fax Detection . . . . . . . . . . . . . . . . . . . . . . . . . . . . . . . . . . . . . . . . . . . . . . . . . . . . . . . . . 485
Flexible Answering Schedules. . . . . . . . . . . . . . . . . . . . . . . . . . . . . . . . . . . . . . . . . . . . 486
Flexible Call Routing. . . . . . . . . . . . . . . . . . . . . . . . . . . . . . . . . . . . . . . . . . . . . . . . . . . 487
Flexible Mailbox Numbering Plan. . . . . . . . . . . . . . . . . . . . . . . . . . . . . . . . . . . . . . . . . 488
Flexible Numbering Plan Example. . . . . . . . . . . . . . . . . . . . . . . . . . . . . . . . . . . . . . . 488
Forced Unscreened Transfer . . . . . . . . . . . . . . . . . . . . . . . . . . . . . . . . . . . . . . . . . . . . . 489
Getting Recorded Help . . . . . . . . . . . . . . . . . . . . . . . . . . . . . . . . . . . . . . . . . . . . . . . . . 490
Go to a Mailbox . . . . . . . . . . . . . . . . . . . . . . . . . . . . . . . . . . . . . . . . . . . . . . . . . . . . . . . 491
Greeting . . . . . . . . . . . . . . . . . . . . . . . . . . . . . . . . . . . . . . . . . . . . . . . . . . . . . . . . . . . . . 493
Multiple Greetings . . . . . . . . . . . . . . . . . . . . . . . . . . . . . . . . . . . . . . . . . . . . . . . . . . . 493
Remote Greetings . . . . . . . . . . . . . . . . . . . . . . . . . . . . . . . . . . . . . . . . . . . . . . . . . . . . 493
Group Mailbox. . . . . . . . . . . . . . . . . . . . . . . . . . . . . . . . . . . . . . . . . . . . . . . . . . . . . . . . 497
Ring Group Mailbox. . . . . . . . . . . . . . . . . . . . . . . . . . . . . . . . . . . . . . . . . . . . . . . . . . 497
UCD Group Mailbox . . . . . . . . . . . . . . . . . . . . . . . . . . . . . . . . . . . . . . . . . . . . . . . . . 497
Understanding Group Mailbox Types . . . . . . . . . . . . . . . . . . . . . . . . . . . . . . . . . . . . 497
Programming a Ring Group Mailbox . . . . . . . . . . . . . . . . . . . . . . . . . . . . . . . . . . . . . 499
Programming a UCD Group Mailbox . . . . . . . . . . . . . . . . . . . . . . . . . . . . . . . . . . . . 501
Guest Mailbox . . . . . . . . . . . . . . . . . . . . . . . . . . . . . . . . . . . . . . . . . . . . . . . . . . . . . . . . 503
Hang Up . . . . . . . . . . . . . . . . . . . . . . . . . . . . . . . . . . . . . . . . . . . . . . . . . . . . . . . . . . . . . 506
Instruction Menu . . . . . . . . . . . . . . . . . . . . . . . . . . . . . . . . . . . . . . . . . . . . . . . . . . . . . . 507
Leaving a Message. . . . . . . . . . . . . . . . . . . . . . . . . . . . . . . . . . . . . . . . . . . . . . . . . . . . . 509
Additional Options While Leaving a Message . . . . . . . . . . . . . . . . . . . . . . . . . . . . . . 509
Listening to Messages . . . . . . . . . . . . . . . . . . . . . . . . . . . . . . . . . . . . . . . . . . . . . . . . . . 512
Handling Partially Reviewed Messages . . . . . . . . . . . . . . . . . . . . . . . . . . . . . . . . . . . 513
Telephone Display while Listening to a Message . . . . . . . . . . . . . . . . . . . . . . . . . . . 513
Log Onto Voice Mail . . . . . . . . . . . . . . . . . . . . . . . . . . . . . . . . . . . . . . . . . . . . . . . . . . . 515
Local (On-site) Logon . . . . . . . . . . . . . . . . . . . . . . . . . . . . . . . . . . . . . . . . . . . . . . . . 515
Remote Log On. . . . . . . . . . . . . . . . . . . . . . . . . . . . . . . . . . . . . . . . . . . . . . . . . . . . . . 515
Mailbox Name . . . . . . . . . . . . . . . . . . . . . . . . . . . . . . . . . . . . . . . . . . . . . . . . . . . . . . . . 518
Mailbox Options Menu . . . . . . . . . . . . . . . . . . . . . . . . . . . . . . . . . . . . . . . . . . . . . . . . . 520
Mailbox Security Code Delete. . . . . . . . . . . . . . . . . . . . . . . . . . . . . . . . . . . . . . . . . . . . 522
Main Menu. . . . . . . . . . . . . . . . . . . . . . . . . . . . . . . . . . . . . . . . . . . . . . . . . . . . . . . . . . . 523
Make Call. . . . . . . . . . . . . . . . . . . . . . . . . . . . . . . . . . . . . . . . . . . . . . . . . . . . . . . . . . . . 525
Master Mailbox . . . . . . . . . . . . . . . . . . . . . . . . . . . . . . . . . . . . . . . . . . . . . . . . . . . . . . . 527
Message Count Display . . . . . . . . . . . . . . . . . . . . . . . . . . . . . . . . . . . . . . . . . . . . . . . . . 528
Message Delete . . . . . . . . . . . . . . . . . . . . . . . . . . . . . . . . . . . . . . . . . . . . . . . . . . . . . . . 530
Message Forward . . . . . . . . . . . . . . . . . . . . . . . . . . . . . . . . . . . . . . . . . . . . . . . . . . . . . . 531
Message Length . . . . . . . . . . . . . . . . . . . . . . . . . . . . . . . . . . . . . . . . . . . . . . . . . . . . . . . 533
Message Listen Mode . . . . . . . . . . . . . . . . . . . . . . . . . . . . . . . . . . . . . . . . . . . . . . . . . . 534
Message Notification . . . . . . . . . . . . . . . . . . . . . . . . . . . . . . . . . . . . . . . . . . . . . . . . . . . 535
How Message Notification Works to Normal Telephone Numbers. . . . . . . . . . . . . . 535
How Message Notification Works to Digital Pager Numbers . . . . . . . . . . . . . . . . . . 535
Message On Hold. . . . . . . . . . . . . . . . . . . . . . . . . . . . . . . . . . . . . . . . . . . . . . . . . . . . . . 541
Message Playback Direction . . . . . . . . . . . . . . . . . . . . . . . . . . . . . . . . . . . . . . . . . . . . . 543
Message Record . . . . . . . . . . . . . . . . . . . . . . . . . . . . . . . . . . . . . . . . . . . . . . . . . . . . . . . 544
Message Reply . . . . . . . . . . . . . . . . . . . . . . . . . . . . . . . . . . . . . . . . . . . . . . . . . . . . . . . . 545
Message Retention . . . . . . . . . . . . . . . . . . . . . . . . . . . . . . . . . . . . . . . . . . . . . . . . . . . . . 547
Message Retention Guard Time . . . . . . . . . . . . . . . . . . . . . . . . . . . . . . . . . . . . . . . . . 547
DSX Software Manual
Table of Contents ◆ ix
Page 12

Table of Contents
Message Storage Limit . . . . . . . . . . . . . . . . . . . . . . . . . . . . . . . . . . . . . . . . . . . . . . . . . 548
Message Waiting Lamp . . . . . . . . . . . . . . . . . . . . . . . . . . . . . . . . . . . . . . . . . . . . . . . . . 549
Multiple Company Greetings. . . . . . . . . . . . . . . . . . . . . . . . . . . . . . . . . . . . . . . . . . . . . 550
Next Call Routing Mailbox . . . . . . . . . . . . . . . . . . . . . . . . . . . . . . . . . . . . . . . . . . . . . . 552
Programming Voice Mail . . . . . . . . . . . . . . . . . . . . . . . . . . . . . . . . . . . . . . . . . . . . . . . 558
Quick Message. . . . . . . . . . . . . . . . . . . . . . . . . . . . . . . . . . . . . . . . . . . . . . . . . . . . . . . . 560
Record and Send a Message . . . . . . . . . . . . . . . . . . . . . . . . . . . . . . . . . . . . . . . . . . . . . 562
Remote Programming . . . . . . . . . . . . . . . . . . . . . . . . . . . . . . . . . . . . . . . . . . . . . . . . . . 564
Routing Mailbox . . . . . . . . . . . . . . . . . . . . . . . . . . . . . . . . . . . . . . . . . . . . . . . . . . . . . . 566
Screened Transfer . . . . . . . . . . . . . . . . . . . . . . . . . . . . . . . . . . . . . . . . . . . . . . . . . . . . . 567
Security Code. . . . . . . . . . . . . . . . . . . . . . . . . . . . . . . . . . . . . . . . . . . . . . . . . . . . . . . . . 570
Single Digit Dialing . . . . . . . . . . . . . . . . . . . . . . . . . . . . . . . . . . . . . . . . . . . . . . . . . . . . 572
Subscriber Mailbox . . . . . . . . . . . . . . . . . . . . . . . . . . . . . . . . . . . . . . . . . . . . . . . . . . . . 574
System Administrator . . . . . . . . . . . . . . . . . . . . . . . . . . . . . . . . . . . . . . . . . . . . . . . . . . 576
System Administrator Mailbox . . . . . . . . . . . . . . . . . . . . . . . . . . . . . . . . . . . . . . . . . . . 578
System Reinitialization . . . . . . . . . . . . . . . . . . . . . . . . . . . . . . . . . . . . . . . . . . . . . . . . . 579
Time and Date with Voice Mail. . . . . . . . . . . . . . . . . . . . . . . . . . . . . . . . . . . . . . . . . . . 580
Time and Date Stamp. . . . . . . . . . . . . . . . . . . . . . . . . . . . . . . . . . . . . . . . . . . . . . . . . . . 581
Transfer to a Mailbox. . . . . . . . . . . . . . . . . . . . . . . . . . . . . . . . . . . . . . . . . . . . . . . . . . . 583
Transfer to a UCD Group . . . . . . . . . . . . . . . . . . . . . . . . . . . . . . . . . . . . . . . . . . . . . . . 585
Undefined Routing. . . . . . . . . . . . . . . . . . . . . . . . . . . . . . . . . . . . . . . . . . . . . . . . . . . . . 586
Unscreened Transfer . . . . . . . . . . . . . . . . . . . . . . . . . . . . . . . . . . . . . . . . . . . . . . . . . . . 587
Voice Mail Overflow . . . . . . . . . . . . . . . . . . . . . . . . . . . . . . . . . . . . . . . . . . . . . . . . . . . 590
Voice Prompting Messages . . . . . . . . . . . . . . . . . . . . . . . . . . . . . . . . . . . . . . . . . . . . . . 593
Volume Control with Voice Mail . . . . . . . . . . . . . . . . . . . . . . . . . . . . . . . . . . . . . . . . . 594
Subscriber Mailbox Options . . . . . . . . . . . . . . . . . . . . . . . . . . . . . . . . . . . . . . . . . . . . 552
Logging Onto a Subscriber Mailbox while Listening to the Greeting . . . . . . . . . . . . 553
Recording Options . . . . . . . . . . . . . . . . . . . . . . . . . . . . . . . . . . . . . . . . . . . . . . . . . . . 562
Screened vs. Unscreened Transfer . . . . . . . . . . . . . . . . . . . . . . . . . . . . . . . . . . . . . . . 567
Screened Transfer and Inactive Mailboxes. . . . . . . . . . . . . . . . . . . . . . . . . . . . . . . . . 567
Time and Date Stamp with Caller ID . . . . . . . . . . . . . . . . . . . . . . . . . . . . . . . . . . . . . 581
Transfer Message Handling . . . . . . . . . . . . . . . . . . . . . . . . . . . . . . . . . . . . . . . . . . . . 583
Screened vs. Unscreened Transfer . . . . . . . . . . . . . . . . . . . . . . . . . . . . . . . . . . . . . . . 587
Unscreened Transfer and Inactive Mailboxes . . . . . . . . . . . . . . . . . . . . . . . . . . . . . . 587
x ◆ Table of Contents DSX Software Manual
Page 13

Table of Contents
System Options: 1001-1702 . . . . . . . . . . . . . . . . . . . . . . . . . . . . . . . . . . . . . . . . . . . 595
10xx-Configuration . . . . . . . . . . . . . . . . . . . . . . . . . . . . . . . . . . . . . . . . . . . . . . . . . . . . 595
100x-System . . . . . . . . . . . . . . . . . . . . . . . . . . . . . . . . . . . . . . . . . . . . . . . . . . . . . . . 595
1001-Version . . . . . . . . . . . . . . . . . . . . . . . . . . . . . . . . . . . . . . . . . . . . . . . . . . . . . . . . . . . .595
1001-01: System Type . . . . . . . . . . . . . . . . . . . . . . . . . . . . . . . . . . . . . . . . . . . . . . . . 595
1001-02: Software Version. . . . . . . . . . . . . . . . . . . . . . . . . . . . . . . . . . . . . . . . . . . . . 595
1001-03: DSP Version . . . . . . . . . . . . . . . . . . . . . . . . . . . . . . . . . . . . . . . . . . . . . . . . 596
101x-ID. . . . . . . . . . . . . . . . . . . . . . . . . . . . . . . . . . . . . . . . . . . . . . . . . . . . . . . . . . . 597
1011-Name . . . . . . . . . . . . . . . . . . . . . . . . . . . . . . . . . . . . . . . . . . . . . . . . . . . . . . . . . . . . . .597
1011-01: System Name. . . . . . . . . . . . . . . . . . . . . . . . . . . . . . . . . . . . . . . . . . . . . . . . 597
1011-02: Telephone Number . . . . . . . . . . . . . . . . . . . . . . . . . . . . . . . . . . . . . . . . . . . 597
Name Programming Chart . . . . . . . . . . . . . . . . . . . . . . . . . . . . . . . . . . . . . . . . . . . . . 598
102x-Time. . . . . . . . . . . . . . . . . . . . . . . . . . . . . . . . . . . . . . . . . . . . . . . . . . . . . . . . . 599
1021-Set Time and Date . . . . . . . . . . . . . . . . . . . . . . . . . . . . . . . . . . . . . . . . . . . . . . . . . . . .599
1021-01: System Time . . . . . . . . . . . . . . . . . . . . . . . . . . . . . . . . . . . . . . . . . . . . . . . . 599
1021-02: System Date. . . . . . . . . . . . . . . . . . . . . . . . . . . . . . . . . . . . . . . . . . . . . . . . . 599
1022-Daylight Savings Time . . . . . . . . . . . . . . . . . . . . . . . . . . . . . . . . . . . . . . . . . . . . . . . .600
1022-01: Automatic Daylight Savings Time Setting . . . . . . . . . . . . . . . . . . . . . . . . . 600
1023-Internet (Network Time Server [NTS]) . . . . . . . . . . . . . . . . . . . . . . . . . . . . . . . . . . . .601
1023-01: Network Time Server Name . . . . . . . . . . . . . . . . . . . . . . . . . . . . . . . . . . . . 601
103x-Programming . . . . . . . . . . . . . . . . . . . . . . . . . . . . . . . . . . . . . . . . . . . . . . . . . . 602
1031-Password Entry . . . . . . . . . . . . . . . . . . . . . . . . . . . . . . . . . . . . . . . . . . . . . . . . . . . . . .602
1031-01: New Password . . . . . . . . . . . . . . . . . . . . . . . . . . . . . . . . . . . . . . . . . . . . . . . 602
11xx-CPU . . . . . . . . . . . . . . . . . . . . . . . . . . . . . . . . . . . . . . . . . . . . . . . . . . . . . . . . . . . 603
110x-I/O . . . . . . . . . . . . . . . . . . . . . . . . . . . . . . . . . . . . . . . . . . . . . . . . . . . . . . . . . . 603
1101-RS232 Settings . . . . . . . . . . . . . . . . . . . . . . . . . . . . . . . . . . . . . . . . . . . . . . . . . . . . . .603
1101-01: Baud Rate . . . . . . . . . . . . . . . . . . . . . . . . . . . . . . . . . . . . . . . . . . . . . . . . . . 603
1102-Modem Settings . . . . . . . . . . . . . . . . . . . . . . . . . . . . . . . . . . . . . . . . . . . . . . . . . . . . .604
1103-USB Settings . . . . . . . . . . . . . . . . . . . . . . . . . . . . . . . . . . . . . . . . . . . . . . . . . . . . . . . .605
1104-Ethernet Setup . . . . . . . . . . . . . . . . . . . . . . . . . . . . . . . . . . . . . . . . . . . . . . . . . . . . . . .606
1104-01: System IP Address. . . . . . . . . . . . . . . . . . . . . . . . . . . . . . . . . . . . . . . . . . . . 606
1104-02: System Subnet Mask . . . . . . . . . . . . . . . . . . . . . . . . . . . . . . . . . . . . . . . . . . 606
1104-03: Default Gateway . . . . . . . . . . . . . . . . . . . . . . . . . . . . . . . . . . . . . . . . . . . . . 607
111x-Tones . . . . . . . . . . . . . . . . . . . . . . . . . . . . . . . . . . . . . . . . . . . . . . . . . . . . . . . . 608
1111-DTMF Setup . . . . . . . . . . . . . . . . . . . . . . . . . . . . . . . . . . . . . . . . . . . . . . . . . . . . . . . .608
1111-01: Manual DTMF Tone On . . . . . . . . . . . . . . . . . . . . . . . . . . . . . . . . . . . . . . . 608
1111-02: Manual DTMF Tone Off. . . . . . . . . . . . . . . . . . . . . . . . . . . . . . . . . . . . . . . 608
1111-03: Speed Dial DTMF Tone On . . . . . . . . . . . . . . . . . . . . . . . . . . . . . . . . . . . . 608
1111-04: Speed Dial DTMF Tone Off . . . . . . . . . . . . . . . . . . . . . . . . . . . . . . . . . . . . 610
12xx-Slots . . . . . . . . . . . . . . . . . . . . . . . . . . . . . . . . . . . . . . . . . . . . . . . . . . . . . . . . . . . 611
120x-Stations . . . . . . . . . . . . . . . . . . . . . . . . . . . . . . . . . . . . . . . . . . . . . . . . . . . . . . 611
1201-Type (Station Card Type) . . . . . . . . . . . . . . . . . . . . . . . . . . . . . . . . . . . . . . . . . . . . . .611
1201-01: Card Type . . . . . . . . . . . . . . . . . . . . . . . . . . . . . . . . . . . . . . . . . . . . . . . . . . 611
1202-Ports (Primary Station Ports) . . . . . . . . . . . . . . . . . . . . . . . . . . . . . . . . . . . . . . . . . . .612
1202-01: Primary Station Port Assignment . . . . . . . . . . . . . . . . . . . . . . . . . . . . . . . . 612
1203-Secondary Station Ports . . . . . . . . . . . . . . . . . . . . . . . . . . . . . . . . . . . . . . . . . . . . . . .613
1203-01: Secondary Station Port Assignment . . . . . . . . . . . . . . . . . . . . . . . . . . . . . . 613
121x-Lines . . . . . . . . . . . . . . . . . . . . . . . . . . . . . . . . . . . . . . . . . . . . . . . . . . . . . . . . 614
1211-Lines (Line Card Type) . . . . . . . . . . . . . . . . . . . . . . . . . . . . . . . . . . . . . . . . . . . . . . . .614
1211-01: Card Type . . . . . . . . . . . . . . . . . . . . . . . . . . . . . . . . . . . . . . . . . . . . . . . . . . 614
1212-Ports . . . . . . . . . . . . . . . . . . . . . . . . . . . . . . . . . . . . . . . . . . . . . . . . . . . . . . . . . . . . . . .615
DSX Software Manual Table of Contents ◆ xi
Page 14

Table of Contents
13xx-Numbering . . . . . . . . . . . . . . . . . . . . . . . . . . . . . . . . . . . . . . . . . . . . . . . . . . . . . . 620
14xx-COS (Class of Service). . . . . . . . . . . . . . . . . . . . . . . . . . . . . . . . . . . . . . . . . . . . . 628
1212-01: Line Port Assignment . . . . . . . . . . . . . . . . . . . . . . . . . . . . . . . . . . . . . . . . . 615
1213-T1/E1 Card Setup . . . . . . . . . . . . . . . . . . . . . . . . . . . . . . . . . . . . . . . . . . . . . . . . . . . .616
1213-01: Number of PCM Channels . . . . . . . . . . . . . . . . . . . . . . . . . . . . . . . . . . . . . 616
1213-02: Clock Control . . . . . . . . . . . . . . . . . . . . . . . . . . . . . . . . . . . . . . . . . . . . . . . 616
1213-03: Transmit Pulse Amplitude. . . . . . . . . . . . . . . . . . . . . . . . . . . . . . . . . . . . . . 617
1213-04: Framer Type . . . . . . . . . . . . . . . . . . . . . . . . . . . . . . . . . . . . . . . . . . . . . . . . 617
1213-05: Zero Suppression. . . . . . . . . . . . . . . . . . . . . . . . . . . . . . . . . . . . . . . . . . . . . 618
1213-06: Loopback Mode. . . . . . . . . . . . . . . . . . . . . . . . . . . . . . . . . . . . . . . . . . . . . . 618
130x-Dial Plan . . . . . . . . . . . . . . . . . . . . . . . . . . . . . . . . . . . . . . . . . . . . . . . . . . . . . 620
1301-Digits . . . . . . . . . . . . . . . . . . . . . . . . . . . . . . . . . . . . . . . . . . . . . . . . . . . . . . . . . . . . . .620
1301-[01-10]: Function Type . . . . . . . . . . . . . . . . . . . . . . . . . . . . . . . . . . . . . . . . . . . 620
1301-[01-10]: Expected Number of Digits. . . . . . . . . . . . . . . . . . . . . . . . . . . . . . . . . 620
131x-Extensions . . . . . . . . . . . . . . . . . . . . . . . . . . . . . . . . . . . . . . . . . . . . . . . . . . . . 623
1311-Stations . . . . . . . . . . . . . . . . . . . . . . . . . . . . . . . . . . . . . . . . . . . . . . . . . . . . . . . . . . . .623
1311-01: Station Extension Number. . . . . . . . . . . . . . . . . . . . . . . . . . . . . . . . . . . . . . 623
1312-Voice Mail Ports . . . . . . . . . . . . . . . . . . . . . . . . . . . . . . . . . . . . . . . . . . . . . . . . . . . . .624
1312-01: Voice Mail Extension Number . . . . . . . . . . . . . . . . . . . . . . . . . . . . . . . . . . 624
1313-Lines . . . . . . . . . . . . . . . . . . . . . . . . . . . . . . . . . . . . . . . . . . . . . . . . . . . . . . . . . . . . . .625
1313-01: Line Extension Number. . . . . . . . . . . . . . . . . . . . . . . . . . . . . . . . . . . . . . . . 625
1314-Ring Groups . . . . . . . . . . . . . . . . . . . . . . . . . . . . . . . . . . . . . . . . . . . . . . . . . . . . . . . .626
1314-01: Ring Group Master Extension Number. . . . . . . . . . . . . . . . . . . . . . . . . . . . 626
1315-UCD Groups . . . . . . . . . . . . . . . . . . . . . . . . . . . . . . . . . . . . . . . . . . . . . . . . . . . . . . . .627
1315-01: UCD Group Master Extension Number . . . . . . . . . . . . . . . . . . . . . . . . . . . 627
140x-Station . . . . . . . . . . . . . . . . . . . . . . . . . . . . . . . . . . . . . . . . . . . . . . . . . . . . . . . 628
1401-Features . . . . . . . . . . . . . . . . . . . . . . . . . . . . . . . . . . . . . . . . . . . . . . . . . . . . . . . . . . . .628
1401-01: System Speed Dial Access . . . . . . . . . . . . . . . . . . . . . . . . . . . . . . . . . . . . . 628
1401-02: Extended Ring . . . . . . . . . . . . . . . . . . . . . . . . . . . . . . . . . . . . . . . . . . . . . . . 628
1401-03: Privacy. . . . . . . . . . . . . . . . . . . . . . . . . . . . . . . . . . . . . . . . . . . . . . . . . . . . . 628
1401-04: ACD Supervisor . . . . . . . . . . . . . . . . . . . . . . . . . . . . . . . . . . . . . . . . . . . . . 629
1401-05: Soft Keys . . . . . . . . . . . . . . . . . . . . . . . . . . . . . . . . . . . . . . . . . . . . . . . . . . . 629
1401-06: Conversation Record . . . . . . . . . . . . . . . . . . . . . . . . . . . . . . . . . . . . . . . . . . 629
1401-07: DND Override . . . . . . . . . . . . . . . . . . . . . . . . . . . . . . . . . . . . . . . . . . . . . . . 629
1401-08: Receive DID Calls. . . . . . . . . . . . . . . . . . . . . . . . . . . . . . . . . . . . . . . . . . . . 630
1401-09: Receive DID Camp-On . . . . . . . . . . . . . . . . . . . . . . . . . . . . . . . . . . . . . . . . 631
1401-10: Name Programming . . . . . . . . . . . . . . . . . . . . . . . . . . . . . . . . . . . . . . . . . . 631
1401-11: Language Programming . . . . . . . . . . . . . . . . . . . . . . . . . . . . . . . . . . . . . . . 631
1401-12: Call Screening . . . . . . . . . . . . . . . . . . . . . . . . . . . . . . . . . . . . . . . . . . . . . . . 632
1401-13: Hotline Automatic Transfer. . . . . . . . . . . . . . . . . . . . . . . . . . . . . . . . . . . . . 632
1402-Access . . . . . . . . . . . . . . . . . . . . . . . . . . . . . . . . . . . . . . . . . . . . . . . . . . . . . . . . . . . . .633
1402-01: Forced Line Disconnect. . . . . . . . . . . . . . . . . . . . . . . . . . . . . . . . . . . . . . . . 633
1402-02: Barge In (Intrusion) . . . . . . . . . . . . . . . . . . . . . . . . . . . . . . . . . . . . . . . . . . . 633
1402-03: Camp-On to Busy Extension. . . . . . . . . . . . . . . . . . . . . . . . . . . . . . . . . . . . 633
1402-04: Silent Monitor . . . . . . . . . . . . . . . . . . . . . . . . . . . . . . . . . . . . . . . . . . . . . . . 634
1402-05: Activate Night Mode . . . . . . . . . . . . . . . . . . . . . . . . . . . . . . . . . . . . . . . . . . 634
1402-06: Direct Line Access . . . . . . . . . . . . . . . . . . . . . . . . . . . . . . . . . . . . . . . . . . . 634
1403-SLT’s (Single Line Telephone Options) . . . . . . . . . . . . . . . . . . . . . . . . . . . . . . . . . . .635
1403-01: Flash for Single Line Set . . . . . . . . . . . . . . . . . . . . . . . . . . . . . . . . . . . . . . . 635
1403-02: Single Ring for Single Line Set. . . . . . . . . . . . . . . . . . . . . . . . . . . . . . . . . . 635
1403-03: Special Dial Tone for Single Line Set. . . . . . . . . . . . . . . . . . . . . . . . . . . . . 635
1403-04: High Voltage Message Waiting Lamp for Single Line Set. . . . . . . . . . . . . 636
xii ◆ Table of Contents DSX Software Manual
Page 15

Table of Contents
1403-05: FSK Message Waiting Lamp for Single Line Set . . . . . . . . . . . . . . . . . . . . 636
1403-06: Loop Disconnect for Single Line Set . . . . . . . . . . . . . . . . . . . . . . . . . . . . . 636
1404-Caller ID . . . . . . . . . . . . . . . . . . . . . . . . . . . . . . . . . . . . . . . . . . . . . . . . . . . . . . . . . . .638
1404-01: Caller ID Display. . . . . . . . . . . . . . . . . . . . . . . . . . . . . . . . . . . . . . . . . . . . . 638
1404-02: Second Call Caller ID . . . . . . . . . . . . . . . . . . . . . . . . . . . . . . . . . . . . . . . . . 638
1404-03: Third Party Caller ID. . . . . . . . . . . . . . . . . . . . . . . . . . . . . . . . . . . . . . . . . . 638
1404-04: Caller ID Display Separator . . . . . . . . . . . . . . . . . . . . . . . . . . . . . . . . . . . . 639
1404-05: Outgoing ANI Privacy. . . . . . . . . . . . . . . . . . . . . . . . . . . . . . . . . . . . . . . . . 639
1404-06: Caller ID Alert Lamp . . . . . . . . . . . . . . . . . . . . . . . . . . . . . . . . . . . . . . . . . 639
1405-Distinctive Ringing . . . . . . . . . . . . . . . . . . . . . . . . . . . . . . . . . . . . . . . . . . . . . . . . . . .641
1405-01: Ring Type Configuration. . . . . . . . . . . . . . . . . . . . . . . . . . . . . . . . . . . . . . . 641
1405-02: Station Ring Override . . . . . . . . . . . . . . . . . . . . . . . . . . . . . . . . . . . . . . . . . 641
1405-03: Key Ring Override . . . . . . . . . . . . . . . . . . . . . . . . . . . . . . . . . . . . . . . . . . . 641
1406-Call Forwarding Options . . . . . . . . . . . . . . . . . . . . . . . . . . . . . . . . . . . . . . . . . . . . . . .643
1406-01: Call Forwarding Off-Premises . . . . . . . . . . . . . . . . . . . . . . . . . . . . . . . . . . 643
1406-02: Internal Call Forwarding . . . . . . . . . . . . . . . . . . . . . . . . . . . . . . . . . . . . . . . 643
1407-Paging . . . . . . . . . . . . . . . . . . . . . . . . . . . . . . . . . . . . . . . . . . . . . . . . . . . . . . . . . . . . .644
1407-01: Make All Call Page . . . . . . . . . . . . . . . . . . . . . . . . . . . . . . . . . . . . . . . . . . . 644
1407-02: Make Page Into Zone 1 . . . . . . . . . . . . . . . . . . . . . . . . . . . . . . . . . . . . . . . . 644
1407-03: Make Page Into Zone 2 . . . . . . . . . . . . . . . . . . . . . . . . . . . . . . . . . . . . . . . . 644
1407-04: Make Page Into Zone 3 . . . . . . . . . . . . . . . . . . . . . . . . . . . . . . . . . . . . . . . . 645
1407-05: Make Page Into Zone 4 . . . . . . . . . . . . . . . . . . . . . . . . . . . . . . . . . . . . . . . . 645
1407-06: Make Page Into Zone 5 . . . . . . . . . . . . . . . . . . . . . . . . . . . . . . . . . . . . . . . . 645
1407-07: Make Page Into Zone 6 . . . . . . . . . . . . . . . . . . . . . . . . . . . . . . . . . . . . . . . . 645
1407-08: Make Page Into Zone 7 . . . . . . . . . . . . . . . . . . . . . . . . . . . . . . . . . . . . . . . . 646
141x-Line . . . . . . . . . . . . . . . . . . . . . . . . . . . . . . . . . . . . . . . . . . . . . . . . . . . . . . . . . 647
1411-Access . . . . . . . . . . . . . . . . . . . . . . . . . . . . . . . . . . . . . . . . . . . . . . . . . . . . . . . . . . . . .647
1411-01: Camp-On to Busy Lines . . . . . . . . . . . . . . . . . . . . . . . . . . . . . . . . . . . . . . . 647
1411-02: Line Queue Priority . . . . . . . . . . . . . . . . . . . . . . . . . . . . . . . . . . . . . . . . . . . 647
1411-03: Automatic Hold . . . . . . . . . . . . . . . . . . . . . . . . . . . . . . . . . . . . . . . . . . . . . . 647
1411-04: Enhanced Last Number Redial . . . . . . . . . . . . . . . . . . . . . . . . . . . . . . . . . . 648
1411-05: Unsupervised Conference . . . . . . . . . . . . . . . . . . . . . . . . . . . . . . . . . . . . . . 648
1412-Toll Restriction . . . . . . . . . . . . . . . . . . . . . . . . . . . . . . . . . . . . . . . . . . . . . . . . . . . . . .649
1412-01: Walking Class of Service (Day) . . . . . . . . . . . . . . . . . . . . . . . . . . . . . . . . . 649
1412-02: Walking Class of Service (Night) . . . . . . . . . . . . . . . . . . . . . . . . . . . . . . . . 649
1412-03: Station Locking . . . . . . . . . . . . . . . . . . . . . . . . . . . . . . . . . . . . . . . . . . . . . . 649
1412-04: Forced Account Codes . . . . . . . . . . . . . . . . . . . . . . . . . . . . . . . . . . . . . . . . 651
1412-05: Verified Account Codes . . . . . . . . . . . . . . . . . . . . . . . . . . . . . . . . . . . . . . . 651
1412-06: Account Codes for Toll Calls Only. . . . . . . . . . . . . . . . . . . . . . . . . . . . . . . 651
15xx-Options . . . . . . . . . . . . . . . . . . . . . . . . . . . . . . . . . . . . . . . . . . . . . . . . . . . . . . . . . 652
150x-Operators . . . . . . . . . . . . . . . . . . . . . . . . . . . . . . . . . . . . . . . . . . . . . . . . . . . . . 652
1501-Setup . . . . . . . . . . . . . . . . . . . . . . . . . . . . . . . . . . . . . . . . . . . . . . . . . . . . . . . . . . . . . .652
1501-01: Number of Operators. . . . . . . . . . . . . . . . . . . . . . . . . . . . . . . . . . . . . . . . . . 652
1502-Assignments . . . . . . . . . . . . . . . . . . . . . . . . . . . . . . . . . . . . . . . . . . . . . . . . . . . . . . . .653
1502-01: Operator Number 1 . . . . . . . . . . . . . . . . . . . . . . . . . . . . . . . . . . . . . . . . . . . 653
1502-02: Operator Number 2 . . . . . . . . . . . . . . . . . . . . . . . . . . . . . . . . . . . . . . . . . . . 653
1502-03: Operator Number 3 . . . . . . . . . . . . . . . . . . . . . . . . . . . . . . . . . . . . . . . . . . . 653
1502-04: Operator Number 4 . . . . . . . . . . . . . . . . . . . . . . . . . . . . . . . . . . . . . . . . . . . 654
151x-Stations . . . . . . . . . . . . . . . . . . . . . . . . . . . . . . . . . . . . . . . . . . . . . . . . . . . . . . 655
1511-Display . . . . . . . . . . . . . . . . . . . . . . . . . . . . . . . . . . . . . . . . . . . . . . . . . . . . . . . . . . . .655
1511-01: Name Format. . . . . . . . . . . . . . . . . . . . . . . . . . . . . . . . . . . . . . . . . . . . . . . . 655
1511-02: Clock Display Format . . . . . . . . . . . . . . . . . . . . . . . . . . . . . . . . . . . . . . . . . 656
DSX Software Manual Table of Contents ◆ xiii
Page 16

Table of Contents
16xx-Timers. . . . . . . . . . . . . . . . . . . . . . . . . . . . . . . . . . . . . . . . . . . . . . . . . . . . . . . . . . 669
1512-Calls . . . . . . . . . . . . . . . . . . . . . . . . . . . . . . . . . . . . . . . . . . . . . . . . . . . . . . . . . . . . . . .657
1512-01: Automatic Handsfree. . . . . . . . . . . . . . . . . . . . . . . . . . . . . . . . . . . . . . . . . . 657
1512-02: Call Waiting Tones . . . . . . . . . . . . . . . . . . . . . . . . . . . . . . . . . . . . . . . . . . . 657
1513-Intercom . . . . . . . . . . . . . . . . . . . . . . . . . . . . . . . . . . . . . . . . . . . . . . . . . . . . . . . . . . .658
1513-01: Intercom Voice Announcements . . . . . . . . . . . . . . . . . . . . . . . . . . . . . . . . . 658
1513-02: Handsfree Reply (Handsfree Answerback). . . . . . . . . . . . . . . . . . . . . . . . . 658
152x-MOH/BGM . . . . . . . . . . . . . . . . . . . . . . . . . . . . . . . . . . . . . . . . . . . . . . . . . . . 659
1521-Setup . . . . . . . . . . . . . . . . . . . . . . . . . . . . . . . . . . . . . . . . . . . . . . . . . . . . . . . . . . . . . .659
1521-01: Enable Music on Hold. . . . . . . . . . . . . . . . . . . . . . . . . . . . . . . . . . . . . . . . . 659
1521-02: Music on Hold for Transferred Calls . . . . . . . . . . . . . . . . . . . . . . . . . . . . . 659
1521-03: Background Music Source . . . . . . . . . . . . . . . . . . . . . . . . . . . . . . . . . . . . . 659
1521-04: Background Music over External Page . . . . . . . . . . . . . . . . . . . . . . . . . . . . 660
1521-05: Audio Input 1 Gain Setting . . . . . . . . . . . . . . . . . . . . . . . . . . . . . . . . . . . . . 661
1521-06: Audio Input 2 Gain Setting . . . . . . . . . . . . . . . . . . . . . . . . . . . . . . . . . . . . . 661
153x-Paging . . . . . . . . . . . . . . . . . . . . . . . . . . . . . . . . . . . . . . . . . . . . . . . . . . . . . . . 662
1531-Setup . . . . . . . . . . . . . . . . . . . . . . . . . . . . . . . . . . . . . . . . . . . . . . . . . . . . . . . . . . . . . .662
1531-01: External Page Ring Type. . . . . . . . . . . . . . . . . . . . . . . . . . . . . . . . . . . . . . . 662
1531-02: Extension Ring Over External Page . . . . . . . . . . . . . . . . . . . . . . . . . . . . . . 662
1531-03: External Page Ring Volume . . . . . . . . . . . . . . . . . . . . . . . . . . . . . . . . . . . . 663
1531-04: Door Chime Over External Page. . . . . . . . . . . . . . . . . . . . . . . . . . . . . . . . . 664
1531-05: External Page Gain . . . . . . . . . . . . . . . . . . . . . . . . . . . . . . . . . . . . . . . . . . . 664
1532-Ring Control . . . . . . . . . . . . . . . . . . . . . . . . . . . . . . . . . . . . . . . . . . . . . . . . . . . . . . . .665
1532-[01-64]: External Page Line Ringing . . . . . . . . . . . . . . . . . . . . . . . . . . . . . . . . 665
154x-SMDR (Station Message Detail Recording) . . . . . . . . . . . . . . . . . . . . . . . . . . 666
1541-Setup . . . . . . . . . . . . . . . . . . . . . . . . . . . . . . . . . . . . . . . . . . . . . . . . . . . . . . . . . . . . . .666
1541-01: SMDR Port . . . . . . . . . . . . . . . . . . . . . . . . . . . . . . . . . . . . . . . . . . . . . . . . . 666
1541-02: Print SMDR Headers. . . . . . . . . . . . . . . . . . . . . . . . . . . . . . . . . . . . . . . . . . 666
1541-03: SMDR Language. . . . . . . . . . . . . . . . . . . . . . . . . . . . . . . . . . . . . . . . . . . . . 666
155x-Account Codes . . . . . . . . . . . . . . . . . . . . . . . . . . . . . . . . . . . . . . . . . . . . . . . . 667
1551-Setup . . . . . . . . . . . . . . . . . . . . . . . . . . . . . . . . . . . . . . . . . . . . . . . . . . . . . . . . . . . . . .667
1551-01: Dial # to Enter Account Codes . . . . . . . . . . . . . . . . . . . . . . . . . . . . . . . . . . 667
1551-02: Allow Account Codes in Speed Dial Bins . . . . . . . . . . . . . . . . . . . . . . . . . 667
1551-03: Show Account Codes on Telephone Display . . . . . . . . . . . . . . . . . . . . . . . 667
1551-04: Account Code Toll Restriction Level . . . . . . . . . . . . . . . . . . . . . . . . . . . . . 668
160x-Feature Timers. . . . . . . . . . . . . . . . . . . . . . . . . . . . . . . . . . . . . . . . . . . . . . . . . 669
1601-Incoming Call Timers . . . . . . . . . . . . . . . . . . . . . . . . . . . . . . . . . . . . . . . . . . . . . . . . .669
1601-01: Line No Answer Timer . . . . . . . . . . . . . . . . . . . . . . . . . . . . . . . . . . . . . . . . 669
1601-02: DIL No Answer Timer . . . . . . . . . . . . . . . . . . . . . . . . . . . . . . . . . . . . . . . . 669
1601-03: Call Forward No Answer Timer . . . . . . . . . . . . . . . . . . . . . . . . . . . . . . . . . 670
1601-04: UCD No Answer Timer . . . . . . . . . . . . . . . . . . . . . . . . . . . . . . . . . . . . . . . 670
1602-Outgoing Call Timers . . . . . . . . . . . . . . . . . . . . . . . . . . . . . . . . . . . . . . . . . . . . . . . . .671
1602-01: Interdigit Timer . . . . . . . . . . . . . . . . . . . . . . . . . . . . . . . . . . . . . . . . . . . . . . 671
1602-02: Line Response Timer. . . . . . . . . . . . . . . . . . . . . . . . . . . . . . . . . . . . . . . . . . 671
1602-03: Dialtone Detect Timer . . . . . . . . . . . . . . . . . . . . . . . . . . . . . . . . . . . . . . . . . 671
1602-04: Dial Pause Timer . . . . . . . . . . . . . . . . . . . . . . . . . . . . . . . . . . . . . . . . . . . . . 673
1602-05: CO Busy Out Timer . . . . . . . . . . . . . . . . . . . . . . . . . . . . . . . . . . . . . . . . . . 673
1602-06: Repeat Redial Timer . . . . . . . . . . . . . . . . . . . . . . . . . . . . . . . . . . . . . . . . . . 673
1602-07: Repeat Redial Busy Timer . . . . . . . . . . . . . . . . . . . . . . . . . . . . . . . . . . . . . 673
1603-Recall Timers . . . . . . . . . . . . . . . . . . . . . . . . . . . . . . . . . . . . . . . . . . . . . . . . . . . . . . .675
1603-01: Transfer Recall Timer . . . . . . . . . . . . . . . . . . . . . . . . . . . . . . . . . . . . . . . . . 675
1603-02: Hold Recall Timer . . . . . . . . . . . . . . . . . . . . . . . . . . . . . . . . . . . . . . . . . . . . 675
xiv ◆ Table of Contents DSX Software Manual
Page 17

Table of Contents
1603-03: Exclusive Hold Recall Timer . . . . . . . . . . . . . . . . . . . . . . . . . . . . . . . . . . . 675
1603-04: Park Orbit Recall Timer . . . . . . . . . . . . . . . . . . . . . . . . . . . . . . . . . . . . . . . 677
1604-Station Timers . . . . . . . . . . . . . . . . . . . . . . . . . . . . . . . . . . . . . . . . . . . . . . . . . . . . . . .678
1604-01: Delay Ring Timer . . . . . . . . . . . . . . . . . . . . . . . . . . . . . . . . . . . . . . . . . . . . 678
1604-02: Call Coverage Delay Ring Timer . . . . . . . . . . . . . . . . . . . . . . . . . . . . . . . . 678
1604-03: Extended Ringing Timer . . . . . . . . . . . . . . . . . . . . . . . . . . . . . . . . . . . . . . . 678
1605-Control Timers . . . . . . . . . . . . . . . . . . . . . . . . . . . . . . . . . . . . . . . . . . . . . . . . . . . . . .680
1605-01: Page Duration Timer . . . . . . . . . . . . . . . . . . . . . . . . . . . . . . . . . . . . . . . . . . 680
1605-02: Meet Me Conference Join Timer. . . . . . . . . . . . . . . . . . . . . . . . . . . . . . . . . 680
1605-03: Door Relay Unlock Timer. . . . . . . . . . . . . . . . . . . . . . . . . . . . . . . . . . . . . . 680
1605-04: Forced Program Exit Timer. . . . . . . . . . . . . . . . . . . . . . . . . . . . . . . . . . . . . 681
1605-05: Backlight Idle Timer . . . . . . . . . . . . . . . . . . . . . . . . . . . . . . . . . . . . . . . . . . 681
161x-COI (Analog Line) Timers . . . . . . . . . . . . . . . . . . . . . . . . . . . . . . . . . . . . . . . 682
1611-Incoming . . . . . . . . . . . . . . . . . . . . . . . . . . . . . . . . . . . . . . . . . . . . . . . . . . . . . . . . . . .682
1611-01: Minimum Ring Detect Timer . . . . . . . . . . . . . . . . . . . . . . . . . . . . . . . . . . . 682
1611-02: Minimum Single Ring Detection Timer . . . . . . . . . . . . . . . . . . . . . . . . . . . 682
1611-03: Minimum Double Ring Detection Off Timer . . . . . . . . . . . . . . . . . . . . . . . 683
1611-04: Maximum Double Ring Detection Off Timer. . . . . . . . . . . . . . . . . . . . . . . 684
1611-05: Ringing Signal End Detection Timer . . . . . . . . . . . . . . . . . . . . . . . . . . . . . 684
1611-06: Caller ID Detection Timer. . . . . . . . . . . . . . . . . . . . . . . . . . . . . . . . . . . . . . 684
1612-Outgoing . . . . . . . . . . . . . . . . . . . . . . . . . . . . . . . . . . . . . . . . . . . . . . . . . . . . . . . . . . .685
1612-01: DP Break Timer. . . . . . . . . . . . . . . . . . . . . . . . . . . . . . . . . . . . . . . . . . . . . . 685
1612-02: DP Make Timer . . . . . . . . . . . . . . . . . . . . . . . . . . . . . . . . . . . . . . . . . . . . . . 685
1612-03: DP Interdigit Timer . . . . . . . . . . . . . . . . . . . . . . . . . . . . . . . . . . . . . . . . . . . 685
1612-04: PBX/Centrex Flash Timer . . . . . . . . . . . . . . . . . . . . . . . . . . . . . . . . . . . . . . 686
1612-05: Flash Disconnect Timer. . . . . . . . . . . . . . . . . . . . . . . . . . . . . . . . . . . . . . . . 686
1612-06: Ground Start Timer . . . . . . . . . . . . . . . . . . . . . . . . . . . . . . . . . . . . . . . . . . . 686
1612-07: Shunt Pause Timer. . . . . . . . . . . . . . . . . . . . . . . . . . . . . . . . . . . . . . . . . . . . 687
1613-Loop Control . . . . . . . . . . . . . . . . . . . . . . . . . . . . . . . . . . . . . . . . . . . . . . . . . . . . . . . .688
1613-01: Loop Current Detection Timer . . . . . . . . . . . . . . . . . . . . . . . . . . . . . . . . . . 688
1613-02: Far End Disconnect Timer . . . . . . . . . . . . . . . . . . . . . . . . . . . . . . . . . . . . . 688
1613-03: Power Failure Recovery Detect Timer . . . . . . . . . . . . . . . . . . . . . . . . . . . . 689
162x-SLI (Analog Single Line) Timers . . . . . . . . . . . . . . . . . . . . . . . . . . . . . . . . . . 690
1621-Incoming . . . . . . . . . . . . . . . . . . . . . . . . . . . . . . . . . . . . . . . . . . . . . . . . . . . . . . . . . . .690
1621-01: Minimum DP Break Timer . . . . . . . . . . . . . . . . . . . . . . . . . . . . . . . . . . . . . 690
1621-02: Maximum DP Break Timer. . . . . . . . . . . . . . . . . . . . . . . . . . . . . . . . . . . . . 690
1621-03: Minimum DP Make Timer . . . . . . . . . . . . . . . . . . . . . . . . . . . . . . . . . . . . . 691
1621-04: Maximum DP Make Timer . . . . . . . . . . . . . . . . . . . . . . . . . . . . . . . . . . . . . 692
1621-05: Minimum Hookflash Timer. . . . . . . . . . . . . . . . . . . . . . . . . . . . . . . . . . . . . 692
1621-06: Maximum Hookflash Timer . . . . . . . . . . . . . . . . . . . . . . . . . . . . . . . . . . . . 692
1621-07: Minimum Off Hook Timer . . . . . . . . . . . . . . . . . . . . . . . . . . . . . . . . . . . . . 692
1621-08: Dial Pulse Guard Timer. . . . . . . . . . . . . . . . . . . . . . . . . . . . . . . . . . . . . . . . 693
1621-09: Off Hook Guard Time . . . . . . . . . . . . . . . . . . . . . . . . . . . . . . . . . . . . . . . . . 693
1622-Outgoing . . . . . . . . . . . . . . . . . . . . . . . . . . . . . . . . . . . . . . . . . . . . . . . . . . . . . . . . . . .694
1622-01: Loop Disconnect Timer. . . . . . . . . . . . . . . . . . . . . . . . . . . . . . . . . . . . . . . . 694
1622-02: Ring/MW Wait Period Time . . . . . . . . . . . . . . . . . . . . . . . . . . . . . . . . . . . . 694
163x-T1/E1 Timers. . . . . . . . . . . . . . . . . . . . . . . . . . . . . . . . . . . . . . . . . . . . . . . . . . 695
1631-Incoming . . . . . . . . . . . . . . . . . . . . . . . . . . . . . . . . . . . . . . . . . . . . . . . . . . . . . . . . . . .695
1631-01: Receive Loop Detection Timer . . . . . . . . . . . . . . . . . . . . . . . . . . . . . . . . . . 695
1631-02: Receive Dial Pulse Minimum Break Timer . . . . . . . . . . . . . . . . . . . . . . . . 695
1631-03: Receive Dial Pulse Maximum Break Timer . . . . . . . . . . . . . . . . . . . . . . . . 695
1631-04: Receive Dial Pulse Minimum Make Timer. . . . . . . . . . . . . . . . . . . . . . . . . 696
DSX Software Manual Table of Contents ◆ xv
Page 18

Table of Contents
1631-05: Receive Dial Pulse Maximum Make Timer . . . . . . . . . . . . . . . . . . . . . . . . 696
1631-06: Receive Minimum Flash Timer. . . . . . . . . . . . . . . . . . . . . . . . . . . . . . . . . . 696
1631-07: Receive Maximum Flash Timer . . . . . . . . . . . . . . . . . . . . . . . . . . . . . . . . . 697
1631-08: Receive Minimum Clear Signal Timer . . . . . . . . . . . . . . . . . . . . . . . . . . . . 697
1632-Outgoing . . . . . . . . . . . . . . . . . . . . . . . . . . . . . . . . . . . . . . . . . . . . . . . . . . . . . . . . . . .698
1632-01: Transmit Dial Pulse Break Timer . . . . . . . . . . . . . . . . . . . . . . . . . . . . . . . . 698
1632-02: Transmit Dial Pulse Make Timer . . . . . . . . . . . . . . . . . . . . . . . . . . . . . . . . 698
1632-03: Transmit Dial Pulse Interdigit Timer . . . . . . . . . . . . . . . . . . . . . . . . . . . . . 698
1632-04: Transmit Flash Timer . . . . . . . . . . . . . . . . . . . . . . . . . . . . . . . . . . . . . . . . . 699
1632-05: Transmit Clear Signal Timer. . . . . . . . . . . . . . . . . . . . . . . . . . . . . . . . . . . . 699
164x-T1 Specific Timers . . . . . . . . . . . . . . . . . . . . . . . . . . . . . . . . . . . . . . . . . . . . . 700
1641-Ring Detect . . . . . . . . . . . . . . . . . . . . . . . . . . . . . . . . . . . . . . . . . . . . . . . . . . . . . . . . .700
1641-01: Minimum Ring Detect Timer . . . . . . . . . . . . . . . . . . . . . . . . . . . . . . . . . . . 700
1641-02: Single Ring Minimum Detection Timer . . . . . . . . . . . . . . . . . . . . . . . . . . . 700
1641-03: Double Ring Minimum Detection Timer . . . . . . . . . . . . . . . . . . . . . . . . . . 700
1641-04: Double Ring Maximum Detection Timer . . . . . . . . . . . . . . . . . . . . . . . . . . 700
1641-05: Ring Stop Detection Timer . . . . . . . . . . . . . . . . . . . . . . . . . . . . . . . . . . . . . 701
1642-Call Control . . . . . . . . . . . . . . . . . . . . . . . . . . . . . . . . . . . . . . . . . . . . . . . . . . . . . . . . .702
1642-01: Transmit Wink Timer . . . . . . . . . . . . . . . . . . . . . . . . . . . . . . . . . . . . . . . . . 702
1642-02: Receive Minimum Wink Timer . . . . . . . . . . . . . . . . . . . . . . . . . . . . . . . . . 702
1642-03: Receive Maximum Wink Timer . . . . . . . . . . . . . . . . . . . . . . . . . . . . . . . . . 702
1642-04: Ground Start Remove Ring Timer . . . . . . . . . . . . . . . . . . . . . . . . . . . . . . . 702
165x-E1 Specific Timers . . . . . . . . . . . . . . . . . . . . . . . . . . . . . . . . . . . . . . . . . . . . . 704
1651-TX (Transmit Timers) . . . . . . . . . . . . . . . . . . . . . . . . . . . . . . . . . . . . . . . . . . . . . . . . .704
1651-01: Transmit Seize Acknowledge Timer. . . . . . . . . . . . . . . . . . . . . . . . . . . . . . 704
1651-02: Transmit Digit Acknowledge Timer . . . . . . . . . . . . . . . . . . . . . . . . . . . . . . 704
1651-03: Transmit Answer Timer . . . . . . . . . . . . . . . . . . . . . . . . . . . . . . . . . . . . . . . 704
1651-04: Transmit Forced Clear Signal Timer. . . . . . . . . . . . . . . . . . . . . . . . . . . . . . 704
1651-05: Transmit Seize Signal (BZL) Timer . . . . . . . . . . . . . . . . . . . . . . . . . . . . . . 705
1651-06: Transmit Double Answer (BZL) Timer . . . . . . . . . . . . . . . . . . . . . . . . . . . 705
1652-RX (Receive Timers) . . . . . . . . . . . . . . . . . . . . . . . . . . . . . . . . . . . . . . . . . . . . . . . . .706
1652-01: Receive Minimum Seize Acknowledge Timer . . . . . . . . . . . . . . . . . . . . . . 706
1652-02: Receive Maximum Seize Acknowledge Timer. . . . . . . . . . . . . . . . . . . . . . 706
1652-03: Receive Minimum Digit Acknowledge Timer . . . . . . . . . . . . . . . . . . . . . . 706
1652-04: Receive Maximum Digit Acknowledge Timer . . . . . . . . . . . . . . . . . . . . . . 706
1652-05: Receive Minimum Answer Timer. . . . . . . . . . . . . . . . . . . . . . . . . . . . . . . . 707
1652-06: Receive Maximum Answer Timer . . . . . . . . . . . . . . . . . . . . . . . . . . . . . . . 707
1652-07: Receive Minimum Meter Pulse Timer . . . . . . . . . . . . . . . . . . . . . . . . . . . . 707
1652-08: Receive Maximum Meter Pulse Timer . . . . . . . . . . . . . . . . . . . . . . . . . . . . 708
1652-09: Receive Minimum Double Answer (BZL) Timer. . . . . . . . . . . . . . . . . . . . 708
1652-10: Receive Maximum Double Answer (BZL) Timer . . . . . . . . . . . . . . . . . . . 708
1652-11: Receive Minimum Line Block Timer . . . . . . . . . . . . . . . . . . . . . . . . . . . . . 708
1652-12: Receive Line Block Recover Timer . . . . . . . . . . . . . . . . . . . . . . . . . . . . . . 709
1653-MFC Incoming Timers . . . . . . . . . . . . . . . . . . . . . . . . . . . . . . . . . . . . . . . . . . . . . . . .710
1653-01: GI Signal Timer. . . . . . . . . . . . . . . . . . . . . . . . . . . . . . . . . . . . . . . . . . . . . . 710
1653-02: GI Tone Complete Timer . . . . . . . . . . . . . . . . . . . . . . . . . . . . . . . . . . . . . . 710
1653-03: GII Signal Timer . . . . . . . . . . . . . . . . . . . . . . . . . . . . . . . . . . . . . . . . . . . . . 710
1653-04: GA Pulse Response Timer . . . . . . . . . . . . . . . . . . . . . . . . . . . . . . . . . . . . . 710
1654-MFC Outgoing Timers . . . . . . . . . . . . . . . . . . . . . . . . . . . . . . . . . . . . . . . . . . . . . . . .712
1654-01: GA Response Timer . . . . . . . . . . . . . . . . . . . . . . . . . . . . . . . . . . . . . . . . . . 712
1654-02: GA Tone Complete Timer. . . . . . . . . . . . . . . . . . . . . . . . . . . . . . . . . . . . . . 712
1654-03: GB Response Timer . . . . . . . . . . . . . . . . . . . . . . . . . . . . . . . . . . . . . . . . . . 712
xvi ◆ Table of Contents DSX Software Manual
Page 19

Table of Contents
1654-04: GB Tone Complete Timer. . . . . . . . . . . . . . . . . . . . . . . . . . . . . . . . . . . . . . 712
1654-05: GC Response Timer . . . . . . . . . . . . . . . . . . . . . . . . . . . . . . . . . . . . . . . . . . 713
1654-06: GC Tone Complete Timer. . . . . . . . . . . . . . . . . . . . . . . . . . . . . . . . . . . . . . 713
17xx-Speed Dial (System) . . . . . . . . . . . . . . . . . . . . . . . . . . . . . . . . . . . . . . . . . . . . . . . 714
170x-Setup . . . . . . . . . . . . . . . . . . . . . . . . . . . . . . . . . . . . . . . . . . . . . . . . . . . . . . . . 714
1701-Format . . . . . . . . . . . . . . . . . . . . . . . . . . . . . . . . . . . . . . . . . . . . . . . . . . . . . . . . . . . . .714
1701-01: Number of System Speed Dial Bins . . . . . . . . . . . . . . . . . . . . . . . . . . . . . . 714
1702-Assignment (System Speed Dial Assignment) . . . . . . . . . . . . . . . . . . . . . . . . . . . . . .715
1702-[001-999]: Select System Speed Dial Bin to Program . . . . . . . . . . . . . . . . . . . 715
1702-[001-999]: System Speed Dial Bin Type. . . . . . . . . . . . . . . . . . . . . . . . . . . . . . 715
1702-[001-999]: System Speed Dial Bin Line . . . . . . . . . . . . . . . . . . . . . . . . . . . . . . 715
1702-[001-999]: System Speed Dial Bin Group. . . . . . . . . . . . . . . . . . . . . . . . . . . . . 716
1702-[001-999]: System Speed Dial Bin Number . . . . . . . . . . . . . . . . . . . . . . . . . . . 716
1702-[001-999]: System Speed Dial Bin Name . . . . . . . . . . . . . . . . . . . . . . . . . . . . . 717
DSX Software Manual Table of Contents ◆ xvii
Page 20

Table of Contents
Stations: 2101-2501 . . . . . . . . . . . . . . . . . . . . . . . . . . . . . . . . . . . . . . . . . . . . . . . . . . 719
21xx-Configuration . . . . . . . . . . . . . . . . . . . . . . . . . . . . . . . . . . . . . . . . . . . . . . . . . . . . 719
210x-Setup . . . . . . . . . . . . . . . . . . . . . . . . . . . . . . . . . . . . . . . . . . . . . . . . . . . . . . . . 719
2101-Type . . . . . . . . . . . . . . . . . . . . . . . . . . . . . . . . . . . . . . . . . . . . . . . . . . . . . . . . . . . . . . .719
2101-01: Station Type . . . . . . . . . . . . . . . . . . . . . . . . . . . . . . . . . . . . . . . . . . . . . . . . 719
2101-02: Station Name . . . . . . . . . . . . . . . . . . . . . . . . . . . . . . . . . . . . . . . . . . . . . . . . 720
2101-03: Station Display Language . . . . . . . . . . . . . . . . . . . . . . . . . . . . . . . . . . . . . . 722
2101-04: Door Chime Selection . . . . . . . . . . . . . . . . . . . . . . . . . . . . . . . . . . . . . . . . . 722
2101-05: Outgoing ANI ID. . . . . . . . . . . . . . . . . . . . . . . . . . . . . . . . . . . . . . . . . . . . . 723
2101-06: Door Relay Assignment . . . . . . . . . . . . . . . . . . . . . . . . . . . . . . . . . . . . . . . 723
2102-Access . . . . . . . . . . . . . . . . . . . . . . . . . . . . . . . . . . . . . . . . . . . . . . . . . . . . . . . . . . . . .724
2102-01: Class of Service . . . . . . . . . . . . . . . . . . . . . . . . . . . . . . . . . . . . . . . . . . . . . . 724
2102-02: Station Toll Level (Day) . . . . . . . . . . . . . . . . . . . . . . . . . . . . . . . . . . . . . . . 724
2102-03: Station Toll Level (Night) . . . . . . . . . . . . . . . . . . . . . . . . . . . . . . . . . . . . . . 724
2102-04: User Programming Access Level . . . . . . . . . . . . . . . . . . . . . . . . . . . . . . . . 725
2102-05: Station PIN Code. . . . . . . . . . . . . . . . . . . . . . . . . . . . . . . . . . . . . . . . . . . . . 725
2103-Ringing . . . . . . . . . . . . . . . . . . . . . . . . . . . . . . . . . . . . . . . . . . . . . . . . . . . . . . . . . . . .726
2103-01: Day Ring Type . . . . . . . . . . . . . . . . . . . . . . . . . . . . . . . . . . . . . . . . . . . . . . 726
2103-02: Night Ring Type . . . . . . . . . . . . . . . . . . . . . . . . . . . . . . . . . . . . . . . . . . . . . 726
2103-03: Delay Ring Type . . . . . . . . . . . . . . . . . . . . . . . . . . . . . . . . . . . . . . . . . . . . . 726
2103-04: Station’s Intercom Ring Tone . . . . . . . . . . . . . . . . . . . . . . . . . . . . . . . . . . . 727
2103-05: Station’s Ring Group Ring Tone. . . . . . . . . . . . . . . . . . . . . . . . . . . . . . . . . 727
2103-06: Station’s Recall Ring Tone . . . . . . . . . . . . . . . . . . . . . . . . . . . . . . . . . . . . . 727
2103-07: Station’s Ring “A” Tone . . . . . . . . . . . . . . . . . . . . . . . . . . . . . . . . . . . . . . . 728
2103-08: Station’s Ring “B” Tone . . . . . . . . . . . . . . . . . . . . . . . . . . . . . . . . . . . . . . . 728
2103-09: Station’s Ring “C” Tone . . . . . . . . . . . . . . . . . . . . . . . . . . . . . . . . . . . . . . . 728
2104-Display . . . . . . . . . . . . . . . . . . . . . . . . . . . . . . . . . . . . . . . . . . . . . . . . . . . . . . . . . . . .729
2104-01: Backlight Brightness While Active. . . . . . . . . . . . . . . . . . . . . . . . . . . . . . . 729
2104-02: Backlight Brightness While Idle . . . . . . . . . . . . . . . . . . . . . . . . . . . . . . . . . 729
2104-03: Key Pad Illumination. . . . . . . . . . . . . . . . . . . . . . . . . . . . . . . . . . . . . . . . . . 729
211x-Options . . . . . . . . . . . . . . . . . . . . . . . . . . . . . . . . . . . . . . . . . . . . . . . . . . . . . . 731
2111-Features . . . . . . . . . . . . . . . . . . . . . . . . . . . . . . . . . . . . . . . . . . . . . . . . . . . . . . . . . . . .731
2111-01: Allow Do Not Disturb . . . . . . . . . . . . . . . . . . . . . . . . . . . . . . . . . . . . . . . . . 731
2111-02: Allow Background Music . . . . . . . . . . . . . . . . . . . . . . . . . . . . . . . . . . . . . . 731
2111-03: Enable DSS/BLF Keys . . . . . . . . . . . . . . . . . . . . . . . . . . . . . . . . . . . . . . . . 731
2111-04: Ringing Line Preference . . . . . . . . . . . . . . . . . . . . . . . . . . . . . . . . . . . . . . . 732
2111-05: Key Access for Outside Lines . . . . . . . . . . . . . . . . . . . . . . . . . . . . . . . . . . . 732
2111-06: Line Dial Up . . . . . . . . . . . . . . . . . . . . . . . . . . . . . . . . . . . . . . . . . . . . . . . . 732
2111-07: Retain Line Volume Setting . . . . . . . . . . . . . . . . . . . . . . . . . . . . . . . . . . . . 732
2111-08: Answering Machine . . . . . . . . . . . . . . . . . . . . . . . . . . . . . . . . . . . . . . . . . . 733
2111-09: Personal Speed Dial. . . . . . . . . . . . . . . . . . . . . . . . . . . . . . . . . . . . . . . . . . . 734
2112-Speaker Control . . . . . . . . . . . . . . . . . . . . . . . . . . . . . . . . . . . . . . . . . . . . . . . . . . . . . .735
2112-01: Automatic Handsfree. . . . . . . . . . . . . . . . . . . . . . . . . . . . . . . . . . . . . . . . . . 735
2112-02: Headset Mode . . . . . . . . . . . . . . . . . . . . . . . . . . . . . . . . . . . . . . . . . . . . . . . 735
2112-03: Voice Announcements Through Speaker . . . . . . . . . . . . . . . . . . . . . . . . . . 735
2112-04: Voice Announcements in Headset Mode . . . . . . . . . . . . . . . . . . . . . . . . . . 737
2112-05: Handsfree Reply (Handsfree Answerback). . . . . . . . . . . . . . . . . . . . . . . . . 737
2112-06: Paging Through Speaker . . . . . . . . . . . . . . . . . . . . . . . . . . . . . . . . . . . . . . . 737
2113-Groups . . . . . . . . . . . . . . . . . . . . . . . . . . . . . . . . . . . . . . . . . . . . . . . . . . . . . . . . . . . . .738
2113-01: Dial 9 Group . . . . . . . . . . . . . . . . . . . . . . . . . . . . . . . . . . . . . . . . . . . . . . . . 738
2113-02: Ring Group . . . . . . . . . . . . . . . . . . . . . . . . . . . . . . . . . . . . . . . . . . . . . . . . . 738
2113-03: Pickup Group. . . . . . . . . . . . . . . . . . . . . . . . . . . . . . . . . . . . . . . . . . . . . . . . 739
xviii ◆ Table of Contents DSX Software Manual
Page 21

Table of Contents
2113-04: Privacy Group . . . . . . . . . . . . . . . . . . . . . . . . . . . . . . . . . . . . . . . . . . . . . . . 740
2113-05: Page Group (Zone) . . . . . . . . . . . . . . . . . . . . . . . . . . . . . . . . . . . . . . . . . . . 740
2114-Off Hook Options . . . . . . . . . . . . . . . . . . . . . . . . . . . . . . . . . . . . . . . . . . . . . . . . . . . .741
2114-01: Prime Line Type . . . . . . . . . . . . . . . . . . . . . . . . . . . . . . . . . . . . . . . . . . . . . 741
2114-01: Prime Line Key . . . . . . . . . . . . . . . . . . . . . . . . . . . . . . . . . . . . . . . . . . . . . . 741
2114-01: Prime Line Line. . . . . . . . . . . . . . . . . . . . . . . . . . . . . . . . . . . . . . . . . . . . . . 741
2114-01: Prime Line Group . . . . . . . . . . . . . . . . . . . . . . . . . . . . . . . . . . . . . . . . . . . . 742
2114-02: Station Ring Down Type. . . . . . . . . . . . . . . . . . . . . . . . . . . . . . . . . . . . . . . 743
2114-02: Station Ring Down Destination. . . . . . . . . . . . . . . . . . . . . . . . . . . . . . . . . . 743
2114-03: Station’s Operator Extension Number . . . . . . . . . . . . . . . . . . . . . . . . . . . . 744
2115-Hunting and Overflow Options . . . . . . . . . . . . . . . . . . . . . . . . . . . . . . . . . . . . . . . . . .745
Sample Hunt Group Programming . . . . . . . . . . . . . . . . . . . . . . . . . . . . . . . . . . . . . . . 745
2115-01: Hunt Type . . . . . . . . . . . . . . . . . . . . . . . . . . . . . . . . . . . . . . . . . . . . . . . . . . 746
2115-01: Hunt Destination . . . . . . . . . . . . . . . . . . . . . . . . . . . . . . . . . . . . . . . . . . . . . 746
2115-01: UCD Group Master Number . . . . . . . . . . . . . . . . . . . . . . . . . . . . . . . . . . . . 746
2115-02: DID Station Intercept Type . . . . . . . . . . . . . . . . . . . . . . . . . . . . . . . . . . . . . 748
2115-02: DID Station Intercept Destination. . . . . . . . . . . . . . . . . . . . . . . . . . . . . . . . 748
2116-Off Hook Signaling Options . . . . . . . . . . . . . . . . . . . . . . . . . . . . . . . . . . . . . . . . . . . .749
2116-01: Off Hook Signaling for Incoming Intercom Calls. . . . . . . . . . . . . . . . . . . . 749
2116-02: Off Hook Signaling for Calls from Hotline Partner . . . . . . . . . . . . . . . . . . 749
2116-03: Off Hook Signaling for Incoming Outside Calls. . . . . . . . . . . . . . . . . . . . . 750
2117-Call Logging (Caller ID Logging) . . . . . . . . . . . . . . . . . . . . . . . . . . . . . . . . . . . . . . .751
2117-01: Caller ID Log Type . . . . . . . . . . . . . . . . . . . . . . . . . . . . . . . . . . . . . . . . . . . 751
2117-01: Caller ID Log Size. . . . . . . . . . . . . . . . . . . . . . . . . . . . . . . . . . . . . . . . . . . . 751
2117-01: Caller ID Log Group . . . . . . . . . . . . . . . . . . . . . . . . . . . . . . . . . . . . . . . . . . 752
212x-Keys. . . . . . . . . . . . . . . . . . . . . . . . . . . . . . . . . . . . . . . . . . . . . . . . . . . . . . . . . 753
2121-Feature Keys . . . . . . . . . . . . . . . . . . . . . . . . . . . . . . . . . . . . . . . . . . . . . . . . . . . . . . . .753
2121-[01 to 24]: Feature Key Codes. . . . . . . . . . . . . . . . . . . . . . . . . . . . . . . . . . . . . . 758
2121-[01 to 24]: Feature Key Data . . . . . . . . . . . . . . . . . . . . . . . . . . . . . . . . . . . . . . . 758
2122-Ring Override (Key Ring Override) . . . . . . . . . . . . . . . . . . . . . . . . . . . . . . . . . . . . . .759
2122-[01 to 24]: Key Ring Override. . . . . . . . . . . . . . . . . . . . . . . . . . . . . . . . . . . . . . 759
2123-BLF (DSS Keys) . . . . . . . . . . . . . . . . . . . . . . . . . . . . . . . . . . . . . . . . . . . . . . . . . . . . .760
2123-[01-24]: DSS/BLF Key Assignments . . . . . . . . . . . . . . . . . . . . . . . . . . . . . . . . 760
2124-Soft Keys (Idle Menu Soft Keys for Super Display) . . . . . . . . . . . . . . . . . . . . . . . . .761
2124-[01-12]: Idle Menu Soft Key Assignments (Super Display) . . . . . . . . . . . . . . . 761
213x-Access . . . . . . . . . . . . . . . . . . . . . . . . . . . . . . . . . . . . . . . . . . . . . . . . . . . . . . . 763
2131-Lines . . . . . . . . . . . . . . . . . . . . . . . . . . . . . . . . . . . . . . . . . . . . . . . . . . . . . . . . . . . . . .763
2131-[01-64]: Line Access . . . . . . . . . . . . . . . . . . . . . . . . . . . . . . . . . . . . . . . . . . . . . 763
2132-Ringing . . . . . . . . . . . . . . . . . . . . . . . . . . . . . . . . . . . . . . . . . . . . . . . . . . . . . . . . . . . .764
2132-[01-64]: Line Ringing . . . . . . . . . . . . . . . . . . . . . . . . . . . . . . . . . . . . . . . . . . . . 764
2133-Line Groups . . . . . . . . . . . . . . . . . . . . . . . . . . . . . . . . . . . . . . . . . . . . . . . . . . . . . . . . .765
2133-[01-64]: Line Group Access . . . . . . . . . . . . . . . . . . . . . . . . . . . . . . . . . . . . . . . 765
214x-IntraMail (Station Mailbox) . . . . . . . . . . . . . . . . . . . . . . . . . . . . . . . . . . . . . . 766
2141-Type . . . . . . . . . . . . . . . . . . . . . . . . . . . . . . . . . . . . . . . . . . . . . . . . . . . . . . . . . . . . . . .766
2141-01: Station Mailbox Type . . . . . . . . . . . . . . . . . . . . . . . . . . . . . . . . . . . . . . . . . 766
2142-Setup . . . . . . . . . . . . . . . . . . . . . . . . . . . . . . . . . . . . . . . . . . . . . . . . . . . . . . . . . . . . . .767
2142-01: Number of Messages . . . . . . . . . . . . . . . . . . . . . . . . . . . . . . . . . . . . . . . . . . 767
2142-02: Message Retention . . . . . . . . . . . . . . . . . . . . . . . . . . . . . . . . . . . . . . . . . . . 767
2142-03: System Administrator . . . . . . . . . . . . . . . . . . . . . . . . . . . . . . . . . . . . . . . . . 767
2142-04: Station Mailbox Voice Prompt Language . . . . . . . . . . . . . . . . . . . . . . . . . . 768
2143-Options . . . . . . . . . . . . . . . . . . . . . . . . . . . . . . . . . . . . . . . . . . . . . . . . . . . . . . . . . . . .769
2143-01: Message Playback Order . . . . . . . . . . . . . . . . . . . . . . . . . . . . . . . . . . . . . . . 769
DSX Software Manual Table of Contents ◆ xix
Page 22

Table of Contents
22xx-Ring Groups . . . . . . . . . . . . . . . . . . . . . . . . . . . . . . . . . . . . . . . . . . . . . . . . . . . . . 779
23xx-UCD Groups . . . . . . . . . . . . . . . . . . . . . . . . . . . . . . . . . . . . . . . . . . . . . . . . . . . . . 790
2143-02: Auto Erase/Save of Messages . . . . . . . . . . . . . . . . . . . . . . . . . . . . . . . . . . . 769
2143-03: Auto Time Stamp . . . . . . . . . . . . . . . . . . . . . . . . . . . . . . . . . . . . . . . . . . . . 769
2143-04: Message Waiting Lamp. . . . . . . . . . . . . . . . . . . . . . . . . . . . . . . . . . . . . . . . 771
2143-05: Recording Conversation Beep. . . . . . . . . . . . . . . . . . . . . . . . . . . . . . . . . . . 771
2144-Auto-Attendant (Automated Attendant) . . . . . . . . . . . . . . . . . . . . . . . . . . . . . . . . . . .772
2144-01: Auto Attendant Do Not Disturb . . . . . . . . . . . . . . . . . . . . . . . . . . . . . . . . . 772
2144-02: Forced Unscreened Transfer . . . . . . . . . . . . . . . . . . . . . . . . . . . . . . . . . . . . 772
2144-03: Dialing Option. . . . . . . . . . . . . . . . . . . . . . . . . . . . . . . . . . . . . . . . . . . . . . . 772
2144-04: Next Call Routing Mailbox . . . . . . . . . . . . . . . . . . . . . . . . . . . . . . . . . . . . . 774
2144-05: Directory List Number . . . . . . . . . . . . . . . . . . . . . . . . . . . . . . . . . . . . . . . . 774
215x-Speed Dial (Personal) . . . . . . . . . . . . . . . . . . . . . . . . . . . . . . . . . . . . . . . . . . . 775
2151-Assignment (Personal Speed Dial Bin Assignment) . . . . . . . . . . . . . . . . . . . . . . . . . .775
2151-[01-20]: Personal Speed Dial Bin Type. . . . . . . . . . . . . . . . . . . . . . . . . . . . . . . 775
2151-[01-20]: Personal Speed Dial Bin Line . . . . . . . . . . . . . . . . . . . . . . . . . . . . . . . 775
2151-[01-20]: Personal Speed Dial Bin Group. . . . . . . . . . . . . . . . . . . . . . . . . . . . . . 775
2151-[01-20]: Personal Speed Dial Bin Number . . . . . . . . . . . . . . . . . . . . . . . . . . . . 776
2151-[01-20]: Personal Speed Dial Bin Name . . . . . . . . . . . . . . . . . . . . . . . . . . . . . . 777
220x-Setup . . . . . . . . . . . . . . . . . . . . . . . . . . . . . . . . . . . . . . . . . . . . . . . . . . . . . . . . 779
2201-Identification . . . . . . . . . . . . . . . . . . . . . . . . . . . . . . . . . . . . . . . . . . . . . . . . . . . . . . . .779
2201-01: Ring Group Name . . . . . . . . . . . . . . . . . . . . . . . . . . . . . . . . . . . . . . . . . . . . 779
2201-02: Ring Group Incoming Ring Type . . . . . . . . . . . . . . . . . . . . . . . . . . . . . . . . 780
221x-IntraMail (Ring Group Mailbox). . . . . . . . . . . . . . . . . . . . . . . . . . . . . . . . . . . 781
2211-Type . . . . . . . . . . . . . . . . . . . . . . . . . . . . . . . . . . . . . . . . . . . . . . . . . . . . . . . . . . . . . . .781
2211-01: Mailbox Type . . . . . . . . . . . . . . . . . . . . . . . . . . . . . . . . . . . . . . . . . . . . . . . 781
2211-01: Routing Mailbox Number . . . . . . . . . . . . . . . . . . . . . . . . . . . . . . . . . . . . . . 781
2212-Setup . . . . . . . . . . . . . . . . . . . . . . . . . . . . . . . . . . . . . . . . . . . . . . . . . . . . . . . . . . . . . .782
2212-01: Number of Messages . . . . . . . . . . . . . . . . . . . . . . . . . . . . . . . . . . . . . . . . . . 782
2212-02: Message Retention . . . . . . . . . . . . . . . . . . . . . . . . . . . . . . . . . . . . . . . . . . . 782
2212-03: System Administrator . . . . . . . . . . . . . . . . . . . . . . . . . . . . . . . . . . . . . . . . . 782
2212-04: Ring Group Mailbox Voice Prompt Language . . . . . . . . . . . . . . . . . . . . . . 783
2213-Options . . . . . . . . . . . . . . . . . . . . . . . . . . . . . . . . . . . . . . . . . . . . . . . . . . . . . . . . . . . .784
2213-01: Message Playback Order . . . . . . . . . . . . . . . . . . . . . . . . . . . . . . . . . . . . . . . 784
2213-02: Auto Erase/Save of Messages . . . . . . . . . . . . . . . . . . . . . . . . . . . . . . . . . . . 784
2213-03: Auto Time Stamp . . . . . . . . . . . . . . . . . . . . . . . . . . . . . . . . . . . . . . . . . . . . 785
2213-04: Message Waiting Lamp. . . . . . . . . . . . . . . . . . . . . . . . . . . . . . . . . . . . . . . . 785
2213-05: Recording Conversation Beep. . . . . . . . . . . . . . . . . . . . . . . . . . . . . . . . . . . 786
2214-Auto-Attendant (Automated Attendant) . . . . . . . . . . . . . . . . . . . . . . . . . . . . . . . . . . .787
2214-01: Auto Attendant Do Not Disturb . . . . . . . . . . . . . . . . . . . . . . . . . . . . . . . . . 787
2214-02: Forced Unscreened Transfer . . . . . . . . . . . . . . . . . . . . . . . . . . . . . . . . . . . . 787
2214-03: Dialing Option. . . . . . . . . . . . . . . . . . . . . . . . . . . . . . . . . . . . . . . . . . . . . . . 788
2214-04: Next Call Routing Mailbox . . . . . . . . . . . . . . . . . . . . . . . . . . . . . . . . . . . . . 788
2214-05: Directory List Number . . . . . . . . . . . . . . . . . . . . . . . . . . . . . . . . . . . . . . . . 789
230x-Setup . . . . . . . . . . . . . . . . . . . . . . . . . . . . . . . . . . . . . . . . . . . . . . . . . . . . . . . . 790
2301-Identification . . . . . . . . . . . . . . . . . . . . . . . . . . . . . . . . . . . . . . . . . . . . . . . . . . . . . . . .790
2301-01: UCD Group Name. . . . . . . . . . . . . . . . . . . . . . . . . . . . . . . . . . . . . . . . . . . . 790
2301-02: UCD Group Incoming Ring Type . . . . . . . . . . . . . . . . . . . . . . . . . . . . . . . . 791
2302-Options . . . . . . . . . . . . . . . . . . . . . . . . . . . . . . . . . . . . . . . . . . . . . . . . . . . . . . . . . . . .792
2302-01: UCD Group Overflow Destination . . . . . . . . . . . . . . . . . . . . . . . . . . . . . . . 792
231x-IntraMail (UCD Group Mailbox) . . . . . . . . . . . . . . . . . . . . . . . . . . . . . . . . . . 793
2311-Type . . . . . . . . . . . . . . . . . . . . . . . . . . . . . . . . . . . . . . . . . . . . . . . . . . . . . . . . . . . . . . .793
xx ◆ Table of Contents DSX Software Manual
Page 23

Table of Contents
2311-01: UCD Group Mailbox Type . . . . . . . . . . . . . . . . . . . . . . . . . . . . . . . . . . . . . 793
2311-01: UCD Group Routing Mailbox Number. . . . . . . . . . . . . . . . . . . . . . . . . . . . 793
2312-Setup . . . . . . . . . . . . . . . . . . . . . . . . . . . . . . . . . . . . . . . . . . . . . . . . . . . . . . . . . . . . . .794
2312-01: Number of Messages . . . . . . . . . . . . . . . . . . . . . . . . . . . . . . . . . . . . . . . . . . 794
2312-02: Message Retention . . . . . . . . . . . . . . . . . . . . . . . . . . . . . . . . . . . . . . . . . . . 794
2312-03: System Administrator . . . . . . . . . . . . . . . . . . . . . . . . . . . . . . . . . . . . . . . . . 794
2312-04: UCD Group Mailbox Voice Prompt Language. . . . . . . . . . . . . . . . . . . . . . 795
2313-Playback . . . . . . . . . . . . . . . . . . . . . . . . . . . . . . . . . . . . . . . . . . . . . . . . . . . . . . . . . . .796
2313-01: Message Playback Order . . . . . . . . . . . . . . . . . . . . . . . . . . . . . . . . . . . . . . . 796
2313-02: Auto Erase/Save of Messages . . . . . . . . . . . . . . . . . . . . . . . . . . . . . . . . . . . 796
2313-03: Auto Time Stamp . . . . . . . . . . . . . . . . . . . . . . . . . . . . . . . . . . . . . . . . . . . . 796
2313-04: Message Waiting Lamp. . . . . . . . . . . . . . . . . . . . . . . . . . . . . . . . . . . . . . . . 797
2313-05: Recording Conversation Beep. . . . . . . . . . . . . . . . . . . . . . . . . . . . . . . . . . . 797
2314-(Auto-Attendant) Automated Attendant . . . . . . . . . . . . . . . . . . . . . . . . . . . . . . . . . . .798
2314-01: Auto Attendant Do Not Disturb . . . . . . . . . . . . . . . . . . . . . . . . . . . . . . . . . 798
2314-02: Forced Unscreened Transfer . . . . . . . . . . . . . . . . . . . . . . . . . . . . . . . . . . . . 798
2314-03: Dialing Option. . . . . . . . . . . . . . . . . . . . . . . . . . . . . . . . . . . . . . . . . . . . . . . 798
2314-04: Next Call Routing Mailbox . . . . . . . . . . . . . . . . . . . . . . . . . . . . . . . . . . . . . 799
2314-05: Directory List Number . . . . . . . . . . . . . . . . . . . . . . . . . . . . . . . . . . . . . . . . 799
24xx-DSS Consoles . . . . . . . . . . . . . . . . . . . . . . . . . . . . . . . . . . . . . . . . . . . . . . . . . . . . 800
240x-Setup . . . . . . . . . . . . . . . . . . . . . . . . . . . . . . . . . . . . . . . . . . . . . . . . . . . . . . . . 800
2401-Config (DSS Console Configuration) . . . . . . . . . . . . . . . . . . . . . . . . . . . . . . . . . . . . .800
2401-01: DSS Owner . . . . . . . . . . . . . . . . . . . . . . . . . . . . . . . . . . . . . . . . . . . . . . . . . 800
2402-Keys (DSS Console Keys) . . . . . . . . . . . . . . . . . . . . . . . . . . . . . . . . . . . . . . . . . . . . .801
2402-[01-60]: DSS Console Key Codes. . . . . . . . . . . . . . . . . . . . . . . . . . . . . . . . . . . 801
2402-[01-60]: DSS Console Key Data . . . . . . . . . . . . . . . . . . . . . . . . . . . . . . . . . . . . 801
25xx-Text Messages (Selectable Display Messaging). . . . . . . . . . . . . . . . . . . . . . . . . . 806
250x-Setup . . . . . . . . . . . . . . . . . . . . . . . . . . . . . . . . . . . . . . . . . . . . . . . . . . . . . . . . 806
2501-Text . . . . . . . . . . . . . . . . . . . . . . . . . . . . . . . . . . . . . . . . . . . . . . . . . . . . . . . . . . . . . . .806
2501-[01-16]: Selectable Display Messages. . . . . . . . . . . . . . . . . . . . . . . . . . . . . . . . 806
Name Programming Chart . . . . . . . . . . . . . . . . . . . . . . . . . . . . . . . . . . . . . . . . . . . . . 807
DSX Software Manual Table of Contents ◆ xxi
Page 24

Table of Contents
Lines: 3101-3715 . . . . . . . . . . . . . . . . . . . . . . . . . . . . . . . . . . . . . . . . . . . . . . . . . . . . 809
31xx-Configuration . . . . . . . . . . . . . . . . . . . . . . . . . . . . . . . . . . . . . . . . . . . . . . . . . . . . 809
310x-Setup . . . . . . . . . . . . . . . . . . . . . . . . . . . . . . . . . . . . . . . . . . . . . . . . . . . . . . . . 809
3101-Type . . . . . . . . . . . . . . . . . . . . . . . . . . . . . . . . . . . . . . . . . . . . . . . . . . . . . . . . . . . . . . .809
3101-01: Line Type . . . . . . . . . . . . . . . . . . . . . . . . . . . . . . . . . . . . . . . . . . . . . . . . . . 809
3101-02: Line Name . . . . . . . . . . . . . . . . . . . . . . . . . . . . . . . . . . . . . . . . . . . . . . . . . . 810
3101-03: DTMF Dialing. . . . . . . . . . . . . . . . . . . . . . . . . . . . . . . . . . . . . . . . . . . . . . . 811
3101-04: PBX Line. . . . . . . . . . . . . . . . . . . . . . . . . . . . . . . . . . . . . . . . . . . . . . . . . . . 811
3101-05: E1 Signaling Type . . . . . . . . . . . . . . . . . . . . . . . . . . . . . . . . . . . . . . . . . . . . 811
3101-06: MFC Signaling Type . . . . . . . . . . . . . . . . . . . . . . . . . . . . . . . . . . . . . . . . . . 812
3102-Access . . . . . . . . . . . . . . . . . . . . . . . . . . . . . . . . . . . . . . . . . . . . . . . . . . . . . . . . . . . . .813
3102-01: Line Class of Service. . . . . . . . . . . . . . . . . . . . . . . . . . . . . . . . . . . . . . . . . . 813
3102-02: Line Toll Level . . . . . . . . . . . . . . . . . . . . . . . . . . . . . . . . . . . . . . . . . . . . . . 813
3103-Settings . . . . . . . . . . . . . . . . . . . . . . . . . . . . . . . . . . . . . . . . . . . . . . . . . . . . . . . . . . . .814
3103-01: Transmit Gain . . . . . . . . . . . . . . . . . . . . . . . . . . . . . . . . . . . . . . . . . . . . . . . 814
3103-02: Receive Gain . . . . . . . . . . . . . . . . . . . . . . . . . . . . . . . . . . . . . . . . . . . . . . . . 814
3103-03: Loop Length . . . . . . . . . . . . . . . . . . . . . . . . . . . . . . . . . . . . . . . . . . . . . . . . 815
3103-04: Tandem Calls. . . . . . . . . . . . . . . . . . . . . . . . . . . . . . . . . . . . . . . . . . . . . . . . 816
3103-05: Music On Hold Source . . . . . . . . . . . . . . . . . . . . . . . . . . . . . . . . . . . . . . . . 816
311x-Options . . . . . . . . . . . . . . . . . . . . . . . . . . . . . . . . . . . . . . . . . . . . . . . . . . . . . . 817
3111-Features . . . . . . . . . . . . . . . . . . . . . . . . . . . . . . . . . . . . . . . . . . . . . . . . . . . . . . . . . . . .817
3111-01: Disable Forced Account Codes . . . . . . . . . . . . . . . . . . . . . . . . . . . . . . . . . . 817
3111-02: Override Extension’s Toll Level . . . . . . . . . . . . . . . . . . . . . . . . . . . . . . . . . 817
3111-03: Dial Tone Detection . . . . . . . . . . . . . . . . . . . . . . . . . . . . . . . . . . . . . . . . . . 817
3111-04: Enable MFC Group B . . . . . . . . . . . . . . . . . . . . . . . . . . . . . . . . . . . . . . . . . 818
3111-05: Store and Forward . . . . . . . . . . . . . . . . . . . . . . . . . . . . . . . . . . . . . . . . . . . . 818
3111-06: Station Message Detail Recording . . . . . . . . . . . . . . . . . . . . . . . . . . . . . . . 818
3112-Termination . . . . . . . . . . . . . . . . . . . . . . . . . . . . . . . . . . . . . . . . . . . . . . . . . . . . . . . . .819
3112-01: Direct Termination in the Day. . . . . . . . . . . . . . . . . . . . . . . . . . . . . . . . . . . 819
3112-02: Enable Day Overflow . . . . . . . . . . . . . . . . . . . . . . . . . . . . . . . . . . . . . . . . . 819
3112-03: Day Overflow Destination. . . . . . . . . . . . . . . . . . . . . . . . . . . . . . . . . . . . . . 820
3112-04: Direct Termination at Night . . . . . . . . . . . . . . . . . . . . . . . . . . . . . . . . . . . . 820
3112-05: Enable Night Overflow . . . . . . . . . . . . . . . . . . . . . . . . . . . . . . . . . . . . . . . . 820
3112-06: Night Overflow Destination . . . . . . . . . . . . . . . . . . . . . . . . . . . . . . . . . . . . 821
3113-Ringing . . . . . . . . . . . . . . . . . . . . . . . . . . . . . . . . . . . . . . . . . . . . . . . . . . . . . . . . . . . .822
3113-01: Pickup Group Assignment. . . . . . . . . . . . . . . . . . . . . . . . . . . . . . . . . . . . . . 822
3113-02: Day Ring Type . . . . . . . . . . . . . . . . . . . . . . . . . . . . . . . . . . . . . . . . . . . . . . 822
3113-03: Night Ring Type . . . . . . . . . . . . . . . . . . . . . . . . . . . . . . . . . . . . . . . . . . . . . 823
3113-04: Delay Ring Type . . . . . . . . . . . . . . . . . . . . . . . . . . . . . . . . . . . . . . . . . . . . . 824
312x-Caller ID . . . . . . . . . . . . . . . . . . . . . . . . . . . . . . . . . . . . . . . . . . . . . . . . . . . . . 825
3121-Settings . . . . . . . . . . . . . . . . . . . . . . . . . . . . . . . . . . . . . . . . . . . . . . . . . . . . . . . . . . . .825
3121-01: Caller ID Type. . . . . . . . . . . . . . . . . . . . . . . . . . . . . . . . . . . . . . . . . . . . . . . 825
3121-02: ANI/DNIS Format. . . . . . . . . . . . . . . . . . . . . . . . . . . . . . . . . . . . . . . . . . . . 825
3121-03: ANI/DNIS Delimiter . . . . . . . . . . . . . . . . . . . . . . . . . . . . . . . . . . . . . . . . . . 826
3121-04: Number of ANI Digits. . . . . . . . . . . . . . . . . . . . . . . . . . . . . . . . . . . . . . . . . 826
3122-Groups . . . . . . . . . . . . . . . . . . . . . . . . . . . . . . . . . . . . . . . . . . . . . . . . . . . . . . . . . . . . .827
3122-[01-08]: Caller ID Group Membership . . . . . . . . . . . . . . . . . . . . . . . . . . . . . . . 827
313x-Voice Mail. . . . . . . . . . . . . . . . . . . . . . . . . . . . . . . . . . . . . . . . . . . . . . . . . . . . 828
3131-Settings . . . . . . . . . . . . . . . . . . . . . . . . . . . . . . . . . . . . . . . . . . . . . . . . . . . . . . . . . . . .828
3131-01: Pass Caller ID to Voice Mail. . . . . . . . . . . . . . . . . . . . . . . . . . . . . . . . . . . . 828
3131-02: IntraMail Answer Table Assignment . . . . . . . . . . . . . . . . . . . . . . . . . . . . . 828
3131-03: Line Voice Prompt Language . . . . . . . . . . . . . . . . . . . . . . . . . . . . . . . . . . . 829
xxii ◆ Table of Contents DSX Software Manual
Page 25

Table of Contents
314x-TIE Line . . . . . . . . . . . . . . . . . . . . . . . . . . . . . . . . . . . . . . . . . . . . . . . . . . . . . 830
3141-Dialing . . . . . . . . . . . . . . . . . . . . . . . . . . . . . . . . . . . . . . . . . . . . . . . . . . . . . . . . . . . . .830
3141-01: Tie Line Caller’s Outbound Dial 9 Group. . . . . . . . . . . . . . . . . . . . . . . . . . 830
3141-02: Tie Line Caller’s Operator Extension . . . . . . . . . . . . . . . . . . . . . . . . . . . . . 830
3142-Line Access . . . . . . . . . . . . . . . . . . . . . . . . . . . . . . . . . . . . . . . . . . . . . . . . . . . . . . . . .831
3142-[01-64]: Tie Line Caller’s Outbound Line Access . . . . . . . . . . . . . . . . . . . . . . 831
3143-Group Access . . . . . . . . . . . . . . . . . . . . . . . . . . . . . . . . . . . . . . . . . . . . . . . . . . . . . . .832
3143-[01-64]: Tie Line Caller’s Outbound Line Group Access. . . . . . . . . . . . . . . . . 832
32xx-Groups . . . . . . . . . . . . . . . . . . . . . . . . . . . . . . . . . . . . . . . . . . . . . . . . . . . . . . . . . 833
320x-Setup . . . . . . . . . . . . . . . . . . . . . . . . . . . . . . . . . . . . . . . . . . . . . . . . . . . . . . . . 833
3201-Order . . . . . . . . . . . . . . . . . . . . . . . . . . . . . . . . . . . . . . . . . . . . . . . . . . . . . . . . . . . . . .833
3201-[01-64]: Line Group . . . . . . . . . . . . . . . . . . . . . . . . . . . . . . . . . . . . . . . . . . . . . 833
33xx-DID (Direct Inward Dialing) . . . . . . . . . . . . . . . . . . . . . . . . . . . . . . . . . . . . . . . . 834
330x-Setup . . . . . . . . . . . . . . . . . . . . . . . . . . . . . . . . . . . . . . . . . . . . . . . . . . . . . . . . 834
3301-Options . . . . . . . . . . . . . . . . . . . . . . . . . . . . . . . . . . . . . . . . . . . . . . . . . . . . . . . . . . . .834
3301-01: Number of DID Digits. . . . . . . . . . . . . . . . . . . . . . . . . . . . . . . . . . . . . . . . . 834
3302-Translations . . . . . . . . . . . . . . . . . . . . . . . . . . . . . . . . . . . . . . . . . . . . . . . . . . . . . . . . .835
DID Example: Routing DID Block 400-416 . . . . . . . . . . . . . . . . . . . . . . . . . . . . . . . 835
Default Routing. . . . . . . . . . . . . . . . . . . . . . . . . . . . . . . . . . . . . . . . . . . . . . . . . . . . . . 835
Programming Ranges and Exceptions . . . . . . . . . . . . . . . . . . . . . . . . . . . . . . . . . . . . 835
3302-01: Incoming DID Digits. . . . . . . . . . . . . . . . . . . . . . . . . . . . . . . . . . . . . . . . . . 836
3302-01: Day Translation Destination . . . . . . . . . . . . . . . . . . . . . . . . . . . . . . . . . . . . 836
3302-01: Night Translation Destination . . . . . . . . . . . . . . . . . . . . . . . . . . . . . . . . . . . 836
3302-01: MFC Category. . . . . . . . . . . . . . . . . . . . . . . . . . . . . . . . . . . . . . . . . . . . . . . 837
34xx-PBX . . . . . . . . . . . . . . . . . . . . . . . . . . . . . . . . . . . . . . . . . . . . . . . . . . . . . . . . . . . 838
340x-Setup . . . . . . . . . . . . . . . . . . . . . . . . . . . . . . . . . . . . . . . . . . . . . . . . . . . . . . . . 838
3401-Codes . . . . . . . . . . . . . . . . . . . . . . . . . . . . . . . . . . . . . . . . . . . . . . . . . . . . . . . . . . . . . .838
3401-01: PBX Access Code Digits. . . . . . . . . . . . . . . . . . . . . . . . . . . . . . . . . . . . . . . 838
35xx-Toll Restriction . . . . . . . . . . . . . . . . . . . . . . . . . . . . . . . . . . . . . . . . . . . . . . . . . . . 839
350x-Setup . . . . . . . . . . . . . . . . . . . . . . . . . . . . . . . . . . . . . . . . . . . . . . . . . . . . . . . . 839
3501-Type . . . . . . . . . . . . . . . . . . . . . . . . . . . . . . . . . . . . . . . . . . . . . . . . . . . . . . . . . . . . . . .839
3501-01: Toll Restriction Country Type . . . . . . . . . . . . . . . . . . . . . . . . . . . . . . . . . . 839
3501-02: Emergency Number. . . . . . . . . . . . . . . . . . . . . . . . . . . . . . . . . . . . . . . . . . . 839
351x-Options . . . . . . . . . . . . . . . . . . . . . . . . . . . . . . . . . . . . . . . . . . . . . . . . . . . . . . 840
3511-Settings . . . . . . . . . . . . . . . . . . . . . . . . . . . . . . . . . . . . . . . . . . . . . . . . . . . . . . . . . . . .840
3511-01: Active Key Pad . . . . . . . . . . . . . . . . . . . . . . . . . . . . . . . . . . . . . . . . . . . . . . 840
3512-U.S. Dialing . . . . . . . . . . . . . . . . . . . . . . . . . . . . . . . . . . . . . . . . . . . . . . . . . . . . . . . . .841
3512-01: Allow 0 + XXX Operator Assisted Dialing . . . . . . . . . . . . . . . . . . . . . . . . 841
3512-02: Allow 011 + XXX International Dialing. . . . . . . . . . . . . . . . . . . . . . . . . . . 841
3512-03: Allow 101x Equal Access Dialing . . . . . . . . . . . . . . . . . . . . . . . . . . . . . . . 841
3512-04: Allow N11 Dialing . . . . . . . . . . . . . . . . . . . . . . . . . . . . . . . . . . . . . . . . . . . 842
3513-International Dialing . . . . . . . . . . . . . . . . . . . . . . . . . . . . . . . . . . . . . . . . . . . . . . . . . .843
352x-1010-XXX / Local XXX (Equal Access Dialing). . . . . . . . . . . . . . . . . . . . . . 844
3521-Table Options . . . . . . . . . . . . . . . . . . . . . . . . . . . . . . . . . . . . . . . . . . . . . . . . . . . . . . .844
3521-01: Initialize Table. . . . . . . . . . . . . . . . . . . . . . . . . . . . . . . . . . . . . . . . . . . . . . . 844
3521-02: Table Type (Allow or Deny) . . . . . . . . . . . . . . . . . . . . . . . . . . . . . . . . . . . . 844
3522-Table Entries . . . . . . . . . . . . . . . . . . . . . . . . . . . . . . . . . . . . . . . . . . . . . . . . . . . . . . . .845
3522-xx: Table Data . . . . . . . . . . . . . . . . . . . . . . . . . . . . . . . . . . . . . . . . . . . . . . . . . . 845
353x-1+XXX / TBL-A XXX (NPA/NXX Dialing 3-Digit Table) . . . . . . . . . . . . . 846
3531-Table Options . . . . . . . . . . . . . . . . . . . . . . . . . . . . . . . . . . . . . . . . . . . . . . . . . . . . . . .846
3531-01: Initialize Table. . . . . . . . . . . . . . . . . . . . . . . . . . . . . . . . . . . . . . . . . . . . . . . 846
DSX Software Manual Table of Contents ◆ xxiii
Page 26

Table of Contents
36xx-AC Codes (Verified Account Codes Table) . . . . . . . . . . . . . . . . . . . . . . . . . . . . . 854
37xx-Caller ID (System-Wide Options) . . . . . . . . . . . . . . . . . . . . . . . . . . . . . . . . . . . . 855
3531-02: Table Type (Allow or Deny) . . . . . . . . . . . . . . . . . . . . . . . . . . . . . . . . . . . . 846
3532-Table Entries . . . . . . . . . . . . . . . . . . . . . . . . . . . . . . . . . . . . . . . . . . . . . . . . . . . . . . . .847
3532-xx: Table Data . . . . . . . . . . . . . . . . . . . . . . . . . . . . . . . . . . . . . . . . . . . . . . . . . . 847
354x-1+XXX-XXX / TBL-A XXXXXXX (1 + NPA + NXX Dialing 6-Digit Table) .
848
3541-Table Options . . . . . . . . . . . . . . . . . . . . . . . . . . . . . . . . . . . . . . . . . . . . . . . . . . . . . . .848
3541-01: Initialize Table. . . . . . . . . . . . . . . . . . . . . . . . . . . . . . . . . . . . . . . . . . . . . . . 848
3541-02: Table Type (Allow or Deny) . . . . . . . . . . . . . . . . . . . . . . . . . . . . . . . . . . . . 848
3542-Table Entries . . . . . . . . . . . . . . . . . . . . . . . . . . . . . . . . . . . . . . . . . . . . . . . . . . . . . . . .849
3542-xx: Table Data . . . . . . . . . . . . . . . . . . . . . . . . . . . . . . . . . . . . . . . . . . . . . . . . . . 849
355x-XXX / TBL-B-XXX (NPA/NXX Dialing 3-Digit Table). . . . . . . . . . . . . . . . 850
3551-Table Options . . . . . . . . . . . . . . . . . . . . . . . . . . . . . . . . . . . . . . . . . . . . . . . . . . . . . . .850
3551-01: Initialize Table. . . . . . . . . . . . . . . . . . . . . . . . . . . . . . . . . . . . . . . . . . . . . . . 850
3551-02: Table Type (Allow or Deny) . . . . . . . . . . . . . . . . . . . . . . . . . . . . . . . . . . . . 850
3552-Table Entries . . . . . . . . . . . . . . . . . . . . . . . . . . . . . . . . . . . . . . . . . . . . . . . . . . . . . . . .851
3552-xx: Table Data . . . . . . . . . . . . . . . . . . . . . . . . . . . . . . . . . . . . . . . . . . . . . . . . . . 851
356x-XXX-XXX / TBL-B XXXXXX (NPA + NXX Dialing 6-Digit Table) . . . . . 852
3561-Table Options . . . . . . . . . . . . . . . . . . . . . . . . . . . . . . . . . . . . . . . . . . . . . . . . . . . . . . .852
3561-01: Initialize Table. . . . . . . . . . . . . . . . . . . . . . . . . . . . . . . . . . . . . . . . . . . . . . . 852
3561-02: Table Type (Allow or Deny) . . . . . . . . . . . . . . . . . . . . . . . . . . . . . . . . . . . . 852
3562-Table Entries . . . . . . . . . . . . . . . . . . . . . . . . . . . . . . . . . . . . . . . . . . . . . . . . . . . . . . . .853
3562-xx: Table Data . . . . . . . . . . . . . . . . . . . . . . . . . . . . . . . . . . . . . . . . . . . . . . . . . . 853
360x-Setup . . . . . . . . . . . . . . . . . . . . . . . . . . . . . . . . . . . . . . . . . . . . . . . . . . . . . . . . 854
3601-Codes . . . . . . . . . . . . . . . . . . . . . . . . . . . . . . . . . . . . . . . . . . . . . . . . . . . . . . . . . . . . . .854
3601-xx: Verified Account Code Data . . . . . . . . . . . . . . . . . . . . . . . . . . . . . . . . . . . . 854
370x-Log Groups (Caller ID Logging Groups) . . . . . . . . . . . . . . . . . . . . . . . . . . . . 855
3701-Setup . . . . . . . . . . . . . . . . . . . . . . . . . . . . . . . . . . . . . . . . . . . . . . . . . . . . . . . . . . . . . .855
3701-[01-08]: Caller ID Logging Group Size . . . . . . . . . . . . . . . . . . . . . . . . . . . . . . 855
371x-Callback. . . . . . . . . . . . . . . . . . . . . . . . . . . . . . . . . . . . . . . . . . . . . . . . . . . . . . 856
3711-Route . . . . . . . . . . . . . . . . . . . . . . . . . . . . . . . . . . . . . . . . . . . . . . . . . . . . . . . . . . . . . .856
3711-01: Caller ID Callback Route Type . . . . . . . . . . . . . . . . . . . . . . . . . . . . . . . . . . 856
3711-01: Caller ID Callback Line . . . . . . . . . . . . . . . . . . . . . . . . . . . . . . . . . . . . . . . 856
3711-01: Caller ID Callback Group . . . . . . . . . . . . . . . . . . . . . . . . . . . . . . . . . . . . . . 857
3712-Treatment Options (Caller ID Callback Dial Treatment Options) . . . . . . . . . . . . . . .858
3712-01: Initialize Caller ID Dial Treatment Tables . . . . . . . . . . . . . . . . . . . . . . . . . 858
3712-02: 10-Digit Local Calls . . . . . . . . . . . . . . . . . . . . . . . . . . . . . . . . . . . . . . . . . . 858
3712-03: Home Area Code Exception List Type . . . . . . . . . . . . . . . . . . . . . . . . . . . . 859
3713-Home NPA’s (Home Area Code Table) . . . . . . . . . . . . . . . . . . . . . . . . . . . . . . . . . . .860
3713-[01-16]: Home Area Code Table Data . . . . . . . . . . . . . . . . . . . . . . . . . . . . . . . 860
3714-HNPA Exceptions (Home Area Code Exception List Table) . . . . . . . . . . . . . . . . . . .861
3714-[01-96]: Home Area Code Exception List Table Data . . . . . . . . . . . . . . . . . . . 861
3715-FNPA Exceptions (Foreign Area Code Exception List Table) . . . . . . . . . . . . . . . . . .862
3715-[01-96]: Foreign Area Code Exception List Table Data . . . . . . . . . . . . . . . . . . 862
xxiv ◆ Table of Contents DSX Software Manual
Page 27

Table of Contents
Voice Mail Options: 4101-4231 . . . . . . . . . . . . . . . . . . . . . . . . . . . . . . . . . . . . . . . . . 863
41xx-Configuration . . . . . . . . . . . . . . . . . . . . . . . . . . . . . . . . . . . . . . . . . . . . . . . . . . . . 863
410x-System (Voice Mail System Options) . . . . . . . . . . . . . . . . . . . . . . . . . . . . . . . 863
4101-Type . . . . . . . . . . . . . . . . . . . . . . . . . . . . . . . . . . . . . . . . . . . . . . . . . . . . . . . . . . . . . . .863
4101-01: Voice Mail Type . . . . . . . . . . . . . . . . . . . . . . . . . . . . . . . . . . . . . . . . . . . . . 863
4101-02: Voice Mail Master Number. . . . . . . . . . . . . . . . . . . . . . . . . . . . . . . . . . . . . 864
411x-Ports (Voice Mail Port Setup) . . . . . . . . . . . . . . . . . . . . . . . . . . . . . . . . . . . . . 865
4111-Options (Voice Mail Port Options) . . . . . . . . . . . . . . . . . . . . . . . . . . . . . . . . . . . . . . .865
4111-01: Voice Mail Port Name. . . . . . . . . . . . . . . . . . . . . . . . . . . . . . . . . . . . . . . . . 865
4111-02: Voice Mail Port Class of Service . . . . . . . . . . . . . . . . . . . . . . . . . . . . . . . . 865
4111-03: Voice Mail Port Toll Restriction Level (Day). . . . . . . . . . . . . . . . . . . . . . . 866
4111-04: Voice Mail Port Toll Restriction Level (Night) . . . . . . . . . . . . . . . . . . . . . 866
Name Programming Chart . . . . . . . . . . . . . . . . . . . . . . . . . . . . . . . . . . . . . . . . . . . . . 867
4112-Off Hook (Voice Mail Port Off Hook Options) . . . . . . . . . . . . . . . . . . . . . . . . . . . . . 868
4112-01: Outgoing Dial 9 Group . . . . . . . . . . . . . . . . . . . . . . . . . . . . . . . . . . . . . . . . 868
4112-02: Operator’s Extension. . . . . . . . . . . . . . . . . . . . . . . . . . . . . . . . . . . . . . . . . . 868
4113-Line Access (Voice Mail Port Outgoing Line Access) . . . . . . . . . . . . . . . . . . . . . . . .869
4113-xx: Outgoing Line xx Access . . . . . . . . . . . . . . . . . . . . . . . . . . . . . . . . . . . . . . 869
4114-Group Access (Outgoing Line Group Access) . . . . . . . . . . . . . . . . . . . . . . . . . . . . . .870
4114-xx: Outgoing Line Group xx Access . . . . . . . . . . . . . . . . . . . . . . . . . . . . . . . . . 870
42xx-IntraMail . . . . . . . . . . . . . . . . . . . . . . . . . . . . . . . . . . . . . . . . . . . . . . . . . . . . . . . . 871
420x-Options . . . . . . . . . . . . . . . . . . . . . . . . . . . . . . . . . . . . . . . . . . . . . . . . . . . . . . 871
4201-Messages (IntraMail Message Options) . . . . . . . . . . . . . . . . . . . . . . . . . . . . . . . . . . . 871
4201-01: Outgoing Message Length. . . . . . . . . . . . . . . . . . . . . . . . . . . . . . . . . . . . . . 871
4201-02: Incoming Message Length . . . . . . . . . . . . . . . . . . . . . . . . . . . . . . . . . . . . . 872
4201-03: Message Backup/Go Ahead Time. . . . . . . . . . . . . . . . . . . . . . . . . . . . . . . . 872
4202-Notification (Message Notification Options) . . . . . . . . . . . . . . . . . . . . . . . . . . . . . . . 873
4202-01: Wait Between Non-Pager Callout Attempts . . . . . . . . . . . . . . . . . . . . . . . . 873
4202-02: Wait Between Digital Pager Callout Attempts . . . . . . . . . . . . . . . . . . . . . . 873
4202-03: Wait Between Busy Non-Pager Callout Attempts . . . . . . . . . . . . . . . . . . . 874
4202-04: Wait Between RNA Non-Pager Callout Attempts . . . . . . . . . . . . . . . . . . . 875
4202-05: Wait for Answer Non-Pager Callout Attempts . . . . . . . . . . . . . . . . . . . . . . 875
4202-06: Number of Callout Attempts . . . . . . . . . . . . . . . . . . . . . . . . . . . . . . . . . . . . 876
4202-07: Send Pager Callout Until Acknowledged . . . . . . . . . . . . . . . . . . . . . . . . . . 877
4202-08: Digital Pager Callback Number . . . . . . . . . . . . . . . . . . . . . . . . . . . . . . . . . 877
4202-09: Delay in Dialing Digital Pager Callback Number. . . . . . . . . . . . . . . . . . . . 877
4203-Voice Prompts (Active System Voice Prompt Languages) . . . . . . . . . . . . . . . . . . . .879
4203-01: Primary Voice Prompt Language . . . . . . . . . . . . . . . . . . . . . . . . . . . . . . . . 879
4203-02: Secondary Voice Prompt Language . . . . . . . . . . . . . . . . . . . . . . . . . . . . . . 879
421x-Answer Table . . . . . . . . . . . . . . . . . . . . . . . . . . . . . . . . . . . . . . . . . . . . . . . . . 880
4211-Setup (Answer Table Setup) . . . . . . . . . . . . . . . . . . . . . . . . . . . . . . . . . . . . . . . . . . . .880
4211-01: Default Mailbox . . . . . . . . . . . . . . . . . . . . . . . . . . . . . . . . . . . . . . . . . . . . . 880
4211-02: Answer Schedule Override . . . . . . . . . . . . . . . . . . . . . . . . . . . . . . . . . . . . . 880
4211-03: Override Mailbox . . . . . . . . . . . . . . . . . . . . . . . . . . . . . . . . . . . . . . . . . . . . 881
4211-04: Next Answer Table . . . . . . . . . . . . . . . . . . . . . . . . . . . . . . . . . . . . . . . . . . . 881
4212-Schedule (Schedule Setup) . . . . . . . . . . . . . . . . . . . . . . . . . . . . . . . . . . . . . . . . . . . . .882
4212-[01-10]: Schedule Type . . . . . . . . . . . . . . . . . . . . . . . . . . . . . . . . . . . . . . . . . . . 882
4212-[01-10]: Routing Mailbox Number . . . . . . . . . . . . . . . . . . . . . . . . . . . . . . . . . . 883
4212-[01-10]: Schedule Start Day . . . . . . . . . . . . . . . . . . . . . . . . . . . . . . . . . . . . . . . 883
4212-[01-10]: Schedule End Day . . . . . . . . . . . . . . . . . . . . . . . . . . . . . . . . . . . . . . . . 884
4212-[01-10]: Schedule Run Date . . . . . . . . . . . . . . . . . . . . . . . . . . . . . . . . . . . . . . . 884
4212-[01-10]: Schedule Start Time . . . . . . . . . . . . . . . . . . . . . . . . . . . . . . . . . . . . . . 885
DSX Software Manual Table of Contents ◆ xxv
Page 28

Table of Contents
4212-[01-10]: Schedule End Time . . . . . . . . . . . . . . . . . . . . . . . . . . . . . . . . . . . . . . . 886
Type 1 (Day of Week) Schedule Example . . . . . . . . . . . . . . . . . . . . . . . . . . . . . . . . . 887
Type 2 (Range of Days) Schedule Example. . . . . . . . . . . . . . . . . . . . . . . . . . . . . . . . 888
Type 3 (Date) Schedule Example . . . . . . . . . . . . . . . . . . . . . . . . . . . . . . . . . . . . . . . . 889
422x-Routing Mailbox . . . . . . . . . . . . . . . . . . . . . . . . . . . . . . . . . . . . . . . . . . . . . . . 890
4221-Setup (Routing Mailbox Setup) . . . . . . . . . . . . . . . . . . . . . . . . . . . . . . . . . . . . . . . . .890
4221-01: Routing Mailbox Type . . . . . . . . . . . . . . . . . . . . . . . . . . . . . . . . . . . . . . . . 890
4221-02: Routing Mailbox Voice Prompt Language . . . . . . . . . . . . . . . . . . . . . . . . . 890
4222-Routing Options . . . . . . . . . . . . . . . . . . . . . . . . . . . . . . . . . . . . . . . . . . . . . . . . . . . . .891
4222-01: Dial Action Table . . . . . . . . . . . . . . . . . . . . . . . . . . . . . . . . . . . . . . . . . . . . 891
4222-02: Time Limit for Dialing Commands. . . . . . . . . . . . . . . . . . . . . . . . . . . . . . . 891
4222-03: Screened Transfer Timeout . . . . . . . . . . . . . . . . . . . . . . . . . . . . . . . . . . . . . 891
4222-04: Fax Detection . . . . . . . . . . . . . . . . . . . . . . . . . . . . . . . . . . . . . . . . . . . . . . . 892
4222-05: Fax Extension . . . . . . . . . . . . . . . . . . . . . . . . . . . . . . . . . . . . . . . . . . . . . . . 892
4223-Announcement Opts (Announcement Mailbox Options) . . . . . . . . . . . . . . . . . . . . . .893
4223-01: Repeat Count . . . . . . . . . . . . . . . . . . . . . . . . . . . . . . . . . . . . . . . . . . . . . . . . 893
4223-02: Hang Up After . . . . . . . . . . . . . . . . . . . . . . . . . . . . . . . . . . . . . . . . . . . . . . . 893
4223-03: Next Call Routing Mailbox . . . . . . . . . . . . . . . . . . . . . . . . . . . . . . . . . . . . . 894
4224-Directory Options (Directory Dialing Mailbox Options) . . . . . . . . . . . . . . . . . . . . . .895
4224-01: Directory List Number to Use . . . . . . . . . . . . . . . . . . . . . . . . . . . . . . . . . . . 895
4224-02: Time Limit for Dialing Commands. . . . . . . . . . . . . . . . . . . . . . . . . . . . . . . 895
4224-03: Screened Transfer Timeout . . . . . . . . . . . . . . . . . . . . . . . . . . . . . . . . . . . . . 896
4224-04: Extension Name Match . . . . . . . . . . . . . . . . . . . . . . . . . . . . . . . . . . . . . . . . 897
4224-05: Minimum Number of Letters Required. . . . . . . . . . . . . . . . . . . . . . . . . . . . 897
4224-06: Transfer Options . . . . . . . . . . . . . . . . . . . . . . . . . . . . . . . . . . . . . . . . . . . . . 898
4224-07: Next Call Routing Mailbox . . . . . . . . . . . . . . . . . . . . . . . . . . . . . . . . . . . . . 899
4224-08: Fax Detection . . . . . . . . . . . . . . . . . . . . . . . . . . . . . . . . . . . . . . . . . . . . . . . 899
4224-09: Fax Transfer Extension . . . . . . . . . . . . . . . . . . . . . . . . . . . . . . . . . . . . . . . . 900
423x-Dial Actions (Dial Action Table Options) . . . . . . . . . . . . . . . . . . . . . . . . . . . 901
4231-Digit Assignment . . . . . . . . . . . . . . . . . . . . . . . . . . . . . . . . . . . . . . . . . . . . . . . . . . . .901
4231-01: Digit xx Action . . . . . . . . . . . . . . . . . . . . . . . . . . . . . . . . . . . . . . . . . . . . . . 903
4231-01: Digit xx Routing Data . . . . . . . . . . . . . . . . . . . . . . . . . . . . . . . . . . . . . . . . . 903
STRF Action - Screened Transfer (1). . . . . . . . . . . . . . . . . . . . . . . . . . . . . . . . . . . . . 905
UTRF Action - Unscreened Transfer (2) . . . . . . . . . . . . . . . . . . . . . . . . . . . . . . . . . . 906
REC1 Action - Quick Message With Greeting (3) . . . . . . . . . . . . . . . . . . . . . . . . . . . 907
REC2 Action - Quick Message Without Greeting (4) . . . . . . . . . . . . . . . . . . . . . . . . 908
LOGON Action - Log Onto Voice Mail (5) . . . . . . . . . . . . . . . . . . . . . . . . . . . . . . . . 909
Hang Up Action (6) . . . . . . . . . . . . . . . . . . . . . . . . . . . . . . . . . . . . . . . . . . . . . . . . . . 910
GOTO Action - Go to Mailbox (7). . . . . . . . . . . . . . . . . . . . . . . . . . . . . . . . . . . . . . . 911
UND Action - Undefined Routing (0) . . . . . . . . . . . . . . . . . . . . . . . . . . . . . . . . . . . . 912
Digits. . . . . . . . . . . . . . . . . . . . . . . . . . . . . . . . . . . . . . . . . . . . . . . . . . . . . . . . . . . . . . 913
Caller Dialed Digits . . . . . . . . . . . . . . . . . . . . . . . . . . . . . . . . . . . . . . . . . . . . . . . . . . 913
Ignore Digits . . . . . . . . . . . . . . . . . . . . . . . . . . . . . . . . . . . . . . . . . . . . . . . . . . . . . . . . 913
No Routing . . . . . . . . . . . . . . . . . . . . . . . . . . . . . . . . . . . . . . . . . . . . . . . . . . . . . . . . . 914
Pause . . . . . . . . . . . . . . . . . . . . . . . . . . . . . . . . . . . . . . . . . . . . . . . . . . . . . . . . . . . . . . 914
xxvi ◆ Table of Contents DSX Software Manual
Page 29

Table of Contents
Maintenance Options: 9001 - 9042 . . . . . . . . . . . . . . . . . . . . . . . . . . . . . . . . . . . . . . 915
90xx-Utilities . . . . . . . . . . . . . . . . . . . . . . . . . . . . . . . . . . . . . . . . . . . . . . . . . . . . . . . . . 915
900x-Reset (Reset Utilities) . . . . . . . . . . . . . . . . . . . . . . . . . . . . . . . . . . . . . . . . . . . 915
9001-System (System Reset) . . . . . . . . . . . . . . . . . . . . . . . . . . . . . . . . . . . . . . . . . . . . . . . .915
9001-01: System Reset . . . . . . . . . . . . . . . . . . . . . . . . . . . . . . . . . . . . . . . . . . . . . . . . 915
9002-Station (Station Reset) . . . . . . . . . . . . . . . . . . . . . . . . . . . . . . . . . . . . . . . . . . . . . . . . .916
9002-01: Station Reset . . . . . . . . . . . . . . . . . . . . . . . . . . . . . . . . . . . . . . . . . . . . . . . . 916
901x-Initialize (Initialize Utilities) . . . . . . . . . . . . . . . . . . . . . . . . . . . . . . . . . . . . . . 917
9011-System (Initialize System) . . . . . . . . . . . . . . . . . . . . . . . . . . . . . . . . . . . . . . . . . . . . .917
9011-01: System Initialization . . . . . . . . . . . . . . . . . . . . . . . . . . . . . . . . . . . . . . . . . . 917
9012-Toll Restrictions (Initialize Toll Restriction) . . . . . . . . . . . . . . . . . . . . . . . . . . . . . . .918
9012-01: Initialize Toll Restriction. . . . . . . . . . . . . . . . . . . . . . . . . . . . . . . . . . . . . . . 918
9013-CID Logs (Initialize Caller ID Logs) . . . . . . . . . . . . . . . . . . . . . . . . . . . . . . . . . . . . .919
9013-01: Initialize Caller ID Logs . . . . . . . . . . . . . . . . . . . . . . . . . . . . . . . . . . . . . . . 919
9014-Ring Tones (Initialize Ring Tones) . . . . . . . . . . . . . . . . . . . . . . . . . . . . . . . . . . . . . . .920
9014-01: Initialize Ring Tones . . . . . . . . . . . . . . . . . . . . . . . . . . . . . . . . . . . . . . . . . . 920
902x-Copy . . . . . . . . . . . . . . . . . . . . . . . . . . . . . . . . . . . . . . . . . . . . . . . . . . . . . . . . 921
9021-Station Copy . . . . . . . . . . . . . . . . . . . . . . . . . . . . . . . . . . . . . . . . . . . . . . . . . . . . . . . .921
9021-01: Station Copy . . . . . . . . . . . . . . . . . . . . . . . . . . . . . . . . . . . . . . . . . . . . . . . . 921
9022-Line Copy . . . . . . . . . . . . . . . . . . . . . . . . . . . . . . . . . . . . . . . . . . . . . . . . . . . . . . . . . .923
9022-01: Line Copy . . . . . . . . . . . . . . . . . . . . . . . . . . . . . . . . . . . . . . . . . . . . . . . . . . 923
903x-Swap Ports. . . . . . . . . . . . . . . . . . . . . . . . . . . . . . . . . . . . . . . . . . . . . . . . . . . . 925
9031-Station Swap . . . . . . . . . . . . . . . . . . . . . . . . . . . . . . . . . . . . . . . . . . . . . . . . . . . . . . . .925
9031-01: Station Swap . . . . . . . . . . . . . . . . . . . . . . . . . . . . . . . . . . . . . . . . . . . . . . . . 925
9032-Line Swap . . . . . . . . . . . . . . . . . . . . . . . . . . . . . . . . . . . . . . . . . . . . . . . . . . . . . . . . . .926
9032-01: Line Swap . . . . . . . . . . . . . . . . . . . . . . . . . . . . . . . . . . . . . . . . . . . . . . . . . . 926
904x-Backup/Restore . . . . . . . . . . . . . . . . . . . . . . . . . . . . . . . . . . . . . . . . . . . . . . . . 927
9041-Backup . . . . . . . . . . . . . . . . . . . . . . . . . . . . . . . . . . . . . . . . . . . . . . . . . . . . . . . . . . . . .927
9041-01: Backup to CompactFlash. . . . . . . . . . . . . . . . . . . . . . . . . . . . . . . . . . . . . . . 927
9042-Restore . . . . . . . . . . . . . . . . . . . . . . . . . . . . . . . . . . . . . . . . . . . . . . . . . . . . . . . . . . . . .928
9042-01: Restore from CompactFlash . . . . . . . . . . . . . . . . . . . . . . . . . . . . . . . . . . . . 928
DSX Program List . . . . . . . . . . . . . . . . . . . . . . . . . . . . . . . . . . . . . . . . . . . . . . . . . . . . . 929
Index . . . . . . . . . . . . . . . . . . . . . . . . . . . . . . . . . . . . . . . . . . . . . . . . . . . . . . . . . . . . . . . 947
DSX Software Manual Table of Contents ◆ xxvii
Page 30

Table of Contents
xxviii ◆ Table of Contents DSX Software Manual
Page 31

Using the DSX Software Manual
Using the DSX Software Manual
How the Manual is Organized
This manual describes the features and programming of the DSX telephone system. It is divided into eight
chapters as follows:
❥ Introduction
This is the chapter you are reading now. It provides information about the DSX system’s default feature
setup and basic startup programming. You’ll also find handy charts for system codes and capacities, as
well as key layout illustrations for each DSX telephone.
❥ Features
The Features chapter contains the description, programming, related features, and operation for each
DSX telephone system feature. The programming required to customize each feature is presented in a
handy, easy to understand, step-by-step guide. For feature operation, use the convenient operation charts
at the end of each feature.
❥ IntraMail
For description, programming, related features and operation of each IntraMail Voice Mail with Automated Attendant feature, turn to the IntraMail chapter.
❥ System 1001-1702
Turn to this chapter for details on the DSX system option programming.
❥ Station 2101-2501
Refer to this chapter for details on the DSX station option programming.
❥ Line 3101-3715
For details on the DSX line option programming, read this chapter.
❥ Voice Mail 4101-4231
When setting up IntraMail, you’ll find the details on each IntraMail option in this chapter. This chapter
also provides the specifics on options required for UltraMail and external NVM-Series voice mail.
❥ Maintenance 9001-9042
You will find details on the maintenance options in this chapter.
Introduction
Introduction
Additionally, at the end of this manual are the DSX Program List (page 929) and Index (page 947).
The System Document CD
The System Document CD provided with your system contains documentation, software, and other DSX
resources. Insert this CD into your PC and browse through its contents.
DSX Software Manual Introduction ◆ 1
Page 32

Default Feature Setup
Default Feature Setup
Default Features
All lines are loop start DTMF.
1.
• Use 3101-01: Line Type (page 809) to change this assignment.
In DSX-80/160, lines 1-12 ring on line keys 1-12 for extensions 300-315.
2.
• All other extensions are lamp only for lines 1-12.
• Lines 13-64 do not appear on line keys.
In DSX40, lines 1-8 ring on line keys 1-8.
3.
• Lines 5-8 require the Line Expansion Board.
To customize line ringing, use one of the following:
4.
• User Programmable Features (page 368) code #RAL.
• 2132-[01-64]: Line Ringing (page 764).
1.
The circuit types for keyset extensions are automatically set when the extension is plugged in.
Keyset users can place outside calls by:
2.
• Pressing a line key and dialing the outside number.
-See Central Office Calls, Placing (page 78).
• Pressing INTERCOM, dialing 9, then dialing the outside number.
-See Line Group Routing (page 223).
• Line Dial-Up and Direct Line Access are disabled.
-See Central Office Calls, Placing (page 78) for more.
All extensions have full incoming and outgoing access to all outside lines.
3.
• See Initial Startup Programming on the next page if you want to change this assignment.
The default Feature Key assignments are:
4.
• Keys 1-12 (1-8 on DSX-40) are line keys.
• Keys 13-24 (9-24 on DSX-40) are undefined.
At the attendant’s telephone:
5.
• Key 12 (on 22-button) or key 24 (on 34-button) is an Operator Call Key.
-Use the Operator Call Key to answer incoming Intercom calls queued at the attendant’s extension. See Attendant
Call Queuing (page 22).
Default Features for Lines
Default Features for Extensions
Default Features for IntraMail
1.
Each extension has an IntraMail voice mailbox.
All mailboxes are enabled.
2.
• To disable a mailbox, see 2141-01: Station Mailbox Type (page 766).
The IntraMail Automated Attendant does not answer outside calls.
3.
• To set up the Automated Attendant, turn to Automated Attendant (page 433).
2 ◆ Introduction DSX Software Manual
Page 33

Initial Startup Programming
1. Enter the programming mode.
1. From any display telephone:
- Press INTERCOM + Dial #*#*
- Enter the system password + HOLD
The system passwords are:
2.
- 632379 (NECDSX) for Installer (level 3)
- 9999 for System Administrator 2 (level 2)
- 0000 for System Administrator 1 (level 1)
3. See System Programming Password Protection (page 336) for more.
2. Assign the correct circuit type to each of your installed lines.
1. In 3101-01: Line Type (page 809), assign the correct circuit type for each line. Analog line types are:
- 51 for loop start DTMF
- 52 for loop start DP
Default Feature Setup
Introduction
3.
4.
5. To change the default system passwords:
6. To return the system to the factory installed (default) programming:
By default, each extension has full incoming and outgoing access to each line. To change this
assignment:
1. If yes, in 2131-[01-64]: Line Access (page 763), change each extension’s line access as required:
- 0 for no access
- 1 for incoming access only
- 2 for outgoing access only
- 3 for full access
2. Using 902x-Copy (page 921) may save you time.
By default, all extensions 300-315 ring immediately day and night for on lines 1-12. To change
this assignment:
1. In 2132-[01-64]: Line Ringing (page 764) set the ringing option for each extension:
- 0 for lamp only (no ringing) day and night
- 1 for day and night ringing
- 2 for night ringing only
- 3 for delay ringing day and night
2. Using 902x-Copy (page 921) may save you time.
1. Turn to System Programming Password Protection (page 336) to learn more about system passwords.
1. Turn to 901x-Initialize (Initialize Utilities) (page 917) to learn more about system initialization.
DSX Software Manual Introduction ◆ 3
Page 34
Default Feature Setup
Checking your System’s Software Level
How to Check your System’s Software Level
To check your system’s software level:
1.
Press INTERCOM.
Dial #*#*.
2.
3.
• The system software level shows on the first line of your display.
• You see: DSX-nn vxx.xx.xx
Press SPEAKER to exit.
4 ◆ Introduction DSX Software Manual
Page 35

Charts
Charts
DSX Dial Codes by Feature (Page 1 of 2)
For this feature Dial this code When you are
Barge In (Intrusion)
Call Forwarding
4
INTERCOM
+ *30 Canceling Call Forwarding at an
Barging-In on a co-worker’s call
extension
INTERCOM + *32 + Extension or 0
(for the operator)
INTERCOM + *33 Setting up Call Forwarding Off
Enabling Call Forwarding Busy/No
Answer
Premise
INTERCOM + *34 + Extension or 0
Enabling Call Forwarding All Calls
(for the operator)
INTERCOM + *36 + Extension or 0
Enabling Call Forwarding No Answer
(for the operator)
Call Waiting / Camp-On
Central Office Calls, Placing
INTERCOM + *37 + 2 (all calls) or 8
(outside calls)
+ Do not hang up
2
2 + Hang up
INTERCOM
+ #9 + Line number
(e.g., 01)
Setting up Personal Answering
Machine Emulation
Camping-On to a co-worker
Leaving a Callback for a co-worker
Using Line Dial-Up to place an outside call
Introduction
Dial Number Preview
Directed Call Pickup
Flash
Forced Line Disconnect
Group Call Pickup
Hold
Intercom
Meet-Me Conference
INTERCOM + Line extension number
(e.g., 101)
INTERCOM + 9 or 90-98 Accessing a Line Group to place an
Using Direct Line Access to place an
outside call
outside call
INTERCOM
*
+ ** + Extension Intercepting a call ringing a
Previewing a number before dialing
co-worker’s extension
#3
Flashing a line at a single line
extension
#
Using Forced Line Disconnect to disconnect a busy outside line
INTERCOM
+ *# Answering a call ringing a phone in
your Pickup Group
INTERCOM
INTERCOM
+ *4 + Line number (e.g.,
01)
+ Extension (e.g., 301) Placing an Intercom call to a co-
Picking up an outside call on System
Hold at a co-worker’s extension
worker
INTERCOM
+ #11 or # 12 Setting up or joining a Meet-Me Con-
ference
DSX Software Manual Introduction ◆ 5
Page 36

Charts
DSX Dial Codes by Feature (Page 2 of 2)
For this feature Dial this code When you are
Monitor / Silent Monitor
Night Service / Night Ring
Paging
Park
Removing Lines and Extensions
From Service
Selectable Display Messaging
Speed Dial
Transfer
6
+ UNA code (01-04) Answering a call ringing UNA at
**
INTERCOM
+ *1 + Page zone (1-7 or
0 for All Call)
INTERCOM
+ * + System Park Orbit
(60-69)
INTERCOM + ** + Extension (e.g.,
301)
INTERCOM
+ #40 + Extension (e.g.,
301) or line (e.g., 101) + 4 (to return)
or 6 (to remove)
INTERCOM
+ *38 + Message (00-16)
+ Hold + Add additional digits + Hold
INTERCOM
+ # + System bin (201-
299) or Personal bin (701-720)
INTERCOM
+ Extension (e.g., 301) Transferring a call to a co-worker’s
Setting up Monitor after calling a busy
co-worker
night
Making an internal Paging announcement
Parking or retrieving a call from System Park Orbit
Using Personal Park to Park or
retrieve a call at a co-workers extension
Removing or returning an extension
or line to service
Enabling a Selectable Display Message
Dialing a System or Personal Speed
Dial number
extension
Line Queuing / Line Callback
Voice Mail
Voice Over
INTERCOM + Extension (e.g., 301) +
V-MAIL
2 Queuing or leaving a Callback for a
INTERCOM
+ V-MAIL Calling your mailbox from your key-
Lift handset + *8 Calling your mailbox from your single
INTERCOM + Extension (e.g., 301) +
V-MAIL
Hookflash + Extension (e.g., 301) +
INTERCOM + *37 + 2 (all calls) or 8
(outside calls)
INTERCOM + *30 Canceling Personal Answering
9
Transferring a call to a co-worker’s
mailbox
busy line
set
line telephone
Transferring a call to a co-worker’s
mailbox from your keyset
8
Transferring a call to a co-worker’s
mailbox from your single line telephone
Setting up Personal Answering
Machine Emulation
Machine Emulation
Initiating a Voice Over to a busy
extension (after hearing busy/ring
tone)
6 ◆ Introduction DSX Software Manual
Page 37

Charts
System Number Plan/Capacities (Page 1 of 2)
DSX40 DSX80/160
System Options
Classes of Service 1-15
(COS 1 normally reserved for attendants)
Conference 32 simultaneous users in Conference (total of all Conferences system-wide)
8 simultaneous Conferences maximum
8 parties maximum in any one Conference
Extension Hunting (UCD) Master
Numbers
Extension Hunting Groups 8 (1-8)
Group Call Pickup Groups 8 (1-8, 0 = unassigned)
Privacy Release Groups 16 (1-16, 0 = unassigned)
Speed Dial, Personal 20 bins at each extension (701-720)
See Speed Dial (page 315) for additional information on Speed Dial capacities.
Speed Dial, System 999
Tenant Groups 1
8
Introduction
Timeslots Non-blocking
Toll Restriction Levels 7 (1-7, 0 = no restriction)
Voice Mail Master Numbers 1 (normally 700)
Lines
Direct Line Access Codes 101-108 101-164
Line Dial Up Codes #901-#908 #901-#964
Ring Groups 8 (1-8)
0 = no assignment
Ring Group master numbers are normally 600-607.
Line Group Access Codes 90-98
Line Groups 9 (0-8)
Line Ports 8 (1-8)
Lines 5-8 require the Expansion Board.
Extensions
Attendant (Operator) Access
Number
0 (single operator)
01-04 (multiple operators)
64 (1-64)
Attendants 4
DSX Software Manual Introduction ◆ 7
Page 38

Charts
System Number Plan/Capacities (Page 2 of 2)
DSX40 DSX80/160
Analog Door Boxes, Built-In 20
Analog Door Boxes, Total The maximum number of DSX Analog Door Boxes you can install is determined by
the number of 2PGDAD Modules, which in turn is limited only by the availability
of 16ESIU station ports.
DSS Consoles 4
The System Load Factor may limit the total number that you can install. Refer to
the system’s Hardware Manual
Telephone Extension Numbers 300-325 300-427
Telephone Station Numbers 34 (1-34) 128 (1-128)
.
Total Number of Station Devices 34
This includes digital extensions, analog
extensions, and analog Door Boxes.
Paging and Park
Page Zones (Internal) 7 zones (1-7) and All Call (0)
Page Zone (External) All Call and zone 1 broadcast from the Page audio minijack
Page Relays 2 in each built-in Door Box port
2 in each 2PGDAD Module (Future)
Park Orbits 10 (60-69)
Orbits 68 and 69 have extended (5 min.) timers
Passwords
System Administrator 1
(Level 1)
System Administrator 2
(Level 2)
Installer (Level 3) 632379 (NECDSX)
0000
9999
May be limited by load factor.
2 in each 2PGDAD Module (Future)
128
8 ◆ Introduction DSX Software Manual
Page 39

Telephone Illustrations
Telephone Illustrations
Introduction
Ring/Message Lamp
Speed Dial
Bin keys
Feature keys
1093100 - 2
Thu June 8 11:52 AM
Pat Smith x301
Menu Dir VM:00 CL:00
CLEARCHECK
Line 1 Line 2 Line 3 Line 4 Line 5 Line 6
Line 7 Line 8 Line 9 Line 10 Line 11 Line 12
GHI
PQRS
ABC
JKL
TUV
DEF
MNO
WXYZ
TRANSFER
FLASH
REDIAL
MUTE
INTERCOM
V-MAIL
DND
CONF
Alpanumeric Display
Soft keys
In DSX-40:
Keys 1-8 are line keys.
Keys 9-12 are undefined.
In DSX-80/160:
Keys 1-12 are line keys.
For Attendants:
Key 12 is the
Operator Call key.
SPEAKER
VOLUME
Fixed Function keys
22-Button Display Telephone
HOLD
Microphone
DSX Software Manual Introduction ◆ 9
Page 40

Telephone Illustrations
Ring/Message Lamp
Speed Dial
Bin keys
Feature keys
1093100 - 1
Thu June 8 11:52 AM
Pat Smith x301
Menu Dir VM:00 CL:00
CLEARCHECK
Line 1 Line 2 Line 3 Line 4 Line 5 Line 6
Line 7 Line 8 Line 9 Line 10 Line 11 Line 12
GHI
PQRS
ABC
JKL
TUV
DEF
MNO
WXYZ
TRANSFER
FLASH
REDIAL
MUTE
INTERCOM
V-MAIL
DND
CONF
Alpanumeric Display
Soft keys
In DSX-40:
Keys 1-8 are line keys.
Keys 9-24 are undefined.
In DSX-80/160:
Keys 1-12 are line keys.
Keys 13-24 are undefined.
For Attendants:
Key 24 is the
Operator Call key.
SPEAKER
VOLUME
Fixed Function keys
34-Button Display Telephone
HOLD
Microphone
10 ◆ Introduction DSX Software Manual
Page 41

Soft keys
Feature keys
1093100 - 4
Telephone Illustrations
Thu June 8 11:52 AM
Pat Smith x301
Menu
Director
y
V-Mail 00
Calls 00
g
Pa e SP Dial 2
SP Dial 1
Introduction
Ring/Message Lamp
CLEARCHECK
Alpanumeric Display
Soft keys
Line 1 Line 2 Line 3 Line 4 Line 5 Line 6
Line 7 Line 8 Line 9 Line 10 Line 11 Line 12
GHI
PQRS
ABC
JKL
TUV
VOLUME
DEF
MNO
WXYZ
TRANSFER
FLASH
REDIAL
MUTE
SPEAKER
INTERCOM
V-MAIL
DND
CONF
HOLD
Fixed Function keys
In DSX-40:
Keys 1-8 are line keys.
Keys 9-24 are undefined.
In DSX-80/160:
Keys 1-12 are line keys.
Keys 13-24 are undefined.
For Attendants:
Key 24 is the
Operator Call key.
Microphone
34-Button Super Display Telephone
DSX Software Manual Introduction ◆ 11
Page 42
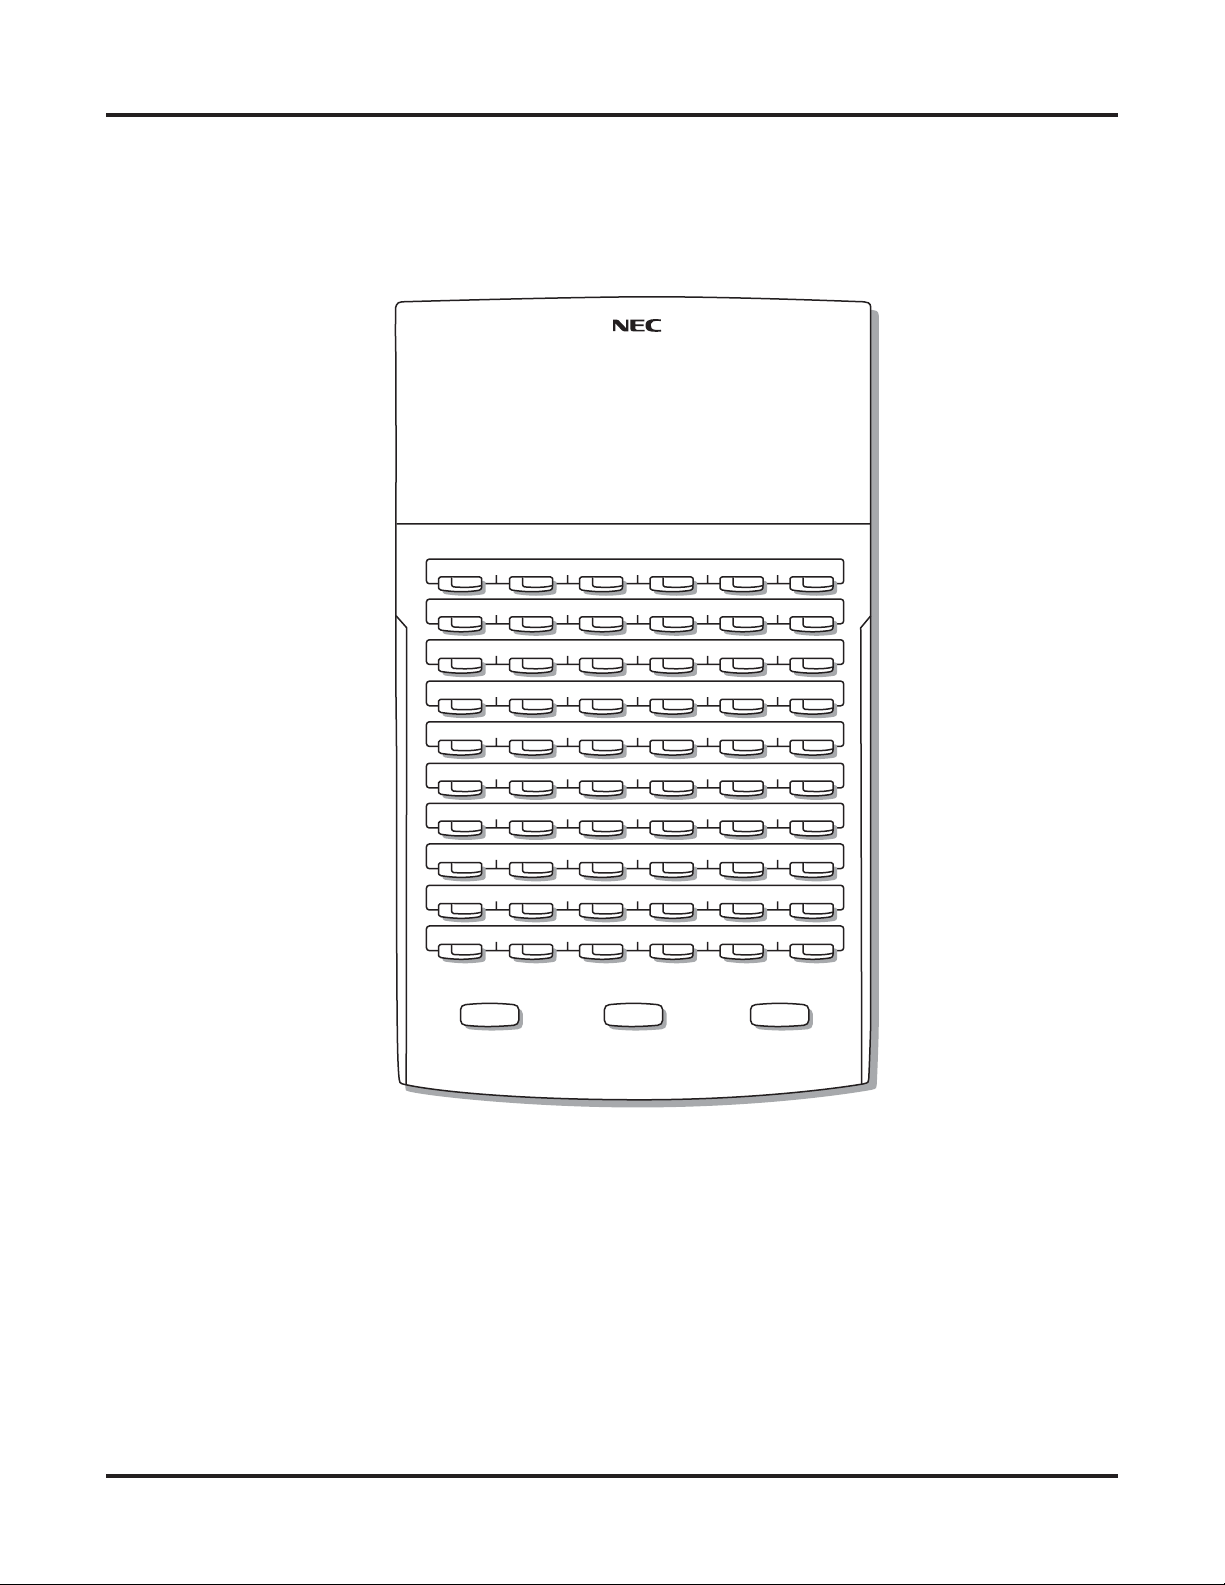
Telephone Illustrations
1093100 -3
300 301 302 303 304 305
306 307 308 309 310 311
312 313 314 315 316 317
318 319 320 321 322 323
324 325 326 327 328 329
330 331 332 333 334 335
336 337 338 339 340 341
342 343 344 345 346 347
RELEASE
ALL
CALL
Park 60 Park 61
TRANSFERANSWER
Page 1 Page 2 Page 3
NightPark 62 Park 63 Park 64 Park 65 Park 66
60-Button DSS Console
12 ◆ Introduction DSX Software Manual
Page 43

Introduction
Introduction
How To Use This Chapter
This chapter provides detailed information on the system’s features. The features in this chapter are in alphabetical order, like a dictionary, and are subdivided into headings as follows:
❥ Description
Read Description to get an overview of the feature. Along with the feature’s description is the Default
Setting, which outlines how the feature works with the default (factory installed) programming. When
initially installed, the system uses the default setting. For specific default settings on each programmable
option, follow the cross-reference to that option.
❥ Programming
This heading provides a handy, easy to understand, step-by-step guide to the system programming
required to activate and/or customize the feature. If you need more detail about an option, follow the
cross-reference to that option.
❥ Related Features
Read Related Features to learn how the feature interacts with other features.
❥ Operation
Refer to this heading for convenient, compact, yet detailed operation charts for using each feature.
Features
Features
DSX Software Manual Features ◆ 13
Page 44

Account Codes
Account Codes
Description
Use Account codes to categorize and/or restrict outside calls.
Account Codes are user-dialed codes that help categorize and/or restrict outside calls. Account Codes are
from 2-10 digits long, using any combination of the digits 0-9. There are three types of Account Codes:
❥ Optional (Unforced Account Codes)
❥ Forced Account Codes
❥ Verified Account Codes
Optional (Unforced) Account Codes
Optional Account Codes allow a keyset extension user to enter an Account Code while placing an outside
call or any time while on a call. This type of Account Code is optional: the system does not require the user
to enter it. If the keyset user is already talking on an outside call, their conversation continues uninterrupted
while they enter an Account Code.
Single line telephone users can only enter an Account Code while placing their outside call.
Forced Account Codes
Forced Account Codes require an extension user to enter an Account Code every time they place an outside
call. If the user doesn’t enter the code, the system prevents the call. The system can require Forced Account
Codes for all outside calls, or just for toll calls (as determined by Toll Restriction programming). Note that
Forced Account Codes do not pertain to incoming calls.
Verified Account Codes
With Verified Account Codes, the system compares the Account Code the user dials with a list of codes pro-
grammed into the Verified Account Code Table. If the Account Code is in the table, the call goes through
(provided it is not prevented by an extension’s Toll Restriction programming). If the code is not in the table,
the system prevents the call. Verified Account Codes, if enabled, apply only to Forced Account Codes.
Using Account Codes and Speed Dial
To simplify Account Code operation, Personal and System Speed Dial bins can contain Account Codes.
Keep the following in mind when using Speed Dial and Account Codes:
❥ The Account Code can be either the first or last entry in the bin, and must be preceded and followed by
the # character. For example, the Account Code 1234 must be entered as #1234#.
❥ 1551-02: Allow Account Codes in Speed Dial Bins (page 667) must be enabled in system programming:
❥ The Speed Dial bin can contain an Account Code followed by an outside number, or just the Account
Code. The Account Code must be preceded and followed by a # entry. If the bin contains just the
Account Code, the user must be sure to press the bin key before dialing the outside number.
❥ If the system has Verified Account Codes enabled, the Account Code entered in the Speed Dial bin must
match an entry in the Verified Account Code Table.
❥ If the Speed Dial bin does not contain an Account Code, the user must enter the Account Code manually.
If Forced Account Codes are enabled, the system requires
the user to enter the Account Code before it
outdials the stored Speed Dial number.
❥ An extension user can preselect a line for a Speed Dial call.
Using Account Codes with Last Number Redial and Save
Last Number Redial and Save do not store Account Codes. This means that the user must manually enter an
Account Code to have it included with a call dialed using Last Number Redial and Save. If Forced Account
Codes are enabled, the system requires the user to enter the Account Code before it outdials the stored number saved by Last Number Redial or Save.
14 ◆ Features DSX Software Manual
Page 45

An extension user can preselect a line for a Last Number Redial or Save call.
Account Codes and Emergency Calls
Account Codes are never enforced for emergency (911 and 1+911) calls.
DSS Console Account Code Key
A keyset user can have an Account Code key on their DSS Console. It works the same as a keyset Account
Code key.
Conditions
• Do not use Account Codes that begin with 911 or 1911.
Default Setting
• Account Codes disabled.
Programming
General Account Code Programming
1. Should users be able to store Account Codes in Speed Dial bins?
1. If yes, in 1551-02: Allow Account Codes in Speed Dial Bins (page 667), enter Yes.
2. If no, in 1551-02: Allow Account Codes in Speed Dial Bins (page 667), enter No.
Account Codes
Features
2. While on outside calls, should extension users be able to dial # to enter Account Codes?
1. If yes, in 1551-01: Dial # to Enter Account Codes (page 667), enter Ye s.
2. If no, in 1551-01: Dial # to Enter Account Codes (page 667), enter No.
3.
4. Should a keyset have an Account Code key to simplify entering Account Codes?
5.
Should Account Code entries by hidden (i.e., replaced by * characters) on each telephone’s
display?
1. If yes, in 1551-03: Show Account Codes on Telephone Display (page 667), enter Yes.
2. If no, in 1551-03: Show Account Codes on Telephone Display (page 667), enter No.
1. If yes, in 2121-Feature Keys (page 753), select an available key and assign it key code 26.
2. If no, make sure the keyset has no Account Code keys (key code 26) assigned in 2121-Feature Keys
(page 753).
Should a keyset’s DSS Console have an Account Code key to simplify entering Account
Codes?
1. If yes, in 2401-Config (DSS Console Configuration) (page 800), select an available key on the DSS Con-
sole and assign it key code 26.
2. If no, make sure the DSS Console has no Account Code keys (key code 26) assigned in 2401-Config
(DSS Console Configuration) (page 800).
DSX Software Manual Features ◆ 15
Page 46

Account Codes
Setting Up Forced Account Codes
1.
Should an extension have Forced Account Codes (i.e., be required to enter an Account Code
while placing an outside call)?
1. In 2102-01: Class of Service (page 724), check the extension’s Class of Service level.
2. If yes (enable Forced Account Codes), in 1412-04: Forced Account Codes (page 651) for the extension’s
Class of Service level, enter Yes.
3. If no (disable Forced Account Codes), 1412-04: Forced Account Codes (page 651) for the extension’s
Class of Service level, enter No.
2. Should an extension have Forced Account Codes only for long distance (toll) calls?
1. In 2102-01: Class of Service (page 724), check the extension’s Class of Service level.
2. If yes:
- In 1412-06: Account Codes for Toll Calls Only (page 651), enter
Yes.
- In 1551-04: Account Code Toll Restriction Level (page 668), enter the Toll Level the system will
use to differentiate toll calls from local calls.
3. If no, in 1412-06: Account Codes for Toll Calls Only (page 651), enter No.
3. Do you have specific lines that should never require users to enter a Forced Account Code?
1. If yes, in 3111-01: Disable Forced Account Codes (page 817), enter Yes.
2. If no, in 3111-01: Disable Forced Account Codes (page 817), enter No.
Setting Up Verified Account Codes
1.
Should an extension be required to enter a Verified Account Code while placing an outside
call?
1. In 2102-01: Class of Service (page 724), check the extension’s Class of Service level.
2. If yes:
- In 1412-05: Verified Account Codes (page 651), enter Yes.
- In 36xx-AC Codes (Verified Account Codes Table) (page 854), enter codes into the Verified Account
Codes Table.
- If 1551-01: Dial # to Enter Account Codes (page 667) is enabled (Yes ), do not enter # in any of
your Verified Account Codes.
3. If no, in 1412-05: Verified Account Codes (page 651), enter No.
16 ◆ Features DSX Software Manual
Page 47

Account Codes
Programming Examples
1. Forced Account Codes Require an Account Code only for 900 and 1 + 900 Long Distance Calls.
1. In 1412-04: Forced Account Codes (page 651), enter Yes.
2. In 1412-06: Account Codes for Toll Calls Only (page 651), enter Yes.
3. In 1551-04: Account Code Toll Restriction Level (page 668), enter 2 (for example).
Make the following entries for Toll Restriction Level 2.
4. In 3511-01: Active Key Pad (page 840), enter Yes.
In 3512-04: Allow N11 Dialing (page 842), enter Ye s.
In 3512-01: Allow 0 + XXX Operator Assisted Dialing (page 841), enter Yes.
In 3512-03: Allow 101x Equal Access Dialing (page 841), enter Yes.
5. In 352x-1010-XXX / Local XXX (Equal Access Dialing) (page 844), make a deny table with no entries
(i.e., deny nothing). This is the default setting.
6. In 353x-1+XXX / TBL-A XXX (NPA/NXX Dialing 3-Digit Table) (page 846), make a deny table and enter
900.
7. In 354x-1+XXX-XXX / TBL-A XXXXXXX (1 + NPA + NXX Dialing 6-Digit Table) (page 848), make a
deny table with no entries (i.e., deny nothing). This is the default entry.
8. In 355x-XXX / TBL-B-XXX (NPA/NXX Dialing 3-Digit Table) (page 850), make a deny table and enter
900.
9. In 356x-XXX-XXX / TBL-B XXXXXX (NPA + NXX Dialing 6-Digit Table) (page 852), make a deny table
with no entries (i.e., deny nothing). This is the default setting.
10. In 2102-01: Class of Service (page 724), assign the Class of Service with Forced Account Codes enabled
to the extension.
11. In 2102-02: Station Toll Level (Day) (page 724) and 2102-03: Station Toll Level (Night) (page 724), be
sure the extension does not use Toll Level 2. If it does, Toll Restriction will always deny 1 + 900 and 900
calls (regardless of whether the user enters an Account Code).
With this programming, an extension user can:
1. Press a line key or dial a code for an outside line.
2. Wait for a reminder tone (3 beeps).
• With Forced Account Codes enabled, the system automatically goes into the Account Code mode after
you press a line key in step 1 above.
• If you have an Account Code Feature Key, it flashes green.
3. If dialing a 1 + 900 or 900 call, dial the Account Code.
If dialing any other long distance call, skip this step.
4. Press # (if enabled), the Account Code soft key, or an Account Code Feature Key (if programmed).
5. Dial the outside number.
• If the user doesn’t enter an Account Code for 900 or 1 + 900 calls, the system will cut off the call.
• The system will also cut off any call not allowed by the extension’s Toll Restriction programming.
Features
DSX Software Manual Features ◆ 17
Page 48

Account Codes
2. Forced Account Codes Allow 800 and 1 + 800 Long Distance Dialing without an Account Code.
1. In 1412-04: Forced Account Codes (page 651), enter Yes.
2. In 1412-06: Account Codes for Toll Calls Only (page 651), enter Yes.
3. In 1551-04: Account Code Toll Restriction Level (page 668), enter 2 (for example).
Make the following entries for Toll Restriction Level 2.
4. In 3511-01: Active Key Pad (page 840), enter Yes.
In 3512-04: Allow N11 Dialing (page 842), enter Ye s.
In 3512-01: Allow 0 + XXX Operator Assisted Dialing (page 841), enter Yes.
In 3512-03: Allow 101x Equal Access Dialing (page 841), enter Yes.
5. In 352x-1010-XXX / Local XXX (Equal Access Dialing) (page 844), make a deny table with no entries
(i.e., deny nothing). This is the default setting.
6. In 353x-1+XXX / TBL-A XXX (NPA/NXX Dialing 3-Digit Table) (page 846), make an allow table and
enter 800.
7. In 354x-1+XXX-XXX / TBL-A XXXXXXX (1 + NPA + NXX Dialing 6-Digit Table) (page 848), make a
deny table with no entries (i.e., deny nothing). This is the default entry.
8. In 355x-XXX / TBL-B-XXX (NPA/NXX Dialing 3-Digit Table) (page 850), make an allow table and enter
800.
9. In 356x-XXX-XXX / TBL-B XXXXXX (NPA + NXX Dialing 6-Digit Table) (page 852), make a deny table
with no entries (i.e., deny nothing). This is the default setting.
10. In 2102-01: Class of Service (page 724), assign the Class of Service with Forced Account Codes enabled
to the extension.
With this programming, an extension user can:
1. Press a line key or dial a code for an outside line.
2. Wait for a reminder tone (3 beeps).
• With Forced Account Codes enabled, the system automatically goes into the Account Code mode after
you press a line key in step 1 above.
• If you have an Account Code Feature Key, it flashes green.
3. If dialing a 1 + 800 or 800 call, skip this step.
If dialing any other long distance call, dial the Account Code.
4. Press # (if enabled), the Account Code soft key, or an Account Code Feature Key (if programmed).
5. Dial the outside number.
• The call will go through without an Account Code. If the user doesn’t enter an Account Code for all
other calls, the system will cut off the call.
• The system will also cut off any call not allowed by the extension’s Toll Restriction programming.
18 ◆ Features DSX Software Manual
Page 49

Other Related Features
Features
Central Office Calls, Placing (page 78)
• You can use Store and Forward with Forced Account Codes.
Last Number Redial (page 219) and Save Number Dialed (page 298)
• Last Number Redial and Save do not store Account Codes. This means that the user must manually
enter an Account Code to have it included with a call redialed using Last Number Redial and Save.
Speed Dial (page 315)
• An extension user can store an Account Code in a Speed Dial bin. See Using Account Codes and
Speed Dial (page 14) for more.
Station Message Detail Recording (page 328)
• Account Codes print on the SMDR report.
Voice Mail (page 372)
• Voice mail callout features (such as Message Notification) may interact with Account Codes if the
callout number contains # characters.
IntraMail Features
None
Operation
Account Codes
Features
Optional (Unforced) Account Codes
[Super Display Soft Key] - [Keyset Soft Key]
In these instructions:
[Super Display Soft Key]
[Keyset Soft Key]
• For keysets, Optional Account Codes apply to both incoming and outgoing calls. For outgoing calls, you can enter the
Account Code before or after dialing the outside number.
• For Single Line sets, Optional Account Codes apply only to outgoing calls. You must enter the Account Code after getting dial tone on the line but before dialing the outside number.
To enter an Optional (Unforced) Account Code:
1.
Place or Answer outside call.
[Acct Code]
2.
[Acct]
When you see Enter Account Code, enter Account Code.
3.
4.
5.
• An Account Code can be up to 10 digits long, using the digits 0-9.
[Acct Code]
[Acct]
For outside calls only:
a.
Dial your outside number.
• Toll Restriction may still prevent you from dialing certain outside numbers.
Press Account Code soft key.
• You can optionally press an Account Code Feature Key or dial # (if enabled).
Press Account Code soft key.
• You can optionally press an Account Code Feature Key or dial # (if enabled).
DSX Software Manual Features ◆ 19
Page 50
Account Codes
Forced Account Codes
[Super Display Soft Key] - [Keyset Soft Key]
• Forced Account Codes may prevent Speed Dial from dialing 911 emergency services.
• Forced Account Codes do not apply to incoming calls.
To enter a Forced Account Code:
Access a line for an outgoing call.
1.
2.
• You hear three beeps.
When you see Enter Account Code, enter Account Code.
• An Account Code can be up to 10 digits long, using the digits 0-9.
• If your system has Verified Account Codes enabled, you must
enter one from the Verified Account Codes
Table. If you enter an invalid Verified Account Code, your call will be cut off in the next step.
• Skip this step to bypass Account Code entry (for example, when dialing a local call and your system requires
Account Codes only for toll calls).
[Acct Code]
3.
[Acct]
Dial your outside number.
4.
Press Account Code soft key.
• You can optionally press an Account Code Feature Key or dial # (if enabled).
• Toll Restriction may still prevent you from dialing certain outside numbers.
In these instructions:
[Super Display Soft Key]
[Keyset Soft Key]
20 ◆ Features DSX Software Manual
Page 51

Alphanumeric Display
Description
Alphanumeric Display
The Alphanumeric Display messages help the display telephone user process calls, identify
callers and customize features.
The 22- and 34-Button Display Telephones have a three-line, 24-character per line alphanumeric display.
The first line displays the date and time (while idle) and feature status messages. The second line is used
extensively by IntraMail. The third line displays the Soft Key definitions.
The 34-Button Super Display Telephone has a nine-line, 24-character per line alphanumeric display. The
first line displays the date and time (while idle) and feature status messages, just like the 22- and 34-Button
Display Telephones. The second line is used extensively by IntraMail. Lines 4-9 are the comprehensive
Super Display Telephone soft key definitions.
❥ To learn more about the display telephones:
- see 22-Button Display Telephone on page 9
- see 34-Button Display Telephone on page 10
- see 34-Button Super Display Telephone on page 11
❥ To learn more about the Soft Keys, see Interactive Soft Keys on page 210.
Conditions
• None
Default Setting
• Enabled for all display telephones.
Programming
None
Other Related Features
Features
Interactive Soft Keys (page 210)
The interactive Soft keys provide users with intuitive access to the telephone’s features.
Volume, Brightness, and Contrast Controls (page 388)
While a feature is active, pressing a VOLUME key adjusts the volume of the active feature. While the
telephone is idle, pressing a VOLUME key adjusts the display contrast. Turn to this feature for addi-
tional volume, brightness, and contrast controls.
IntraMail Features
None
Features
Operation
Refer to the individual features for feature operation.
DSX Software Manual Features ◆ 21
Page 52

Attendant Call Queuing
Attendant Call Queuing
Description
Attendant Call Queuing helps minimize call congestion in systems that use the attendant as
the overflow destination for unanswered calls.
An unlimited number of callers can queue for the attendant. The callers hear ringback while they wait for the
attendant to answer — not busy tone. If you have the attendant as the overflow destination for Direct Inward
Lines, for example, unanswered DILs will “stack up” at the attendant until they are answered.
Operator Call Key
The last Feature Key on an attendant telephone is permanently assigned as an Operator Call key. When the
operator has Intercom calls waiting to be answered, the calls queue under this key. The key winks (on) when
calls are queued.
The Operator Call key is a permanent assignment for all extensions assigned as operators. You cannot
change this assignment. Attendant Call Queuing is a permanent, non-programmable feature.
Conditions
• None
Default Setting
• No operators assigned by default. Once assigned, key 12 (on 22-button) or key 24 (on 34-button) is an
Operator Call Key.
Programming
See Attendant Position (page 24) for required attendant programming.
Other Related Features
Features
Attendant Position (page 24)
Assign system attendants.
Call Coverage Keys (page 40)
A Call Coverage Key will not pick up a call ringing the attendant’s Operator Call Key.
Off-Hook Signaling (page 255)
The Operator Call Key does not activate off-hook signaling.
Ringing Line Preference (page 295)
Ringing Line Preference will not answer a call ringing the Operator Call Key.
Voice Mail (page 372)
• Automated Attendant Screened (STRF) Transfers flash the Operator Call key and the Ring Indicator
lamp. The call does not flash a line/loop key. (Note that Ringing Line Preference will not pick up a call
ringing the attendant’s Operator Call key.)
• Automated Attendant Unscreened (UTRF) Transfers flash the line’s line/loop key and the Ring Indicator lamp.
IntraMail Features
None
22 ◆ Features DSX Software Manual
Page 53

Operation
Attendant Call Queuing
Attendant Call Queuing
[Super Display Soft Key] - [Keyset Soft Key]
To answer a call flashing the Operator Call Key:
1.
Press the flashing Operator Call key.
In these instructions:
[Super Display Soft Key]
[Keyset Soft Key]
Features
DSX Software Manual Features ◆ 23
Page 54

Attendant Position
Attendant Position
Description
The attendant is the system’s call processing focal point.
The attendant is the focal point for call processing within the system. The system can have up to four attendants. In addition to the features of a standard keyset, the attendant also has the following unique capabilities
(refer to the respective feature for details):
❥ Attendant Call Queuing (page 22)
Incoming Intercom calls from co-workers queue for the attendant. The callers never hear busy tone.
❥ Barge In (Intrusion) (page 36)
The attendant can break into another extension user’s established call. This option is enabled in the attendant’s Class of Service (COS 1).
❥ Direct Line Access (page 115)
Direct Line Access lets the attendant user dial a code to access an individual line. This option is enabled
in the attendant’s Class of Service (COS 1).
❥ Forced Line Disconnect (page 182)
In an emergency, the attendant can release (disconnect) another user’s active outside call. This option is
enabled in the attendant’s Class of Service (COS 1).
❥ Line Queuing / Line Callback (page 230)
The attendant can Camp-On (queue) for a busy line. This option is enabled in the attendant’s Class of
Service (COS 1).
❥ Night Service / Night Ring (page 252)
An attendant with a System Night key can put the system in the night mode. This option is enabled in the
attendant’s Class of Service (COS 1).
❥ Removing Lines and Extensions from Service (page 287)
The attendant can remove problem lines from service —then return them to service once the problem is
corrected. This option is enabled because the attendant has Direct Line Access enabled in their Class of
Service (COS 1).
The attendant should use a 34-Button Display or 34-Button Super Display Telephone. In addition, most
attendants should find a DSS Console helpful when processing calls.
Conditions
• Ringing Line Preference will not pick up a call ringing the attendant’s Operator Call key.
• System operators will not ring for Ring Group calls.
Default Setting
• No attendants assigned.
24 ◆ Features DSX Software Manual
Page 55

Programming
Attendant Position
1.
2. Set up the system attendants (operators).
3.
For best performance, install a 34-Button Display or 34-Button Super Display telephone for the
attendant.
1. A DSS Console will also help the attendant process calls more quickly.
1. For a single operator:
- In 1501-01: Number of Operators (page 652), enter 1.
- In 1502-01: Operator Number 1 (page 653), enter the extension number for operator 1.
- If you omit this step, by default users can dial 0 for extension 300 bit it won’t be an operator.
- In 2114-03: Station’s Operator Extension Number (page 744), for each extension enter operator 1’s
extension number.
2. For multiple operators:
- In 1501-01: Number of Operators (page 652), enter the number of operators you need (2-4).
- In 1502-01: Operator Number 1 (page 653), enter the extension number for operator 1.
- In 1502-02: Operator Number 2 (page 653), enter the extension number for operator 2.
- In 1502-03: Operator Number 3 (page 653), enter the extension number for operator 3.
- In 1502-04: Operator Number 4 (page 654), enter the extension number for operator 4.
- In 2114-03: Station’s Operator Extension Number (page 744), assign an operator to each extension.
3. For no operators:
- In 1501-01: Number of Operators (page 652), enter 0.
- In 2114-03: Station’s Operator Extension Number (page 744), remove the assignment for each
extension.
While busy on a call, should the attendant get Off-Hook Signaling audible notification of
incoming calls?
Features
1. If yes:
- In 2116-03: Off Hook Signaling for Incoming Outside Calls (page 750), for the attendant’s exten-
sion enter 1 for Camp-On or 2 for Off-Hook Ringing.
2. If no:
- In 2116-03: Off Hook Signaling for Incoming Outside Calls (page 750), for the attendant’s exten-
sion enter 0.
4. Should 0 (or 01-04 in multiple-operator systems) be the digit users dial to reach their operator?
1. If yes, leave the following at their factory default values:
- In 1301-[01-10]: Function Type (page 620), digit 0 = 1 (Operator).
- In 1301-[01-10]: Expected Number of Digits (page 620), digit 0 =
2. If no:
- In 1301-[01-10]: Function Type (page 620), assign the new digit Function Type 1 (Operator).
- In 1301-[01-10]: Expected Number of Digits (page 620), for the new digit enter 2.
2.
DSX Software Manual Features ◆ 25
Page 56

Attendant Position
Other Related Features
Features
Barge In (Intrusion) (page 36)
Since the attendant is never busy, Intercom callers cannot Barge In on an attendant.
Call Coverage Keys (page 40)
A Call Coverage Key will not pick up a call ringing the attendant’s Operator Call Key.
Call Waiting / Camp-On (page 58)
Since the attendant is never busy, Intercom callers cannot Camp-On to an attendant.
Callback (page 61)
Since the attendant is never busy, Intercom callers cannot leave a Callback for an attendant.
Class of Service (page 88)
By default, the system assigns Class of Service 1 to the attendant. This provides the attendant with
Barge In, Call Forwarding Off Premises, Direct Line Access, Forced Line Disconnect, Night Service,
and Line Queuing (Camp-On) capability.
Do Not Disturb (page 143)
The attendant can have Do Not Disturb. In addition, pressing DND at the attendant activates the night
mode for any lines directly terminated to the attendant.
Door Box (page 147)
An operator can monitor a Door Box by having a Call Coverage key to monitor ringing and a Hotline
key to call the Door Box.
Feature Keys (page 169)
If an operator is reassigned (i.e., moved from 300 to 301), only the Operator Call key will automatically follow the new assignment. All other Feature Keys must be reprogrammed for the new operator.
Group Ring (page 189)
System operators will not ring for Ring Group calls.
Intercom (page 211)
Designate each extension’s operator.
Monitor / Silent Monitor (page 243)
Since the attendant is never busy, Intercom callers cannot Monitor an attendant.
Privacy (page 277)
Since the attendant is never busy for Intercom calls, the attendant always has Privacy enabled.
Removing Lines and Extensions from Service (page 287)
Normally, the attendant should be able to remove extensions and lines from service.
Voice Mail (page 372)
• STRF transfers to the attendant from the voice mail Automated Attendant flash the Operator Call key
and the Ring Indicator lamp. The call does not flash a line/loop key. (Note that Ringing Line Preference will not pick up a call ringing the attendant’s Operator Call key.)
• UTRF transfers to the attendant from the voice mail Automated Attendant flash the line’s line/loop key
and the Ring Indicator lamp.
Voice Over (page 385)
An operator cannot receive a Voice Over from a co-worker since their extension is never busy to Intercom callers.
IntraMail Features
None
26 ◆ Features DSX Software Manual
Page 57
Operation
Attendant Position
To call the attendant:
Press INTERCOM.
1.
• You hear dial tone.
Dial 0.
2.
• You hear two beeps.
• This calls the attendant assigned to your extension. If your system has multiple attendants, you can reach them
by dialing 01-04.
• In a multiple attendant system, you can dial 0 and wait on the line to automatically call operator 1.
[Super Display Soft Key] - [Keyset Soft Key]
Attendant Position
In these instructions:
[Super Display Soft Key]
[Keyset Soft Key]
Features
DSX Software Manual Features ◆ 27
Page 58

Auto Redial
Auto Redial
Description
Instead of redialing, have Auto Redial periodically retry a busy outside number.
Auto Redial periodically redials a busy outside number. If a keyset user places an outside call and the call
recipient is busy, the user can press a soft key to enable Auto Redial. The keyset user doesn’t have to retry
the number, hoping it will go through.
Auto Redial will periodically retry the number up to 15 times. Auto Redial cancels when the called party
rings or answers, or when the extension:
❥ Places or answers another outside call.
❥ Receives an Intercom voice announcement or answers an Intercom call by lifting the handset or pressing
❥ Presses SPEAKER to cancel Auto Redial.
❥ Presses any other fixed feature key except MIC.
❥ Lifts and replaces the handset.
❥ Presses the CANCEL soft key (Super Display only).
For your reference, the following table shows the standard call progress tones.
SPEAKER.
Call Progress Tones
Reorder (Fast Busy) tone 480 Hz + 620 Hz 250 mS on, 250 mS off
Audible ring tone (ring-
Stutter dial tone 350 Hz + 440 Hz 800 mS to 1.2 sec on,
Conditions
• None
Default Setting
• Enabled
Description Frequencies Rate
Dial tone 350 Hz + 440 Hz Steady
(+ 25 mS)
Busy tone 480 Hz + 620 Hz 500 mS on, 500 mS off
(+ 50 mS)
440 Hz + 880 Hz 800mS to 1.2 sec on, 2.7
back)
sec to 3.3 sec off
800mS to 1.2 sec off
28 ◆ Features DSX Software Manual
Page 59

Programming
1. Is the interval between Auto Redial callout attempts correctly set?
1. If yes, leave 1602-06: Repeat Redial Timer (page 673) at its current setting.
2. If no, change 1602-06: Repeat Redial Timer (page 673) to meet the site requirements.
Auto Redial
2. Is the system waiting an adequate time for busy tone when handling an Auto Redial?
1. If yes, leave 1602-07: Repeat Redial Busy Timer (page 673) at its current setting.
2. If no, change 1602-07: Repeat Redial Busy Timer (page 673) to meet the site requirements.
Other Related Features
Features
Last Number Redial (page 219)
Last Number Redial allows an extension user to quickly redial the last outside number dialed.
IntraMail Features
None
Operation
[Super Display Soft Key] - [Keyset Soft Key]
To enable Auto Redial:
1.
Place an outside call and receive busy tone.
2.
[Auto Redial]
[Alnd]
You see:
WAITING (30 SEC)
AUTO REDIAL 1 OF 15
Press to enable Auto Redial.
Auto Redial
In these instructions:
[Super Display Soft Key]
[Keyset Soft Key]
• The system enables Auto Redial for the last outside call you dialed.
The display shows the interval between callout attempts (e.g., 30 seconds), as
well as how many times redial has occurred (e.g., 1 of 15).
• SPEAKER winks when your telephone has Auto Redial enabled.
Features
3.
The system periodically redials the call, up to 15 times.
Auto Redial cancels when you:
• Place or answer another outside call.
• Receive an Intercom voice announcement or answer an Intercom call by lifting the handset or
pressing SPEAKER.
• Press SPEAKER to cancel Auto Redial.
• Lift and replace the handset.
• Press the CANCEL soft key (Super Display only).
If a Caller ID call rings while Auto Redial is enabled, your display will show the number and optional
name of the incoming caller. However, the ringing does not cancel Auto Redial. In addition, the Auto
Redial display will be restored after the Caller ID call stops ringing.
DSX Software Manual Features ◆ 29
Page 60

Automatic Handsfree
Automatic Handsfree
Description
Automatic Handsfree is a convenience for workers who don’t have a free hand to answer a call
or use a feature.
Automatic Handsfree allows a keyset user to place or answer a call Handsfree by just pressing a key — without lifting the handset or pressing SPEAKER first. If enabled, the system provides Automatic Handsfree for:
❥ Call Coverage keys
❥ Central Office Calls (line and loop calls)
❥ Group Call Pickup keys
❥ Hotline Keys
❥ Intercom (INTERCOM key)
❥ Last Number Redial (REDIAL key)
❥ Paging keys
❥ Park keys
❥ Personal Speed Dial bin keys
❥ Personal and System Speed Dial Feature Keys
The system always provides Automatic Handsfree for:
❥ Dial Number Preview
❥ Directory Dialing
Conditions
• None
Default Setting
• Enabled
Programming
1. Enable or disable Automatic Handsfree system-wide.
1. To enable, in 1512-01: Automatic Handsfree (page 657) enter Yes.
2. To disable, in 1512-01: Automatic Handsfree (page 657) enter No.
2. If enabled system-wide, enable or disable Automatic Handsfree for an extension.
1. To enable, in 2112-01: Automatic Handsfree (page 735) enter Yes.
2. To disable, in 2112-01: Automatic Handsfree (page 735) enter No.
30 ◆ Features DSX Software Manual
Page 61

Other Related Features
Features
Central Office Calls, Placing (page 78)
With Automatic Handsfree, an extension user can press a line key to place an outside call without first
lifting the handset or pressing SPEAKER. Users without Automatic Handsfree can preselect a line
key before lifting the handset or pressing SPEAKER.
Handsfree and Handsfree Answerback (page 195)
Process calls using the speaker and microphone in the telephone (instead of the handset).
Headset Compatibility (page 198)
While in the headset mode, Automatic Handsfree simplifies answering outside calls.
Line Keys (page 227)
Automatic Handsfree allows the keyset user to answer a call ringing a line key without lifting the
handset; they just press the line key instead.
Loop Keys (page 233)
Automatic Handsfree allows the keyset user to answer a call ringing a loop key without lifting the
handset; they just press the loop key instead.
IntraMail Features
None
Automatic Handsfree
Features
Operation
If enabled, Automatic Handsfree operation is automatic when you press the key.
DSX Software Manual Features ◆ 31
Page 62

Automatic Ring Down
Automatic Ring Down
Description
Turn to Ringdown Extension (page 293).
32 ◆ Features DSX Software Manual
Page 63

Automatic Slot Configuration
Description
Automatic Slot Configuration
The system automatically installs PCBs when you power up the system.
Automatic Slot Configuration automatically sets up station and line PCBs when you initially power up the
system. This simplifies installation because you don’t have to use system programming to activate station
and line PCBs after you plug them in.
Here’s how Automatic Slot Configuration works:
1. With power off, install your station and line PCBs.
2. With the system powered down, install the station and line PCBs from left to right in the order you want
your extension and line numbers set up.
• Be sure to install a 16ESIU PCB in the first slot (CN1).
• You don’t have to group your station and line PCBs together, although it may be more convenient to
do so.
3. Power up the system.
4. On power up, the system scans the PCBs from left to right and sets up the extension and line numbering
as follows.
• Extension numbers will begin with 300 in the first slot and increment from left to right.
• Line numbers will begin with 101 (starting from the first installed line PCB) and will also increment
from left to right.
System reset does not cause reconfiguration. Automatic Slot Configuration is temporarily disabled during a
system reset.
Programming
1. Optionally reconfigure station PCBs after the initial installation.
1. Use 120x-Stations (page 611) to reconfigure your station PCBs.
Features
2. Optionally reconfigure line PCBs after the initial installation.
1. Use 121x-Lines (page 614) to reconfigure your line PCBs.
Other Related Features
None
Operation
N/A
DSX Software Manual Features ◆ 33
Page 64

Background Music
Background Music
Description
Broadcast music through the telephone speaker for a more pleasing work environment.
Background Music (BGM) sends music from a customer-provided music source to speakers in keysets. If an
extension user activates it, BGM plays whenever the extension is idle. Incoming calls and Paging announcements temporarily override (turn off) Background Music. Background Music requires a customer-provided
external music source connected to one of two audio input minijacks.
❥ In DSX-40, the audio input minijacks are located on the equipment cabinet.
❥ In DSX-80/160, the audio input minijacks are located on the CPU PCB.
The external music source you connect to the audio input minijacks is typically a CD player or FM receiver.
The source, which you can also use for Music on Hold, must be compatible with the following specifications:
Input Impedance 10K Ohms
Relative Input Level +18 dBr (+/- dBr) at 1.0 kHz
For more on connecting a customer-provided music source, refer to the system’s Hardware Manual.
Note:
In accordance with U.S. copyright law, a license may be required from the American Society of Composers,
Authors and Publishers (ASCAP) or other similar organizations, if radio, television broadcasts or music
other than material not in the public domain are transmitted through the Music on Hold feature of telecommunications systems. NEC Unified Solutions, Inc. hereby disclaims any liability arising out of the failure to
obtain such a license.
Conditions
• None
Default Setting
• Enabled system-wide and at each extension.
Music Source Specifications
Programming
1. Enable or disable Background Music system-wide.
1. To enable, in 1521-03: Background Music Source (page 659) specify the BGM source (1 for audio input
1 or 2 for audio input 2).
2. To disable, in 1521-03: Background Music Source (page 659) enter 0.
2. If enabled system-wide, enable or disable Background Music for an extension.
1. To enable, in 2111-02: Allow Background Music (page 731) enter Yes.
2. To disable, in 2111-02: Allow Background Music (page 731) enter No.
34 ◆ Features DSX Software Manual
Page 65

Other Related Features
Features
Do Not Disturb (page 143)
DND does not affect the operation of Background Music.
Headset Compatibility (page 198)
Background Music plays in the headset when the extension is in the headset mode.
Music on Hold (page 246)
Background Music and Music on Hold share the same music source.
Paging (page 259)
Background Music can broadcast over the External Paging speakers.
Single Line Telephones (page 305)
Background Music is not available to single line telephones.
IntraMail Features
None
Operation
Background Music
Features
Background Music
[Super Display Soft Key] - [Keyset Soft Key]
To turn Background Music on and off:
1.
Do not lift the handset or press SPEAKER.
2.
Press HOLD.
In these instructions:
[Super Display Soft Key]
[Keyset Soft Key]
DSX Software Manual Features ◆ 35
Page 66

Barge In (Intrusion)
Barge In (Intrusion)
Description
In an emergency, use Barge In to get through to a co-worker right away.
Barge In permits an extension user to break into another extension user’s established call. This sets up a
three-way conversation between the intruding extension and the two parties on the initial call. The user can
Barge In on an Intercom call or outside call.
Conditions
• Barge In uses a system Conference circuit. See Conference (page 89) for more.
Default Setting
• Disabled
Programming
CAUTION
Unauthorized intrusion on calls using this feature may be interpreted as an
invasion of privacy.
1. Enable or disable an extension’s ability to Barge In on a co-worker’s call.
1. In 2102-01: Class of Service (page 724), check the extension’s Class of Service level.
2. To enable, in 1402-02: Barge In (Intrusion) (page 633) enter Ye s.
3. To disable, in 1402-02: Barge In (Intrusion) (page 633) enter No.
2. Should the called extension be able to block Barge In attempts?
1. In 2102-01: Class of Service (page 724), check the extension’s Class of Service level.
2. To block Barge In attempts, in 1401-03: Privacy (page 628) enter Yes.
3. To allow Barge In attempts, in 1401-03: Privacy (page 628) enter No.
Other Related Features
Features
Attendant Position (page 24)
Since the attendant is never busy, Intercom callers cannot Barge In on an attendant.
Conference (page 89)
An extension user can Barge In on a Conference.
Forced Line Disconnect (page 182)
As an alternative to Barging In, disconnect the line instead.
Privacy (page 277)
Privacy blocks Barge In attempts.
IntraMail Features
None
36 ◆ Features DSX Software Manual
Page 67

Operation
Barge In (Intrusion)
Barge In (Intrusion)
[Super Display Soft Key] - [Keyset Soft Key]
To Barge In on a call:
Place one of the following types of call:
1.
• Call busy extension.
• Press line key for busy line.
• Press INTERCOM and dial 101 for busy line (i.e., using Direct Line Access).
• Press INTERCOM and dial #901 for busy line (i.e., using Line Dial-up).
• Press INTERCOM and dial Line Group access code (e.g., 9).
2.
[Barge In]
[MORE + Barg}
Press to Barge In.
• Alternately dial 4.
• You hear two beeps.
3.
Join the conversation in progress.
In these instructions:
[Super Display Soft Key]
[Keyset Soft Key]
Features
DSX Software Manual Features ◆ 37
Page 68

Battery Backup
Battery Backup
Description
The system provides permanent backup of system memory.
In the event of commercial AC power failure, the NAND Flash memory on the CPU PCB permanently maintains the site database. Additionally, an internal battery on the CPU provides short-term backup of the system date and time (Real Time Clock) and certain station parameters (such as the Caller ID log). The battery
will hold the Real Time Clock and station parameters for up to 10-14 days. When commercial AC power is
restored, the system restarts with all programming and the time and date intact.
Additional Battery Backup capability can be provided by a customer-supplied Uninterruptable Power Supply (UPS). The length of time the UPS will power the system when power fails depends on the capacity of
the UPS unit. Consult with the UPS manufacturer for the specifics. Refer to the Hardware Manual for addi-
tional details.
Conditions
• None
Default Setting
• None
Programming
None
Other Related Features
Features
When commercial AC power fails, the system does not back up the status of the following:
• Call Forwarding
• Call Waiting / Camp-On
• Do Not Disturb
• Line Queuing
• Message Waiting
• Microphone Mute
Time and Date (page 349)
The system’s internal battery backs up the CPU Real Time Clock for 10-14 days.
IntraMail Features
None
Operation
If the system is properly installed, Battery Backup is automatic during AC power failures and brownouts.
38 ◆ Features DSX Software Manual
Page 69

Brightness Control
Description
Brightness Control
Turn to Volume, Brightness, and Contrast Controls (page 388).
Features
DSX Software Manual Features ◆ 39
Page 70

Call Coverage Keys
Call Coverage Keys
Description
Call Coverage keys allow an extension user to cover a co-worker’s calls from their own telephone.
A keyset can have Call Coverage Keys for a co-worker’s extensions, Ring Group master numbers and UCD
Group master numbers. The Call Coverage Key lights when the co-worker’s extension is busy, flashes slowly
when the co-worker has an incoming call, and flashes fast when the co-worker is in Do Not Disturb. The Call
Coverage Key can ring immediately when a call comes into the covered extension, ring after a delay or not
ring at all. In addition, the keyset user can press the Call Coverage Key to intercept their co-worker’s incoming call. They can also go off hook and press the Call Coverage key to call the covered extension. An extension can have as many Call Coverage Keys as they have available Feature Keys on their telephone.
Call Coverage Key Busy Lamp Indications
When the key is: The covered extension is:
Off Idle or not installed
On Busy
Slow Flash Ringing
Call Coverage Keys will intercept the following types of calls:
❥ Key Ring Calls
❥ Ringing Intercom calls
❥ Calls to a UCD Group master number
❥ Calls ringing a Group Ring master number
❥ Transferred calls
Call Coverage Keys will not intercept a call ringing the attendant’s Operator Call Key.
Call Coverage Guard Timer
The 4 second Call Coverage Guard Timer helps extensions that have the same Call Coverage key assignments. As soon as an extension user presses their Call Coverage key to answer a call, the key becomes
unavailable for 4 seconds to all other extensions with that same key. (Users will hear reorder tone if they
press their key before the 4 seconds expire.) This helps prevent users from inadvertently placing a call to the
covered destination.
Conditions
• None
Default Setting
• No Call Coverage Keys assigned.
• The Call Coverage Delay Ring timer is 10 seconds.
Medium Flash Covered extension is in DND for outside
calls (option 1).
Fast Flash
Covered extension is in DND for Intercom
calls (option 2) or All Calls (option 3).
40 ◆ Features DSX Software Manual
Page 71

Programming
1. Setting up Call Coverage keys on a keyset.
1. In 2121-[01 to 24]: Feature Key Codes (page 758):
- For an Immediate Ring Call Coverage key, assign key code 06.
- For a No Ring (Lamp Only) Call Coverage key, assign key code 07.
- For a Delay Ring Call Coverage key, assign key code 08.
2. In 2121-[01 to 24]: Feature Key Data (page 758), enter the destination the key will cover:
- Extension number
- Ring Group master number
- UCD Group master number
2. Setting up Call Coverage keys on a DSS Console.
1. In 2402-[01-60]: DSS Console Key Codes (page 801):
- For an Immediate Ring Call Coverage key, assign key code 06.
- For a No Ring (Lamp Only) Call Coverage key, assign key code 07.
- For a Delay Ring Call Coverage key, assign key code 08.
2. In 2402-[01-60]: DSS Console Key Data (page 801), enter the destination the key will cover:
- Extension number
- Ring Group master number
- UCD Group master number
Call Coverage Keys
Features
3. For Delay Ring Call Coverage keys (if any), set the delay ring interval.
1. In 1604-02: Call Coverage Delay Ring Timer (page 678), set the timer to meet the site requirements.
DSX Software Manual Features ◆ 41
Page 72

Call Coverage Keys
Other Related Features
Features
Direct Station Selection (DSS) Console (page 120)
DSS Consoles can have Call Coverage keys.
Distinctive Ringing (page 135)
By using Key Ring Override, Distinctive Ringing allows an extension user to set up unique ringing for
their Call Coverage keys.
Door Box (page 147)
If you enter Door Chime type 0 (normal ring) above, you can set up Call Coverage keys for the Door
Box Ring Group. This allows extensions that are not members of the Ring Group to answer Door Box
calls. Extensions with Call Coverage keys to the Door Box Ring Group can also activate the relay.
Extension Hunting (page 154)
A keyset can have Call Coverage keys for UCD Group master numbers. The group can be a normal
UCD Group or a “dummy” group with no members.
Group Ring (page 189)
A keyset can have Call Coverage keys for Ring Group master numbers.
Hotline (page 207)
Hotline keys provide many of the features available with Call Coverage keys.
Intercom (page 211)
A user can press a Call Coverage Key as an alternative to dialing Intercom numbers.
Key Ring (page 214)
Call Coverage will pick up Key Ring calls.
Transfer (page 358)
An extension user can use a Call Coverage key to Transfer a call to the covered extension.
User Programmable Features (page 368)
An extension user can use the User Programmable Features to set up their own Call Coverage keys.
Voice Mail (page 372)
Pressing TRANSFER + Call Coverage key can Transfer a call to an uninstalled extension’s mailbox
(if the mailbox is enabled).
Voice Over (page 385)
After calling a co-worker by pressing their Call Coverage key, and extension user can dial 9 to leave a
Voice Over (if enabled in programming).
IntraMail Features
None
42 ◆ Features DSX Software Manual
Page 73

Operation
Call Coverage Keys
Answering Call Coverage Keys
[Super Display Soft Key] - [Keyset Soft Key]
To answer a call ringing or flashing a Call Coverage key:
1.
Press the flashing Call Coverage key.
Using Call Coverage Keys to Place Calls
[Super Display Soft Key] - [Keyset Soft Key]
To place a call from an idle Call Coverage key to the covered extension:
Press the Call Coverage key.
1.
• You hear two beeps or Intercom ringing.
Speak with the co-worker at the covered extension.
2.
• The Call Coverage key lights green while you are connected.
Using Call Coverage Keys to Transfer Calls
[Super Display Soft Key] - [Keyset Soft Key]
To Transfer your call using a Call Coverage key:
1.
Do not hang up.
2.
Press TRANSFER.
3.
Press your Call Coverage key.
In these instructions:
[Super Display Soft Key]
[Keyset Soft Key]
In these instructions:
[Super Display Soft Key]
[Keyset Soft Key]
In these instructions:
[Super Display Soft Key]
[Keyset Soft Key]
Features
4.
Do one of the following.
a.
b.
c.
When you Transfer a call, it will recall to you if it is unanswered at the destination. If you don’t answer the recall, it
5.
Announce the call to make a Screened Transfer.
• Hang up if your co-worker accepts the call.
Hang up to send the call through as an Unscreened Transfer.
Press the flashing line key to return to the call if your co-worker doesn’t want it.
diverts to Key Ring.
User Programmable Feature
Setting Call Coverage Key Ringing
Feature Mnemonic Operation Access Level
Feature Key Ringing
#RA (#72)
#RAC
+ Call Coverage key repeatedly to select ringing
mode +
SPEAKER to exit.
• Call Coverage keys flash as follows:
- Lamp only = On red
- Immediate ring = On green
- Delay ring = Fast flash green.
2-5
DSX Software Manual Features ◆ 43
Page 74

Call Forwarding
Call Forwarding
Description
Call Forwarding ensures that the user’s calls are covered when they are away from their work area.
Call Forwarding permits an extension user to redirect their call to another extension. The types of Call Forwarding are:
❥ Call Forwarding when Not Answered
Calls ringing the extension forward when not answered.
❥ Call Forwarding when Busy or Not Answered
Calls ringing the extension forward when not answered, and all calls forward while the extension is busy.
❥ Call Forwarding Immediate
All calls to the extension forward immediately.
You can set up Call Forwarding to reroute all calls or just outside calls. If an extension with forwarding set
for outside calls only receives a screened Transfer, the initial voice-announcement broadcasts at the extension. When the caller hangs up to complete the transfer, the outside call forwards as programmed.
Call Forwarding Chaining
Extension user’s can chain Call Forwards. For example, extension 301 can forward all calls immediately to
304, which in turn can forward all calls immediately to extension 302. Any co-worker calling 301 or 304
goes to 302 instead. If extension 302 is Call Forwarded to voice mail, callers to 301 or 304 go directly to
302’s mailbox.
Call Forwarding Cancel
Call Forwarding cancel allows a keyset user to dial a code to simultaneously cancel all Call Forwarding system-wide. The extension must have access level 4 or 5 set up in 2102-04: User Programming Access Level
(page 725).
Call Forwarding Key
A keyset user can have a key on their telephone or DSS Console assigned as a Call Forwarding key.
❥ While the extension is idle, pressing the key puts the extension in the Call Forwarding programming
mode - the same as pressing INTERCOM and dialing *3.
- If the extension has Call Forwarding enabled, and the user presses the key and waits (for at least 6
seconds), Call Forwarding is automatically cancelled.
- If the extension has Call Forwarding disabled, and the user presses the key and waits (for at least 6
seconds), the prior Call Forwarding mode is automatically enabled (if any).
❥ While the extension is busy, pressing the key switches Call Forwarding on and off.
Call Forwarding Key BLF
This flash rate: Means:
Off Call Forwarding is disabled.
Fast flash The extension is in the Call For-
warding programming mode.
Slow flash Call Forwarding is enabled at the
extension.
44 ◆ Features DSX Software Manual
Page 75

Call Forwarding Toggle in a Personal Speed Dial Bin
If an extension doesn’t have an available Feature Key for a Call Forwarding key, the user can program a Personal Speed Dial bin for similar operation (without the BLF). To do this:
❥ While on hook, dial #77.
❥ Press the key for the Personal Speed Dial bin you want to program + HOLD.
❥ For LINE/GRP/ICM, press INTERCOM + HOLD.
❥ For NUM, dial *3 + HOLD.
❥ For NA, enter a name of your choosing + HOLD.
❥ Press SPEAKER to exit.
While the extension is idle, pressing the bin key puts the extension in the Call Forwarding programming
mode - the same as pressing INTERCOM and dialing *3.
❥ If the extension has Call Forwarding enabled, and the user presses the bin key and waits (for at least 6
seconds), Call Forwarding is automatically cancelled.
❥ If the extension has Call Forwarding disabled, and the user presses the bin key and waits (for at least 6
seconds), the prior Call Forwarding mode is automatically enabled (if any).
Call Forwarding Confirmation Tone
Keyset users will hear a single confirmation beep after enabling or cancelling Call Forwarding. Single line
telephone users will hear Intercom dial tone after enabling or cancelling Call Forwarding.
Call Forwarding
Features
DSX Software Manual Features ◆ 45
Page 76

Call Forwarding
Call Forwarding Timers
The following diagrams show how the system implements various timers when handling forwarded calls.
Refer to the programming for each individual timer for more information.
Transferred Outside Call to Forwarded Extension
Extension A transfers line to extension B, which
is forwarded Busy/No Answer (type 2) to extension C.
1603-01: Transfer Recall Timer
(page 675)
1601-03: Call Forward No Answer
Timer (page 670)
1601-03: Call Forward No Answer
Timer (page 670)
DIL (no overflow) to Forwarded Extension
1601-02: DIL No Answer Timer
(page 669)
The line rings extension B for the Transfer Recall
time. See Transfer (page 358) for more.
If unanswered, the call then rings extension C
(the forward destination) for the Call Forward
Ring No Answer time.
If still unanswered, the call rings the extension
that initially transferred the call (A) for the Call
Forward Ring No Answer time.
If still unanswered, call diverts to Key Ring.
DIL (with no overflow) rings programmed destination, which is forwarded Busy/No Answer
(type 2) to a co-worker.
DIL rings programmed DIL destination for the
DIL No Answer time.
1601-02: DIL No Answer Timer
(page 669)
46 ◆ Features DSX Software Manual
If unanswered, the call rings the extension to which
it is call forwarded for the DIL No Answer time.
If still unanswered, call diverts to Key Ring.
Page 77

DIL (with overflow) to Forwarded Extension
DIL (with overflow) rings programmed destination, which is forwarded Busy/No Answer (type
2) to a co-worker.
Call Forwarding
1601-02: DIL No Answer Timer
(page 669)
1601-02: DIL No Answer Timer
(page 669)
1601-02: DIL No Answer Timer
(page 669)
Outside Call on Hold at Forwarded Extension
1603-02: Hold Recall Timer
(page 675)
DIL rings programmed DIL destination for the
DIL No Answer time.
Features
If unanswered, the call rings the extension to which
it is forwarded for the DIL No Answer time.
If unanswered, the DIL rings the programmed
overflow destination for the DIL No Answer time.
If still unanswered, call diverts to Key Ring.
Extension forwarded to co-worker using Busy/
No Answer (type 2) to a co-worker puts outside
call on Hold.
If not picked up, outside call recalls the extension
that put it on Hold after the Hold Recall time.
1601-01: Line No Answer Timer
(page 669)
Conditions
• An extension’s Call Forwarding is reinstated after a power down or system reset. For example, an
extension with calls forwarded immediately to voice mail will still be forwarded to voice mail after the
system resets or is powered down and then powered back up.
• The display CFWD Not Allowed indicates that an Call Forwarding is denied because it would set up
an illegal Call Forwarding loop. For example, if extension 305 if forwarded to 301, and 301 attempts
to forward to 305, the user at 305 would see the display
Default Setting
• Enabled
DSX Software Manual Features ◆ 47
The call then rings the extension that put it on
Hold for the Line Revert time.
If still unanswered, call diverts to Key Ring.
CFWD Not Allowed.
Page 78

Call Forwarding
Programming
1. Should an extension be able to use Call Forwarding?
1. In 2102-01: Class of Service (page 724), check the extension’s Class of Service level.
2. If yes, in 1406-02: Internal Call Forwarding (page 643) enter Ye s.
3. If no, in 1406-02: Internal Call Forwarding (page 643) enter No.
2.
3. Should extension be allowed to use Call Forwarding Cancel?
4. Should extension have a Call Forwarding key?
5. Should extension’s DSS Console have a Call Forwarding key?
If an extension has Ring No Answer forwarding enabled, do calls route to the forwarding
destination after the correct interval?
1. In yes, leave 1601-03: Call Forward No Answer Timer (page 670) at its current setting.
2. If no, change 1601-03: Call Forward No Answer Timer (page 670) to meet the site requirements.
1. If yes, in 2102-04: User Programming Access Level (page 725), assign access level 4 or 5.
2. If no, in 2102-04: User Programming Access Level (page 725), assign access level 0-3.
1. In 2121-[01 to 24]: Feature Key Codes (page 758), assign key code 27 to an available Feature Key.
1. In 2402-[01-60]: DSS Console Key Codes (page 801), assign key code 27 to an available Feature Key on
the DSS Console.
Other Related Features
Features
Call Coverage Keys (page 40)
Call Forwarding will not reroute a call ringing a Call Coverage Key.
Call Forwarding Off Premises (page 51)
Off Premises Call Forwarding allows a keyset user to forward their calls to an off-site location (such
as a cell phone or remote office).
Direct Inward Line (page 109)
Call Forwarding will reroute Direct Inward Lines.
Do Not Disturb (page 143)
• Call Forwarding considers an extension in DND as busy. In addition, an extension can have both DND
and Call Forwarding enabled at the same time.
• Note that Call Forwarding has priority over Do Not Disturb. If both are enabled simultaneously at an
extension, Call Forwarding is in force.
Door Box (page 147)
An extension user cannot forward a call to a Door Box.
Extension Hunting (page 154)
• If a member of a Circular or Terminal Hunting group forwards their calls, hunting will follow Call
Forwarding.
• Calls to a UCD Group will not follow Call Forwarding at a group member’s extension. However, calls
directed to the group member’s extension (such as DILs and transferred calls) will follow the Call Forwarding set up at the extension.
48 ◆ Features DSX Software Manual
Page 79

Call Forwarding
Group Ring (page 189)
Call Forwarding will not reroute Group Ring calls.
Intercom (page 211)
Call Forwarding when Busy and Call Forwarding when Busy/Not Answered will not reroute voiceannounced Intercom calls. It will reroute only ringing Intercom calls.
Key Ring (page 214)
Call Forwarding will not reroute Key Ring calls.
Line Keys (page 227)
Call Forwarding will not reroute calls ringing line keys.
Loop Keys (page 233)
Call Forwarding will not reroute a call ringing a loop key (unless the call is a DIL).
Message Waiting (page 238)
• An extension user cannot leave a Message Waiting at a co-worker that has Call Forwarding Immediate
(*34) enabled. Pressing
• An extension user cannot leave a Message Waiting at a busy co-worker that has Call Forwarding
Busy/No Answer (*32) enabled. Pressing V-MAIL will automatically leave a message at the forward-
ing destination instead.
Selectable Display Messaging (page 300)
Enabling or canceling Call Forwarding cancels an extension’s Selectable Display Messaging.
Transfer (page 358)
• Call Forwarding will reroute transferred calls.
• When handling Transfer recalls, Call Forwarding has priority over Extension Hunting. See Interaction
Between Call Forwarding, Extension Hunting, and Transfer Recall (page 359) for more.
V-MAIL
automatically leaves a message at the forwarding destination instead.
Features
IntraMail Features
None
DSX Software Manual Features ◆ 49
Page 80

Call Forwarding
Operation
Activating or Canceling Call Forwarding
To activate Call Forwarding:
1.
Select the Call Forwarding options.
[Menu + Call Forward]
[Menu + Cfwd]
2.
Select or cancel a Call Forwarding type.
[Immediate]
[Immed]
[Ring/No Ans]
[RNA]
[Busy/No Ans]
[BNA]
[Off-Premise]
[MORE + OFFP]
[Ans Machine]
[MORE + AME]
[Message]
[MORE + MSG]
[None]
[MORE + MORE + NONE]
Select the Call Forwarding destination:
3.
• An extension number or UCD Group master number.
• 0 for the operator.
• V-MAIL for voice mail.
In these instructions:
[Super Display Soft Key]
[Keyset Soft Key]
Alternately do one of the following:
• Press INTERCOM and dial *3.
• Press your Call Forwarding Feature Key.
Select Call Forwarding Immediate.
• Alternately dial 4.
Select Call Forwarding when Not Answered.
1
• Alternately dial 6.
Select Call Forwarding when Busy or Not Answered.
1
• Alternately dial 2.
Select Call Forwarding Off Premises.
• Alternately dial 3.
• Turn to Call Forwarding Off Premises (page 51) for more.
Select Personal Answering Machine Emulation.
• Alternately dial 7.
• Skip to Personal Answering Machine Emulation (page 373) for more.
Select Selectable Display Messaging.
• Alternately dial 8.
• Skip to Selectable Display Messaging (page 300) for more.
Select to cancel Call Forwarding.
• Alternately dial 0.
4.
Select the Call Forwarding mode.
[All]
[All]
[Line Only]
[Line]
1
Option will not forward voice-announced Intercom calls.
Select forwarding all calls.
• Alternately dial
2.
Select forwarding outside calls only.
• Alternately dial
8.
User Programmable Feature
Canceling All Call Forwards System-Wide
Feature Mnemonic Operation Access Level
Call Forwarding Clear All
#CC (#22)
50 ◆ Features DSX Software Manual
#CC
+ Y to clear (cancel) forwarding or N to exit without
clearing + SPEAKER to hang up.
4 and 5
Page 81

Call Forwarding Off Premises
Description
Call Forwarding Off Premises
When a user is out of the office, they can send their calls to their home office or cell phone.
Off Premises Call Forwarding allows a keyset user to forward their calls to an off-site location (such as a cell
phone or remote office) if allowed by their Class of Service. Keyset users can stay in touch by having Off
Premises Call Forwarding automatically forward their calls while they are away from the office. To set up
Off Premises Call Forwarding, the user selects the line or Line Group over which the call should route, as
well as the number the system should dial. The number dialed can be from an extension’s Personal Speed
Dial bin containing an outside number, or the user can enter an outside number directly into their Personal
Speed Dial bin 720. When a call rings the forwarded extension, the system selects the specified line or group
and then outdials the stored number.
Off Premises Call Forwarding reroutes:
❥ Intercom calls
❥ Transferred calls
❥ Direct Inward Lines
❥ UTRF (unscreened transfer) calls routed from the voice mail Automated Attendant
❥ Circular and Terminal Extension Hunting calls
Off Premises Call Forwarding does not reroute:
❥ Key Ring calls
❥ Calls to a UCD Group master number.
❥ Group Ring calls (i.e., calls to a Ring Group master number)
❥ UCD Group Calls (i.e., calls to a UCD Group master number)
❥ Ringing Call Coverage key calls
Features
You can set up Off Premises Call Forwarding to reroute all calls or just outside calls. If an extension with
forwarding set for outside calls only receives a screened Transfer, the initial voice-announcement broadcasts
at the extension. When the caller hangs up to complete the transfer, the outside call forwards as programmed.
Call Forwarding Off Premises Example
Call Routes to Emergency Service Number After Hours
A service department dispatcher has Key Ring for lines 1-4 during the day. The dispatcher answers calls on
those lines and assigns dispatchers accordingly. At night, the calls on lines 1-4 must automatically route to
the technician on call for emergency service. To do this:
1. In 3112-01: Direct Termination in the Day (page 819), make sure lines 1-4 are assigned as Key Ring
lines (by pressing CLEAR).
2. In 3112-04: Direct Termination at Night (page 820), terminate lines 1-4 directly to the dispatcher’s
extension (e.g., extension 300).
3. At the dispatcher’s extension, program a Personal Speed Dial bin for each technician that is qualified to
take emergency calls.
4. At the end of the day, the dispatcher presses their System Night key to put the system in the night mode.
5. After enabling the night mode, the dispatcher implements Off Premises Call Forwarding to whichever
Speed Dial bin represents the technician on call for that evening.
6. Calls ringing lines 1-4 at night automatically route to the technician on call.
Conditions
• Telco must provide Loop Disconnect Supervision on the originating line (i.e., the line that Off Premises Call Forwarding will reroute).
• All other Speed Dial programming also applies to Off Premises Call Forwarding.
DSX Software Manual Features ◆ 51
Page 82

Call Forwarding Off Premises
• An extension Speed Dial number stored in bin 719 should not be longer than 16 digits. If it is, the system automatically clears bin 719 when it stores an Off Premises Call Forwarding number in bin 720.
• An extension user cannot off premise call forward to a Personal Speed Dial bin that contains an Intercom number. If the user selects a bin that contains an Intercom number, the system cancels Off Premises Call Forwarding.
• Off Premises Call Forwarding is cleared after a system reset or power down.
• If a line rings an off-premise forwarded extension and the specified outbound route is busy, the system reroutes the call to the programmed overflow destination (normally Key Ring). Intercom callers
will hear busy tone if the outbound route is busy, and have the option of dialing 2 for Line Queuing
or Line Callback.
• Tandem Calling must be enabled for the originating line (i.e., the line that Off Premises Call Forwarding will reroute).
- If a screened Transfer is made to an extension with Line Only forwarding, and Tandem Calling is
not enabled for the originating line, the transferred line immediately goes to Key Ring when the
transferring party hangs up.
- If a screened Transfer is made to an extension with All Calls forwarding, and Tandem Calling is not
enabled for the originating line, the transferred line will stay at the transferring extension when that
party hangs up.
• Off Premises Call Forwarding is not available at single line telephones.
Default Setting
• Call Forwarding Off Premises is disabled in an extension’s Class of Service.
• Tandem Calling is disabled for lines.
Programming
1. Should an extension be able to use Off Premises Call Forwarding?
1. In 2102-01: Class of Service (page 724), check the extension’s Class of Service level.
2. If yes:
- In 1406-01: Call Forwarding Off-Premises (page 643), enter Ye s.
- In 1406-02: Internal Call Forwarding (page 643), enter Ye s.
- In 2111-09: Personal Speed Dial (page 734), enter Yes.
3. If no, in 1406-01: Call Forwarding Off-Premises (page 643) enter No.
2. Should Off Premises Call Forwarding be able to reroute incoming outside calls?
1. If yes, in 3103-04: Tandem Calls (page 816) enter Ye s.
2. If no, in 3103-04: Tandem Calls (page 816) enter No.
3.
Do you want to enter the Personal Speed Dial numbers an extension will use for Off Premises
Call Forwarding from system programming?
1. If yes, in 215x-Speed Dial (Personal) (page 775) enter Personal Speed Dial numbers for the extension.
- Off Premises Call Forwarding cannot use Intercom Speed Dial.
2. If no, skip this step.
52 ◆ Features DSX Software Manual
Page 83

Other Related Features
Features
Call Forwarding (page 44)
Call Forwarding permits an extension user to redirect their call to another extension.
Single Line Telephones (page 305)
Call Forwarding Off Premises is not available at single line telephones.
IntraMail Features
None
Operation
Activating or Canceling Call Forwarding Off Premises
To activate Call Forwarding:
Select the Call Forwarding options.
1.
[Menu + Call Forward]
[Menu + Cfwd]
Select or cancel a Call Forwarding Off Premises.
2.
[Off-Premise]
[MORE + OFFP]
[None]
[MORE + MORE + None]
Do one of the following.
3.
Alternately do one of the following:
• Press INTERCOM and dial *3.
• Press your Call Forwarding Feature Key.
Select Call Forwarding Off Premises, then proceed to step 3 below.
• Alternately dial 3.
Select to cancel Call Forwarding.
• Alternately dial 0 or press CLEAR.
Call Forwarding Off Premises
In these instructions:
[Super Display Soft Key]
[Keyset Soft Key]
Features
a.
b.
To select a Personal Speed Dial bin as your Off Premises Call Forwarding number:
[SPEED DIAL BIN]
[Bin]
Select the bin option.
When you see BIN#:
• Enter the Personal Speed Dial bin you want to use (701-720) + HOLD.
To store a new Off Premises Call Forwarding number:
• The system automatically stores this number in bin 720.
[NUMBER]
[Num]
When you see
Select the number option.
LINE/GRP/ICM:
• Enter the line number (e.g., 1 for line 1) or Line Group number (e.g.,
90 for group 0) +
HOLD.
• Following Speed Dial programming methods, enter the number you
want to store (up to 16 digits long) + HOLD.
MUTE to store a Pause.
- Press
- Press FLASH to store a Flash.
- You cannot enter a name using this option.
If you see 720: IN USE OVERRIDE?
[YES]
[YES]
[NO]
[NO]
Select to override the existing entry and enter a
new number.
Select to cancel and back up to step 3.
DSX Software Manual Features ◆ 53
Page 84

Call Forwarding Off Premises
Activating or Canceling Call Forwarding Off Premises
c.
To view the currently enabled Off Premises Call Forwarding number (if any):
In these instructions:
[Super Display Soft Key]
[Keyset Soft Key]
Select the Call Forwarding mode.
4.
[All]
[All]
[Line Only]
[Line]
[VIEW]
[View]
Select to view the currently stored number.
• Press SPEAKER to exit the view mode.
Select forwarding all calls.
• Alternately dial 2.
Select forwarding outside calls only.
• Alternately dial 8.
54 ◆ Features DSX Software Manual
Page 85

Call Timer
Description
Call Timer
Call Timer helps users that must keep track of their time on the phone.
Call Timer lets a keyset user with a Call Timer key time their outside calls on the telephone display. There
are two types of Call Timer keys:
❥ Manual Call Timer
Any time while placing a call or while on a call, a display keyset user can press their Manual Call Timer
key to start the Call Timer. The Call Timer will continue until the user hangs up or presses their Manual
Call Timer key again.
❥
Automatic Call Timer
In addition to the features of the Manual Call Timer key, the Automatic Call Timer key provides automatic
timing for outside calls. When a display keyset with an Automatic Call Timer key places or answers an outside call, the Call Timer automatically starts when that outside call connects. The Automatic Call Timer
does not automatically start for Intercom calls. The Automatic Call Timer can also work like a Manual Call
Timer key. There is no need to have a Manual and Automatic Call Timer key on the same phone.
The Call Timer feature also provides:
❥ Review of Previously Timed Call
Any time after hanging up from a timed call, a display keyset user can press their Manual or Automatic
Call Timer key to review the duration of that call.
❥ Timer Reset for Current Call
While the display keyset user is timing their call, they can press CLEAR at any time to reset the Call
Timer to 00:00:00.
❥ Automatic Timer Stop
The system assigns the Call Timer to the active call. When the user terminates the active call, the Call
Timer automatically shuts down.
❥
Wrap-up Timer Display
After hanging up a timed call, a display keyset will show the Call Timer data for 6 seconds before returning
the display to idle. This gives the extension user adequate time to make a record of the timed call, if desired.
Conditions
• None
Default Setting
• No Call Timer keys assigned.
Features
Programming
1. Assign a Manual Call Timer Feature Key to a keyset?
1. In 2121-[01 to 24]: Feature Key Codes (page 758), assign key code 16 to an available Feature Key.
2. In 2121-[01 to 24]: Feature Key Data (page 758), enter 1.
1. Assign an Automatic Call Timer Feature Key to a keyset?
1. In 2121-[01 to 24]: Feature Key Codes (page 758), assign key code 16 to an available Feature Key.
2. In 2121-[01 to 24]: Feature Key Data (page 758), enter 2.
DSX Software Manual Features ◆ 55
Page 86

Call Timer
Other Related Features
Features
Caller ID (page 63)
The Auto Timer feature interacts with Caller ID on the first line of the telephone display.
Central Office Calls, Placing (page 78)
Call Timer shows the time a user has been on an outside call.
Flash (page 177)
Flash restarts the Call Timer.
Hold (page 202)
A user’s Call Timer starts when they pick up a call from Hold. If they place the call on Hold and
another user picks it up, the timer restarts for the new user.
Station Message Detail Recording (page 328)
The SMDR report also keeps track of the time on a call.
IntraMail Features
None
Operation
Automatically Timing Your Outside Call
To time your outside call if you have an Automatic Call Timer key:
In these instructions:
[Super Display Soft Key]
[Keyset Soft Key]
Place or answer outside call.
1.
To manually time your Intercom or outside call:
1.
• The Call Timer starts automatically. The Automatic Call Timer key lights red while the system times the call.
Manually Timing Your Outside Call
While placing or while on the call, do one of the following.
a.
b.
[Timer]
[Time]
Press the Call Timer soft key.
Press the Manual or Automatic Call Timer key.
• The Automatic Call Timer key lights red while the system times the call.
In these instructions:
[Super Display Soft Key]
[Keyset Soft Key]
56 ◆ Features DSX Software Manual
Page 87

Stopping and Restarting the Call Timer for Your Call
To stop the Call Timer:
1.
Do one of the following.
a.
b.
2.
The Call Timer disappears from the display.
[Timer]
[Time]
Press the Call Timer soft key.
Press the Manual or Automatic Call Timer key.
To restart the Call Timer:
• The timer will restart from 00:00.
1.
Do one of the following.
a.
b.
[Timer]
[Time]
Press the Call Timer soft key.
Press the Manual or Automatic Call Timer key.
Resetting the Call Timer
To reset the Call Timer while it is running (i.e., timing your call):
Call Timer
In these instructions:
[Super Display Soft Key]
[Keyset Soft Key]
In these instructions:
[Super Display Soft Key]
[Keyset Soft Key]
Features
Press CLEAR.
1.
• The Call Timer restarts from 00:00. It does not disappear from the display.
Reviewing a Call’s Duration
To review the duration of your last timed call:
1.
Wait for the Manual or Automatic Call Timer key to go out.
2.
Press the Manual or Automatic Call Timer key.
In these instructions:
[Super Display Soft Key]
[Keyset Soft Key]
DSX Software Manual Features ◆ 57
Page 88

Call Waiting / Camp-On
Call Waiting / Camp-On
Description
Call Waiting helps busy extension users know when they have additional waiting calls. It also
lets callers wait in line for a busy extension without being forgotten.
With Call Waiting, an extension user may call a busy extension and wait in line (Camp-On) without hanging
up. When the user Camps-On (by dialing 2), the system signals the busy extension with two beeps indicating
the first waiting call. (The busy extension can be on a handset or Handsfree call.) The call goes through when
the extension becomes free.
If an extension has more than one caller waiting, they queue on a first-in/first-out basis (FIFO). The extension will not hear Camp-On beeps for additional waiting calls.
Off-Hook Signaling also alerts the user when unanswered calls are waiting to get through. Turn to Off-Hook
Signaling (page 255) for more.
The following chart shows when the two types of Off-Hook Signaling occur. Note that Camp-On tones occur
for an extension when they are the exclusive recipient of the call (such as a DIL).
Off-Hook Ringing
1
Camp-On Tones
Key Ring Yes No
Transferred Outside Call Yes Yes
Direct Inward Line Yes Yes
Transfer from voice mail (UTRF) Yes Yes
Call Coverage Key Yes No
Group Call Pickup Key Yes No
1
For Off-Hook ringing, 2116-03: Off Hook Signaling for Incoming Outside Calls (page 750) = 2.
2
For Camp-On tones, 2116-03: Off Hook Signaling for Incoming Outside Calls (page 750) = 1.
Conditions
• A system reset or power failure cancels all Camp-Ons system wide.
• While busy on a call, Camp-On tones occur only for the first incoming call and do not repeat.
Default Setting
• Call Waiting tones enabled.
2
58 ◆ Features DSX Software Manual
Page 89

Call Waiting / Camp-On
Programming
1. Should an extension be able to send Camp-On tones to a busy co-worker?
1. In 2102-01: Class of Service (page 724), check the sending extension’s Class of Service level.
2. If yes, in 1402-03: Camp-On to Busy Extension (page 633), enter Yes for the initiating extension.
- Check step 2 below to be sure Camp-On is not blocked by the receiving extension.
- This option does not restrict Callback.
3. If no, in 1402-03: Camp-On to Busy Extension (page 633) enter No.
2. Should an extension be able to receive Camp-On tones when a co-worker camps-on?
1. In 2102-01: Class of Service (page 724), check the receiving extension’s Class of Service level.
2. If yes:
- In 1512-02: Call Waiting Tones (page 657), be sure Camp-On is enabled system-wide (Yes).
- In 2116-01: Off Hook Signaling for Incoming Intercom Calls (page 749), enter 1 to enable receiv-
ing Camp-On tones at an extension.
- In 1401-03: Privacy (page 628), enter No to be sure that Privacy does not block incoming
Camp-On signals.
3. If no, do one of the following:
- To disable Camp-On system-wide, in 1512-02: Call Waiting Tones (page 657) enter No.
- To disable Camp-On for a specific extension, in 2116-01: Off Hook Signaling for Incoming Inter-
com Calls (page 749) enter 0.
- To have Privacy block incoming Camp-On tones, in 1401-03: Privacy (page 628) enter No.
Features
DSX Software Manual Features ◆ 59
Page 90

Call Waiting / Camp-On
Other Related Features
Features
Attendant Position (page 24)
An extension user cannot Camp-On to the attendant because the attendant’s extension is never busy.
Callback (page 61)
If an extension user Camps-On and then hangs up, the system converts the Camp-On to a Callback.
Caller ID (page 63)
An extension programmed to receive Camp-On tones or Off-Hook Ringing from a waiting call will
also receive Second Call Caller ID.
Direct Inward Line (page 109)
DILs to a busy extension automatically send Camp-On tones.
Do Not Disturb (page 143)
An extension cannot Camp-On to a busy co-worker that is also in Do Not Disturb.
Intercom (page 211)
A user can Camp-On after placing an Intercom call to a busy co-worker.
Key Ring (page 214)
A Key Ring call will not send Camp-On beeps to a busy extension that normally rings for that call.
Line Queuing / Line Callback (page 230)
Line Queuing lets an extension user Camp-On to a busy line.
Privacy (page 277)
Privacy blocks Camp-On / Call Waiting.
Split (Alternate) (page 323)
Camp-On lets an extension user know that a call is waiting to be answered. The user can Split between
the waiting call and their current call.
Transfer (page 358)
An extension user can Transfer a call to a busy extension. The call will automatically
Camp-On to the busy extension.
Volume, Brightness, and Contrast Controls (page 388)
The extension user cannot adjust the volume of incoming Camp-On tone.
IntraMail Features
None
Operation
In these instructions:
Camp-On to a Busy Extension
To Camp-On to a busy extension:
Call the busy extension.
1.
2.
3.
60 ◆ Features DSX Software Manual
• Listen for busy or busy/ring tone.
• With IntraMail installed, you will hear a voice prompt first.
Dial 2 but do not hang up.
• If you hang up, the system converts your Camp-On to a Callback.
When your co-worker hangs up their initial call, you hear:
• Ringback as their telephone rings.
• Your co-worker’s voice when they answer.
[Super Display Soft Key]
[Keyset Soft Key]
Page 91

Callback
Description
Callback
With Callback, a user does not have to repeatedly call a busy extension back, hoping to find it idle.
When an extension user calls a busy co-worker, they can leave a Callback request for a return call. The system services Callback requests as follows:
❥ Caller at extension A leaves a Callback at extension B.
- Caller can place or answer additional calls in the mean time.
❥ When extension B becomes idle, the system rings extension A. This is the Callback ring.
❥ Once caller A answers the Callback ring, the system rings (formerly busy) extension B.
- If caller A doesn’t answer the Callback ring, the system cancels the Callback.
❥ As soon as caller B answers, the system sets up an Intercom call between A and B.
An extension user can leave a Callback at many extensions simultaneously. The system processes the Callbacks as the extensions become free. In addition, many extensions can leave a Callback at the same extension. The system processes these Callbacks on a first-in/first-out (FIFO) basis.
If an extension user leaves a Callback request and then fails to answer within four rings, the system cancels
the Callback.
Conditions
• A system reset or power failure cancels all Callbacks system-wide.
Default Setting
• Callback enabled.
Features
Programming
1.
Should an extension be able to receive Camp-On tones when a co-worker leaves them a
Callback request?
1. In 2102-01: Class of Service (page 724), check the receiving extension’s Class of Service level.
2. If yes:
3. If no, do one of the following:
- In 1512-02: Call Waiting Tones (page 657), be sure Camp-On is enabled system-wide (Yes).
- In 2116-01: Off Hook Signaling for Incoming Intercom Calls (page 749), enter 1 to enable receiv-
ing Camp-On tones at an extension.
- In 1401-03: Privacy (page 628), enter No to be sure that Privacy does not block incoming
Camp-On signals.
- To disable Camp-On system-wide, in 1512-02: Call Waiting Tones (page 657) enter No.
- To disable Camp-On for a specific extension, in 2116-01: Off Hook Signaling for Incoming Inter-
com Calls (page 749) enter 0.
- To have Privacy block incoming Camp-On tones, in 1401-03: Privacy (page 628) enter No.
DSX Software Manual Features ◆ 61
Page 92
Callback
Other Related Features
Features
Attendant Position (page 24)
An extension user cannot leave a Callback for the attendant because the attendant’s extension is
never busy.
Call Waiting / Camp-On (page 58)
If an extension user starts to leave a Callback request but doesn’t hang up, the system Camps-On
instead.
Central Office Calls, Answering (page 74)
If a line is ringing an extension because of a prior Callback, and then receives a new outside call, it
will start ringing for the new call. The Callback request is then queued.
Do Not Disturb (page 143)
An extension cannot leave a Callback for a busy co-worker that is also in Do Not Disturb.
Line Queuing / Line Callback (page 230)
An extension user can queue for a busy line and then hang up to turn the queue into a line Callback.
IntraMail Features
None
Operation
Leaving a Callback
To leave a Callback at a busy extension:
Call the busy extension.
1.
• Listen for busy or busy/ring tone.
Dial 2 and hang up.
2.
• Stay on the line without hanging up if you want to Camp-On instead.
When the busy co-worker becomes free:
3.
• You hear Intercom ring.
Answer the Intercom ring.
4.
• The system automatically places a call to your co-worker.
• Speak to your co-worker when the call goes through.
Cancelling a Callback
To cancel a Callback:
Do not lift the handset, do not press INTERCOM, and do not press SPEAKER.
1.
Dial # + DC (32).
2.
• This cancels the Callback you have left. If you have left callbacks for several extensions, this simultaneously
cancels all your Callbacks.
In these instructions:
[Super Display Soft Key]
[Keyset Soft Key]
In these instructions:
[Super Display Soft Key]
[Keyset Soft Key]
62 ◆ Features DSX Software Manual
Page 93

Caller ID
Description
Single and Multiple Message Format Compatibility
Caller ID on the SMDR Report
Caller ID
Caller ID automatically displays the phone number and optional name for incoming outside calls.
Caller ID allows a display keyset to show an incoming caller’s telephone number (called Directory Number
or DN) and optional name as the call is ringing. Caller ID supports the telco’s Called Number Identification
(CNI) and Called Number Delivery (CND) service, when available. These services provide the Caller ID
information (i.e., messages) between the first and second ring burst of an incoming call.
Caller ID provides the following features:
There are two types of Caller ID message formats currently available: Single Data Message Format (SDMF)
and Multiple Data Message Format (MDMF). With Single Message Data Format, the telco sends only the
caller’s phone number (DN). The DN can be up to 10 digits long. In Multiple Data Message Format, the
telco sends the DN and the caller’s name. The DN for this format can be up to 15 digits long, and the name
provided can consist of up to 15 ASCII characters.
If no DN is received, no number or error message displays.
Caller ID data prints on the SMDR report. SDMF records print a single line which shows just the incoming
number. MDMF records print on two lines, with the first line showing the number and the second line showing the name. Unlike the telephone display, the SMDR report can show the entire 15 digits in the DN, if
required.
Features
Following is a sample SMDR report showing Caller ID data. The first two lines of the report show a complete MDMF record with both the caller’s number and name. The last two lines of the report show two Caller
ID error messages: Private Number and Out of Area. The “IN” in the type column indicates that the records
shown are for incoming calls.
If no DN is received, no number or error message displays.
Station Message Detail Recording
05/10/2005 11:11A
---+---+--------------------------------+----------+---------+--------+--Sta|Lin| Number Dialed | Account | Start |Duration| T
---+---+--------------------------------+----------+---------+--------+--301| 02| 2139261000| |11:11:39A|00:00:13|IN
301| 02| ANDERSON ALLEN| |11:11:39A|00:00:13|IN
301| 02| Private Number| |11:12:26A|00:00:12|IN
301| 02| Out of Area Number| |11:13:16A|00:00:12|IN
Caller ID Integration with Voice Mail
Caller ID fully integrates with IntraMail, UltraMail, and the NVM-Series voice mail systems. This enables
voice mail features such as Make Call with Caller ID. Make Call allows the voice mail subscriber to return a
call to someone who left them a message without knowing the calling party’s phone number.
Second Call Caller ID (Extension Level Call Waiting Caller ID)
While a display keyset user is busy on a call, the system can show the Caller ID information for a waiting
call. If the busy extension is programmed to receive Camp-On tones or Off-Hook Ringing from the waiting
call, the system will send the Caller ID data to the busy telephone’s display. If the busy extension does not
receive Camp-On tones or Off-Hook Ringing, it will also not receive the waiting call’s Caller ID. (Note that
Caller ID data from a Camp-On is displayed only once, corresponding to the single Camp-On beep.) This is
an internal system feature and does not use the telco’s Call Waiting Caller ID.
DSX Software Manual Features ◆ 63
Page 94

Caller ID
Third Party Caller ID Check
Caller ID Display Separator
Caller ID to Single Line Telephones
Third Party Caller ID Check allows an idle or busy keyset user to display the Caller ID data for another line.
The line that the user checks can be ringing or busy.
An extension’s display can optionally show a calling party number separator. The separator is a dash after
the area code and after the local exchange on a 7 or 10 digit number. If disabled, the calling party number
displays without a separator.
The system provides Caller ID data to single line ports. This allows single line Caller ID telephones to
receive the Caller ID data also available at keysets. Up to 8 single line telephones can receive Caller ID data
simultaneously. (To conserve system resources, consider turning off Caller ID in 1404-01: Caller ID Display
(page 638) for extensions that do not require or support Caller ID.)
On Intercom calls, the single line telephone display will show the extension number and name (if programmed) of the internal caller.
Conditions
• None
Default Setting
• Caller ID for each a line is disabled.
- See 3121-01: Caller ID Type (page 825).
• Caller ID with voice mail is enabled.
- See 3131-01: Pass Caller ID to Voice Mail (page 828).
• An extension’s Caller ID display is enabled.
- See 1404-01: Caller ID Display (page 638).
• Second Call Caller ID is enabled.
- See 1404-02: Second Call Caller ID (page 638).
• Third Party Caller ID Check is disabled.
- See 1404-03: Third Party Caller ID (page 638).
• The Caller ID Display Separator is disabled.
- See 1404-04: Caller ID Display Separator (page 639).
• The telco must provide Caller ID service for each line that has Caller ID programming enabled.
64 ◆ Features DSX Software Manual
Page 95

Programming
1. Should the outside line provide Caller ID (if Caller ID service is also provided by the telco)?
1. If yes:
- In 3121-01: Caller ID Type (page 825) enter the type of Caller ID required (DSP = 1, ATRU-DB =
2, T1/E1 ANI = 3).
- For ANI Caller ID, in 3121-02: ANI/DNIS Format (page 825) and 3121-04: Number of ANI Digits
(page 826), set for compatibility with the connected service.
- In 1611-06: Caller ID Detection Timer (page 684), set for compatibility with the connected service.
2. If no, in 3121-01: Caller ID Type (page 825), enter 0.
2. Should an extension display the incoming Caller ID data?
1. In 2102-01: Class of Service (page 724), check the extension’s Class of Service level.
2. If yes:
- In 1404-01: Caller ID Display (page 638) enter Yes.
- Make sure the extension rings for the line. See Central Office Calls, Answering (page 74) for
more.
3. If no, in 1404-01: Caller ID Display (page 638) enter No.
Caller ID
Features
3. Should an extension display 2nd Call Caller ID (Extension Level Call Waiting Caller ID)?
1. In 2102-01: Class of Service (page 724), check the extension’s Class of Service level.
2. If yes:
- In 1404-02: Second Call Caller ID (page 638) enter Yes.
- In 2116-03: Off Hook Signaling for Incoming Outside Calls (page 750), enter 1 (for Camp-On
tones) or 2 (for off-hook ringing). See Account Codes (page 14) for more.
- Check to see if Call Timer key blocks the first line of the 2nd Call Caller ID display. If it does, make
sure the extension doesn’t have a Call Timer key.
3. If no, in 1404-02: Second Call Caller ID (page 638) enter No.
4. Should an extension be able to use 3rd Party Caller ID Check?
1. In 2102-01: Class of Service (page 724), check the extension’s Class of Service level.
2. If yes, in 1404-03: Third Party Caller ID (page 638) enter Ye s.
3. If no, in 1404-03: Third Party Caller ID (page 638) enter No.
5. Should an extension’s Caller ID display use the display separator?
1. In 2102-01: Class of Service (page 724), check the extension’s Class of Service level.
2. If yes, in 1404-04: Caller ID Display Separator (page 639) enter Ye s.
3. If no, in 1404-04: Caller ID Display Separator (page 639) enter No.
6. Should outside lines send Caller ID data to voice mail?
1. If yes, in 3131-01: Pass Caller ID to Voice Mail (page 828) enter Yes.
2. If no, in 3131-01: Pass Caller ID to Voice Mail (page 828) enter No.
DSX Software Manual Features ◆ 65
Page 96

Caller ID
Other Related Features
Features
Call Timer (page 55)
The Auto Timer feature interacts with Caller ID on the first line of the telephone display. If an extension has Call Timer enabled, the first line (i.e., caller’s name) of the Second Call Caller ID display
won’t show. The user will only see the caller’s number (in the second line).
Call Waiting / Camp-On (page 58) and Off-Hook Signaling (page 255)
• An extension programmed to receive Camp-On tones or Off-Hook Ringing from a waiting call will
also receive Second Call Caller ID.
• If an extension is set up to receive Off Hook Ringing, it will receive Second Call Caller ID for each
new outside call. The display returns to idle when the second call stops ringing.
• If an extension is set up to receive Call Wait beeps, it will receive Second Call Caller ID only for the first
call. This occurs, for example, for DILs and transferred outside calls. With transferred outside calls, the
Second Call Caller ID displays until the call recalls the transferring destination (if not picked up). With
DILs, the Second Call Caller ID displays remains until the extension activates another feature.
Caller ID Logging (page 68)
An extension can store the caller’s name and phone number for easy review and redialing.
Group Ring (page 189)
An extension’s display will show Caller ID data for a line terminated to a Ring Group master number
as the call is ringing.
Station Message Detail Recording (page 328)
Caller ID prints out on the SMDR report.
Voice Mail (page 372)
Caller ID fully integrates with IntraMail, UltraMail and NVM-Series voice mail systems.
IntraMail Features
None
66 ◆ Features DSX Software Manual
Page 97
Operation
Clearing the Display
To cancel (clear) the Caller ID display and return your phone to its normal display:
• You can only do this while you are on a call, not while your phone is ringing.
Press CLEAR.
1.
To turn the Caller ID display back on (after you press CLEAR to cancel it):
Press CHECK.
1.
Third Party Caller ID
To display the Caller ID data for the third party’s call:
Press INTERCOM + CHECK.
1.
Press one of the following keys for the call you want to check.
2.
• You see Caller ID data for the line you select.
Press a line key while the call is ringing or connected to the third party.
Caller ID
In these instructions:
[Super Display Soft Key]
[Keyset Soft Key]
In these instructions:
[Super Display Soft Key]
[Keyset Soft Key]
Features
Press a loop key while the call is ringing the third party.
Press a Hotline key while the call is connected to the third party.
Press a Call Coverage key while the call is ringing the third party.
Hang up when you are done.
3.
DSX Software Manual Features ◆ 67
Page 98

Caller ID Logging
Caller ID Logging
Description
An extension can store the caller’s name and phone number for easy review and redialing.
When caller ID is enabled, Caller ID Logging stores a record of the caller’s number and name (if provided
by the telco) for each outside call that rings an extension. This allows an extension user to easily review and
redial their calls. The system can log records directly to an extension or to one of 8 Caller ID Logging
Groups. All the extensions in the same Logging Group share the same Caller ID records. Each extension or
Logging Group can store up to 99 Caller ID records. The system stores up to 1000 Caller ID records, allocated among all extensions and Caller ID Logging Groups. All Caller ID records are retained when the system is powered down or reset. If a line rings more than one extension simultaneously, the system logs the
call at all ringing extensions.
Caller ID Logging also provides:
❥ Programmable Caller ID Callback Routing
You can set up Caller ID Callbacks (return calls) to select either a line or Line Group to redial calls
allowed by the extension’s Toll Restriction. Caller ID Callback Routing can also optionally:
- Strip the area code from the number dialed.
- Strip the leading 1 from the number dialed.
- Add a leading 1 to the number dialed.
❥ Soft Key Integration
Unique Caller ID soft keys provide the extension user with the capability to view all of their Caller ID
records or just records for unanswered calls. Super Display telephone users can additionally view
records of answered calls.
❥ Save Number to Speed Dial
While reviewing a Caller ID record, the extension user can optionally store the number and optional
name directly in an Extension Speed Dial bin.
❥ New Record for Calls on Hold and Parked Calls
The system creates a new Caller ID record for a call retrieved from Hold at an extension other than the
one that initially placed it on Hold. The same is also true for Parked calls.
- A new call rings the system and creates a CID record.
- Extension 301 answers the call and places it on Hold.
- Extension 302 retrieves the call from Hold.
- The system creates another record of the call at extension 302.
❥ New Record for Transferred Call
A transferred call creates a new call record each time it is transferred. For example:
- A new call rings the system and creates a CID record.
- Extension 300 answers the call and transfers it to extension 301.
- The system creates a new (answered) record for the call at extension 301.
- Extension 301 transfers the call to extension 302.
- The system creates another new (answered) record for the call at extension 302.
❥ Answered Status for Calls Answered at Analog Ports
Calls answered by keyset (digital) and single line (analog) extensions are marked as answered. Calls
answered by voice mail ports are not marked as answered.
❥ Record Created for Voice Mail Park and Page
If a call is placed in Personal Park Orbit by voice mail, the system creates a record for the call on the
extension at which it is parked, and at the extension that picked up the call. (Note that there is no record
created at the voice mail port.)
68 ◆ Features DSX Software Manual
Page 99

Types of Calls that are Logged
Call ID Logging will make a record of any outside call to an extension that can normally be answered using
Ringing Line Preference. These include:
❥ Line key (Key Ring) and Loop Key calls
❥ Transfers
❥ Direct Inward Lines (DILs)
❥ Group Ring calls
Caller ID Logging
Caller ID and Answering Machines
If voice mail is not installed, Caller ID Logging can provide unique handling of a customer-provided
answering machine. If an extension is designated as an answering machine in programming, any outside call
picked up by the answering machine will not be marked as answered in the Caller ID log. For example, if a
call rings into the system and is picked up by the answering machine, it will show as a new call in the Caller
ID log. In addition, it will flash green on the Ring/Message lamp indicating that there is a new call.
Conditions
• None
Default Setting
• There is no Caller ID outbound line/group specified.
• There is no home area code specified. In addition, all local calls are 7 digits long.
• In DSX-40, all keyset extensions (300-315) are in Caller ID Logging Group 1. Since all keysets share
a common group log, deleting a record at one keyset will automatically update the log for all others.
• In DSX-80/160, extensions 300-315 are set up for personal logging with 10 records each. There are no
records assigned to other extensions.
• Caller ID Logging Group 1 can store 99 records. All other groups are blank.
• All lines are assigned to Caller ID Logging Group 1.
• The Caller ID Alert Lamp is enabled.
Features
DSX Software Manual Features ◆ 69
Page 100

Caller ID Logging
Programming
Setting Up Caller ID Callbacks
1. Make sure Caller ID is installed.
1. If Caller ID is not installed, turn to Caller ID (page 63) and set up your system’s Caller ID.
2. Assign the outgoing route the system will use for Caller ID callbacks.
1. In 3711-01: Caller ID Callback Route Type (page 856), select the type of route used for Caller ID call-
backs (1 = line, 2 = Line Group).
2. For line, in 3711-01: Caller ID Callback Line (page 856) enter the line number (1-64) the system will
use for Caller ID callbacks.
3. For Line Groups, in 3711-01: Caller ID Callback Group (page 857) enter the Line Group number (90-
98
) the system will use for Caller ID callbacks.
3. Designate the system’s home area code (i.e., the area code in which the system is installed).
1. Before programming for the first time, use 3712-01: Initialize Caller ID Dial Treatment Tables
(page 858) to initialize the Caller ID Dial Treatment Tables.
2. In 3713-[01-16]: Home Area Code Table Data (page 860), enter the area code(s) in which the system is
installed.
- You must make an assignment in this program so that Caller ID can properly process callbacks
(return calls).
4. Should the extension have personal or group Caller ID Logging?
1. For personal Caller ID logging:
- In 2117-01: Caller ID Log Type (page 751), enter 1.
- In 2117-01: Caller ID Log Size (page 751), specify the number of Caller ID records (1-99) the
extension should have.
- When assigning records, be careful not to exceed the system maximum (1000).
2. For group Caller ID logging:
- In 2117-01: Caller ID Log Type (page 751), enter 2.
- In 2117-01: Caller ID Log Group (page 752), specify the group to which the extension should
belong (
- In 3122-[01-08]: Caller ID Group Membership (page 827), indicate into which Caller ID groups
the line should log its calls. The line can be a member of any or all groups.
- In 3701-[01-08]: Caller ID Logging Group Size (page 855), specify the total number of records
that can be stored in each Caller ID Logging group.
- When assigning records, be careful not to exceed the system maximum (1000).
5. Does the area in which the system is installed use 10-digit local calling?
1-8).
1. If yes, in 3712-02: 10-Digit Local Calls (page 858) enter Yes.
2. If no, in 3712-02: 10-Digit Local Calls (page 858) enter No.
6. Are there any calls within the system’s home area code that are toll calls?
1. If yes:
70 ◆ Features DSX Software Manual
 Loading...