

Page 1

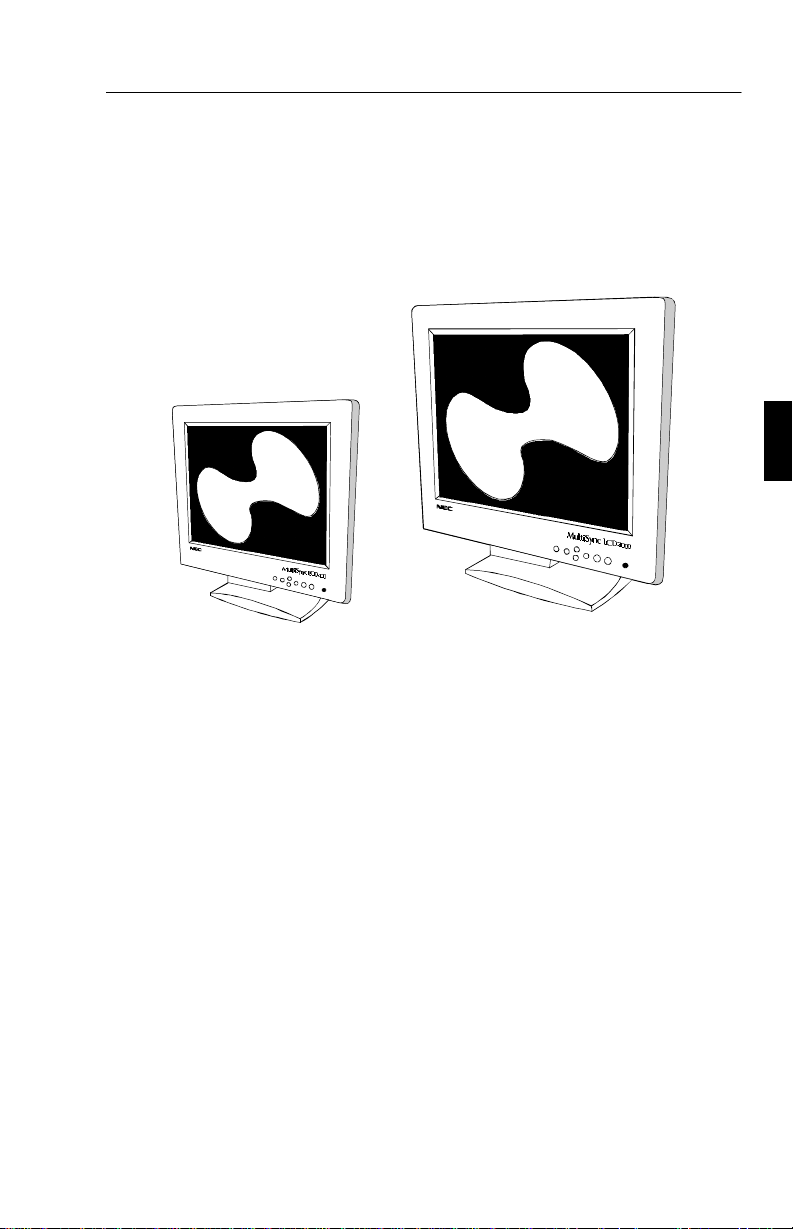
MultiSync LCD400
MultiSync LCD2000
User’s Manual
Page 2
Declaration of the Importer
We hereby certify that the color monitors
MultiSync LCD
MultiSync LCD
are in compliance with
Council Directive 73/23/EEC:
- EN 60950
Council Directive 89/336/EEC:
- EN 55022
- EN 61000-3-2
- EN 61000-3-3
- EN 50082-1
(IEC 801-2)
(IEC 801-3)
(IEC 801-4)
and marked with
(LA-1421JMW)
400
2000 (LA-2031JMW)
NEC Europe Ltd. Ismaning Office
Steinheilstraße 4-6
D-85737 Ismaning, Germany
Page 3

Safety Instruction
Caution:
When operating the LA-1421JMW/LA-2031JMW with a 220-240V AC
power source in Europe except UK, use the power cord provided with
the monitor.
In UK, a BS approved power cord with moulded plug has a Black (five
Amps) fuse installed for use with this equipment. If a power cord is not
supplied with this equipment please contact your supplier.
When operating the LA-1421JMW/LA-2031JMW with a 220-240V AC
Power source in Australia, use the power cord provided with the
monitor.
For all other cases, use a power cord that matches the AC voltage of the
power outlet and has been approved by and complies with the safety
standard of your particular country.
IBM PC/XT/AT, PS/2, MCGA, VGA, 8514/A and XGA are registered trademarks of
International Business Machines Corporation.
Apple and Macintosh are registered trademarks of Apple Computer Inc.
Microsoft and Windows are registered trademarks of the Microsoft Corporation.
NEC is a registered trademark of NEC Corporation. ErgoDesign, IPM, OSM, ColorControl,
OptiClear, C
Electronics, Ltd.
MultiSync is a registered trademark of NEC Technologies, Inc in U.S., and of NEC Home
Electronics, Ltd in Canada, U.K., Germany, France, Spain, Italy, Austria, Benelux,
Switzerland, Denmark, Finland, Norway and Saudi Arabia.
All other trademarks or registered trademarks are property of their respective owners.
ROMACLEAR and Advanced Digital Control System are trademarks of NEC Home
Page 4

For the Customer to use in U.S.A or Canada.
Canadian Department of Communications Compliance
Statement
DOC: This Class B digital apparatus meets all requirements of the
Canadian Interference-Causing Equipment Regulations.
Cet appareil numérique de la classe B respecte toutes les exigences du
Règlement sur le matériel brouiller du Canada.
C-UL: Bears the C-UL Mark and is in compliance with Canadian
Safety Regulations according to C.S.A. C22.2 #950.
Ce produit porte la marque ‘C-UL’ et se conforme aux règlements de
sûrele Canadiens selon CAN/CSA C22.2 No. 950.
FCC Information
1. Use the attached specified cables with the LA-1421JMW and
LA-2031JMW color monitors so as not to interfere with radio and
television reception.
(1) Please use the Shielded power cable or equivalent to ensure
FCC compliance.
(2) MultiSync LCD400: Shielded video signal cable.
(3) MultiSync LCD2000: Shielded 15-pin VGA to BNC cable.
Use of other cables and adapters may cause interference with
radio and television reception.
2. This equipment has been tested and found to comply with the
limits for a Class B digital device, pursuant to part 15 of the FCC
Rules. These limits are designed to provide reasonable protection
against harmful interference in a residential installation. This
equipment generates, uses, and can radiate radio frequency
energy, and, if not installed and used in accordance with the
instruction, may cause harmful interference to radio
communications. However, there is no guarantee that interference
will not occur in a particular installation. If this equipment does
cause harmful interference to radio or television reception, which
Page 5

can be determined by turning the equipment off and on, the
user is encouraged to try to correct the interference by one or
more of the following measures:
- Reorient or relocate the receiving antenna.
- Increase the separation between the equipment and
receiver.
- Connect the equipment into an outlet on a circuit different
from that to which the receiver is connected.
- Consult your dealer or an experienced radio/TV
technician for help.
If necessary, the user should contact the dealer or an
experienced radio/television technician for additional
suggestion. The user may find the following booklet, prepared
by the Federal Communications Commission, helpful: “How
to Identify and Resolve Radio-TV Interference Problems.”
This booklet is available from the U.S. Government Printing
Office, Washington, D.C., 20402, Stock No.
004-000-00345-4.
Page 6

Page 7

English
Page 8

Introduction to the NEC MultiSync LCD400/LCD2000 E - 1
Introduction to the NEC MultiSync LCD400/LCD2000
Congratulations on your purchase of the NEC MultiSync LCD400/
LCD
2000 true colour monitor!
Analog Advantage
Capable of displaying unlimited colours in a continuous spectrum,
providing a truer representation of colour. The monitor’s high contrast
LCD enhances colour vibrancy and improves focus with no geometric
distortion.
Wider Compatibility
Because the MultiSync LCD monitor is analog through and through, it
does not require special analog to digital display or interface cards but
can accept RGB input directly.
Reduced Footprint
Provides the ideal solution for environments requiring superior image
quality but with size and weight limitations. The monitor’s small
footprint and low weight allow it to be moved or transported easily from
one location to another.
Colour Control system
Allows you to adjust the colours on your screen and customize the
colour accuracy of your monitor to a variety of standards.
OSM (On-Screen Manager) Controls
Allows you to quickly and easily adjust all elements of your screen
image via simple to use on-sreen menus.
Page 9

E - 2 Introduction to the NEC MultiSync LCD400/LCD2000
ErgoDesign Features
Enhance human ergonomics to improve the working environment,
protect the health of the user and save money. Examples include OSM
controls for quick and easy image adjustments, tilt/swivel base for
preferred angle of vision small footprint and compliance with MPRII
guidelines for lower emissions.
Plug and Play (MultiSync LCD400 only)
The Microsoft solution with the Windows 95 operating system
facilitates setup and installation by allowing the monitor to send its
capabilities (such as screen size and resolutions supported) directly to
your computer, automatically optimizing display performance.
IPM (Intelligent PowerManager) System
Provides innovative power-saving methodes that allow the monitor to
shift to a lower power consumption level when on but not in use, saving
two-thirds of your monitor energy cost, reducing emissions and
lowering the air conditioning cost of the workplace.
Multiple frequency Technology
Automatically adjusts monitor to the display card’s scanning frequency,
thus displaying the resolution required.
FullScan Capability
Allows you to use the entire screen area in most resolutions,
significantly expanding image size.
Page 10

Contents of Package E - 3
Contents of Package
Your new MultiSync LCD monitor box should contain the following:
NEC MultiSync LCD
–
NEC MultiSync LCD
(Model LA-142lJMW)/
400
2000 (Model LA-203lJMW).
– AC power cable.
– Video signal cable – 15 pin mini D-SUB to 15 pin mini D-SUB
(LCD
400)/
Video signal cable – 15 pin mini D-SUB to BNC (LCD
2000
).
– User’s manual.
Remember to save the original box and packing materials to transport or
ship this monitor.
Page 11

E - 4 Recommended Use
Recommended Use
For optimum performance, please note the following when setting up
and using the MultiSync LCD
• The optimum monitor position is facing away from direct
sunlight.
• Allow adequate ventilation around the monitor so that heat
can properly dissipate.
• Do not place any heavy objects on the power cord. Damage
to the cord may cause shock or fire.
• Use the monitor in a clean and dry area.
• Handle with care when transporting. Save packaging for
transporting.
• The power cable connector is the primary means of detaching
the system from the power supply. The monitor should be
installed close to a power outlet which is easily accessible.
400/LCD2000 colour monitor:
• Clean the LCD monitor surface with a lint-free, non-abrasive
cloth. Avoid using any cleaning solution, glass cleaner or
tissue paper.
• For optimum performance, allow 20 minutes for warm-up.
• Avoid displaying fixed patterns on the monitor for extremely
long periods of the time to avoid after-image effects.
• Avoid applying pressure to the LCD monitor surface.
Page 12

Recommended Use E - 5
CORRECT PLACMENT AND ADJUSTMENT OF THE MONITOR
CAN REDUCE EYE, SHOULDER AND NECK FATIGUE. CHECK
THE FOLLOWING WHEN YOU POSITION THE MONITOR:
• Adjust the monitor height so that thr top of the screen is at or
slightly below eye level. Your eyes should look slightly
downward when viewing the middle of the screen.
• Position your monitor no closer than 40 cm and no further
away than 70 cm from your eyes. The optimal distance of
MultiSync LCD
400 is 53 cm, MultiSync LCD2000 is 61 cm.
• Rest your eyes periodically by focusing on an object at least
6 m away.
• Position the monitor at a 90° angle to windows and other light
sources to minimize glare and reflections. Adjust the monitor
tilt so that ceiling lights do not reflect on your screen.
• If reflected light makes it hard for you to see your screen, use
an anti-glare filter.
• Adjust the monitor’s brightness and contrast control to
enhance readability.
• Use a document holder placed close to the screen.
• Position whatever you are looking at most of the time (the
screen or reference material) directly in front of you to
minimize turning your head while you are typing.
• Get regular eye checkups.
Page 13

E - 6 Installation
Installation
Connection to your Personal Computer
The MultiSync LCD400/LCD2000 true colour monitor complements PC
compatible computers. Your system has one of two configurations:
the video controller is built into the computer.
–
– the video controller is in the form of a display card (sometimes
referred to as graphics card, video adapter or graphics board).
Both configurations have a video connector (or a CRT PORT on laptop
computers). If you are not sure which connector is the video connector,
refer to your computer or display card manual.
To attach the monitor to your system, follow these instructions:
1. Turn off the power to the monitor and computer.
2. If necessary, install the display card. For more information
about installing your card, refer to the display card manual.
3. Connect the 15-pin mini D-SUB of the appropriate signal
cable to the connector of the display card in your computer.
Tighten all srews.
4. For the LCD
video signal cable to the appropriate connector on the back of
the monitor.
For the LCD
connectors on the back of the monitor. Connect the red BNC
cable to the BNC connector on the monitor labelled R, the green
BNC cable to the BNC connector on the monitor labelled
G/Sync, the blue BNC cable to the BNC connector on the
monitor labelled B. If you have a fourth BNC connector
(Composite Sync), connect it to the BNC connector on the
monitor labelled H/CS. If you have a fifth BNC connector
(Vertical Sync), connect it to the BNC connector on the monitor
labelled VS.
400: Connect the 15-pin mini D-SUB of the
2000: Connect the BNC cable to the appropriate
Page 14

Installation E - 7
Note: Incorrect cable connections may result in irregular operation,
damage display quality/components of LCD module and/or shorten the
module’s life.
5. Connect one end of the power cable to the MultiSync LCD
monitor and the other end to the power outlet.
6. Turn on the monitor and the computer.
7. This completes the installation.
If you have any problems, please refer to the Troubleshooting section of
this manual.
Connection to your Personal Computer (Macintosh)
With the Macintosh cable adapter, the MultiSync LCD400/LCD2000
colour monitor is compatible with the Macintosh family of computers.
You will connect your MultiSync colour monitor one of two ways to
your Macintosh computer:
– On-board video port
– NuBus/PCI/PDS display card
Both configurations should have the same style video connector. If you
are not sure which port is the monitor connector, please reference your
computer or display card manual.
To attach the monitor to your system, follow these instructions:
1. Turn off the power to your MultiSync LCD monitor and
Macintosh.
2. If necessary, install the display card. For more information on
this installation, reference the display card manual.
3. Connect the MultiSync LCD
Macintosh cable adapter to the computer. Attach the 15-pin
mini D-SUB end of the appropriate signal cable to the
Macintosh cable adapter. Tighten all srews.
400 or MultiSync LCD2000
Page 15

E - 8 Installation
4. For the LCD400: Connect the 15-pin mini D-SUB of the
video signal cable to the appropriate connector on the back of
the monitor.
For the LCD
2000: Connect the BNC cable to the appropriate
connectors on the back of the monitor. Connect the red BNC
cable to the BNC connector on the monitor labelled R, the
green BNC cable to the BNC connector on the monitor
labelled G/Sync, the blue BNC cable to the BNC connector
on the monitor labelled B. If you have a fourth BNC
connector (Composite Sync), connect it to the BNC connector
on the monitor labelled H/CS. If you have a fifth BNC
connector (Vertical Sync), connect it to the BNC connector
on the monitor labelled VS.
Note: Incorrect cable connections may result in irregular operation,
damage display quality/components of LCD module and/or shorten the
module’s life.
5. Connect one end of the power cable to the MultiSync LCD
monitor and the other end to the power outlet.
6. Turn on the monitor and the computer.
7. This completes the installation.
If you have any problems, please refer to the Troubleshooting section of
this manual.
Please contact your local dealer for information about the Mac Adapter.
Power Macintosh 6100/60 and 66 users need to use the Apple HDI-45
cable adapter and Powerbook users need to use the Apple VID-14 cable
adapter in conjunction with the appropriate MultiSync Macintosh cable
adapter when connecting a MultiSync LCD monitor.
Page 16
Controls E - 9
Controls
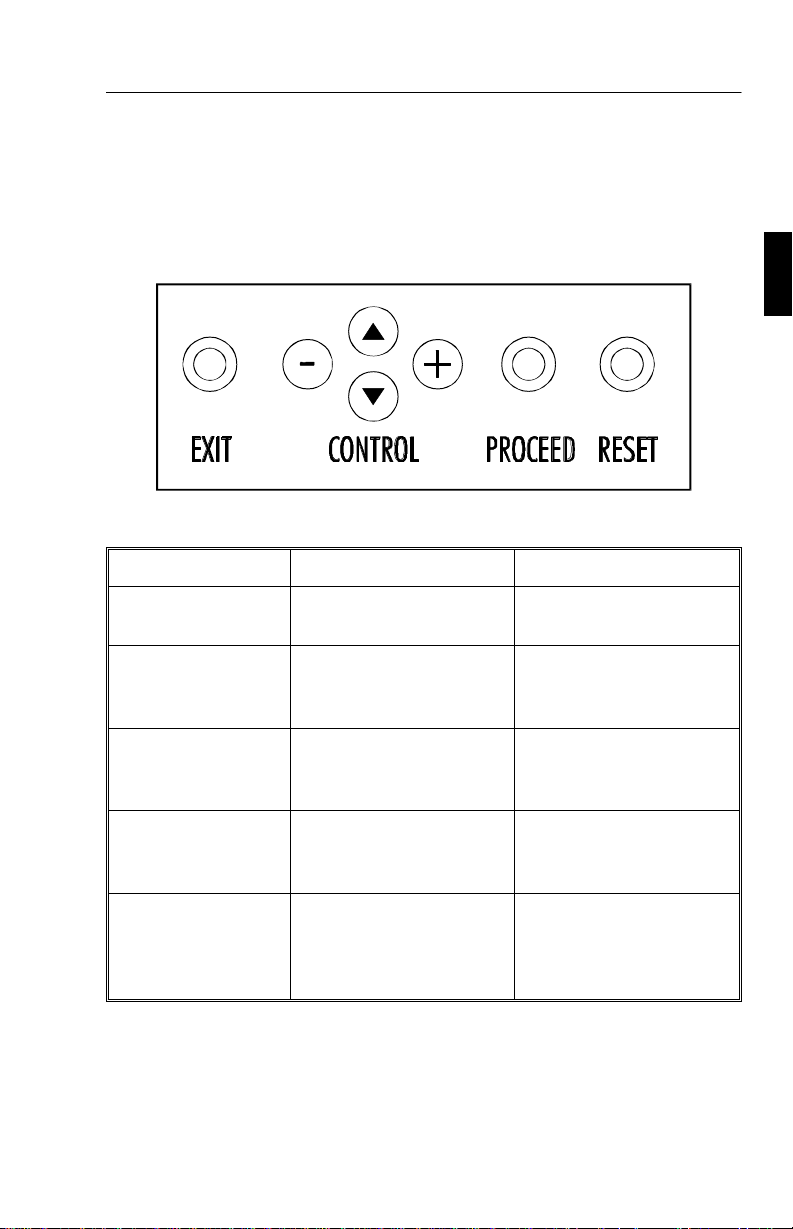
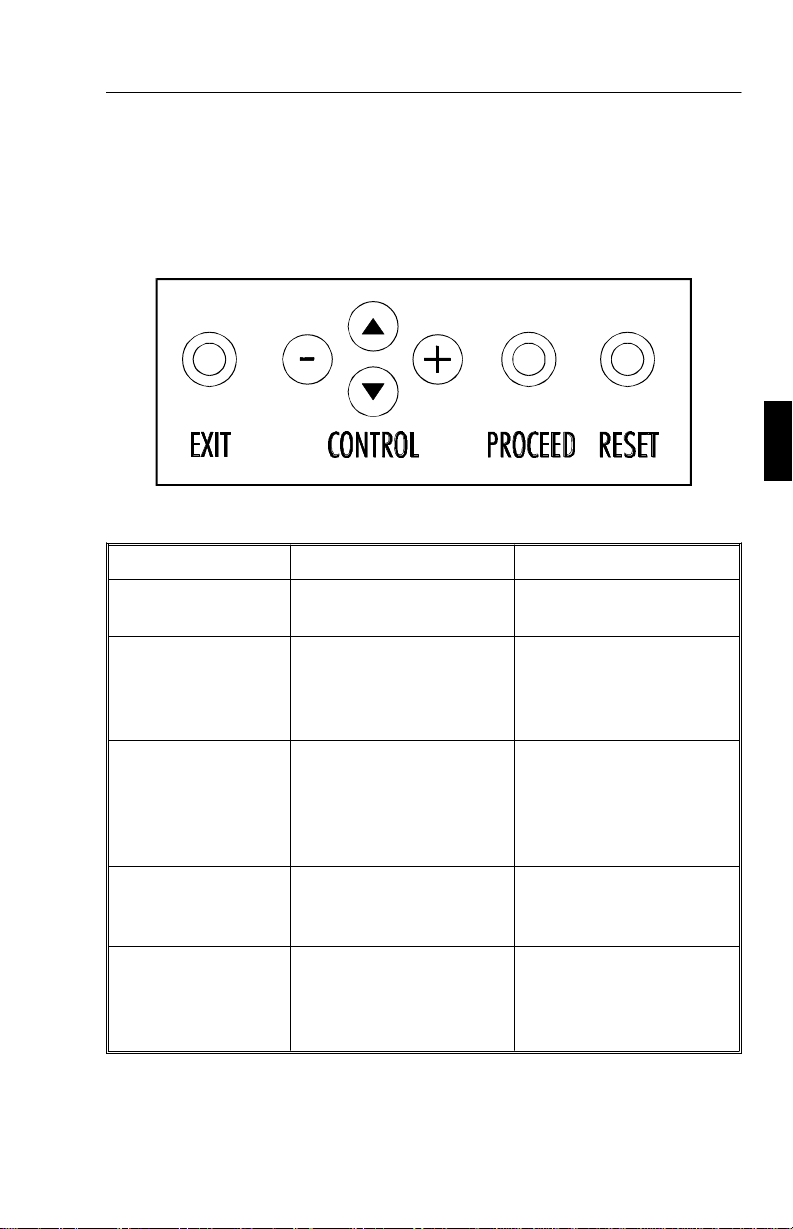
OSM Controls
The OSM controls on the front of the monitor provide the following
functions:
Control Main Menu Sub-Menu
EXIT
CONTROL ▲/▼ Moves the highlighted
CONTROL -/+ Has no function. Moves the bar in the + or
PROCEED
RESET: The
currently highlighted
control to the factory
setting.
Exits the OSM controls. Exits to the OSM controls
main menu.
Moves the highlighted
area up/down to select one
of the controls.
Proceeds to selected menu
choice (indicated by the
highlighted area).
Resets all the controls
within the highlighted
menu.
area up/down to select
one of the controls
- direction to increase or
decrease the adjustment.
Activates Auto Adjust
feature. In Display Mode,
opens additional window
Resets the highlighted
control.
NOTE: When RESET is pressed, a warning window will appear
allowing you to cancel the reset function.
Page 17

E - 10 Controls
Brightness and Contrast
Brightness: Adjust the overall image and background screen brightness.
Contrast:
Auto Adjust Contrast: Corrects the image displayed for non-standard
video inputs.
Adjust the image brightness in relation to the background.
Auto Adjust
Allows automatic adjustment of the position and image adjust control.
Position
Control horizontal and vertical image position within the display area of
the LCD.
Auto Adjust Position: Automatically sets the horizontal and vertical
image position within the display area of the LCD.
Image Adjust
Coarse:
Coarse total.
Fine: Improves focus, clarity and image stability by increasing or
decreasing the Fine total.
NOTE: The Image Adjust Fine control must be used to complete the
setup of your MultiSync LCD
Auto Adjust Coarse/Fine:
matically adjusts the Coarse or Fine settings.
Auto Adjust Coarse: (MultiSync LCD
matically adjusts the Coarse setting.
Adjust the horizontal size by increasing or decreasing the
2000 monitor.
(MultiSync LCD
monitor only) Auto-
400
2000 monitor only) Auto-
Color Control System
Colour presets 1 through 5 selects the desired colour setting. Each
colour setting is adjusted at the factory to the stated degree Kelvin. If a
setting is adjusted, the name of the setting will change from degree
Kelvin to Custom. Color Gain (Red, Green, Blue): Increases or
decreases red, green or blue colour portion depending upon which is
selected. The change in colour will appear on screen and the direction
(increase or decrease) will be shown by the colour bars.
Page 18

Controls E - 11
OSM Location
You can choose where you would like the OSM control image to appear
on your screen. Selecting OSM Location allows you to manually adjust
the position of the OSM control menu left, right, up or down.
OSM Turn Off Time
The OSM control menu will stay on as long as it is in use. In the OSM
Turn Off Time submenu, you can select how long the monitor waits
after the last touch of a button to shut off the OSM control menu. The
preset choices are 10, 20, 30, 60 and 120 seconds.
OSM Lock Out
This control completely locks out access to all OSM control functions.
When attempting to activate OSM controls while in the lock out mode, a
screen will appear indicating the OSM controls are locked out. To
activate the OSM Lock Out function, press PROCEED, then ▲ and
hold down simultaneously. To de-activate the OSM Lock Out, press
PROCEED,
then ▲ and hold down simultaneously.
Display Mode
Display Mode provides information about the current resolution display
and technical data including the preset timing being used and the
horizontal and vertical frequencies.
NOTE:
by the monitor. The user can change to the appropriate resolution by entering
the Display Mode sub-menu and selecting the corresponding option.
Display Mode should only be used if a resolution is not recognized
Language Select
OSM control menus are available in six languages.
Factory Preset
Selecting Factory Preset allows you to reset all OSM control settings
back to the factory settings. The RESET button will need to be held
down for several seconds to take effect, individual settings can be reset
by highlighting the control to be reset and pressing the RESET button.
Page 19

E - 12 Specifications
Specifications
MultiSync LCD400
Display 35.8 cm (14.1 inch) viewable image size; 1024 x 768
native resolution (Pixel Count); active matrix;
thin film transistor (TFT); liquid crystal display (LCD);
0.28 mm dot pitch; XtraView™ technology; 180 cd/m²
white luminance, typical; 150:1 contrast ratio, typical
Input Signal Video Analog 0.7 Vp-p 75 Ω
Sync Separate sync. TTL Level
Horizontal sync. Positive/Negative
Vertical sync. Positive/Negative
Composite sync. (Positive/Negative)
(TTL Level)
Sync on Green video (Positive) 0.7
Vp-p and sync. Negative 0.3 Vp-p
Display Colours Analog Input: Unlimited number of colours
(Depends on the graphics board)
Synchronisation
Range
Resolutions
Supported
Active Display
Area***
Power supply AC 100-120 V / 220-240 V 50/60 Hz
Current Rating 0.9 A @ 100-120 V /
Dimensions W x H x D 357 x 362 x 168 mm
Weight 5.2 kg
Horizontal 24.8 kHz to 60.0 kHz (Automatically)
Vertical 56.2 Hz to 85.1 Hz (Automatically)
720 x 400: VGA text*
640 x 480 at 60 Hz to 85 Hz*
800 x 600 at 56 Hz to 85 Hz*
832 x 624 at 75 Hz*
1024 x 768 at 60 Hz to 75 Hz**
Horizontal 286 mm
Vertical 214 mm
0.5 A @ 220-240 V
Page 20

Specifications E - 13
Operating
Environmental
Considerations
Storage
Environmental
Considerations
* Interpolated Resolutions: when resolutions are shown that are lower than the pixel
count of the LCD module, text my appear chappy or lines may appear to be bold. This is
normal and necessary for all current flat panel technologies, each dot on the screen is
actually one pixel, so to expand resolutions to full screen, an interpolation of the
resolution must be done. When the interpolated resolutions is not an exact multiple of
the native resolution, the mathematical interpolation necessary may cause some lines to
appear thicker than others.
** NEC cites recommend resolutions at 60 Hz for optimal display performance.
*** Active display area is dependent upon the signal timing.
Temperature 5° C to + 35° C
Humidity 30% to 80%
Temperature -10° C to + 60° C
Humidity 10% to 85%
Technical specifications are subject to change without notice.
Page 21

E - 14 Specifications
Multisync LCD
Display 51.1 cm (20.1 inch) viewable image size; 1280 x 1024
Input Signal Video Analog 0.7 Vp-p 75 Ω
Display Colours Analog Input: Unlimited number of colours
Synchronisation
Range
Resolutions
Supported
2000
native resolution (Pixel Count); active matrix;
thin film transistor (TFT); liquid crystal display (LCD);
0.31 mm dot pitch; XtraView™ technology; 150 cd/m²
white luminance, typical; 150:1 contrast ratio, typical
Sync Separate sync. TTL Level
Horizontal sync. Positive/Negative
Vertical sync. Positive/Negative
Composite sync. (Positive/Negative)
(TTL Level)
Sync on Green video (Positive) 0.7
Vp-p and sync. Negative 0.3 Vp-p
(Depends on the graphics board)
Horizontal 24.0 kHz to 80.0 kHz (Automatically)
Vertical 56.0 Hz to 76.0 Hz (Automatically)
720 x 400: VGA text*
640 x 480 at 60 Hz to 76 Hz
800 x 600 at 56 Hz to 76 Hz*
832 x 624 at 75 Hz*
1024 x 768 at 60 Hz to 76 Hz*
1280 x 960 at 60 Hz to 76 Hz
1280 x 1024 at 60 Hz to 76 Hz**
Active Display
Area***
Power supply AC 100-120 V / 220-240 V 50/60 Hz
Current Rating 1.0 A @ 100-120 V /
Dimensions W x H x D 500 x 483 x 220 mm
Weight 10.0kg
Horizontal 399 mm
Vertical 319 mm
0.5 A @ 220-240 V
Page 22
Troubleshooting/Support E - 15
Operating
Environmental
Considerations
Storage
Environmental
Considerations
* Interpolated Resolutions: when resolutions are shown that are lower than the pixel
count of the LCD module, text my appear chappy or lines may appear to be bold. This is
normal and necessary for all current flat panel technologies, each dot on the screen is
actually one pixel, so to expand resolutions to full screen, an interpolation of the
resolution must be done. When the interpolated resolutions is not an exact multiple of
the native resolution, the mathematical interpolation necessary may cause some lines to
appear thicker than others.
** NEC cites recommend resolutions at 60 Hz for optimal display performance.
*** Active display area is dependent upon the signal timing.
Temperature 5° C to + 30° C
Humidity 30% to 80%
Temperature -10° C to + 60° C
Humidity 10% to 85%
Technical specifications are subject to change without notice.
Troubleshooting/Support
Problem Check These Items
No pictures - The signal cable should be completely connected to
the display card/computer.
- The display card should be completely seated in its
slot.
- Power Switch and computer power switch should be
in the ON position.
- Check to make sure that a supported mode has been
selected on the display card or system being used.
(Please consult display card or system manual to
change graphics mode.)
- Check the monitor and your display card with respect
to compatibility and recommended settings.
- Check the signal cable connector for bent or
pushed-in pins.
Page 23

E - 16 Troubleshooting/Support
Problem Check These Items
Image is unstable,
unfocused or
swimming is
apparent
LED on the monitor
is not lit (no green or
amber colour can be
seen)
Display image has a
green cast to it
Display image is not
centered
Display image is not
sized properly
- Signal cable should be completely attached to the
computer.
- Use the
adjust display by increasing or decreasing the fine
total. When the display mode will be changed, the
OSM Image Adjust settings may need to be
re-adjusted.
- Check the monitor and your display card with respect
to compatibility and recommended signal timings.
Power Switch should be in the ON position and the
power cord should be connected.
Open OSM Display Mode and press the + Control
button.
Use OSM Position adjustment controls to adjust
centering.
- Use the OSM Image Adjust controls to increase or
decrease the Coarse total.
- Check to make sure that a supported mode has been
selected on the display card or system being used.
(Please consult display card or system manual to
change graphics mode.)
OSM Image Adjust
controls to focus and
Selected resolution
is not displayed
properly
Use OSM Display Mode to enter Mode Change sub
menu and confirm that the appropriate resolution has
been selected. If not, select corresponding option.
Page 24
Deutsch
Page 25

Vorstellung des NEC MultiSync LCD400/LCD2000 D - 1
Vorstellung des NEC MultiSync LCD400/LCD2000
Herzlichen Glückwunsch zum Kauf Ihres NEC MultiSync LCD400/
LCD
2000 Farbmonitors.
Analog ist besser
Der MultisyncLCD
detailtreu darstellen. Der sehr hohe Kontrastumfang erhöht die
Farbbrillanz und verbessert die Bildschärfe ohne die Bildgeometrie zu
beeinflussen.
Anschlußvielfalt
Der MultiSync LCD Monitor ist durch und durch ein analoger Monitor.
Mit dem analogen Interface ist ein Anschluß an spezielle Grafik- bzw.
Interface-Karten nicht erforderlich, sondern der LCD Monitor kann
direkt über die RGB Signale arbeiten.
400
/LCD
kann eine unbegrenzte Zahl an Farben
2000
Minimierte Stellfläche
Die überragende Bildqualität bei minimaler Bildgröße und Gewicht sind
die idealen Voraussetzungen für einen ergonomischen Bildschirmarbeitsplatz. Als kleines, leichtes Arbeitsgerät kann der MultiSync
LCD
400/LCD2000 ohne Probleme von einer Einsatzstelle zur nächsten
transportiert werden.
Farbeinstellungsmenü (ColorControl System)
Über das ColorControl System kann die Farbintensität Ihres
Bildschirmes exakt eingestellt werden.
OSM (On Screen Manager)
Der On Screen Manager erlaubt eine direkte, menügesteuerte
Einstellung individueller Bildparameter.
Page 26

D - 2 Vorstellung des NEC MultiSync LCD400/LCD2000
Ergo Design
Das Ergo Design, verbessert die Arbeitsumgebung an die Eigenschaften
und Bedürfnisse des Menschen, schützt die Gesundheit des Benutzers
und ermöglicht finanzielle Einsparungen. Zu den ergonomischen
Anordnungen gehören u.a. das OSM-Menü für einfache und schnelle
Bildeinstellungen, die Einstellmöglichkeiten des Betrachtungs-winkels,
die kleine Stellfläche und die Strahlenschutzverordnung gemäß MPRII.
Plug&Play (nur MultiSync LCD400)
Plug&Play ist die in Windows 95 integrierte Antwort von Microsoft bei
der Installation von Peripheriegeräten. Der Multisync Monitor teilt seine
Leistungsmerkmale direkt dem System mit, so daß von diesem
automatisch die bestmögliche Auflösung und Bildfrequenz eingestellt
wird.
Intelligen Power Manager
Der Intelligent Power Manager (intelligenter Energiesparer) ist eine
fortschrittliche Einrichtung zum Energiesparen. Somit werden bei
Arbeitspausen am LCD Monitor 2/3 an Energie und Kosten eingespart,
Emissionen reduziert und der Sauerstoffverbrauch am Arbeitsplatz wird
niedriger.
Multi-Frequenz-Technologie
Multi-Frequenz-Technologie hat die Eigenschaft, daß die horizontale
und vertikale Frequenz bei allen Bildschirmauflösungen automatisch
eingestellt wird.
FullScan
FullScan hat die Eigenschaft, bei allen Bildschirmauflösungen immer
die maximale Bildschirmfläche zu nutzen.
Page 27
Lieferumfang D - 3
Lieferumfang
Die folgende Übersicht zeigt den Lieferumfang Ihres neuen MultiSync
LCD Monitors:
– NEC MultiSync LCD400 (Model LA-142lJMW)/
NEC MultiSync LCD
2000 (Model LA-203lJMW).
– AC Netzkabel.
– Videosignalkabel - 15 pin mini D-SUB auf 15 pin mini D-SUB
(LCD
400)
Videosignalkabel - 15 pin mini D-SUB to BNC (LCD
2000).
– Bedienerhandbuch.
Karton und Verpackungsmaterial sollten Sie für einen späteren
Transport bzw. Versand Ihres LCD Monitors aufbewahren.
Page 28

D - 4 Aufstellen
Aufstellen
Um eine optimale Qualität Ihres MultiSync LCD400/LCD2000 zu
gewährleisten, sollten Sie folgende Punkte bei der Aufstellung Ihres
Farbmonitors beachten:
• Plazieren Sie den Monitor nicht in direktem Sonnenlicht.
• Achten sie darauf, daß die Lüftungsschlitze des LCD
Monitors nicht verdeckt sind, um eine optimale Wärmeabfuhr
zu gewährleisten.
• Stellen Sie keine schweren Gegenstände auf das Netzkabel
des LCD Monitors. Beschädigtes Netzkabel kann zu Brand
oder Stromschlag führen.
• Benutzen Sie den LCD Monitor nur in trockener und sauberer
Umgebung.
• Transportieren Sie den LCD Monitor mit der nötigen
Vorsicht.
• Schließen Sie den LCD Monitor an eine Steckdose an, die
sich leicht zugänglich, in der Nähe des Gerätes befinden muß.
• Zur Reinigung der LCD Display-Oberfläche benutzen Sie am
besten ein weiches Tuch. Benutzen Sie keine
Reinigungsflüssigkeit oder Papiertücher.
• Um eine optimale Abbildungsleistung zu erreichen, benötigt
der Monitor ca. 20 Minuten Zeit zur Aufwärmung.
• Vermeiden Sie die Darstellung von festgelegten
Abbildungsmustern über einen extrem langen Zeitraum, um
Beeinträchtigungen der Bildschirmqualität zu verhindern.
• Vermeiden Sie Druckeinwirkungen auf die LCD-Oberfläche.
Page 29

Aufstellen D - 5
DAMIT AUGEN, NACKEN- UND SCHULTERMUSKULATUR
BEIM ARBEITEN AN DEM BILDSCHIRM ENTLASTET WERDEN,
BEACHTEN SIE BEIM AUFSTELLEN UND EINSTELLEN IHRES
LCD MONITORS BITTE FOLGENDES:
• Stellen Sie die Höhe des Monitors so ein, daß sich der obere
Rand des Bildschirms in der Höhe Ihrer Augen oder etwas
tiefer befindet.
• Der Abstand Auge und Monitor sollte zwischen 40 cm und
70 cm betragen. Der optimale Abstand beträgt beim
MultiSync LCD
53cm, beim MultiSync LCD
400
2000
61 cm.
• Entspannen Sie Ihre Augen regelmäßig durch Fixierung eines
Gegenstandes in mindestens 6 m Abstand. Blinzeln Sie oft
mit den Augen.
• Stellen Sie den Monitor in einem Winkel von 90° zum
Fenster oder anderen Lichtquellen auf, damit Blendungen und
Reflexionen auf dem Bildschirm soweit wie möglich
vermieden werden. Stellen Sie den Schwenk-/Neigefuß Ihres
Montitors so ein, daß durch Deckenbeleuchtung
Spiegelungen auf dem Bildschirm vermieden werden.
• Falls durch eine zu starke Beleuchtung die Erkennbarkeit
Ihres Monitors erschwert wird, benutzen Sie einen
Antireflixionsfilter.
• Stellen Sie die Helligkeit und den Kontrast so ein, daß die
Lesbarkeit des Bildschirms erhöht wird.
• Benutzen Sie einen Vorlagenhalter, der in der Nähe Ihres
Monitors aufgestellt wird.
• Plazieren Sie Vorlagen, auf die Sie am meisten schauen,
direkt vor sich, damit beim Schreiben der Kopf so wenig wie
möglich bewegt muß.
• Lassen Sie regelmäßig Ihre Augen vom Arzt überprüfen.
Page 30

D - 6 Installation
Installation
Anschluß an kompatiblen PCs
Der LCD400/LCD2000 Farbmonitor ist geeignet für den Einsatz an PC
kompatiblen Computern. Ihr System verfügt über einen von zwei
Konfigurationen:
– Einen eingebauten Grafikadapter.
– Eine installierte Grafikkarte.
Beide Variaten haben einen Videoausgangsbuchse zum Anschluß eines
Monitors. Sollten Sie nicht sicher sein, an welche Buchse der Monitor
anzuschließen ist, so lesen Sie dies im Benutzerhandbuch der
Grafikkarte oder des Computer nach. Im Zweifelsfall fragen Sie Ihren
NEC Fachhändler.
Zum Anschluß Ihres Monitors an das System verfahren sie wie folgt:
1. Schalten Sie die Stromversorgung vom Computer und
Monitor aus.
2. Falls notwendig, installieren Sie eine Grafikkarte nach den
Anweisungen im Benutzerhandbuch der Grafikkarte.
3. Schließen Sie das Signalkabel (15-pin mini D-SUB) am
Signaleingang des LCD Monitors und an der entsprechenden
Videobuchse Ihres Computers an.
4. LCD
400: Schließen Sie das 15-pin mini D-SUB Signalkabel
an der Geräterückseite Ihres Monitors an.
LCD
2000: Die BNC-Kabel sind durch die Farben rot, grün
und blau gekennzeichnet und müssen wie folgt an die
BNC-Anschlüsse des LCD-Monitors auf der Geräterückseite
angeschlossen werden: Das rote Kabel an den BNC-Anschluß
mit der Bezeichnung R. Das grüne Kabel an den
BNC-Anschluß mit der Bezeichnung G/Sync. Das blaue
Kabel an den BNC-Anschluß mit der Bezeichnung B. Sollten
Sie einen vierten haben, schließen Sie das Kabel an den
BNC-Anschluß mit der Bezeichnung H/CS an. Sollten Sie
Page 31

Installation D - 7
einen fünften BNC-Anschluß haben, schließen Sie das Kabel
an den BNC-Anschluß mit der Bezeichnung VS
(VerticalSync) an.
Achtung: Falsch angeschlossene Signalkabel können zu Unregelmäßigkeiten beim Monitorbetrieb, einer schlechten Bildqualität bzw.
der Beschädigung des LCD Moduls führen und verkürzt somit die
Lebensdauer.
5. Verbinden Sie das mitgelieferte Netzkabel auf einer Seite mit
dem LCD Monitor und auf der anderen Seite mit einer
geerdeten Wandsteckdose.
6. Schalten Sie den Monitor und Computer ein.
7. Hiermit ist der Anschluß des Monitors abgeschlossen.
Sollten sich hierbei Probleme ergeben, so lesen Sie bitte den Abschnitt
„Hilfe bei Problemen“
Anschluß an Macintosh Computer
Der LCD400/LCD2000 Farbmonitor ist geeignet für den Anschluß an
Computer der Macintosh Familie.
Es gibt eine von zwei Möglichkeiten, Ihren NEC MultiSync
Farbmonitor an den Macintosh Computer anzuschließen:
Integrieten Grafikadapter
–
– NuBus-, PCI-, PDS-Grafikkarte
Beide Varianten haben eine Videoausgangsbuchse. Sollten Sie nicht
sicher sein, an welche Buchse der Monitor anzuschließen ist, so lesen
Sie dies im Benutzerhandbuch der Grafikkarte oder des Computer nach.
Verfahren Sie wie folgt, um Ihren Monitor an einen Macintosh
Computer anzuschließen:
1. Schalten Sie die Stromversorgung von Computer und Monitor
aus.
2. Falls notwendig, installieren Sie die Grafikkarte nach den
Anweisungen im Benutzerhandbuch der Grafikkarte.
Page 32

D - 8 Installation
3. Schließen Sie den optional erhältlichen Macintosh-Adapter am
Videoausgang des Computers an und schließen Sie das 15-Pin
Mini D-SUB Ende des Signalkabels an den Macintosh-Adapter
an. Sichern Sie die Verbindung durch Festziehen der Schrauben.
4. LCD
400: Schließen Sie das freie 15-pin mini D-SUB Ende
des Signalkabels an den Signaleingang Ihres Monitors an der
Geräterückseite an.
LCD
2000: Die BNC-Kabel sind durch die Farben rot, grün und
blau gekennzeichnet und müssen wie folgt an die
BNC-Anschlüsse des LCD-Monitors auf der Geräterückseite
angeschlossen werden: Das rote Kabel an den BNC-Anschluß
mit der Bezeichnung R. Das grüne Kabel an den
BNC-Anschluß mit der Bezeichnung G/Sync. Das blaue Kabel
an den BNC-Anschluß mit der Bezeichnung B. Sollten Sie einen
vierten haben, schließen Sie das Kabel an den BNC-Anschluß
mit der Bezeichnung H/CS an. Sollten Sie einen fünften
BNC-Anschluß haben, schließen Sie das Kabel an den
BNC-Anschluß mit der Bezeichnung VS (VerticalSync) an.
Achtung: Falsch angeschlossene Signalkabel können zu Unregelmäßigkeiten beim Monitorbetrieb, einer schlechten Bildqualität bzw. der
Beschädigung des LCD Moduls führen und verkürzt somit die Lebensdauer.
5. Verbinden Sie das mitgelieferte Netzkabel auf einer Seite mit
dem LCD Monitor und auf der anderen Seite mit einer
geerdeten Wandsteckdose.
6. Schalten Sie den Monitor und Computer ein.
7. Hiermit ist der Anschluß des Monitors abgeschlossen.
Sollten sich hierbei Probleme ergeben, so lesen Sie bitte den Abschnitt
„Hilfe bei Problemen“.
Informationen über den Mac-Adapter können Sie über Ihren
NEC-Fachhändler beziehen.
Benutzer eines Power Macintosh 6100/60 oder 66 benötigen zum
Anschluß des Monitors das mit dem Computer gelieferte Kabel HDI-45
und Powerbook-Benutzer benötigen das Kabel VID-14 zusätzlich zum
optional erhältlichen Macintosh Adapter.
Page 33
Bedienung D - 9
Bedienung
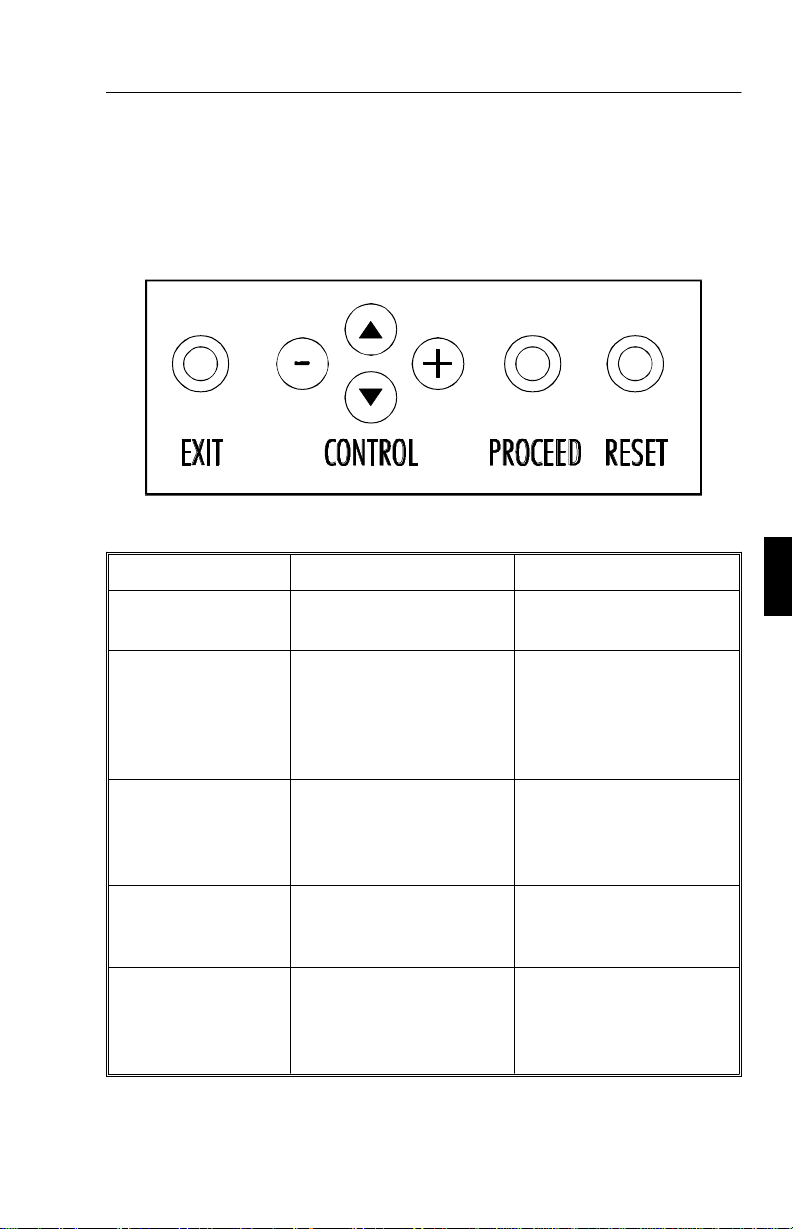
OSM Bedienelemente
Die OSM Bedienelemente befinden sich vorne am Monitor und geben
Ihnen einen Überblick über folgende Funktionen:
Bedienelemente Hauptmenü Untermenü
EXIT Beendet das OSM-Menü. Verzweigt zum OSM
Hauptmenü.
CONTROL ▲/▼ Verschiebt den hervor-
gehobenen Bereich nach
oben oder unten, um einen
Menüpunkt auszuwählen
CONTROL
PROCEED Die Taste PROCEED
RESET: setzt die
aktuellen Parameter
auf die Werkseinstellung zurück.
-/+ Hat keine Funktion Erhöht oder verringert den
dient der Auswahl eines
markierten Menüpunktes.
Setzt alle Parameter des
aktivierten Menüpunktes
auf die Werkseinstellung
zurück.
Verschiebt den hervorgehobenen Bereich nach
oben oder unten, um einen
Menüpunkt auszuwählen
Wert des markierten Parameters durch Verschieben
des Bildlauffeldes in die +
oder - Richtung .
Verzweigt in das
markierte Untermenü.
Setzt den aktuellen
Paramater auf die
Werkseinstellung zurück.
HINWEIS: Wird die Reset Taste gedrückt, so erscheint ein Fenster mit
einer Warnung, die darauf hinweist, daß Sie den aktuellen Menüpunkt
auf die Werkseinstellung zurücksetzen können
Page 34

D - 10 Bedienung
Helligkeits- und Kontrasteinstellung
Helligkeit: Erlaubt die Einstellung der Bildhelligkeit in Abhängigkeit
vom Bildschirmhintergrung.
Kontrast: Ändert die Helligkeit des Bildinhaltes im Verhältnis zum
Bildhintergrund.
Automatische Anpassung Kontrast: Korrigiert die Bilddarstellung,
wenn Signalquelle nicht dem Standard entspricht.
Automatische Bildeinstellung
Stellt die Bildgröße und Bildlage automatisch ein.
Bildlage Menü
Steuert die horizontale und vertikale Bildlage der LCD-Anzeige.
Automatische Anpassung Position: Positioniert automatisch das Bild
horizontal und vertikal innerhalb der Anzeigefläche des LCDs.
Bildeinstellung
Bildpunkte:
Stabilität: dient als Feinjustierung, um die Bildschärfe, Reinheit und
Stabilität zu verbessern.
Hinweis: Die Fein-Regelung für die Bildanpassung muß angewandt
werden, um die Einstellung Ihres MultiSync LCD
vervollständigen.
Automatische Bildanpassung grob/fein:
Monitor) justiert automatisch die grobe oder feine Bildanpassung.
Automatische grobe Bildanpassung: (nur MultiSync LCD200
Monitor) justiert automatisch die grobe Bildanpassung.
macht das Bild schmaler oder breiter
(nur MultiSync LCD
2000 zu
400
ColorControl Menü
Das ColorControl Menü erlaubt die Auswahl zwischen 5 verschiedenen
Farbeinstellungen, die individuell geändert werden können. Jede
Einstellung ist werkseitig auf eine definierte Farbtemperatur justiert, die
in Kelvin angezeigt wird. Wird diese Vorgabe individuell geändert, so
wechselt die Anzeige Kelvin in Custom. Farbintensität (Rot, Grün,
Blau): Erhöht oder verringert den Anteil der jeweiligen Farbe. Die
Farbanteile können Sie erhöhen oder verringern in dem Sie die die
Page 35

Bedienung D - 11
Laufleiste über die Funktionstaste -/+ in die gewünschte Richtung
bewegen. Die Änderung der Farbe wird auf dem Bildschirm präsentiert.
OSM-Position
Über die OSM-Position haben sie die Möglichkeit, den Erscheinungsort
des OSM-Menüs entsprechend nach links, rechts, oben oder unten zu
verschieben.
OSM-Anzeigedauer
Während der Bearbeitung des OSM-Menüs, schaltet sich die
OSM-Anzeige nicht ab. Im Untermenü „OSM-Anzeigedauer“ können
Sie die Verweildauer der OSM-Anzeige auf dem Bildschirm, die hier in
Sekunden definiert ist, einstellen. Sie haben eine Auswahl zwischen 10,
20, 30, 60 und 120 Sekunden.
OSM-Abschaltung
Schaltet den Zugriff auf die Einstellmöglichkeiten des OSM ab. Wird
auf das OSM-Menü zugegriffen, so erscheint eine Bildschirmmeldung,
daß das OSM abgeschaltet wird. Soll der Zugriff auf das OSM dauerhaft
abgeschaltet werden, so drücken Sie die PROCEED-Taste, halten diese
gedrückt und drücken dann die Taste ▲. Um den Zugriff auf das OSM
erneut zu ermöglichen, drücken Sie die gleiche Tastenkombination wie
beim Abschalten.
Grafik Modus
Dieser OSM-Menüpunkt liefert Informationen über den aktuell
benutzten Grafikmodus mit den wichtigsten technische Daten wie
Bildwiederholfrequenz und das vorgebene Timing.
HINWEIS: Der Grafik Modus sollte nur aufgerufen werden, wenn der
aktuelle Bildmodus nicht korrekt wiedergegeben wird. Sie können die
eingestellte Auflösung im Untermenü des Grafik Modus koregieren.
Sprachauswahl
Dieser OSM-Menüpunkt erlaubt die Auswahl zwischen 6 verschiedenen
Sprachen.
Page 36

D - 12 Technische Daten
Werkseinstellung
In diesem Menüpunkt werden alle Einstellungen auf die
Werkseinstellungen zurückgesetzt, indem Sie die
RESET
-Taste für ein
paar Sekunden gedrückt halten. Um einzelne Einstellungen
zurückzusetzen, makieren Sie den hervorgehobenen Bereich und
drücken dann die RESET-Taste.
Technische Daten
MultiSync LCD400
Anzeige 35,8 cm (14,1 Zoll) sichtbarer Bereich; Aktiv Matrix
Dünnfilm Transistor (TFT) LCD-Anzeige; 0,28 mm Dot
Pitch, max. Auflösung 1024 x 768; XtraView™
Technologie; 180cd/m² Leuchtstärke; Kontrast 150:1
Eingangssignal Video Analog RGB 0,7 Vp-p/75 Ohm
positiv
Sync Separate Sync. TTL Pegel
Horizontal Sync. Positiv/Negativ
Vertikal Sync. Positiv/Negativ
Composite Sync. TTL-Pegel
Positiv/Negativ
Sync. on Green video 0,7 Vp-p
Positiv und Sync. 0,3 Vp-p Negativ
Darstellbare
Farben
Synchronisation Horizontal 24,8 kHz to 60,0 kHz (automatisch)
Unterstützte
Formate
Analoges
Eingangssignal
Vertical 56,2 Hz to 85,1 Hz (automatisch)
unbegrenzte Anzahl von Farben
(abhängig von der benutzten
Grafikkarte)
720 x 400: VGA Text*
640 x 480: 60 Hz bis 85 Hz*
800 x 600: 56 Hz bis 85 Hz*
832 x 624: 75 Hz*
1024 x 768: 60 Hz bis 75 Hz**
Page 37

Technische Daten D - 13
Sichtbarer Bereich Horizontal 286 mm
Vertikal 214 mm
Nennspannung AC 100-120 V/ 220-240 V 50/60 Hz
Stromaufnahme 0,9 A bei 100-120 V /
0,5 A bei 220-240 V
Abmessungen B x H x T 357 x 362 x 168 mm
Gewicht 5,2 kg
Betriebs-
bedingungen
Temperatur 5° C bis + 35° C
Luftfeuchtigkeit 30% bis 80%
Lagerbedingungen Temperatur -10° C bis + 60° C
Luftfeuchigkeit 10% bis 85%
* Interpolierte Auflösungen: Werden Auflösungen benutzt, die niedriger sind als die
physikalische Auflösung des LCD Moduls, kann Text unscharf und Linien zu fett
angezeigt werden. Bei allen aktuellen LCD Monitoren ist es normal und üblich, daß ein
Dot einem Punkt (Pixel) entspricht, so daß bei kleineren Auflösungen die Full Screen
angezeigt werden die Auflösung interpoliert werden muß. Entspricht die interpolierte
Auflösung nicht exakt einem Vielfachen der physikalischen Auflösung, können bei der
mathematischen Interpolationen gleichen Linien dicker als andere erscheinen.
** Von NEC empfohlene Auflösung bei 60 Hz für ergomonisches Arbeiten.
*** Der aktive sichtbare Bereich ist abhängig vom Eingangssignal.
Technische Änderungen vorbehalten
Page 38

D - 14 Technische Daten
MultiSync LCD2000
Anzeige 51,1 cm (20,1 Zoll) sichtbarer Bereich; Aktiv Matrix
Dünnfilm Transistor (TFT) LCD-Anzeige; 0,31 mm Dot
Pitch, max. Auflösung 1280 x 1024; XtraView™
Technologie; 150cd/m² Leuchtstärke; Kontrast 150:1
Eingangssignal Video Analog RGB 0,7 Vp-p/75 Ohm
positiv
Sync Separate Sync. TTL Pegel
Horizontal Sync. Positiv/Negativ
Vertikal Sync. Positiv/Negativ
Composite Sync. TTL-Pegel
Positiv/Negativ
Sync. on Green video 0,7 Vp-p
Positiv und Sync. 0,3 Vp-p Negativ
Darstellbare
Farben
Synchronisation Horizontal 24,0 kHz to 80,0 kHz (automatisch)
Unterstützte
Formate
Sichtbarer Bereich Horizontal 399 mm
Nennspannung AC 100-120 V/ 220-240 V 50/60 Hz
Stromaufnahme 1,0 A bei 100-120 V /
Abmessungen B x H x T 500 x 483 x 220 mm
Gewicht 10,0 kg
Analoges
Eingangssignal
Vertical 56,0 Hz to 76,0 Hz (automatisch)
Vertikal 319 mm
unbegrenzte Anzahl von Farben
(abhängig von der benutzten
Grafikkarte)
720 x 400: VGA Text*
640 x 480, 60 Hz bis 76 Hz
800 x 600, 56 Hz bis 76 Hz*
832 x 624, 75 Hz*
1024 x 768, 60 Hz bis 76 Hz*
1280 x 960, 60 Hz bis 76 Hz*
1280 x 1024, 60 Hz bis 76 Hz**
0,5 A bei 220-240 V
Page 39

Hilfe bei Problemen D - 15
Betriebsbedingungen
Temperatur 5° C bis + 30° C
Luftfeuchtigkeit 30% bis 80%
Lagerbedingungen Temperatur -10° C bis + 60° C
Luftfeuchigkeit 10% bis 85%
* Interpolierte Auflösungen: Werden Auflösungen benutzt, die niedriger sind als die
physikalische Auflösung des LCD Moduls, kann Text unscharf und Linien zu fett
angezeigt werden. Bei allen aktuellen LCD Monitoren ist es normal und üblich, daß ein
Dot einem Punkt (Pixel) entspricht, so daß bei kleineren Auflösungen die Full Screen
angezeigt werden die Auflösung interpoliert werden muß. Entspricht die interpolierte
Auflösung nicht exakt einem Vielfachen der physikalischen Auflösung, können bei der
mathematischen Interpolationen gleichen Linien dicker als andere erscheinen.
** Von NEC empfohlene Auflösung bei 60 Hz für ergomonisches Arbeiten.
*** Der aktive sichtbare Bereich ist abhängig vom Eingangssignal.
Technische Änderungen vorbehalten
Hilfe bei Problemen
Problemstellung Notwendige Überprüfungen
Kein Bild - Die Signalkabel muß fest mit dem Ausgang der
Grafikkarte verbunden sein.
- Überprüfen Sie den festen Sitz der Grafikkarte.
- Die Netzschalter von Monitor und Computer müssen
in Stellung ON stehen.
- Prüfen Sie, ob der ausgewählte Grafikmodus mit der
Grafikkarte oder dem angewandten System
übereinstimmt. (Das Kapitel können Sie auch im
Benutzerhandbuch der Grafikkarte oder des Computer
nachlesen).
Prüfen Sie, ob die Signale der Grafikkarte vom
Monitor verarbeitet werden können.
- Prüfen Sie den Anschlußstecker auf verbogene
Steckkontakte.
Page 40

D - 16 Hilfe bei Problemen
Problemstellung Notwendige Überprüfungen
Das Bild ist unstabil,
unscharf oder
scheint zu
schwimmen
Die Netz LED am
Monitor leuchtet
nicht (die Farben
Grün und Amber
sind nicht
erkennbar)
Das Bild hat einen
Grünstich
Das Bild ist nicht
mittig
Das Bild wird nicht
in richtiger Größe
dargestellt
- Das Signalkabel muß fest mit dem Ausgang des
Computers verbunden sein.
- Nutzen Sie den OSM Menüpunkt
regeln Sie den Fine Regler bis das Bild scharf und klar
ist. Nach einem Wechsel des Grafikmodus muß diese
Einstellung eventuell wiederholt werden.
- Prüfen Sie, ob der Grafikmodus der Grafikkarte vom
Monitor verarbeitet werden kann.
- Bringen Sie den Netzschalter des Monitors in die
ON-Position.
Öffnen Sie den OSM-Menüpunkt Grafikmodus und
drücken Sie die Taste +.
Nutzen Sie den OSM Regler zur Einstellung von
vertikaler - und horizontaler Bildgröße und -lage.
- Nutzen Sie den OSM Menüpunkt Bildeinstellung
und regeln Sie den Regler bis die die richtige
Bildgröße dargestellt wird.
- Prüfen Sie, ob der Grafikkmodus der Grafikkarte
vom Monitor verarbeitet werden kann. (Das Kapitel
können Sie auch im Benutzerhandbuch der
Grafikkarte oder des Computer nachlesen).
Image Adjust
und
Die gewählte
Auflösung wird
nicht
ordnungsgemäß
wiedergegeben
Nutzen Sie den OSM-Menüpunkt Grafikmodus und
gehen Sie dort ins Untermenü Moduswechsel. Stimmt
die Einstellung nicht mit der vom Computer
bereitgestellten Auflösung überein, so ändern Sie die
Einstellung entsprechend.
Page 41

Français
Page 42

Introduction au moniteur NEC MultiSync LCD400/LCD2000 F - 1
Introduction au moniteur NEC MultiSync LCD400/-
2000
LCD
Toutes nos félicitations pour votre acquisition du moniteur “true color”
NEC MultiSync LCD
Avantage du mode analogique
Ce mode permet d’afficher un nombre illimité de couleurs dans un
spectre continu, procurant ainsi une représentation plus réaliste des
couleurs. La technologie LCD à haut contraste du moniteur rehausse
l’éclat des couleurs et améliore la netteté sans occasionner de
déformation géométrique.
Compatibilité étendue
Du fait que le moniteur MultiSync LCD est intégralement analogique, il
n’a besoin d’aucune carte spécifique d’affichage ou d’interface avec
conversion analogique/digital, mais autorise une entrée RVB directe.
400/LCD2000 !
Encombrement réduit
Constitue la solution idéale pour les environnements qui nécessitent une
image de haute qualité et un encombrement et un poids limités.
L’encombrement réduit et le faible poids du moniteur permettent de le
déplacer ou de le transporter rapidement d’un point à un autre.
Système de contrôle des couleurs
Vous permet de régler les couleurs sur l’écran et de définir la précision
des couleurs de votre moniteur suivant toute une gamme de standards.
Réglages OSM (On-Screen Manager)
Vous permettent de régler rapidement et facilement tous les éléments de
votre image écran à l’aide de menus simples à utiliser.
Page 43

F - 2 Introduction au moniteur NEC MultiSync LCD400/LCD2000
Caractéristiques ErgoDesign
L’ergonomie est poussée pour améliorer l’environnement de travail,
protéger la santé de l’utilisateur et induire des économies. On peut citer
à titre d’exemple les réglages OSM pour un réglage rapide et facile de
l’image, l’embase inclinable et pivotante pour obtenir un angle de vision
préférentiel, le faible encombrement et la conformité aux directives
MPRII pour une émissivité plus faible.
Plug and Play (MultiSync LCD400 seulement)
La solution Microsoft avec le système d’exploitation Windows 95
facilite la configuration et l’installation en permettant au moniteur
d’envoyer directement ses caractéristiques (comme la taille de l’écran et
les résolutions supportées) à votre ordinateur, optimisant ainsi
automatiquement les performances de l’affichage.
Système IPM (Intelligent Power Manager)
Fournit des méthodes innovantes d’économie de courant qui permettent
au moniteur de passer dans un mode à faible consommation électrique
lorsqu’il est sous tension sans être utilisé, ce qui économise les deux
tiers du coût de la consommation électrique du moniteur, réduit les
émissions et diminue le coût de la climatisation du local.
Technologie multifréquences
Règle automatiquement le moniteur sur la fréquence de balayage de la
carte vidéo, ce qui procure un affichage à la résolution requise.
Caractéristique FullScan
Vous permet d’utiliser toute la surface de l’écran avec la plupart des
résolutions, ce qui agrandit l’image de façon significative.
Page 44

Contenu de la boîte F - 3
Contenu de la boîte
Le contenu de la boîte de votre nouveau moniteur MultiSync LCD doit
être le suivant :
– NEC MultiSync LCD400 (modèle LA-1421JMW)/
NEC MultiSync LCD
2000 (modèle LA-2031JMW),
– Cordon secteur,
– Câble vidéo - connecteurs D-SUB 15 broches/mini D-SUB 15
broches (LCD
Câble vidéo - connecteurs mini D-SUB 15 broches / BNC
(LCD
2000),
400)/
– Manuel de l’utilisateur.
Utilisez la boîte et les matériaux d’emballage originaux pour transporter
ou expédier ce matériel.
Page 45

F - 4 Utilisation recommandée
Utilisation recommandée
Pour des performances optimales, prenez les éléments suivants en
considération pour installer et utiliser le moniteur couleur MultiSync
LCD
400/LCD2000 :
• La position optimale du moniteur est obtenue en l’orientant
dans la direction opposée à celle des rayons du soleil.
• Une ventilation adéquate est nécessaire autour du moniteur
pour pouvoir évacuer convenablement la chaleur.
• Ne placez aucun objet lourd sur le cordon secteur. Un cordon
endommagé peut provoquer une électrocution ou un incendie.
• Utilisez le moniteur dans un endroit propre et sec.
• Manipulez le moniteur avec précaution pendant le transport. à
cette fin, conservez les matériaux d’emballage.
• Saisissez le cordon secteur par sa fiche pour le débrancher de
la prise de courant. Le moniteur doit être installé près d’une
prise de courant facilement accessible.
• Nettoyez la surface du moniteur LCD avec un chiffon non
pelucheux et non abrasif. N’utilisez pas de liquide de
nettoyage, de produit nettoyant pour vitres ou de papier de
soie.
• Pour des performances optimales, laissez préchauffer
l’appareil pendant 20 minutes.
• Évitez d’afficher des motifs fixes pendant de longues
périodes pour éviter tout effet de rémanence à l’écran.
• Évitez d’exercer toute pression sur la surface du moniteur
LCD.
Page 46

Utilisation recommandée F - 5
UN POSITIONNEMENT ET UN RÉGLAGE CORRECTS DU
MONITEUR PEUVENT RÉDUIRE LA FATIGUE OCULAIRE ET
CELLE AFFECTANT LES ÉPAULES ET LE COU. CONTRÔLEZ
LES ÉLÉMENTS SUIVANTS LORSQUE VOUS POSITIONNEZ LE
MONITEUR :
• Réglez la hauteur du moniteur de façon à ce que le haut de
l’écran soit situé à la hauteur des yeux ou juste en dessous. La
direction de votre regard doit être légèrement inclinée vers le
bas lorsque vous regardez le centre de l’écran.
• Votre moniteur doit être placé à une distance comprise entre
40 et 70 cm de vos yeux. La distance optimale est 53 cm pour
le MultiSync LCD
400 et 61 cm pour le MultiSync LCD2000.
• Reposez vos yeux régulièrement en fixant un objet situé à 6
m de distance au moins. Clignez souvent des yeux.
• Orientez le moniteur suivant une direction perpendiculaire
aux fenêtres ou aux autres sources lumineuses pour minimiser
les éblouissements et les reflets. Réglez l’angle de
basculement du moniteur de façon à éviter que les lumières
du plafond ne se reflètent sur l’écran.
• Utilisez un filtre anti-reflets si les lumières réfléchies vous
empêchent de voir correctement votre écran.
• Réglez la luminosité et le contraste du moniteur pour
améliorer la lisibilité.
• Utilisez un accessoire porte-document placé près de l’écran.
• Placez directement en face de vous ce que vous utilisez le
plus (l’écran ou le document de réfé-rence), pour minimiser
les rotations de la tête pendant la frappe.
• Faites contrôler régulièrement votre vue.
Page 47

F - 6 Installation
Installation
Connexion à un ordinateur de type PC
Le moniteur couleur MultiSync LCD400/LCD2000 complète les
ordinateurs compatibles PC. Votre système a l’une des deux
configurations suivantes :
– le contrôleur vidéo est intégré à la carte mère de l’ordinateur,
– le contrôleur vidéo se présente sous la forme d’une carte
d’affichage (appelée quelquefois carte graphique ou adaptateur
vidéo).
Les deux configurations comportent un connecteur vidéo (ou un “CRT
PORT” sur les ordinateurs portables). Si vous n’êtes pas certain de
reconnaître le connecteur vidéo, référez-vous au manuel de votre
ordinateur ou de votre carte graphique.
Pour relier le moniteur à votre système, suivez les instructions
suivantes:
1. Éteignez le moniteur et l’ordinateur.
2. Si nécessaire, installez la carte vidéo. Pour plus de détails sur
cette installation, référez-vous au manuel de la carte.
3. Insérez la fiche mini D-SUB 15 broches du câble vidéo
approprié dans le connecteur de la carte vidéo de votre
ordinateur. Serrez toutes les vis.
4. Pour le LCD
câble vidéo dans le connecteur approprié à l’arrière du
moniteur.
Pour le LCD
appropriés situés à l’arrière du moniteur. Branchez le câble
BNC rouge sur le connecteur BNC du moniteur portant la
mention R, le câble BNC vert sur le connecteur BNC du
moniteur portant la mention G/Sync, le câble BNC bleu sur le
connecteur BNC du moniteur portant la mention B. S’il y a un
quatrième connecteur BNC (synchro composite), branchez-le
400 : Insérez la fiche mini D-SUB 15 broches du
2000 : Reliez le câble BNC aux connecteurs
Page 48

Installation F - 7
sur le connecteur BNC du moniteur portant la mention H/CS.
S’il y a un cinquième connecteur BNC (synchro verticale),
branchez-le au connecteur BNC du moniteur portant la
mention VS.
Nota :
Des branchements de câbles incorrects peuvent occasionner un
fonctionnement irrégulier, dégrader la qualité d’affichage ou des
composants du module LCD et/ou abréger la durée de vie de ce dernier.
5. Connectez une extrémité du cordon secteur au moniteur
MultiSync LCD et l’autre extrémité à la prise de courant.
6. Mettez le moniteur et l’ordinateur sous tension.
7. Ceci termine l’installation.
En cas de problème, veuillez vous référer au chapitre Dépannage de ce
manuel.
Connexion à votre ordinateur (Macintosh)
Équipé de l’adaptateur de câble pour Macintosh, le moniteur couleur
MultiSync LCD
ordinateurs Macintosh.
Votre moniteur couleur MultiSync LCD
votre Macintosh selon l’une des deux façons suivantes :
port vidéo intégré à la carte mère,
–
– carte graphique Nubus/PCI/PDS.
Les deux configurations peuvent avoir le même type de connecteur
vidéo. Si vous n’êtes pas certain de reconnaître le connecteur vidéo,
référez-vous au manuel de votre ordinateur ou de votre carte graphique.
400/LCD2000 est compatible avec la série des
400
/LCD
se connecte à
2000
Pour relier le moniteur à votre système, suivez les instructions
suivantes:
1. Éteignez le moniteur et le Macintosh..
2. Si nécessaire, installez la carte vidéo. Pour plus de détails sur
cette installation, référez-vous au manuel de la carte.
Page 49

F - 8 Installation
3. Connectez au Macintosh l’adaptateur de câble MultiSync
LCD
400 ou MultiSync LCD2000 pour Macintosh. Reliez la
fiche mini D-SUB 15 broches du câble vidéo approprié à
l’adaptateur de câble pour Macintosh. Serrez toutes les vis.
4. Pour le LCD
400 : Insérez la fiche mini D-SUB 15 broches du
câble vidéo dans le connecteur approprié à l’arrière du
moniteur.
Pour le LCD
2000 : Reliez le câble BNC aux connecteurs
appropriés situés à l’arrière du moniteur. Branchez le câble
BNC rouge sur le connecteur BNC du moniteur portant la
mention R, le câble BNC vert sur le connecteur BNC du
moniteur portant la mention
G/Sync
, le câble BNC bleu sur le
connecteur BNC du moniteur portant la mention B. S’il y a un
quatrième connecteur BNC (synchro composite), branchez-le
sur le connecteur BNC du moniteur portant la mention H/CS.
S’il y a un cinquième connecteur BNC (synchro verticale),
branchez-le au connecteur BNC du moniteur portant la
mention VS.
Nota : Des branchements de câbles incorrects peuvent occasionner un
fonctionnement irrégulier, dégrader la qualité d’affichage ou des
composants du module LCD et/ou abréger la durée de vie de ce dernier.
5. Connectez une extrémité du cordon secteur au moniteur
MultiSync LCD et l’autre extrémité à la prise de courant.
6. Mettez le moniteur et le Macintosh sous tension.
7. Ceci termine l’installation.
En cas de problème, veuillez vous référer au chapitre Dépannage de ce
manuel.
Pour avoir plus de détails sur l’adaptateur Mac, veuillez vous adresser à
votre revendeur local.
Pour connecter un moniteur MultiSync LCD, les utilisateurs de Power
Macintosh 6100/60 et 66 doivent utiliser l’adaptateur de câble Apple
HDI-45, et les utilisateurs de Powerbook doivent utiliser l’adaptateur de
câble Apple VID-14 en liaison avec l’adaptateur de câble MultiSync
pour Macintosh approprié.
Page 50
Boutons de réglage F - 9
Boutons de réglage
Réglages OSM
Les boutons de réglage OSM situés sur l’avant du moniteur procurent
les fonctions suivantes :
Bouton de réglage Menu principal Sous-menu
EXIT Quitte les réglages OSM. Revient au menu principal
des réglages OSM
CONTROL ▲/▼ Déplace la zone de
surbrillance vers le haut
ou le bas pour
sélectionner l’un des
réglages.
CONTROL -/+ Aucune fonction. Déplace la barre dans le
PROCEED Exécute le choix de menu
sélectionné (indiqué par la
zone en surbrillance)
RESET:
Réinitialisation aux
réglages d’usine.
Réinitialise tous les
réglages inclus dans la
zone en surbrillance du
menu.
Déplace la zone de
surbrillance vers le haut
ou le bas pour
sélectionner l’un des
réglages.
sens + ou - pour
augmenter ou diminuer la
valeur.
En mode Affichage,
active la caractéristique de
réglage automatique.
Réinitialise le réglage en
surbrillance.
NOTA : Lorsque l’on appuie sur RESET, une fenêtre d’alerte apparaît
pour permettre d’annuler la demande de réinitialisation.
Page 51

F - 10 Boutons de réglage
Luminosité et contraste
Brillance : Règle la luminosité de toute l’image et de l’arrière-plan.
Contraste :
Contraste Automatique: Corrige les paramètres images pour les
modes vidéo non standards.
Règle la luminosité de l’image par rapport à l’arrière-plan.
Réglage automatique
Permet un fonctionnement automatique des réglages “Position” et
“Réglage image”.
Position
Contrôle la position horizontale et verticale de l’image dans la zone
d’affichage du LCD.
Position Automatique: Corrige automatiquement la position
horizontale et verticale afin d’obtenir une image dans la zone
d’affichage du panneau LCD.
Réglage image
Grossier: On règle la dimension horizontale de l’image en augmentant
ou en diminuant la valeur Grossier.
Fin: On améliore la mise au point, la netteté et la stabilité de l’image en
augmentant ou en diminuant la valeur Fin.
NOTE:
configuration de votre moniteur NEC MultiSync LCD
Réglage Fin/Simple Auto: (MultiSync LCD
Automatiquement le réglage Fin ou Simple.
Réglage Simple Auto: (MultiSync LCD
automatiquement le Réglage Simple.
La fonction Réglage fin doit-être utilisé pour finaliser la
.
2000
400 uniquement). Ajuste
2000 uniquement). Ajuste
Système de contrôle des couleurs
Les réglages de couleurs prédéfinis 1 à 5 permettent de sélectionner le
réglage de couleur voulu. Chaque réglage de couleur est réglé en usine sur
la température de couleur Kelvin indiquée en degrés. Si un réglage est
modifié, son nom passe de “degré Kelvin” à “Custom” (personnalisé).
Gain de couleur (Rouge, Vert, Bleu) : Augmente ou diminue le niveau du
canon rouge, vert ou bleu, suivant celui qui a été sélectionné. Le
Page 52

Boutons de réglage F - 11
changement de couleur apparaît à l’écran et le sens (augmentation ou
diminution) est indiqué par les barres de couleur.
Position OSM
Vous pouvez choisir la position de l’écran à laquelle l’image des
réglages OSM doit apparaître. En sélectionnant Position OSM, vous
pouvez régler manuellement la position du menu des réglages OSM vers
la gauche, la droite, le haut ou le bas.
Délai d’extinction OSM
Le menu des réglages OSM reste affiché aussi longtemps que vous
l’utilisez. Dans le sous-menu “Délai d’extinction OSM”, vous pouvez
choisir le délai qui s’écoule entre l’appui sur un bouton et l’extinction
automatique du menu des réglages OSM. Les délais prédéfinis sont 10,
20, 30, 60 and 120 secondes.
Verrouillage OSM
Ce réglage verrouille totalement l’accès à toutes les fonctions de réglage
OSM. Toute tentative d’activation des réglages OSM lorsque le mode
verrouillage OSM est activé se soldera par l’affichage d’un message
indiquant que les réglages OSM sont verrouillés. Pour activer la
fonction Verrouillage OSM, appuyez simultanément sur PROCEED, et
sur ▲. Procédez de même pour désactiver cette fonction.
Mode d’affichage
Cette option donne des informations sur la résolution courante de
l’affichage ainsi que des données techniques incluant la synchronisation
prédéfinie utilisée et les fréquences horizontale et verticale.
NOTA : L’option Mode d’affichage est à utiliser uniquement si une
résolution n’est pas reconnue par le moniteur. L’utilisateur peut passer à
la résolution de son choix en entrant dans le sous-menu Mode
d’affichage et en sélectionnant l’option correspondante.
Langue
Les menus de réglage OSM sont disponibles en six langues.
Page 53

F - 12 Spécifications
Réglage d’usine
Cette option vous permet de réinitialiser tous les réglages OSM à leur
valeur d’usine. Pour que la demande soit prise en compte, il est
nécessaire de maintenir l’appui sur le bouton RESET pendant plusieurs
secondes. On peut réinitialiser un réglage individuel en le sélectionnant
et en appuyant sur le bouton RESET.
Spécifications
MultiSync LCD400
Affichage: Dimensions de l’image affichable : 35,8 cm (14,1");
résolution vraie 1024 x 768 (pixels) ; matrice active ;
transistor à film fin (TFT) ; affichage à cristaux liquides
(LCD) ; pas 0,28 mm ; technologie XtraView™;
luminance blanche 180 cd/m² ; taux de contraste
caractéristique 150:1
Signal d’entrée Vidéo Analogique 0,7 Vp-p 75 Ω
Nombre de
couleurs
Plage de
synchronisation
Résolutions
supportées
Synchro Synchro séparée niveau TTL
Synchro horizontale positive/négative
Synchro verticale positive/négative
Synchro composite (positive/
négative) (niveau TTL)
Synchro sur le vert (positive) 0,7
Vp-p et synchro négative 0,3 Vp-p
Entrée analogique : Nombre de couleurs illimité
(dépend de la carte graphique)
Horizontale 24,8 kHz à 60,0 kHz (automatique)
Verticale 56,2 Hz à 85,1 Hz (automatique)
720 x 400 : texte VGA*,
640 x 480 de 60 Hz à 85 Hz*,
800 x 600 de 56 Hz à 85 Hz*,
832 x 624 à 75 Hz*,
1024 x 768 de 60 Hz à 75 Hz**
Page 54

Spécifications F - 13
Zone d’affichage
active***
Horizontalement 286 mm
Verticalement 214 mm
Alimentation AC 100-120 V/ 220-240 V 50/60 Hz
Intensité 0,9 A à 100-120 V /
0,5 A à 220-240 V
Dimensions L x H x P 357 x 362 x 168 mm
Poids 5,2 kg
Environnement
de travail
Environnement
de stockage
* Résolutions interpolées : Quand les résolutions affichées sont inférieures au nombre
de pixels du module LCD, le texte peut apparaître craquelé et les lignes peuvent paraître
plus épaisses. Ceci est normal et nécessaire pour toutes les technologies d’affichage sur
panneaux plats pour lesquels chaque point de l’écran occupe réellement un pixel. Pour
agrandir la résolution à celle du plein écran, une interpolation mathématique de celle-ci
est nécessaire. Quand cette résolution interpolée ne correspond pas exactement à un
multiple entier de la résolution d’origine, la nécessaire interpolation mathématique peut
faire que certaines lignes apparaissent plus épaisses que d’autres.
** NEC recommande les résolutions à 60 Hz pour un affichage optimal.
*** La zone d’affichage active dépend de la fréquence de synchronisation du signal.
Température 5° C à + 35° C
Humidité 30 % à 80 %
Température -10° C à + 60° C
Humidité 10 % à 85 %
Les spécifications techniques sont susceptibles d’être modifiées sans
préavis.
Page 55

F - 14 Spécifications
MultiSync LCD2000
Affichage : Dimensions de l’image affichable : 51,1 cm (20,1");
résolution vraie 1280 x 1024 (pixels) ; matrice active ;
transistor à film fin (TFT) ; affichage à cristaux liquides
(LCD) ; pas 0,31 mm ; technologie XtraView™;
luminance blanche 150 cd/m² ; taux de contraste
caractéristique 150:1
Signal d’entrée Vidéo Analogique 0,7 Vp-p 75
Synchro Synchro séparée niveau TTL
Synchro horizontale positive/négative
Synchro verticale positive/négative
Synchro composite (positive/
négative) (niveau TTL)
Synchro sur le vert (positive) 0,7
Vp-p et synchro négative 0,3 Vp-p
Nombre de
couleurs
Plage de
synchronisation
Résolutions
supportées
Zone d’affichage
active***
Entrée analogique : Nombre de couleurs illimité
(dépend de la carte graphique)
Horizontale 24,0 kHz à 80,0 kHz (automatique)
Verticale 56,0 Hz à 76,0 Hz (automatique)
720 x 400 : texte VGA*,
640 x 480 de 60 Hz à 76 Hz,
800 x 600 de 56 Hz à 76 Hz*,
832 x 624 à 75 Hz*,
1024 x 768 de 60 Hz à 76 Hz*,
1280 x 960 de 60 Hz à 76 Hz,
1280 x 1024 de 60 Hz à 76 Hz**
Horizontalement 399 mm
Verticalement 319 mm
Ω
Alimentation AC 100-120 V/ 220-240 V 50/60 Hz
Intensité 1,0 A à 100-120 V /
0,5 A à 220-240 V
Dimensions L x H x P 500 x 483 x 220 mm
Poids 10,0 kg
Page 56

Dépannage/Support F - 15
Environnement
de travail
Environnement
de stockage
* Résolutions interpolées : Quand les résolutions affichées sont inférieures au nombre
de pixels du module LCD, le texte peut apparaître craquelé et les lignes peuvent paraître
plus épaisses. Ceci est normal et nécessaire pour toutes les technologies d’affichage sur
panneaux plats pour lesquels chaque point de l’écran occupe réellement un pixel. Pour
agrandir la résolution à celle du plein écran, une interpolation mathématique de celle-ci
est nécessaire. Quand cette résolution interpolée ne correspond pas exactement à un
multiple entier de la résolution d’origine, la nécessaire interpolation mathématique peut
faire que certaines lignes apparaissent plus épaisses que d’autres.
** NEC recommande les résolutions à 60 Hz pour un affichage optimal.
*** La zone d’affichage active dépend de la fréquence de synchronisation du signal.
Température 5° C à + 30° C
Humidité 30 % à 80 %
Température -10° C à + 60° C
Humidité 10 % à 85 %
Les spécifications techniques sont susceptibles d’être modifiées sans
préavis.
Dépannage/Support
Problème Vérifier ces éléments
Pas d’image - Le câble vidéo doit être bien connecté à la carte
graphique et à l’ordinateur.
- La carte graphique doit être insérée à fond dans son
logement.
- Les interrupteurs d’alimentation du moniteur et de
l’ordinateur doivent être sur la position “Marche”.
- Vérifiez qu’un mode d’affichage supporté a été
sélectionné pour la carte d’affichage ou le système
utilisé (veuillez consulter le manuel de votre carte
graphique ou de votre système pour modifier le mode
graphique).
- Vérifier la compatibilité et les réglages recommandés
de votre moniteur et de votre carte graphique.
- Vérifiez que le connecteur du câble vidéo ne
comporte aucune broche tordue ou rentrée.
Page 57

F - 16 Dépannage/Support
Problème Vérifier ces éléments
L’image est instable,
n’est pas nette ou
bouge
Voyant du moniteur
non éclairé (on ne
voit aucune couleur
verte ou ambre)
L’image affichée
présente une
dominante verte
L’image n’est pas
centrée
L’image n’a pas la
bonne taille
- Le câble vidéo doit être bien connecté à la carte
graphique et à l’ordinateur.
- Utilisez les boutons
mettre au point et régler l’affichage en augmentant ou
en diminuant la valeur “Fin”. Lorsque l’affichage est
réglé, le Réglage d’image OSM peut nécessiter un
réajustement.
- Vérifier la compatibilité et les réglages recommandés
de votre moniteur et de votre carte graphique.
- L’interrupteur d’alimentation doit être sur la position
“Marche” et le cordon secteur doit être branché.
Ouvrez le menu “OSM”, mode d’affichage et
appuyez sur la touche de contrôle +.
Utilisez les réglages Position OSM pour régler le
centrage.
- Utilisez les boutons Réglage d’image OSM pour
augmenter ou diminuer la valeur “Grossier”
- Vérifiez qu’un mode d’affichage supporté a été
sélectionné pour la carte d’affichage ou le système
utilisé (veuillez consulter le manuel de votre carte
graphique ou de votre système pour modifier le mode
graphique).
Réglage d’image OSM
pour
La résolution choisie
ne s’affiche pas
correctement
Utilisez le mode d’affichage OSM pour entrer dans le
sous-menu Changement de mode et confirmer que la
bonne résolution a bien été sélectionnée. Sinon,
choisissez l’option correspondante.
Page 58

Español
Page 59

Introducción al NEC MultiSync LCD400/LCD2000 S - 1
Introducción al NEC MultiSync LCD400/LCD2000
Le felicitamos por la adquisición de su monitor color NEC MultiSync
LCD
400/LCD2000.
Ventaja Analógica
Capaz de visualizar un número ilimitado de colores en un espectro
contínuo, proporcionando una representación de color real. El alto
contraste de la pantalla LCD mejora el color y el foco sin producir
distorsiones geométricas.
Más amplia compatibilidad
Debido a que el monitor LCD acepta señal analógica, no requiere
tarjetas gráficas o interfaces especiales, sino que acepta la entrada RGB
directamente.
Dimensiones reducidas
Proporciona una solución ideal para entornos que requieren una calidad
de imagen óptima con tamaño y peso limitados. Sus pequeñas
dimensiones y bajo peso, permiten transportarlo fácilmente de un puesto
a otro.
Control de Color
Permite ajustar los colores de la pantalla, ajustando los colores de su
monitor a una amplia variedad de estándares.
Controles OSM (On Screen Manager)
Los menús en pantalla le permiten ajustar los parámetros de la pantalla
de una manera simple e intuitiva.
Características ErgoDesign
Mejorar la ergonomía para aumentar el confort en el entrorno de trabajo,
proteger la salud del usuario y ahorrar dinero. Entre otras características
se incluyen: menús OSM en pantalla para ajustes fáciles y rápidos de la
Page 60

S - 2 Introducción al NEC MultiSync LCD400/LCD2000
imagen, base basculable para optimizar el ángulo de visión, base
reducida y certificación de emisiones reducidas MPRII.
Plug and Play (Sólo MultiSync LCD400)
Integrado en Windows 95, mediante el sistema Plug&Play, el monitor
informa de sus capacidades al sistema (tales como tamaño de pantalla y
resoluciones soportadas), optimizando automáticamente las prestaciones
de la pantalla.
Sistema IPM (Intelligent Power Manager)
El sistema IPM permite ahorrar energía cuando su monitor está
encendido pero no está siendo utilizado. Gacias a este sistema, usted
podrá ahorrar hasta dos tercios del coste de energía de su monitor,
reduciendo emisiones y costes de aire acondicionado en el entorno de
trabajo.
Tecnología de Frecuencia Múltiple
Ajusta automáticamente el monitor a la frecuencia de su tarjeta gráfica,
visualizando la resolución requerida.
Capacidad FullScan
Le permite usar todo el área de la pantalla en la mayoría de la
resoluciones, aumentando significactivamente el tamaño de la imagen.
Page 61
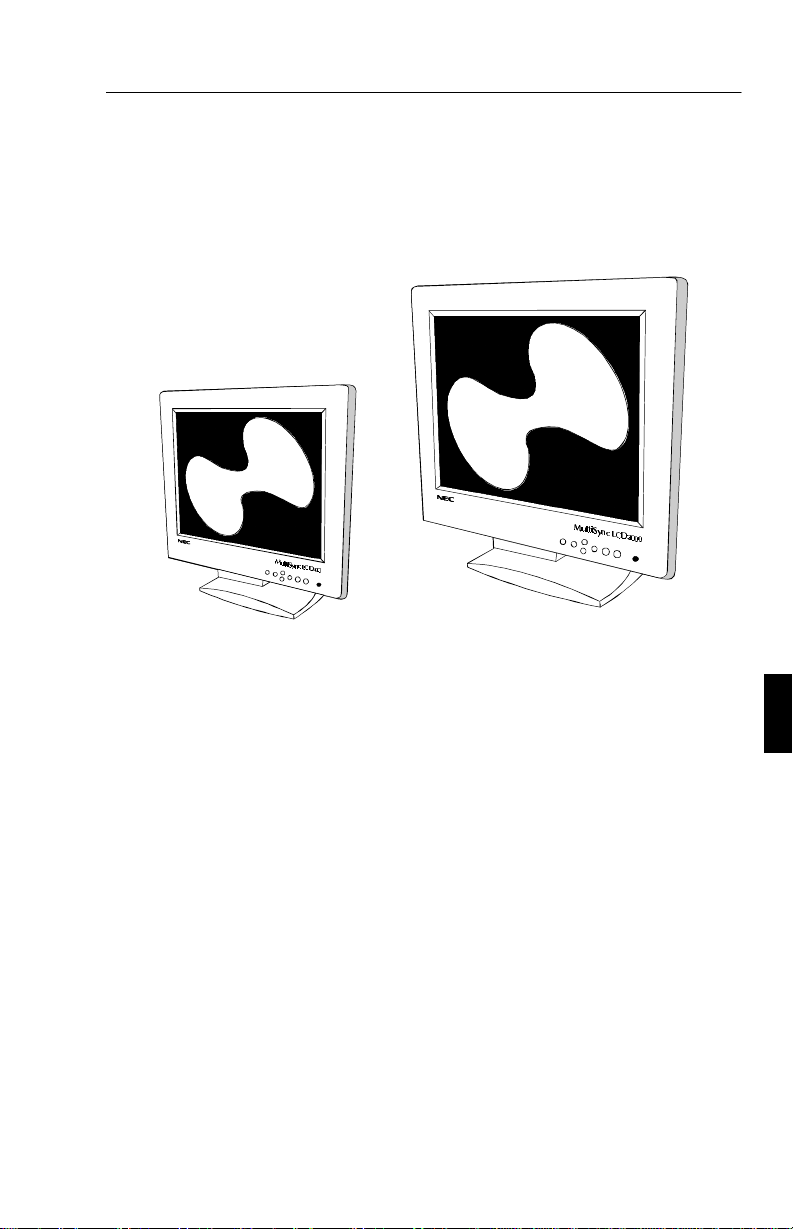
Contenidos del Embalaje S - 3
Contenidos del Embalaje
La caja de su nuevo monitor MultiSync LCD debe contener lo siguiente
– NEC MultiSync LCD
NEC MultiSync LCD
(Modelo LA-142lJMW)/
400
2000 (Modelo LA-203lJMW).
– Cable de corriente.
– Cable de señal de video– 15 pin mini D-SUB a 15 pin mini
D-SUB (LCD
Cable de señal de video– 15 pin mini D-SUB a BNC
(LCD
2000
400)/
).
– Manual del usuario.
Recuerde conservar la caja y embalajes originales para futuros
transportes del monitor.
Page 62

S - 4 Uso recomendado
Uso recomendado
Para conseguir unas prestaciones óptimas de su monitor MultiSync
LCD
400/LCD2000 observe lo siguiente:
• La pantalla debe estar en una posición tal que no le incida la
luz solar directamente.
• Permita una ventilación adecuada al monitor de tal manera
que el calor pueda disiparse convenientemente.
• No coloque objetos pesados encima del cable de corriente. Si
se daña puede causar incendios o descargas eléctricas.
• Utilice el monitor en un área limpia y seca.
• Manéjelo con cuidado cuando lo transporte. Conserve los
embalajes para el transporte.
• El monitor debe estar instalado cerca de la toma de corriente,
y ésta debe ser fácilmente accesible.
• Limpie la superficie del monitor LCD con un trapo no
abrasivo. Evite utilizar cualquier solución de limpieza como
limpiadores de cristales o toallitas.
• Las máximas prestaciones aparecerán después de 20 minutos
de calentamiento.
• Evite visualizar imágenes fijas en la pantalla durante períodos
largos de tiempo.
• Evite aplicar presión sobre la superficie del monitor LCD.
Page 63

Uso recomendado S - 5
UN CORRECTO EMPLAZAMIENTO Y AJUSTE DEL MONITOR,
PUEDE REDUCIR LA FATIGA VISUAL, DE LOS HOMBROS Y
DEL CUELLO. COMPRUEBE LO SIGUIENTE CUANDO
COLOQUE EL MONITOR:
• Ajuste la altura del monitor de tal manera que la parte
superior de la pantalla quede ligeramente por debajo del nivel
de sus ojos. Sus ojos deben mirar ligeramente hacia abajo
cuando visualice el centro de la pantalla.
• Su monitor debe estar colocado a no menos de 40 cm y a no
más de 70 cms de sus ojos. La distancia óptima para el
MultiSync LCD
61 cms.
400 es 53 cm y para el MultiSync LCD2000,
• Descanse sus ojos enfocando periódicamente hacia algún
objeto que se encuentre a más de 6 mts. Parpadee con
frecuencia.
• El monitor debe formar un ángulo de 90º con respecto a la
ventana o cualquier otra fuente de luz. De esta manera se
reducirán los reflejos. Ajuste el monitor, basculando sobre su
base, para que la luz del techo no se refleje en la pantalla.
• Si la luz reflejada le produce dificultades en la visión, utilice
un filtro antireflejos.
• Ajuste los controles de brillo y contraste del monitor para
mejorar la visión.
• Use un atril ,para colocar el documento, colocándolo cerca de
la pantalla.
• Coloque lo que usted mira más frecuentemente (la pantalla o
material de referencia) justo enfrente de usted para evitar
girar la cabeza mientras teclea.
• Compruebe periódicamente su visión.
Page 64

S - 6 Instalación
Instalación
Conexión a su Ordenador Personal
Los monitores en color MultiSync LCD400/LCD2000 son compatibles
con los ordenadores compatibles PC. Su sistema posee una de las dos
configuraciones siguientes:
– El controlador de video está integrado en el ordenador.
– El controlador de video es una tarjeta gráfica instalada en un slot.
Ambas configuraciones poseen un conector de video (denominado puerto
CRT en los ordenadores portátiles). Si usted no está seguro de cuál es su
conector de video, consulte el manual de su tarjeta gráfica o PC.
Para conectar el monitor a su sistema, siga estas instrucciones:
1. Apague el monitor y el ordenador.
2. Si es necesario, instale la tarjeta gráfica. Para más
información sobre la instalación consulte el manual.
3. Conecte el conector 15-pin mini D-SUB del cable de señal de
video al conector de video de su tarjeta gráfica. Apriete los
tornillos.
4. Para el LCD
cable de señal de video al conector correspondiente en la
parte trasera del monitor.
Para el LCD
apropiados en la parte trasera del monitor. Conecte, el cable
BNC rojo al conector etiquetado R, el verde al conector
etiquetado G/Sync, el azul al conector etiquetado B. Si usted
tiene un cuarto concector BNC (Sincronismo Compuesto),
conéctelo al conector etiquetado H/CS. Si usted tiene un
quinto conector de Sincronismo Vertical, conéctelo al
conector etiquetado VS.
Una conexión incorrecta puede generar un mal funcionamiento o
Nota:
daños en la calidad de la pantalla y de los componentes de los módulos
LCD, acortando la vida de los mismos.
400: Conecte el conector 15-pin mini D-SUB del
2000: Conecte el cable BNC a los conectores
Page 65

Instalación S - 7
5. Conecte uno de los extremos del cable de corriente al monitor
MultiSync LCD y el otro extremo a una toma de corriente.
6. Encienda el monitor y el ordenador.
7. Esto completa la instalación.
Si encuentra problemas, por favor, consulte la sección “Solución de
Problemas” de su manual.
Conexión a su Ordenador Personal (Macintosh)
Con un adaptador opcional para Macintosh, los monitores MultiSync
LCD
400/LCD2000 son compatibles con la familia de ordenadores
Macintosh.
Conectará su monitor color MultiSync de una de estas dos maneras, a su
ordenador Macintosh:
– Tarjeta de video integrada
– Tarjeta de video NuBus/PCI/PDS
Ambas configuraciones deben tener el mismo tipo de conector de video.
Si no está seguro de cuál es su conector, por favor, consulte el manual
de su ordenador o tarjeta gráfica.
Para conectar el monitor a su sistema, siga las siguientes instrucciones:
1. Apague el monitor MultiSync LCD y su ordenador Macintosh.
2. Si es necesario, instale la tarjeta gráfica. Para más
información sobre la instalación, consulte el manual de su
tarjeta gráfica.
3. Conecte el adaptador al puerto de video de su ordenador
Macintosh. Conecte el cable de señal de video 15-pin mini
D-SUB al final del adaptador. Apriete los tornillos.
4. Para el LCD
400: Conecte el conector 15-pin mini D-SUB del
cable de señal de video al conector correspondiente en la
parte trasera del monitor.
Para el LCD
2000: Conecte el cable BNC a los conectores
apropiados en la parte trasera del monitor. Conecte, el cable
Page 66

S - 8 Instalación
BNC rojo al conector etiquetado R, el verde al conector
etiquetado G/Sync, el azul al conector etiquetado B. Si usted
tiene un cuarto concector BNC (Sincronismo Compuesto),
conéctelo al conector etiquetado H/CS. Si usted tiene un
quinto conector de Sincronismo Vertical, conéctelo al
conector etiquetado VS.
Nota: Una conexión incorrecta puede generar un mal funcionamiento o
daños en la calidad de la pantalla y de los componentes de los módulos
LCD, acortando la vida de los mismos.
5. Conecte uno de los extremos del cable de corriente al monitor
MultiSync LCD y el otro extremo a una toma de corriente.
6. Encienda el monitor y el ordenador.
7. Esto completa la instalación.
Si encuentra problemas, por favor, consulte la sección “Solución de
Problemas” de su manual.
Por favor, consulte con su distribuidor para mayor información sobre el
adaptador para Mac.
Los usuarios de Power Macintosh 6100/60 y 66 necesitan usar el cable
adaptador HDI-45 y los de Powerbook el cable adaptador Apple VID-14 ,
además del adaptador para Mac de los monitores MultiSync LCD.
Page 67

Controles S - 9
Controles
Controles OSM
Los controles OSM le proporcionan las siguientes funciones:
Control Menú principal Sub-Menu
EXIT Salir de los controles OSM Sale al menú principal
OSM
CONTROL ▲/▼
CONTROL -/+ No tiene función Mueve la barra en la
PROCEED Selecciona el menú
RESET: Vuelve a
configuración de
fábrica el control
resaltado.
Mueve el área resaltada
arriba/abajo para
seleccionar uno de los
controles.
escogido. (indicado por el
área resaltada).
Vuelve a configuración de
fábrica todos los controles
dentro del menú resaltado.
Mueve el área resaltada
arriba/abajo para
seleccionar uno de los
controles.
dirección + ó -, para
incrementar o disminuir el
ajuste.
Activa la característica de
Auto Ajuste en Modo de
Visualización.
Vuelve a configuración de
fábrica el control
resaltado.
NOTA: Cuando se presiona RESET, se mostrará un aviso de
precaución, permitiéndole cancelar la función reset si usted lo desea.
Page 68

S - 10 Controles
Brillo y Contraste
Brillo: Ajusta el brillo de toda la imagen de la pantalla y del fondo.
Contraste:
Auto Ajuste de Contraste: Corrige la imagen visualizada para entradas
de video no estándares.
Ajusta el brillo de la imagen en relación al fondo.
Auto Ajuste
Permite un ajuste automático de los controles de Posición y de Ajuste de
Imagen.
Posición
Controla la posición horizontal y vertical de la imagen dentro del área
de visión del LCD.
Auto Ajuste de Posición: Ajusta automáticamente la posición
horizontal y vertical de la imagen dentro del area de visión del LCD.
Ajuste de Imagen
Grueso:
Fino: Mejora el foco, claridad y estabilidad de la imagen.
NOTA: El control de Ajuste Fino de Imagen debe utilizarse para
completar la configuración de su monitor MultiSync LCD
Auto Ajuste Aprox/Fino: (sólo MultiSync LCD
automáticamente las configuraciones de Aprox. o Fino.
Auto Ajuste Aprox.:
automáticamente las configuración Aprox.
Ajusta el tamaño horizontal.
(sólo MultiSync LCD
2000.
400) Ajusta
) Ajusta
2000
Sistema de Control de Color
Selecciona uno de los cinco ajustes de Color. Cada selección de Color
es ajustada en fábrica a una temperatura determinada. Si una de las
selecciones es cambiada, el nombre de la configuración cambiará de
“grados Kelvin” a “Usuario”.
Incrementa o disminuye la ganancia del color rojo, verde o azul,
dependiendo de cuál esté seleccionado. El cambio del color aparecerá en
la pantalla y la dirección (aumento o disminución) será mostrado por las
barras de color.
Ganancia de Color (Rojo, Verde, Azul):
Page 69

Controles S - 11
Localización OSM
Usted puede escoger dónde quiere que le aparezca la ventana de control
OSM en su pantalla. Localización OSM, le permite ajustar manualmente
la posición de la ventana moviéndola izquierda/derecha y arriba/abajo.
Tiempo de apagado OSM
Con esta opción, usted escogerá el tiempo que la ventana OSM
permanecerá abierta después del último toque de botón. Las elecciones
preseleccionadas son 10, 20, 30, 60 y 120 segundos.
Bloqueo OSM
Este control bloquea completamente el acceso a las funciones de control
OSM. Cuando intente activar los controles OSM mientras están en
modo bloqueo, una pantalla le avisará de que los controles OSM están
bloqueados. Para activar el bloqueo presione PROCEED, luego ▲ y
manténgalas presionadas simultáneamente. Para desactivar el bloqueo,
presione
simultáneamente.
PROCEED,
luego ▲ y manténgalas presionadas
Modo Visualización
El Modo de Visualización le proporciona información sobre la
resolución actual y datos técnicos que incluyen el “timing”
preseleccionado que está siendo utilizado y las frecuencias horizontales
y verticales.
NOTA: El cambio dentro de Modo de visualización debería ser
utilizado solamente cuando una resolución no es reconocida por el
monitor. El usuario puede cambiar la resolución apropiada
introduciéndose en el submenú “Cambio de Modo” y seleccionando la
resolución deseada.
Selección del Lenguaje
Los menús de controles OSM son disponibles en seis lenguajes.
Page 70

S - 12 Especificaciones
Configuración de Fábrica
Seleccionando Configuración de Fábrica, todos los controles OSM
cambiarán a los parámetros de Fábrica. El botón
RESET
deberá ser
mantenido durante algunos segundos para que tenga efecto.
Configuraciones individuales pueden cambiarse resaltando el controls
que quiere cambiar y presionando luego RESET.
Especificaciones
MultiSync LCD400
Pantalla: 35.8 cm (14.1") de diagonal de imagen visible;
1024 x 768 resolución del panel LCD (Número de Pixels);
Matrz activa; TFT; cristal líquido (LCD); 0.28 mm dot
pitch; Tecnología XtraView™ ; 180cd/m² luminancia del
blanco; 150:1 tasa de contraste.
Señal de entrada Video Analógica 0.7 Vp-p 75 Ω
Colores
Visualizables
Rango de
Frecuencias
Resoluciones
Soportadas
Sincronismo Sinc. Separado. Nivel TTL
sinc. Horizontal Positivo/Negativo
sinc. Vertical Positivo/Negativo
sinc. Compuesto. (Positivo/Negativo)
(Nivel TTL)
Sinc. en Verde (Positivo) 0.7 Vp-p y
sinc. Negativo 0.3 Vp-p
Entrada
analógica:
Horizontal 24.8 kHz a 60.0 kHz (Automáticamente)
Vertical 56.2 Hz a 85.1 Hz (Automáticamente)
Número de colores ilimitado
(Depende de la tarjeta gráfica)
720 x 400: VGA texto*
640 x 480 de 60 Hz a 85 Hz*
800 x 600 de 56 Hz a 85 Hz
832 x 624 a 75 Hz*
1024 x 768 de 60 Hz a 75 Hz**
Page 71

Especificaciones S - 13
Area de pantalla
Activa***
Fuente de
Horizontal 286 mm
Vertical 214 mm
AC 100-120 V/ 220-240 V 50/60 Hz
alimentación
Consumo 0.9 A @ 100-120 V /
0.5 A @ 220-240 V
Dimensiones Ancho x alto x
357 x 362 x 168 mm
profundo
Peso 5.2 kg
Consideraciones
ambientales de
funcionamiento
Consideraciones
ambientales de
almacenamiento
* Resoluciones Interpoladas: Cuando las resoluciones mostradas son más bajas que el
número de pixels del módulo LCD, los textos o líneas pueden parecer con grosores no
uniformes. Este efecto es normal y necesario para todos los paneles LCD, con la
tecnología actual. Cada punto de la pantalla es actualmente un pixel, así que si se
expande la imagen a pantalla completa, es necesario una interpolación de la resolución.
Cuando la resolución interpolada no es exactamente un múltiplo de la resolución
original del panel LCD, la interpolación matemática necesaria, causa que algunas líneas
aparezcan más gruesas que otras.
** NEC cita resoluciones recomendadas a 60 Hz para unas prestaciones óptimas.
*** El área de vision Activa depende del “timing” de la señal de la tarjeta de video.
Temperatura 5° C a + 35° C
Humedad 30% a 80%
Temperatura -10° C a + 60° C
Humedad 10% a 85%
La especificaciones técnicas pueden cambiar sin previo aviso.
Page 72
S - 14 Especificaciones
MultiSync LCD2000
Pantalla: 51.1 cm (20.1") de diagonal de imagen visible;
1280 x 1024 resolución del panel LCD (Número de
Pixels); Matrz activa; TFT; cristal líquido (LCD);
0.31 mm dot pitch; Tecnología XtraView™ ; 150cd/m²
luminancia del blanco; 150:1 tasa de contraste.
Señal de entrada Video Analógica 0.7 Vp-p 75 Ω
Sincronismo Sinc. Separado. Nivel TTL
sinc. Horizontal Positivo/Negativo
sinc. Vertical Positivo/Negativo
sinc. Compuesto. (Positivo/Negativo)
(Nivel TTL)
Sinc. en Verde (Positivo) 0.7 Vp-p y
sinc. Negativo 0.3 Vp-p
Colores
Visualizables
Rango de
Frecuencias
Resoluciones
Soportadas
Area de pantalla
Activa***
Fuente de
alimentación
Consumo 1.0 A @ 100-120 V /
Dimensiones Ancho x alto x
Peso 10.0 kg
Entrada
analógica:
Horizontal 24.0 kHz a 80.0 kHz (Automáticamente)
Vertical 56.0 Hz a 76.0 Hz (Automáticamente)
Horizontal 399 mm
Vertical 319 mm
profundo
Número de colores ilimitado
(Depende de la tarjeta gráfica)
720 x 400: VGA texto*
640 x 480 de 60 Hz a 76 Hz
800 x 600 de 56 Hz a 76 Hz*
832 x 624 a 75 Hz*
1024 x 768 de 60 Hz a 76 Hz*
1280 x 960 de 60 Hz a 76 Hz
1280 x 1024 de 60 Hz a 76 Hz**
AC 100-120 V/ 220-240 V 50/60 Hz
0.5 A @ 220-240 V
500 x 483 x 220 mm
Page 73

Solución de Problemas S - 15
Consideraciones
ambientales de
funcionamiento
Consideraciones
ambientales de
almacenamiento
* Resoluciones Interpoladas: Cuando las resoluciones mostradas son más bajas que el
número de pixels del módulo LCD, los textos o líneas pueden parecer con grosores no
uniformes. Este efecto es normal y necesario para todos los paneles LCD, con la
tecnología actual. Cada punto de la pantalla es actualmente un pixel, así que si se
expande la imagen a pantalla completa, es necesario una interpolación de la resolución.
Cuando la resolución interpolada no es exactamente un múltiplo de la resolución
original del panel LCD, la interpolación matemática necesaria, causa que algunas líneas
aparezcan más gruesas que otras.
** NEC cita resoluciones recomendadas a 60 Hz para unas prestaciones óptimas.
*** El área de vision Activa depende del “timing” de la señal de la tarjeta de video.
Temperatura 5° C a + 30° C
Humedad 30% a 80%
Temperatura -10° C a + 60° C
Humedad 10% a 85%
La especificaciones técnicas pueden cambiar sin previo aviso.
Solución de Problemas
Problema Compruebe lo siguiente
No hay imagen - El cable de señal debe estar completamente
conectado a la salida de la tarjeta gráfica.
- La tarjeta gráfica debe estar completamente insertada
en su slot.
-Los interruptores de encendido del monitor y del
ordenador deben estar en la posición ON.
- Compruebe que el modo gráfico seleccionado en la
tarjeta gráfica es compatible. (Por favor, consulte el
manual de su tarjeta gráfica para cambiar de modo
gráfico).
- Compruebe la compatibilidad de su tarjeta gráfica
con el monitor.
- Compruebe que el conector de video no tiene pines
doblados o rotos.
Page 74

S - 16 Solución de Problemas
Problema Compruebe lo siguiente
La imagen es
inestable o
desenfocada.
El indicador de
encendido del
monitor está
apagado (no muestra
color verde o ámbar)
La imagen presenta
un color verdoso
La imagen no está
centrada
El tamaño de la
imagen no es
correcto
- El cable de señal debe estar completamente
conectado a la salida de video de su ordenador.
- Use el control
enfocar y ajustar la imagen mediante el ajuste fino de
imagen. Cuando se cambie de modo de visualización,
la configuración OSM de Ajuste de Imagen puede
necesitar reajustarse.
- Compruebe la compatibilidad de su tarjeta gráfica
con el monitor.
- El interruptor de encendido debe estar ON y el cable
de corriente debe estar conectado.
- Asegúrese de que el ordenador no haya entrado en el
modo de ahorro de energía (toque el teclado o el ratón).
Abra Modo Visualización OSM y presione el botón
de control +.
Use el control OSM de ajuste de Posición para centrar
la imagen.
- Use el control OSM de Ajuste de Imagen.
- Compruebe que el modo gráfico seleccionado en la
tarjeta gráfica es compatible. (Por favor, consulte el
manual de su tarjeta gráfica para cambiar de modo
gráfico).
OSM de Ajuste de Imagen
para
La resolución
seleccionada no se
visualiza
apropiadamente
Use el control OSM, Modo de Visualización para
entrar en el submenú Cambio de modo y confirmar
que la resolución seleccionada ha sido detectada. De lo
contrario, selecciónela manualmente.
Page 75

Italiano
Page 76

Introduzione ai Monitor NEC Multisync LCD400 e LCD2000 I - 1
Introduzione ai Monitor NEC Multisync LCD400 e
2000
LCD
Congratulazioni per avere scelto i monitor True Color NEC Multisync
LCD
400 e LCD2000!
Il vantaggio di un monitor analogico
Capaci di visualizzare infiniti colori in uno spettro continuo, ne
forniscono una rappresentazione più reale. Il pannello LCD ad alto
contrasto di questi monitor esalta la brillantezza dei colori e migliora la
messa a fuoco senza distorsione geometrica.
Vasta compatibilità
Poiché il monitor è completamente analogico non richiede convertitori
analogico-digitali o interfacce, ma può accettare direttamente i segnali RGB.
Ingombro ridotto
E’ la soluzione ideale per le esigenze di prestazioni superiori ma con
dimensioni e peso contenuti. La ridotta area di appoggio del monitor e il
suo peso minimo consentono agevoli spostamenti.
Il sistema Color Control
Permette di regolare i colori sul vostro schermo e di personalizzarli in
modo accurato scegliendo fra più impostazioni.
Il sistema di configurazione OSM (On-Screen Manager)
Permette di regolare velocemente e facilmente tutti i parametri della
vostra immagine sul video, semplicemente usando i menù sullo schermo.
Opzioni ErgoDesign
Migliorato nel comfort di utilizzo, protegge la salute dell’utente e
consente una maggiore economia d’esercizio. Un esempio di ergonomia
sono i controlli OSM per regolazioni facili e rapide, l’inclinazione
Page 77

I - 2 Introduzione ai Monitor NEC Multisync LCD400 e LCD2000
regolabile dello schermo per un ottimale angolo di osservazione e la
conformità allo standard MPRII per i bassi livelli di emissione.
Plug and Play (solo per il modello LCD400)
Questa soluzione di Microsoft propria di Windows 95 facilita
l’installazione del monitor poiché vengono forniti direttamente al vostro
computer i dati specifici di funzionamento (come dimensioni del quadro
e risoluzioni), ottimizzando automaticamente le prestazioni del monitor.
IPM (Intelligent PowerManager) System
Questo sistema fornisce metodi di risparmio energetico innovativi che
permettono al monitor di consumare poca energia quando è in stand-by,
risparmiando i 2/3 del consumo energetico e riducendo le emissioni di
radiazioni.
Tecnologia Multiple Frequency
Sincronizza automaticamente il monitor alla frequenza di scansione
della scheda grafica visualizzando automaticamente la risoluzione
impostata.
Capacità FullScan
Permette di usare tutta l’area dello schermo nella maggioranza delle
risoluzioni ingrandendo sensibilmente la dimensione del quadro.
Page 78

Contenuto della confezione I - 3
Contenuto della confezione
La scatola del vostro nuovo Multisync LCD contiene:
– Il monitor NEC MultiSync LCD400 (Modello LA-142lJMW)/
Il monitor NEC MultiSync LCD
2000 (Modello LA-203lJMW).
– Cavo di alimentazione di rete.
– Cavo segnali video – 15 pin mini D-SUB a 15 pin mini D-SUB
(LCD
400)/
Cavo segnali video – 15 pin mini D-SUB a BNC (LCD
2000).
– Manuale Utente.
Ricordate di conservare la scatola e l’imballo originali per trasportare o
spedire il monitor.
Page 79

I - 4 Uso raccomandato
Uso raccomandato
Per ottenere ottime prestazioni attenetevi ai seguenti consigli per
l’installazione e l’uso del monitor MultiSync LCD
• La posizione ottimale del monitor è quella distante dalla luce
diretta del sole.
• L’area intorno al monitor deve rimanere libera così che il
calore si disperda facilmente.
• Non appoggiare oggetti pesanti sul cavo di alimentazione.
Eventuali danni al cavo possono provocare shock o incendi.
• Usare il monitor in un ambiente pulito e asciutto.
• Maneggiare con cura durante il trasporto. Conservare
l’imballo.
• La sconnessione dall’alimentazione di rete si completa
scollegando il connettore del cavo di alimentazione. Perciò il
monitor deve essere installato vicino a una presa di rete
accessibile.
400/LCD2000:
• Per pulire lo schermo LCD del monitor usare un panno non
abrasivo, evitare prodotti per la pulizia dei vetri.
• Per una migliore resa attendere 20 minuti dopo l’accensione.
• Non visualizzare per lunghi periodi la stessa immagine per
evitare effetti di persistenza sul display.
• Evitare pressioni sulla superficie dell’LCD.
Page 80

Uso raccomandato I - 5
UN CORRETTO POSIZIONAMENTO DEL MONITOR PUO’
RIDURRE L’AFFATICAMENTO DEGLI OCCHI, DELLE SPALLE
E DEL COLLO. ATTENETEVI A QUANTO SEGUE PER
POSIZIONARE IL MONITOR:
• Regolare l’altezza del monitor in modo che il margine
superiore dello schermo sia all’altezza o appena sotto gli
occhi. I vostri occhi dovrebbero guardare leggermente verso
il basso.
• Posizionare il monitor ad una distanza compresa fra 40 e 70 cm
dal punto di osservazione. La distanza ottimale per il Multisync
LCD
400 è di 53 cm, per il Multisync LCD2000 è di 61 cm.
• Riposare gli occhi osservando ad esempio un oggetto distante
circa 6 metri. Aprire e chiudere gli occhi frequentemente.
• Orientare il monitor a 90 gradi rispetto a sorgenti di luce o
finestre per ridurre riflessi o riverberi. Regolare l’inclinazione
del monitor per annullare il iflesso delle luci installate sul
soffitto.
• Se le luci riflesse rendono difficoltoso osservare lo schermo,
utilizzare uno schermo antiriflesso aggiuntivo.
• Regolare contrasto e luminosita’ per ottimizzare la leggibilità.
• Utilizzare un appoggio per i documenti di fianco al monitor.
• Posizionare di fronte a voi ogni oggetto di uso frequente (lo
schermo stesso o documentazione di riferimento) per evitare
di girare il capo frequentemente durante il lavoro.
• Ricorrere a visite oculistiche regolarmente.
Page 81

I - 6 Installazione
Installazione
Collegamento al vostro personal computer.
Il MultiSync LCD400/LCD2000 True Color è progettato per l’uso su
sistemi PC compatibili. Il vostro sistema può avere una delle seguenti
configurazioni:
– Il controller video è implementato nella scheda principale del
computer.
Il controller video è una scheda aggiutiva da installare nel
–
computer.
Entrambe le configurazioni dispongono di un connettore video (o porta
CRT nei computer laptop). Se non siete sicuri di quale sia il connettore
video consultate la documentazione del PC o della scheda grafica.
Per collegare il monitor al vostro sistema seguite le istruzioni:
1. Spegnere il monitor e il computer.
2. Se necessario installare la scheda grafica.Per maggiori
informazioni al riguardo consultare la relativa
documentazione.
3. Collegare il connettore mini D-SUB 15 pin del cavo segnali
all’apposito connettore della scheda grafica del computer.
Stringere tutte leviti.
4. Per l’ LCD
del cavo segnali al connettore apposito sul retro del monitor.
Per l’ LCD
connettori sul retro del monitor. Collegate il cavo BNC rosso
al connettore BNC del monitor segnalato con R; il cavo BNC
verde al connettore BNC segnalato con G/Sync; il cavo BNC
blu al connettore BNC segnalato con B. Se il cavo BNC ha un
quarto connettore (Composite Sync) collegarlo al connettore
BNC del monitor segnalato con H/CS. Se il cavo BNC ha un
quinto connettore (Vertical Sync) collegarlo al connettore
BNC del monitor segnalato con VS.
400: Collegate il connettore 15-pin mini D-SUB
2000: Collegate il cavo BNC agli appositi
Page 82

Installazione I - 7
N.B.: Eventuali collegamenti scorretti possono causare risultati
indesiderati, danneggiare il display e limitarne la durata.
5. Collegate un capo del cavo di alimentazione al monitor e
l’altro all presa di rete.
6. Accendete il monitor e il computer.
7. L’installazione è completata.
In caso di problemi consultare il manuale al capitolo: Soluzione
Problemi (Troubleshooting).
Collegamento al vostro Personal Computer (Macintosh)
Con il cavo adattatore Macintosh, il monitor MultiSync
LCD
400/LCD2000 è compatibile con tutta la famiglia dei PC Macintosh.
Potete collegare il monitor MultiSync al vostro computer Macintosh in
uno dei due modi seguenti:
– Porta video On-board
– Scheda grafica NuBus/PCI/PDS
Entrambe le configurazioni dovrebbero avere lo stesso tipo di
connettore. Se non siete sicuri di quale sia il connettore con cui
collegare il monitor, consultate la documentazione del Computer o della
scheda grafica.
Per collegare il monitor al vostro sistema, seguite queste istruzioni:
1. Spegnete sia il monitor Multisync LCD che il PC Macintosh.
2. Se necessario installate la scheda grafica. Per ulteriori
informazioni sull’ installazione consultate il manuale della
scheda grafica.
3. Collegate il cavo adattatore Macintosh del MultiSync LCD
o del MultiSync LCD2000 al Computer. Collegate il terminale
15-pin mini D-SUB del cavo segnali appropriato al cavo
adattatore Macintosh. Stringete tutte le viti.
400
Page 83

I - 8 Installazione
4. Per l’ LCD400: Collegate il connettore 15-pin mini D-SUB
del cavo segnali al connettore apposito sul retro del monitor.
Per l’ LCD
Collegate il cavo BNC agli appositi
2000:
connettori sul retro del monitor. Collegate il cavo BNC rosso
al connettore BNC del monitor segnalato con R; il cavo BNC
verde al connettore BNC segnalato con G/Sync; il cavo BNC
blu al connettore BNC segnalato con B. Se il cavo BNC ha un
quarto connettore (Composite Sync) collegarlo al connettore
BNC del monitor segnalato con
. Se il cavo BNC ha un
H/CS
quinto connettore (Vertical Sync) collegarlo al connettore
BNC del monitor segnalato con VS.
Eventuali collegamenti scorretti possono causare risultati
N.B.:
indesiderati, danneggiare il display e limitarne la durata.
5. Collegate un capo del cavo di alimentazione al monitor
MultiSync LCD e l’altro capo alla presa di rete.
6. Accendete il monitor e il computer.
7. Avete completato l’installazione.
In caso di problemi, consultare il manuale al capitolo: Soluzione
Problemi (Troubleshooting).
Contattate il vostro rivenditore per maggiori informazioni
sull’adattatore MAC.
Gli utenti del Power Macintosh 6100/60 e 66 devono usare il cavo
adattatore Apple HDI-45 e gli utenti del Powerbook devono usare il
cavo adattatore Apple VID-14 unitamente all’appropriato cavo
adattatore MultiSync Macintosh quando si collega il monitor Multisync
LCD.
Page 84

Comandi I - 9
Comandi
Comandi OSM (On Screen Manager)
I comandi OSM sul frontale del monitor attivano le seguenti funzioni:
Tasto Main Menu Sub-Menu
EXIT Conclude le operazioni
OSM
CONTROL ▲/▼ Sposta l’area evidenziata
su o giù per selezionare
uno dei comandi
CONTROL -/+ Non attiva funzioni Sposta la barra nelle
PROCEED Conferma la selezione del
menù scelto (indicato
dall’area evidenziata)
RESET: Riporta la
funzione evidenziata
al valore impostato
in fabbrica.
NOTA:
Quando il tasto RESET e’ premuto, un menu’ di avviso e’
Ripristina tutte le funzioni
del menu’ evidenziato ai
valori di fabbrica
Riporta al menù
principale OSM
Sposta l’area evidenziata
su o giù per selezionare
uno dei comandi
direzioni + o - per
aumentare o diminuire la
regolazione
Attiva l’opzione di Auto
Adjust nel Display Mode.
Ripristina la funzione
evidenziata al valore di
fabbrica.
proposto per consentire di annullare la funzione.
Page 85

I - 10 Comandi
Brightness e Contrast
Brightness: Regola la luminosita’ di immagine e la retroilluminazione
dello schermo.
Contrast: Regola la luminosita’ della immagine in rapporto alla
retroilluminazione.
Auto Adjust Contrast: Corregge l’immagine visualizzata per input
video non stadard.
Autoadjust
Consente la regolazione automatica della posizione e del formato
dell’immgine.
Position
Regola la posizione verticale e orizzontale dell’immagine nell’area dello
schermo.
Auto Adjust Position: Configura automaticamente la posizione orizzontale
e verticale dell’immaginea ll’interno dell’area visualizzabile dell’LCD.
Image Adjust
Coarse: Regola la dimensione orizzontale aumentando o diminuendo il
Coarse total.
Fine: Migliora la messa a fuoco, la definizione e la stabilità di
immagine aumentando o diminuendo il Fine total.
NOTE:
essere utilizzata la funzione Image Adjust Fine
Auto Adjust Coarse/Fine: (solo per monitot MultiSync LCD
Effettua automaticamente l’aggiustamento di massima o di precisione.
Auto Adjust Coarse: (solo per monitor MultiSync LCD
automaticamente l’aggiustamento.
per completare il setup del monitor MultiSync LCD
2000) Effettua
2000
deve
400)
Color Control System
Il Color Control System prevede 5 preimpostazioni del colore
personalizzabili, da selezionare secondo le diverse necessità. Ogni
impostazione del colore è comunque pre-regolata in fabbrica ad un
valore in gradi Kelvin prestabilito. Se un’impostazione viene
modificata, il suo nome cambierà da gradi Kelvin a Custom.
Color
Page 86

Comandi I - 11
Gain (Rosso, Verde, Blu): aumenta o diminuisce l’intensità di
emissione del colore, rosso, verde o blu, selezionato. Il risultato
complessivo sarà visibile direttamente sullo schermo, e l’entità della
regolazione sarà simbolizzata da barre colorate di dimensione
proporzionalmente variabile.
OSM Location
Potete scegliere dove posizionare il menù OSM sul vostro schermo.
Selezionando OSM Location potete regolare manualmente la posizione
dello stesso menù nelle varie direzioni.
OSM Turn Off Time
Il menù OSM rimane attivo finchè è in uso. Nel sottomenù
TurnOffTime di OSM potete stabilire quando disattivare
automaticamente il menù OSM dopo l’ultima pressione di un tasto sul
monitor. I valori preimpostati sono: 10, 20, 30, 60 e 120 secondi.
OSM Lock Out
Questa funzione blocca completamente l’accesso al menù OSM.
Tentando di attivare il menù OSM mentre è attiva la funzione di blocco,
apparirà un menù che avviserà del blocco delle funzioni OSM. Per
attivare il comando OSM Lock Out premere il tasto PROCEED e in
seguito il tasto ▲ contemporaneamente. Per disattivare il comando
OSM Lock Out ripetere la medesima sequenza.
Display Mode
La funzione Display Mode fornisce dati riguardo la risoluzione in uso e
dati tecnici come il preset timing e le frequenze orizzontali e verticali.
N.B.: la funzione Display Mode deve essere solamente usata se la
risoluzione non è riconosciuta dal monitor. L’utente può impostare la
risoluzione corretta attivando il sotto menù Display Mode e
selezionando l’opzione corrispondente.
Language Select
I menu di comandi OSM sono disponibili in sei lingue.
Page 87

I - 12 Caratteristiche tecniche
Factory Preset
Selezionando la funzione Factory Preset, potrete riportare le funzioni
dell’OSM menù ai valori di fabbrica. E’ necessario tenere premuto il
tasto RESET per qualche secondo per completare l’operazione. Singole
funzioni possono essere reimpostate, dopo averle evidenziate, premendo
il bottone RESET.
Caratteristiche tecniche
MultiSync LCD400
Display: 35.8 cm (14.1 inch) dimensione dell’immagine; 1024 x
768 risoluzione nativa (Pixel Count);
tecnologia a matrice attiva; transistor a film sottile (TFT);
display a cristalli liquidi (LCD); 0.28 mm dot pitch;
tecnologia XtraView™ ; 180cd/m² luminanza del bianco;
150:1 rapporto contrasto
Segnali di
ingresso
Colori Ingresso
Intervalli di
sincronizzazione
Video Analogico 0.7 Vp-p 75 Ω
Sync Separate sync. TTL Level
analogico:
orrizzontale da 24.8 kHz a 60.0 kHz
verticale da 56.2 Hz a 85.1 Hz
Sincronismo orizzontale
Positivo/Negativo
Sincronismo verticale
Positivo/Negativo
Sincronismo composito
(Positivo/Negativo) (TTL Level)
Sync on Green video (Positive) 0.7
Vp-p and sync. Negative 0.3 Vp-p
numero illimitato di colori
(dipende dalla scheda grafica)
(Automaticamente)
(Automaticamente)
Page 88

Caratteristiche tecniche I - 13
Risoluzioni
supportate
720 x 400: VGA testo*
640 x 480 da 60 Hz a 85 Hz*
800 x 600 da 56 Hz a 85 Hz*
832 x 624 da 75 Hz*
1024 x 768 da 60 Hz a 75 Hz**
Area*** attiva
del display
Orizzontale 286 mm
Verticale 214 mm
Alimentazione AC 100-120 V/ 220-240 V 50/60 Hz
Corrente assorbita 0.9 A @ 100-120 V /
0.5 A @ 220-240 V
Dimensioni A x L x P 357 x 362 x 168 mm
Peso 5.2 kg
Condizioni
ambientali di
lavoro
Condizioni
ambientali a
riposo
* Risoluzioni Interpolate: quando le risoluzioni impostate sono inferiori del numero di
pixel del modulo LCD , il testo puo’ apparire assottigliato e le linee inspessite. Cio’ e’
normale e necessario per tutte le attuali tecnologie costruttive di pannelli, ogni punto
sullo schermo corrisponde attualmente a un pixel, cosi’ per adattare le risoluzioni ad una
immagine a pieno schermo, e’ necessaria una interpolazione della risoluzione stessa.
Quando la risoluzione interpolata non corrisponde a un multiplo esatto della risoluzione
nativa, l’interpolazione matematica necessaria puo’ rendere alcune linee piu’ fini o piu’
spesse.
** NEC raccomanda risoluzioni a 60 Hz per prestazioni ottimali del display.
*** L’area attiva del display dipende dal segnale di temporizzazione.
Temperatura da 5° C a + 35° C
Umidita’ dal 30% all’ 80%
Temperatura da -10° C a + 60° C
Umidita’ 10% to 85%
Le caratteristiche tecniche sono soggette a modifiche senza preavviso.
Page 89

I - 14 Caratteristiche tecniche
MultiSync LCD2000
Display: 51.1 cm (20.1 inch) dimensione dell’immagine;
1280 x 1024 risoluzione nativa (Pixel Count);
tecnologia a matrice attiva; transistor a film sottile (TFT);
display a cristalli liquidi (LCD); 0.31 mm dot pitch;
tecnologia XtraView™ ; 150cd/m² luminanza del bianco;
150:1 rapporto contrasto
Segnali di
ingresso
Colori Ingresso
Intervalli di
sincronizzazione
Risoluzioni
supportate
Video Analogico 0.7 Vp-p 75
Sync Separate sync. TTL Level
analogico:
orrizzontale da 24.0 kHz a 80.0 kHz
verticale da 56.0 Hz a 76.0 Hz
Ω
Sincronismo orizzontale Positivo/
Negativo
Sincronismo verticale Positivo/
Negativo
Sincronismo composito (Positivo/
Negativo) (TTL Level)
Sync on Green video (Positive) 0.7
Vp-p and sync. Negative 0.3 Vp-p
numero illimitato di colori
(dipende dalla scheda grafica)
(Automaticamente)
(Automaticamente)
720 x 400: VGA testo*
640 x 480 da 60 Hz a 76 Hz
800 x 600 da 56 Hz a 76 Hz*
832 x 624 da 75 Hz*
1024 x 768 da 60 Hz a 76 Hz*
1280 x 960 da 60 Hz a 76 Hz
1280 x 1024 da 60Hz a 76 Hz**
Area*** attiva
del display
Alimentazione AC 100-120 V/ 220-240 V 50/60 Hz
Corrente assorbita 1.0 A @ 100-120 V /
Orizzontale 399 mm
Verticale 319 mm
0.5 A @ 220-240 V
Page 90

Soluzione problemi / Supporto I - 15
Dimensioni A x L x P 500 x 483 x 220 mm
Peso 10.0 kg
Condizioni
ambientali di
lavoro
Condizioni
ambientali a
riposo
* Risoluzioni Interpolate: quando le risoluzioni impostate sono inferiori del numero di pixel
del modulo LCD , il testo puo’ apparire assottigliato e le linee inspessite. Cio’ e’ normale e
necessario per tutte le attuali tecnologie costruttive di pannelli, ogni punto sullo schermo
corrisponde attualmente a un pixel, cosi’ per adattare le risoluzioni ad una immagine a pieno
schermo, e’ necessaria una interpolazione della risoluzione stessa. Quando la risoluzione
interpolata non corrisponde a un multiplo esatto della risoluzione nativa, l’interpolazione
matematica necessaria puo’ rendere alcune linee piu’ fini o piu’ spesse.
** NEC raccomanda risoluzioni a 60 Hz per prestazioni ottimali del display.
*** L’area attiva del display dipende dal segnale di temporizzazione.
Temperatura da 5° C a + 30° C
Umidita’ dal 30% all’ 80%
Temperatura da -10° C a + 60° C
Umidita’ 10% to 85%
Le caratteristiche tecniche sono soggette a modifiche senza preavviso.
Soluzione problemi / Supporto
Problema Controllare i seguenti punti
Nessuna immagine - Il cavo segnali deve essere completamente collegato
al computer / scheda grafica.
- La scheda grafica deve essere completamente inserita
nello slot.
- Gli interruttori di accensione del computer e del
monitor devono essere posizionati su ON.
- Assicurarsi che una modalita’ di funzionamento
corretta sia effettivamente impostata riguardo la
scheda grafica o il computer (consultare la
manualistica del computer o della scheda grafica per
cambiare le modalita’ di lavoro del Display.)
- Assicurarsi che il monitor e la vostra scheda grafica
rispettino la compatibilità e le impostazioni raccomandate.
- Controllare sui connettori del cavo segnali la
presenza di contatti ricurvi o rientrati.
Page 91

I - 16 Soluzione problemi / Supporto
Problema Controllare i seguenti punti
L’immagine è
instabile, sfuocata o
con ondulazioni
apparenti.
Il LED sul frontale
del monitor non è
acceso (la luce verde
o gialla non è
visualizzata).
L’immagine
visualizzata presenta
un aspetto verde.
L’immagine non è
centrata.
L’immagine non è
correttamente
dimensionata.
- Il cavo segnali deve essere saldamente fissato al
Computer.
- Usare i comandi del menù
mettere a fuoco e tarare il display aumentando o
diminuendo il Fine total. Quando il Display Mode
viene modificato, i comandi del menu OSM Image
Adjust devono essere reimpostati.
- Assicurarsi che il monitor e la vostra scheda grafica
rispettino la compatibilità e le temporizzazioni dei
segnali raccomandate.
- Il tasto di accensione deve essere nella posizione ON
e il cavo di rete deve essere collegato.
Aprire il Menu OESM e premere il pulsalnte di
controllo +.
Usare i comandi del menù OSM Position per regolare
la centratura.
- Usare i comandi del menù OSM Image Adjust per
aumentare o diminuire il Coarse total.
- Assicurarsi che sia selezionata una modalità
supportata riguardo la scheda grafica o il sistema in
uso ( consultare la documentazione della scheda
grafica o del sistema per cambiare la modalità grafica).
OSM Image Adjust
per
La risoluzione scelta
non è visualizzata
corretamente.
Usare l’OSM Display Mode per attivare il sottomenù
Mode Change e controllare che la risoluzione corretta
sia impostata altrimenti selezionare l’opzione
corrispondente.
Page 92

Appendix
Page 93

App. A PIN ASSIGNMENTS A - 1
App. A PIN ASSIGNMENTS
MINI D-SUB 15 P
Pin No. LCD400 LCD2000
1 RED RED
2 GREEN GREEN
3 BLUE BLUE
4 NO-CONNECTION GROUND
5 GROUND NO-CONNECTION
6 GROUND GROUND
7 GROUND GROUND
8 GROUND GROUND
9 NO-CONNECTION NO-CONNECTION
10 GROUND GROUND
11 GROUND GROUND
12 SDA NO-CONNECTION
13 H.SYNC, H/V.SYNC H.SYNC, H/V.SYNC
14 V.SYNC V.SYNC
15 SCL NO-CONNECTION
Page 94

A - 2 App. B Preset Signal Timing LCD400
App. B Preset Signal Timing LCD400
Preset Resolution Vertical
Frequency (Hz)
1 640 x 400 56.42 24.83 21.05
2 640 x 480 59.99 31.47 25.18
3 720 x 350 70.09 31.47 28.32
4 720 x 400 70.09 31.47 28.32
5 800 x 600 56.25 35.16 36.00
6 800 x 600 60.32 37.88 40.00
7 640 x 480 66.67 35.00 30.24
8 640 x 480 72.81 37.86 31.50
9 640 x 480 75.00 37.50 31.50
10 720 x 350 85.04 37.93 35.50
11 720 x 400 85.04 37.93 35.50
12 800 x 600 75.00 46.88 49.50
13 640 x 480 85.01 43.27 36.00
14 1024 x 768 60.00 48.36 65.00
15 800 x 600 72.19 48.08 50.00
Horizontal
Frequency (kHz)
Frequency (MHz)
Pixel
16 832 x 624 74.55 49.73 57.28
17 800 x 600 85.06 53.67 56.25
18 1024 x 768 70.07 56.48 75.00
19* 1024 x 768 75.03 60.02 78.75
* Recommended timing
Page 95

App. B Preset Signal Timing LCD2000 A - 3
App. B Preset Signal Timing LCD2000
Preset Resolution Vertical
Frequency (Hz)
1 640 x 400 56.43 24.83 21.05
2 640 x 480 59.99 31.47 25.18
3 640 x 350 70.09 31.47 25.18
4 640 x 400 70.09 31.47 25.18
5 800 x 600 56.25 35.16 36.00
6 800 x 600 60.32 37.88 40.00
7 640 x 480 66.61 35.00 30.24
8 640 x 480 72.81 37.86 31.50
9 640 x 480 75.00 37.50 31.50
10 800 x 600 75.00 46.88 49.50
11 1024 x 768 60.00 48.36 65.00
12 800 x 600 72.19 48.08 50.00
13 1024 x 768 60.00 52.45 70.49
14 1280 x 960 60.00 60.00 108.00
15 1024 x 768 70.07 56.48 75.00
Horizontal
Frequency (kHz)
Frequency (MHz)
Pixel
16 1024 x 768 75.03 60.02 78.75
17* 1280 x 1024 60.02 63.98 108.00
18 1280 x 1024 59.93 64.60 107.50
19 1280 x 1024 67.19 71.69 117.00
20 1280 x 960 75.00 75.00 126.00
21 1280 x 1024 75.03 79.98 135.00
22 1280 x1024 76.11 81.13 135.00
* Recommended timing
Page 96

C&C for Human Potential
LA-1421JMW
LA-2031JMW
Printed in Japan
78132381
 Loading...