

Page 1

Copyright Notice
Windows® XP and Windows® 2000 are registered
trademarks of Microsoft Corporation in the United States
and/or other countries.
This product contains ACCESS Co., Ltd.’s NetFront
Internet browser software.
NetFront V3.2 is the trademark or registered trademark of
ACCESS Co., Ltd. in Japan and in other countries.
A portion of this software includes software modules
developed by the Independent JPEG Group.
You may not alter or reproduce, or remove from this product
the Internet browser software contained herein.
Use of the GIF decoder module contained in this product is
permitted only as a part of browser software, under a
license from Unisys Corporation. For other use, you have to
obtain a separate license from Unisys Corporation.
Purchase and/or use of the browser software contained in
this product does not authorise your use of any other
product or performance of any other method or activity
involving use of the LZW patents or GIF technology, unless
you are separately licensed in writing by Unisys
Corporation.
Java and all Java-based marks are trademarks or registered
trademarks of Sun Microsystems, Inc. in the U.S. and other
countries.
®
T9
Text Input is a registered trademark of Tegic
Communications Inc.
T9 Text Input is licensed under one or more of the following:
U.S. Pat. Nos. 5,818,437, 5,953,541, 5,187,480, 5,945,928,
6,011,554, and 6,307,548; Australian Pat. No. 727539;
Canadian Pat. No. 1,331,057; United Kingdom Pat. No.
2238414B; Hong Kong Standard Pat. No. HK0940329;
Republic of Singapore Pat. No. 51383; Euro.Pat. No. 0 842
463 (96927260.8) DE/DK, FI, FR, IT,NL,PT.ES,SE,GB;
Republic of Korea Pat. Nos. KR201211B1 and
KR226206B1; and additional patents are pending
worldwide.
Licensed by QUALCOMM Incorporated under one or more
of the following United States Patents and/or their
counterparts in other nations: 4,901,307, 5,490,165,
5,056,109, 5,504,773, 5,101,501, 5,506,865, 5,109,390,
5,511,073, 5,228,054, 5,535,239, 5,267,261, 5,544,196,
TM
V3.2
5,267,262, 5,568,483, 5,337,338, 5,600,754, 5,414,796,
5,657,420, 5,416,797, 5,659,569, 5,710,784, and
5,778,338.
The specifications and information in this manual are
subject to change without notice.
Some contents in this manual may not apply to your phone
depending upon the software of the phone or your service
provider.
1
Page 2

2
Page 3

Important Safety Information
Emergency services
To make an emergency call in any country
• Ensure that your N600i is switched on and in service.
• Press the Send key to return to the Home screen if
needed.
• Press 112 (or 999 within the UK or 000 in Australia)
followed by the Send key. (When the USIM card is not
inserted or when the dial lock function is on, press the
SK2 (Emrgcy). When the dial lock function is on, press
112 and SK1 (Yes). Refer to Locking your N600i
section on page 26 for further instructions on
emergency calls when the key lock is on.)
Follow the instructions and do not end the call until told to
do so.
2 Tell the operator which service you require: Police,
Ambulance, Fire Brigade, Coastguard or Mountain
Rescue Service. Give your location and, if possible,
remain where you are to maintain contact.
2 The 112 emergency number service is available on every
digital network service. Alternatively, use 999 in the UK,
or 000 in Australia. Note that these can only be used with
a valid USIM.
2 Due to the nature of the cellular system, connection to
emergency calls cannot be guaranteed.
General care
A phone contains delicate electronic circuitry, magnets and
battery systems. You should treat it with care and pay
attention to the following:
• This phone is fitted with an internal battery that can
only be replaced by a qualified service engineer. There
is a risk of explosion if the battery is replaced with an
incorrect battery type. Dispose of the used battery in
accordance with the manufacturer's instructions.
• Do not allow the phone, battery or accessories to come
into contact with liquids or moisture at any time. Do not
immerse in liquid.
• Do not paint the phone.
• Do not drop, throw or subject the phone to rough
treatment.
• Do not place the phone alongside computer disks,
credit cards, travel cards and other magnetic media.
The information contained on disks or cards may be
affected by the phone.
• Do not leave the phone or the battery in places where
the temperature could exceed 60 °C, e.g. on a car
dashboard or a window sill, behind glass in direct
sunlight, etc.
• Do not remove the battery while the phone is switched
on.
• Take care not to allow metal objects, such as coins or
key rings to contact or short-circuit the battery
terminals.
• Do not dispose of batteries in a fire. Dispose of Li-ION
batteries at a Li-ION recycling point. For more specific
battery and power supply information, see pages 6 and
7.
• Do not put the battery in your mouth, as battery
electrolytes may be toxic if swallowed.
• Do not attempt to dismantle the phone or any of its
accessories.
• Do not put a battery into a microwave oven, dryer or
high-pressure container.
• Do not let the battery come into direct contact with an
electric outlet or cigarette lighter charger. Use only
authorised charger units.
• Do not pierce the battery with a sharp object such as a
needle.
• When the battery is thrown away, be sure it is nonconducting by applying vinyl tape to the (+) and (-)
terminals.
• Do not disassemble or modify the battery.
• Do not solder the battery directly.
• Stop using the battery if you detect any abnormalities,
such as odour, discolouration or heat during use,
charge or storage.
• Do not use the phone with a damaged or misshapen
battery.
3
Page 4

• In the unlikely event of a battery leak, take care to keep
the battery discharge away from your eyes or skin. If
the leakage does come into contact with the eyes or
skin, please flush thoroughly in clean water and consult
a doctor.
• Remove a worn out battery immediately.
• The handset itself may become warm when the
handset is used for an extended period of time or when
the video functions are used. Also, it may become
warm while the battery is being charged.
• When a phone is set to Vibration mode, the vibration
can sometimes cause your phone to move. Be careful
not to place the phone near heat sources (such as a
heater) or too close to the edge of the table.
• Use an anti-static cloth to clean the phone. Do not use
an ordinary dry cloth or electrostatically charged cloth.
Do not use chemical or abrasive cleaners as these
could damage the case.
• Remember to recycle the cardboard packaging
supplied with this phone.
• Remember to make backup copies of all important data
on your phone.
• Do not leave the battery pack empty or disconnected
for a long time, otherwise some data may be initialised.
• Take care not to put your phone in your back pocket
and then sit on it. Also, do not put your phone at the
bottom of a bag where it may subject to excessive
weight or pressure. Doing so may damage the LCD
and camera lens and cause them to malfunction.
• Hold the phone away from your ear when you
- Play video/music on the Multimedia Player
- Play the ringtune through the speaker.
It may damage, or irritate your ears.
Safety
The use of mobile phones is not allowed in some radiationsensitive areas, such as hospitals, research centres and
aircraft. Ensure that you switch off your phone in these
areas. If in doubt, remove the battery.
Aircraft safety
Switch off your phone and remove its battery when inside or
near an aircraft. The use of phones in aircraft is illegal. It
may be dangerous to the operation of the aircraft and it may
disrupt the mobile network. Failure to observe this
instruction may lead to suspension or denial of mobile
network services to the offender or legal action or both.
Do not use the phone on the ground without the permission
of the ground staff.
Hospital safety
Switch off your phone and remove its battery in areas where
the use of phones is prohibited. Follow the instructions
given by the respective medical centre regarding the use of
mobile phones on their premises.
General safety
• Observe "Turn off mobile" signs, such as those near
petrol stations, chemicals or explosives and switch off
your phone.
• If you have a heart condition, be careful with the call
vibration or tone volume settings.
• Do not allow children to play with the phone, charger or
batteries.
• Do not use the phone where blasting is in progress.
• The operation of some medical electronic devices,
such as hearing aids and pacemakers, may be affected
if you use a mobile phone next to them. Observe any
warning signs and the manufacturer's
recommendations.
• Your phone contains metal which may cause a skin
irritation, a rash or eczema.
Road safety
• You MUST exercise proper control of your vehicle at all
times. Give your full attention to driving.
• Observe all local safety regulations regarding the use
of mobile phones while driving.
• Pull off the road and park before making or answering a
call.
• You MUST NOT stop on the hard shoulder of a
motorway to answer or make a call, except in an
emergency.
4
Page 5

• Switch off your phone at a refuelling point, such as a
petrol station, even if you are not refuelling your own
car.
• Do not store or carry flammable or explosive materials
in the same compartment as a radio transmitter.
• Electronic vehicle systems, such as anti-lock brakes,
speed control and fuel injection systems are not
normally affected by radio transmissions. The
manufacturer of such equipment can advise if it is
adequately shielded from radio transmissions. If you
suspect vehicle problems caused by radio
transmissions, consult your dealer and do not switch on
the phone until it has been checked by qualified
approved installers.
• Check if local laws and/or regulations restrict the use of
phones while driving.
Vehicles equipped with an airbag
An airbag inflates with great force. Do not place objects,
including either installed or portable wireless equipment, in
the area over the airbag or in the airbag deployment area. If
in-vehicle wireless equipment is improperly installed and the
airbag inflates, serious injury could result.
Third party equipment
The use of third party equipment, batteries, cables or
accessories, not made or authorised by NEC, may
invalidate the warranty of your phone and also adversely
affect the phone's operation.
Service
The phone, batteries and charger contain no userserviceable parts. We recommend that your NEC phone is
serviced or repaired by an NEC authorised service centre.
Please contact 3 or NEC for advice.
Efficient use
The phone has an internal antenna. For optimum
performance with minimum power consumption, please do
not cover the internal antenna area with your hand.
Covering the internal antenna affects call quality, may cause
the phone to operate at higher power levels than needed
and may shorten talk and standby times.
Radio frequency energy
Your phone is a low-power radio transmitter/receiver. When
it is turned on, it intermittently receives and transmits radio
frequency (RF) energy (radio waves). The system that
handles the call controls the power level at which the phone
transmits.
Exposure to radio frequency energy
• The phone is designed not to exceed the limits for
exposure to RF energy set by national authorities and
international health agencies.* These limits are part of
comprehensive guidelines and establish permitted
levels of radio wave exposure for the general
population. The guidelines were developed by
independent scientific organisations such as ICNIRP
(International Commission on Non-ionizing Radiation
Protection) through periodic and thorough evaluation of
scientific studies. The limits include a substantial safety
margin designed to assure the safety of all persons,
regardless of age and health and to account for any
variations in measurements.
• *Examples of radio frequency exposure guidelines and
standards that the phone is designed to conform to:
• ICNIRP, Guidelines for limiting exposure to time-varying
electric, magnetic and electromagnetic fields (up to 300
GHz)-International Commission on Non-Ionizing
Radiation Protection (ICNIRP). Health Physics, vol.74.
pp, 494-522, April 1998.
• 99/519/EC, EU Council Recommendation on the
limitation of exposure of the general public to
electromagnetic fields 0 Hz-300 GHz. Official Journal
of the European Communities, July 12, 1999.
• ANSI/IEEE C95.1-1992. "Safety levels with respect to
human exposure to radio frequency electromagnetic
fields, 3kHz to 300 GHz". The Institute of Electrical and
Electronics Engineers Inc., New York, 1991.
• FCC Report and Order, ET Docket 93-62, FCC 96-326,
Federal Communications Commission (FCC), August
1996.
• Radiocommunications (Electromagnetic Radiation
Human Exposure) Standard 1999, Australian
Communications Authority (ACA), May 1999.
5
Page 6

Radio Frequency (RF) Signals
THIS MODEL PHONE MEETS THE U.S. GOVERNMENT'S
REQUIREMENTS FOR EXPOSURE TO RADIO WAVES.
Your wireless phone contains a radio transmitter and
receiver. Your NEC phone is designed and manufactured
not to exceed the emission limits for exposure to radio
frequency (RF) energy set by the Federal Communications
Commission of the U.S. Government. These limits are part
of comprehensive guidelines and establish permitted levels
of RF energy for the general population. The guidelines are
based on standards that were developed by independent
scientific organizations through periodic and thorough
evaluation of scientific studies.
The exposure standard for wireless mobile phones employs
a unit of measurement known as the Specific Absorption
Rate (SAR). The SAR limit set by the FCC is 1.6W/kg.*
Tests for SAR are conducted using standard operating
positions accepted by the FCC with the phone transmitting
at its highest certified power level in all tested frequency
bands. Although the SAR is determined at the highest
certified power level, the actual SAR level of the phone
while operating can be well below the maximum value. This
is because the phone is designed to operate at multiple
power levels so as to use only the power required to reach
the network. In general, the closer you are to a wireless
base station antenna, the lower the output.
Before a phone model is available for sale to the public, it
must be tested and certified to the FCC that it does not
exceed the limit established by the U.S. governmentadopted requirement for safe exposure. The tests are
performed on position and locations (for example, at the ear
and worn on the body) as required by FCC for each model.
The highest SAR value for this model phone as reported to
the FCC when tested for use at the ear is (TBD) W/kg, and
when worn on the body, is (TBD) W/kg. (Body-worn
measurements differ among phone models, depending
upon available accessories and FCC requirements). While
there may be differences between the SAR levels of various
phones and at various positions, they all meet the U.S.
government requirement.
The FCC has granted an Equipment Authorization for this
model phone with all reported SAR levels evaluated as in
compliance with the FCC RF exposure guidelines. SAR
information on this model phone is on file with the FCC and
can be found under the Display Grant section at http://
www.fcc.gov/oet/fccid after search on FCC ID A98KMP7N2E1.
For body worn operation, this phone has been tested and
meets the FCC RF exposure guidelines when used with an
NEC accessory designated for this product or when used
with an accessory that contains no metal and that positions
the handset a minimum of 1.5 cm from the body.
**In the United States, the SAR limit for wireless mobile
phones used by the public is 1.6 watts/kg (W/kg) averaged
over one gram of tissue. SAR values may vary depending
upon national reporting requirements and the network band.
Copyright Notice
The video/audio recordings you make/download are
protected by copyright laws. They are for personal use only
and must not be otherwise used without the permission of
the copyright owner.
6
Page 7

Copyright Notice ................................. 1
.............................................................. 1
Important Safety Information .............3
.............................................................. 3
Copyright Notice .......................................6
Manual conventions ..................................5
Reading the titles 5
Menu functions ..........................................5
Getting started ..................................... 5
.............................................................. 5
Main LCD and sub LCD icons ................... 7
Keypad shortcuts ......................................8
Overview of N600i .....................................9
Introducing your N600i ....................... 9
.............................................................. 9
Setting up your N600i ............................. 10
USIM Card and TransFlash memory card ..
10
To Insert/Remove the USIM Card and
TransFlash memory card 10
Battery .....................................................12
To Insert the Battery 12
Charging .................................................13
To Charge the Battery Using the Charger 13
Cautions on charger plug 13
Switching your N600i on and off ............. 14
To Switch On 14
To Switch Off 14
Power Saver 14
Setting the Clock .....................................14
To Set the Clock 14
Entering your PIN Code ...........................14
To Enter your PIN Code 14
Check your own number ..........................14
Menu functions ........................................15
Menu options ...........................................15
Understanding the Menus .................15
...................................... .......................15
Quick Menu and Home Screen Shortcut .16
Taskbar ....................................................16
Making a voice call ..................................17
To make a call using the Contact list 17
To make a call from Incoming calls list 17
To make a call from Outgoing calls list 17
To make a call from Missed calls list 17
For emergency calls 17
Phone (M1) .........................................17
...................................... .......................17
For speed call 18
For one touch dial 18
For pause dial 18
Receiving a Voice Call .............................18
To reject the call 18
When you miss a call 18
During a Voice Call ..................................19
To Switch to a Grouptalk 19
To adjust the earpiece volume 19
To search the contact list 19
CL-1
Page 8

To put a call on hold 19
To record a Call memo 19
To activate Settings 19
To mute the microphone 19
To talk handsfree 19
Making a Video Call ................................19
Receiving a Video Call ............................19
To make a video call using the contact list 19
To Make a video call from Incoming calls list 19
To Make a video call from Outgoing calls list 20
To Make a video call from the Missed calls list 20
To Reject the incoming video call 20
Screen setting 20
During a Video Call .................................20
To set the handsfree mode 20
To zoom in/out 20
To turn the microphone on/off (send/not send
your voice to the other party) 20
To turn your camera on/off (send/not send your
image to the other party) 20
To change the screen display mode 20
To change the picture quality 20
To change the camera mode 20
To set the lighting mode 20
To set the call time duration information 21
To adjust the speaker volume 21
To send a message to the other party 21
Call Logs .................................................21
Message Services ...................................23
To use SMS service ................................23
Messages (M2) ...................................23
...................................... .......................23
To create and send a new message 24
To read a message 24
25
To organise messages 25
To use iMail/iMMS message ....................26
To create and send a new iMail 26
To create and send a new iMMS 27
File Manager (M3) ..............................29
...................................... .......................29
How to run software 31
JavaTM Option menu 31
Java (M4) ............................................31
...................................... .......................31
Prog backlight 32
Contact Entries ........................................33
To Add a New Entry to the Contact 33
Contacts (M5) .....................................33
...................................... .......................33
Capture ....................................................35
To take a photo/make a video 35
Multimedia centre (M6) ......................35
...................................... .......................35
Recording sound .....................................36
To use the voice recorder 36
Viewing an image ....................................36
To use the image viewer 36
To view an image file 37
Playing video and audio ..........................37
To play a video or audio file 37
CL-2
Page 9

................................................................ 38
Playlists ................................................... 38
Bluetooth® .............................................. 39
To use a Bluetooth device 39
External connection (M7) .................39
............................................................ 39
To register a Bluetooth device 40
Synchronisation ...................................... 40
To use Synchronisation 40
Server one to Server six 41
Handset profile ........................................43
Screen settings .......................................43
Settings(M8) ....................................... 43
............................................................ 43
Calls ........................................................ 44
Date and Time ................................ ... ... ... 47
Language ................................................48
Security ................................................... 48
Network setup .........................................49
Clear settings ..........................................50
Calendar .................................................51
To set appointment 51
To Do .......................................................51
To add a new To Do task 51
To edit To Do tasks 51
To delete To Do tasks 51
Toolbox (M9) ...................................... 51
............................................................ 51
Alarm clock ..............................................52
To Edit an Alarm 52
To Change alarm clock status 52
To delete Alarms 52
Notepad ...................................................52
To create a new Notepad entry 52
To edit a Notepad entry 52
To delete a Notepad entry 52
Calculator ................................................52
Call memo ...............................................53
To listen to a call memo 53
To delete a call memo 53
Text Entry ...........................................55
...................................... .......................55
CL-3
Page 10

CL-4
Page 11

Getting started
Manual conventions
The instructions in this user's manual make use of
the shortcuts selection except special cases.
The following markers are used throughout the
user's manual to attract your attention:
2 This type of paragraph will contain information worth
noting.
, This type of paragraph will contain important
information.
☛ This type of description will contain procedures to
operate your phone.
Reading the titles
Some titles in this manual contain information on
how to access the functions. In these titles, M
stands for .
Menu functions
Home screen
You can switch the Home screen to the Menu screen
by pressing
screen by pressing or the CLR key.
N600i provides nine menus on the Menu screen as
follows:
No Top m e nu 2nd level menu Page
1 phone -
2 Messages New message
3 File Manager Memory.
4 Java -
Menu screen
, and the Menu screen to the Home
Inbox
Drafts
Sent
My folders
CB_Message
Options
Memory card
5
Page 12

No Top m e nu 2nd level menu Page
5 Contacts Add contact
Handset contacts
USIM contacts
Manage contacts
Contact groups
Other folders
Settings
6 Mult8imedia
Centre
7 External
Connection
8 Settings Handset profile
Take photo
Make video
Record sound
View images
Play video
Play music
Play sound
Bluetooth
Synchronisation
Flash memory
Screen settings
Calls
Date and time
Language
Security
Network setup
Clear settings
No Top menu 2nd level menu Page
9 Toolbox Calendar
To D o
Alarm clock
Notepad
Calculator
Call memo
6
Page 13

Main LCD and sub LCD icons
(to be provided on next draft)
7
Page 14

Keypad shortcuts
(to be provided on next draft)
8
Page 15

Introducing your N600i
Your N600i combines a wide range of features in a
technologically advanced phone, capable of
operating on UMTS (Universal Mobile
Telecommunication System), also known as 3G,
GSM (Global System for Mobile Communications)
or 2G and GPRS (General Packet Radio Service) or
2.5G.
Overview of N600i
3G allows much greater data speeds than 2G/2.5G
networks and enables you to make video calls, send
multimedia messages, view photos and videos and
much more.
Antenna
Through-hole
for straps
Side up key
Side down key
Earpiece
4 way navigation key
(
Softkey1
Menu ( ) key
Send ( ) key
Charger connector cover
Camera
Main-LCD
)
Select key
Softkey2
Softkey3
Clear ( )/Back key
End/on-off ( )key
Alphanumeric keys
Mouthpiece
Earphone
jack cover
2nd-LCD
Speaker
Rear cover
for battery
9
Page 16

Setting up your N600i
This section explains how to prepare your phone for
use. Before you use your phone you must do the
following:
• Insert a valid USIM (Universal Subscriber Identity
Module) card
• Insert the TransFlash
• Charge the battery
• Set the date and time
2 USIM card and TransFlash memory card are shipped
with N600i. Use those card for the initial setup.
TM
memory card
To Insert/Remove the USIM Card and
TransFlash memory card
Ensure that the power is off. If the power is on, press
and hold
until power is off.
Insert/remove the USIM card as shown in the
diagram. Look at carefully and follow this instruction.
☛ Remove the battery cover.
Rear cover
2
1
USIM Card and TransFlash memory
card
Your N600i includes the USIM card that must be
inserted into your phone, and TransFlash memory
card that is used as an external storage media.
2 TransFlash package includes an adapter with which you
can transfer the data in TransFlash to PC.
The USIM card and TransFlash memory card
holders are located underneath the battery. If the
USIM card is removed, then the phone becomes
unusable until a valid USIM is inserted.
, Always disconnect the charger and other
accessories from your phone before inserting and
removing your USIM card.
About 3mm
☛ If the battery is inserted, remove this.
4
Battery
3
10
Page 17

☛ Insert the USIM card into the USIM card holder and
slide it into place.
Holder
☛ Set the oover.
Memory card
10
6
SIM card
☛ To insert the TransFlash memory card, slide the metal
cover and lift open.
☛ Insert the TransFlash memory card with the gold
plated contacts facing down.
5
Holder
7
Holder
Memory card
8
9
SIM card
11
Page 18

Battery
To Insert the Battery
When fitting the battery, face the outside cover of the
battery towards you. Place the top of the battery into
position and push the lower section of the battery
into place.
☛ Set the battery.
11
12
☛ Return the battery cover.
13
About 3mm
Check that there is no gap
between the rear cover
and the phone body.
You can charge the battery whenever you wish
without affecting the performance of the phone.
2 Your N600i automatically switches off if the battery
charge is too low.
2 Batteries have a life cycle. If you find that the amount of
times you have to charge the battery is increasing
dramatically, the battery life may be coming to an end.
Use only the NEC original or approved batteries.
Unapproved batteries can impair the performance of the
phone and invalidate the warranty.
2 When the battery is not being used for a long period of
time, remove it from your N600i and store in a cool, dry
place.
2 A battery that has not been used for a long period of time
needs to be completely discharged and then recharged
two or three times before reaching full capacity.
12
Page 19

Charging
r
Charger plug
Charger connector
r
A
To Charge the Battery Using the Charger
Insert the battery into the phone (see To Insert the
☛
Battery section above).
☛ Connect the charger plug to your N600i charger
connector.
☛ Plug the charger into a mains socket. The LED
indicator on your N600i lights up while charging is in
progress and goes off when charging is completed.
☛ After charging is completed, unplug the charger from
the charger connector.
Cautions on charger plug
, Do not wrench the charger plug (AC adapter)
when you plug or unplug it. Otherwise damage
may occur on the charger plug or your N600i.
Correct
Incorrect
Charger connecto
Charger plug
rrow mark
Charger plug
Arrow mark
Charger connecto
Charger plug
Charger connector
, Make sure to connect or disconnect the charger
plug (AC adapter) in the following manner.
Press and hold the latches on both sides of the
charger plug and push or pull gently and vertically
from the charger connector.
13
Page 20

Switching your N600i on and off
To Switch On
After inserting the USIM card (see pages 4 and 5)
and the inserting/charging the battery (see pages 6
and 7), press the End (On-Off) key until the phone
switches on (approximately two seconds).
To Switch Off
In Standby mode, press and hold the End (On-Off)
key until the phone powers down. There may be
some delay while the phone switches off. Do not
attempt to switch the phone on again during this
time.
Power Saver
The power saver function turns the screen off when
the phone is left idle for a certain period of time. You
can turn the screen back on by pressing any key.
Setting the Clock
When using your N600i for the first time you are
prompted to set the current date and time.
To Set the Clock
☛ Press the MENU key, select the Settings icon, select
Date and time and Set date and time.
☛ Enter the current date and time. Refer to Date and
time on page 64 for details.
Entering your PIN Code
If you want to secure information in your phone, you
can activate your PIN code so that the phone cannot
be used without entering the PIN as you switch on
your phone. (For information about how to activate
PIN codes, refer to Security on page 65.)
2 PIN1 and PIN2 numbers are usually supplied with your
USIM card. If not, or you have lost them, contact 3.
To Enter your PIN Code
☛ Ensure that your USIM card is in your N600i and that
the battery is charged.
☛ Press and hold the End (On-Off) key until power is on.
☛ If the Password screen is displayed, enter your PIN1.
The code you enter appears as asterisks (*).
2 If you make a mistake while entering your PIN, delete the
wrong number by pressing the C key.
☛ Press the SK1 (OK).
When connecting to the network, the name 3 appears.
If you are connecting onto another network, the name
of another operator appears.
Check your own number
To check your own number, press the Menu key and
press 0 from the Home screen.
14
Page 21
Understanding the Menus
This section describes how to use the menus.
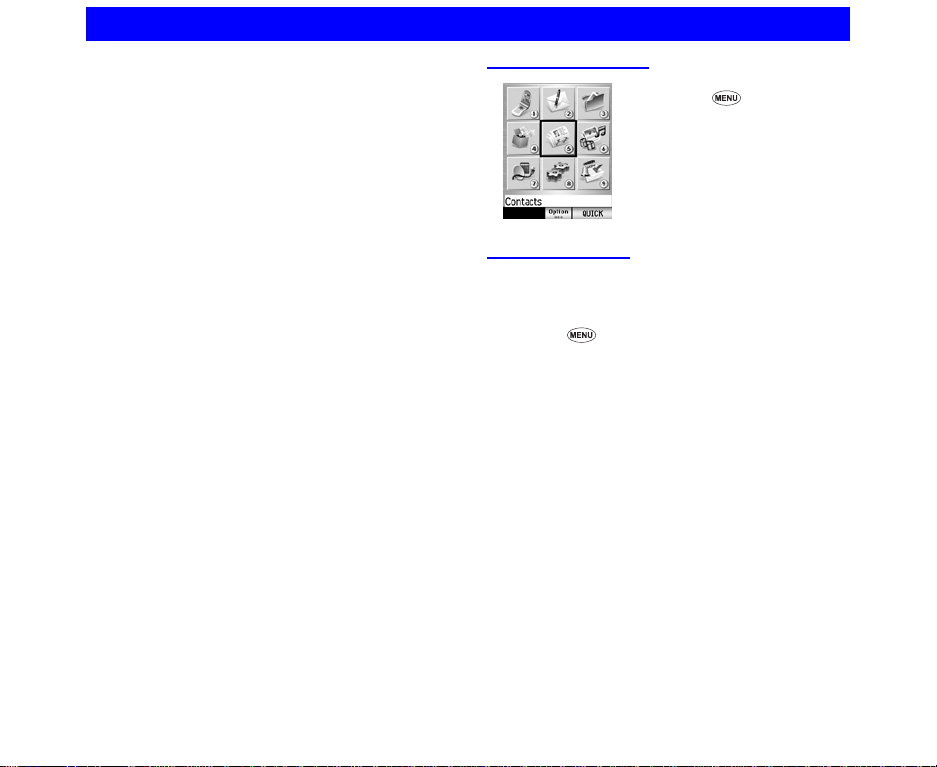
By selecting icons, menus, submenus, options
menus or building your own shortcuts, you can
access the numerous functions and their settings.
• Icon list
An icon is a graphic image that links to a category of
functions or a particular function.
• Menu list
Your N600i's functions are reached through a system of
menus. You can select a menu item by scrolling up or
down and pressing the Enter key. Alternatively, press
the item's corresponding number. If there are more
than nine items in a menu, not all of the choices are
visible on the same screen. You can scroll up or down
to view the next screen. You can reach the main menu
by pressing the MENU key.
• Options menu list (Press Option when available.)
This is a dynamic menu. That is, the options available
depend on the function you are using. The Options
menu indicator (three white dots appear below the time
display at the bottom, centre of the screen) shows
when an Options menu is available. Press the Options
menu key to access the menu. Refer to Home screen
image on page 3 for details. (
Menu functions
To display the Main Menu:
☛ Press
To highlight a Menu option:
☛ Press the 4-way
navigation key (Up,
Down, Left and Right) or
the icon ID number (1 to
9).
Menu options
This section shows you how to use the menus.
The following example shows you how to set your
wallpaper.
☛ Press to display the Menu screen.
☛ Use the Up, Down, Left and Right keys to highlight the
Settings icon. Whenever an icon is highlighted it has
a box around it and the icon name appears at the
bottom of the display.
☛ Press the Enter key and the User settings menu is
displayed.
• Press the Up and Down keys to highlight Screen
settings and press the Enter key, or, alternatively
press 2.
• Press the Up and Down keys to highlight
Wallpaper and press the Enter key, or,
alternatively press 2.
☛ Press SK1 (OK) and the image is set as wallpaper
and the screen returns to the Screen settings list
menu.
15
Page 22
Quick Menu and Home Screen
Shortcut
Quick menu
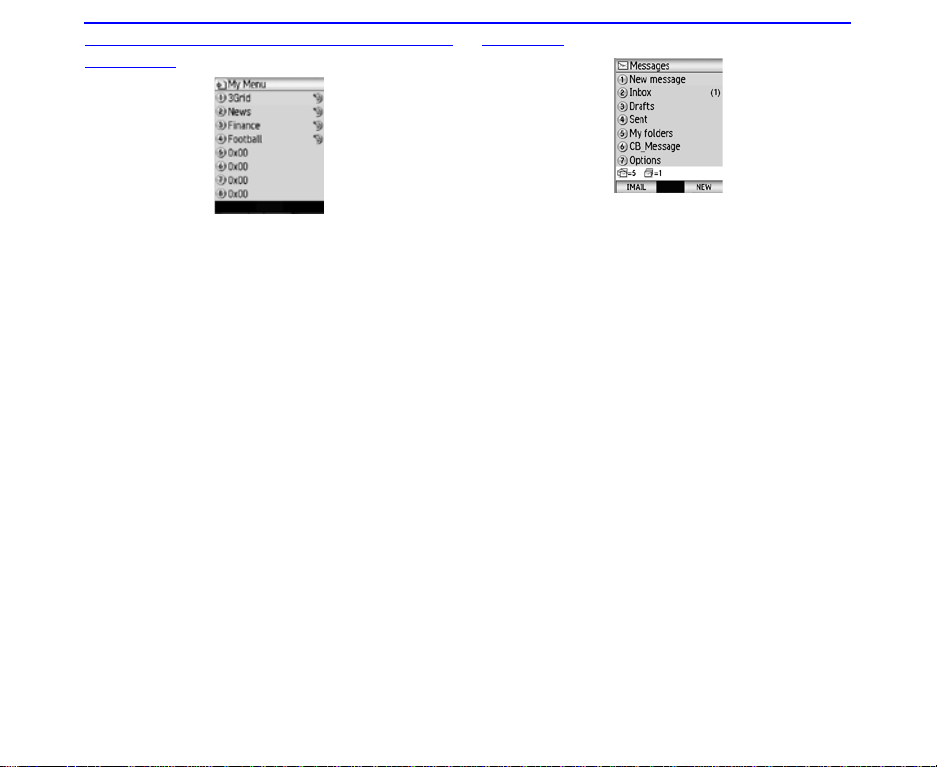
You can create shortcuts to an application or a
function that you frequently use in the Quick menu
or on the Home screen. Whenever you can create a
shortcut to an application/function, the Link this
menu is available on the SK1. From the SK1, you
can select where to add the shortcut, in the Quick
menu list or on the Home screen.
• Quick menu
The Quick menu is your customised list of shortcuts to
applications/functions. Pressing the MENU key twice
on the Home screen or pressing the SK2 (Quick) on
Main Menu displays the Quick menu. Highlight the
required shortcut by pressing the Up and Down keys
and then press Enter key to activate the application/
function.
2 You cannot delete items 1 to 5 in the Quick menu. For
items 6 to 9, you can create shortcuts and also delete
them.
2 The Quick menu display varies depending on the
region.
• Home screen shortcut
You can also create shortcut icons to applications/
functions on the Home screen. Pressing the Enter key
followed by the 4-way navigation keys (Up, Down, Left
and Right) on the Home screen highlights the
shortcuts. Press the Enter key to select the highlighted
shortcut to activate the application/function.
Taskbar
Tas k ba r
Pressing and holding the MENU key displays the
taskbar at the bottom of the screen. When there are
multiple tasks active at the same time, they are
displayed on the taskbar as icons. Highlight using
the 4-way navigation key and press the Enter key to
switch to that task.
On the taskbar, you can end the selected task by
pressing the End key or the SK1 (End task).
Pressing the SK2 (End all) ends all tasks. You can
cancel the taskbar display by pressing the C key.
2 When you end tasks by pressing the End key, SK1 (End
task) or SK2 (End all) the tasks are interrupted, and any
unsaved changes discarded.
16
Page 23
Phone (M1)
☛ 1, or select
1 (Phone) to
press the Enter
key on the Menu
screen.
N600i provides you with the voice call and video
call services. This section guides you through the
following step by step:
• Making a Voice Call
• Receiving a Voice Call
• Other things that you can do during a Voice Call
• Making and Receiving a Video Call (available in
3G coverage only)
2 When using the headset, you can start/end a voice call
using the switch on the microphone.
Making a voice call
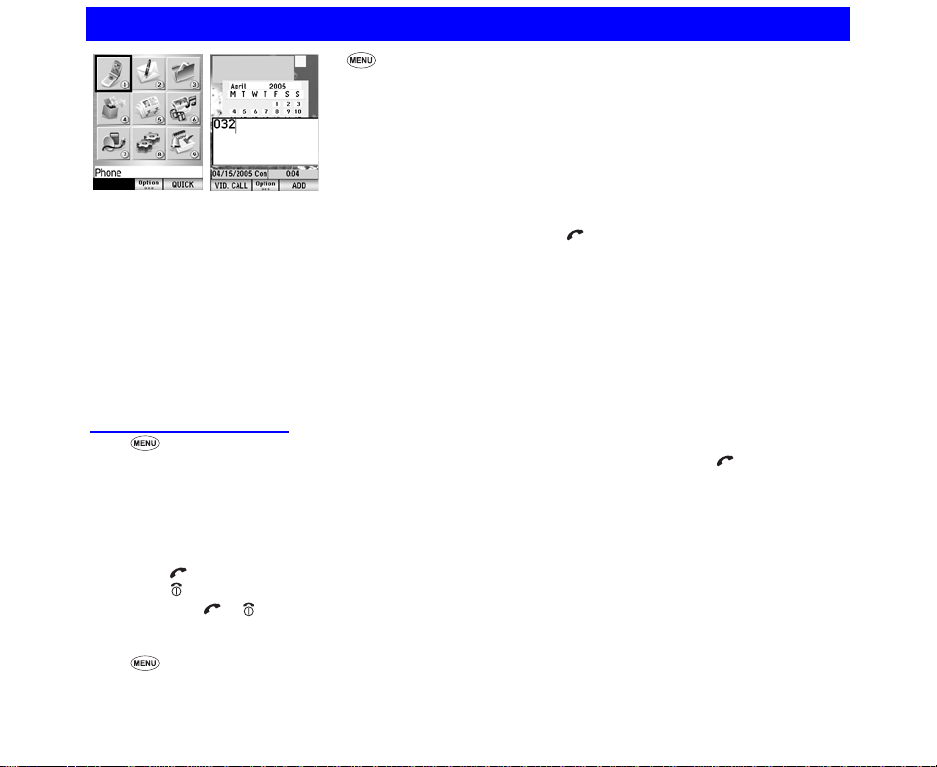
☛ 1, or select 1 (Phone) to press the Enter key on
the Menu screen.
☛ Enter the phone number using the keypad.
2You can enter the phone number on the Home
screen as well.
2To correct mistakes, press the C key briefly to
delete the last number or press and hold the C key
to clear all the numbers.
☛ Press to start the call.
☛ Press to end the call.
2Pressing or is the final operation to start or
end the call for every steps in this section.
To make a call using the Contact list
☛ 5, or select 5 (Contacts) to press the Enter key
on the Menu screen. to display the Contact list.
2You can press the Down key on the Home screen
as well.
☛ Search and select the addressee's phone number.
To make a call from Incoming calls list
☛ Press the Left key on the Home screen to display
Incoming calls.
2You can also press Option on the Home screen,
and press 5 (Call logs), then 2 (Incoming calls).
☛ Select the phone number on the list.
To make a call from Outgoing calls list
☛ Press on the Home screen to display Outgoing
calls.
2You can also press Option on the Home screen,
and press 5 (Call logs), then 1 (Outgoing calls).
☛ Select the phone number on the list.
To make a call from Missed calls list
☛ Press the Right key on the Home screen to display
Missed calls.
2You can also press Option on the Home screen,
and press 5 (Call logs), then 3 (Missed calls).
☛ Select the phone number on the list.
For emergency calls
☛ Enter the emergency number 112, 999 (UK only) or
000 (Australia only) and press .
, While the phone is locked, you can make
emergency calls only to the designated numbers.
Follow the steps below to make emergency calls
while the key lock is set. For details of the key
lock, see xxx.
☛ Enter the designated emergency number (112, 999
for UK only or 000 for Australia only).
☛ The confirmation message is displayed.
17
Page 24
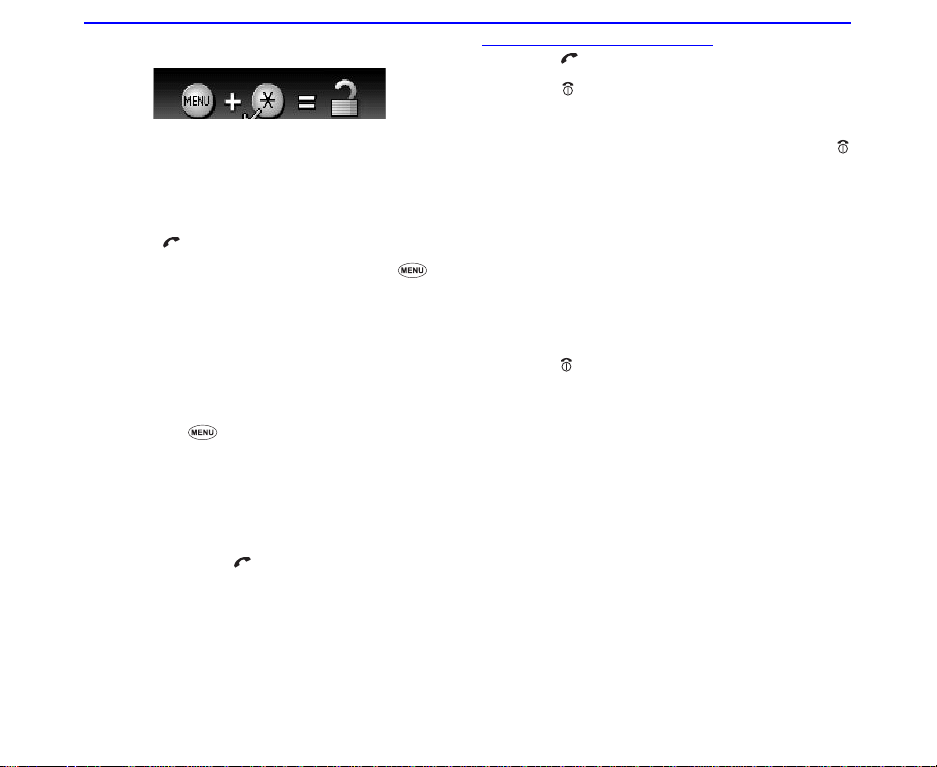
2 The screen below is displayed until you enter the
designated emergency number correctly.
☛ Press SK1 (Yes).
2 Your N600i is unlocked temporarily and the
emergency call is made.
For speed call
☛ Enter a contact memory number from 2 to 99 and
press to call the phone number registered for the
memory number.
☛ To turn on/off the speed dial function, press to
select Settings, Calls, Advanced settings, and then
select Speed dial.
2If more than one phone number is registered for a
memory number, the first number is used to make
a call.
For one touch dial
☛ Pressing and holding a key from 2 to 9 calls the
number registered in the One touch dial list.
☛ To register or edit the number in the One touch dial
list, press to select 5 (Contacts), 7 (Settings),
and 1 (One touch dial). You can register phone
numbers to 2 to 9 in the list. Voicemail number is
preset as 1 and cannot be moved or deleted.
For pause dial
☛ Enter the phone number, then press and hold # to
insert a pause (displayed as p).
☛ Input the numbers to call, inserting pauses where
necessary. Press to dial the input numbers. When
the other party answers the call, the next number is
automatically dialed in 3 seconds. Then, all
succeeding numbers are automatically dialed every 3
seconds.
Receiving a Voice Call
☛ Press or SK1 (Answer) when you receive a voice
call.
☛ Press to end the call.
2 When Any key answer function is activated, you can
press any key to answer the call (except SK2 (Ignore),
Up or Down key (including the side key), Clear key,
and Option).
2 When Active flip function is activated, you can answer
the call only by opening your N600i.
2 When the Calling Line Identification (CLI) function has
been activated by the caller, the registered image is
displayed.
2 When the headset is connected, pressing the headset
switch also answers the call.
2 If you miss a call, it is shown as a missed call by an icon
on the Home screen. The missed call is saved to the
Missed calls list. When you display Missed calls, the icon
disappears
To reject the call
☛ press or the SK2 (Ignore) while receiving a call,
When you miss a call
2 If you miss a call, it is shown as a missed call by an icon
on the Home screen. The missed call is saved to the
Missed calls list. When you display Missed calls, the icon
disappears.
18
Page 25
During a Voice Call
To Switch to a Grouptalk
(When there are two calls on-line: the current call and a
held call)
☛ Press Option and Join calls.
☛ Press Option, Drop/Split Call. Pressing the SK1
(Split) splits the selected caller from the Grouptalk
and the SK2 (Drop) drops the selected caller from the
Grouptalk.
To adjust the earpiece volume
☛ Press the Up and Down key (including the side key)
to adjust the volume while on a call.
To search the contact list
☛ Press SK2 (Contact) to display the Contact list.
To put a call on hold
☛ Press SK1 (Hold) or press Option, while talking, to
select Hold call. The call will be put on hold.
☛ To retrieve the call, press SK1 (Retrieve) or press the
Option and Retrieve call.
To record a Call memo
☛ Press Option and select Call memo to start recording
the conversation.
☛ To stop the recording, press the Enter key.
2 Both your voice and the other party's voice are
recorded. (20 seconds max.) Five call memos can be
recorded in the phone. A call memo is displayed with
its date and time of recording
, Always ask the other party's permission to record.
, You cannot attach call memos to messages.
To activate Settings
☛ Press Option and select Settings to see the following
settings:
• Auto answer: Turns on/off automatic answering.
• Set answer key: Selects Use any key or Send
key only as the call answering key.
• Auto redi al: Turns on/off automatic redial.
• Send DTMF tones: Enables/disables the sending
of Dual Tone Multi Frequency (DTMF) signals.
To mute the microphone
☛ Press Option and select Mute.
To talk handsfree
☛ Press Option and select Handsfree on.
The speaker turns on and you can talk handsfree.
Making a Video Call
When making a Video Call to a Video Capable phone,
follow the steps below:
☛ xx, or press 1 (Phone) on the Menu screen or to
enter the phone number and press SK1 (Vid. call).
2You can enter the phone number on the Home
screen as well.
☛ Hold the camera towards you and talk. Adjust the
camera position if necessary.
2Handsfree is set by default for video calls.
☛ Press to end the call.
Receiving a Video Call
☛ Press or SK1 (Answer) to answer and send the
captured image from the active camera to the other
party.
2 To answer the video call without sending your image,
press the SK2 (No video). The alternative photo is
sent to the other party.
To make a video call using the contact list
☛ xx, or press 5 (Contacts) on the Menu screen to
display the Contact list.
2You can press the Down key on the Home screen
as well.
☛ Search and select the addressee's phone number/
email address.
☛ Press SK1 (Vid. call) to dial the phone number/email
address.
To Make a video call from Incoming calls
list
☛
Press the Left key on the Home screen to display
Incoming calls.
2You can also press Option on the Home screen,
and press 5 (Call logs), then 2 (Incoming calls).
19
Page 26

☛ Search and select the addressee's phone number/
email address.
☛ Press SK1 (Vid. call) to dial the phone number.
To Make a video call from Outgoing calls
list
☛ Press on the Home screen to display Outgoing
calls.
☛ Search and select the addressee's phone number/
email address.
☛ Press the SK1 (Vid. call) to dial the phone number/
email address. (However, SK1 (Vid. call) is invalid for
emergency numbers.)
To Make a video call from the Missed calls
list
☛ Press the Right key on the Home screen to display
Missed calls.
2You can also press Option on the Home screen,
and press 5 (Call logs), then 3 (Missed calls).
☛ Search and select the addressee's phone number/
email address.
☛ Press SK1 (Vid. call) to dial the phone number/email
address.
To Reject the incoming video call
☛ Press or press Option and select Ignore.
Screen setting
☛ Press Option and switch between Use live video and
Use photo instead to hide your image (sent image)
2 The received image and the sent image can both be
displayed on the screen.
During a Video Call
To set the handsfree mode
Press Option, Other settings and select Handsfree
☛
on or Handsfree off.
☛ When the handsfree option is on, the microphone
sensitivity increases, and the other party's voice can
be heard from the speaker.
To zoom in/out
☛ Press the Right key to zoom in or the Left key to
zoom out.
To turn the microphone on/off (send/not
send your voice to the other party)
☛
Press SK2 (Mute/Unmute) to switch the microphone
on and off.
☛ Alternatively, press Option, Other settings and Mute
settings. Select Mute or Unmute.
To turn your camera on/off (send/not send
your image to the other party)
☛ Press SK2 (Show Me) to switch the camera on and
off.
☛ Alternatively, press Option, and then select either
Use live video or Use photo instead (whichever is
displayed).
To change the screen display mode
☛ Press Option, Other Settings and then Screen
mode. Select My side is smaller (to display your
image on the smaller window), My side is larger (to
display your image on the larger window), Other side
only (to display only the other party's image) or My
side only (to display only your image).
To change the picture quality
☛ Press Option and Picture quality. Select Standard,
Better picture (image quality has the priority) or
Faster movement (capturing movement has the
priority).
To change the camera mode
☛ Press Option and Night mode on or off.
To set the lighting mode
20
Page 27
☛ Press Option and Lighting settings. Select Sunny,
Cloudy, Automatic or Indoors.
To set the call time duration information
Press Option, Other settings and Show call length.
☛
Select Show call length or Do not show.
To adjust the speaker volume
☛ Press the Up and Down keys.
To send a message to the other party
☛ Press Option to select Send message.
☛ The Message function is activated, allowing you to
send a message to the other party's phone number.
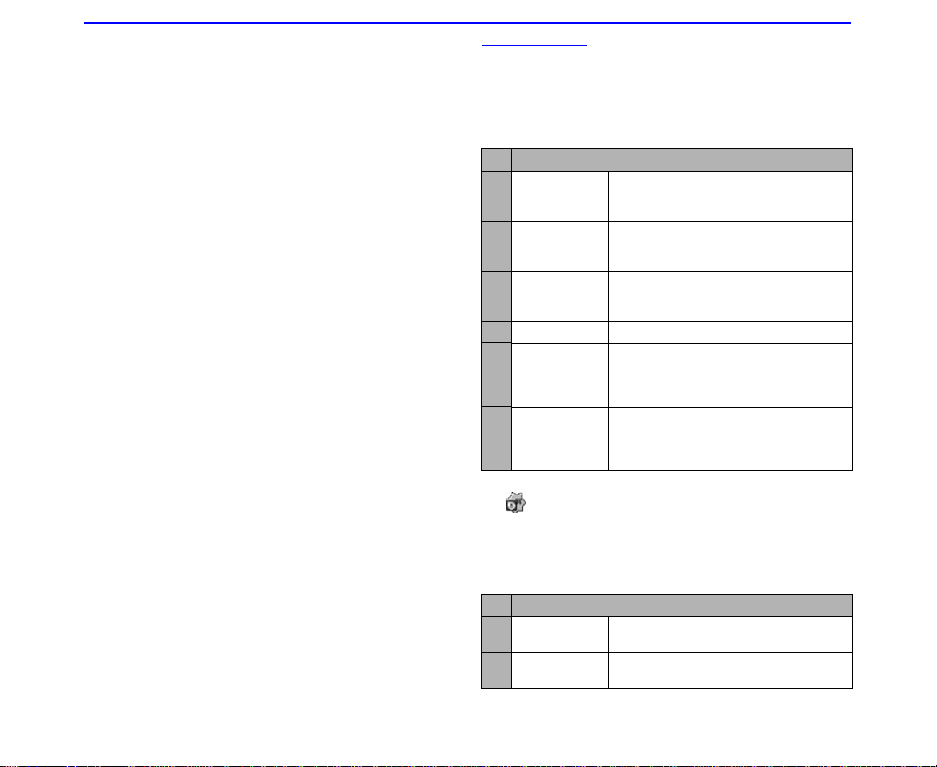
Call Logs
☛ Press Option on the Home screen to select 5 (Call
logs).
Call logs are lists of call records such as incoming/
outgoing/missed calls. Up to 20 entries are saved in each
call log. You can make a call using these logs, and do the
following from Call logs on the Options menu.
No Call logs
1 Outgoing
calls
2 Incoming
calls
3 Missed calls You can also see the Missed calls by
4 Clear all logs Deletes all the call log data.
5 Automatic
delete
Duplicate
records
2 If you miss a call, it is shown as a missed call by an icon
on the Home screen. After you display Missed calls
the icon disappears.
, Depending on the conditions, some options may
be greyed out and not be available
You can do the following operations when displaying a call
record. On a call record, press Option.
No Options menu
1 Send
message
2 Delete
this record
You can also see the Outgoing calls
by pressing the Send key from the
Home screen.
You can also see the Incoming calls
by pressing Left key from the Home
screen.
pressing Right key from the Home
screen.
Turns the automatic deletion function
on/off. This function automatically
deletes the call logs when you switch
off the phone.
Selects whether to allow multiple
records to/from the same number to
be made on the log or not.
Select Allow or Do not allow.
Activates the message function.
Delete the highlighted call record.
21
Page 28
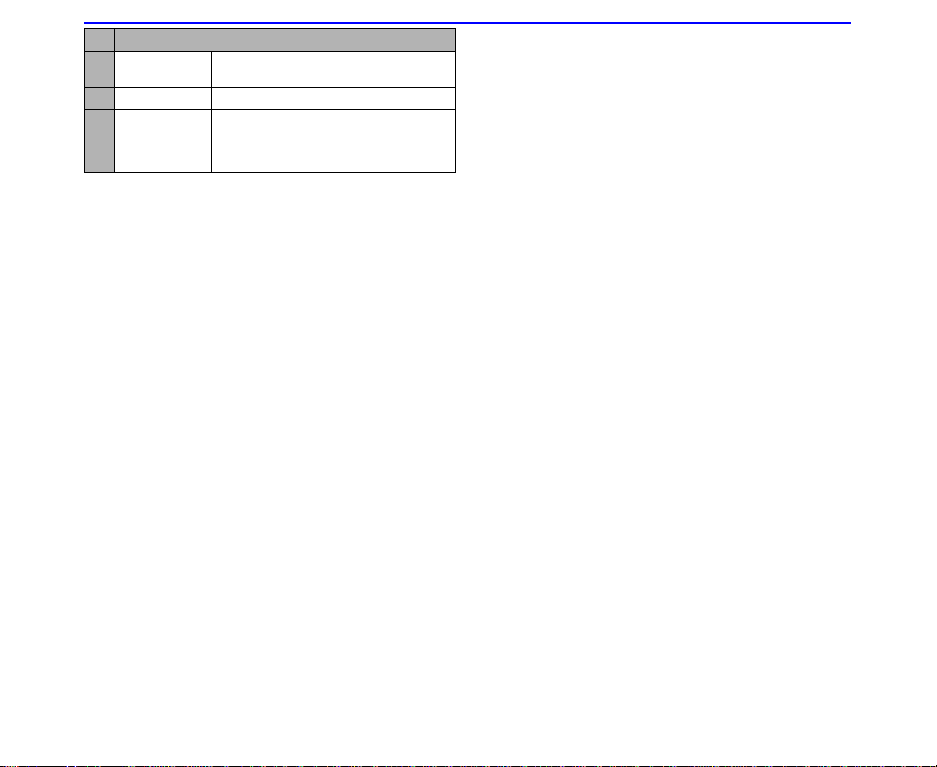
No Options menu
3 Clear
this log
4 Clear all logs Deletes all the call log data.
5 Use number Enters the phone number of the
, Depending on the conditions, some options may
be greyed out and not be available
Deletes all the call records on the log.
record on the Home screen. You can
make a call to the phone number by
pressing the Send key.
22
Page 29
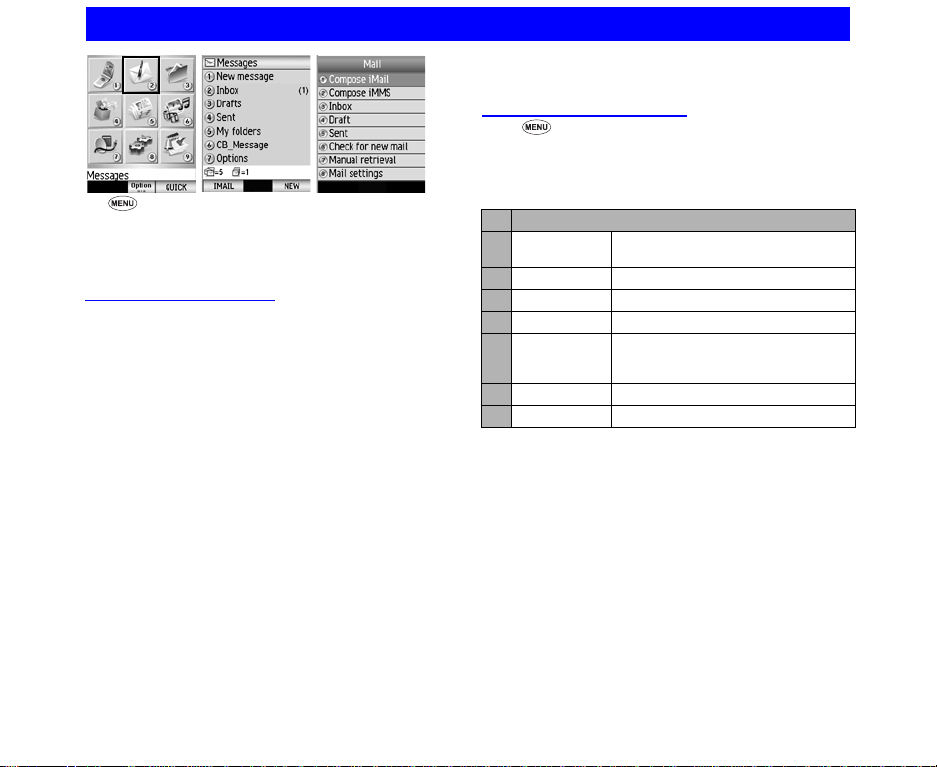
Messages (M2)
☛
2, or select 2 (Messages) to press the Enter key
on the Menu screen.
N600i provides you with the SMS and iMail/iMMS
services.
Message Services
The following message services are available on
your N600i:
• SMS
This service allows you to send short messages (160
half-pitch characters max.) to one or more phone
numbers. To send an SMS message, the destination
phone number must be a mobile phone with an SMS
service subscription.
• iMail
This service allows you to send a message to not only
other mobile phones but also to PCs and other devices
that uses Email addresses. You can attach files from
Pictures, Videos and Sounds in My data (see page xx).
Mail facility is available from the Mail screen under the
i-mode facility. For details on the mail service, see "imode (xxx)" on page xx.
• iMMS
This service allows you to send messages of a
slideshow of text and multimedia files. When you
receive an MMS message, you will be notified by a
message from the MMS centre. You can either
automatically or manually receive the contents of an
MMS message. MMS facility is available from the Mail
screen under the i-mode facility. For details on the mail
service, see "i-mode (Mxxx)" on page xx.
To use SMS service
☛ 2, or select 2 (Messages) to press the Enter
key on the Menu screen.
2 You can switch between SMS and iMail/iMMS using
the SK1 key.
SMS
No Messages
1 New
message
2 Inbox Displays the received message list.
3 Drafts Displays the incomplete message list.
4 Sent Displays the sent message list.
5 My folders Display a list of folders to store the
6 CB_Message
7 Options Change the message settings.
, Depending on the conditions, some options may
be greyed out and not be available
Allows you to create the SMS
message.
messages. You can create up to 10
folders.
23
Page 30
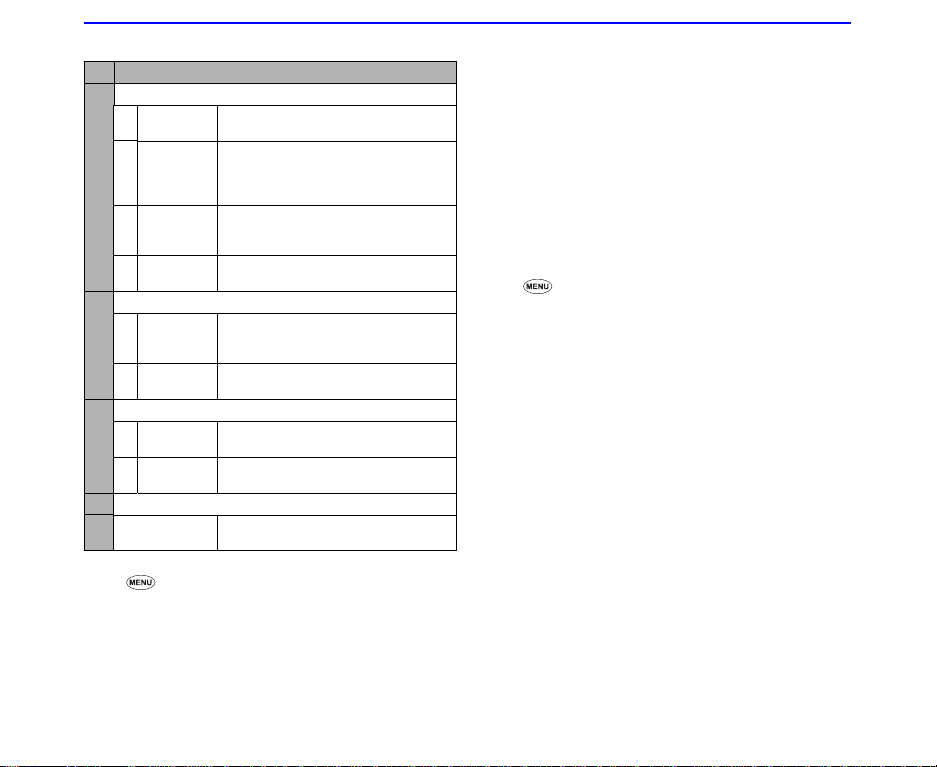
☛ Press Options on SMS service and the following
menus are available
No Settings
1 Communication
1 Send
Options
2 Vali dity
Period
3 Text
msg
centre
4 SMS over
GPRS
2 Edit
1 Signature
setting
2 Quote
indicator
3 View
1 Scrolling Selects the number of lines scrolled
2 Font size Sets the font size (large, medium,
4 CB_Message
5 CB_Setting Clears the settings set under
To create and send a new message
☛ xx, or press 2 (Messages) on the Menu screen
to press SK2 (Msg). Follow the steps below:
1 Select the addressee field on the New message
screen and press the Enter key to display the
address list screen.
•Press the Enter key to put the addresses, or
choose Options to select Open Contacts for
Changes the settings for sending text
messages.
Selects the period of time the text
message is stored on the server
while trying to deliver the text
message.
Edits the text message centre
address. This address is saved in the
USIM card.
Sets GPRS or GSM to transmit SMS.
Turns the automatic signature
insertion function on/off and edits the
signature.
Edits the quoted reply mark.
when you press the Up or Down key.
small).
Settings.
entering the phone numbers from the phonebook.
(Up to 5 addresses are available for entries.)
2 Select the text entry field to enter the message and
press the Enter key.
3 Press the SK1 (Send) to send the message.
The message is sent and saved in the Sent folder.
2 To set the addresee from the contact entries;
Press the SK2 (Find) on the addressee entry box and
select the addressee's phone number.
2 To save an unfinished and unsent message;
Press the SK2 (Save). The message is saved in
Drafts.
2 To cancel the message editing;
Press Options and select Cancel editing.
To read a message
☛ 2, or select 2 (Messages) to press the Enter
key on the Menu screen, and select Inbox. Follow the
steps below:
1 Select the unread message.
2 Press the Enter key and the message contents are
displayed.
2 To filter the received messages by a condition;
Press Options and select Filter. the following options
are available: Show all, Read messages, Unread
messages, USIM, Phone, Send failed, Unsend
messages.
2 To sort the messages;
Press Options and select Sort messages. You can
use By date
descending), By address
address
2 To move a message;
Select the message and press the Options to select
Move. Select the move destination (USIM card
memory is available.), and then press SK2 (Move).
2 To delete a message/all messages;
Select the message on the Inbox screen and press
the SK2 (Delete). Press the SK1 (Yes) to delete the
message. Or select the message on the Inbox screen
and press Options. Select Delete/Delete all and
press the Enter key.
↑
(date ascending), By date↓ (date
↓
(address descending).
↑
(address ascending), By
24
Page 31

2 To display status reports;
Press Options and select View report.
2 To call back to the sender of a Text message;
Display the Text message, press Options and select
Call sender.
2 To make a call to a phone number in the message
text;
Select the message, press the Enter key to display
the message. The phone number is highlighted. (If
there is more than one phone number, highlight using
the Up and Down keys.) Press the Enter key. Then
the phone number is displayed and you can make a
voice or video call.
2 To display a URL in the message text
Select the message to press the Enter key to display
the message text. The URL is highlighted. Press
Options and the Enter key, then select Open in
browser.
To organise messages
When the memory allocated for the message
function is full, your N600i cannot receive new
messages until you move or delete the old
messages. Therefore, to prevent the message
memory from being full, we recommend that you
regularly move the messages to a new folder or
USIM, or delete unnecessary messages.
Creating folders
To manage your message data, create folders under
My folders. You can move the messages in Inbox,
Drafts or Sent to a folder, rename the folder to
indicate the category (e.g. Business, Family or
Friends). Also, you can set addresses to a folder, to
automatically distribute the received messages from
the specified addresses.
☛ To create a folder under My Folders, 2, or
select 2 (Messages) to press the Enter key on the
Menu screen, and press SK2 (Msg). Follow the steps
below:
1 Select My Folders.
2 Press the SK1 (New) to create a new folder, and then
enter the folder name.
Moving messages
Moving is permitted from USIM to the phone. When a
message without the message text downloaded is
included in the moving target, an error message is
displayed and the operation fails. When attachments
are not downloaded first, a confirmation message is
displayed before the operation.
Deleting folders/messages
To delete a folder, select the folder and press the SK2
(Delete) or press Options and select Manage
folders, Delete folder.
To delete the whole folder, select a folder, press
Options and select Manage folders, Delete folder.
To delete all phone messages, press the Options
menu key in Messages and select Delete all folders.
25
Page 32
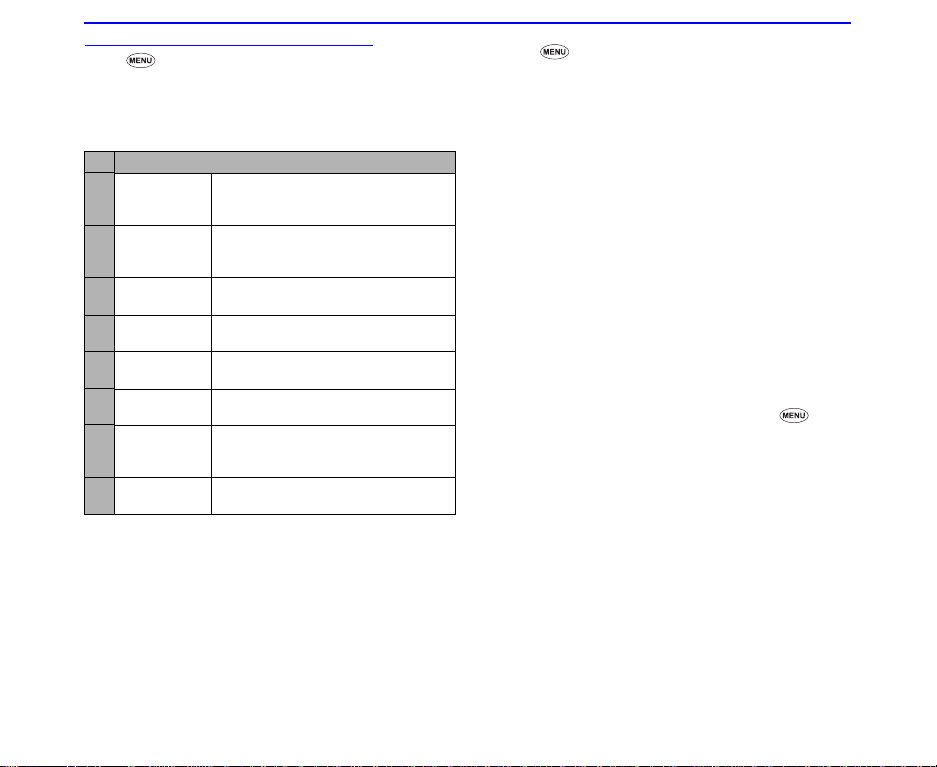
To use iMail/iMMS message
☛ 2, or select 2 ( Messages) to press the Enter key
on the Menu screen.
2 You can switch between SMS and iMail/iMMS using
the SK1 key.
iMail/iMMS
No Messages
1 Compose
iMail
2 Compose
iMMS
3 Inbox Displays the received message list.
4 Draft Displays the incomplete message list.
5 Sent Displays the sent message list.
6 Manual
retrieval
7 Check
for new mail
8 Mail settings Change the settings
2If there is no message in a message list, the list will be
displayed in gray and you cannot select it.
To create and send a new iMail
☛ Press SK2 and 1 to create a new IMail. Follow the
steps below.
1 Set the addressee.
• Highlight the To field to press the Enter key. Put
the key in the destination and press the Enter key.
Allows you to create the iMail
message.
☛ Press SK2 and 1.
Allows you to create the iMMS
message.
☛ Press SK2 and 2.
☛ Press SK2 and 3.
Press SK2 and 4.
☛ Press SK2 and 5.
☛ Press SK2 and 6.
Checks whether a new mail is
coming.
☛ Press SK2 and 7.
☛ Press SK2 and 8.
• To refer to the phonebook;
and press Open phonebook to retrieve the
destination
• To send the mail to more than one addressee;
Press the Enter key from a new address entry field
or press Options to select Open phonebook or
Input Address.
2 Key in the subject.
• Highlight the Subject field and press the Enter
key. Put the key in the subject and press the Enter
key.
3 Key in the message.
• Highlight the Message field and press the Enter
key. Put the key in the subject and press the Enter
key.
4 Attach a file if necessary.
• Highlight the Attachment field and press the Enter
key. Select a file to attach from the My data screen
2 You can attach files up to 299 KB in total, or 10 files.
2 To send the mail, highlight Send and press the Enter
key.
2 To save the mail, highlight Save and press the Enter
key.
2 To delete the currently edited mail, press and
Del. mail.
26
Page 33
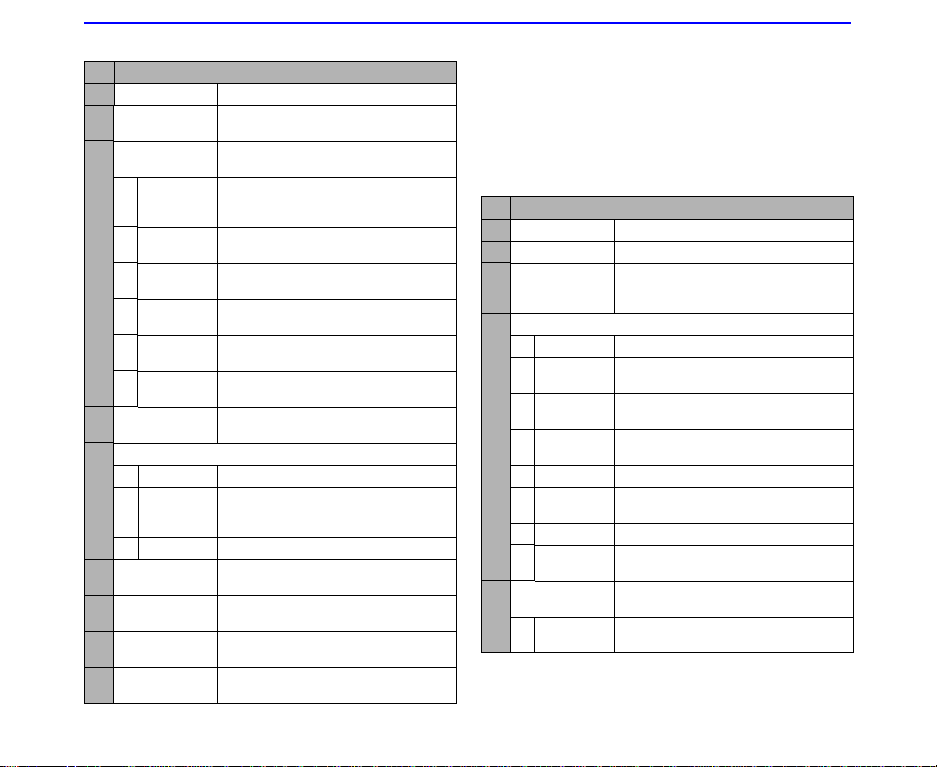
☛ Press Options under the Compose iMail menu and
the following menus are available.
No Settings
1 Send Sends the mail.
2 Edit Saves the mail being edited to the
3 Add Address Adds one address input field (To)
1 Open
Phonebook
2 Input
Address
3 Change toToChanges the address status to TO.
4 Change toCcChanges the address status to Cc.
5 Change to
Bcc
6 Remove
address
4 Address
menu
5 Attachment menu
1 Attach file Attaches a file to the mail.
2 Remove
attachment
3 Open file Plays or displays the attached file.
6 Attach signa-
ture
7 Sender Visi-
bility
8 Delete text Deletes the message of the mail
9 Delete mail Deletes the new mail currently
draft folder.
and displays the sub menus (1 to 6).
Adds the destination directly from the
phonebook.
Allows direct input of the address.
Changes the address status to Bcc.
Deletes the address input field or
information.
Displays the same menu as Add
Address for the hilighted address.
Deletes the attached file.
Attaches a signature.
Sends a mail anonymously.
being edited.
edited.
To create and send a new iMMS
☛ Press SK2 and 2 to create a new IMMS. Follow the
steps below.
2 To send the mail, highlight Send and press the Enter
key.
2 To save the mail, highlight Save and press the Enter
key.
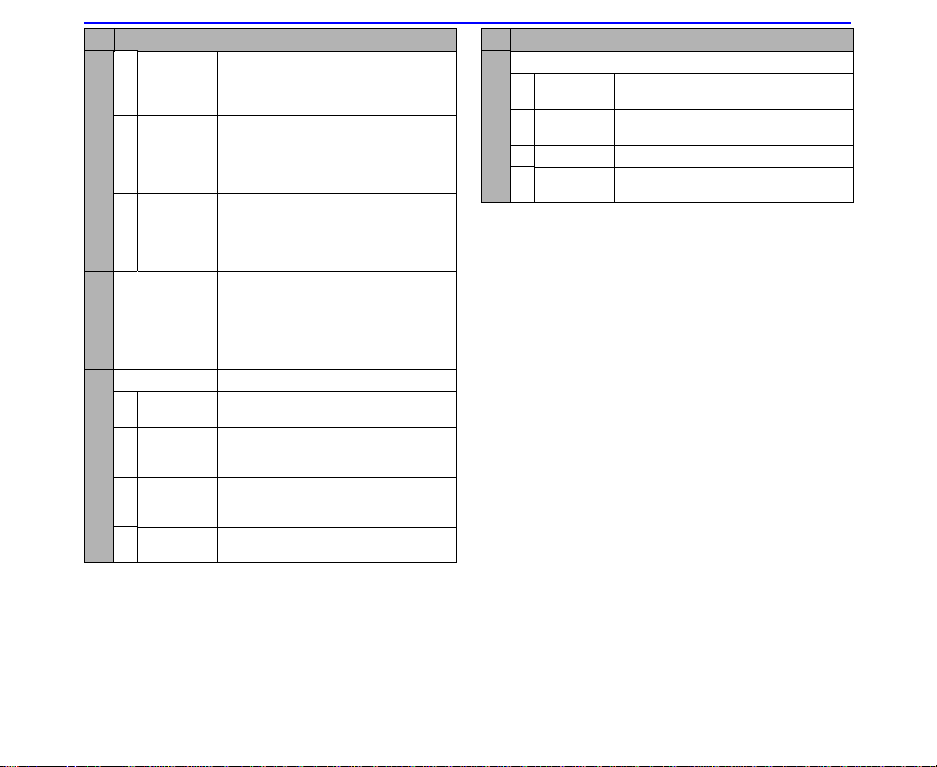
☛ Press Options under the Compose iMMS menu and
the following menus are available.
No Settings
1 Send Sends the mail.
2 Save Saves the currently created MMS.
3 Preview Displays the created slides in order
4 Media
1 Edit text Adds or edits the texts.
2 Delete
text
3 Add
image
4 Delete
image
5 Add audio Adds the music.
6 Delete
audio
7 Add video Adds the movies.
8 Delete
video
5 Fit mode Selects the size in which the image/
1 Actual
size
from the beginning at the preset
playback time for each.
Deletes the texts.
Adds the images
Deletes the images.
Deletes the music.
Deletes the movies.
video is displayed.
Displays the image/video in the
actual size.
27
Page 34
No Settings
2 Fit both
sides
3 Fit longer
side
4 Fit shorter
side
6 Options Sets the length of time a slide is
7 Arrange Slide Attaches a signature.
1 Text color Selects the Text colour from the 16
2 Back-
ground
color
3 Change
area size
4 Swap
position
Displays the image/video in the
reduced size so that the height and
width fit into the image/video display
area.
Displays the image/video in the
reduced size so that the longer side
of the height or width fits the
corresponding side of the image/
video display area.
Displays the image/video in the
reduced size so that the shorter side
of the height or width fits the
corresponding side of the image/
video display area.
displayed, and sets the beginning
and end times for text, image or
sound within that slide display time.
2 You cannot set the beginning
and end time for video files.
different colours.
Selects the Background colour from
the 16 different colours.
Changes the region size of the
image/video field and the text field,
using the
Switches positioning of the image/
video field and text field on the slide.
▲ and ▼ keys.
No Settings
8 Slide
1 Add Adds a new slide after the currently
2 Insert Inserts a new slide just before the
3 Delete Deletes the currently displayed slide.
4 Clear Deletes all the texts/images/music/
displayed slide.
currently displayed slide.
movies on the current slide.
28
Page 35
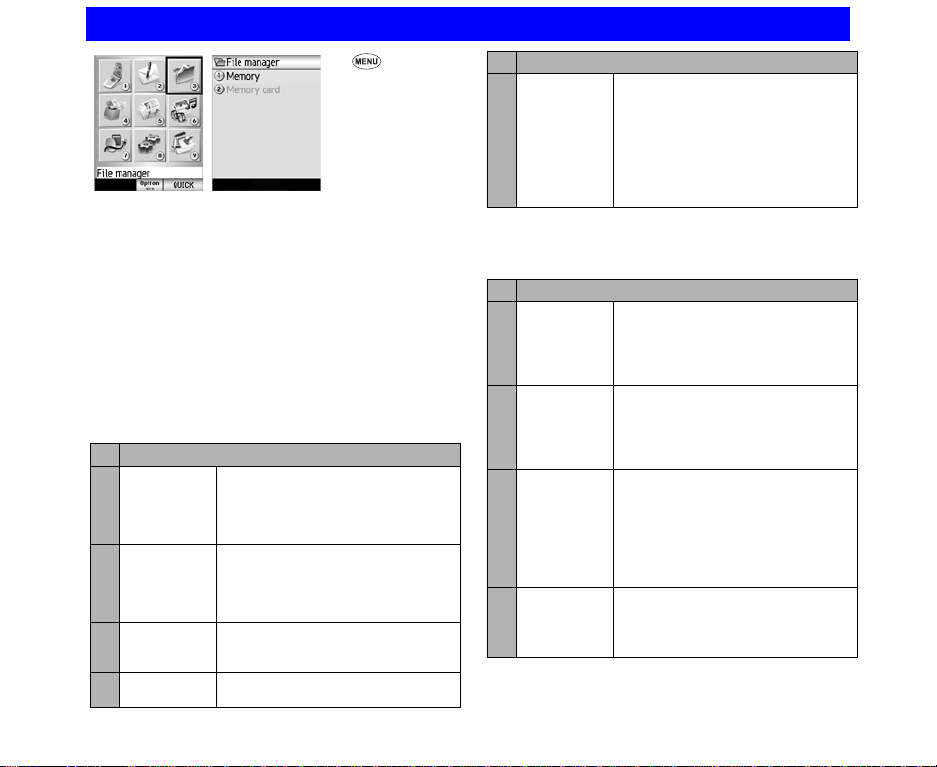
File Manager (M3)
☛ 3, or select
3 (File Manager)
to press the
Enter key on the
Menu screen.
You can manage all of your captured and
downloaded files from the File Manager function.
You can run files that have supported formats, copy,
move, and sort them as well as previewing image
files, and attaching files to messages. In addition,
you can create uniquely-named folders to manage
the files.
The following shows the folders under File Manager
and the information that may help your file
management.
2 N600i provides two memory storage places, Memory
and Memory card, and each has the following folders.
No Memory/Memory card
1 Video files Stores the downloaded and captured
2 Image files Stores the downloaded and captured
3 Music files Stores the downloaded audio files.
4 Sound files Stores the downloaded and captured
video files. Five user folders can be
created under Video files with up to
100 files.
My videos is the default folder.
image files. Five user folders can be
created under Image files with a total
of 100 files.
My photos is the default folder.
Five user folders can be created
under Music files with up to 100 files.
voice files.
No Memory/Memory card
5 Other files Stores the downloaded files with
formats other than the above four
types of files. Text files are stored
here too. (You can activate the viewer
by selecting a text file.) Up to 100 files
can be stored under this folder. No
user folders can be created in this
folder. vCalendar and vCard files are
also stored in Other files.
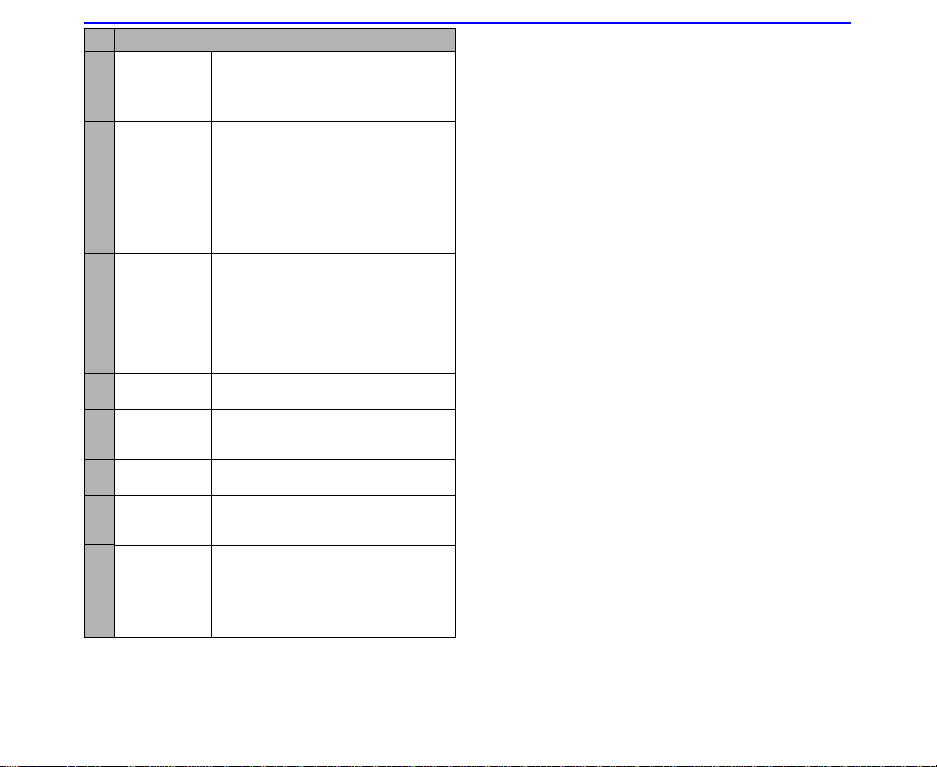
To manage your files, the following options are
available.
No Options menu
1 Send
as message
2 New folder Creates a new folder in the selected
Sends the highlighted file attached to
a message.
2 Downloaded files with
copyrighted settings cannot be
sent from the phone.
folder: Video files/Image files/Music
files/Sound files/Other files. The
default folder name starts "New".
2 Folder names must be unique.
3 Rename Renames the highlighted file/folder.
2 Up to 127 single-byte characters
can be used for a file name. For
a folder name, up to eight singlebyte characters can be specified.
2 You cannot rename files that are
with copyrighted settings.
4 Copy Copies the highlighted file/multiple
files/folders to another folder.
2 Up to 100 files can be selected at
one time.
29
Page 36
No Options menu
5 Move Moves the highlighted file/multiple
6 Delete Deletes the highlighted file/multiple
7 File
properties
8 Switch
memory
9 Sort files Sorts the files in order of file name,
10 Thumbnails Switches to/from thumbnail or list
11 Memory
status
12 link this Create shortcut on the Home screen
, Depending on the conditions, some options may
be greyed out and not be available
files/ to another folder.
2 Maximum of 100 files can be
selected at one time.
files/folders.
2 Up to 100 files can be selected at
one time.
2 When an open file is included in
the selected files to delete, the
delete operation does not
complete.
Displays the file information of the
highlighted file: date, size, title
(displayed if any), file name (always
displayed), attribute, copy permission
and message transfer permission.
In i-mode, Play restriction:, Playable
span and Expire date are also
displayed as information.
Switches between Memory and
Memory card.
file size and date. (Files are displayed
in file name order by default.)
display.
Displays the amount of free/used
memory space in the handset in
bytes.
and in the Quick menu list. Select Add
to Home or Add to Quick Menu.
Pressing SK1 (Link) on the list
screen also creates a shortcut for the
selected file.
30
Page 37
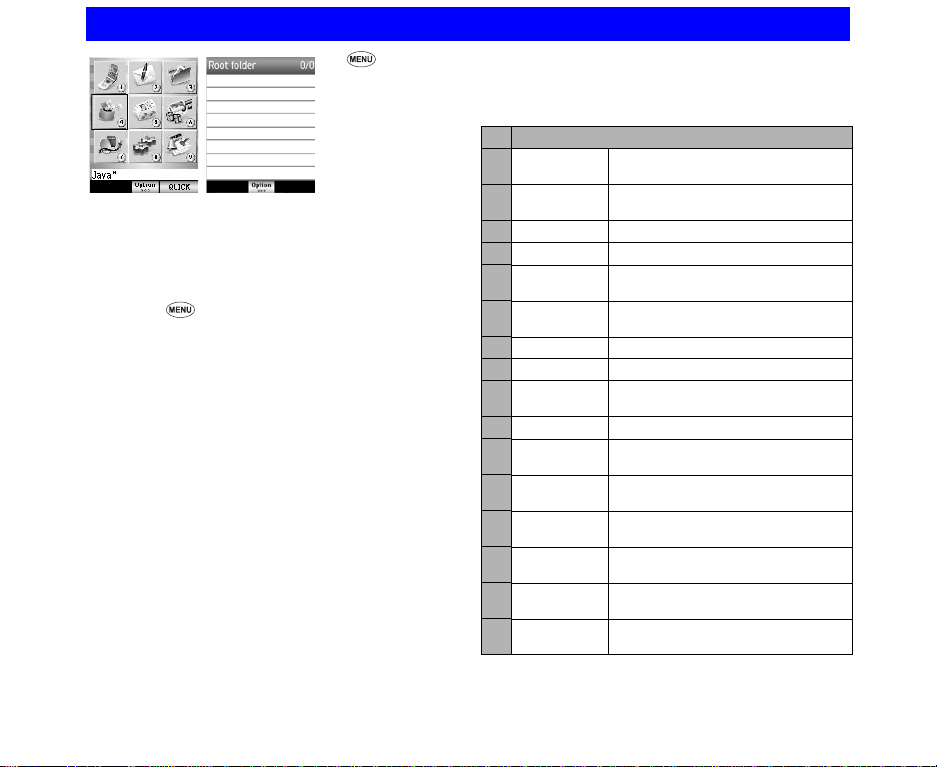
Java (M4)
☛ 4, or
select 4 (Java)
to press the
Enter key on
the Menu
screen.
You can download Java™ applications (games etc.)
from i-mode sites and run them on your phone.
How to run software
To run a software (Java™ application), perform the
following.
☛ Press 4 (Java).
Highlight an application containing the software you
want to run and press the Enter key.
2When you display the Java™ applications list screen for
the first time after downloading a program(s), it may take
a while for your phone to verify the program(s). A
message will be displayed during this process, and you
may activate the program(s) after it is completed.
, After downloading the software, always make
sure that you check the downloaded program is
displayed in the Applications screen.
, Do not remove the battery while the software is
running as data to that point may not be saved.
2While the software is active, the Java™ operation icon is
displayed.
JavaTM Option menu
If an application is highlighted, the following options
are available for use.
☛ Press Option on the Java menu.
No Menu
1 Create folder Displays the text box to prompt an
2 Move
to folder
3 Upgrade Upgrades an application.
4 Delete Deletes the selected application.
5 Delete All Deletes all applications and all
6 Sort Displays the menu screen to select
7 Properties Displays the property screen.
8 Certificate Displays the certificate screen.
9 Network
settings
10 Set iAppli To Displays iAppliTo setting screen.
11 Icon info.
Settings
12 Auto-start
settings
13 Show
descriptor
14 Auto-start
failed.
15 Trace
information
16 System
information
, Depending on the conditions, some options may
be greyed out and not be available
input for the new folder name.
Displays the folder list screen to select
the destination folder.
folders.
the sort criteria.
Displays the network connection
setting screen.
Displays the icon information setting
screen.
Displays the automatic start setting
screen.
Displays the ADF setting screen.
Displays the record screen for the
automatic start failure.
Displays the trace information screen.
Displays the system information
screen.
31
Page 38
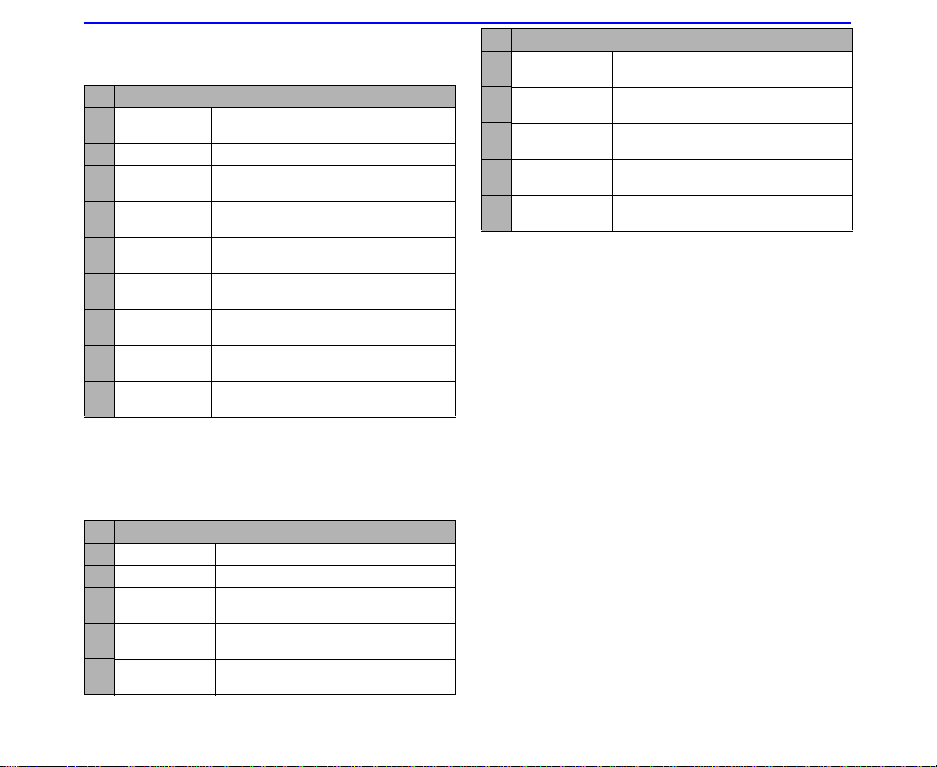
If a folder is highlighted, the following options are
available for use.
☛ Press Option on the Java menu.
No Menu
1 Create folder Displays the text box to prompt an
2 Delete folder Deletes the selected folder.
3 Rename
folder
4 Delete all Deletes all applications and all
5 Sort Displays the menu screen to select
6 Show
descriptor
7 Auto-start
failed.
8 Trace
information
9 System
information
, Depending on the conditions, some options may
be greyed out and not be available
input for the new folder name.
Renames the selected folder.
folders.
the sort criteria.
Displays the ADF setting screen.
Displays the record screen for the
automatic start failure.
Displays the trace information screen
Displays the system information
screen.
Sort menu is as follows.
☛ Press Option on the Java menu.
No Sort
1 Name↑ Sorts by name. (ascending order)
2 Name↓ Sorts by name. (descending order)
3 Last use↑ Sorts by recent execution date and
4 Last use↓ Sorts by recent execution date and
5 Date↑ Sorts by downloaded date and time.
time. (ascending order)
time. (descending order)
(ascending order)
No Sort
6 Date↓ Sorts by downloaded date and time.
7 Size↑ Sorts by application size. (ascending
8 Size↓ Sorts by application size.
9 Usage↑ Sorts by executed counts.
10 Usage↓ Sorts by executed counts.
, Depending on the conditions, some options may
be greyed out and not be available
(descending order)
order)
(descending order)
(ascending order)
(descending order)
Prog backlight
You can set the backlight mode of your phone.
2If you set your phone to follow the normal backlight setting,
the current power save settings will be active
2When the software is not running, the backlight operation
depends on your phone’s backlight settings.
32
Page 39
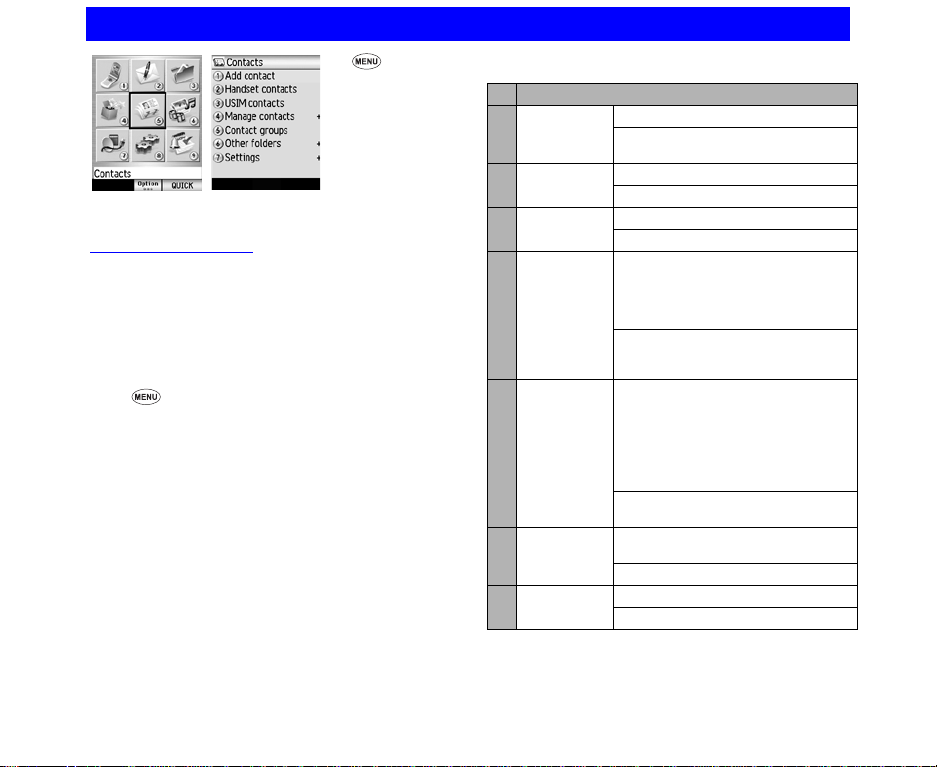
Contacts (M5)
☛ 5, or select
5 (Contacts) to
press the Enter
key on the Menu
screen.
This section describes how to work with contacts.
Contact Entries
Up to 500 entries can be registered in the phone
Contact list. Up to 254 entries can be read from the
USIM contact list, depending on your USIM card
(please ask 3 for details).
2 The maximum number of contacts is affected by the
number of fields used in each contact entry.
To Add a New Entry to the Contact
☛ 5, or select 5 (Contacts) to press the Enter key
on the Menu screen.
☛ Press 1 or Select Add contact.
2You can also display the Handset contacts screen
from the Home screen by pressing the Down key,
then the Option menu key and select Add contact.
☛ Fill in data on the displayed the Add contact screen
and press SK1 (OK).
The following shows the data that you can enter
under a name in the handset or USIM Contact lists
2Upper and lower cells describe Handset contacts and SIM
contacts, respectively.
No Add contact
1 Name (32 single-byte characters max.)
Can be registered, edited and
deleted.
2 Nickname (32 single-byte characters max.)
-
3 Image One image file
-
4 Phone
number
5 Email Up to 3 email addresses
6 URL One homepage address (256 single-
7 Handset
groups
Up to four phone numbers (40 digits
max. for each)
Up to 41 digits can be entered per
phone number when it includes the
international code "+".
One or two phone numbers
(This item can be registered, edited
and deleted.)
2 Though an email address can
contain up to 90 single-byte
characters when you register the
Contact entry, it is limited to 50
single-byte characters when you
send video calls.
Can be registered depending on each
USIM card.
byte characters max).
-
Choose from 16 groups
-
33
Page 40

34
Page 41
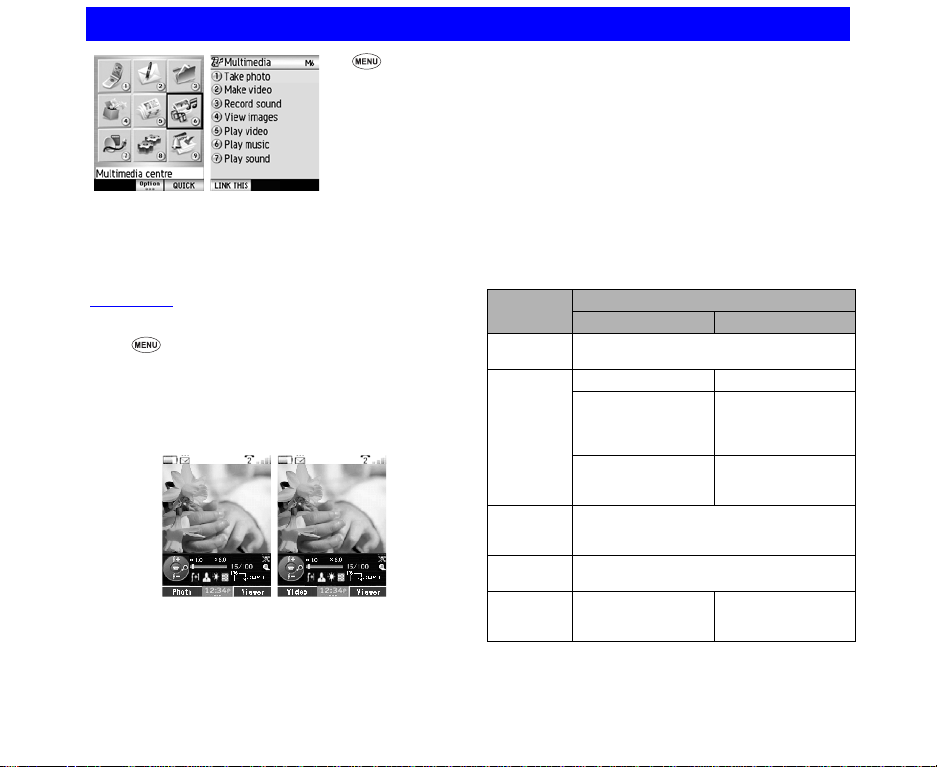
Multimedia centre (M6)
☛ 6, or select
6 (Multimedia
centre) to press
the Enter key on
the Menu screen.
This section describes how to use multimedia centre
on your N600i to capture and play back multimedia
files. You can also use it to play back files that have
been downloaded or sent to you.
Capture
To take a photo/make a video
☛ 6 or select 6 (Multimedia centre) to press the
Enter key on the Menu screen.
2You can press SK2 (Camera) on the Home screen
as well.
☛ Press 1 (select Take photo) to take a photo, or press
2 (select Make video) to make video.
2Press SK1 to switch between Photo and Video
Take photo Make video
☛ To start recording, press the Enter key.
2To turn the zoom function on/off, press the Right or
Left key.
2To adjust the exposure rate, press the Up or Down
key.
☛ To stop recording, press the Enter key again.
2The capture complete screen appears. You can do
the following from this screen.
• Press SK1 (Send) to send the file attached to a
Multimedia message/email.
• To return to the capture preview to take a new
photo or make a new video, press SK2 (New).
2you can use the options of Send as message,
Rename and Delete.
2 To understand the Option settings for your N600i’s
camera, read the following table.
Setting
items
Recording
mode
Zoom OFF/ON OFF/ON
Inward
2 levels max. 2 levels max.
camera
Outward
Exposure
compensation
Camera
direction
File size
limit
8 levels max. 8 levels max.
camera
(File size)
300KB
Unlimited
Camera function
Video Photo
PHOTO
VIDEO
(QCIF and SQCIF
are only available for
zooming.)
(no zooming for
SXGA)
+2, +1, 0, -1, -2
IN (Inward camera)
OUT (Outward camera)
35
Page 42
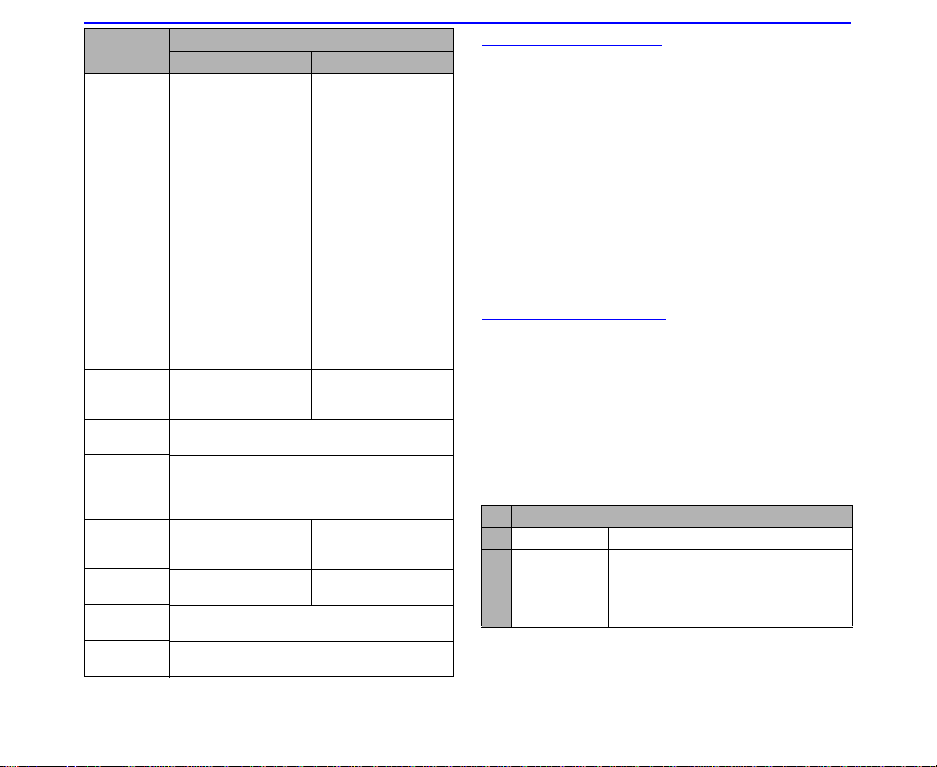
Setting
items
Image
format
Quality of
image
Camera
settings
Lighting
settings
Self timer - Self timer on
Sound
settings
Display
size
Media
selection
(Capture size)
QCIF (176 x 144)
SQCIF (128 x 96)
High
Standard
Economy
Video with sound
Video only
Camera function
Video Photo
(Capture size)
Inward camera:
• Large (352 x 288)
• QCIF (176 x 144
• CLI and icon
(160 x 160)
• SQCIF(128 x 96)
• Wall Paper
(240 x 270)
Outward camera:
• SXGA
(1280 x 1024)
• VGA (640 x 480
• Large (352 x 288)
• QCIF (176 x 144)
• CLI and icon
(160 x 160)
• SQCIF (128 x 96)
• Wall Paper
(240 x 270)
High
Standard
Economy
OFF
ON
Sunny
Cloud
Automat ic
Indoors
(10 sec max.)
Self timer off
-
Do not enlarge
enlarge
Handset
Card
Recording sound
The voice recorder feature allows you to record a message
while you are not online. The recording time is 180 seconds.
The recorded voice is automatically saved as an AMR file
which can be attached to a multimedia message/email.
To use the voice recorder
☛ Press 3 (Record sound) or select Record sound on
the Multimedia screen. Or,
Press 7 (Play sound) or select Play sound on the
Multimedia screen.
☛ To start recording, press the Enter key
☛ To stop recording, press the Enter key again.
☛ After the recording complete screen appears, press
SK1 (Send) to send the recorded voice file attached
to a multimedia message/email or the SK2 (New) to
record a new sound.
Viewing an image
The image viewer function of Multimedia centre allows you
to view JPEG, GIF, PNG, BMP, WBMP, JFIF, DCF and SWF
image files. The image files can be captured by the phone,
downloaded from a browser or received attached to a
message. N600i allows you to view all the files in a selected
file.
To use the image viewer
☛ Press 4 (View images) or select View images on the
Multimedia screen
The following Options menu are available for View images.
No Options menu
1 Playlist Selects the playlist.
2 Set as
Wall paper
Sets the selected image as wallpaper.
If the animation GIF is displayed, this
option cannot be selected. The
following image files are available for
setting: JPEG, PNG and GIF.
36
Page 43
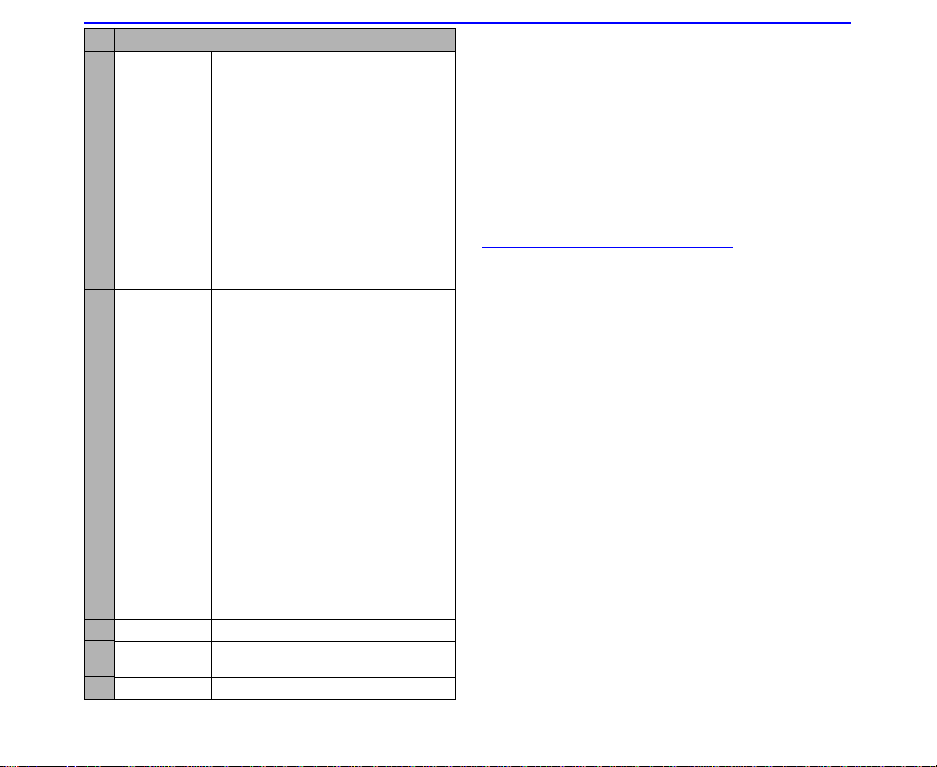
No Options menu
3 Visual
effects
4 Image
settings
5 Rename Edits the file name.
6 File
properties
7 Delete Deletes the selected file.
Apply visual effects to the displayed
image. Select Negative image, Sepia
tone, Mirror image, Soften image,
Sharpen image or Emboss. If the
animation GIF is displayed, this option
cannot be selected.
Press SK1 (Save) to save the change
to the image or SK2 (Undo) to cancel
the change.
2 Visual effects is not available
when the image is CLI
(120x120) size. Neither is it
available when a SQCIF
(128x96) size image is displayed
in QCIF (176x144) display
setting.
Slideshow timing: Sets the interval
between each image for one to 30
seconds. During the slideshow, SK2
(Pause ) or SK2 (Player) is available.
The Enter key is also available to
pause or play a slideshow.
Display settings: Selects to display
the image in Default size or Fit to
screen.
Repeat settings: Turns the repeat
function on/off and selects the repeat
target. Select Repeat on or Repeat
off. This function repeats the playlists
on the View image. This function is
also valid for slide shows.
Slideshow: Turns on/off the
slideshow function that displays all
images in the folder in which a
selected image is stored. Select
Slideshow on or Slideshow off.
Play again: Replays from the first
frame when selected (only when the
Flash file (.swf) is playing).
Displays information about the file
To view an image file
☛ Display the image file list screen from View images.
☛ Select an image file from the file list. To select a
playlist, select an image file from the file list and select
Playlist from the Options menu.
☛ Use the Right key (next) or Left key (previous) to
display the file.
☛ To attach the file to a message, press SK1 (Send).
2SK1 (Send) is greyed out when the attached file is
larger than the file size set in Max send size.
☛ To edit the file name, press Option to select Rename.
☛ To end View image, press Clear.
Playing video and audio
You can play the following type of files captured by the
phone, downloaded from a browser or received attached to
a message. N600i allows you to play all the files in a
selected file.
• Video files; MPEG4, AAC, AMR, WMV and H.263
• Audio files; AAC, WMA, MP3, WAV (u-law), WAV
(linear), MIDI and AMR
2 If you download a file using the browser or receive/send
a message while playing video/audio, the sound may be
interrupted.
2For Play Music, SK1 (Send) is greyed out when you
attach more than 300KB audio file.
To play a video or audio file
☛ Press 5 (select Play video) or 6 (select Play music)
to display the video or audio file list screen.
☛ To select a playlist, select a video or audio file from the
file list and select Playlist from the Options menu.
☛ Do any of the following:
• To pause the file, press the Enter key.
• To stop the file, press and hold the Enter key while
playing.
• To fast forward, press and hold the Right key while
playing or pausing.
• To rewind, press and hold the Left key while
playing or pausing.
• To skip to the next or previous file, press the Right
key (next) or Left key (previous).
37
Page 44
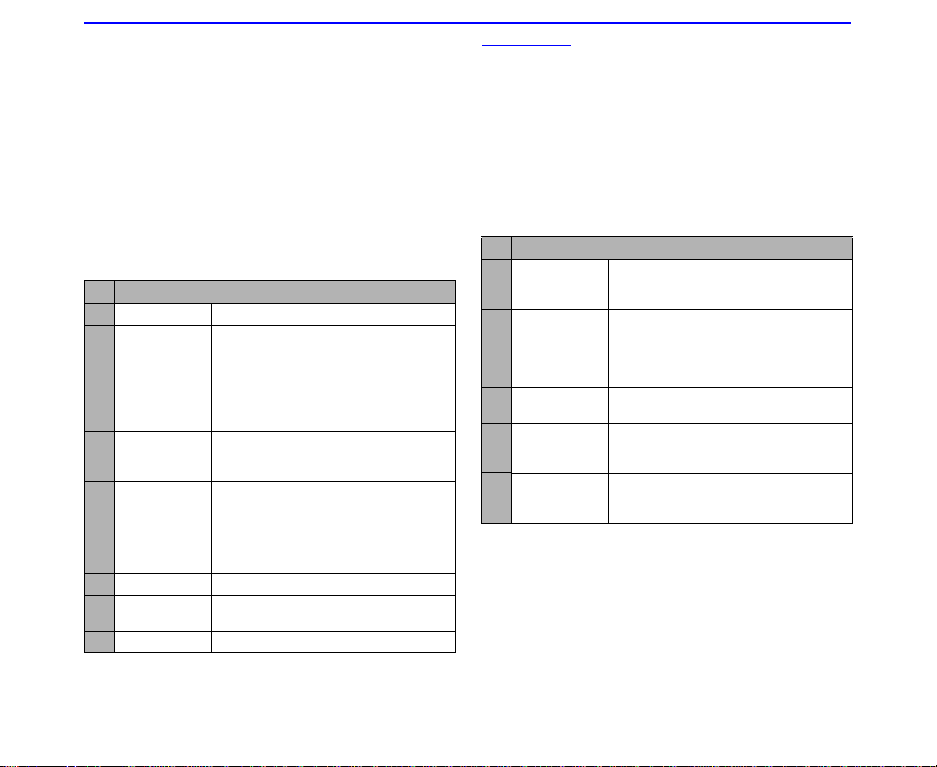
• To repeat, press Option to select Repeat settings
and Repeat on.
• To control the sound volume, press the Up or
Down key, and the side key as well.
• To send the file as a message, press SK1 (Send).
2SK1 (Send) is greyed out when the attached file
is larger than the file size set in Max send size.
2Some files may be with copyrighted settings and
thus cannot be sent out of the phone.
• To replay a file from the beginning after you start
playing, press the Left key.
2 Note that you can only do this if the play time is two
seconds or more.
The following Options menu are available for View images.
No Options menu
1 Playlist Selects the playlist.
2 Video
settings/
Music
settings
3 Mute
settings
4 Ringtune
(Play music
only)
5 Rename Edits the file name.
6 File
properties
7 Delete Deletes the selected file.
Repeat settings: Turns the repeat
function on/off and selects the file to
be repeated. Select Repeat on or
Repeat off.
Play all videos: Sequential plays all
files in the folder in which a selected
file is stored. Select On or Off.
Turns the mute function on/off. This
function turns off N600i's speaker and
the headset.
Changes the ringtune settings for
each phone mode: Meeting profile,
Standard profile, Outdoor profile
and Car profile. Ringtunes are
available in each mode for Voice call,
Message received and Video call.
Displays information about the file
Playlists
You can create a list of images, video or audio files
to play successively and save them as a playlist. You
can create 20 playlists, each containing up to 20
files in the phone memory. You can add a new
playlist by pressing SK1 (Add).
The following operations are available for the
playlists under View image, Play video, Play
music and Play sound.
No Playlists
1 Add
new playlist
2 Edit playlist Adds a file to a playlist or deletes a file
3 Edit playlist
name
4 Delete Deletes the selected playlists. If no
5 Delete all Deletes all the playlists. If no playlist is
In addition, the following submenus are available for
playlists in each of the options above: Add file, File
properties (displaying the file information
depending on the file type), Sort playlist files
(ascending or descending order By name ↑/↓, By
date ↑/↓ and By size ↑/↓), Move file, Delete and
Delete all.
2 You can store the Playlist data. Using SK2 or Options
menu switches between Handeset and Card.
Adds a new playlist when you press
SK1 (Add) or select Add new
playlist from the Options menu.
from a playlist. Select Edit playlist
from the Options menu and press
SK1 (Add) to add a file or SK2
(Delete) to delete a file.
Edits the highlighted file name in the
playlists.
playlist is available, Delete cannot be
selected.
available, Delete all cannot be
selected.
38
Page 45
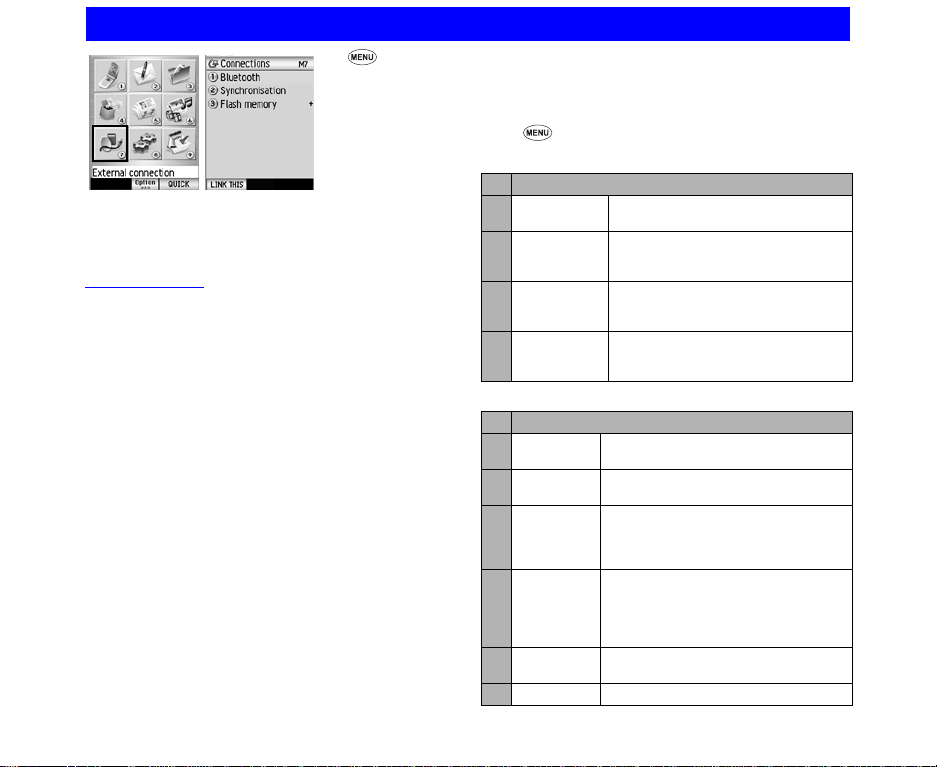
External connection (M7)
☛ 7, or select
7 (External
connection) to
press the Enter
key on the Menu
screen.
N600i provides you with the functions of Bluetooth,
Synchronisation and Flash memory as an
external connection.
Bluetooth®
Using this function allows you to connect an external
Bluetooth supported device to N600i. The following
services are available:
• Dial-up connection
Connecting N600i to a PC via Bluetooth technology
enables the PC to use N600i just like a modem to
establish a dial-up connection to an Internet service
provider.
• Data transfer (Only one phonebook data is available.)
You can transfer the phonebook data to another
Bluetooth device such as PC, PDA and N600i.
• Headset/handsfree connection
You can make/receive a call using a Bluetooth headset
or handsfree kit
2Data transfer is performed as follows:
• For sending data from N600i
1. Select the phonebook data to be sent on your N600i.
2. Search the available device and select the target.
3. Bluetooth connection is established
4. Data transfer starts.
• For receiving a phonebook data on N600i
1. Select Discoverable (see the next section) to set
your N600i to standby mode
2. Data is sent from the target device.
3. The save confirmation screen appears.
4. Press YES (SK1 key) to save the transferred data
into phonebook.
To use a Bluetooth device
☛ 7, or select 7 (External connection) to press
the Enter key on the Menu screen, and Bluetooth to
open or close connection for the Bluetooth devices.
No Bluetooth
1 Discoverable Sets standby mode for connection
2 NEC Head-
set
3 My PC Connects or disconnects to/from a
4 Handsfree
kit
from an external device.
Connects or disconnects to/from NEC
headset. This menu appears after
registration.
PC.
This menu appears after registration.
Connects or disconnects to/from a
handsfree kit. This menu appears
after registration.
☛ Press Options and the following menus are available.
No Options
1 Information Displays information on the selected
2 Search Searches for nearby Bluetooth devices
3 Pairing
standby
4 Terminal
Info.
5 Remove
device
6 Stop all Disconnects all Bluetooth connections.
device.
to register.
Changes the handset status to bonding
wait status in which the handset waits
for the authentication from other
devices in order to register the devices.
Displays the Bluetooth information of
the handset. The device name can be
edited, in which case, the edited device
name is displayed at the other par ty's
Bluetooth device.
Deletes the registered devices from the
list.
39
Page 46
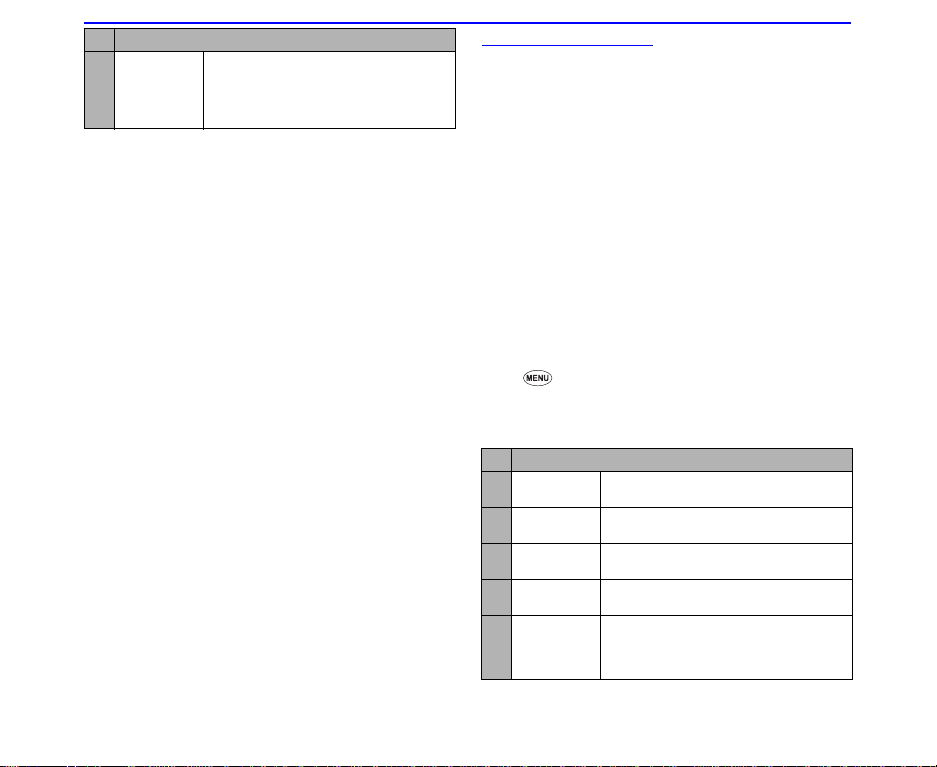
No Options
7 Timeout
settings
, Depending on the conditions, some options may
be greyed out and not be available
Sets the timeout values. The default is
as follows:
Discoverable: 0 minutes
Search: 10 seconds
Paring timer: 5 minutes
To register a Bluetooth device
If the external device is not yet registered on the
Bluetooth screen, register it by the following
procedures:
• Searching the device from N600i
1. Press Options to execute Search
Available devices are found and displayed.
2. Select the target device from the searched list
3. Enter a passkey on N600i.
Enter the same passkey to the target device.
4. Relevant device is registered after authentication is
complete
• Operating N600i from the target device
1. Execute Pairing standby to put N600i in standby
mode.
2. A passkey screen appears when receiving
registration request from the target device
3. Enter a passkey.
4. Each device is registered after authentication is
complete
2Passkey is the Bluetooth PIN code for the remote device.
2A passkey is a number from 1 to 16 digits.
, Before Bluetooth can communicate with a PC,
ensure the Bluetooth Driver is installed.
, There may be Bluetooth devices that cannot be
connected to your N600i
, Depending on the connection status, a Bluetooth
device may not function correctly. In such a case,
retry operation from the device side, or switch
your N600i off and on.
Synchronisation
It is possible to synchronise your Calendar,
Contacts and To Do lists locally between your
N600i and a PC using Bluetooth.
Contacts are treated as vCard files and Calendar
and To D o list entries as vCalendar files.
N600i enables operation with the NEC Mobile Suite
(NMS) which is an interface to interact with the
Phone.
The NEC Mobile Suite contains four modules that
deal with specific type of data, the Backup/Restore,
the MRM - Multimedia Resource Manager, the
PIM - Personal Information Manager and the PIM
Synchronisation. For details, refer to the NEC
Mobile Suite N600i User Guide provided with your
N600i.
To use Synchronisation
☛ 7 or select 7 (External connection) to press
the Enter key on the Menu screen, and press 2 (select
Synchronisation).
Synchronisation provides the following options.
No Options
1 Synchro-
nise
2 Server set-
tings
3 Synchro-
nise all
4 Copy
settings
5 Delete Deletes the selected server
Starts the synchronisation of updated
data with the selected server.
Displays the synchronisation server
settings for the selected server.
Starts the synchronisation of all data
with the selected server.
Copies the settings of the selected
server.
information. When Server one to
Server six is selected, this operation
returns the settings to default values.
40
Page 47
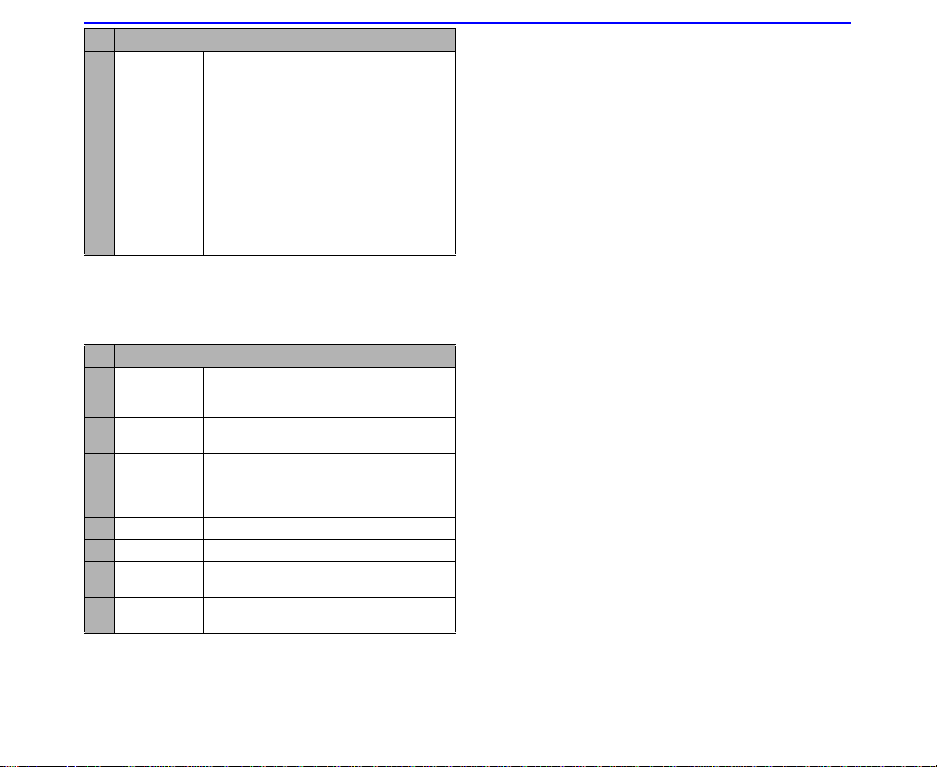
No Options
6 Name
format
☛ Press SK2 (Settings) from the Synchronisation
screen.
Synchronisation provides the following setting options.
No Options
1 Profile
name
2 Server
name
3 Authentica-
tion
4 User name Sets the user name.
5 Password Sets the password.
6 User
database
7 Server
database
Provides the following items to set the
rules for vCard import/export.
Basic Import / Export Rule:
Sets which of the first name and family
name comes first on imported/exported
data.
Display Imported Name:
Sets whether or not to insert a space
between the first name and family
name on imported data.
Export a single name to:
Sets in which of the first or family name
a single name (with no space) should
be exported.
Sets the profile name. Server one to
Server ten are displayed as default
names (with no settings).
Sets the server name.
Enables/disables the authentication
method. Set Entered by user to
enable user entry on the authentication
screen.
Selects the server database from
Contacts, Calendar or To D o.
Sets the server database name
Server one to Server six
For Server name, User database and Server database,
Servers one to six have their own default values that are
configured to perform specific synchronisation operations,
as follows:
• Server one: Contacts
• Server two: Calendar
• Server three: To Do
• Server four: PC and Contacts
• Server five: PC and Calendar
• Server six: PC and To Do
41
Page 48

42
Page 49
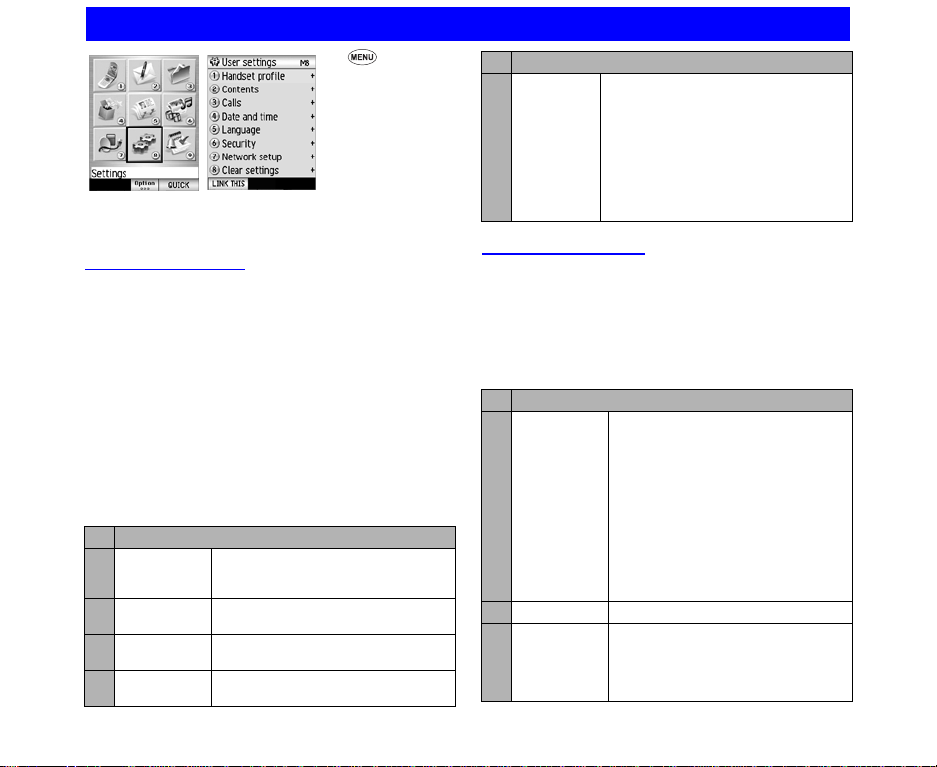
Settings(M8)
☛ 8, or select
8 (Settings) to
press the Enter
key on the Menu
screen.
This section describes how to change the settings
on your N600i.
Handset profile
☛ Press 1 (or select Handset profile) on the User
settings screen.
Handset Profile allows you to change the handset
operation mode to suit different situations: Standard
profile, Meeting profile (quiet surroundings), Outdoor
profile (when carrying your N600i in a pocket or a bag) and
Car profile (while travelling in a car). You can also
customise each profile to make it more useful.
☛ To see and change the settings of a profile, focus on
the profile and press SK1 (Edit).
2 You can also change the active handset profile from
the Home Screen. Press the Up key on the Home
screen, or Option to select a profile option.
The following settings are provided:
No Handset profile
1 Vol um e Adjusts the ringing volume and alarm
2 Ringtunes Selects the ringtune for incoming
3 Illumination Sets the illumination for voice calls,
4 Vibration
pattern
volume levels from Silent to Level 6
(loud).
voice calls, video calls and messages
video calls and messages.
Selects the vibration pattern.
No Options
1 Other
settings
Key tones:
Turns on/off keystroke sounds.
Coverage tone:
Turns the coverage tone on/off.
Auto answ er :
Turns the auto answer function on/off.
When the headset is attached, this
function automatically answers the
call 5 seconds after the call is first
received. Valid for all incoming calls.
Screen settings
☛ Press 2 (or select Screen settings) on the User
settings screen.
Screen settings provides options of Main LCD and Sub
LCD.
☛ Press 1 (Main LCD) on the Screen settings screen.
☛ Press 2 (Sub LCD) on the Screen settings screen.
Main LCD options:
No Main LCD
1 Greeting Pre-installed and downloaded files
2 Wall paper Selects the Home screen image.
3 Power save
time
43
can be set for the following:
Power on animation:
Selects a screen animation
displayed when N600i is turned on.
An image captured with the built-in
camera can also be set.
Power on tone:
Selects a tone that sounds when
you turn on your N600i.
Power of f imag e:
Selects an image that is displayed
when you turn off your N600i.
Sets how long your phone can remain
idle before going into power save
mode, in a range from 1 to 20
minutes. The default setting is 5
minutes.
Page 50
No Main LCD
4 Backlight Backlight:
Sub LCD options:
No Sub LCD
1 Small screen
display
2 Clock style Sets the clock type; Normal clock
3 Backlight Sets Backlight (On/Off) and
Sets the backlight brightness (High
backlight, Medium backlight and
Low backlight) and on/off
(Backlight off).
Backlight time:
Sets the backlight lighting duration
between 10 and 60 seconds. The
default is 15 seconds.
Backlight control:
Sets the Java backlight value. User
setting only (system dependence)
and Application control (software
dependence) are provided.
Sets the backlight options for the sub
display. The following thee are
provided:
Incoming call display: On/Off
New message display: On/Off
Playba ck display: On/Off
and Simple clock.
Backlight time.
Calls
☛ Press 3 (or select Calls) on the User settings screen.
Calls allows you to change various settings for the call
function.
No Calls
1 All calls Receiver volume:
2 Voice calls Sets the settings for voice calls.
Sets the volume level from Silent to
Level 6 for receiving calls.
Send my caller ID:
Sets the caller ID indication. Send
notifies the receiver of your caller ID
and Withhold lets you make calls
without displaying your caller ID.
Caller ID info.:
Accesses the network to check the
status of the current ID notification
settings.
Any key answer:
Turns the any key answer function
on/off. This lets you use any key to
answer a call, except for SK2
(Ignore), Up, Down, End key and
the Option key.
Headset:
Selects the ringtune output from the
phone.
• Speaker rings too: Sets the
ringtune to be played from both
the earphones on the headset and
the speaker.
• Handsfree only: Sets the
ringtune to be played only from
the earphones.
Fixed dialling:
Lets you dial the set number only.
The three options are available: Auto
redial, Active flip and ASL line:
44
Page 51
No Calls
3 Video calls Sets the settings for video calls.
Camera settings
Screen mode:
Selects the displayed images (other
side/my side) and their screen sizes
from My side is smaller, Other
side only, My side is larger and
My side only.
Picture quality:
The quality of the image captured
by N600i can be selected from
Standard, Better picture (priority
given to the image quality), and
Faster movement (priority given to
capturing movement).
Camera mode: Selects the photo
mode to use for video calls from
Portrait mode, Landscape mode
and Night-time mode.
Video call options
Show timer:
Turns on/off the call time of the
current video call.
Voice if no video:
Turns the automatic fallback
function on/off. This function
switches to a voice call whenever a
video call cannot continue for some
reasons.
Use photo instead:
Selects an image (100KB max.) to
be sent instead of using the camera
image to the other party of a video
call.
VIG Access Number:
Sets the VIG (Video Interactive
Gateway) access number which is
used for videophone calls via the
Internet. VIG Access number
depends on each country and can
be changed to that of another
country if necessary.
No Calls
4 Call forward-
ing
5 Call waiting Turns the call waiting service on/off.
6 Call
restrictions
Allows you to set up a number for
forwarding calls to. Available for Voice
calls/Video calls/Fax calls. Available
under these conditions: All calls/If no
answer/If busy/If unreachable.
Forwarding Setup
• Check: Shows the current service
status.
• Update: Updates the service
status.
• Find: The telephone number
registered is copied from
Contacts.
• Forwarding off: Turns off a call
forwarding setting of Voice calls,
Video calls, and Fax calls
individually. To activate this
setting, press the SK1 (Update).
All forwarding off:
Turn off all call forwarding setup of
Voice calls, Video calls, and Fax
calls.
Auto check:
Automatically checks for your
diverts.
Shows the current status of call
waiting.
Check:
Shows the current service status.
Turns the call restriction service on/
off, makes an enquiry and displays
the current service status.
Call types:
• Outgoing Voice calls
• Outgoing Video calls
No restrictions:
Turns off the outgoing restrictions
service.
Internat. if not home:
Outgoing international calls except
those to the home country.
International calls:
Outgoing international calls.
45
Page 52
No Calls
6(Call
restrictions)
7 Call time info Displays and sets the call time
All calls:
All outgoing calls except emergency
calls.
• Incoming Voice calls/Incoming
Video calls
No restrictions:
Turns off the incoming restrictions
service.
Incoming if roaming:
Incoming calls when outside the
home country. Rejects all incoming
calls while roaming except for
callback after an emergency call
All calls:
All incoming calls except for
callback after an emergency call.
Check:
Shows the current service status.
Update:
Service status is updated.
Change password:
Changes the password.
information.
Current call time:
Allows you to change the call time
display setting. Select Current call,
Outgoing calls, All calls or OFF.
Under the following items, the call
time information is displayed in All
calls, Outgoing calls and
Incoming calls.
Summary list:
Displays summary information for
calls.
Voice calls:
Displays voice call information.
Video calls:
Displays video call information.
Reset call timer:
Resets the call time to zero.
No Calls
8 Advanced
settings
8
Dial pause setting:
Edits a string of keypad characters
(up to 128 single-byte characters)
for pause dialling. This function
enables sending out of numbers
while calling with pauses inserted.
For example, after entering a
number with the touch tone service,
you can send out the numbers you
entered beforehand.
Pause dial entry function is useful
for sending messages to a pager,
etc. You can only use keypad
characters (0-9, # and) and pause
(press and hold the # key: displayed
as p). A pause at the beginning
cannot be registered. A pause at the
end is deleted when registered.
Registered pause dial entry can
only be used while calling. Sent out
pause dial entries are not saved in
the Outgoing calls list.
CLI display:
Displays the Caller Identification
(CLI) picture in the contact list when
making and receiving calls.
Ignore if no ID:
Turns no caller ID rejection function
on/off. Rejects any calls received
without caller ID notification.
Voi ce ma il :
Sets voicemail clearance type by
checking the check boxes.
Send tones:
Turns the send tone on/off.
Speed dial:
Turn the Fast dial and Speed dial
functions on/off.
46
Page 53
Date and Time
☛ Press 4 (or select Date and Time) on the User
settings screen.
Date and time allows you to select the date and clock
display formats, set the home/dual time, time difference
from GMT, turn the summer time function on/off and view
the current time of both clocks.
No Date and time
1 Set date and
time
The following settings are provided for
Home time.
Date:
Sets the date for the home time.
Enter month, date and year
separated with the slash according
to the order in Date format setting
(e.g. 15/09/2003 when the Date
format setting is dd/mm/yyyy).
Time:
Sets the time. Enter the current time
using the 24 hour display (e.g. 21:45
for 9:45 p.m.) or using the 12 hour
display (e.g. PM 9:45 for 9:45 p.m.)
depending on your Time format
setting.
Summer time:
Sets whether the current status of
the home/dual time is summer time
or not. You cannot use this when
your Home time is not set.
Zone:
Set the time difference between
home time and GMT.
Selects the city name in your home
area from the Time zone list.
No Date and time
2 Set dual time The following settings are provided for
3 Format and
display
4 View clocks Shows the current time for Home time
Dual time.
Time:
Sets the time. Enter the current time
using the 24 hour display (e.g. 21:45
for 9:45 p.m.) or using the 12 hour
display (e.g. PM 9:45 for 9:45 p.m.)
depending on your Time format
setting.
Summer time:
Sets whether the current status of
the home/dual time is summer time
or not. You cannot use this when
your Home time is not set.
Zone:
Set the time difference between
home time and GMT.
Selects the city name in your home
area from the Time zone list.
Time format:
Sets the time display format to
either 12 hour display or 24 hour
display.
Clock display:
Sets the clock display to Home,
Dual time or Home and Dual time.
Date format:
Sets the date display format to
either dd/mm/yyyy (e.g. 15/09/
2003), mm/dd/yyyy (e.g. 09/15/
2003) or yyyy/mm/dd (e.g. 2003/
09/15).
Always display clock:
Displays the clock all time at the
bottom of the screen.
and Dual time.
47
Page 54
Language
☛ Press 5 (or select Language) on the User settings
screen.
Language allows you to select the language for display and
turn wordwrap function on/off.
No Date and time
1 Display
Language
2 Word w ra p Turns the wordwrap function in text
Selects the display language. All text
in your N600i is displayed in the
selected language.
fields on/off.
2 You cannot change Word wrap
settings while an application is
running.
Security
☛ Press 6 (or select Security) on the User settings
screen.
Security settings allow you to set lock function and code
number settings.
No Security
1 Key locks Provides Keypad lock (Menu+*) and
Side key lock (Menu+#).
No Security
2 Locks Sets the Dial lock and Auto lock
functions.
Dial lock:
This cancels any key operation
except for making emergency calls,
answering a call with the Send key,
rejecting a call with the End key,
using the End key to turn the N600i
on/off, turning off the alarm with any
key and adjusting the volume of the
earpiece. Note that you need a
handset code to turn on/off Dial
lock. Refer to New handset code in
Set codes below for details on the
handset code.
You can also turn Dial lock on/off
from the Home screen. Press
Option on the Home screen and
select 7 (Dial lock).
2 If you enter the incorrect handset
codes three times in a row, Dial
lock forces your N600i into the
lock condition for 30 minutes.
However, if you turn off the
power during the forced dial lock
and then turn on it again, N600i
extends the lock for more 30
minutes.
Auto lock:
Turns on/off the automatic lock
function. With Auto lock on, the
phone is protected by Dial lock
automatically when you switch on
your phone.
48
Page 55
No Security
3 Set codes Sets the codes for PIN1, PIN2,
handeset and private PIN.
Activate PIN1:
PIN1 is used to power on your
N600i. Selects Enable or Disable.
New PIN1:
Changes the PIN1 number. Enter
the current PIN, the new PIN (4-8
digits) and then the new PIN again
for confirmation.
New PIN2:
Changes the PIN2 number. Enter
the current PIN, the new PIN (4-8
digits) and then the new PIN again
for confirmation.
Unlock PIN2:
Displays the PIN2 entry screen
when N600i is turned on.
2 If you enter your PIN incorrectly
three times in a row, the USIM
card is locked. You can unlock it
by using your PIN Unlock Key
(PUK).
New handset code:
Changes the handset code required
to confirm important actions, such
as deleting all Contact list entries.
This requires the Code Number to
prevent accidental mistakes.
To change the handset code, enter
a new code (4 digits), then enter the
new code again for confirmation.
2 When you buy your N600i, the
Code Number is set to 0000.
New private PIN:
Changes the network password.
Input the current password, the new
password (4-8 digits) and then the
new password again for
confirmation.
2 Entry of the handset code (4
digits) is required for the first
setting of New private PIN.
2 You need this password to
change any call restrictions on
your N600i.
Network setup
☛ Press 7 (or select Network setup) on the User
settings screen.
Network setup allows you to change various settings
related to the mobile phone network
.
No Security
49
1 Network
select
2 Pref.
networks
3 i-mode
settings
Selects the network operator (Public
Land Mobile Network, PLMN)
automatically/manually.
When Automatic is selected, N600i
automatically searches and selects
PLMN with RAT indicator in order of
priority.
When Manual is selected, a list of
valid PLMNs is displayed. Select a
PLMN with RAT indicator from the list.
Your N600i establishes a connection
to that PLMN. If this connection is
unsuccessful, a message requesting
another selection is displayed.
Displays the list of PLMNs saved in
the USIM card, updates the PLMN list
with RAT indicator, adds and deletes
PLMN entries and changes the
search priority and the entry display
order. USIM list can contain up to 50
PLMN entries. Add, Sort, Replace
and Delete are provided under the
Options menu.
To change the search priority and the
entry display order:
Press SK1 (Move) on PLMN List. On
PLMN Priority, select the PLMN with
RAT indicator to move, move the
cursor to destination and press the
Enter or SK1.
Page 56
Clear settings
☛ Press 8 (or select Clear settings) on the User
settings screen.
Clear settings function allows you to reset the settings you
have made and clear the phone's memory.
No Security
1 Clear
settings
2 Clear
memory
3 Clear
everything
Resets all the settings to the default
settings.
Clear all user data.
Resets all the settings to the default
settings and clears all the memory.
50
Page 57
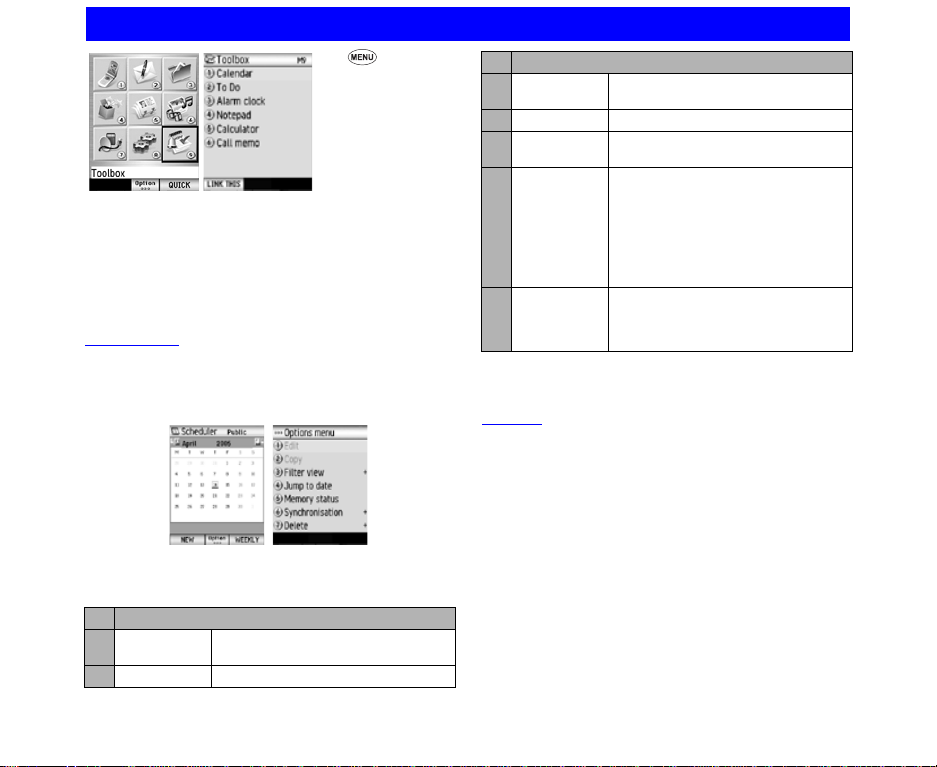
Toolbox (M9)
☛ 9, or select
9 (Toolbox) to
press the Enter
key on the Menu
screen.
This section describes how to use your N600i to
help manage your time and tasks.
You can use your N600i at home or work as a
calendar with appointments and To Do lists, as an
alarm clock, as a calculator and much more. There
are six features available in the Toolbox:
Calendar
☛ Press 1 (or select Calendar) on the Toolbox screen.
Calendar tool has four entry types: Appointment,
Multiday event, Special occasion and Days off.
You can save up to 200 calendar entries.
To set appointment
The following options are available:.
No Options menu
1 Edit Selects an item you want to change
2 Copy Copies the item.
and edit it.
No Options menu
3 Filter view Select the appointment type from All,
4 Jump to date Finds and jump to the date you enter
5 Memory
status
6 Synchronisa
tion
7 Delete Select the calendar entry you want to
, Depending on the conditions, some options may
be greyed out and not be available
Private or Public.
Informs the event and remaining
counts. (200 max.)
You can send calendar entries as a
message or convert them stored in
the phone to vCalendar format for
transferring between the U600i and a
PC. Also you can select the server.
Select options from Send as
message, Save vCalendar and
Synchronisation.
delete and press the Enter key.
Delete event and Delete day off are
available.
To Do
☛ Press 2 (or select To Do) on the Toolbox screen.
This feature allows you to set up To Do tasks that should be
finished by a certain date. You can save up to 200 To Do
entries.
To add a new To Do task
In To Do list, press SK1 (New), or press Option and
select New to open the new task screen. Press the
Enter key on each field to select and edit.
To edit To Do tasks
☛ On the To Do list screen, highlight the To Do entry to
edit, press Option and select Edit. When displaying
the Details screen, press SK1 (Edit).
☛ Edit the task details. After editing, press SK1 (OK).
The To Do entry is overwritten.
To delete To Do tasks
51
Page 58

☛ Select a task from To Do list or Filter List and press
Option. Select Delete, This task and press the Enter
key.
☛ Select the criteria by which you want to sort To Do
tasks: Deadline or Priority and press the Enter key.
☛ Select the category you want to display: All,
Personal, Office, Study, Travel, Shopping,
Preparations, Sport, Housework or Other.
Press the Enter key.
Alarm clock
☛ Press 3 (or select Alarm clock) on the Toolbox
screen.
Select the alarm clock to set up to 5 alarms from Alarm 1 to
Alarm 5 and press the Enter key, or press SK1 (Edit). You
can set a recurring alarm to ring at a specific time on
several days of the week. The Alarm tone will only sound if
the phone is switched on.
To Edit an Alarm
To edit your alarm clock setting, press SK1 (Edit) and edit.
To Change alarm clock status
You can change alarm clock status on/off/disable on
the Alarm clock list screen. Select an alarm on the
list and do the following
☛ To change the alarm clock status from On to Disable,
press SK2 (Disable).
☛ To change the alarm clock status from On to Off,
press SK2 twice (SK2 (Disable) -> SK2 (Off))
☛ Disable cancels the next alarm but does not cancel a
recurring alarm.
☛ Off deactivates the set alarm.
2 Disable is available only for recurring alarms and
cannot be set for alarms without the Repeat setting.
To delete Alarms
☛ (One alarm)
Select an alarm clock from Alarm1 to Alarm5. Press
Option, select Delete and press the Enter key. Select
Delete and press the Enter key.
☛ (All alarms)
Press Option menu, select Delete and press the
Enter key. Select Delete all and press the Enter key.
Notepad
☛ Press 4 (or select Notepad) on the Toolbox screen.
The Notepad feature allows you to keep notes and other
useful information, such as agendas and minutes of
meetings, shopping lists and other items you need to
remember. You can save up to 9 text notes.
To create a new Notepad entry
☛ Select No contents and press the SK1 (New) or
Enter key.
☛ Enter a title (up to 32 single-byte characters including
spaces) and press the Enter key.
☛ Enter a text message (up to 512 single-byte
characters) and press the Enter key.
To edit a Notepad entry
☛ Select a notepad entry from the list and press Option.
Select Edit and press the Enter key.
☛ Select Note title and press the Enter key.
☛ Enter a title (up to 32 single-byte characters including
spaces) and press the Enter key.
☛ Select Note contents and press the Enter key.
☛ Edit a text message (up to 512 single-byte characters)
and press the Enter key.
2 You cannot start a new line in the title.
2 When the title is omitted, the first 32 characters from
the contents are entered as a title automatically.
To delete a Notepad entry
☛ Select a notepad entry from the list and press Option.
Select Delete, then Delete again. Press SK1 (Yes) on
the confirmation screen.
☛ Press Option, select Delete, Delete all. Press SK1
(Yes) on the caution screen to delete all the notepads.
Calculator
☛ Press 5 (or select Calculator) on the Toolbox screen.
52
Page 59
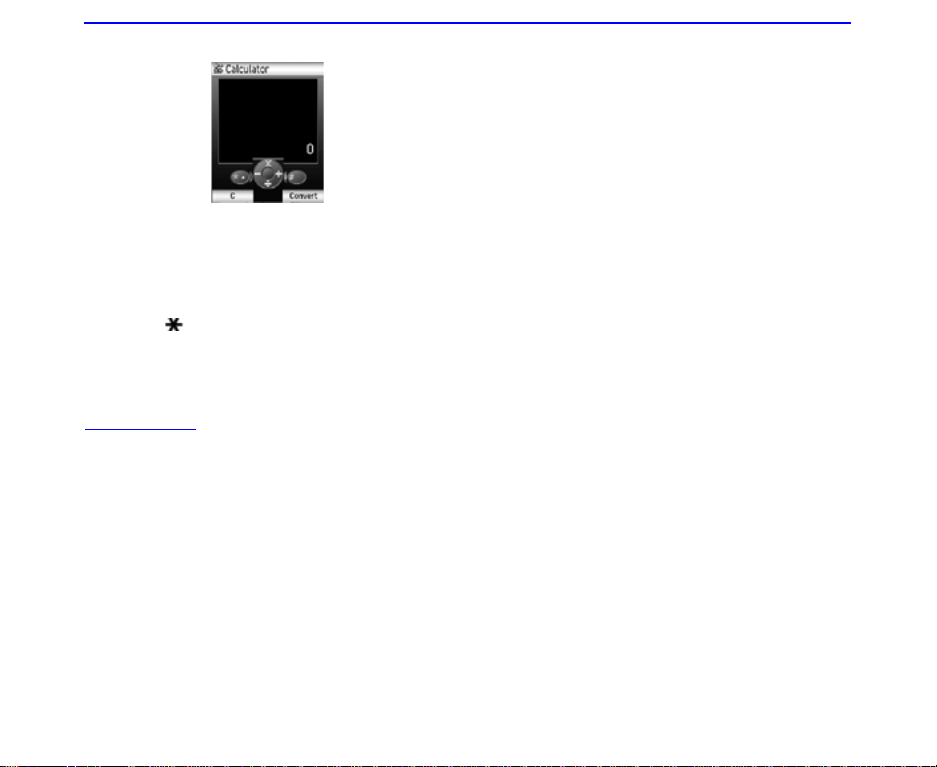
Your N600i has a built-in calculator, which can add,
subtract, divide and multiply. Use the following keys
•Use the Right key as + key
•Use the Left key as - key
•Use the Up key as x key
•Use the Down key as / key
•Use the Enter key as = key
• Use the key to enter a decimal point
• Use SK1 as the AC key or to clear the figure
• Use the # key as +/- switch key
• Use SK2 to switch to the currency converter
Call memo
☛ Press 6 (or select Call memo) on the Toolbox
screen.
The Call memo feature allows you to record a short audio
message (up to 20 seconds) during a call. You can use a
Call memo to temporarily store phone numbers, addresses
or reminders. You can save up to five call memos in your
N600i.
2To record a call memo during a call, press Option and
select Call memo to start recording the conversation.
2 You cannot attach a call memo to messages.
To listen to a call memo
☛ Select a call memo to play the Call memo screen.
☛ Press SK1 (Play) to start playing.
To delete a call memo
☛ Select any call memo to delete on the Call memo
screen.
☛ Press SK2 (Delete) to delete it.
53
Page 60

54
Page 61

Text Entry
(to be provided on next draft)
55
 Loading...