

NEC GT200 User Manual
GT200 Terminal User’s Guide
for UNIVERGE SV Series
(ITX-1DE-1W(BK)TEL)
A50-035098-001 Issue 1.0

Document History
1. Revision 1.0 Jan 1st, 2014
First release
Document History
2

AAbboouutt tthhiiss pprroodduucctt
FFeeddeerraall CCoommmmuunniiccaattiioonnss ((FFCCCC SSttaatteemmeenntt))
CCEE NNoottiiccee ((EEuurrooppeeaann UUnniioonn))
License to use software
Customers shall use the software embedded in ITX-1DE-1W pursuant to the terms and conditions of software
license agreement of the UNIVERGE SV8500 communication server (SLA), UNIVERGE SV8300
communication server (SLA) or UNIVERGE SV8100 system (SLA). The software contains certain third party
open source software components which are provided under the terms and conditions designated at
http://www.bcom.nec.co.jp/soft-license/ITX-1DE-1W_OSS.html.
The terms and conditions of SLA are not applied to such third party open source software components.
Preface
Preface
The use of this equipment may be subject to local rules and regulations. The following rules and regulations may be
relevant in some or all areas.
This device complies with FCC Rules Part 15. Operation is subject to the
following two conditions: (1) this device may not cause harmful interference and
(2) this device must accept any interference received including interference that
may cause undesirable operation.
This equipment has been tested and found to comply within the limit of a Class B
digital device, pursuant to Part 15 of the FCC Rules. These limits are designed to
provide reasonable protection against harmful interference in a residential
installation. This equipment generates, uses and can radiate radio frequency
energy and, if not installed and used in accordance with the manufacturer’s
instructions, may cause harmful interference to radio communications.
However, there is no guarantee that interference will not occur in a particular
installation. If this equipment does cause harmful interference to radio or
television reception, which can be determined by switching the equipment on and
off, the user is encouraged to try to correct the interference by one or more of the
following measures:
Reorient or relocate the interference receiving antenna.
Increase the distance of separation between the equipment and interference
receiver.
Connect the equipment to a power outlet on a circuit different from that to which the interference receiver is
connected.
Consult the dealer or an experienced radio/TV technician for help.
Changes or modifications not expressly approved by the party responsible for compliance could void the user’s
authority to operate the equipment.
The symbol indicates compliance of this equipment to the EMC Directive and the Low Voltage Directive of the
European Union.
Safety & Health
Applied standards: N 60950-1:2006 + A11:2009 + A1:2010 + A12:2011
Electromagnetic Compatibility
Applied standards: EN 55022 Class B:2010 and EN 55024:2010
Assessment
Applied standards: EN 50581:2012
3

Table of Contents
Table of Contents
1 Overview ............................................................................................................................ 5
Package Contents ................................................................................................................. 5
2 Product Description ......................................................................................................... 6
Front View ............................................................................................................................. 6
Back View ............................................................................................................................. 7
Connecting the Phone .......................................................................................................... 8
Supporting Communication Servers ..................................................................................... 8
3 MMI (Man Machine Interface) Configuration ................................................................... 9
Phone Book .......................................................................................................................... 9
Call History .......................................................................................................................... 10
Phone Settings .................................................................................................................... 11
Network Settings ................................................................................................ ................. 13
SIP Settings ........................................................................................................................ 14
SIP Account ........................................................................................................................ 15
System Settings .................................................................................................................. 17
4 Web Configuration .......................................................................................................... 18
Call History .......................................................................................................................... 19
Phone Book ........................................................................................................................ 19
Phone Settings .................................................................................................................... 20
System Settings .................................................................................................................. 24
Global SIP Settings ............................................................................................................. 27
SIP Accounts ...................................................................................................................... 29
Network ............................................................................................................................... 32
5 Feature List ..................................................................................................................... 37
6 Operation ......................................................................................................................... 40
Answering a Call ................................................................................................ ................. 40
Making a Call ...................................................................................................................... 40
Call Options ........................................................................................................................ 40
7 Specification ................................................................................................................... 42
4
Chapter 1 Overview
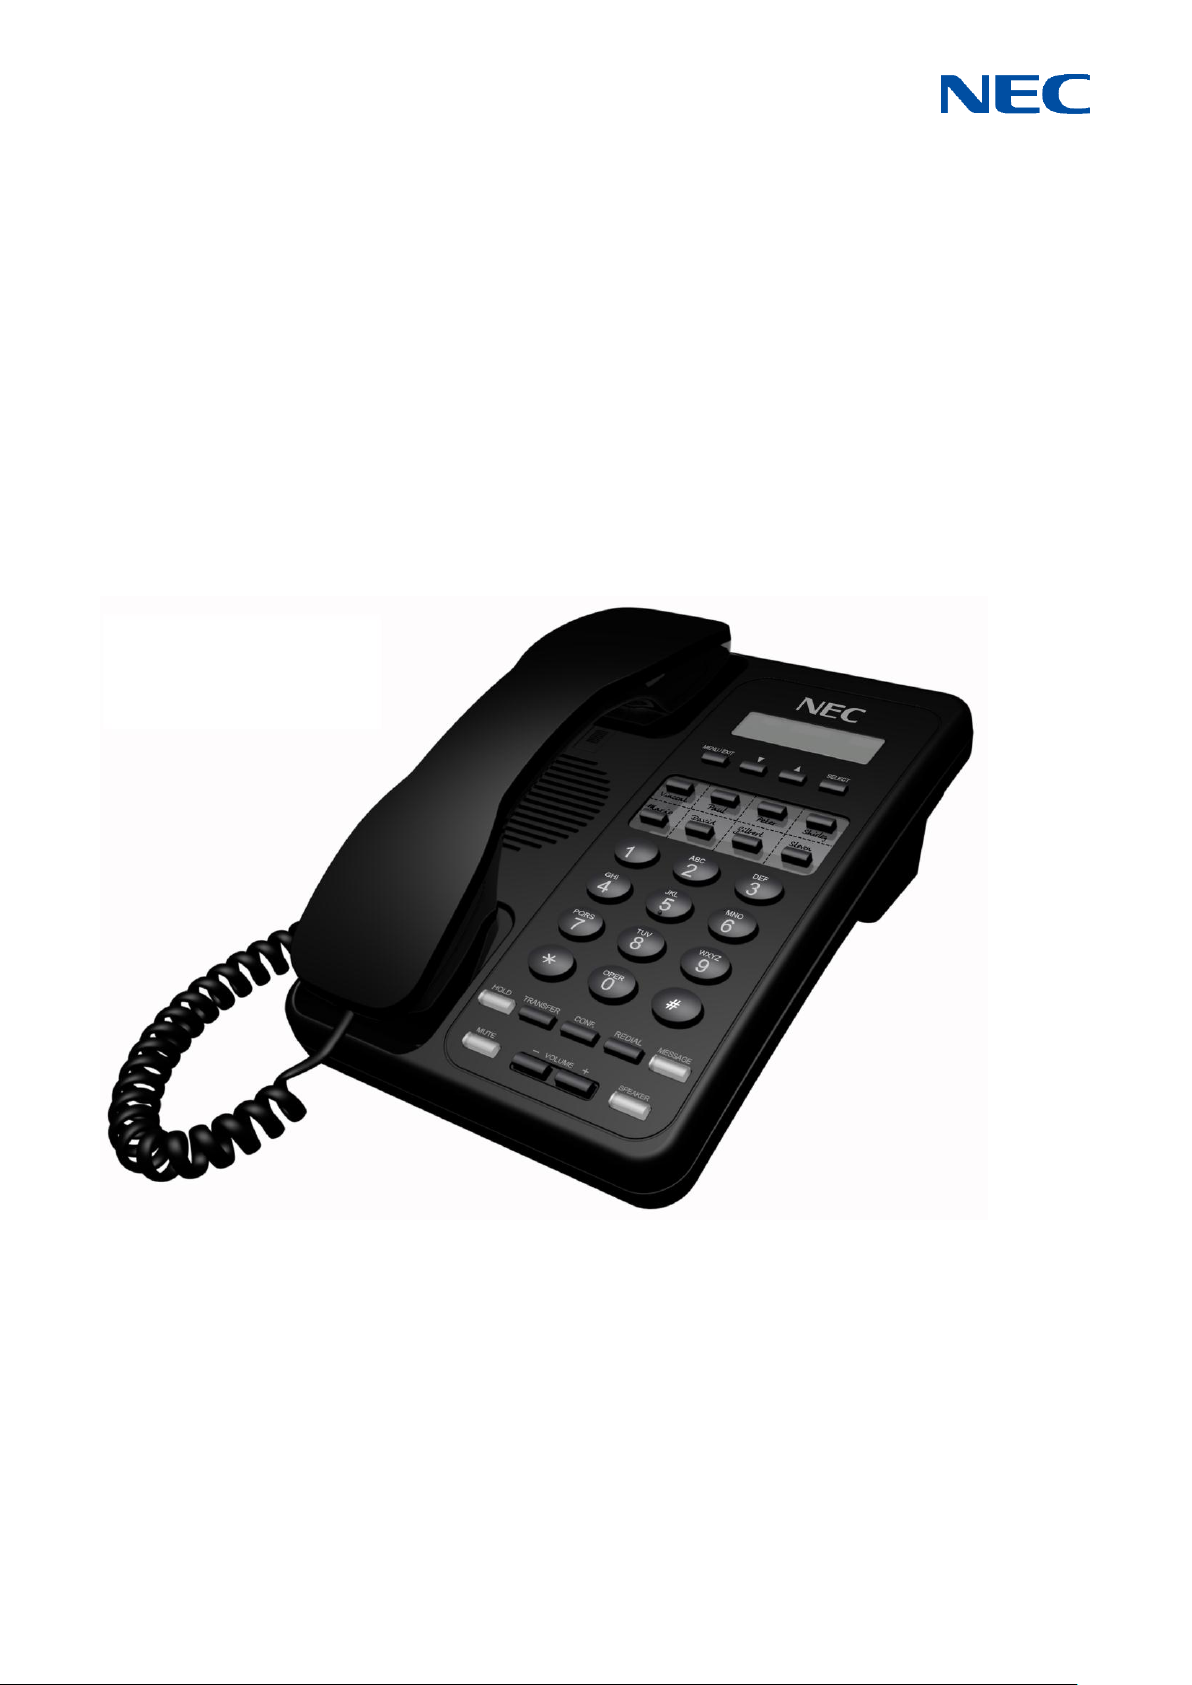
11 OOvveerrvviieeww
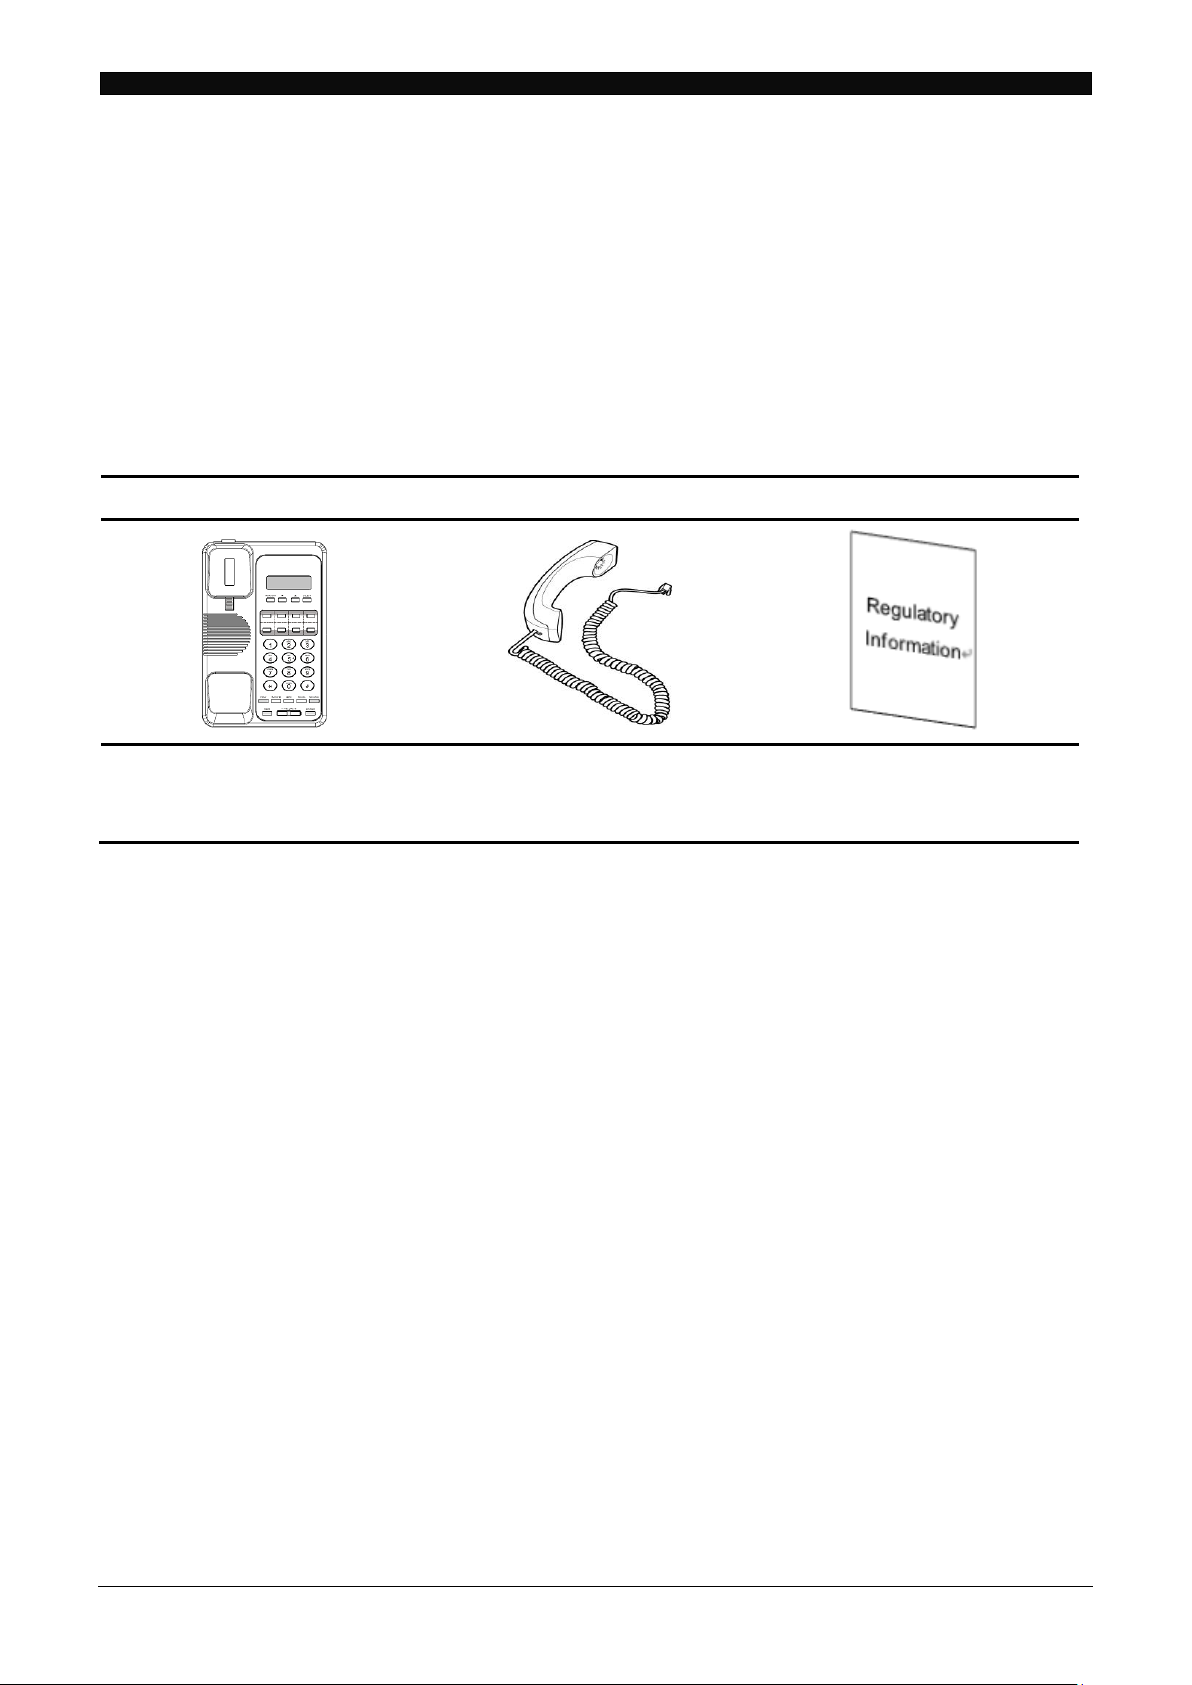
PPaacckkaaggee CCoonntteennttss
VoIP Phone
Handset
Regulatory Information
VoIP Phone system
Used to connect handset
Note: Handset and curl code are
separated. Please connect these.
Regulatory Information
of this product.
Your IP Phone is a full-feature telephone that provides voice communication over an IP network, that allows you to place
and receive phone calls, put calls on hold, transfer calls, and so on. Read this user manual carefully to learn how to operate
this product and take advantage of its features.
When unpacking the VoIP phone, ensure all the following items are present and undamaged. If anything appears to be
missing or broken, contact your dealer for a replacement.
1. VoIP Phone: 1 set
2. Handset: 1 set
3. Curl cord: 1 set
4. Regulatory Information Sheet: 1 sheet
5
Chapter 2 Product Description
22 PPrroodduucctt DDeessccrriippttiioonn
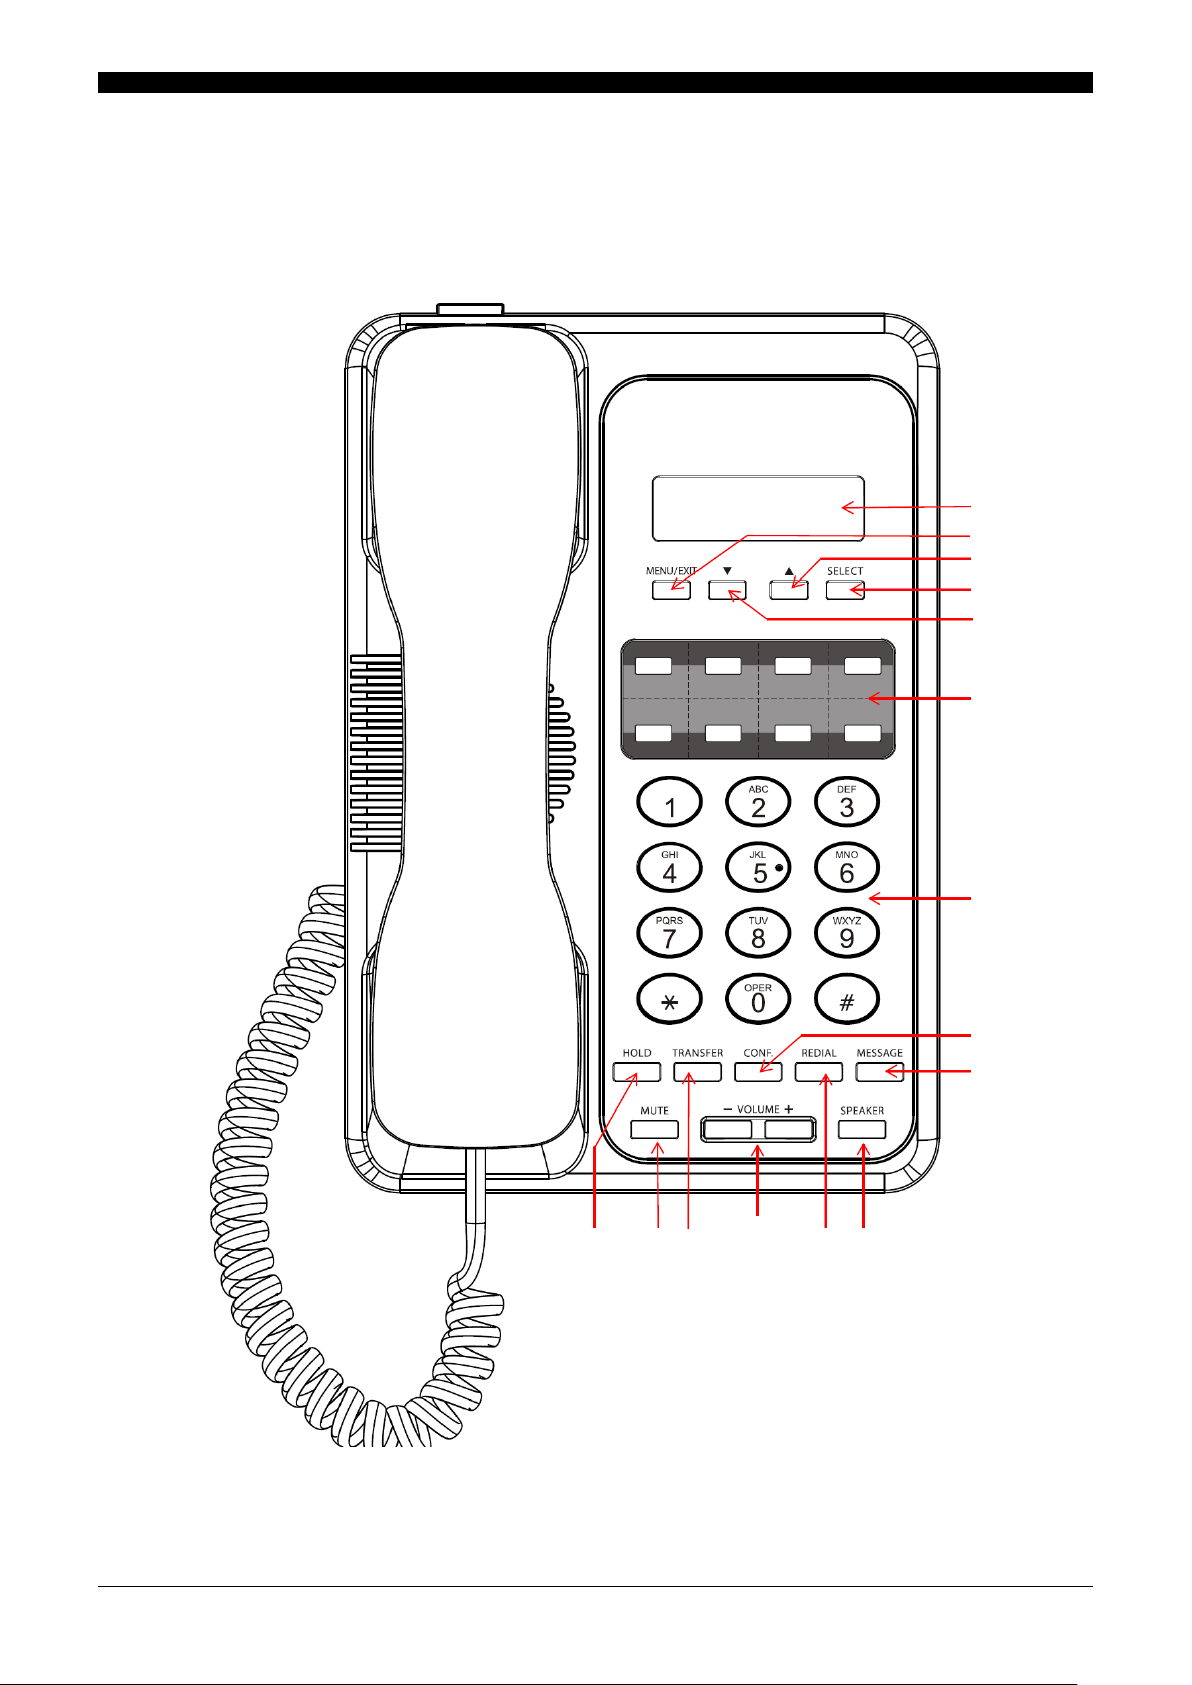
FFrroonntt VViieeww
1
2
15
14
13
12
11
10
3
4 5 6 7 8
9
This chapter contains important information to help you familiarize yourself with the functions of the VoIP phone.
6
Chapter 2 Product Description
Name
Description
1
Display screen
Displays calls and status information.
2
MENU/ EXIT
Press to access the menu options or cancel your
selection and return to the previous level.
3
UP
Press to scroll through lists and menus on the display.
4
SELECT
Press to enter a menu or confirm a selection.
5
DOWN
Press to scroll through lists and menus on the display.
6
Programmable speed dial keys
Press any of the keys to speed dial the preset contact
number.
(To write something on the sheet, please remove the
plastic cover first)
7
Alphanumerical keys
Press these keys to enter phone numbers and texts.
8
CONF
Press to activate the three-way conference call.
9
MESSAGE key with indicator
Press to listen to voice mail messages.
Red light indicates unheard messages.
10
SPEAKER key with indicator
Activates the speakerphone to allow hands free
conversations.
11
REDIAL
Press to call the last dialed number.
12
VOLUME
Press to increase or decrease the volume of the
ringer tone, handset, or speakerphone.
13
TRANSFER
Press to transfer an active call to another phone on
the system.
14
MUTE key with indicator
Press to mute MIC.
15
HOLD key with indicator
Press to put an active call on hold.
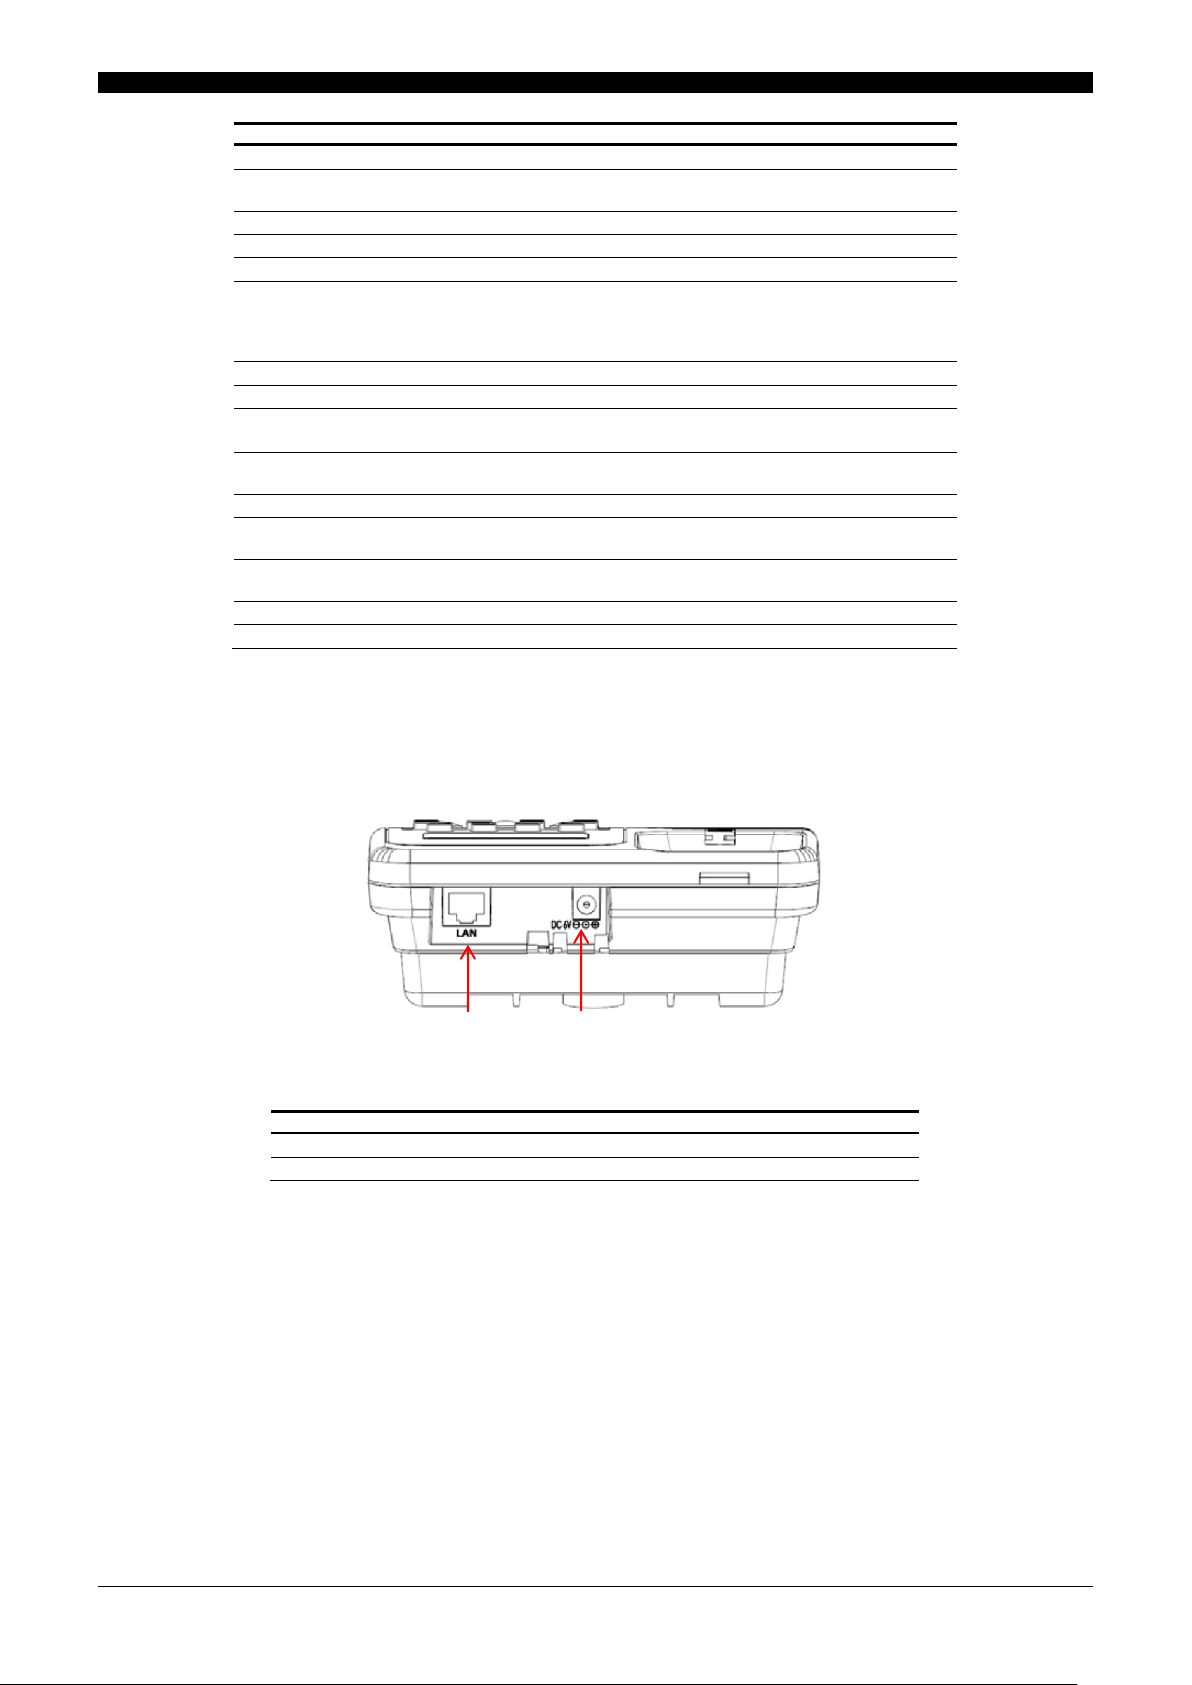
BBaacckk VViieeww
NO.
Name
Description
1
LAN port
Connects to a switch, or hub
2
DC Jack
DC 6V Power Jack, it is covered by a cap
1
2
7
Chapter 2 Product Description
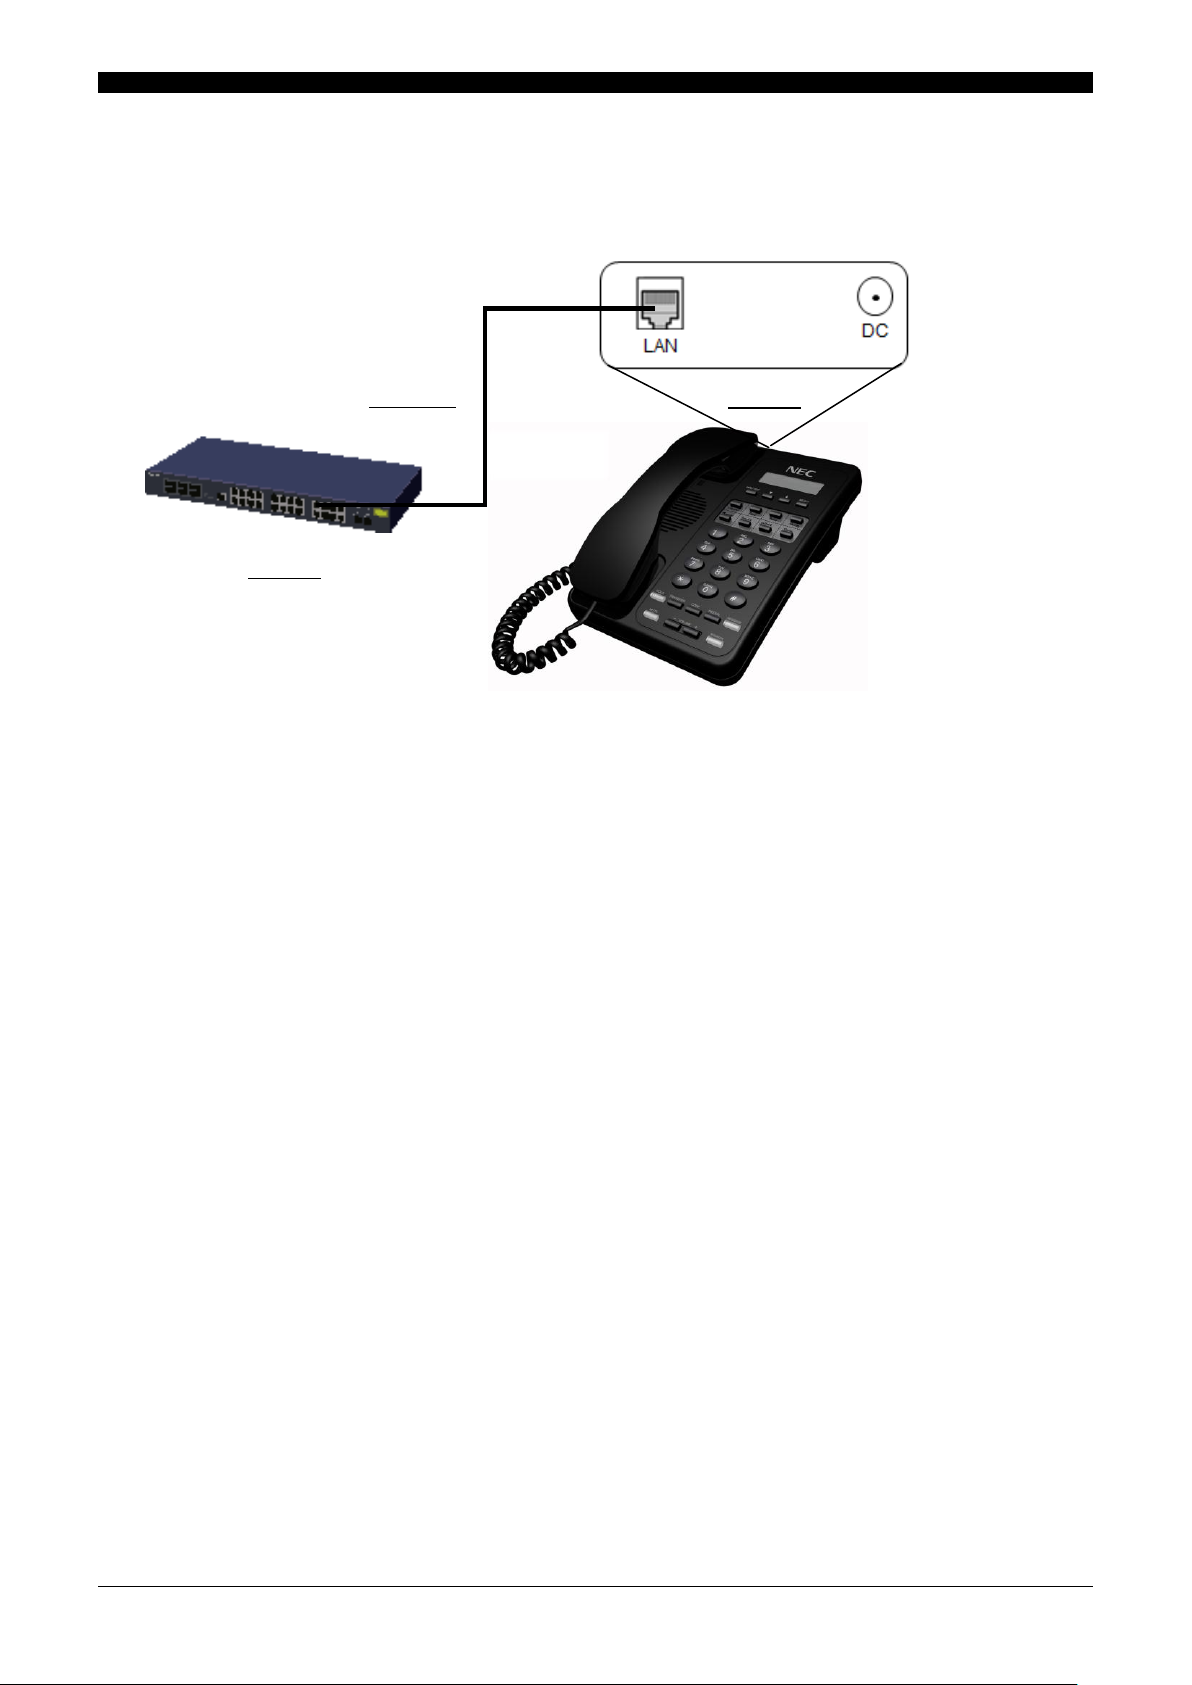
CCoonnnneeccttiinngg tthhee PPhhoonnee
SSuuppppoorrttiinngg CCoommmmuunniiccaattiioonn SSeerrvveerrss
Backside
LAN Hub
LAN Cable
The following illustration shows how to connect the VoIP phone to power, LAN and the handset.
The following communication servers support the VoIP Phone:
1. UNIVERGE SV8500: S7 or higher
2. UNIVERGE SV8300: R9 or higher
3. UNIVERGE SV8100: R9 or higher
8
Chapter 3 MMI Configuration
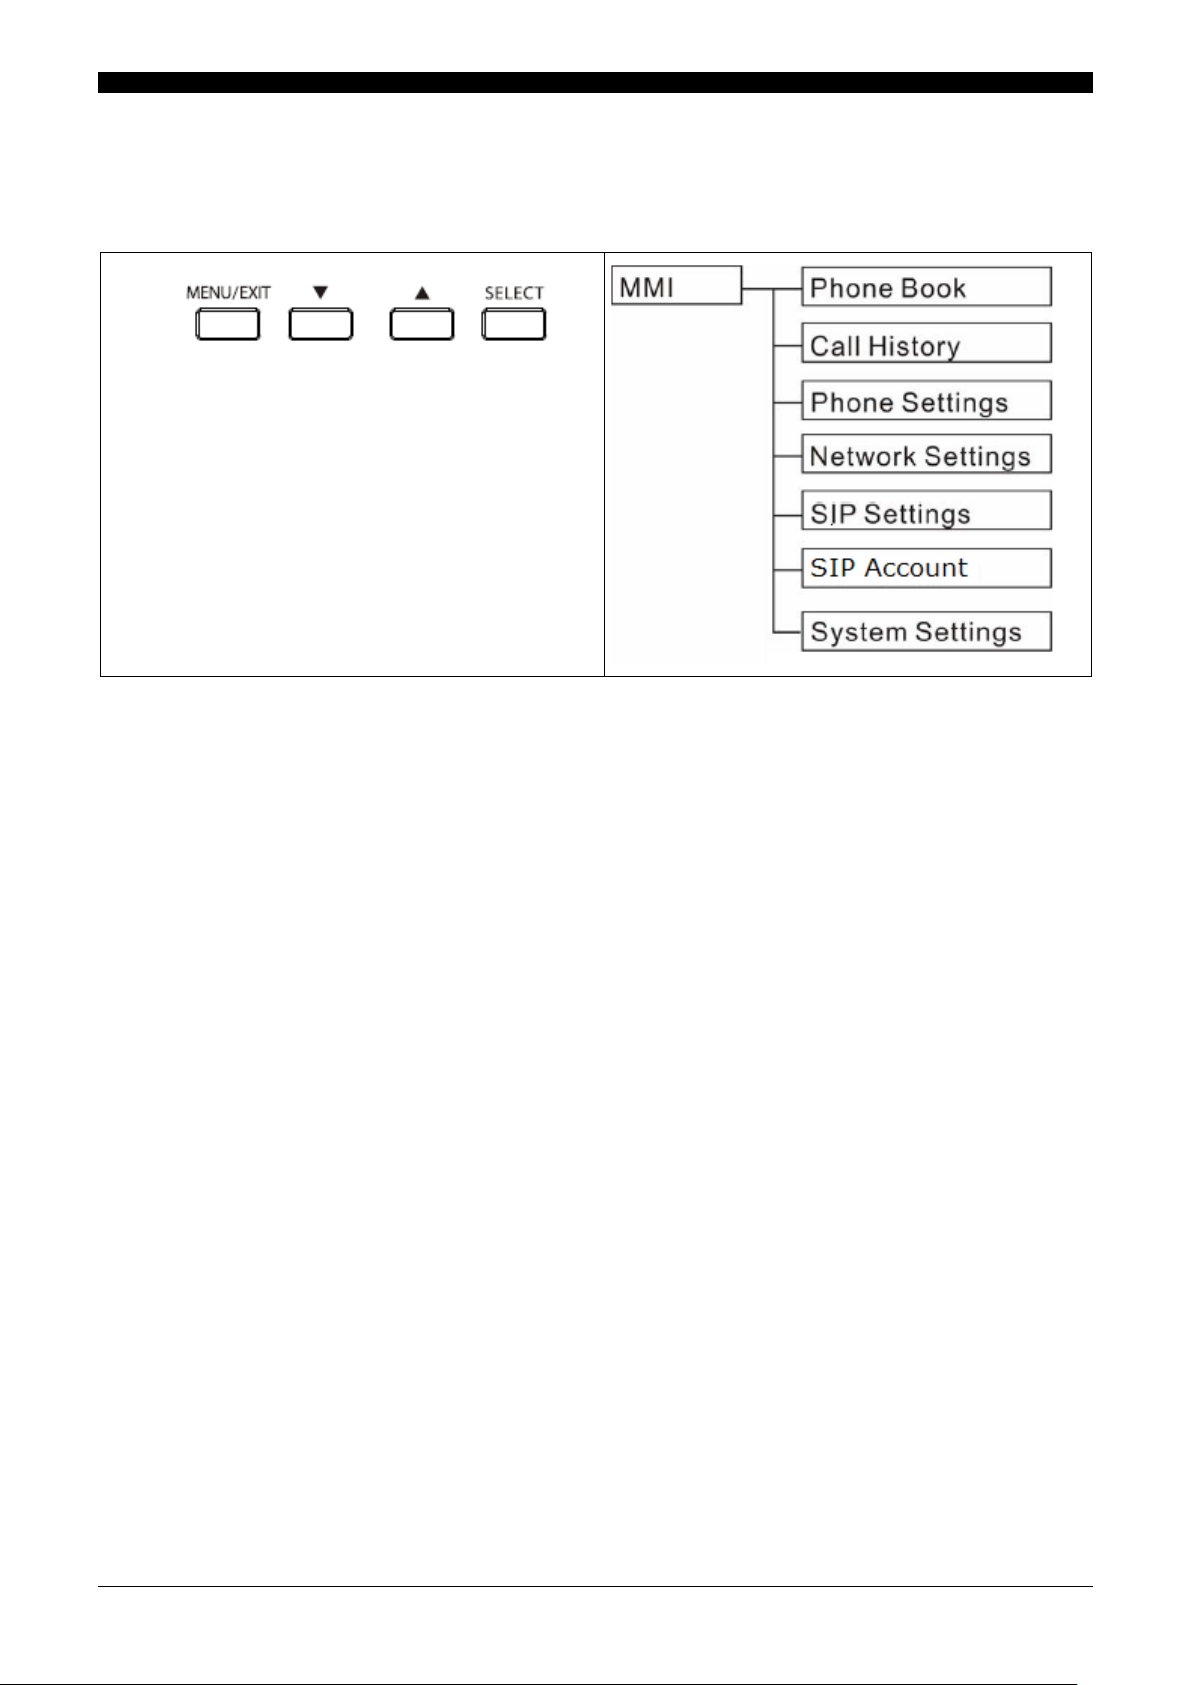
33 MMMMII ((MMaann MMaacchhiinnee IInntteerrffaaccee)) CCoonnffiigguurraattiioonn
1. Press the MENU/EXIT key to access the menu.
2. Using the UP and DOWN keys, scroll through the
displayed menu options. Press the SELECT key to
view the submenu.
3. Repeat the previous step to browse through the
menu items, submenus, and options.
4. Use the UP key to erase a digit entry error.
5. Press the MENU/EXIT key to cancel your selection
and return to the previous menu level.
6. To choose a menu setting, press SELECT.
PPhhoonnee BBooookk
The menu directory enables you to access the product settings and set up the device according to the network conditions
and your preferences. The menu is set up in a simple and easily accessible manner. Follow these steps to access the menu
and the menu items.
Note: Accessing the Phone Setting, Network Settings, SIP Settings, SIP Account, and System Settings submenus
requires a password. Default password is “1234” to login.
The phone book feature enables you to create new entries for your contacts and edit their contact information. It also
enables you to store a number (up to 200) from a received call or a dialed number.
Creating a New Entry
To create a new entry:
1. Type the name, number and domain of the new contact.
2. Press SELECT key to save.
3. Use UP and DOWN keys to switch from YES/NO. Press SELECT again to confirm or to cancel.
Deleting a Contact
To delete a contact in the phone book:
1. Choose Delete and enter the option.
2. Scroll through the phone to locate the number to be deleted.
3. Press the SELECT key to delete.
4. Use UP and DOWN keys to switch from YES/NO. Press SELECT again to confirm or to cancel.
9
Chapter 3 MMI Configuration
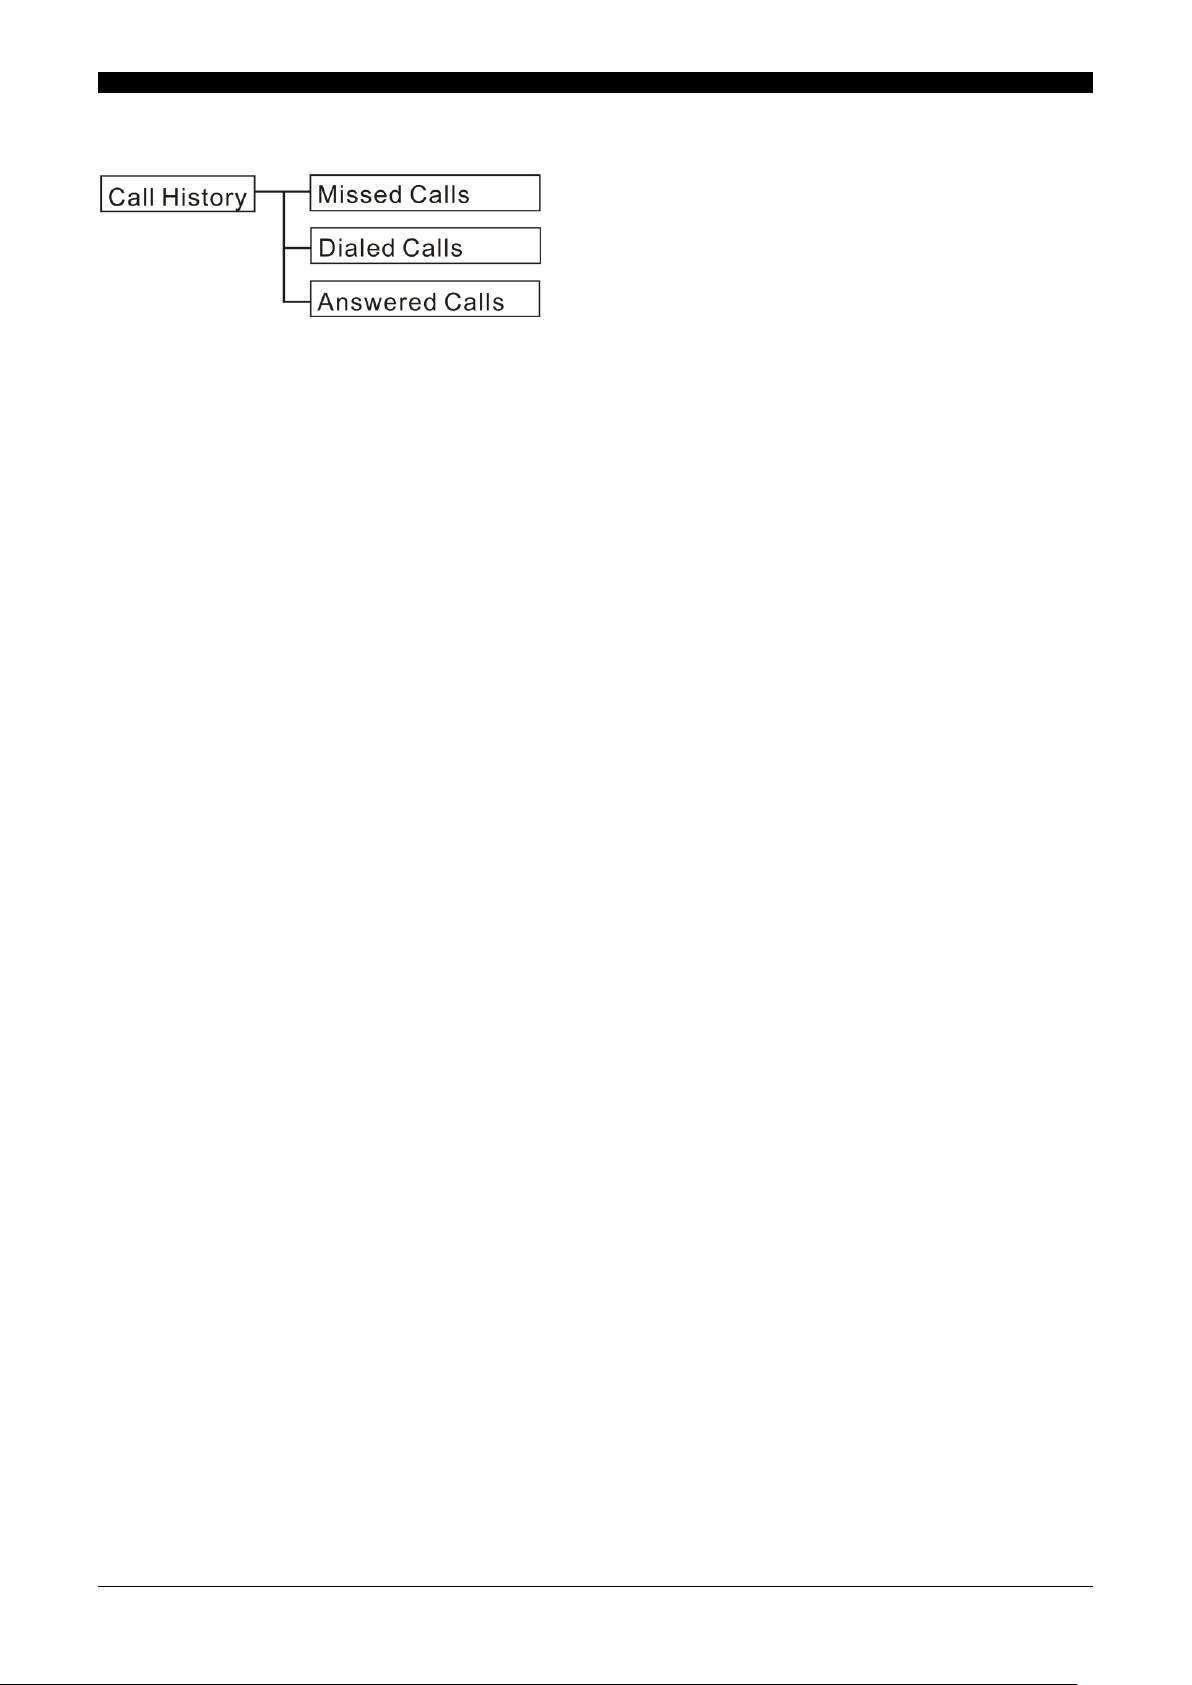
CCaallll HHiissttoorryy
The VoIP phone stores information about calls made or received. The lists are stored from the newest to oldest entries. The
oldest entries are deleted as new entries are added.
Press the MENU/EXIT key, then select Call History to view call information. A maximum of 200 calls can be saved for each
of the received and dialed call logs.
Missed Calls
The Missed Calls list consists of the calls that are not answered. You can choose to dial, detail, delete or save a single
missed call from the missed call logs.
Select a call from the list and press the SELECT key. Select one of the following options by pressing the UP or DOWN keys:
Dial: Dial the number of the selected call.
Detail: Press to view call details.
Delete: Press to delete the number.
Save: Save the number to your phone book.
Note: When you have missed calls, “xxMissedCalls” (xx: number of Missed Calls) is displayed on the idle screen. This
indication will disappear in the following cases:
See Missed Calls in MMI Configuration
Reboot the VoIP terminal
Dialed Calls
The Dialed Calls list consists of the most recent numbers dialed. You can choose to dial, detail, delete or save a single
entry from the dialed call logs.
Select a call from the list and press the SELECT key. Select one of the following options by pressing the UP or DOWN keys:
Dial: Dial the number of the selected call.
Detail: Press to view call details.
Delete: Press to delete the number.
Save: Save the number to your phone book.
Answered Calls
The Answered Calls list consists of the most recent calls received. You can choose to dial, detail, delete or save a single
entry from the received call logs.
Select a call from the list and press the SELECT key. Select one of the following options by pressing the UP or DOWN keys:
Dial: Dial the number of the selected call.
Detail: Press to view call details.
Delete: Press to delete the number.
Save: Save the number to your phone book.
10

Chapter 3 MMI Configuration
PPhhoonnee SSeettttiinnggss
These settings are not available
These settings are not available
Phone Settings allow you to set up phone functions such as call forwarding, speed dialing, and more.
Always Forward
Always Forward allows you to set the account number to which all incoming calls are to be forwarded.
1. Press the MENU/EXIT key. Select Phone Settings then Always Forward.
2. Select from the following options:
Switch: Press to enable or disable this function.
Number: The phone number to forward incoming calls.
Domain: This refers to the SIP account number.
3. Press the MENU/EXIT key, then use the UP and DOWN keys to switch from YES/NO. Press the SELECT key
again to confirm or cancel and return to the previous menu level.
After setting Always Forward, “AlwaysForwad” is displayed on the LCD.
Busy Forward
Busy Forward allows you to set the account number to which incoming calls are to be forwarded when the line is busy. This
function requires you to input the following:
1. Press the MENU/EXIT key. Select Phone Settings then Busy Forward.
2. Select from the following options:
Switch: Press to enable or disable this function.
Number: The phone number to forward incoming calls.
Domain: This refers to the SIP account number.
3. Press the MENU/EXIT key, then use the UP and DOWN keys to switch from YES/NO. Press the SELECT key
again to confirm or cancel and return to the previous menu level.
After setting Busy Forward, “Busy Forwad” is displayed on the LCD.
No Answer Forward
No Answer Forward allows you to forward the phone number and a specific SIP account when not answered for a specified
period of time. This function requires you to input the following:
1. Press the MENU/EXIT key. Select Phone Settings then No Answer Forward.
2. Select from the following options:
Switch: Press to enable or disable this function.
Number: The phone number to forward incoming calls.
Domain: This refers to the SIP account number.
Timeout: This refers to a period of time (10 sec ~ 50 sec) without answering the call.
11

Chapter 3 MMI Configuration
3. Press the MENU/EXIT key, then use the UP and DOWN keys to switch from YES/NO. Press the SELECT key
again to confirm or cancel and return to the previous menu level.
Even if No Answer Forward is set, no indication on the LCD.
Speed Dial
You can use the speed dial feature to assign a hotkey with the phone numbers that you dial most frequently. You can then
press a hotkey and quickly dial a number instead of keying in the entire phone number or searching for it from the phone
book. See Speed Dialing a Number on page 40. (When registering an outside call number, a prefix digit is needed).
1. Press the MENU/EXIT key, then select Phone Settings and Speed Dial.
2. Choose the hotkey number you want to setup.
3. Input the phone Number and Domain.
4. Use Switch to enable or disable this hotkey.
5. Use Reset to reset this hotkey settings.
6. Press the MENU/EXIT key, then use the UP and DOWN keys to switch from YES/NO. Press SELECT again to
confirm or cancel and return to the previous menu level.
Auto Answer
Auto answer allows an incoming call to be answered without requiring any user interaction.
1. Select Switch to enable or disable this function and press the SELECT key to confirm.
2. Press the MENU/EXIT key, then use the UP and DOWN keys to switch from YES/NO. Press SELECT again to
confirm or cancel and return to the previous menu level.
After setting Auto Answer, the phone answers to incoming call with one short ringtone.
Ring Tone
You can select the ring tone type according to your preference. To set the ring tone type:
1. Use the UP and DOWN keys to select the favorite ring tone, then press the SELECT key to confirm selection.
2. To adjust the ring tone volume, simply press the UP and DOWN volume control key to increase/decrease the ring
tone volume.
Music on Hold
The Music on Hold function enables the VoIP phone to play music when a caller is placed on hold.
1. Select Switch to enable or disable this function and press the SELECT key.
2. Select Music On Hold to set the music on hold tone from Default/Ringtone.snd/Silence.snd/Musinonhold.snd.
3. Press the MENU/EXIT key, then use the UP and DOWN keys to switch from YES/NO. Press SELECT again to
confirm or cancel and return to the previous menu level.
When you enable the Music on Hold function, the next time you receive a call, press the Hold key and the caller will hear
music while waiting for you to answer.
Note: Music on Hold is normally provided by the SV systems. The Music on Hold setting in the VoIP phone should be set to
Disable.
Date Format
You can select the date format according to your preference. To set the date format, do the following:
1. Use the UP and DOWN keys to select the date format, and then press the SELECT key to confirm selection.
MM/DD/YYYY (Default)
DD/MM/YYYY
YYYY/MM/DD
2. Press the MENU/EXIT and use UP and DOWN keys to switch from YES/NO. Press the SELECT again to confirm
or to cancel and back to previous menu level.
12
Chapter 3 MMI Configuration
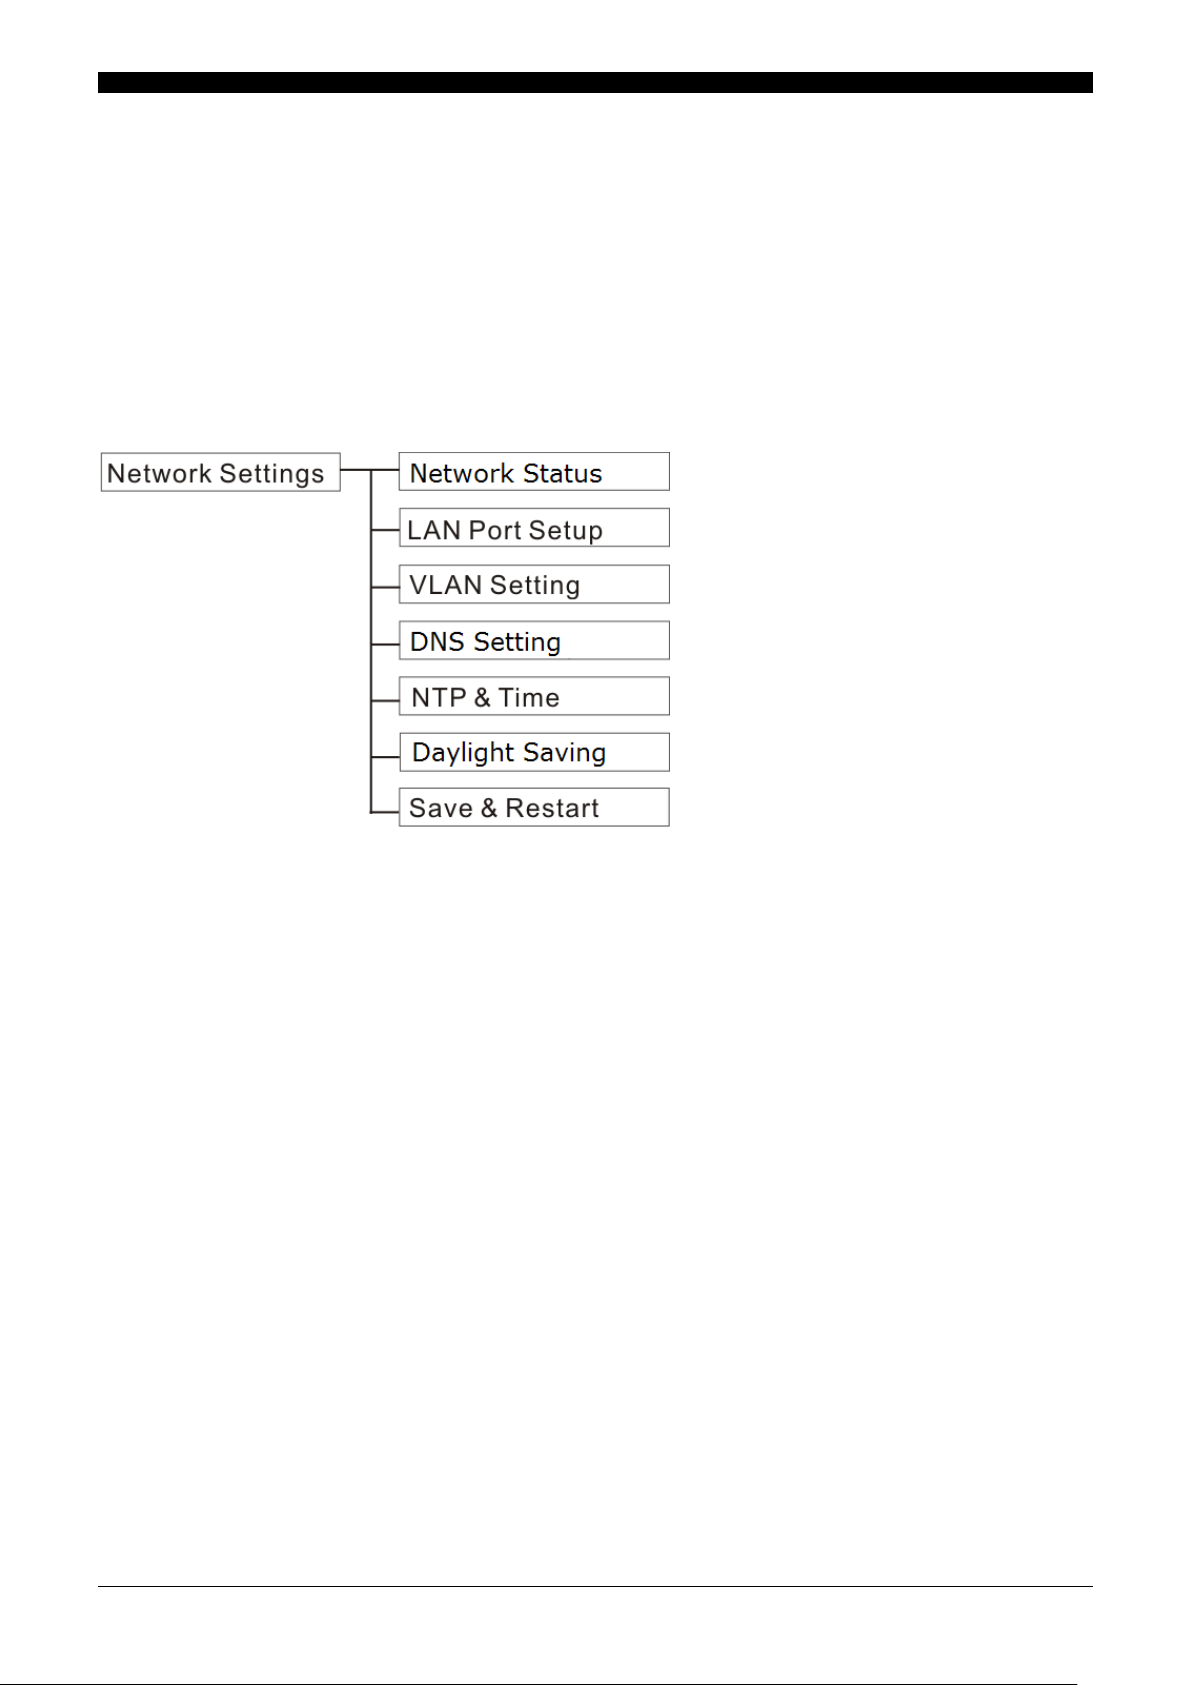
NNeettwwoorrkk SSeettttiinnggss
12/24Hour
You can select the time format according to your preference. To set the time format, do the following:
1. Use the UP and DOWN keys to select the date format, and then press the SELECT key to confirm selection.
12 Hour (Default)
24 Hour
2. Press the MENU/EXIT and use UP and DOWN keys to switch from YES/NO. Press the SELECT again to confirm
or to cancel and back to previous menu level.
This chapter contains important information to help you configure the network settings for your VoIP phone from the phone.
Network Status
You can view the network information from the Network Status submenu.
1. Press the SELECT key to display Status options.
2. Use the UP and DOWN keys to check the internet information.
3. Press the MENU/EXIT key to return to the main menu.
LAN Port Setup
This IP phone supports three different types of connection: DHCP, Static IP, and PPPOE.
If your phone is set to Static IP client, configure the Static IP settings as follows.
1. Choose Static IP setting and press the SELECT key to view the submenus.
2. Use the UP and DOWN keys to check the Static IP Setting.
3. Choose from IP address, Subnet Mask, and Default Gateway.
4. Press the MENU/EXIT key, then use the UP and DOWN keys to switch from YES/NO. Press SELECT again to
confirm or cancel and return to the previous menu level.
To enable the PPPoE function:
1. Select IP Type, PPPoE Setting. Press the SELECT key to save your settings.
2. Use the UP and DOWN keys to check the PPPOE Setting.
3. Type the user name and password.
4. Press the MENU/EXIT key, then use the UP and DOWN keys to switch from YES/NO. Press SELECT again to
confirm or cancel and return to the previous menu level.
13
 Loading...