

Page 1

NEC Confidential and Proprietary
VMware 4.0
Quick Start Guide
(Express5800/320Fd)
Rev 1.0
(2010.5.26)
456-01829-000
Enterprise Servers Division
NEC Corporation of America
Revision History
VMware 4.0 Quick Start Guide
Page 2

NEC Confidential and Proprietary
5/26/2010
Rev1.0
Initial release
R.Mitchem
VMware 4.0 Quick Start Guide
Page 3

NEC Confidential and Proprietary
CMOS configuration:
1. Detach the front bezel.
2. If the Power light is not lit on the upper PCI Module perform the following procedure.
a) Power down and disconnect both power cords from the 320Fd server.
b) Connect the power cord to the AC inlet for the upper module and wait for the diagnostic
LED to go out (LED no 1 on the left side).
c) Connect the power cord to the AC inlet for the lower module and wait for the diagnostic
LED to go out (LED no 1 on the left side).
d) Make sure that both of the CPU/IO module status LED NUMBER 1 is off.
3. Lift the cover on the upper POWER switch and momentary depress the power button.
IMPORTANT:
Do not turn off the power before the “NEC” logo appears.
4. When the message “Press <F2> to enter SETUP” or “Press <F2> to enter SETUP or Press <F12> to
boot from Network” is displayed on the display screen, press F2.
The BIOS Setup Utility “SETUP” starts and the Main menu is displayed on the screen.
VMware 4.0 Quick Start Guide
Page 4

5. Move the cursor onto “Server” and select “Server.”
The Server menu will be displayed:
6. Move the cursor onto “Monitoring Configuration” and press Enter.
NEC Confidential and Proprietary
The Monitoring Configuration submenu appears:
7. Move the cursor onto “OS Boot Monitoring” and press Enter
Parameters will be displayed
VMware 4.0 Quick Start Guide
Page 5
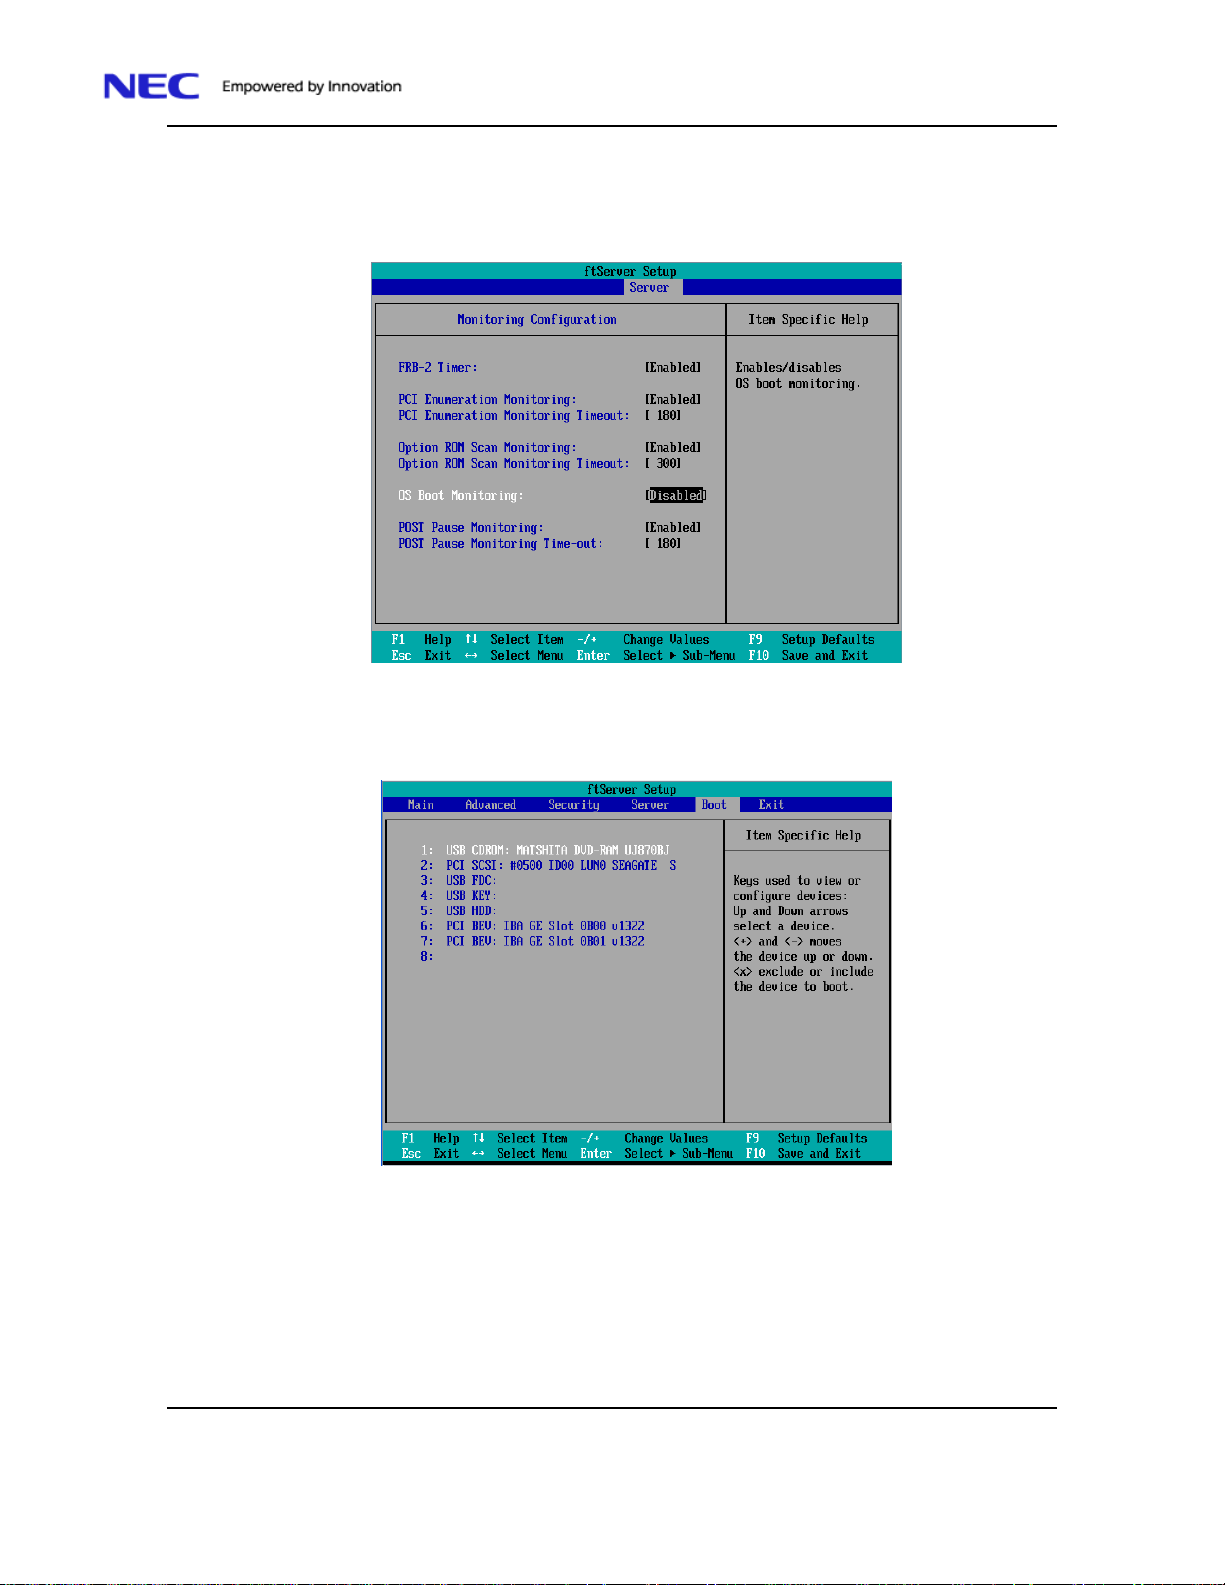
8. Among the parameters, choose “Disabled” and press Enter.
The current display of the configuration for OS Boot Monitoring will be changed to
“Disabled.”
9. Momentary depress the Esc key
NEC Confidential and Proprietary
10. Move the cursor to the Boot menu and verify that the CDROM is the first boot device.
a) To move the CD-ROM to the top of the list use the plus (+) and minus (-) keys
11. Put the ftControl Software DVD in the upper module DVD ROM.
12. Depress F10 to Save and Exit the BIOS configuration and continue booting.
13. When the Welcome screen is displayed depress the Next button to continue.
VMware 4.0 Quick Start Guide
Page 6

14. When prompted for which internal drives to use select the drives
NEC Confidential and Proprietary
15. Depress the Ok button to initialize the selected drives.
16. When the Mirror Initialization box closes depress the Next button
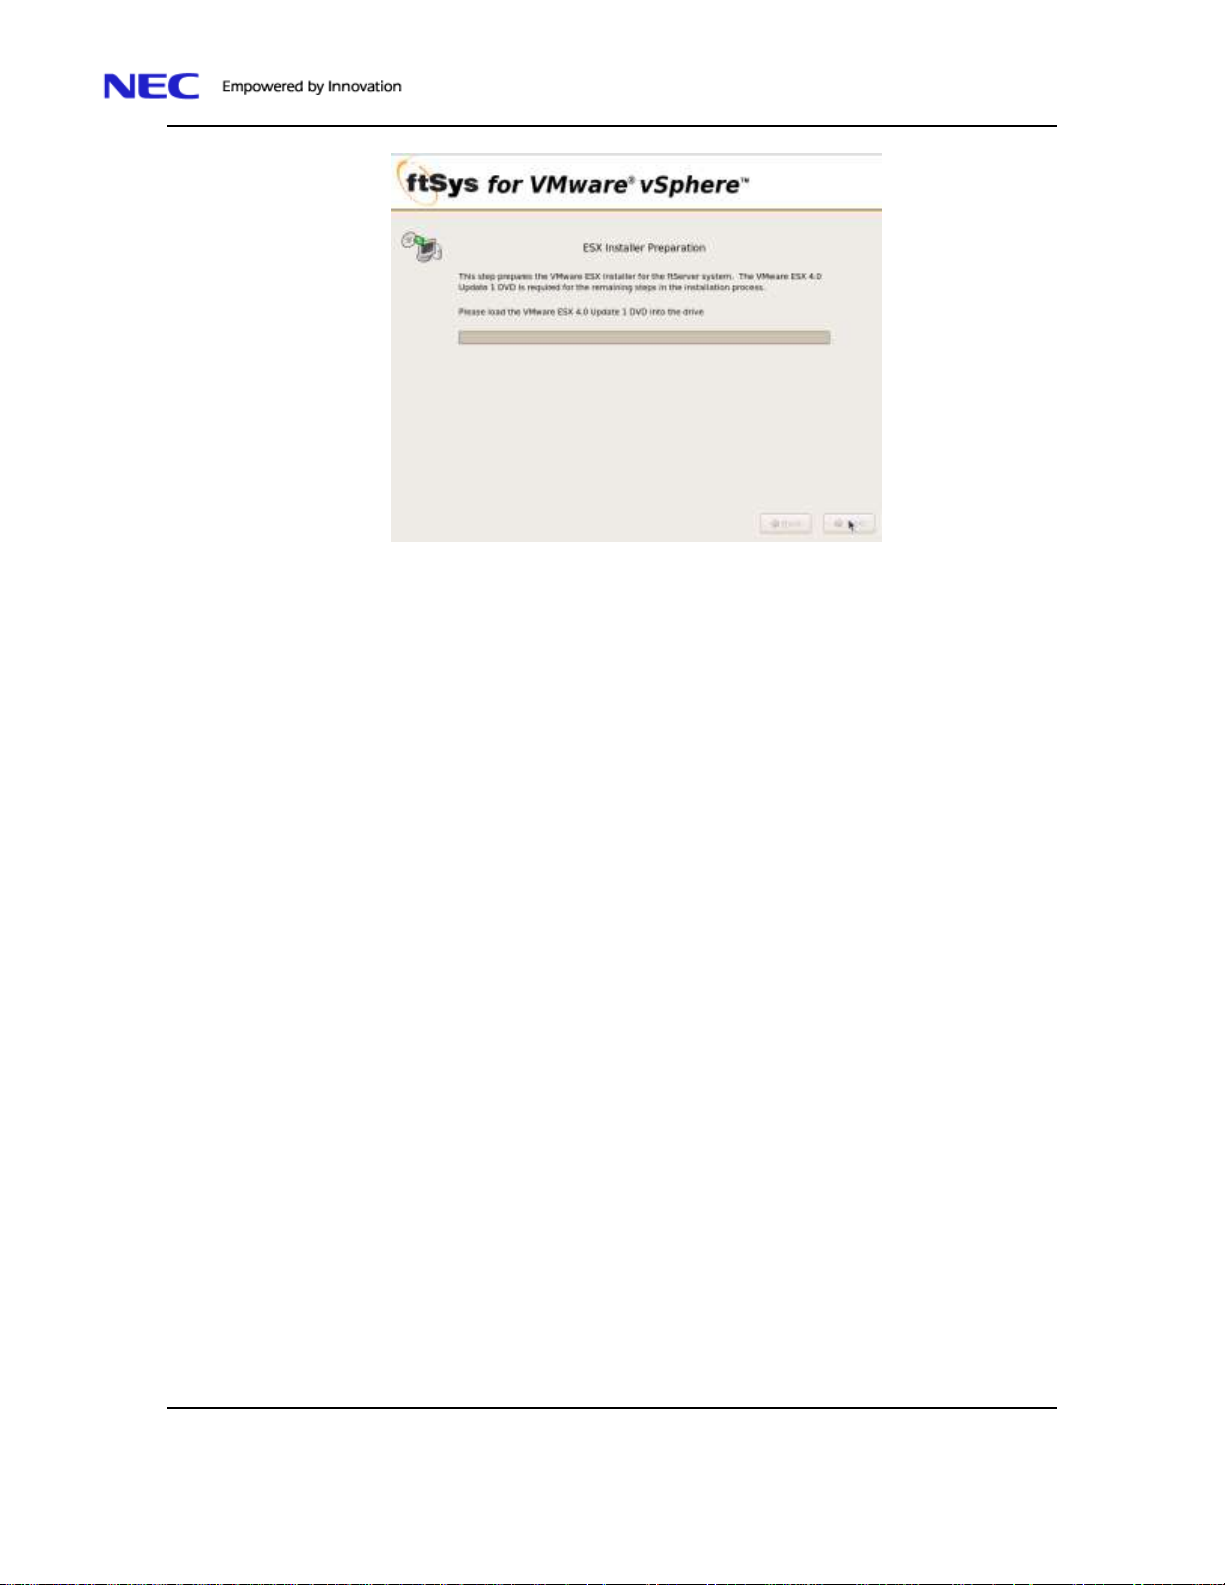
17. When the ESX Installer Preparation box is displayed insert the vSphere 4.0 media.
VMware 4.0 Quick Start Guide
Page 7
NEC Confidential and Proprietary
VMware 4.0 Quick Start Guide
Page 8

NEC Confidential and Proprietary
18. When the EsxInstaller Preparation is complete depress the Next button.
19. When Welcome to the ESX installer screen is displayed depress the Next button.
.
20. After reading and agreeing with it terms of the license check the I accept the terms of this license
agreement box and depress the Next button.
21. Select the type of keyboard on the Select Keyboard screen is displayed and depress Next button.
VMware 4.0 Quick Start Guide
Page 9

NEC Confidential and Proprietary
22. Select No when the Custom Drivers screen is displayed and depress the Next button.
23. When the Load Drivers box is displayed select Yes button.
VMware 4.0 Quick Start Guide
Page 10

24. When the Loading Drivers is complete select the Next button.
NEC Confidential and Proprietary
VMware 4.0 Quick Start Guide
Page 11

NEC Confidential and Proprietary
Note: Before completing the next step connect Ethernet Port 1 (left RJ 45 connector) has an
active network connection. Disconnect the network cables from all other Ethernet ports.
25. When the License screen is displayed enter the serial number and depress the Next button.
26. On the Network Configuration screen, click the Network adaptor in the drop-down list that has a
green check mark and depress the Next button.
27. the second Network Configuration screen, click the radial button Use the following network
settings and enter network settings before depressing the Next button
VMware 4.0 Quick Start Guide
Page 12

NEC Confidential and Proprietary
28. When the Setup Type screen is displayed check the radial button by Advanced Setup and verify
that the check box Configure boot loader automatically is checked. Depress the Next button to
continue.
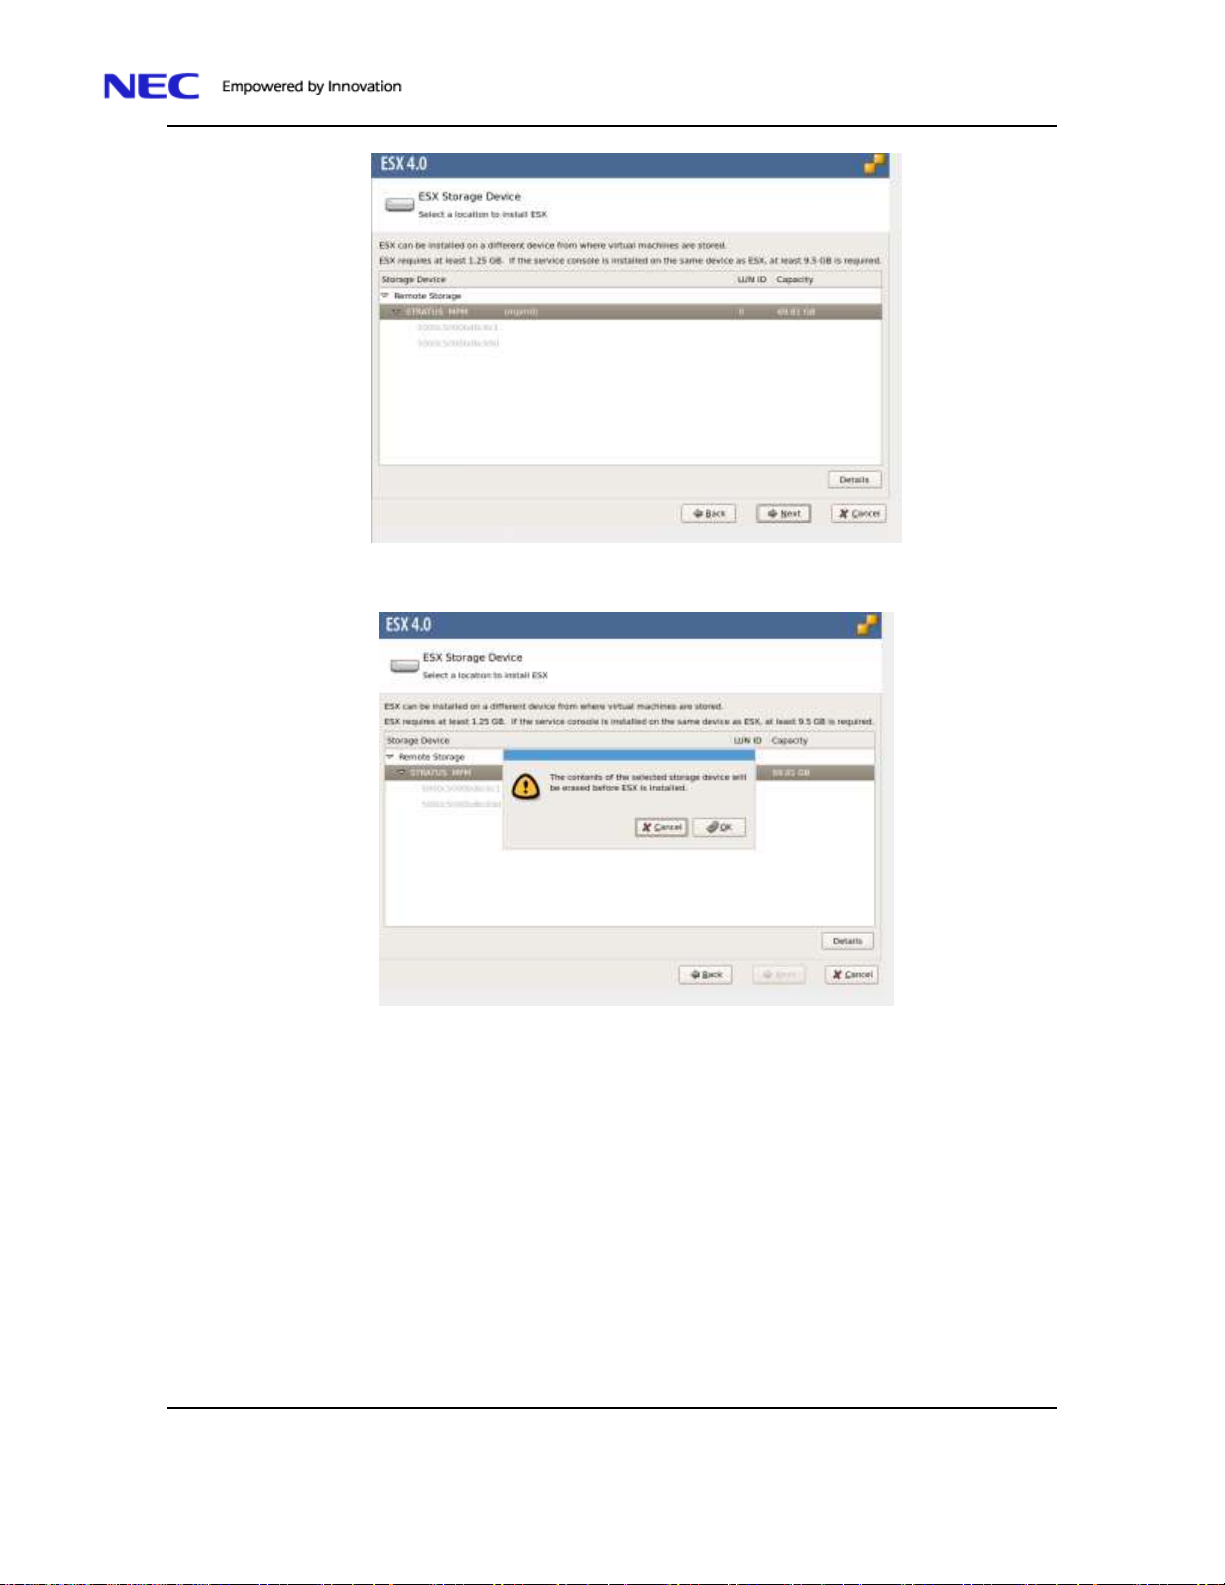
29. When the ESX Storage Device screen is displayed, select the volume to install and depress the Next
button.
VMware 4.0 Quick Start Guide
Page 13
NEC Confidential and Proprietary
30. When the message: “The contents of the selected storage device will be erased before ESX is
installed.” is displayed depress the Ok button to continue
VMware 4.0 Quick Start Guide
Page 14
NEC Confidential and Proprietary
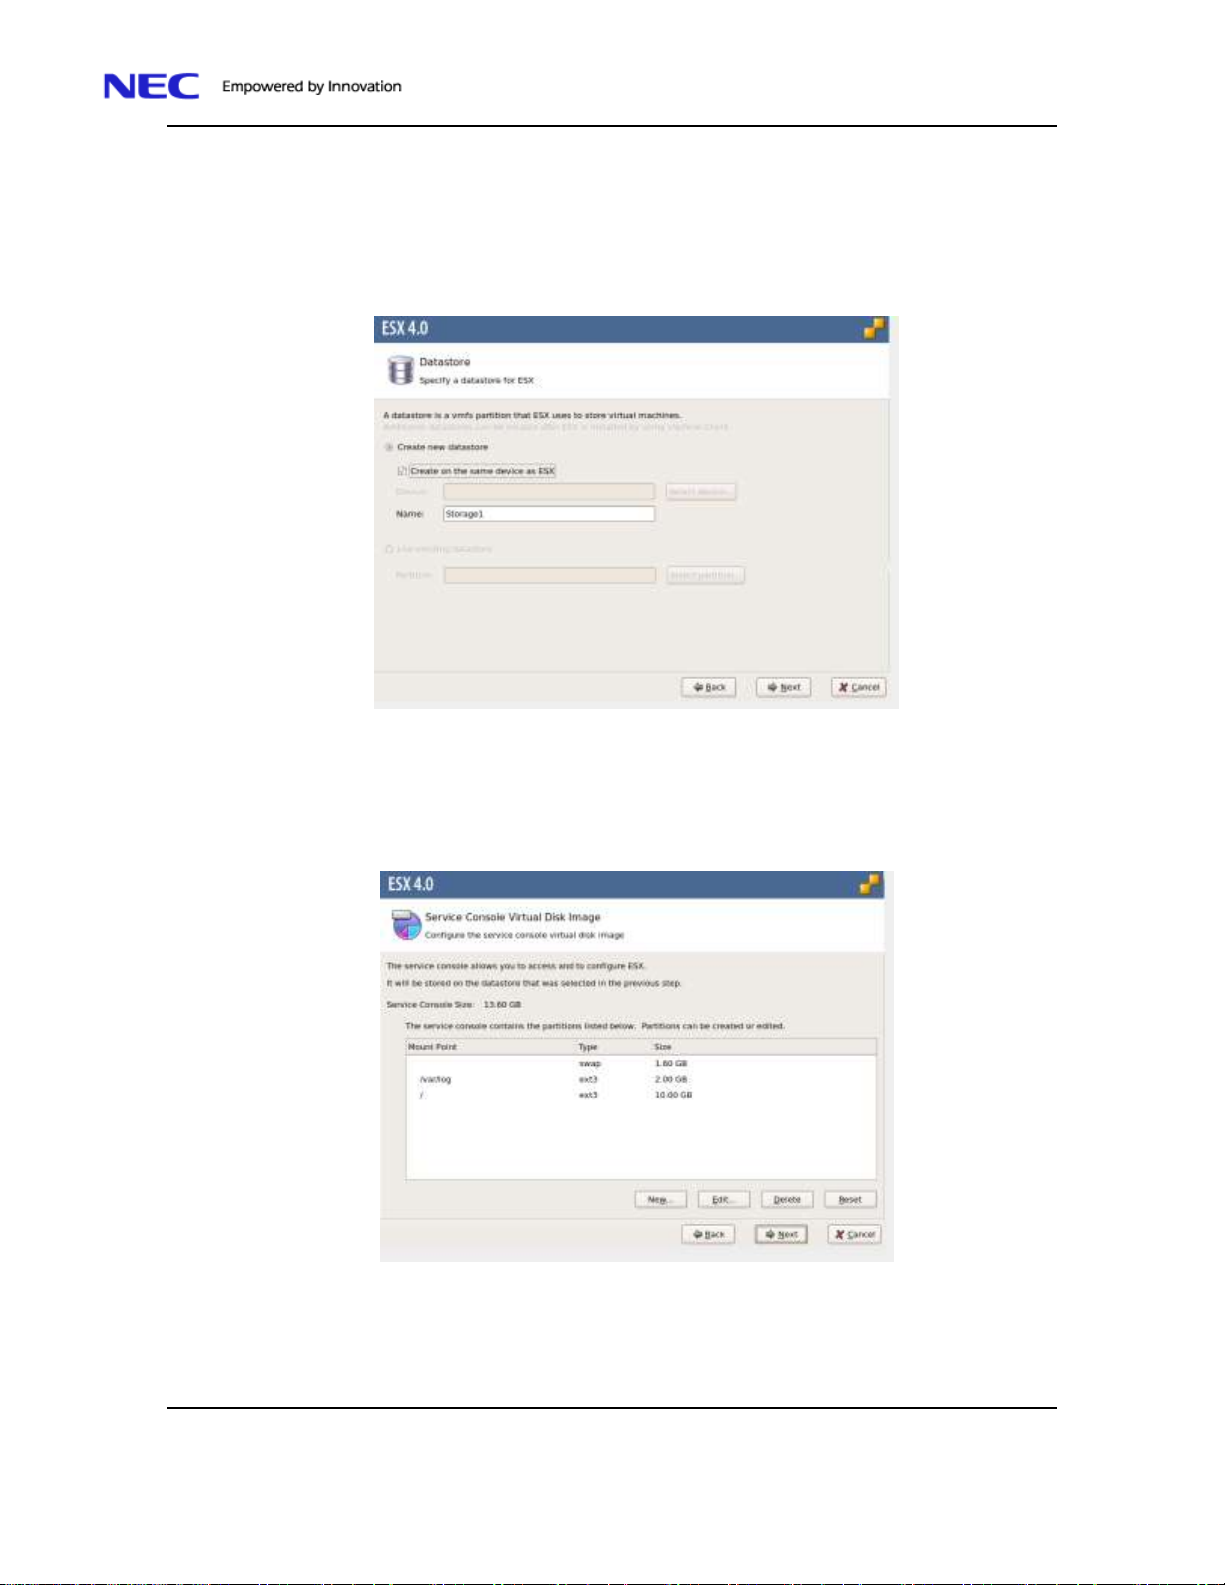
31. When the Datastore screen is displayed you can do:
a) If you are installing the software on a blank LUN ID click Create new datastore.
b) If you are installing on a previously use LUN ID and want to preserver the existing datastore click
Use existing datastore.
c) Click Next to continue.
Note: If you manually alter the default partitions ensure that the partition settings meet or exceed the
default recommendations, which are required for normal operation..
32. When the Service Console Virtual Disk Image screen is displayed, if necessary, customize the
default settings. Click the Next button when you are ready to proceed.
VMware 4.0 Quick Start Guide
Page 15
NEC Confidential and Proprietary
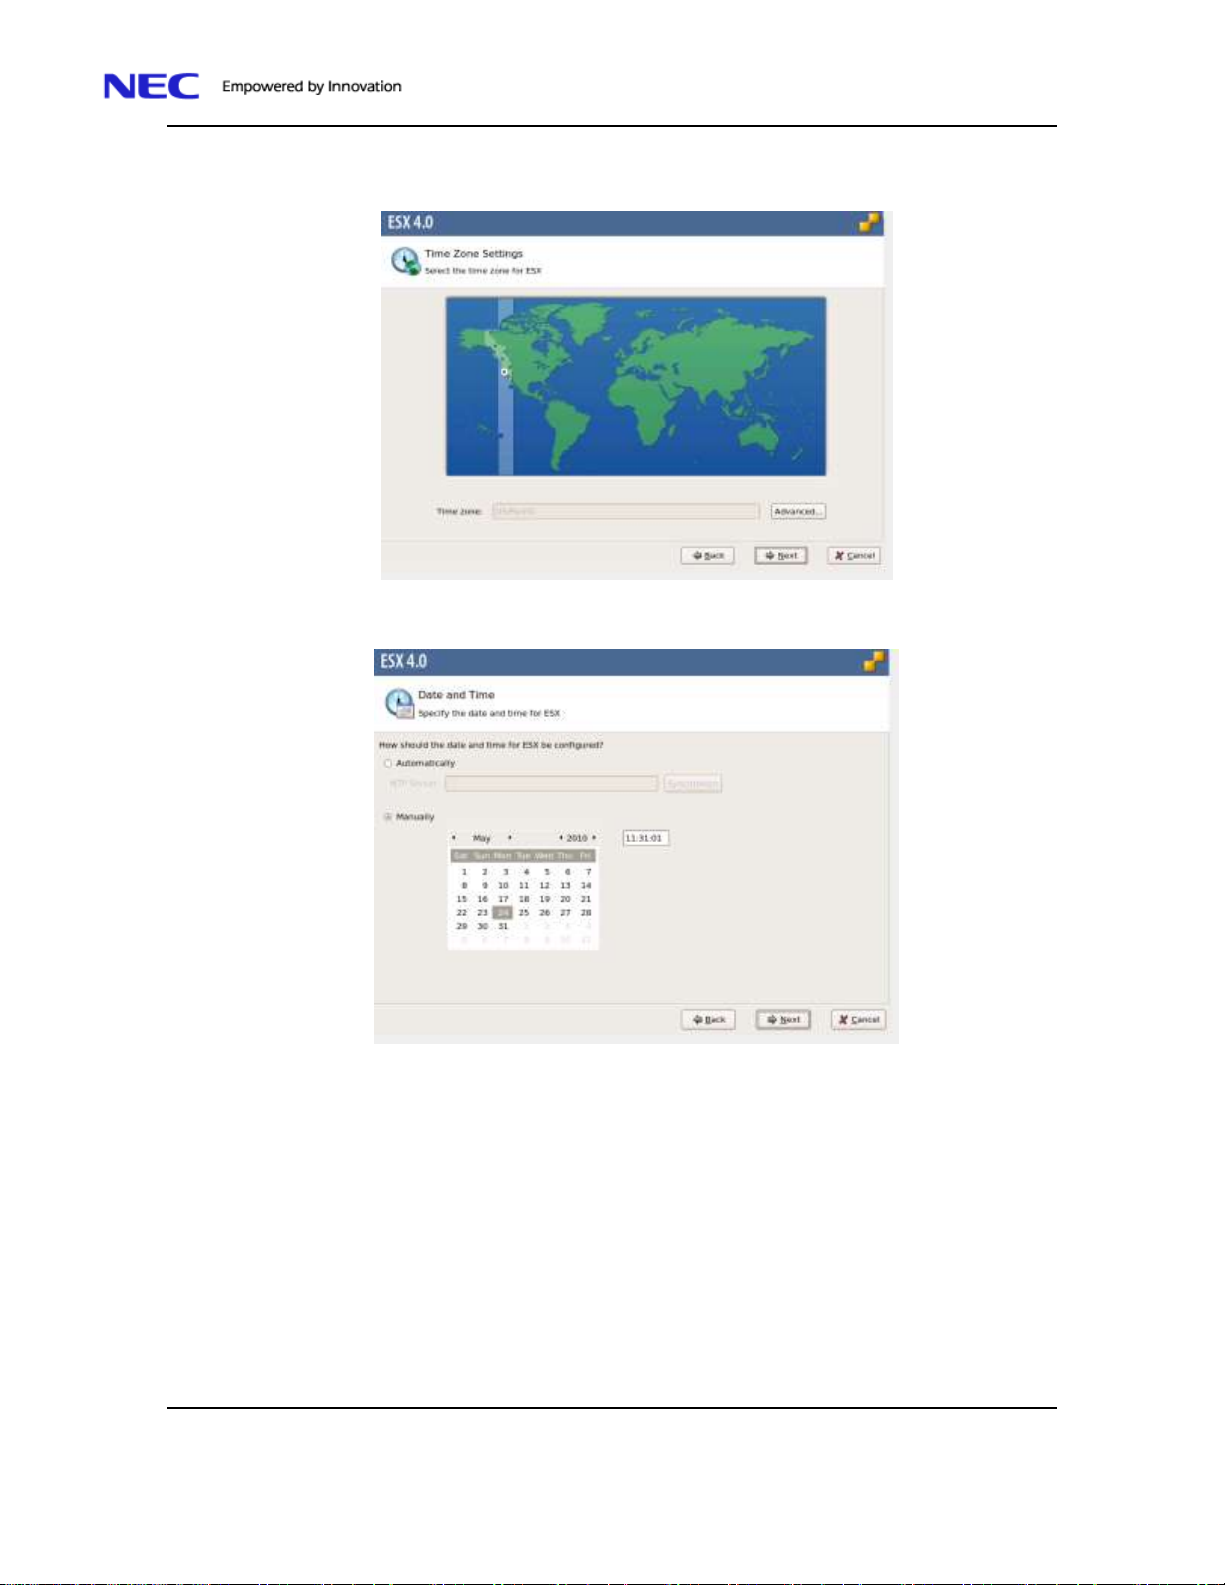
33. When the Time Zone Settings screen is displayed select the appropriate time zone and depress Next
to continue.
34. When the Date and Time screen is displayed correct the date and time as needed and depress Next
to continue.
35. Enter the administrator password when the Set Administrator Password screen is displayed and
depress Next.
VMware 4.0 Quick Start Guide
Page 16

NEC Confidential and Proprietary
36. Verify the settings when the Summary of installation settings screen is displayed. Depress the
Next button to start the installation.
37. Click Next when the Installation is complete.
VMware 4.0 Quick Start Guide
Page 17

NEC Confidential and Proprietary
38. Click Finish button when the ESX 4.0 Installation Complete screen is displayed.
VMware 4.0 Quick Start Guide
Page 18
NEC Confidential and Proprietary
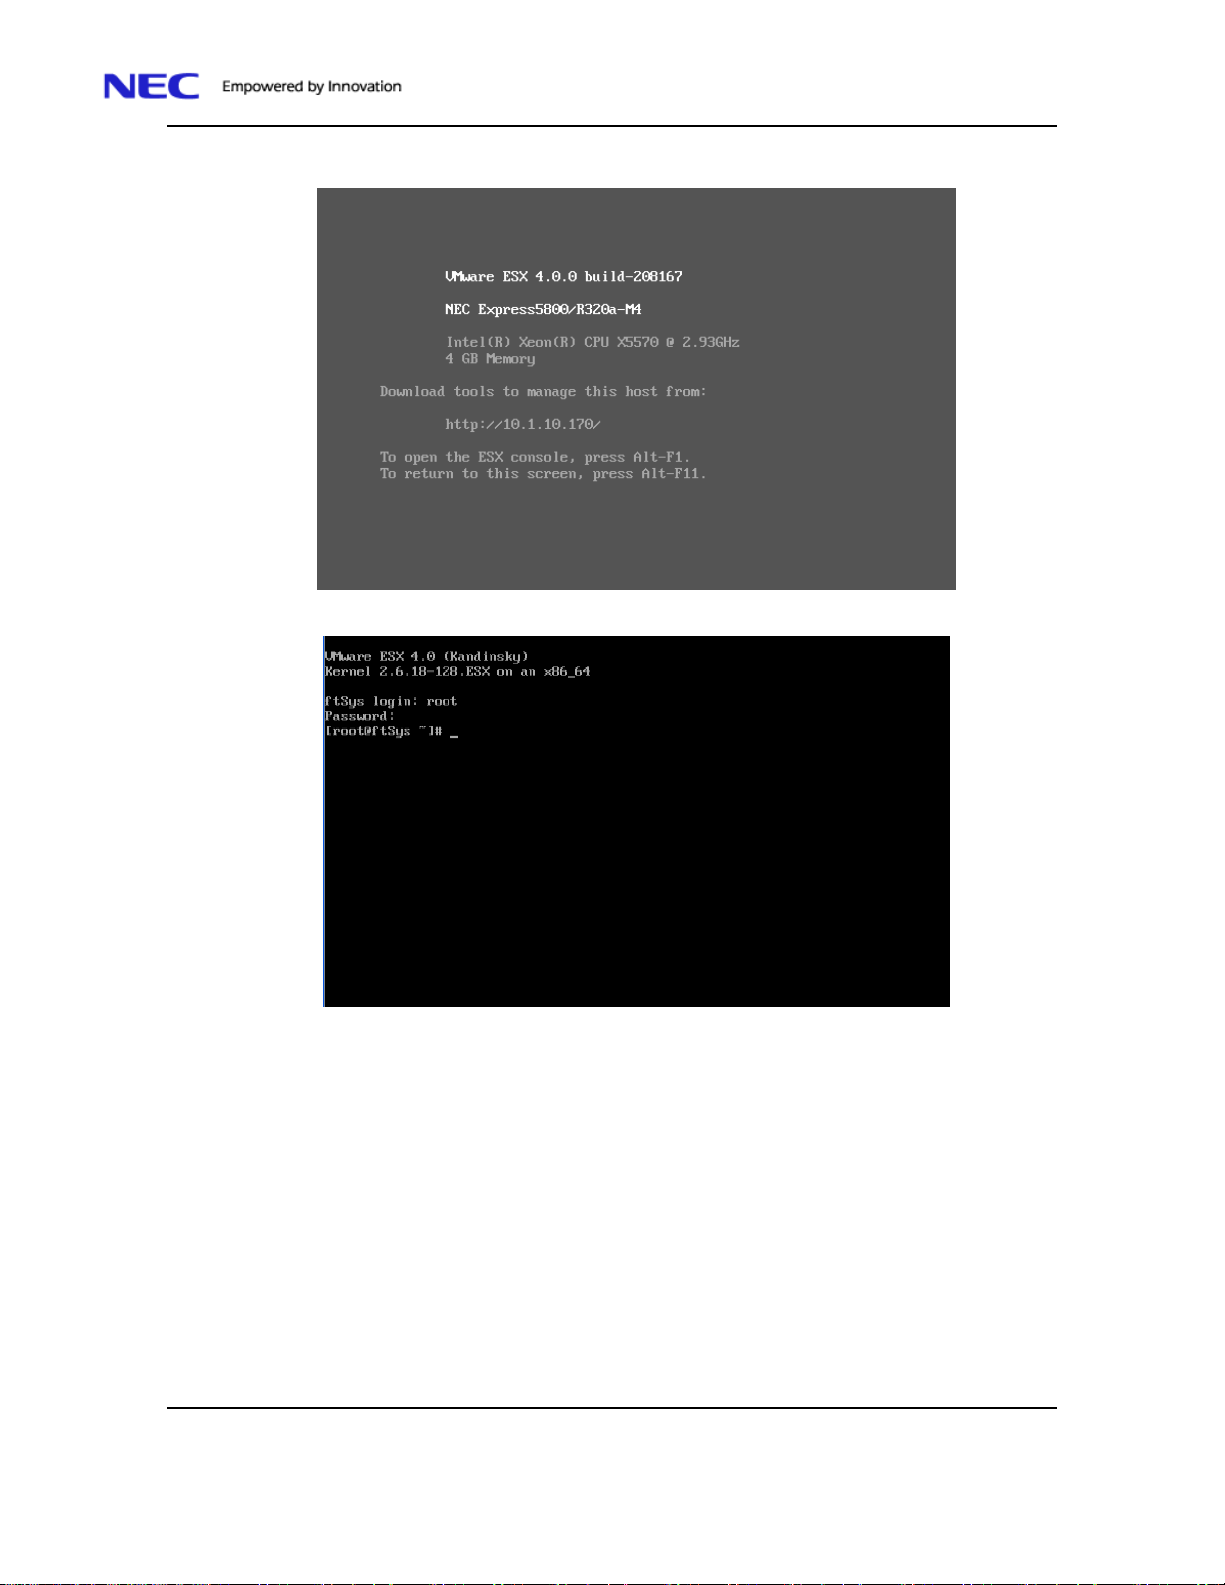
39. When the ESX login in Screen is displayed depress Alt-F1 to logon to the system.
40. Logon to the system as root.
41. Insert the ftControl software into the DVD ROM drive on the top module.
42. Enter /opt/ft/sbin/ft-install to start the installation process.
The installation process prompts you to answer configuration questions, read and accept software
ELUAS. The software verifies the system configuration and advise you of the current system
configuration. Unless you want to change the configuration you can accept the default selections by
depress the Enter key at prompts.
VMware 4.0 Quick Start Guide
Page 19

43. Enter a password for ftadmin when prompted.
44. Press Enter at the final screen to reboot the system
NEC Confidential and Proprietary
45. While the system is rebooting remove the ftControl DVD.
46. Plug in the Ethernet cables in to the additional Ethernet ports on the back of the system.
47. When the message “Press <F2> to enter SETUP” or “Press <F2> to enter SETUP or Press <F12> to
boot from Network” is displayed on the display screen, press F2.
The BIOS Setup Utility “SETUP” starts and the Main menu is displayed on the screen.
VMware 4.0 Quick Start Guide
Page 20

NEC Confidential and Proprietary
VMware 4.0 Quick Start Guide
Page 21

48. Move the cursor onto “Server” and select “Server.”
The Server menu will be displayed:
NEC Confidential and Proprietary
VMware 4.0 Quick Start Guide
Page 22

49. Among the parameters, choose “Disabled” and press Enter.
The current display of the configuration for OS Boot Monitoring will be changed to
“Enabled.”
NEC Confidential and Proprietary
50. Depress F10 to Save and Exit the BIOS configuration and continue booting.
VMware 4.0 Quick Start Guide
Page 23

NEC Confidential and Proprietary
51. When the ESX login in Screen is displayed depress Alt-F1 to logon to the system.
52. Logon to the system as root and enter the following commands to verify that the ftControl software
is installed correctly
a) /opt/ft/bin/ftsmaint ls 0 Verify that the Op State is Duplex
b) /opt/ft/bin/ftsmaint ls 1 Verify that the Op State is Duplex
c) /opt/ft/bin/ftsmaint ls 10 Verify that the Op State is Duplex
d) /opt/ft/bin/ftsmaint ls 1 Verify that the Op State is Duplex
e) /opt/ft/bin/ftsmaint –v Verify that the version is:2.01.269
ESMPro Agent Installation
Note: The environment setting for the snmpd must be modify in order for the ESMPro agent to sent alerts to
a SNMP manager. For additional details see the ESMPro User guide.
53. Perform the following steps to configure the server for SNMP agent
a) Edit /etc/snmp/snmpd.conf
b) Search for the following two lines :
view systemview included .1.3.6.1.2.1.1
view systemview included .1.3.6.1.2.1.25.1.
c) Comment the lines out by adding “#” to the beginning of the line.
#view systemview included .1.3.6.1.2.1.1
#view systemview included .1.3.6.1.2.1.25.1.
d) Add the following line:
view all included .1 80
e) Search for the following line:
access notConfigGroup "" any noauth exact systemview none none
f) Comment the lines out by adding “#” to the beginning of the line.
#access notConfigGroup "" any noauth exact systemview none none
g) Add the following line:
access notConfigGroup "" any noauth exact all all none
h) Save the changes.
i) At the command prompt type “chkconfig –level 345 snmpd on” to start the snmpd service during
the boot process.
54. At the command prompt type “chkconfig –level 345 portmap on” to start the portmap service during
the boot process.
55. The following steps configure the firewall to allow snmp packets and traps to be sent to s
management server. At the command prompt type the following commands:
a) esxcfg-firewall –o 161,udp,in,esmsnmpin
VMware 4.0 Quick Start Guide
Page 24

NEC Confidential and Proprietary
b) esxcfg-firewall –o 161,udp,out,esmsnmpout
c) esxcfg-firewall –o 162,udp,out,esmsnmptrap
Note: The DVD drives are not fault tolerant and are disable for normal operation of the VMware server.
To determine the current status of the IDE subsystem you can execute the enable-ide get status (s) at the command prompt (“/opt/ft./sbin/enable-ide -s”.).
56. At the command prompt type “/opt/ft/sbin/enable-ide” to enable the IDE subsystem.
57. Insert the ESMPro CD into the upper DVD drive and type “mount /dev/cdrom” to mount the media.
58. Enter the following commands to load the ESMPro agent:
a) cd /mnt/cdrom/esmpro_sa/44102-03_x86_64
b) rpm –ivh *.rpm
c) cd /opt/nec/esmpro_sa/log
d) sh /mnt/cdrom/esmpro_sa/vmset.sh –sata –L NONE
e) umount /dev/cdrom
f) sync
g) reboot
59. Remove the CD while the system reboots.
VMware 4.0 Quick Start Guide
 Loading...