

Naim Audio AV-2 Owners manual

1 System Connections
AV2 Installation Guide
1.1 AV source and AV2 with NAP V175 and NAP 150
Digital
coax
or opt
4-pin DIN
4-pin DIN x 2
Centre
Left Front
1.2 Nait 5i system with AV source, AV2 and NAPV 175
Digital coax or optical
5-pin DIN
5-pin DIN
2 x Phono to 5 pin DIN
from AV2 analog socket
3 to Nait 5i AV input.
4-pin DIN x 2
W O R L D C L A S S H I F I
Left Surround
Right Front
Right Surround
AV Source
AV2 Processor
NAP 150 Power Amplifier
NAPV 175 Power Amplifier
Centre
Left Front
Right Front
Left Surround
Right Surround
AV Source
AV2 Processor
NAPV 175 Power Amplifier
CD Player
Tuner
Nait 5i
2 Switch On and Input Setup
2.1 AV2 Switch On
Once all signal connections are made the AV2 can be
switched on. Connect the AV2, using the supplied mains
cable, to an appropriate mains socket and operate the
power switch on the rear panel. A single flashing dot will
be seen on the display while the AV2 starts-up. The dot
will stop flashing to indicate that the AV2 is ready for
use.
When initially switched on the AV2 will be in Standby mode.
Standby is indicated by an illuminated Naim logo and a single
dot indicator on the display. To wake the AV2 from standby
press the handset
standby
key or the front panel
input
or
mode
buttons. The AV2 will wake-up in either the default state if it is
previously unused, or in the state in which it was last shut-down.
2.2 AV2 Input Setup
The AV2 Input Setup routine defines input names, turns-off any
unused inputs, and sets some control and decode parameters.
To switch the AV2 into Input Setup mode press the handset
menu
key followed by the
input
key, or press and hold the front
panel
input
button. The front panel
input
button will flash.
To scroll down or up the setup parameters press the handset
or
keys or the front panel
input
or
mode
buttons.
To select a setting for each parameter press the handset
or
keys or use the front panel rotary control.
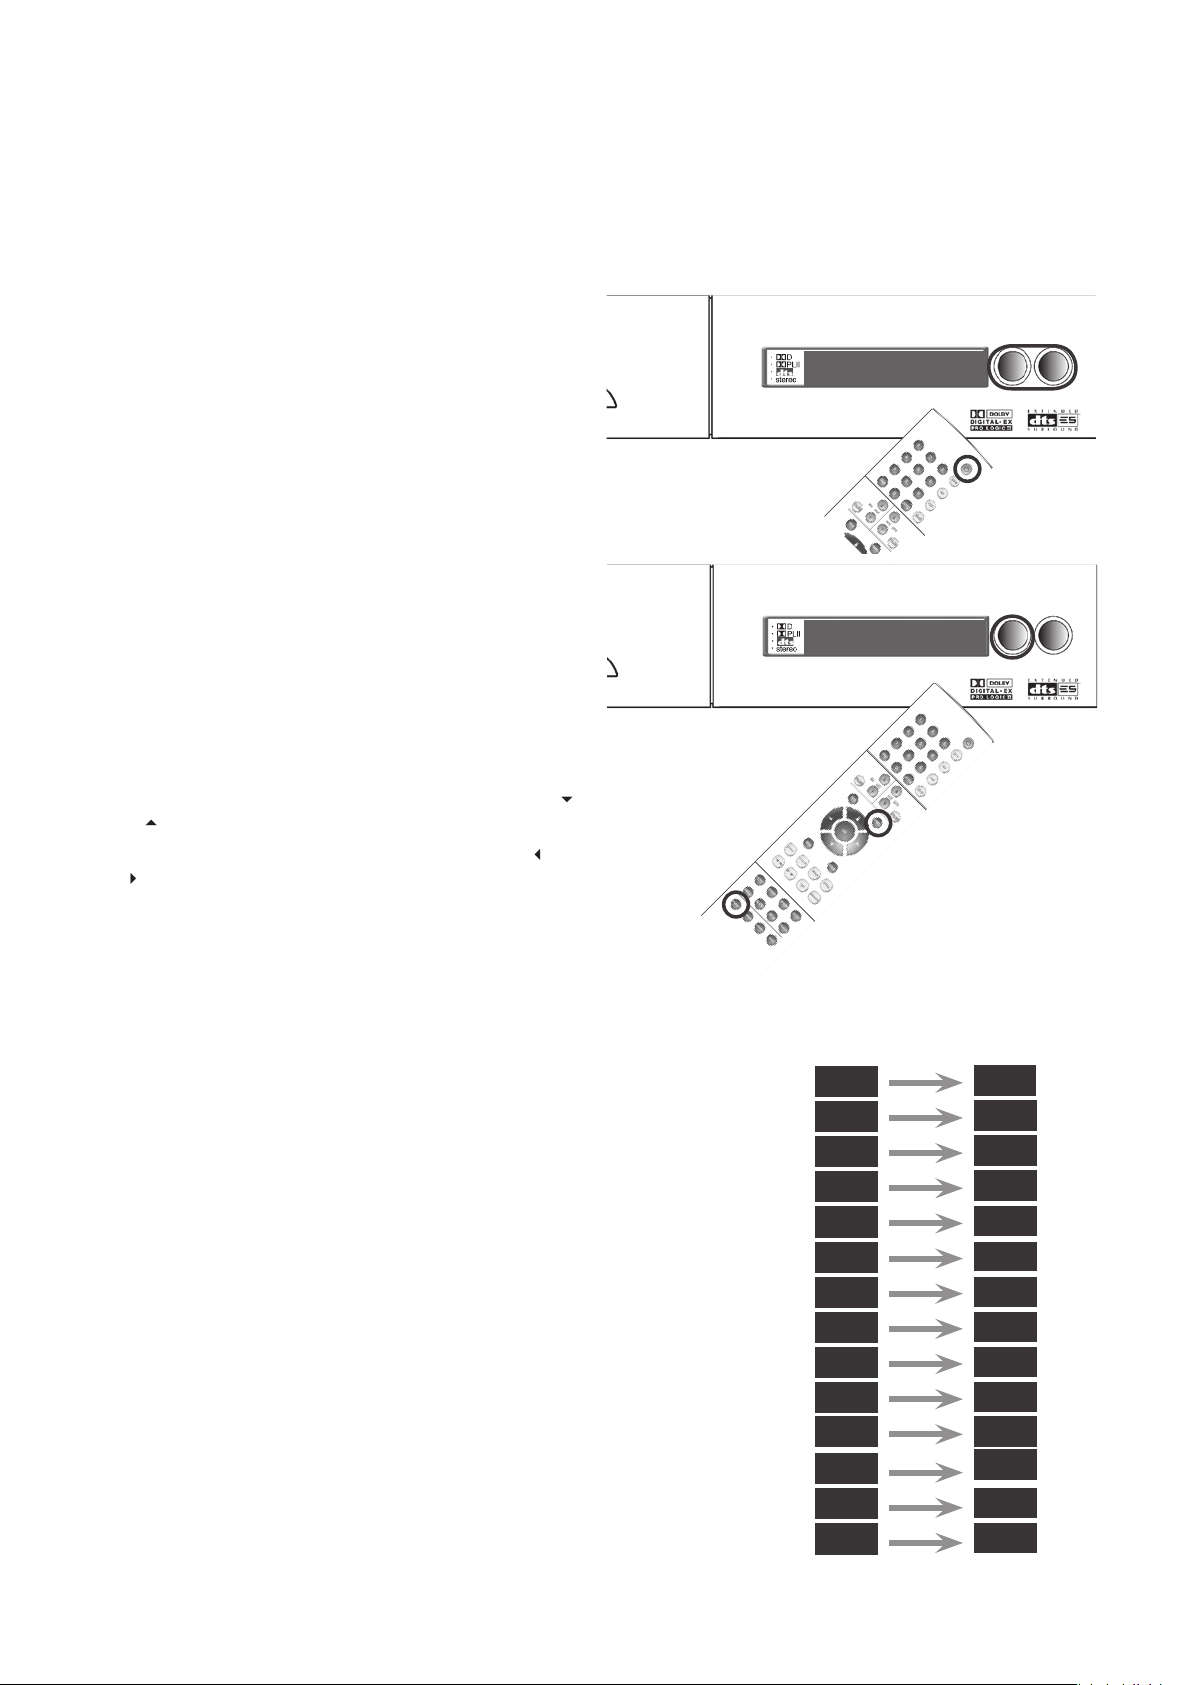
The diagram opposite shows the list of input setup parameters
with some typical settings chosen. In this example, a VCR is
nominated for input AN1, a CD player for input AN2, a Satellite
Receiver for input OP1, and a DVD player for input CO1. All the
other inputs are turned off and both the remote handset control
and Pro Logic II parameters are left at their default settings.
To return all input setup parameters to their default state press
and hold the handset
disp
key while the AV2 is in input setup
mode.
To exit from Input Setup mode press the handset
menu
key
followed by the
input
key, or press and hold the front panel
input
button.
input
mode
v o l 0 0
2
D
2
PLII
stereo
Setup Parameters
Settings
v c r
Versatile Analog Input 1
V i 2
V i 1
c d
Versatile Analog Input 2
A N 3
- - -
Analog Input 3
A N 4
- - -
Analog Input 4
a n 5
- - -
Analog Input 5
a n 6
- - -
s at
- - -
Analog Input 6
o p 1
Optical Digital Input 1
o p 2
d v d
- - -
r c 5
Optical Digital Input 2
co 1
Coaxial Digital Input 1
co 2
Coaxial Digital Input 2
e x t
Remote Control
Pro Logic II “Panorama”
Pro Logic II “Dimension”
Pro Logic II “Centre Width”
D
w
P a n
o f f
0
0
AV2 Installation Guide
input
mode
v o l 0 0
stereo
 Loading...