

Mustek PVR-H140 User Manual
PERSONAL VIDEO RECORDER
User Guide
4567
8
4567
8
4567
8
4567
8
II
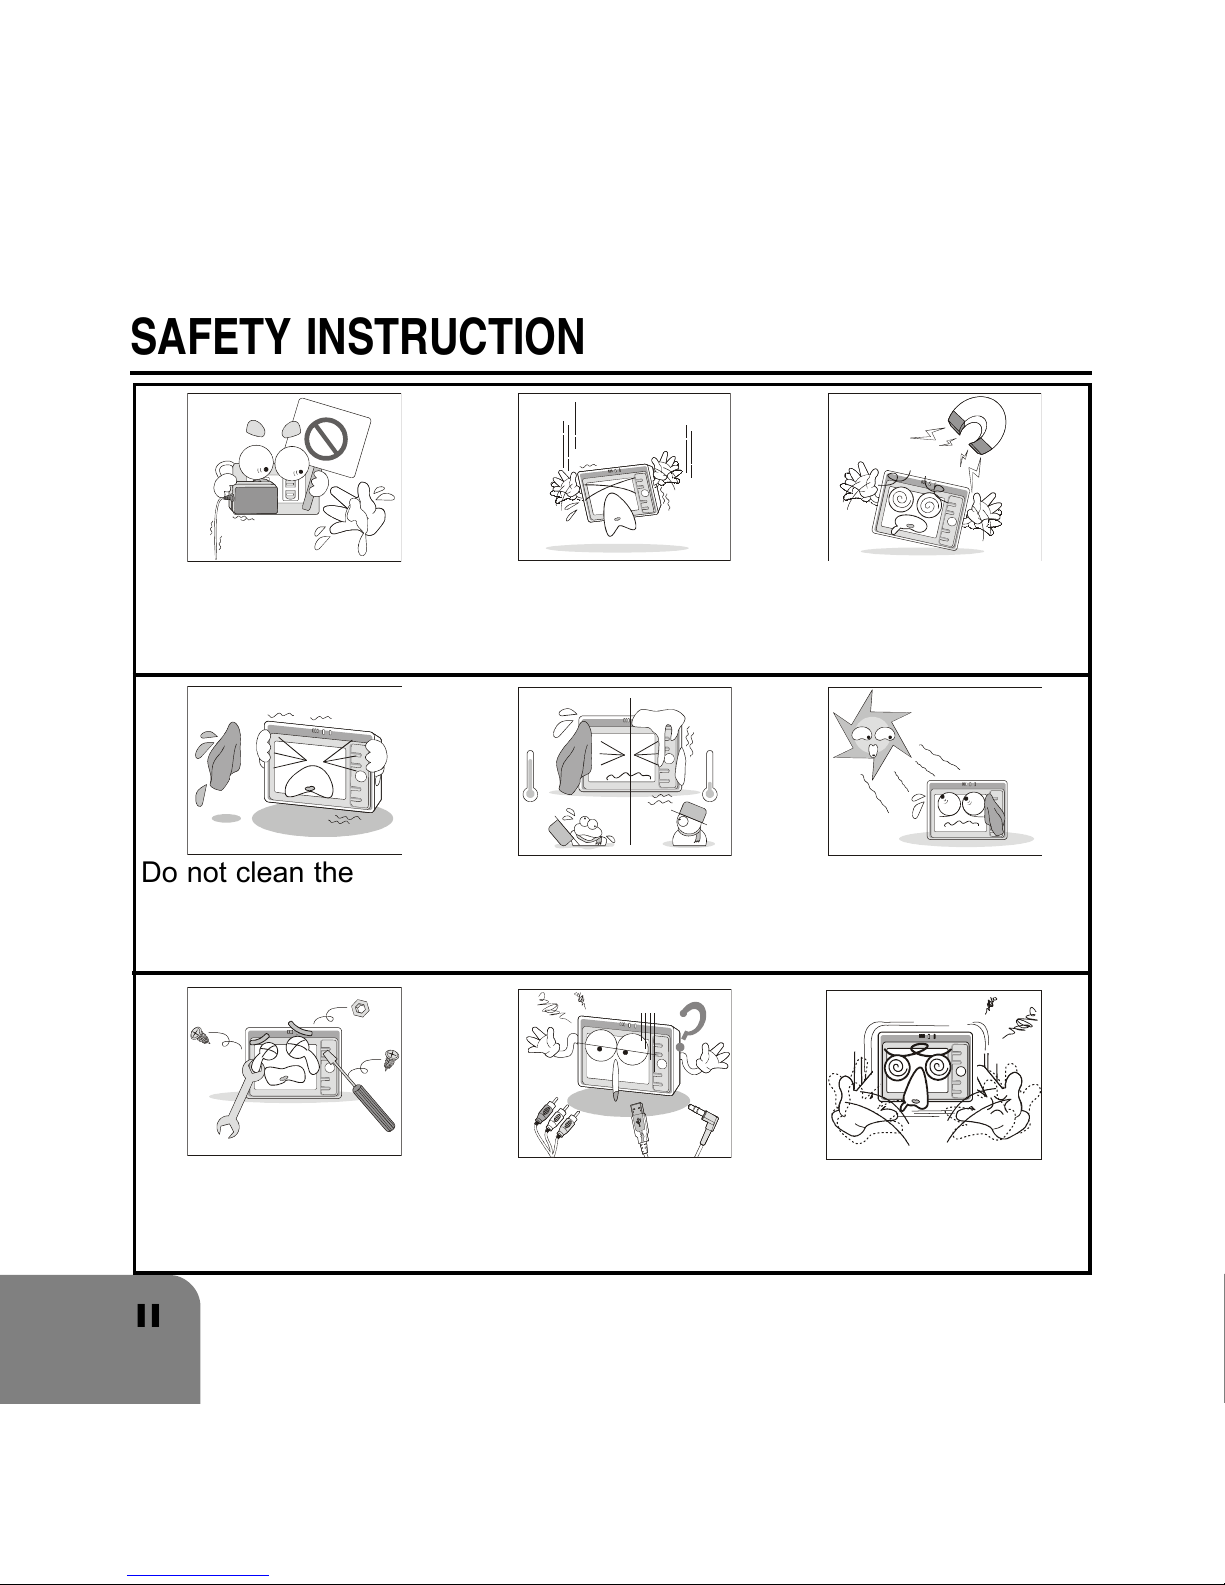
SAFETY INSTRUCTION
Do not clean the device
with wet cloth. Use only
dry and soft cloth.
Do not try to disas-
semble or repair the
device.
Connect the cables
correctly.
Do not expose to low
temperature or high
humidity.
Do not expose to direct
sunlight or extreme
heat.
Do not drop the device.
Handle with care.
Keep away from
magnetic sources.
Do not shake the
device violently while
operating.
Do not plug/unplug the
power cord with wet
hands.

Important Battery Information
The battery used in this device may present a risk of fire or chemical
burn if mistreated.
Do not separately recharge, disassemble, heat above 60°C (140°F),
or incinerate.
Use only the supplied charger. Use of a different charger may
present a risk of fire or explosion.
Keep charger plugged into device for at least 3.5 hours before
attempting to operate for the first time use.
Keep the unit away from children.
Copyright Caution
Copyrighted materials, works of art, and/or presentations may
require authorization to be fully or partially recorded.
Please be aware of all such applicable laws concerning the
ENGLISH
recording and use of such for your country and jurisdiction.
HDD Formatting Caution
After the HDD formatting, be sure to connect the device to PC (with PVR
Console installed) to restore system data and bootup files. Otherwise, it
may not function properly.
III

Battery Charge
Please charge the battery for a minimum of 3.5 hours before
initial use.
1. Plug one end of the power adapter to the DC IN jack of the
PVR and the other end to the appropriate wall plug.
2. The red recharge indicator will light up.
3. When the battery is fully charged, the indicator light will turn
off.
IV
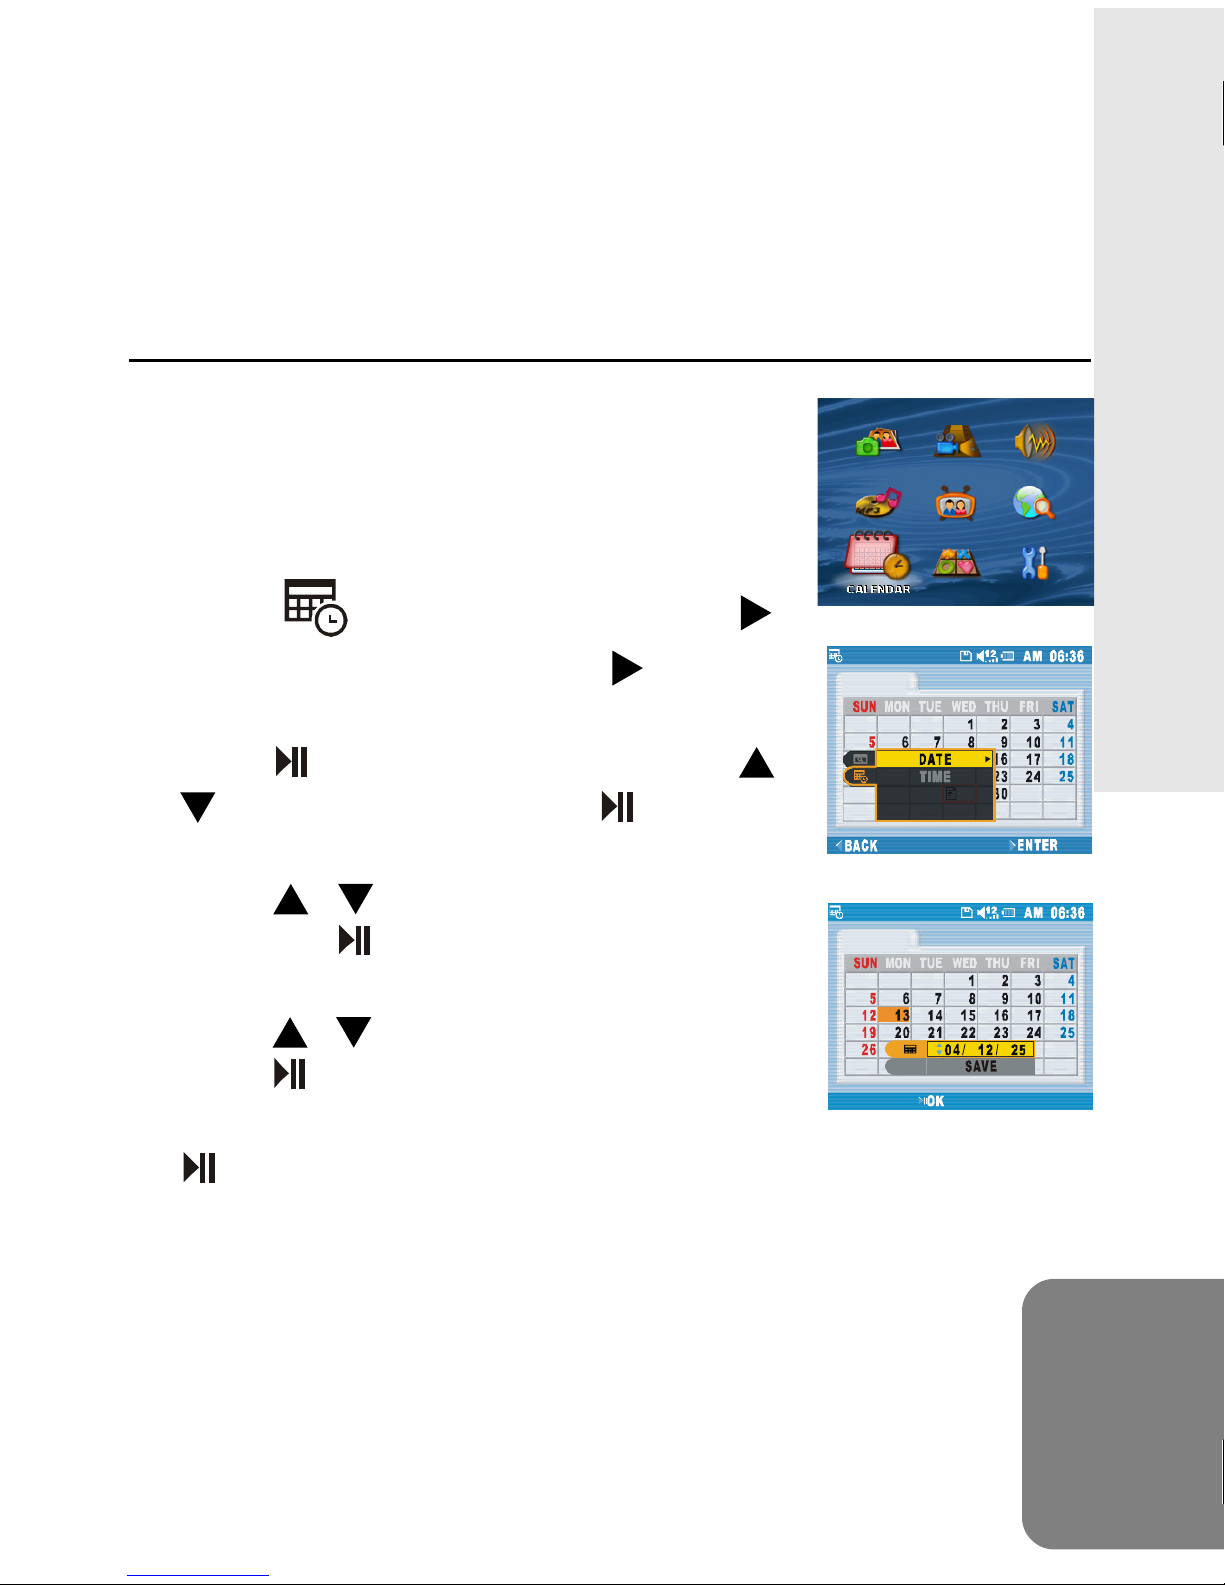
Date and Time Set Up
To display the correct date and time, please
do the following:
1. Select Calendar in the main menu.
2. Press MENU button.
3. Select
button to select DATE. Press button
again to enter.
4. Press
buttons to change. Press button to
confirm and continue.
5. Press
and press
continue.
from the menu and press
to highlight YEAR and press /
/ buttons to set up the month
button to confirm and
ENGLISH
6. Press
press
7. When the above settings are done, press
to save.
Note: The default date format is YY/MM/DD. To change the
/ buttons to set up the day and
button to confirm.
format, go to SETUP Menu.
V

Table of Contents
SAFETY INSTRUCTION .................................................... II
IMPORTANT BATTERY INFORMATION ...........................III
COPYRIGHT CAUTION ....................................................III
BATTERY RECHARGE ..................................................... IV
DATE&TIME SET UP ........................................................ V
OVERVIEW ....................................................................... 1
SOFTWARE INSTALLATION ............................................. 4
CONNECTING TO PC ........................................................ 6
Converting and Transferring Files ..................................... 6
PVR Console ................................................................ 10
BASIC FUNCTIONS ........................................................ 11
Photo Player ................................................................. 11
Photo Playback .................................................................... 11
Zoom .................................................................................... 12
Record Message to a Photo ................................................ 13
Playback/Delete the Message Attached to a Photo ......... 14
VI

Slide Show Playback ........................................................ 16
Effects ............................................................................... 17
Memory Mix ....................................................................... 18
Video Player ............................................................... 20
Video Playback ................................................................. 20
Audio Player ............................................................... 22
Audio Playback ................................................................. 22
Record Audio .................................................................... 23
Repeat Playback .............................................................. 24
Music Player ............................................................... 28
Music Playback ................................................................. 28
Voice Alarm ....................................................................... 29
ENGLISH
AV Center ................................................................... 31
Record Videos from TV to Your PVR................................ 31
Record Videos from DVD to Your PVR ............................ 34
Timer Record.................................................................... 36
VII

File Browser ................................................................ 38
Sort ................................................................................... 39
Rename............................................................................ 40
Create New Folder ........................................................... 41
Calendar ..................................................................... 43
Import from Outlook 2000 ................................................ 44
Import from e-Life Pal ....................................................... 46
Game .......................................................................... 49
TIC-TAC-TOE .................................................................... 49
PUZZLE ............................................................................ 50
MINESWEEPER ............................................................... 51
OTHER FUNCTIONS ....................................................... 52
PVR Console .............................................................. 52
Change the Startup Screen .............................................. 52
Change the Startup Sound & Button Sound .................... 54
DPS Menu .................................................................. 56
VIII

DPS ................................................................................... 56
How to Print ...................................................................... 59
OSD Menu .................................................................... 62
Photo Player Menu ........................................................... 62
Video Player Menu ............................................................ 64
Audio Player Menu ............................................................ 65
Music Player Menu ........................................................... 66
AV Center Menu ................................................................ 68
File Browser Menu ........................................................... 69
Calendar Menu ................................................................. 71
Setup Menu....................................................................... 72
Specifications ................................................................ 73
ENGLISH
IX
1
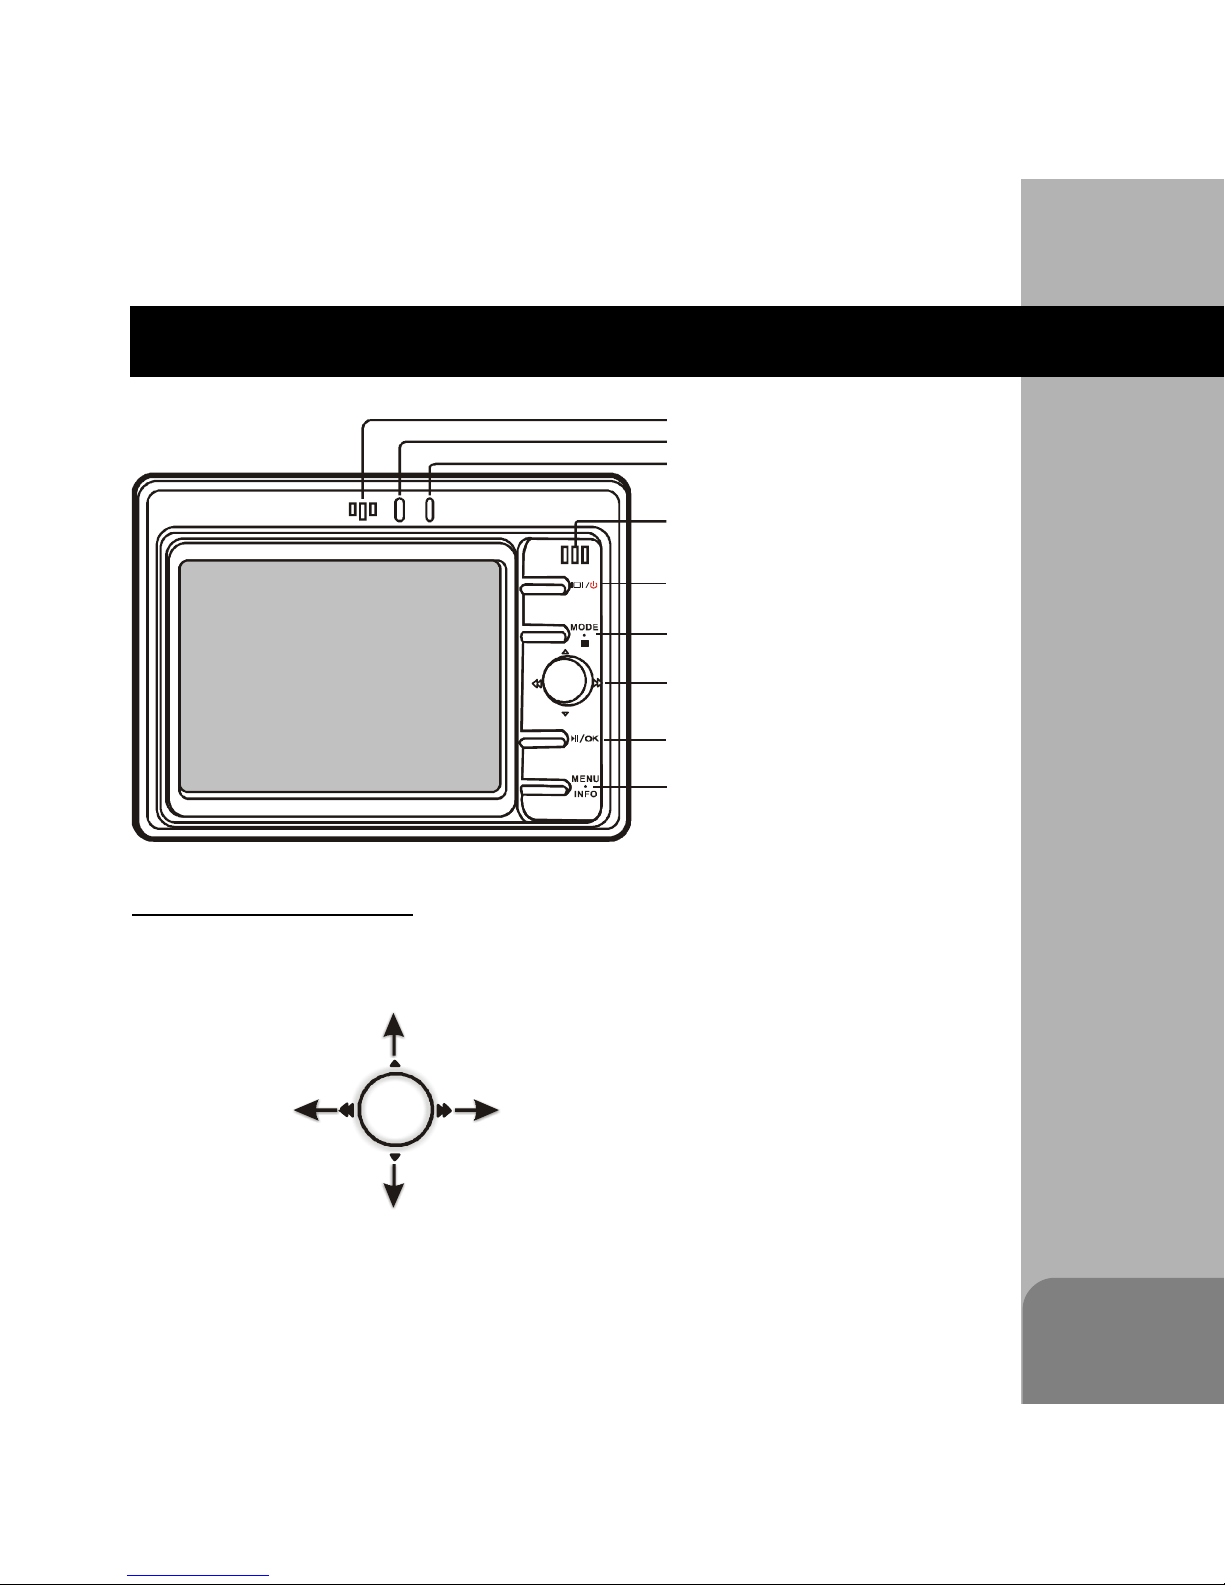
OVERVIEW
A. Microphone
B. Power indicator
C. Recharge indicator
D. Speaker
E. LCD / Power button
Press to turn on/off LCD
Display.
Press and hold 3 secs to
power on/off.
F. Mode / Stop button
G. Directional buttons
H. Play / OK button
I. Menu / Info button
Press to open/close
Menu.
Press and hold 3 secs to
turn on/off Info.
A
B
C
D
E
F
G
H
I
L
J
M
K
Directional Buttons
Left
Up
Down
Right
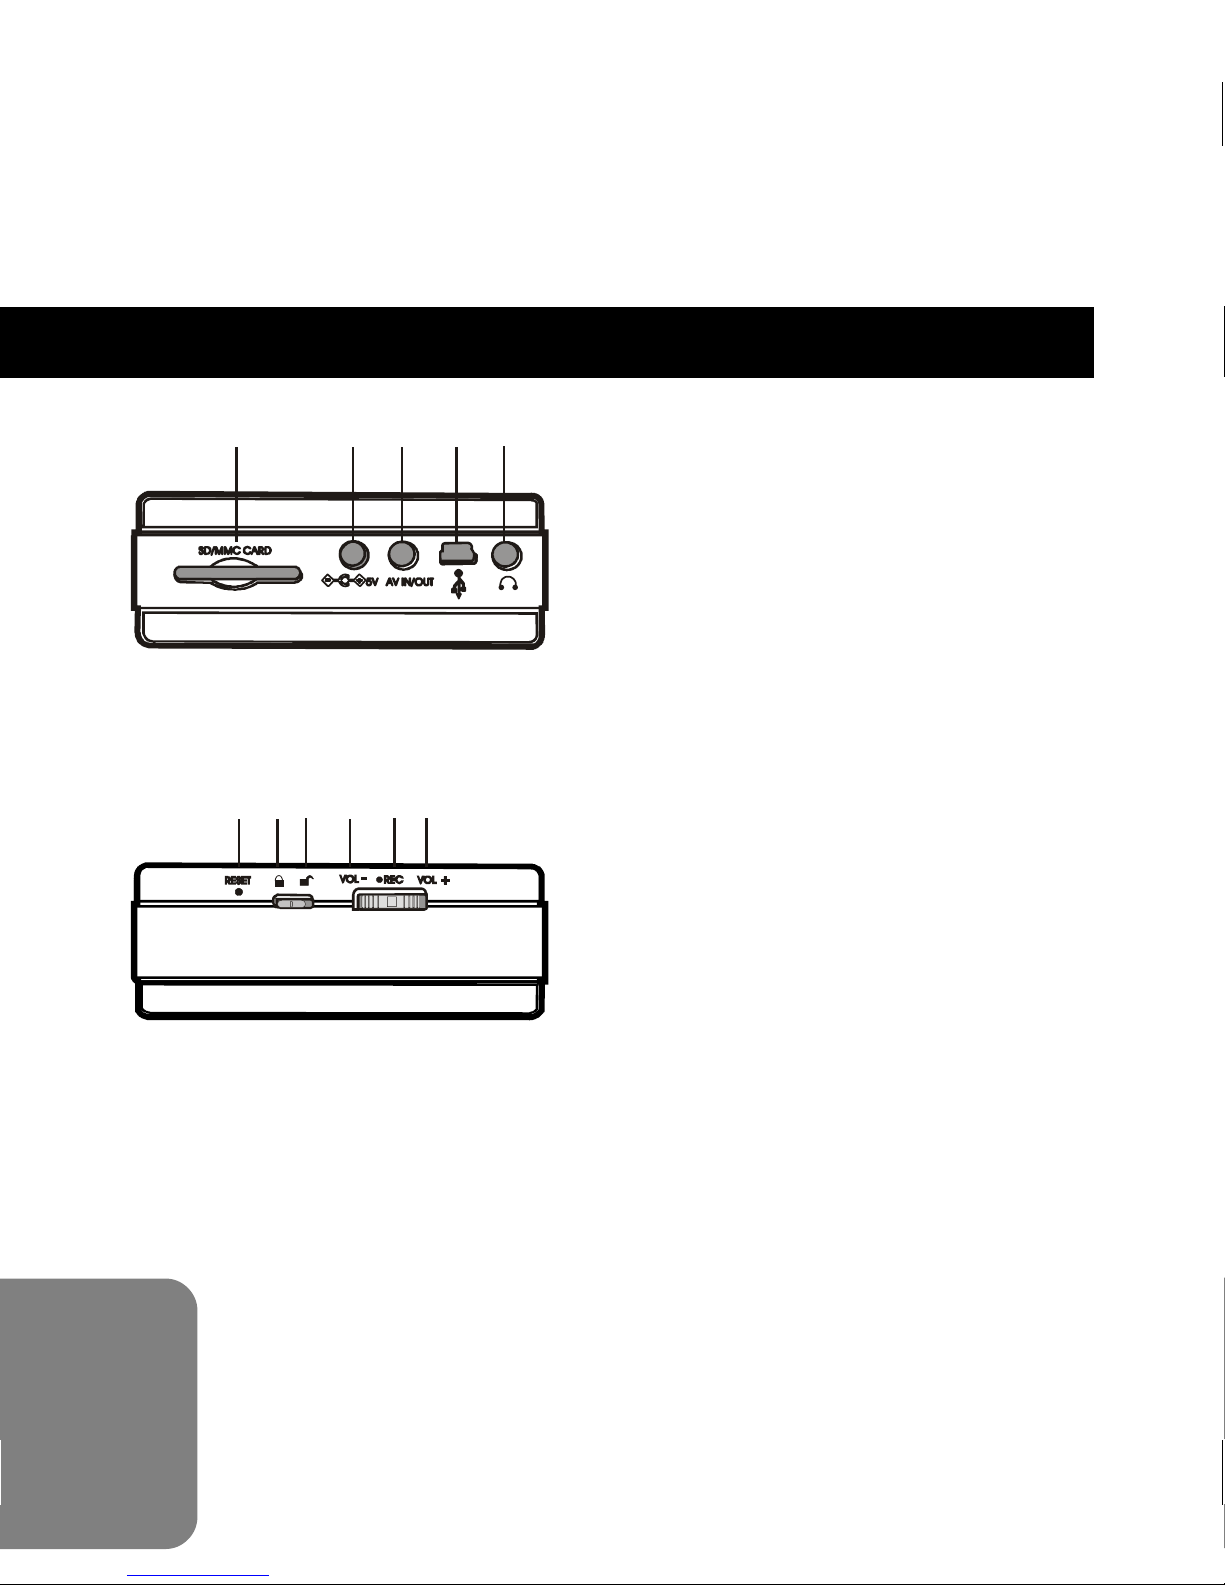
N. SD/MMC Card slot
P
ON
Q
R
O. DC IN jack
P. AV IN/OUT jack
Q. USB jack
R. Earphone jack
S. Reset
Press the button to shut down the
device. To power on, press POWER
button.
2
UTS
VW
X
T. Lock
Slide the switch to the position to
lock the device.
U. Unlock
Slide the switch to the position to
release the lock of the device.
V. Volume-down
Scroll down to decrease the
volume.
W. Record
X. Volume-up
Scroll up to encrease the volume.
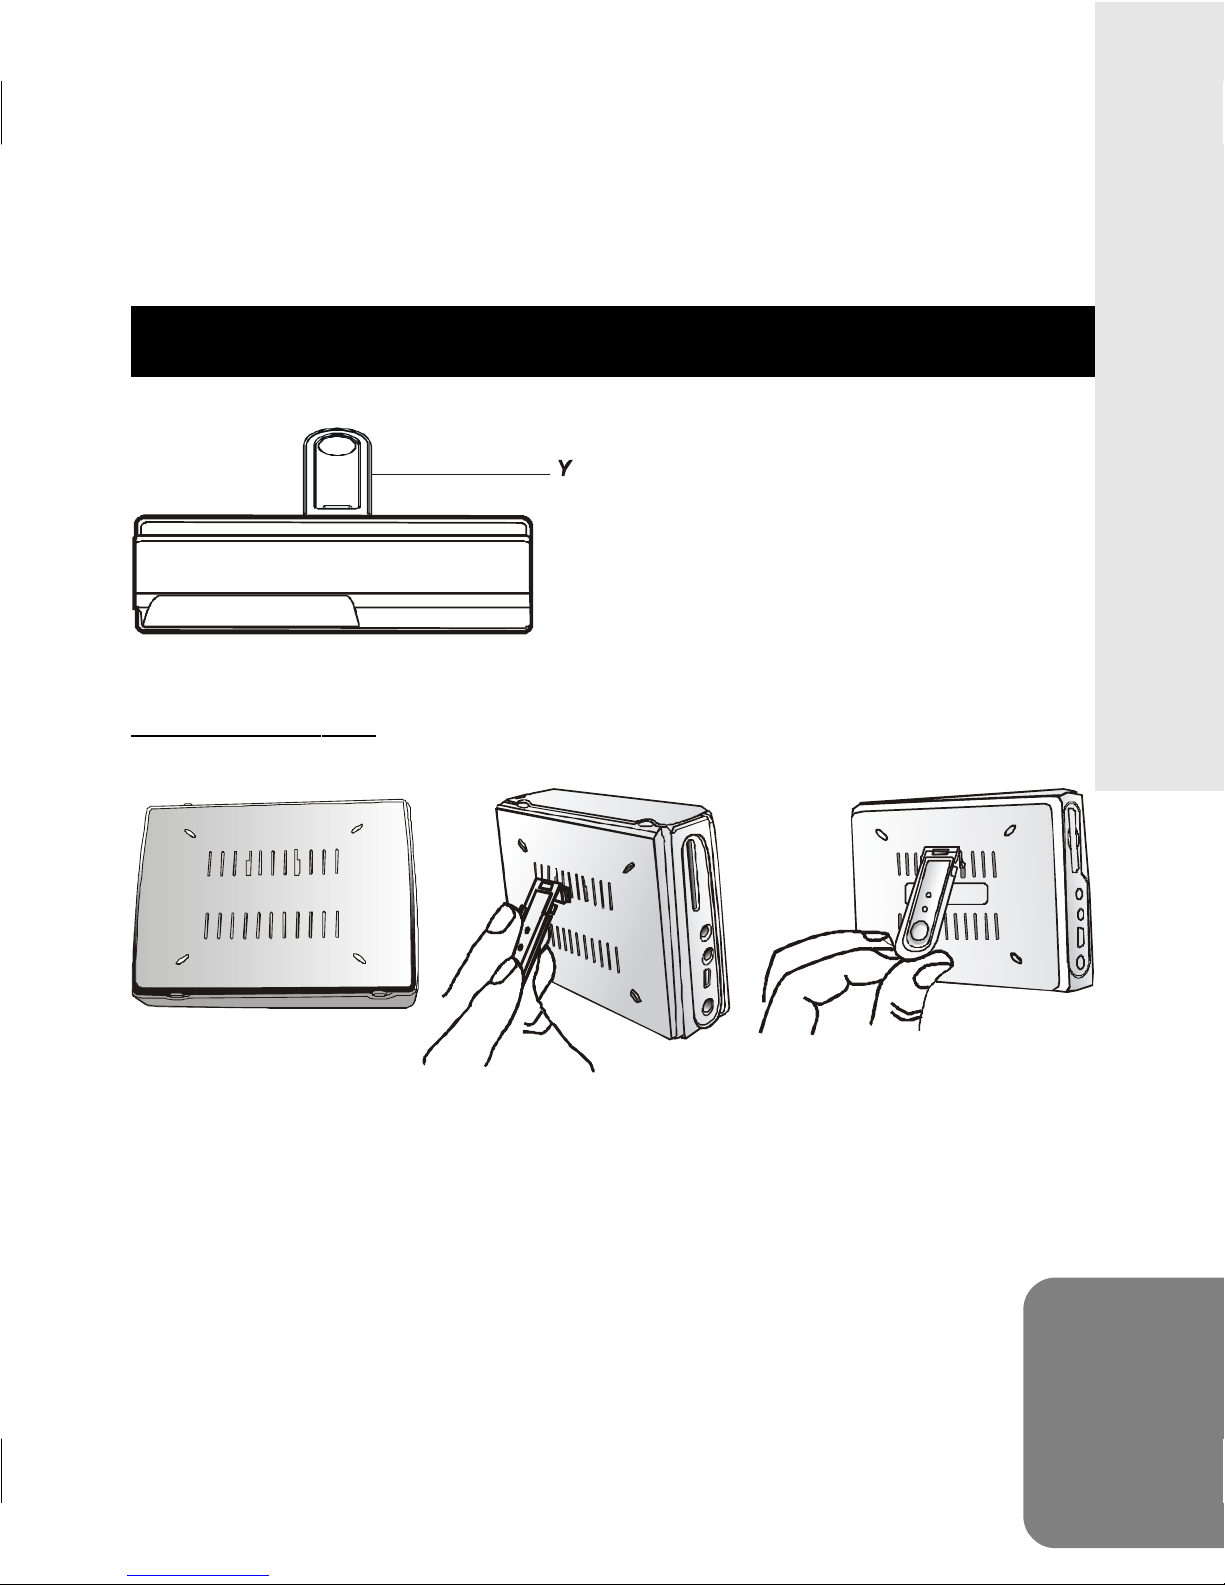
Set Up the Stand
ENGLISH
Y. Stand
Turn over the
PVR
Attach the stand
to the back of
PVR
Pull down the
stand and
fasten tight
3

Software Installation
The bundled CD contains many useful PVR tools. Follow the
instructions below to complete the installation.
1. Insert the Installation CD into CD-ROM. The Select Lan-
guage dialog box appears.
2. Select your preferred language
and click “OK” to continue.
3. A Welcome dialog box appears.
4
Click “ Next”.
4. The Select Components dialog
box appears. Click and select the
software you want to install and
then click “Next“.
5. The Select Program Folder
dialog box appears. You can
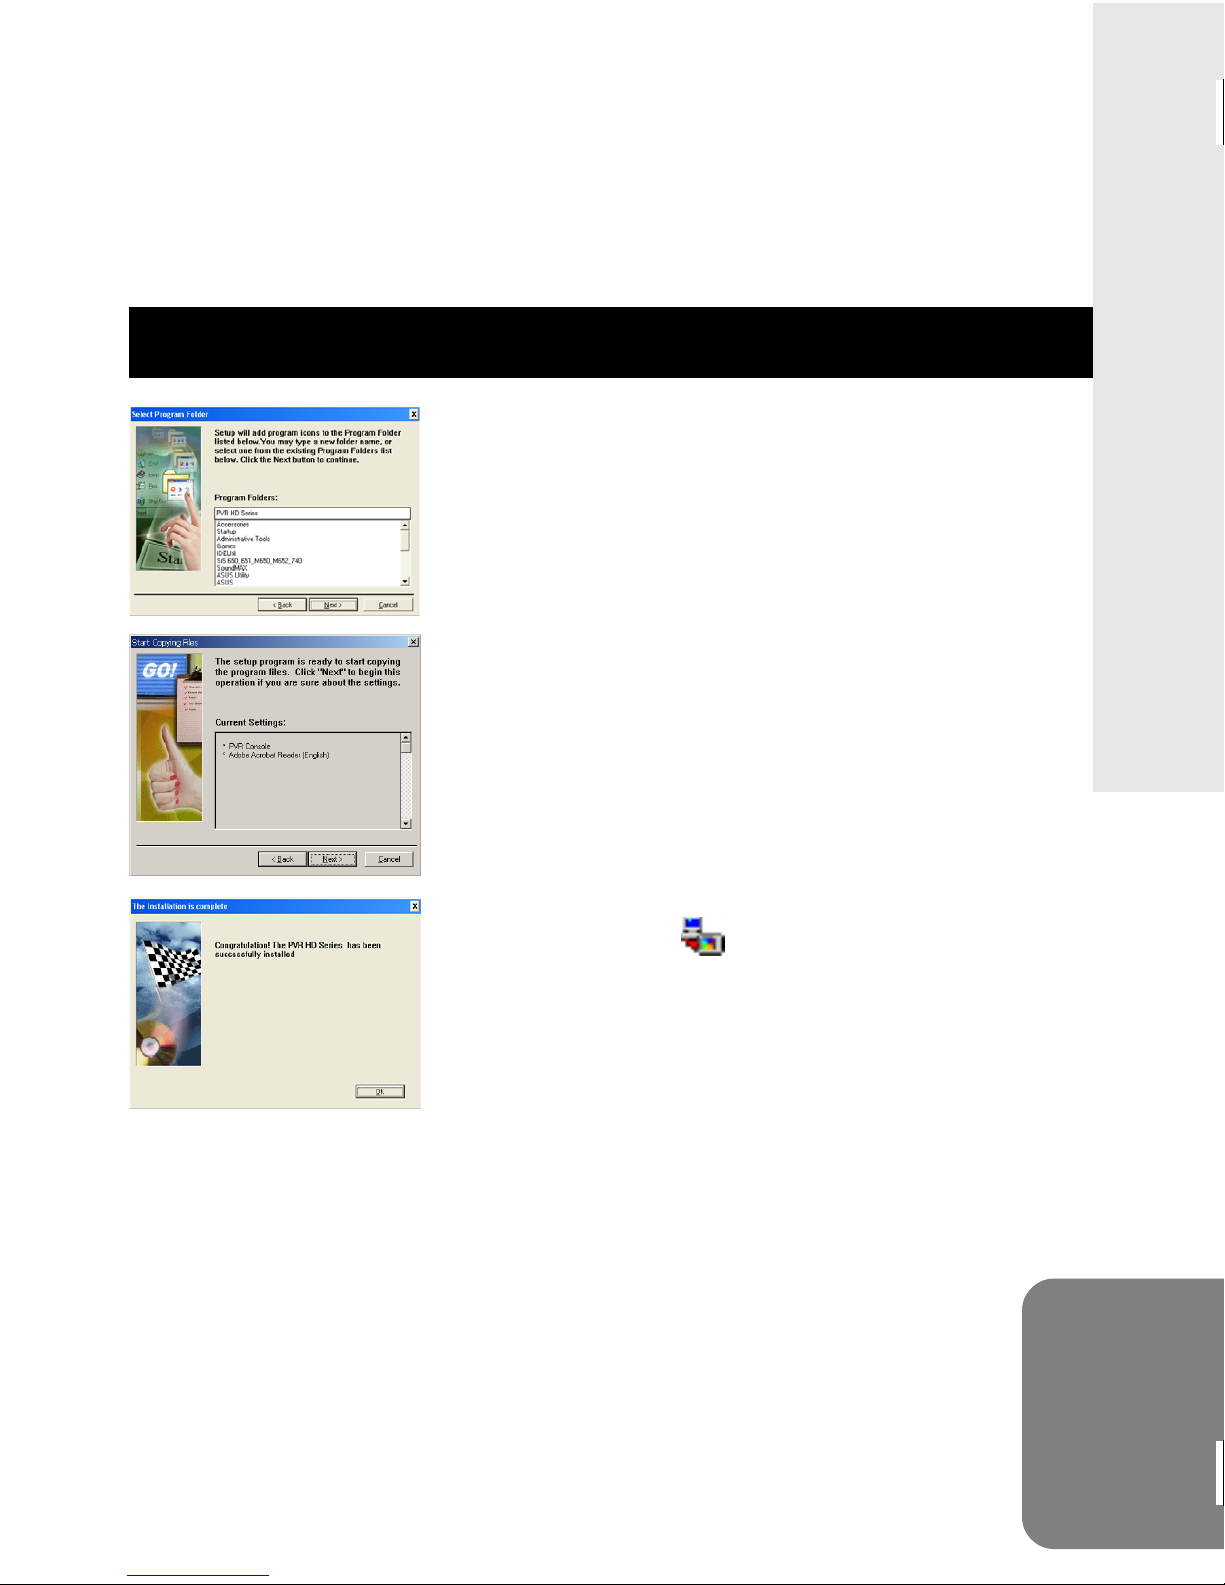
change the folder name listed in the
text box, or simply click “Next” to
continue.
6. The Start Copying Files dialog box
appears confirming that the listed
software will be installed. Click
“Next” to continue.
7. Follow the on-screen instructions to
continue and complete the installation.
8. When the installation is complete,
ENGLISH
the icon
will be displayed on the
Windows’ taskbar.
5
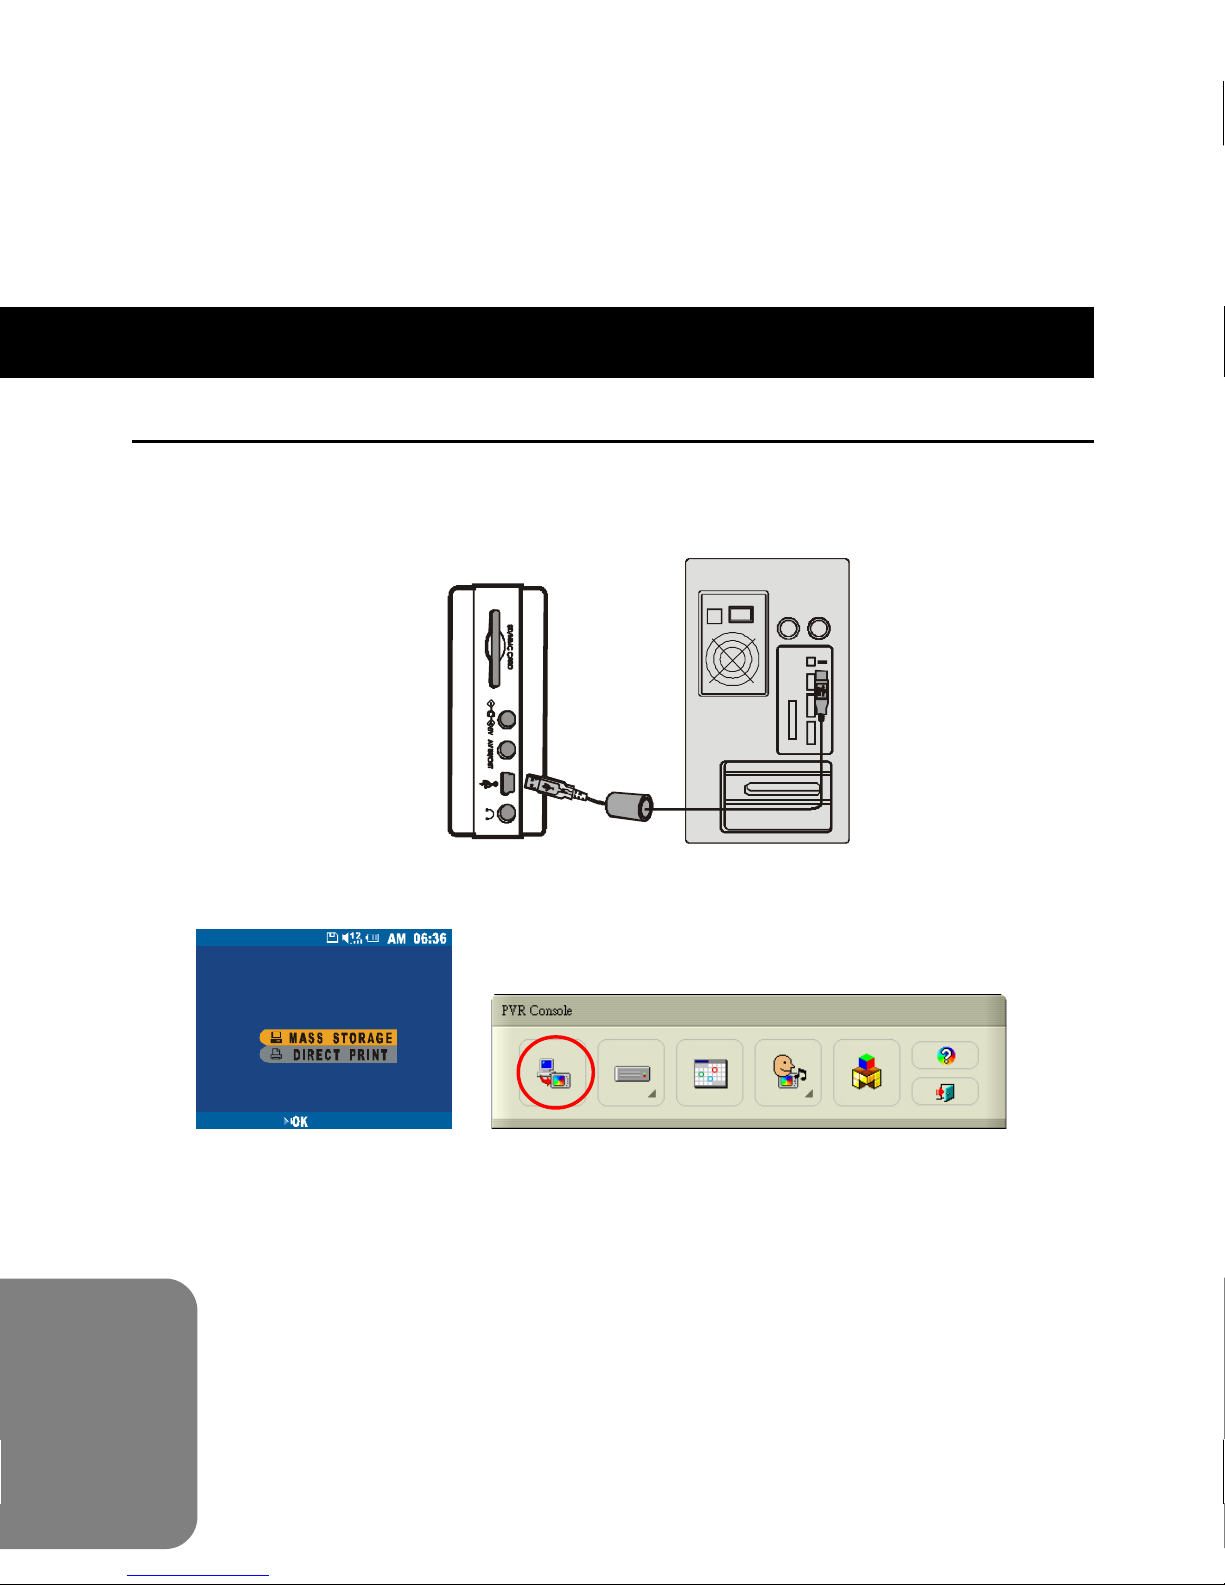
Connecting to PC
Converting and Transferring Files
1. Power on the PVR and connect it to the computer with the
provided USB cable.
2. A mode switch screen appears.
Then PVR Console (Refer to Page 10 for more information)
appears.
6
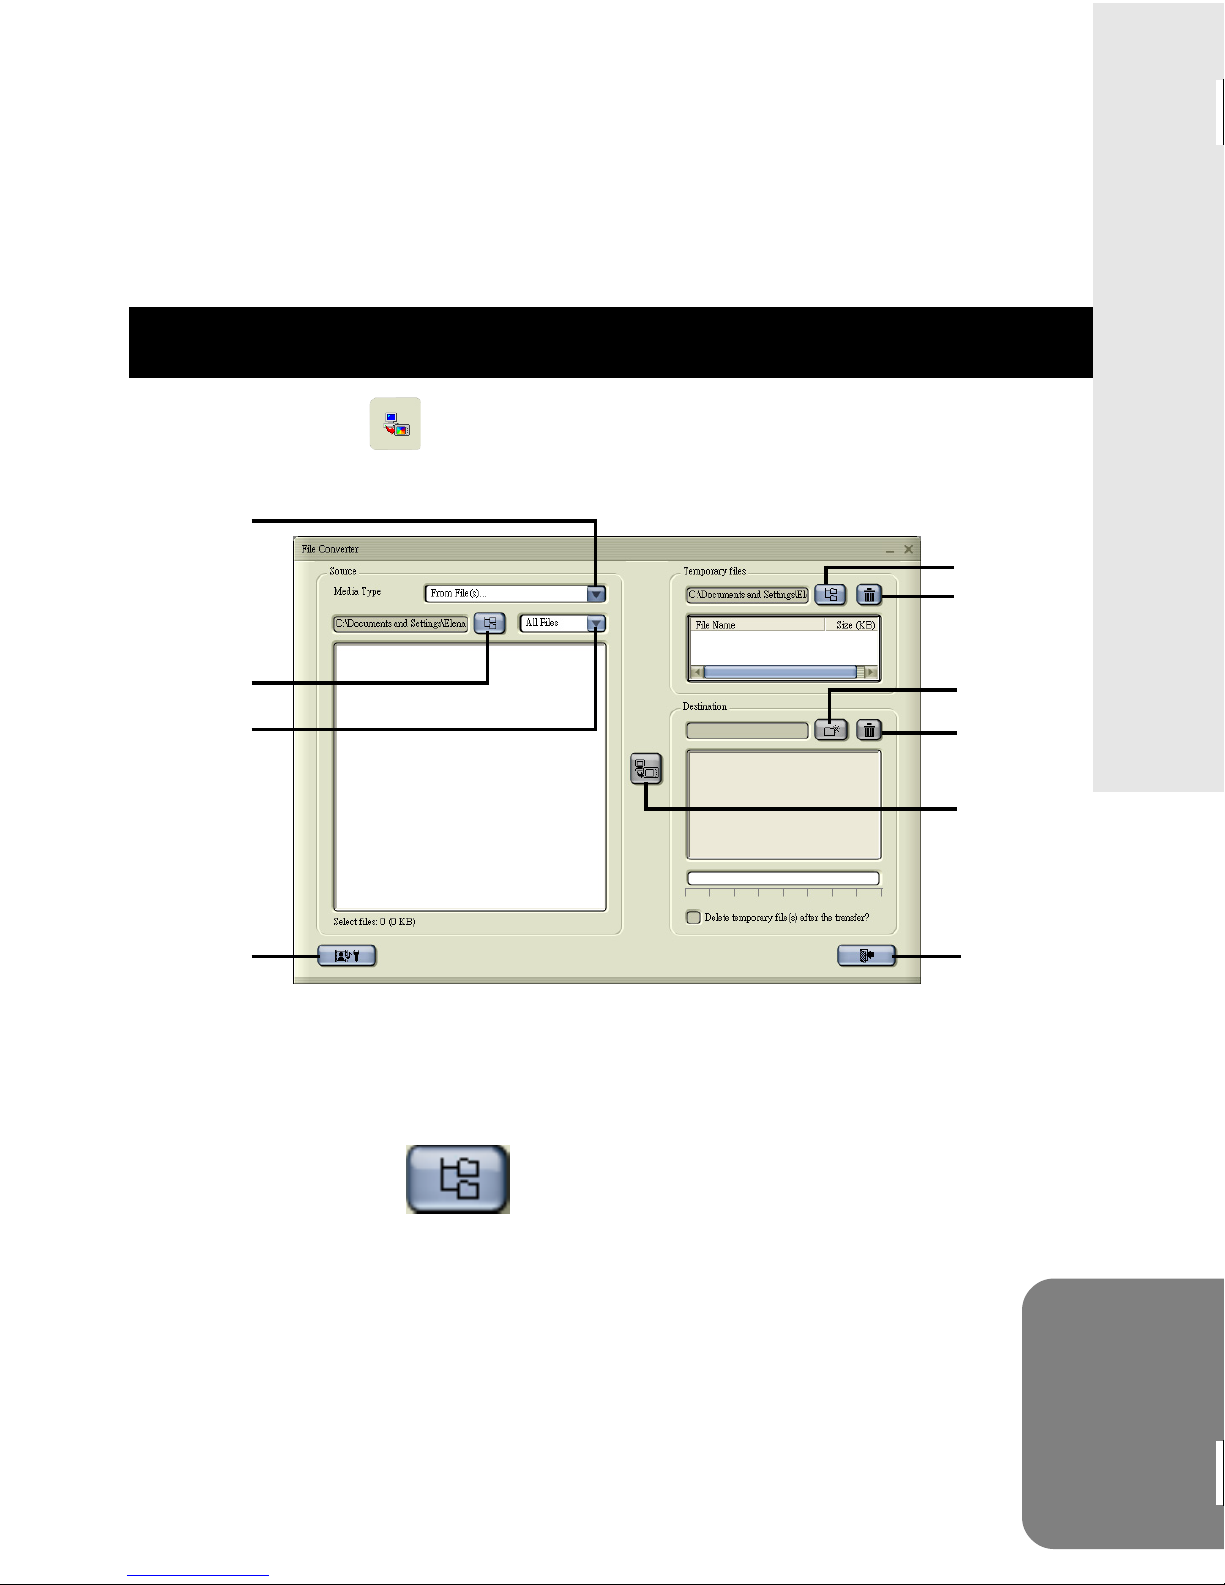
3. Click on the icon to open File Converter application. The
following appears.
Select
Media
Type
Browse
Browse
Delete
Create
Folder
ENGLISH
File Type
Selection
Convert
Settings
Delete
Convert
Exit
4.1 Select the input source from Media Type menu. File Con-
verter will then search your CD-ROM for video CD or Audio
CD (MP3 CD will not display any files). OR
4.2 You can press
Browse button on the left side to
select the path where your files reside.
7
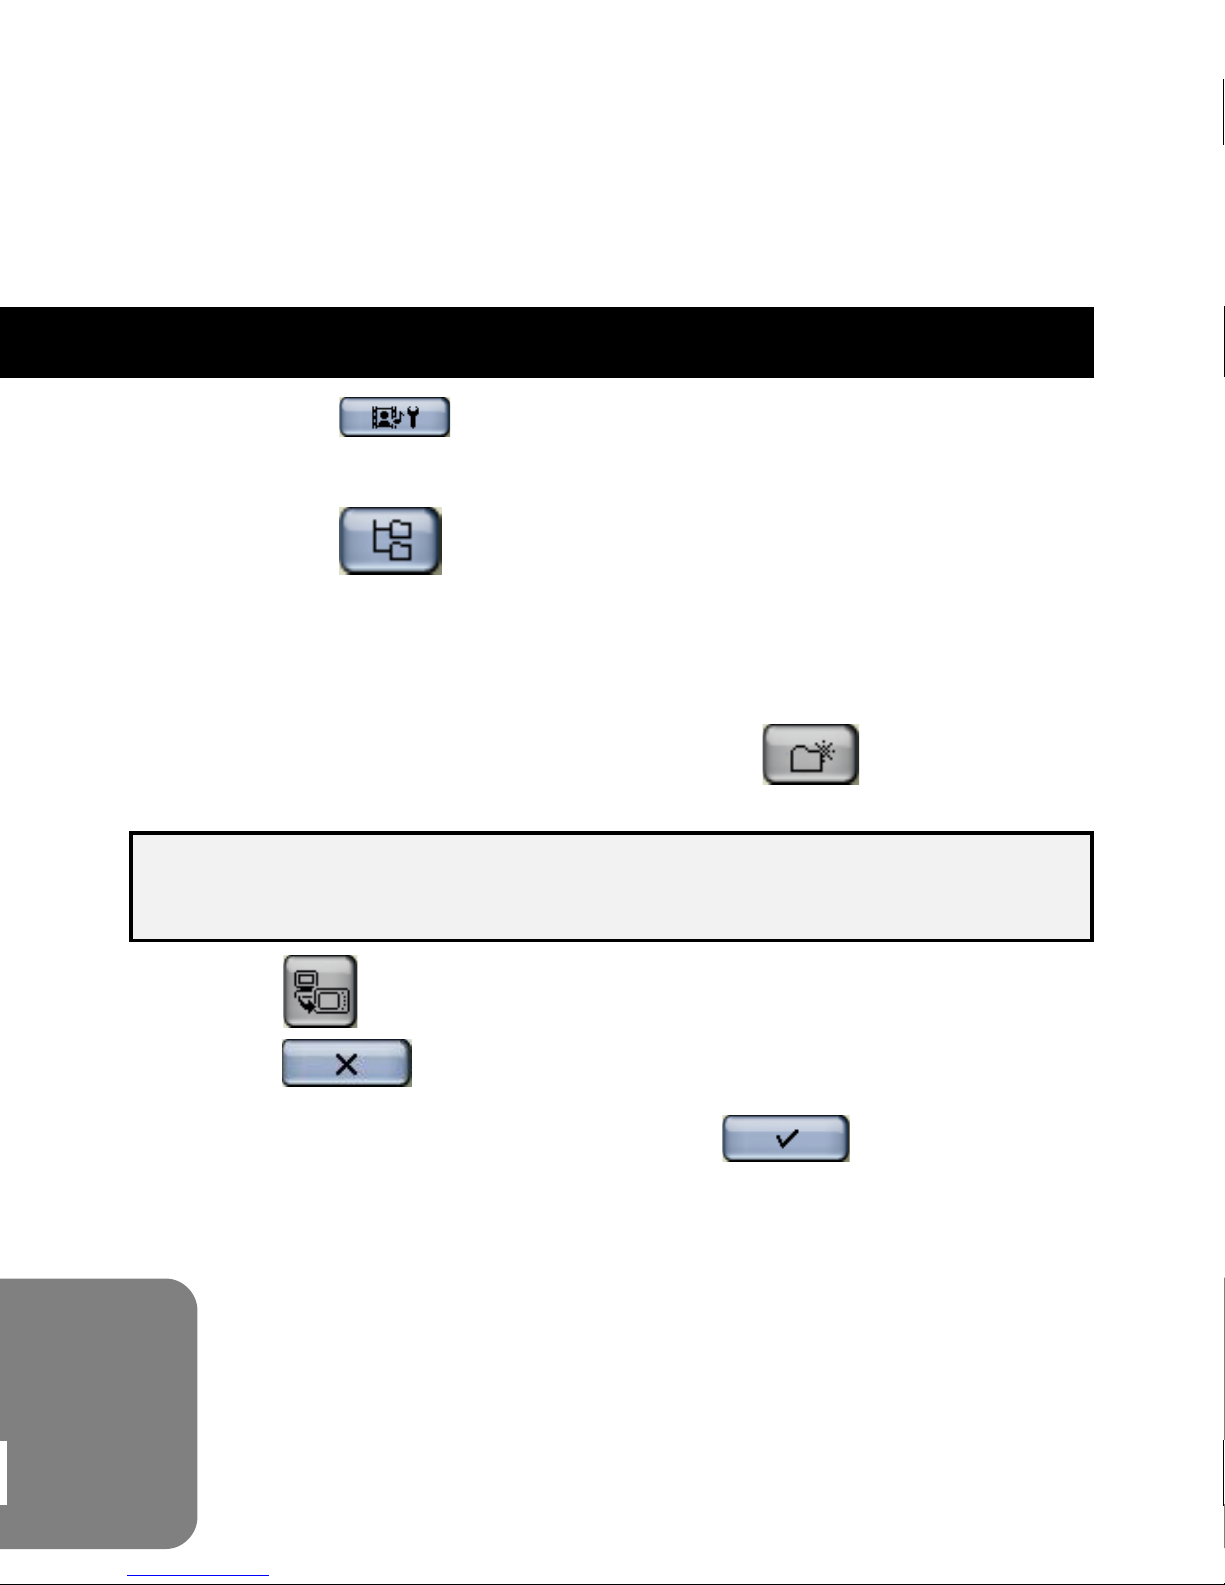
5. Press the button to select the image size or video
quality if you want to convert image/video files.
6. Press the
Browse button on the right side to select
the path where your temporary files will reside before
uploading to PVR.
7. Select the folder (or root directory) from Destination field
where your files will upload to or press
button to
create one.
Note: The File Converter will search for the removable disk
and display the connecteddevice in the Destination field.
8. Press
Convert button. The conversion starts. To stop,
press button.
9. When the conversion is done, press
8
button to exit.
Note1: The File Converter will not convert an AUDIO CD into
WMA format in Windows 98 SE/Me. AUDIO CD
convertion is available in Windows 2000/XP.
Note2: Use only File Converter to convert and transfer video
files to PVR. The source video can come from a variety
of different sources and in a number of different
formats. However File Converter does not support all
video formats or codecs.
Note3: Before using File Converter, you have to download and
install “Windows Media Encoder 7.1” from Microsoft’s
website. Otherwise, all the supported media formats
(see the list below) will fail to convert in Window98 SE/
2000.
ENGLISH
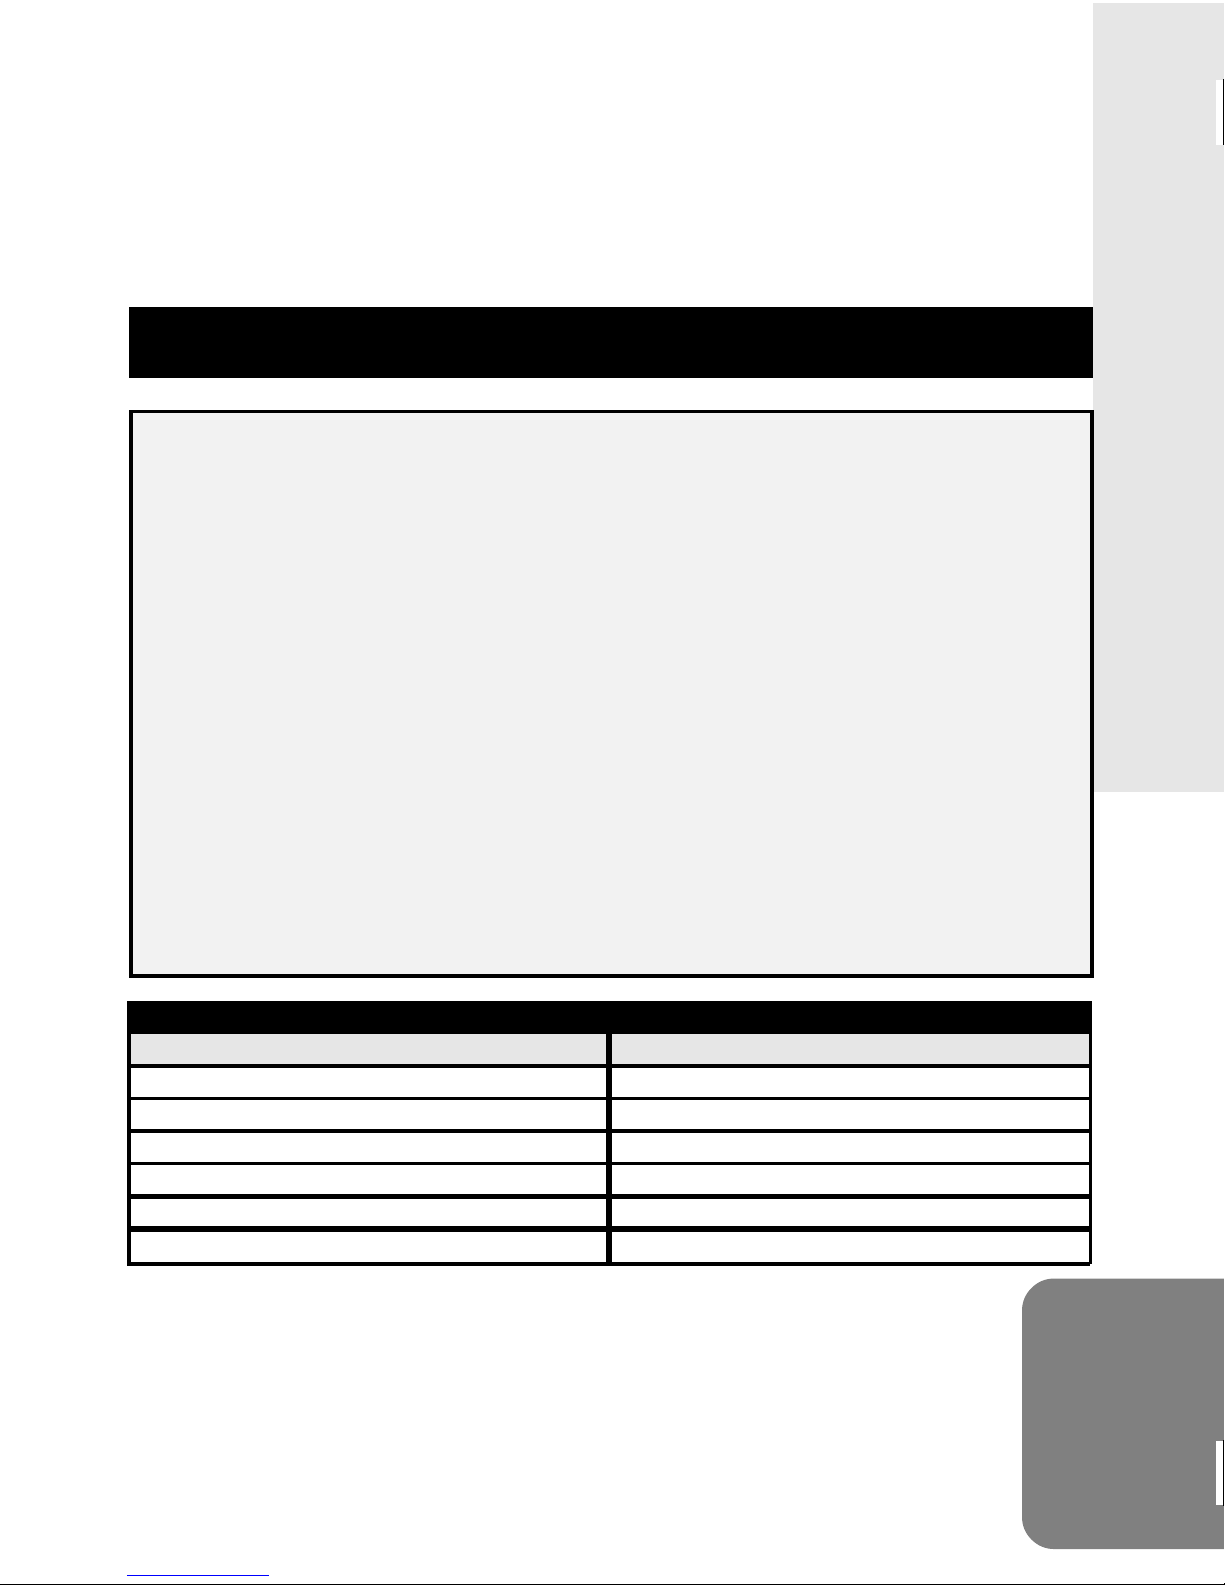
File Converter Supported File Type
F i l e Ty pe (F or ma t ) Extension File Name
Wi nd ow s Med ia Au dio an d Vid eo Fil e F or m at .asf , wmv
Wi nd ow s Au di o an d Vid eo Fi le Fo rmat .avi (D ivX AVI , Moti on J PEG AVI )
A ud io F il e F or m at ( wav e) . wav
A ud io C D Tra ck . cda
Moving Picture Experts Group (MPEG) .m pe g, .m pg , .da t
IMA GE .jpg , .bmp
9
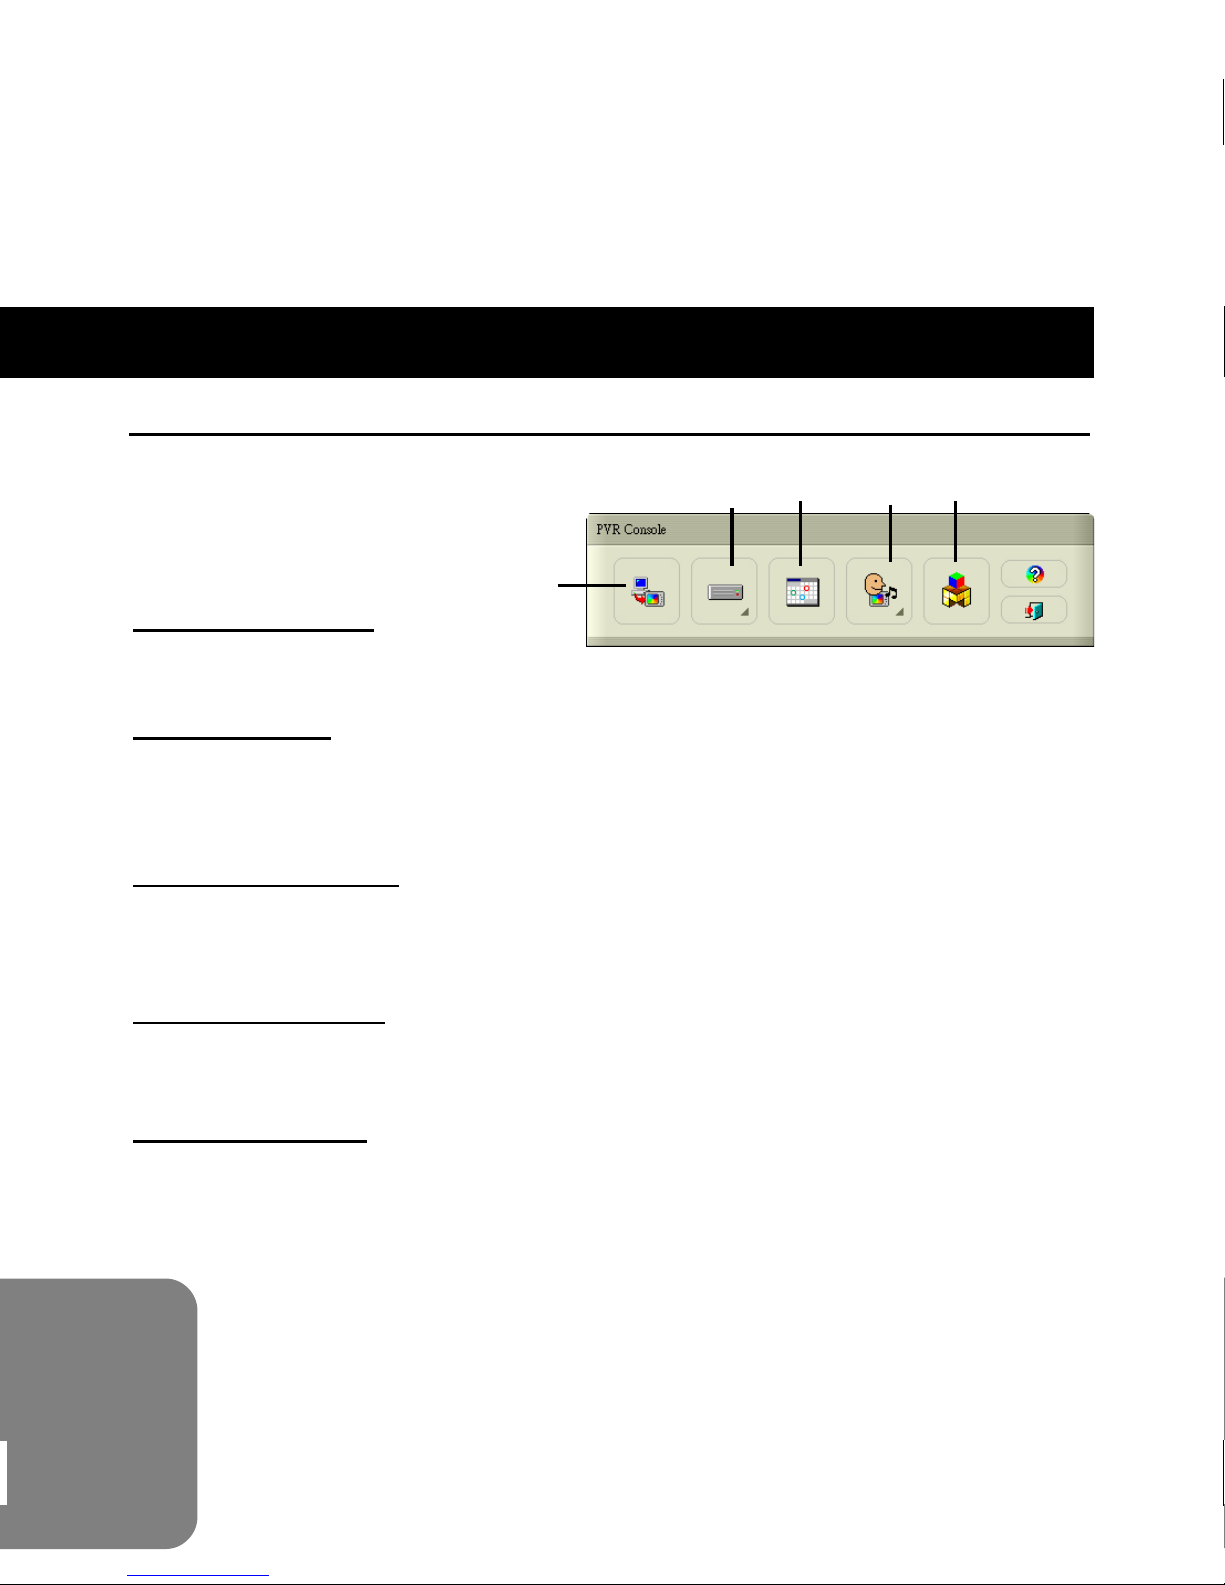
PVR Console
PVR Console consists of 5 applications.
BC DE
A
A. File Converter
Convers multimedia files into playable formats on PVR.
B. Disk Tools
Calls up Microsoft’s Disk Checkup and Disk Defragmenter
programs for system diagnosis and rearrangement.
C. Calendar to Go
Synchronizes the calendar and event data between PC (from
Outlook2000/2002/2003 or e-Life Pal) and PVR.
D. Personal Style
Edits Startup Screen and Sound Effect for PVR.
E. MAX Console
Calls up Max Console software for image editing and retouching.
Note: In order for the above tools to function properly, please
download and install Media Player 9 from Microsoft’s website.
10
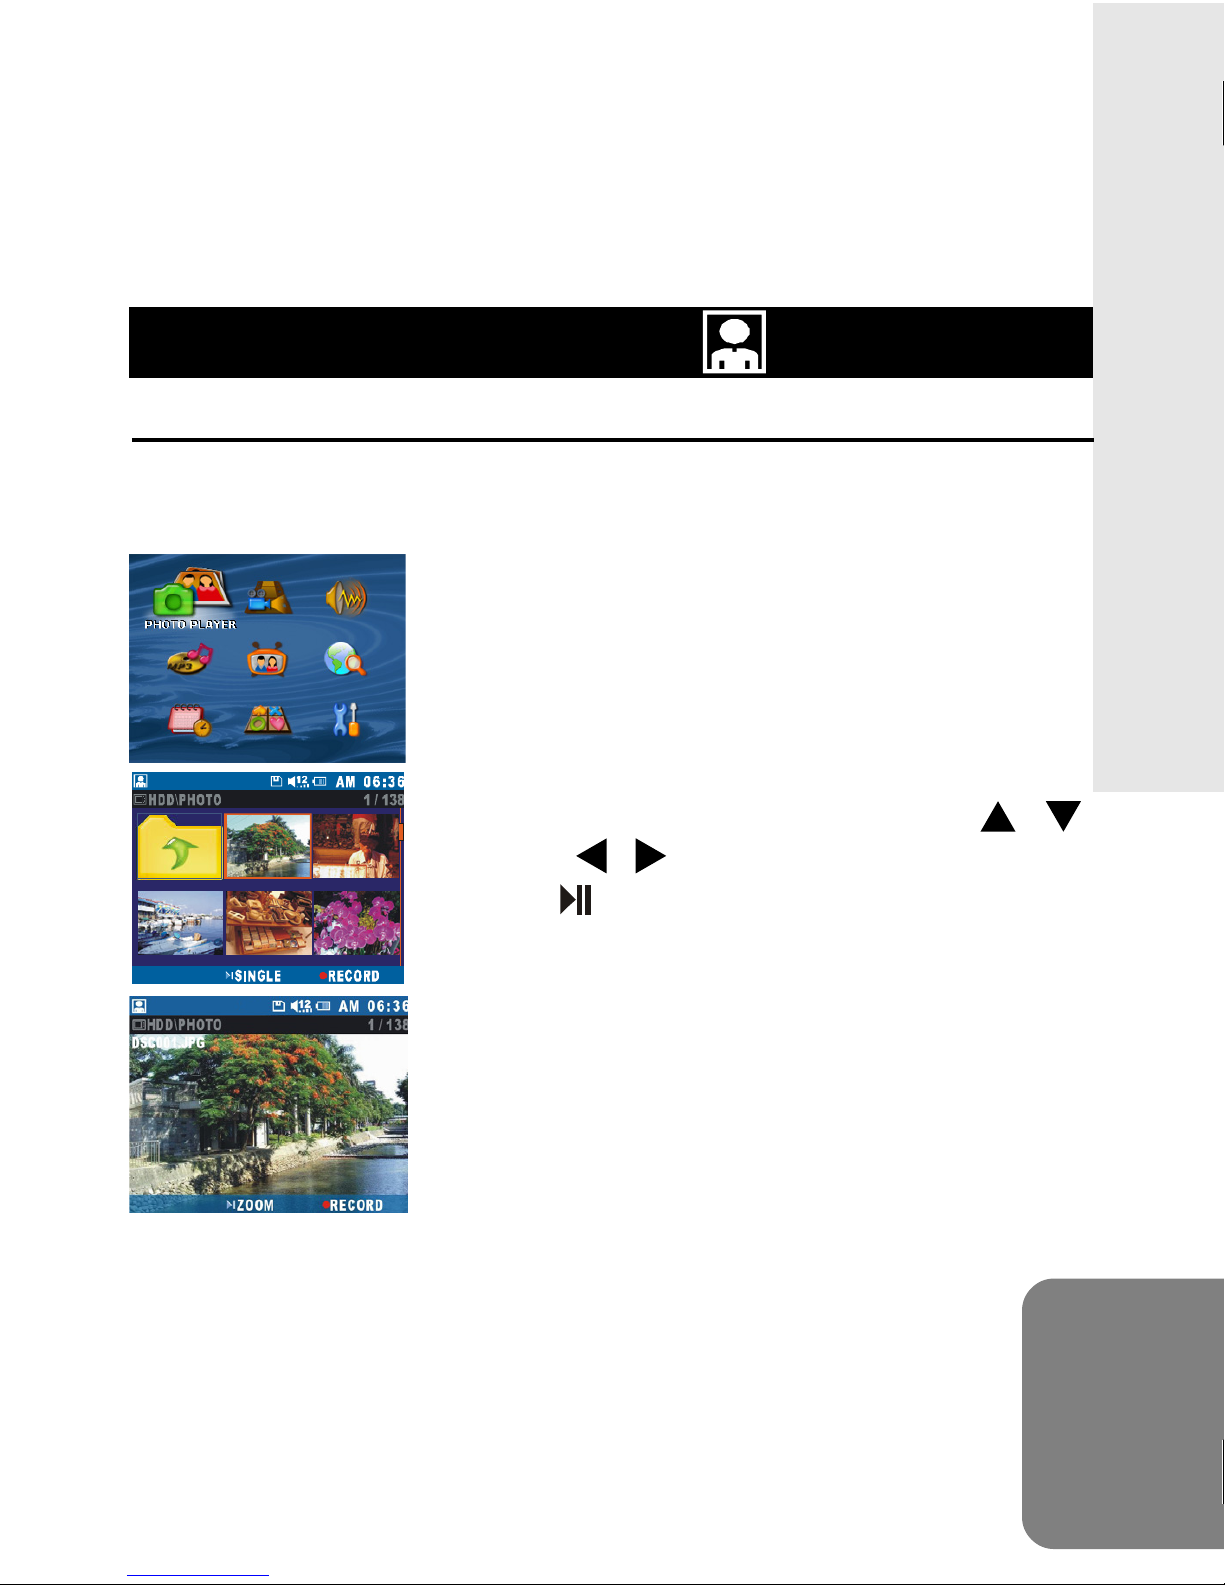
BASIC FUNCTIONS PHOTO PLAYER
Photo Playback
Select PHOTO PLAYER in the Main Menu and press OK button to
enter.
Multiple Photo View (Default):
Now you will see photo thumbnails
are displayed.
Single Photo View:
To view a single photo,press
/ / buttons to select and press
button to display.
/
ENGLISH
11

PHOTO PLAYER
Zoom
Select PHOTO PLAYER in the Main Menu and press OK button to
enter.
Press
a photo and press
To zoom in on the selected photo,
press
will be magnified by 2X. To magnify
more, press
/ / / buttons to select
button to view.
button. The selected photo
button again.
12
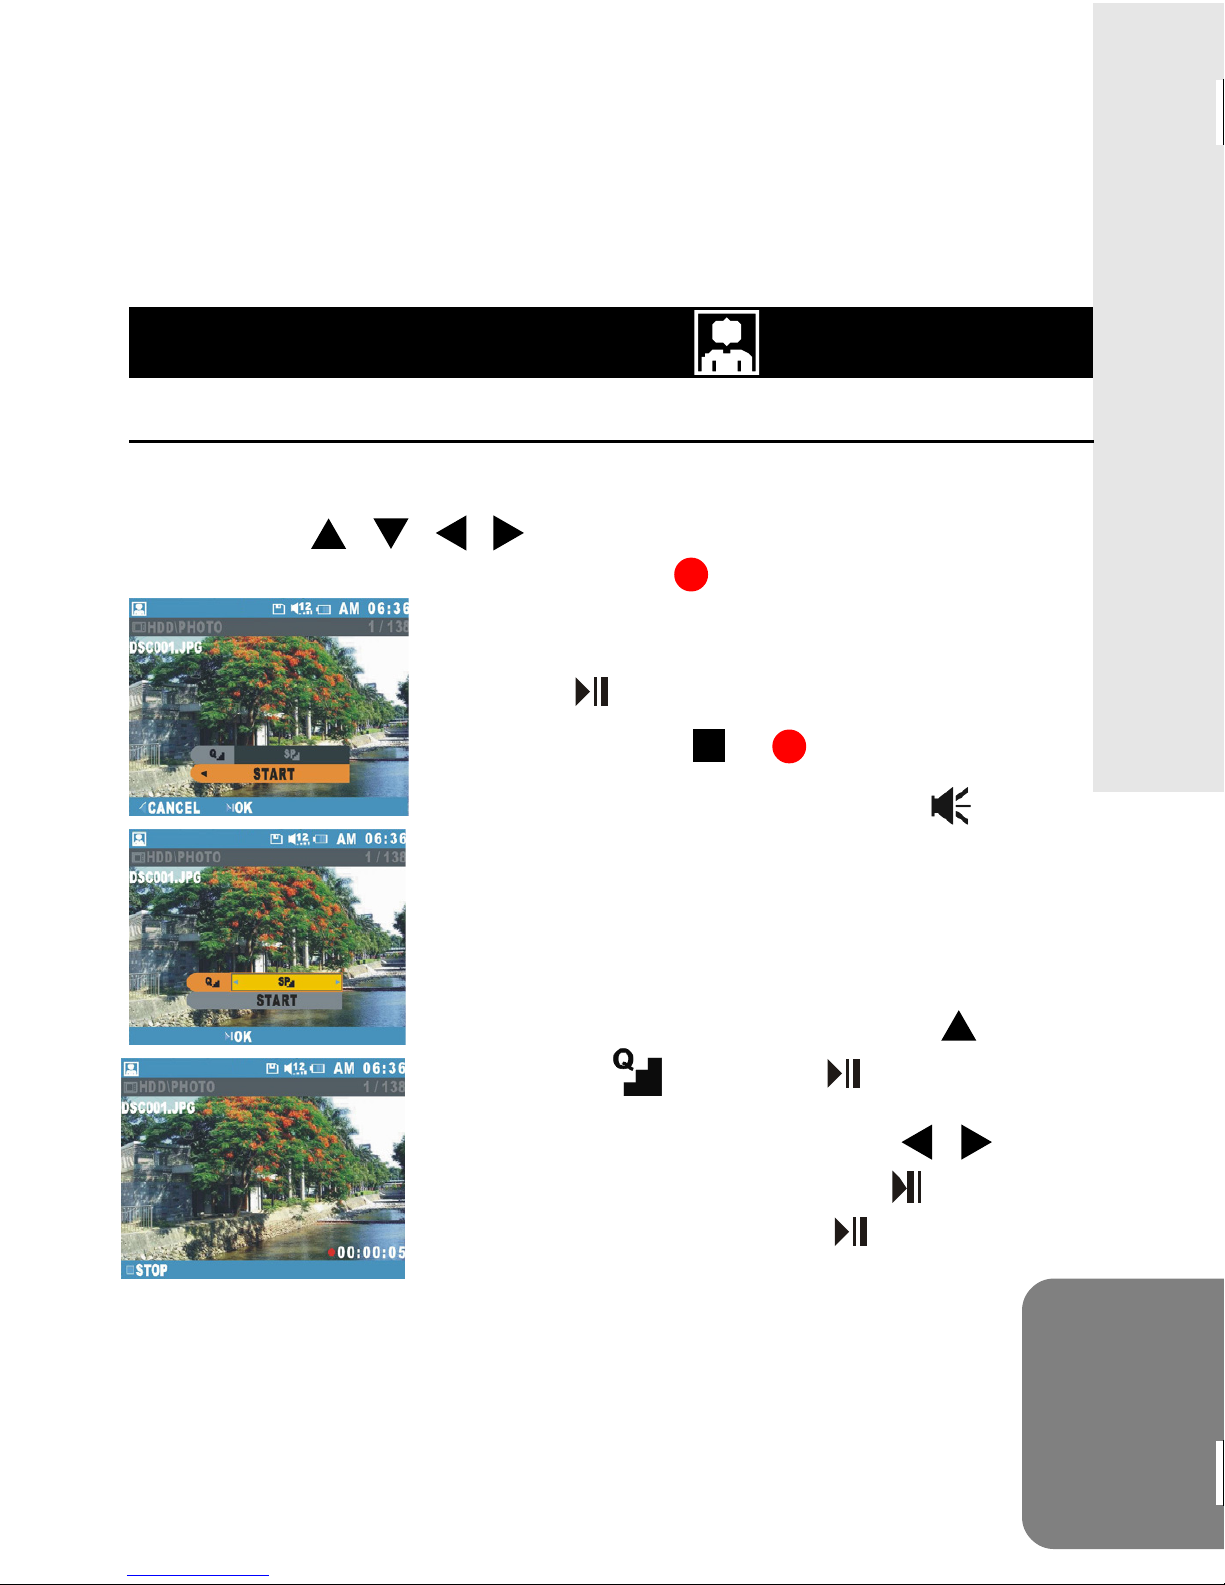
PHOTO PLAYER
Record Message to a Photo
Select PHOTO PLAYER in the Main Menu and press OK button to
enter. Press
attach a voice message to and press
/ / / buttons to select a photo you want to
REC button.
The screen on the left appears. Simply
press
To stop, press
When the recording is done, a
will appear on the top right hand corner of
the photo.
Tip:
You can change the audio quality setting
button to start recording.
or REC button.
icon
ENGLISH
before recording. Simply press
to select
To change the setting, press
buttons to select and press button to
confirm. You may press
recording with the new setting.
and press button to enter.
button to start
button
/
13
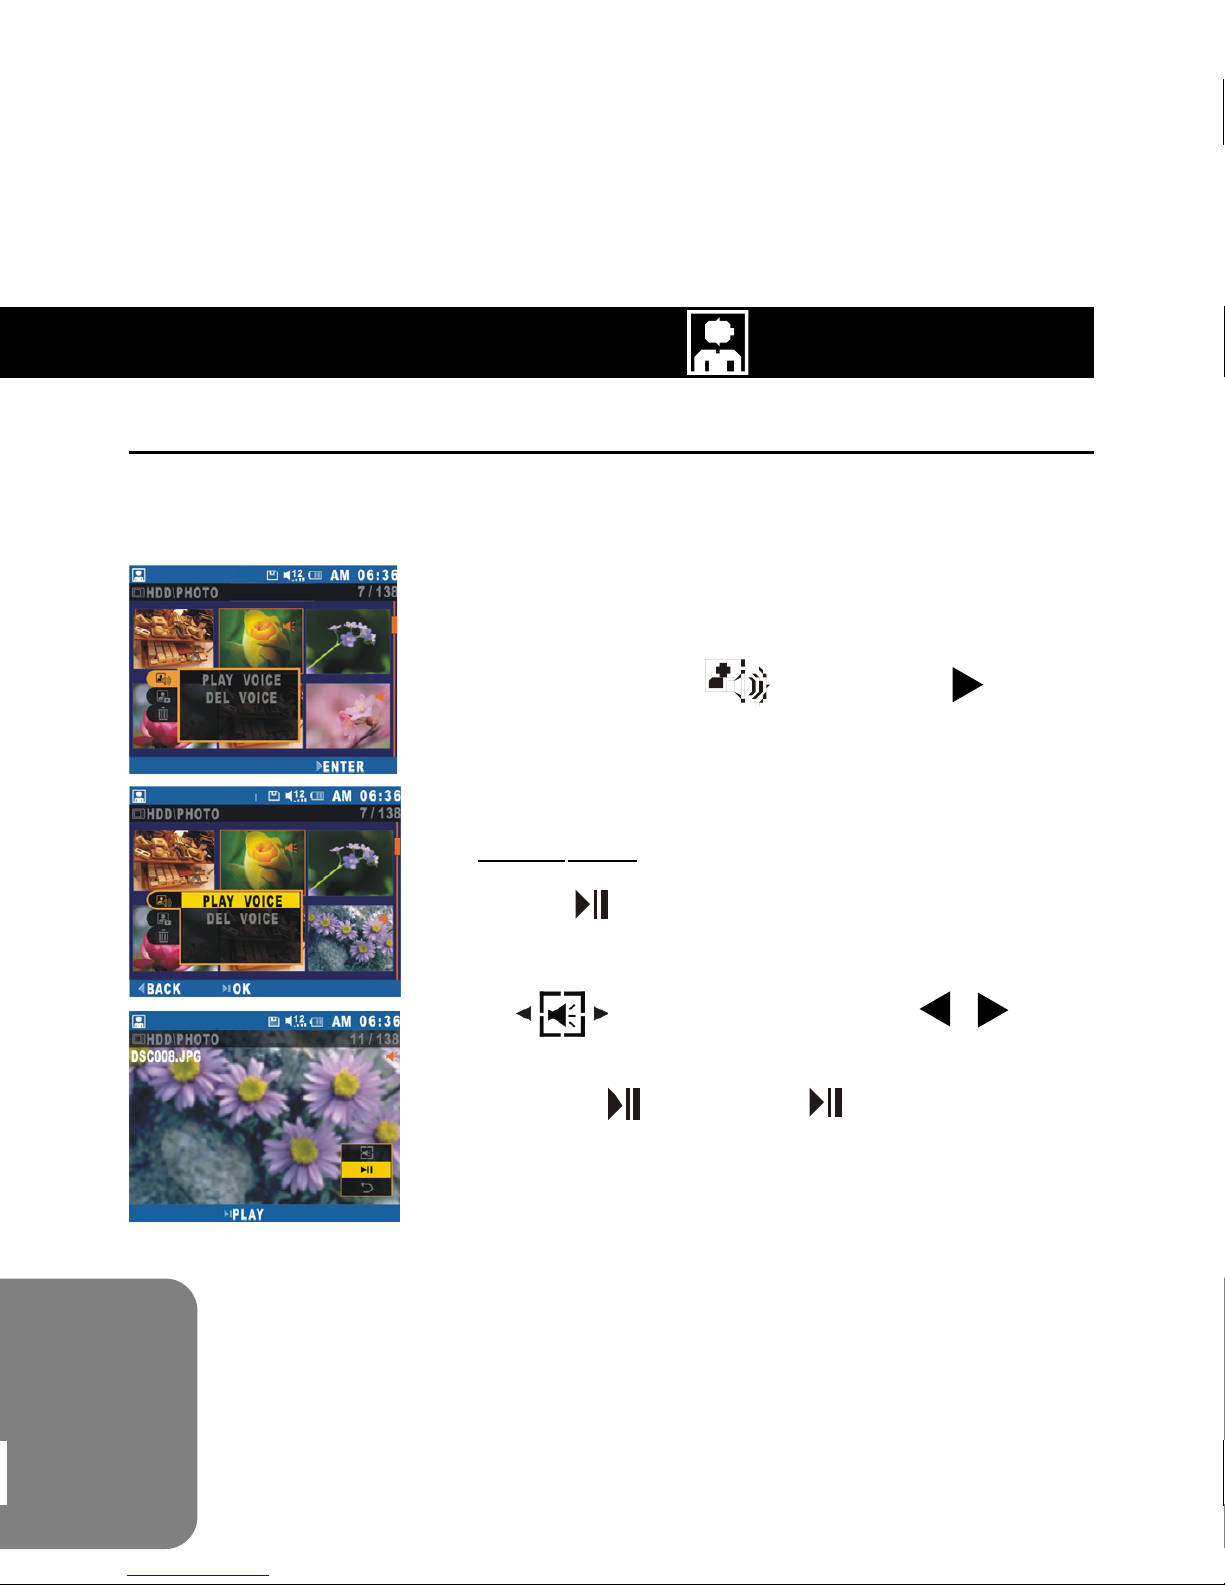
PHOTO PLAYER
Playback/Delete Message Attached to Photo
Select PHOTO PLAYER in the Main Menu and press OK button to
enter.
Select photo with a voice message
attached. Press MENU button and scroll
down to select
to enter PLAY VOICE.
Play Voice:
Press
To play more voice messages, scroll up
to
buttons to select. To start playing, scroll
down to
button twice to start playing.
icon and then press /
and press button.
icon. Press button
14
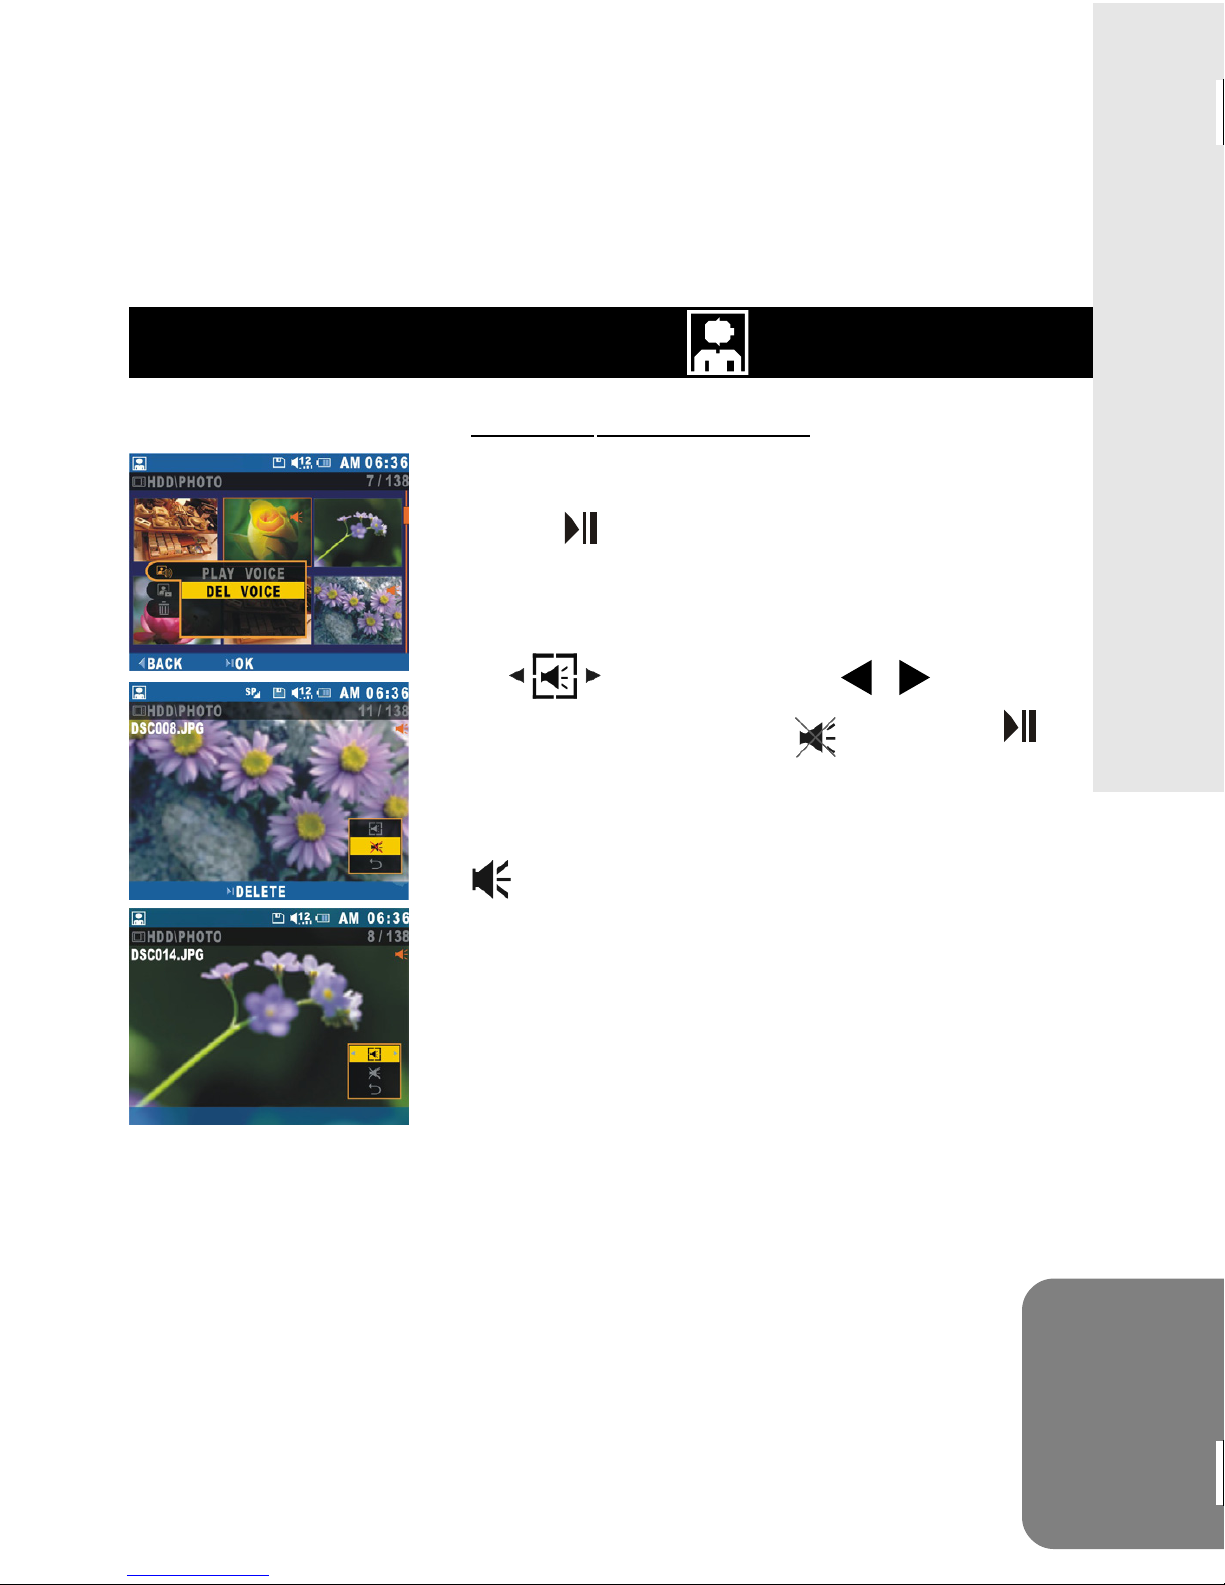
PHOTO PLAYER
Delete Voice Message:
Scroll down to select DEL VOICE and
press
message.
To delete more voice messages, scroll up
to
select. Scroll down to
button to delete.
When the voice message is deleted, the
icon will be removed from the photo.
button twice to delete the voice
icon and press / buttons to
and press
ENGLISH
15

PHOTO PLAYER
Slide Show Playback
Select PHOTO PLAYER in the Main Menu and press OK button to
enter.
Press
photo you want to start the silde show
with. Press MENU button and scroll down
to select
then press
Tip:
You can change the interval and transition
settings. To change the interval, scroll up
to
/ buttons to set the interval and
press
To continue to change the transition,
press
/ / / buttons to select the
. Press button twice and
button to start.
and press button to enter. Press
button to confirm.
button to enter .
16
Press
press
/ buttons to select one and
button to confirm.
 Loading...