

Mustek PowerMust 530(B) Plus, PowerMust 637(B) Plus, PowerMust 745(B) Plus Startup Manual
1. Package Contents
You should have received the following items inside of package:
- UPS Unit
- Startup Manual
- Communication cable
- Installation CD for monitoring software
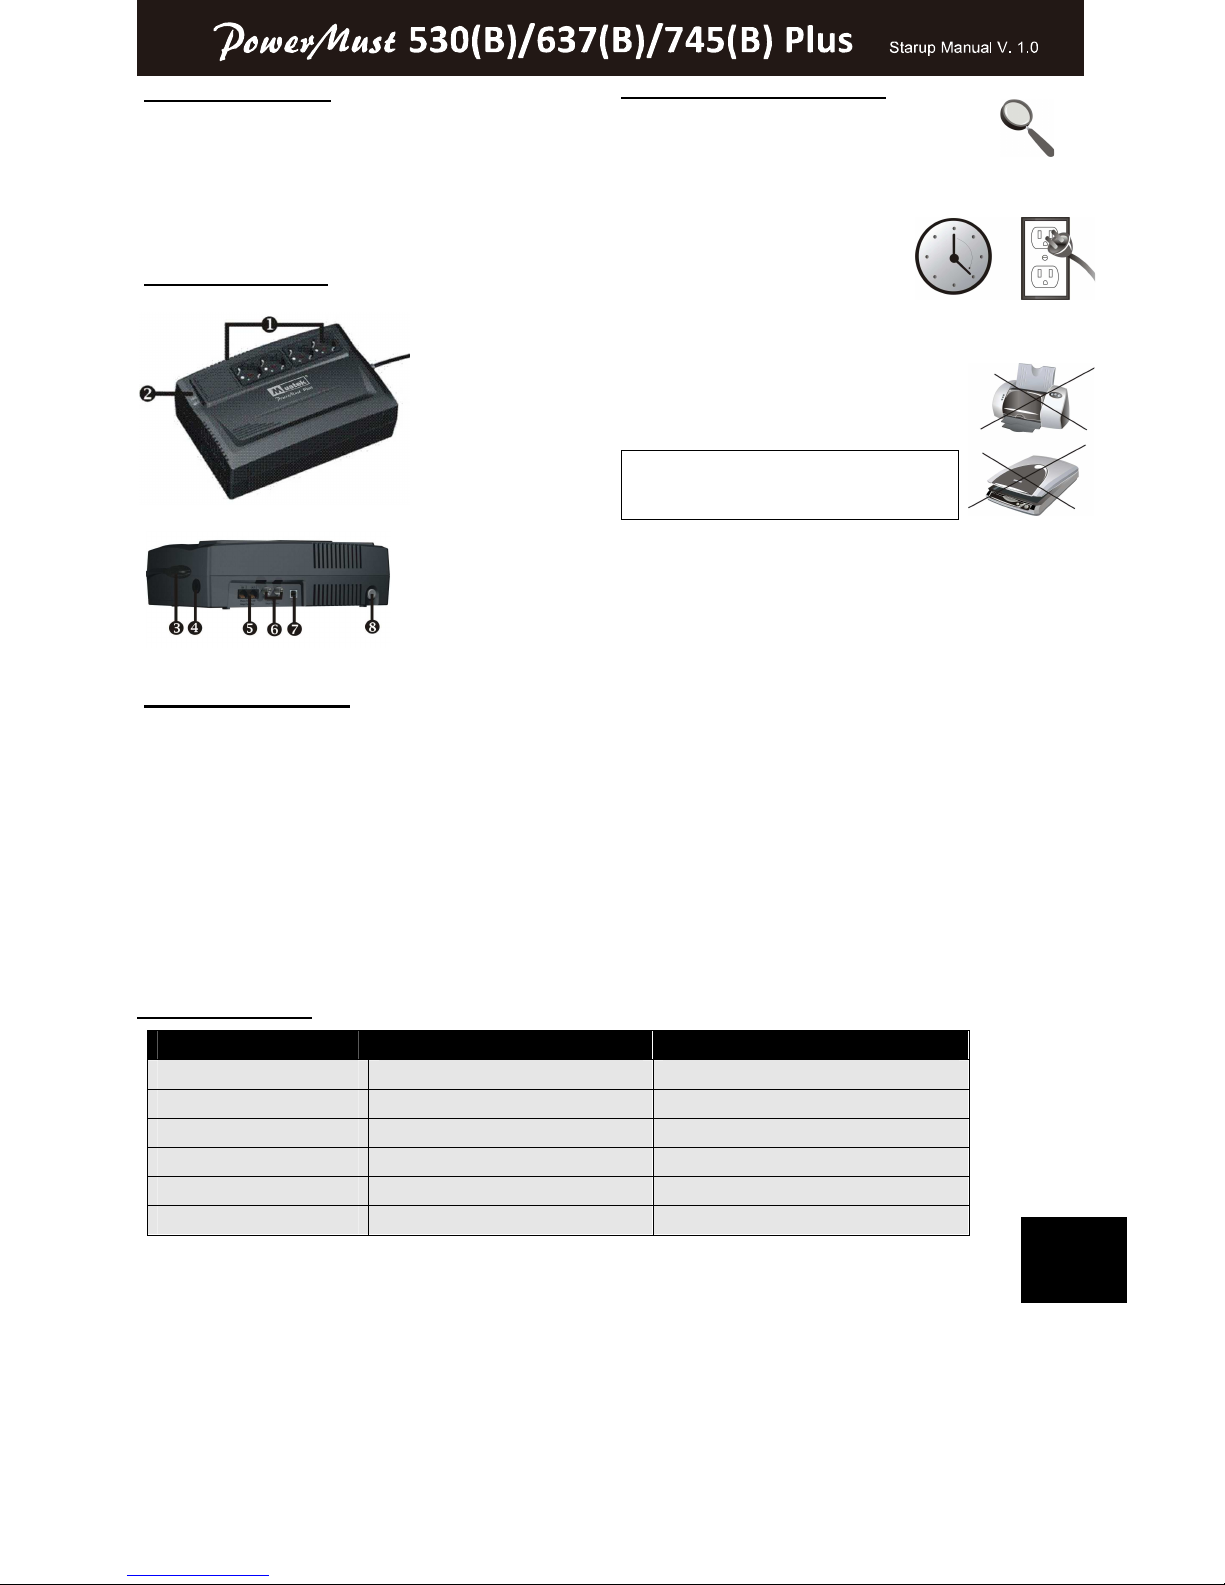
2. Product Overview
Battery backup
receptacles
Status indicators
AC power input
Circuit breaker
Modem/phone/
Network surge
protection
Coaxial surge
protection (option)
USB communication
port
|
Power switch
3. Software Installation
1. Insert the included installation CD into CD-ROM drive and then
follow the on-screen instructions. If there no screen shows when
inserting the CD after 1 minute, please execute setup.exe for
initiating installation software.
2. Enter Serial No label pasted on the UPS unit to install the
software.
3. When your computer restarts, the monitoring software will appear
as a green plug icon located in the system tray, near the clock
4. Installation & Initial Startup
NOTE: Before installation, please inspect the unit. Be
sure that nothing inside the package is damaged.
Connect to Utility and Charging
Plug in the AC input cord to the wall
outlet. For the best results, suggest to
charge the battery at least 4 hours
before initial use. The unit charges its
battery while connecting to the utility.
Connect the Loads
Plug in the loads to output receptacles on the
rear panel of the UPS. Simply turn on the power
switch of UPS unit, then devices connected to
the UPS will be protected by UPS unit.
CAUTION: NEVER connect a laser printer or
scanner to the UPS unit. This may cause the
damage of the unit.
Connect Modem/Phone/Network to Surge Protection
Connect a single modem/phone/network line into surge-protected
“IN” outlet on the back panel of the UPS unit. Connect from “OUT”
outlet to the computer with phone line cable.
Connect Coax Protected Port
(For the model with coax protected
port only)
This coax protected port will protect your TV antenna, cable, and
network.
Turn On/Off the Unit
Turn on the UPS unit by pressing the power switch. Turn off the
UPS unit by pressing again the power switch. You may check the
Status Indicators Section for the details.
Cold Start Function
When the UPS is off and there is no power utility, it's still possible to
cold start the UPS unit to power the loads.
5. Status Indicators
Status Visual Indication Alarm
AC Mode Green Power On LED - On Not applicable
On Battery Yellow Batt. Mode LED - Flash Sounding every 10 seconds
Low Battery Yellow Batt. Mode LED - Flash Sounding every second
Battery Replacement Red Fault LED - On Sounding every 2 seconds
Overload Green Power On LED on Sounding every 0.5 seconds
UPS Fault Red Fault LED - On Continuously sounding
WARNUNG: Dies ist eine USV der Klasse C2. In Wohnansiedlungen kann dieses Erzeugnis Funkstörungen hervorrufen, dann muss der Benutzer
zusätzliche Maßnahmen ergreifen.
WARNING: This is a UPS Class C2. In residential subdivision the product may cause harmful interference, then the users have to take additional
measures.
EN
6. Important Safety Warning
This manual contains important instructions that should be followed
during installation and maintenance of the UPS and batteries.
CAUTION! To prevent the risk of fire or electric shock, install in a
temperature and humidity controlled indoor area free of conductive
contaminants. (See the specs for the acceptable temp. and
humidity range.)
CAUTION! With the installation of this equipment, it should be
prevented that the sum of the leakage current of the UPS to the
connected consumer exceeds 3.5mA.
Attention hazardous through electric shock. Also with disconnection
of this unit from the mains, hazardous voltage still may be
accessible through supply from battery. The battery supply should
be therefore disconnected in the plus and minus pole at the quick
connectors of the battery when maintenance or service work inside
the UPS is necessary.
8. Specification
MODEL 530(B) Plus 637(B) Plus 745(B) Plus
INPUT
Capacity 500VA/300W 625VA/375W 750VA/450W
Voltage 220/230/240VAC
Voltage Range 170-280VAC
OUTPUT
Voltage Regulation
±10% (Batt. Mode)
Transfer Time Typical 2-6ms, 10ms max.
Waveform Simulated Sine Wave (Batt. Mode)
BATTERY
Type & Number 12V/7AH x 1 12V/7AH x 1 12V/9AH x 1
Recharge Time 4 hours recover to 90% capacity
PHYSICAL
Dimension,
DXWXH
292 x 199 x 91 (mm) (foot included)
Net Weight (kgs) 5.08 5.3 5.88
ENVIRONMENT
Humidity 0-90% RH @ 0- 40°C (non-condensing)
Noise Level Less than 40dB
INTERFACE
USB Port
Supports Windows 98 SE/ME/NT 4.x/2000/
2003/XP/Vista/2008
7. Battery Replacement
CAUTION! Servicing of batteries should be performed or
supervised by personnel knowledgeable of batteries and the
required precautions. Keep unauthorized personnel away from
batteries.
CAUTION! When replacing the batteries, use the same number
and type of batteries.
CAUTION! Internal battery voltage is 12Vdc. Sealed, lead-acid,6
cells battery.
CAUTION! Do not dispose of batteries in a fire. The battery may
explode. Do not open or mutilate the battery or batteries. Released
electrolyte is harmful to the skin and eyes.
CAUTION! A battery can present a risk of electric shock and high
short circuit current. The following precaution should be observed
before replacing batteries:
1) Remove watches, rings, or other metal objects.
2) Use tools with insulated handles.
3) Wear rubber gloves and boots.
4) Do not lay tools or metal parts on top of batteries.
5) Disconnect charging source prior to connecting or
disconnecting batteries terminal.
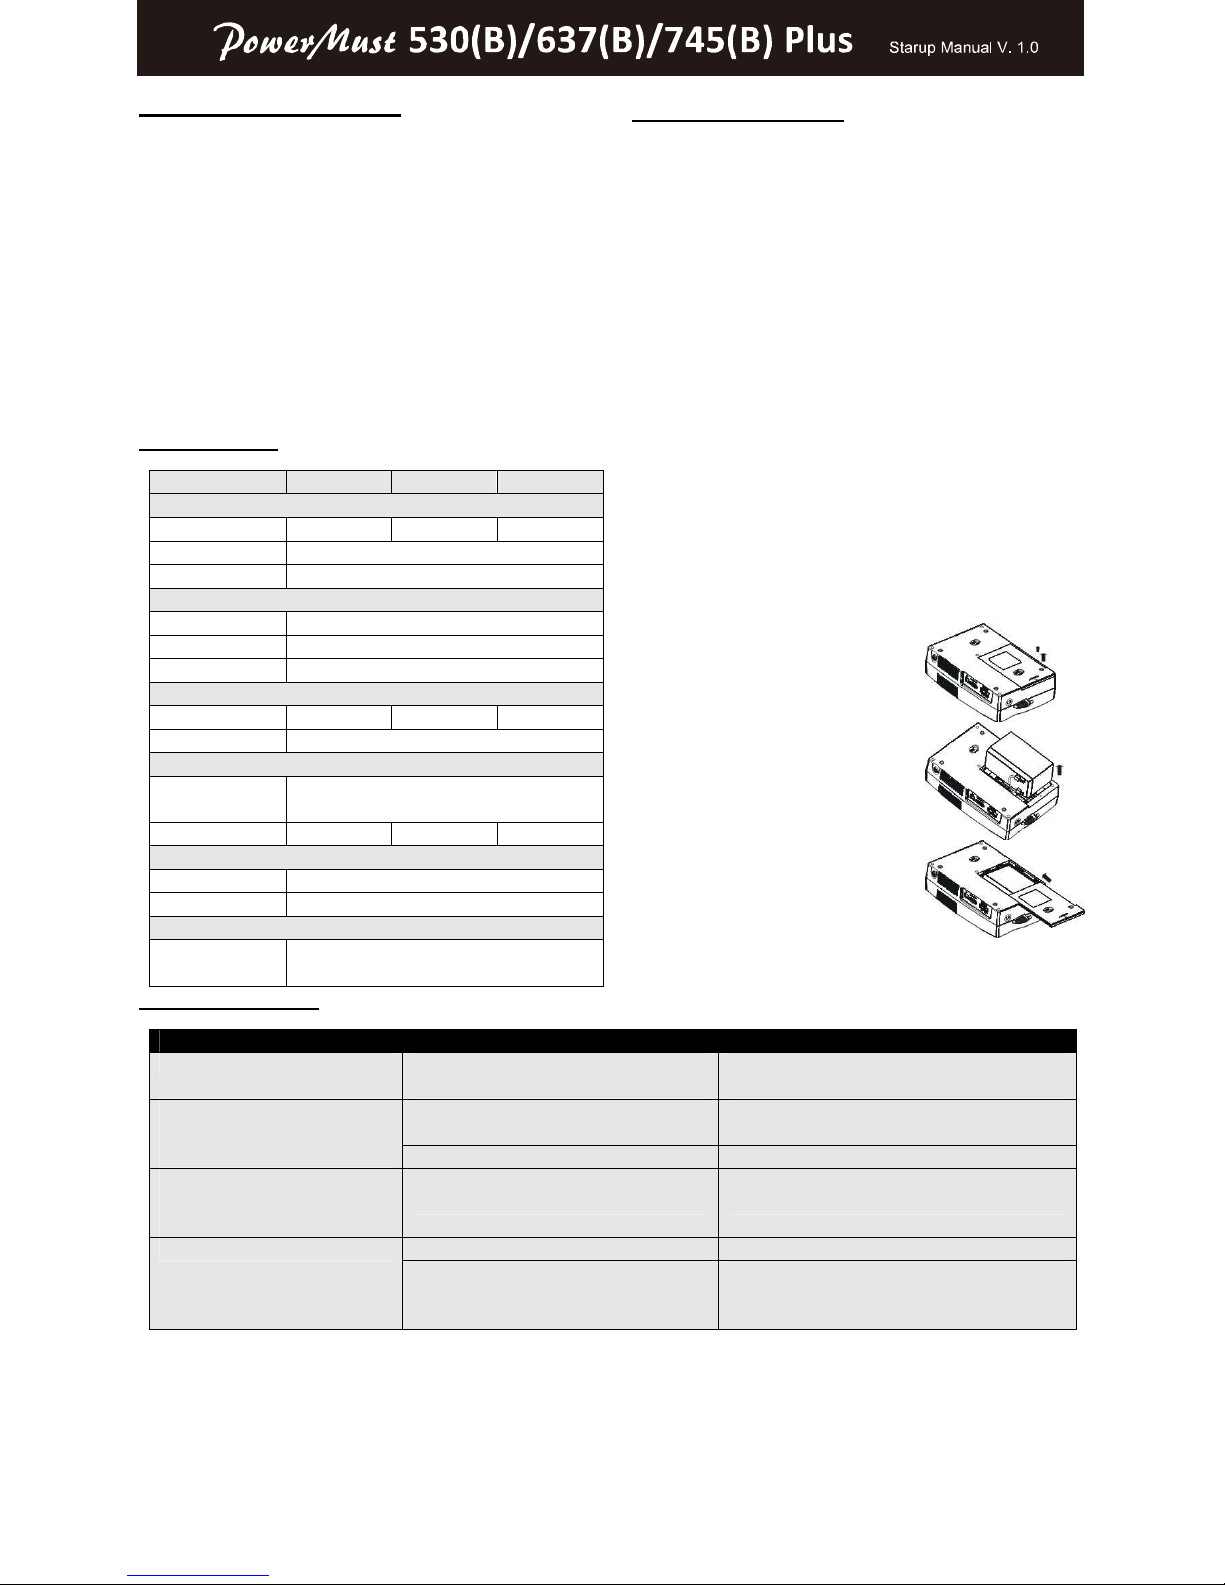
Simple steps to replace the battery:
TURN the unit over and Remove
the screws located on the bottom
of the UPS to open the battery
cover.
LIFT the battery out of the
compartment and disconnect the
two wires connecting it to the
UPS. Replace the same type of
batteries.
Slide the battery compartment
cover back to the battery housing.
9. Trouble Shooting
Problem Probable Cause Solution
The UPS will not turn on. Battery is disconnected or utility power is not
available at the wall outlet.
Connect the battery and ensure power is available
at the wall outlet.
UPS is not connected properly to the mains. Connect the UPS according to the installation
guide.
Yellow LED is flashing, and alarm
is heard intermittently. But mains is
normal.
Line breaker protected. Press the breaker.
UPS shutdown after a few
seconds and circuit breaker
protected.
UPS output is short-circuited, possibly due
to defective computer.
Disconnect your computer from the UPS and then
press the breaker.
Battery is not fully charged. Charge the unit at least 4 hours. Inadequate runtime
Battery is near the end of useful life. As a battery ages, the amount of runtime available
will decrease. You can replace the battery by
following the steps above.
 Loading...