

Muse Research Receptor 2+ User Manual

RECEPTOR Version 2.0.1
Software Update for Receptor 2 Products
Operating
Manual V1.0
February 20, 2014
www.museresearch.com

Table Of Contents
Welcome.......................................................................................................................3
Downloading, Installing, and Registering your Update.........................................................4
Getting Familiar - OVERVIEW...........................................................................................6
RECEPTOR Front panel New Button Layout.........................................................................7
New Terminology of V2.0.1..............,...............................................................................8
PLAY MODE and the SOUNDFINDER function......................................................................8
RECEPTOR Presets Overview ..........................................................................................10
Selecting "PLAY" Presets from the Front Panel..................................................................11
Selecting Individual Synth Channel Presets......................................................................13
Selecting Individual Audio Channel Presets ......................................................................15
Adjusting levels and panning with the MIX menu..............................................................17
Adding effects to the overall mix....................................................................................18
Saving the presets you've created..................................................................................19
Selecting presets when performing live...........................................................................19
Editing Synth and effects plugins / MIDI Learn.................................................................20
Exploring the RECEPTOR Graphical User Interface.............................................................21
The GUI: SoundFinder, Tags, and Presets........................................................................22
The GUI: Synth Channel Controls...................................................................................24
The GUI: Audio Channel Controls...................................................................................25
The GUI: Master Mix Bus Channel Controls......................................................................26
The GUI: SETUP Tab functions.......................................................................................29
The GUI: LIVE MODE feature.........................................................................................35
The GUI: Mini-Strips MODE feature.................................................................................37
The Backup and Restpore feature...................................................................................39
Software and End User License Agreement ......................................................................43
Acknowledgements.......................................................................................................44
Where to go for more info..............................................................................................45
2

RECEPTOR Version 2.0.1 Software Update Manual
Introduction
First off, thanks for being a RECEPTOR 2 owner. Whether you play for fun,gig at a local club or
Church, or tour the world performing for huge crowds, you understand how important it is to have
a stable, high-performance instrument with which to run your favorite virtual instruments and
effects.
Two years ago we released an entirely new version of our user-interface that employed an entirely
new paradigm of a virtual rack. We added the ability to drag and drop your virtual instruments
and effects into this rack, as well as introducing a new way to organize all your presets called
SoundFinder™ that seamless integrates front panel operation with the graphical user interface.
Last year we introduced an entirely new Receptor model called the VIP that introduced a new
feature called LIVE MODE™ that automatically loads the presets you will be performing with, and
dynamically loads new presets and unloads old presets as you move through your "virtual setlist"
that you create with SoundFinder. We followed up the VIP with two new models called the TRIO
and QU4TTRO that greatly enhance what you can do with a Receptor.
Now its your turn. We've taken much of the fantastic new technology we've developed for our
latest products and made it compatible in the RECEPTOR 2, RECEPTOR 2+, RECEPTOR 2 PRO,
RECEPTOR 2+ PRO, RECEPTOR 2 PRO MAX and RECEPTOR 2+ PRO MAX products. Now you can
take advantage of an entirely new user interface (in addition to the previous "mixer-style" interface
that remains an option for you to use) and all of the great new features we've developed over the
last couple of years.
The new Receptor 2.0.1 software update provides you with a huge number of features and benets.
Here are some of the many new features found in this release:
SoundFinder™ function lets you organize your presets using TAGS, a new, exible, •
searchable organization tool that is super easy to use from the front panel and super
powerful when used with the Graphical User Interface.
Over $900 of virtual instrument and effects software is included with this update, including •
the MusePlayer soundset, Camel Phat, Camel Space, MasterVerb 4, TrackPlug4, AAS player,
Alchemy Player, and many more, all "tagged" and ready to use with the new interface.
Simple drag and drop loading of virtual instruments and effects into the virtual rack. •
Fast and easy assignment of effects in "insert" or "send" mode. •
Convenient new Software Manager functionality for installing new plugins and presets. •
Powerful new LIVE MODE function for making live performance a breeze.•
Flexible "mini-strips" view for quick optimization of the view of the rack. •
Up to 16-slots in the rack for your virtual instruments or effects along with two main effects.•
MIDI Learn functionality on both the plugins as well as main mixer parameters.•
New MIDI lter page with "verbose" MIDI monitoring for diagnosis MIDI setups.•
Backup and Restore functionality for creating a backup drive, and performing incremental •
backups of your work.
Support for installing Native Instruments Komplete 9 or Komplete 9 Ultimate.•
Super-fast creation of splits between different synth channels•
Easy creation of new Tags with the abillity to drag and drop presets from one Tag to another. •
This manual will help you get your software update installed, registered, and get you started with
the exciting new features it offers.
3

Getting Started: Downloading your update
The Receptor 2.0.1 update is a paid update. Yeah, we know, every update up to now has been
free, but the fact is this update includes OVER $900 of SOFTWARE and with tons of new features,
if anything, its a bargain. We think you will agree once you start using it. Please note that if you
already own V2.0 software, which came pre-installed on all RECEPTOR 2 products starting in March
2012, then already have all the virtual instruments and effects installed on your unit and do not
need to install those plugins, just the OS software update is necessary.
To purchase the update (and you might have done this already) visit the www.plugorama.com
website, and simply add the Version 2.0.1 Software Update for RECEPTOR 2 into your shopping
cart. Go ahead and check out, and then check your email. You will be sent an invoice for your
purchase which contains the all important sofware authorization code, along with a link to download
the update. If you own V2.0 already, you will need to contact tech support for a special download
code to download and register the update.
Downloading the updates:
The V2.0.1 update consists of TWO les. The System Software (Receptor-update-2.01.20130725),
and the accompanying plugins and presets (Plugin-bundle-2.0.1-4). This plugin preset update
is huge (about 5GB), because it includes that $900 of sofware we talked about and over 4GB of
sampled sounds. You will need a reasonably fast internet connection to download the software.
If you don't have such a connection available, then contact the factory for an alternative to
downloading the software.
Once the software is downloaded, you will need to connect to the Receptor's hard drive using the
Receptor Remote / Muse Tools utility that came with your unit. If you have lost the disc or don't
have it installed on your computer, you can download it by visiting http://www.museresearch.com/
support/updates.php.
Assuming you have the Receptor Remote Control software installed on your computer, connect
Receptor so that both your computer and your Receptor has access to the internet.
NOTE You cannot use Crossover mode to authorize the software upgrade. Receptor must have a
direct connection to the Internet in order to validate the installation!
To connect your Receptor to your computer's network, do the following:
1. Attach a standard Ethernet patch cable to the Ethernet port of your Receptor.
2. Connect the other end of the cable to your computer network's switch or router or an open port
on your cable or DSL modem (if available).
3. Power up the Receptor and press the SETUP button. Turn the top knob until it says "TCP-IP
Setup". Turn the bottom knob until it says AUTO DHCP and then conrm that choice when it asks
"Are you sure?"
Note: Network settings require power cycling to take effect, so if you changed the network settings,
please turn off your Receptor and turn it on again to enter into AUTO DHCP mode.
4.After your Receptor reboots, verify that it is receiving a valid address by selectting SETUP and
going to the TCP/IP Address screen. Valid addresses typical start with 192 or 10. Invalid addresses
typically start with 169.
5.Once your Receptor is connected to your computer's network, you are reaady to connect to your
Receptor from your computer and install your new software.
4
Getting Started: Installing the software update
Now its time to install the software you have downloaded but it needs to be done in TWO steps. The
process is simple:
1. Turn on your Receptor, connect to the hard drive using Muse Remote Control.
2. Drag and drop the "Receptor-update" le you downloaded into "Drop Installers Here".
3. Run the installer from the SETUP menu in your Receptor.
4. Once the installer has run, and the system has rebooted, AUTHORIZE the software update (requires
connection to the Internet) before installing all the plugins and presets.
5. Once the update is authorized, drag and drop the "Plug-in Bundle" le you downloaded into the "Drop
Installers Here" folder, and run the installer from the SETUP page. That's all there is to it. .
Step-by Step Installation Instructions
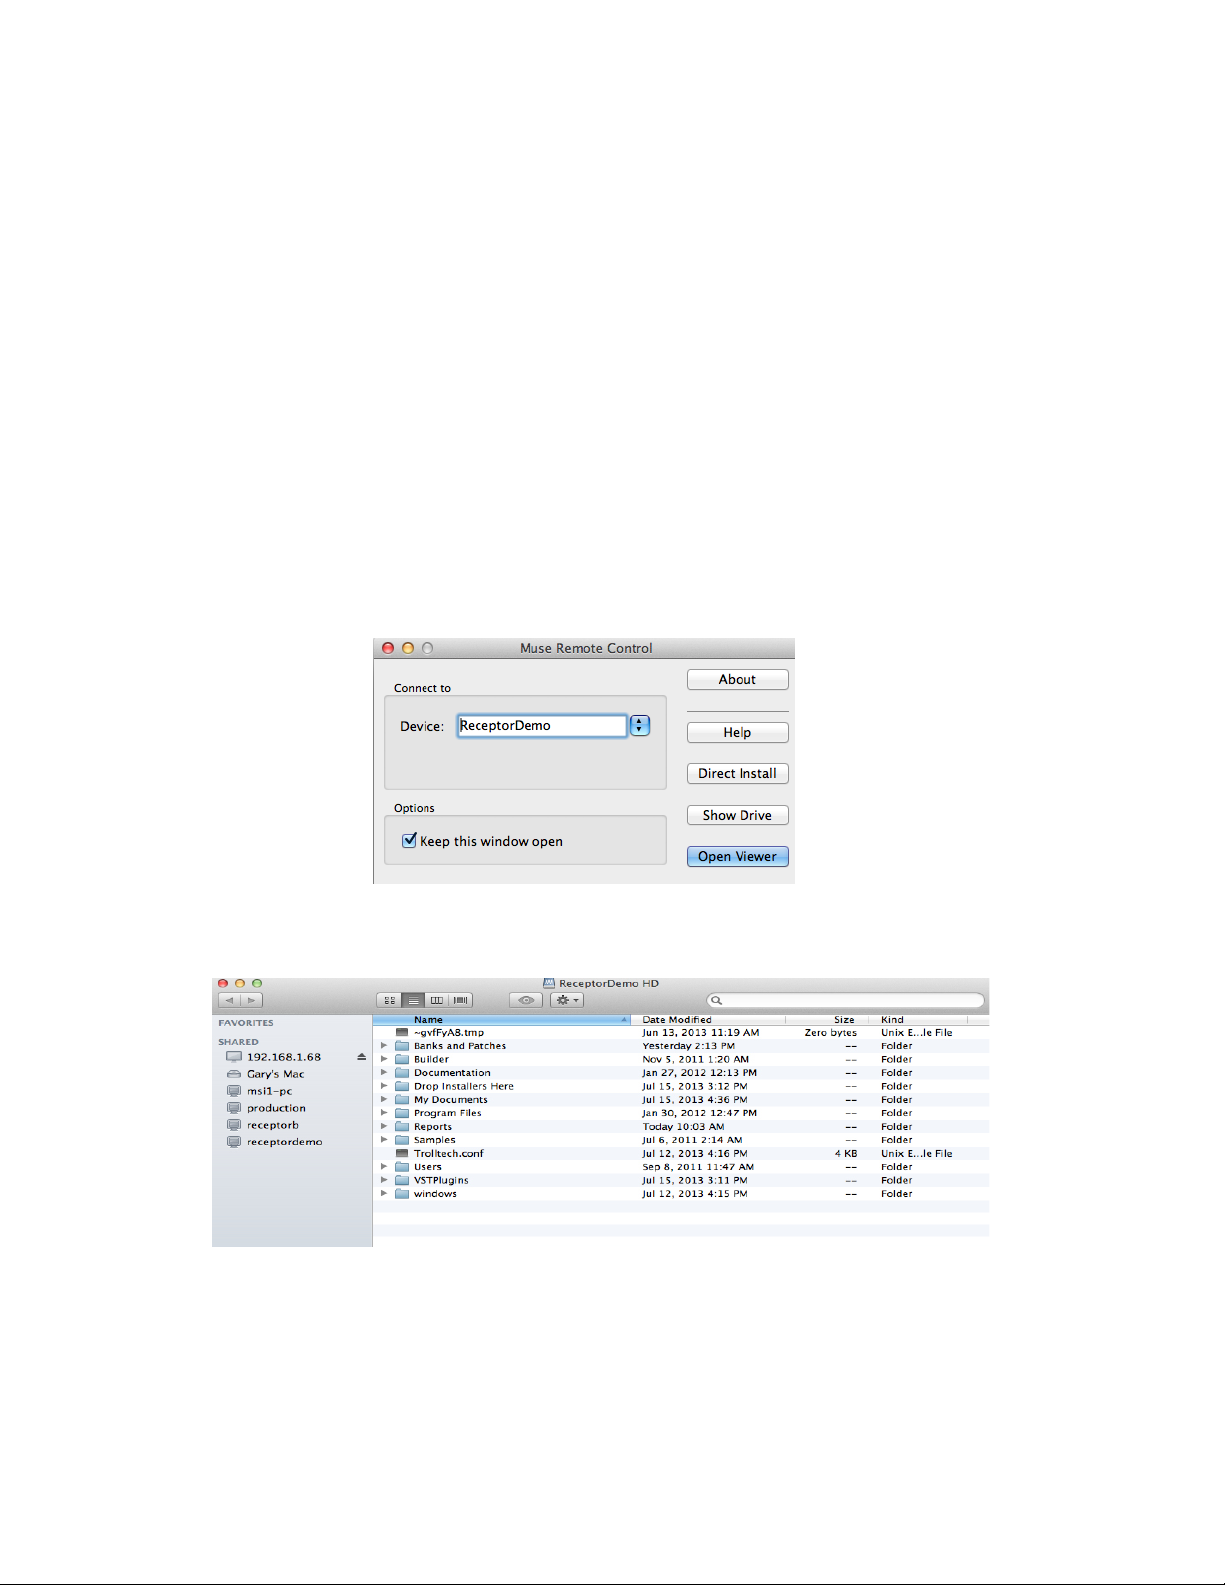
1. First off, we need to open up Receptor's hard drive. Assuming you've established connection between
your computer and the Receptor, we simply press on the HARD DRIVE button that is on the Muse Remote
Control window:
This will open up a window that has the contents of Receptor's hard drive:
2. Locate the folder called "Drop Installers Here" and then drag and drop the "Receptor Update" software
you downloaded into this folder.
5
Getting Started: Completing installation and registering
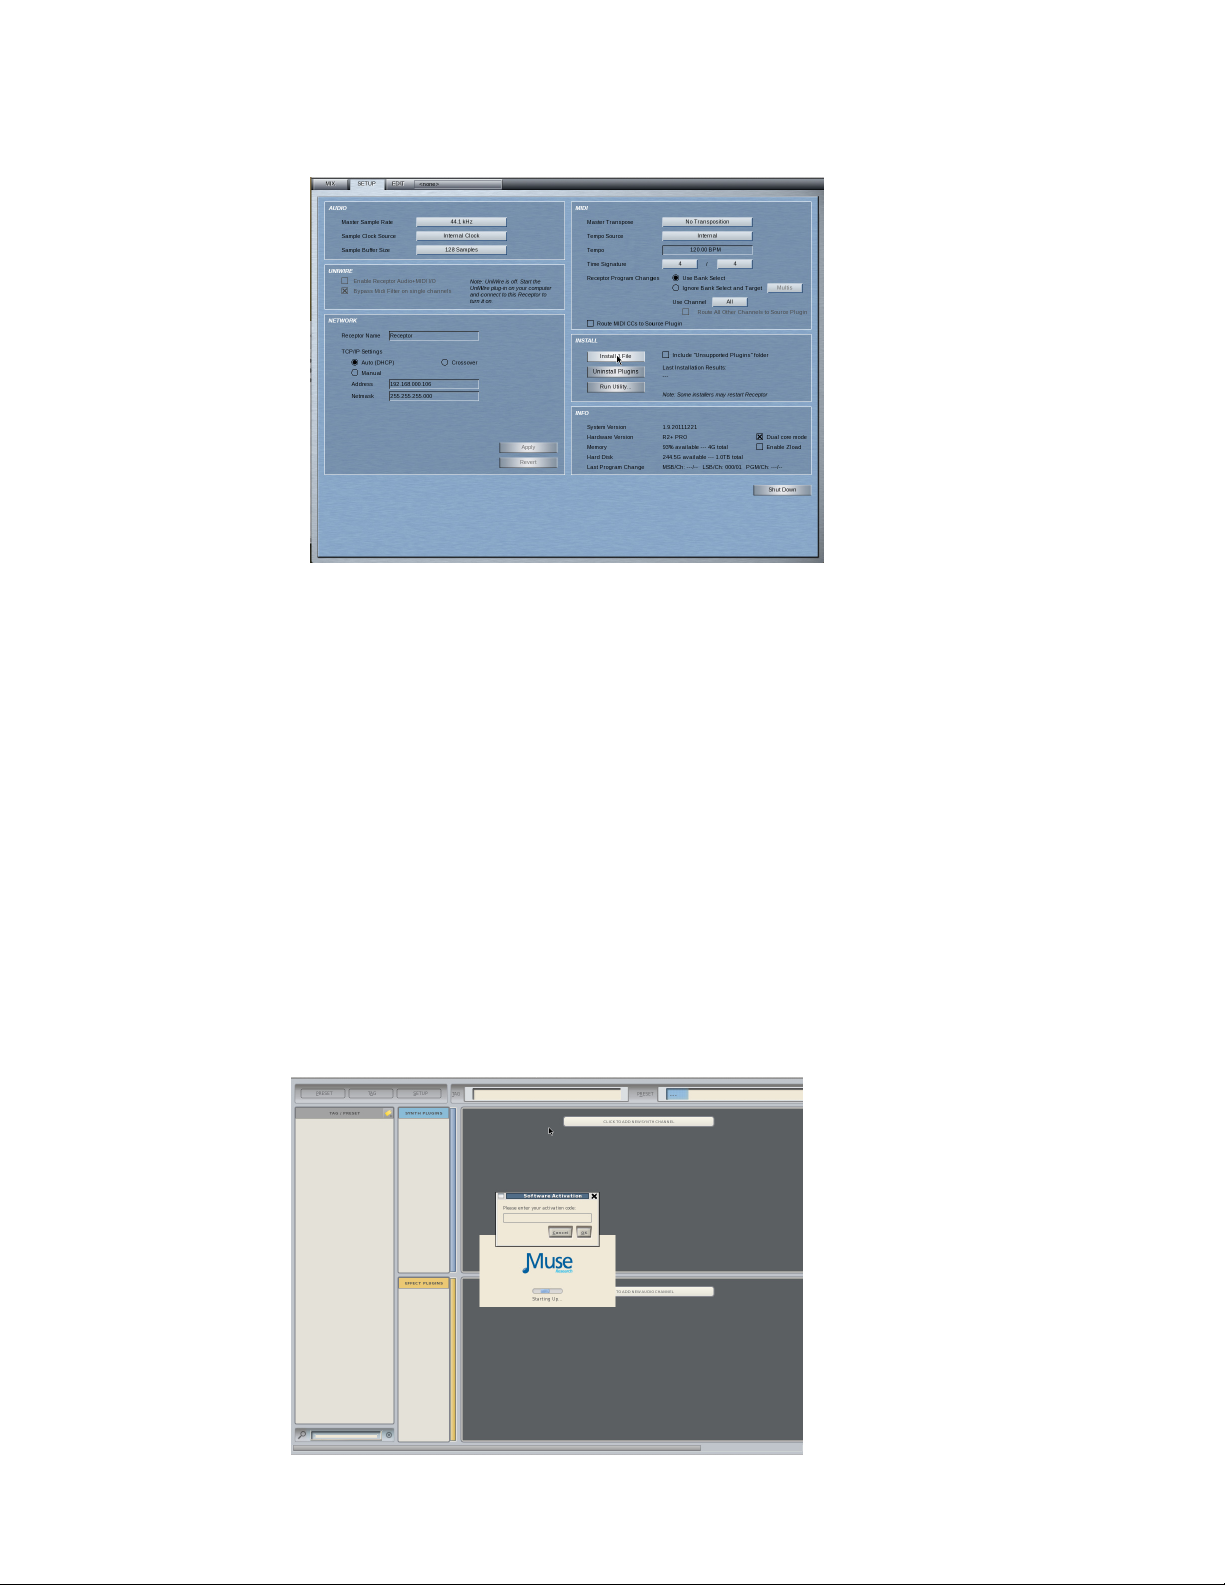
3. Now it's time to install the software by opening up the GUI and going to the SETUP page and selecting
"INSTALL 1 Files" from the INSTALL section of the Setup page.
The system will report its progress as it installs the software and reboot when it is nished installing the
software. When the software has been installed, and the system has rebooted, the front panel LCD screen
will come up with the following message:
Rack Mode Not Authorized
Push Knob to Change Modes
This is your indication that your software is installed and waiting for activation. To activate your software,
you need to enter in the software authorization code provided with your purchase receipt. Mixer mode still
works even with the Rack Mode unactivated. Press the knob to use mixer mode.
4. Authorize the software update before installing the plugins and presets using method A or B below:
A. Connect a mouse, monitor, and keyboard to the back of your Receptor. (HIGHLY RECOMMENDED)
Connect your mouse, monitor, and keyboard to the back of your Receptor. Type in the registration code
you were provided on your receipt into the window that says "Please Enter Your Activation Code" and
click on OK. The Receptor will authorize the software over the Internet, and the window will change to
"Starting Up... Loading Data". Once it is done, you are now able to use Receptor OS V2.0.1 (cue fanfare).
6
B. If an LCD is not available, connect a USB or PS2 keyboard for "blind" activation (Not recommended, but
possible)
If you do not have a mouse, monitor and keyboard attached, you can still authorize the software using
just a keyboard connected to the Receptor. This is done "blind" since you can't verify the authorization
code as you enter it (which is why we don't recommend this method). To authorize the software in
this manner, simply connect the USB or PS2 keyboard to the Receptor, verify that the LCD display of the
Receptor says "Rack Mode Not Authorized" and then CAREFULLY type in the authorization code EXACTLY
as it appears on your receipt. Hit "Return" on your keyboard when you have entered the code, and if the
LCD screen changes to "Starting up" then you have successfully authorized the system. If the screen
remains as it was, the code was wrong (or you are not connected to the Internet) and you can try to enter
the code again. You must type in the code exactly as it appears on the receipt, and you must hit
"return" after entering in all the digits.
5. Now that Version 2.0.1 is authorized, you are ready to install the plugins and presets into your system.
Repeat Steps 1,2, and 3 above using the le "Plugin-bundle", but there is no need to authorize
this le.
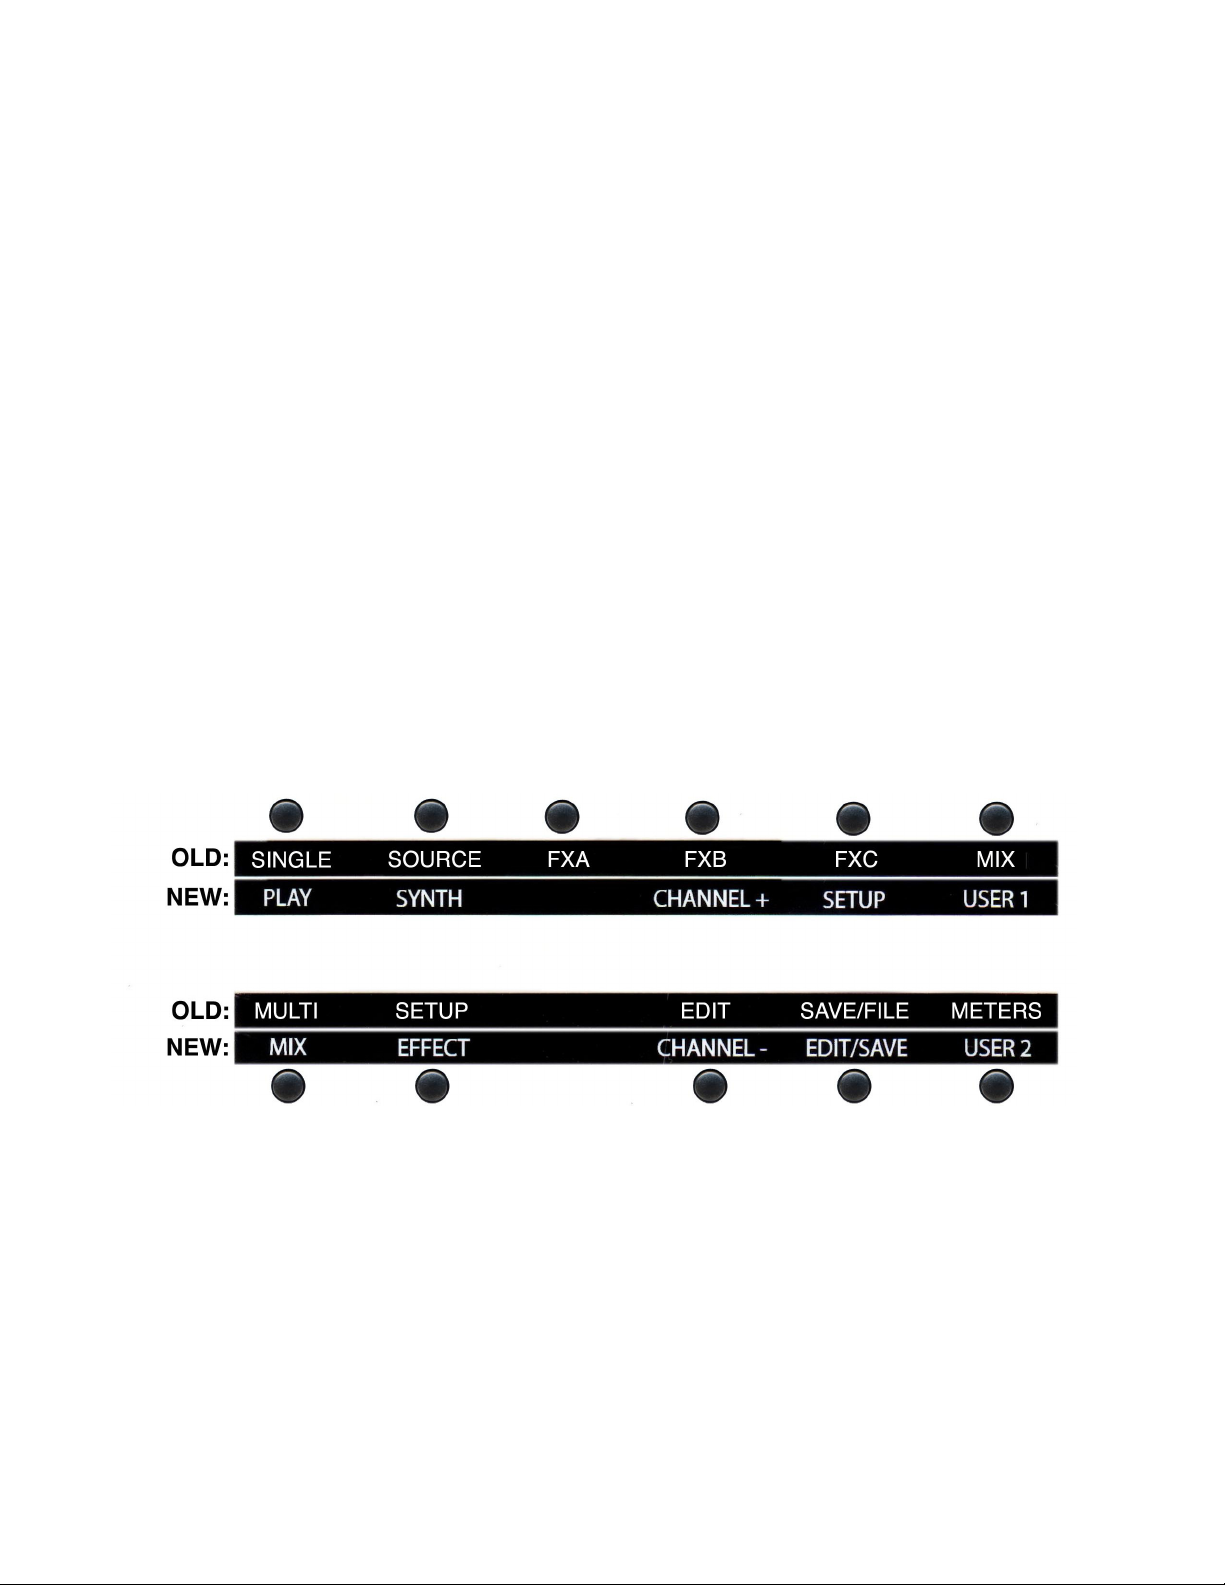
New Front Panel Button Layout for Version 2.0.1 Software
Your new software has a different button layout than before. This is because the new SOUNDFINDER
interface emphasizes the easy selection of presets on what is called the PLAY level. The PLAY level is
really the new Rack-mode interface's "home screen" which lets you select presets that you've created
without having to do anything but turn a knob and push the encoder to load it.
The simple turth is that this button layout is radically different than the mixer mode button layout, and
that's because the user-interfaces are completely different! You will be sent a sticker in the mail with the
new button layout that you can place on the front panel of your Receptor to make it easier to remember
the new button functions, but in the meantime, below is a chart that shows the new button names.
Its best not to compare the old and new, as they bear little resemblance to each other. If you want to keep
things in perspective, you can think of the button set "philosophies" this way:
Mixer Mode: Left hand side of buttons next to the encoders is for preset selection, either on the Single
Channel or Multi (entire mixer) level. The rest of the top row depicts the signal ow throught the mixer,
from source, through three effects and on to the mixer. Remainder of the bottom row is for editing,
saving/organizing presets, and viewing the meter function.
Rack Mode: Most common buttons, including the default PLAY MODE are on the left hand side next to
the encoders. Next column allows you to select the upper or lower section of the rack (top section is
Synths, bottom section is for effects). Next column lets you select the slot or channel for that synth or
effect, moving up or down through the virtual rack. Next button column is for general setup and editing
or saving of presets. Far right hand column of buttons are used to increment or decrement through any
presets in a Tag.
7

Getting Familiar with the V2.0.1 Terminology and Operation
Now that your software is now installed and registered, so its time to become acquainted with the
many new features and benets availble in the V2.0.1 software release!
FIRST... some denitions
PLAY: The PLAY mode is the super simple default mode that happens when the RECEPTOR powers
up. You can tell you are in PLAY mode because the PLAY button on the top left side of the button
eld is lit. PLAY mode is the easiest way to operate your RECEPTOR.
SoundFinder™ is a feature in RECEPTOR that lets you quickly and easily nd the right preset for
the instrument you have connected and/or the style of music you are making. SoundFinder works
whenever you are selecting presets either on a global (PLAY mode) basis, or when you are selecting
a sound or effect preset in a particular synth or effect channel. SoundFinder uses TAGS and
PRESETS to organize the sounds and effects in your RECEPTOR.
TAGS are the "categories" in SoundFinder that allow you to organize your sounds and effects. For
example, you might have an "Acoustic Pianos" TAG, that contains all of your various acoustic pianos
for playing with your MIDI keyboard. You might have an "Guitar Clean" Tag, which contains your
various clean-sounding amp models for playing your electric guitar. And you might have a "Vocal
FX" Tag that contains the appropriate vocal effects when using a microphone.
TAGS are also user-denable, meaning you can create your own categories using the graphical user
interface. This lets you create Tags to organize sounds in your own categories, or dene a set list,
where each preset in that particular Tag has all the sounds you are using for a particular gigl
Note: TAGS are organized into two primary main groups: sounds for playing with a MIDI keyboard,
and effects for processing the incoming audio from one of the inputs. Sounds are simply listed
with the description of the TAG (as in "Synth Pads"), and effects are preceeded by the letters FX
(as in "FX Electric Guitar"). Within the FX group you have different sub-categories depending on
what you are processing, like electric guitar, acoustic guitar, vocals, etc.
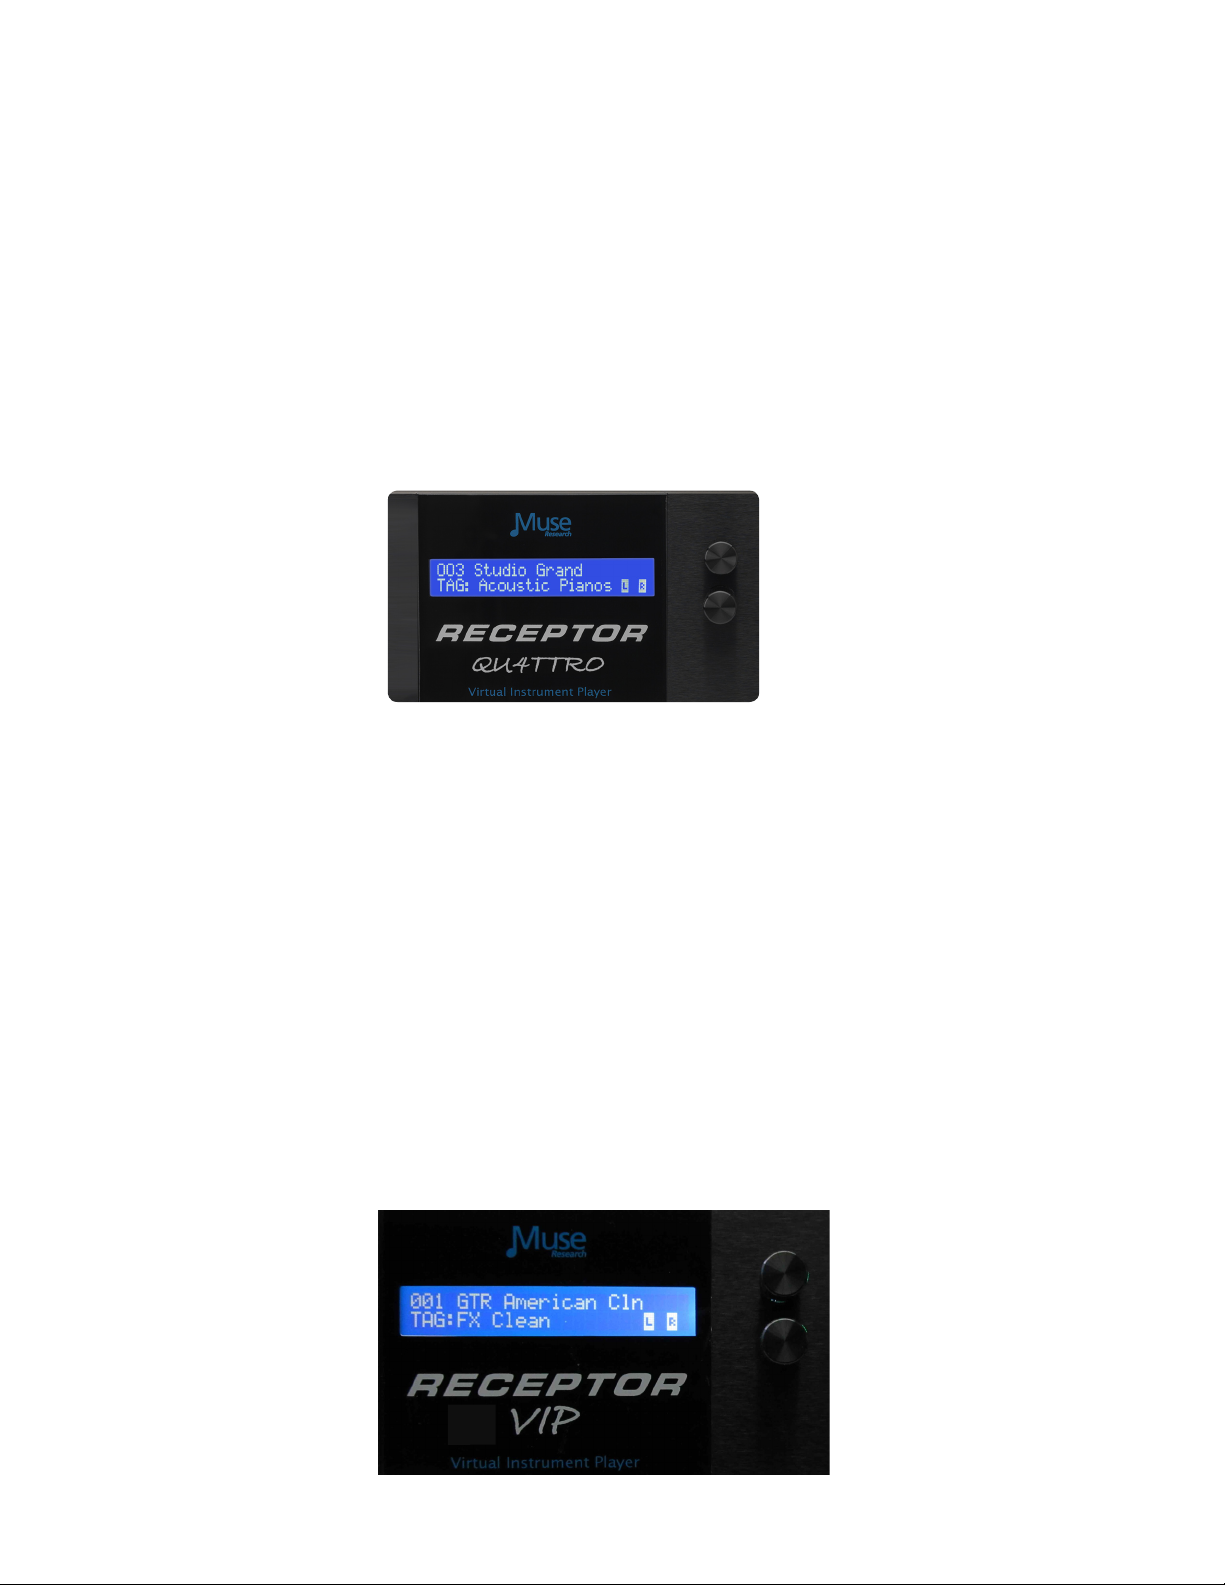
PRESETS are the unique sounds or effects that are in a particular Tag. Take for example the
"Acoustic Pianos" Tag, where you might have presets like "Concert Grand Piano", "Studio Grand",
"Rock Piano", "Jazz Piano", etc. These different piano presets can be selected by turning the top
knob.
Note: The same preset may be associated with several different Tags. For example, the "Rock
Piano" preset might reside in the "Acoustic Pianos" Tag, as well as the "Jam Night" Tag you created.
SoundFinder and PLAY Mode
SoundFinder preset selection works like this: Turn the BOTTOM knob to select a TAG (category)
you want to choose from, and then turn the TOP knob to select the sound or effect (preset) that
you want to perform with. Once you have selected the TAG and PRESET you are interested in,
simply press the bottom or top knob to load that particular sound or effect preset.
Note: A preset selected in PLAY mode affects all aspects of the RECEPTOR. So when you select
a PLAY preset, not only does the virtual instrument or effect associated with the preset load, but
it also congures the MIDI ports, input and output assignments, and mixer settings for the entire
unit. When you change to another preset, the entire RECEPTOR setup will change with that preset;
all channels, all synths and effects, and all input assignment and mix settings.
8

What's great about PLAY mode is that it makes it really easy to utlilize all the functionality of your
RECEPTOR without having to spend a bunch of time creating sounds. With SoundFinder in the PLAY
mode, even someone completely unfamiliar with software instruments and effects can use RECEPTOR.
As you become more comfortable with your RECEPTOR, you'll nd it valuable to know how the different
sounds and effects are organized so you can quickly nd the preset you are looking for.
You already know RECEPTOR does two basic things: it generates sounds using a MIDI keyboard or
controller, or it processes sounds coming from an audio input of some sort. Because of this, there are
two main categories of TAGs: SOUNDS and EFFECTS.
The Tags for SOUNDS simply state the type of sounds to expect in that particular Tag. For example, the
"Acoustic Pianos" Tag has all the various acoustic piano sounds, the "Strings" Tag has all sampled string
instruments inside it.
Here are some example Tags for the synth and sampled sounds:
TAG Name TAG contains: Expected Input:
TAG: Acoustic Guitars Synth / Sampled Sounds MIDI keyboard, controller or interface
TAG: Acoustic Pianos Synth / Sampled Sounds MIDI keyboard, controller or interface
TAG: Brass Synth / Sampled Sounds MIDI keyboard, controller or interface
TAG: Electric Basses Synth / Sampled Sounds MIDI keyboard, controller or interface
TAG: Electric Guitars Synth / Sampled Sounds MIDI keyboard, controller or interface
TAG: Electric Pianos Synth / Sampled Sounds MIDI keyboard, controller or interface
- etcetera -
The Tags for EFFECTS all have the letters FX before the effect category. Therefore, to hear a preset with
FX in the TAG name, you have to have a source of audio connected to the appropriate audio input.
In the realm of FX presets, different presets are designed for different sources of audio. You wouldn't
normally want to sing through a distorted guitar amp model, nor would you want to play guitar through
a vocal harmonizer. For this reason, presets are designed specically for use with different pre-assigned
inputs However, there are also "generic" effect categories for specic types of effects that let you indulge
your more experimental side, or simply get you to a specic effect regardless of the input source quickly.
Here are some example Tags for effects organized by the expected input source:
TAG Name TAG contains: Expected Input:
TAG: FX Acous Guitar Effects for Acous Gtrs Input 1 on AudioBox
TAG: FX Elec Guitar Effects for Acous Gtrs Input 1 on AudioBox
TAG: FX Vocals Effects for Vocalists Input 2 on AudioBox
TAG: FX PA Effects Effects for use with Mixers Inputs A/B on rear / Inputs 3 & 4 on AudioBox
TAG: FX Kbd + Gtr Synths + effects at once MIDI and Input 1 on AudioBox
Here are some example Tags for effects organized by effect type:
TAG Name TAG contains: Expected Input:
TAG: FX Reverb Reverb effects only Any Audio Input (varies by preset)
TAG: FX Spectral Chorus, anger, etc. effects Any Audio Input (varies by preset)
TAG: FX Dynamics Compression, limiter, gates Any Audio Input (varies by preset)
Inside the effects-specic Tags you'll nd presets organized by input type, i.e. inside the TAG: FX Reverb,
you might have GTR Large Hall, VOC Large Hall, and AUX Large Hall, where the GTR preset processes a
guitar on Input A, the VOC preset processes a microphone on Input B, and an AUX preset processes line
level inputs from an external device (keyboard, mixer, etc.) on inputs C & D.
9

The Different Types of Presets in your RECEPTOR
It is important to realize that there are not only different types of Tags for different purposes, but there
are also different "levels" of presets in your RECEPTOR.
The PLAY level has presets that control every aspect of your RECEPTOR. These presets control RECEPTOR
as a whole. The PLAY presets can contain several different virtual instruments and their MIDI settings,
different audio effects and their input assignments, and mixer settings along with the mixer effects, their
presets, and their routing conguration. One preset changes all aspects of the box in one go.
A PLAY preset can / will change any/all of the following:
The virtual instrument synths and effects that are loaded into one or more channels.
The presets in each of these virtual instruments or effects.
The MIDI settings for each and every synth, (MIDI channel, note and velocity range, etc.)
The MIDI controller assignments for every synthand MIDI mixer settings for each effect.
The direct output assignments for each synth channel
The input and direct output assignments for the audio channels.
The Mixer send effect levels for each synth or effect channel..
The relative gain levels and pan control positions for each channel and Master Mix slots.
The Main mixer channel effects that are loaded into the mixer area and their presets.
The routing and direct output conguration of those main master effects and Mix master outs.
So you can see from the list above that one preset in the PLAY mode controls A LOT of different things at
once. This is very handy when you want to explore the factory presets of your RECEPTOR.
However, there are times when you might want to build a preset from scratch, sound by sound or effect
by effect. For this reason, there is a "lower level" of presets that you can access on a channel-by-channel
basis. So just as there are PLAY level TAGS and PRESETS, there are also TAGS and PRESETS on the
"synth channel" and "effect channel" level. This lets you open up a synth or effect channel, and then
either select a preset by choosing a Tag of interest and loading a "factory" preset in to that channel.
SoundFinder let's you quickly and easily select from the hundreds of presets on your RECEPTOR using
convenient categories of sounds and effects, without regard to a particular plug-in's presets. However,
this also means that you are selecting presets from ALL of the synth or effect plugins that are installed on
your RECEPTOR.
There are times when you might want to use SoundFinder but restrict it so that it only displays the
presets of the one particular plugin you have loaded. This is done by clicking on the "Show only (name
of plugin) presets" check box beneath the TAG lter found on any synth or audio channel. So when you
open up an individual synth or effect channel you have the choice of using SoundFinder to ne the kind
of sound you are looking for, or you can turn off SoundFinder, focussing instead on the presets of the one
plug-in you have selected.
But wait... there's more. You can also bypass the SoundFinder function entirely and work only with the
factory presets of any plug-in by opening up the Preset selector on a channel, and then selecting the
BANK tab from the Tag / Preset listing for that particular virtual instrument or effect. You can also do
this from the front panel by selecting a particular synth or effect, pressing the EDIT button, and then
selecting the preset while in the EDIT mode.
IN SUMMARY: Each plug-in on RECEPTOR has its own Factory presets, stored in BANKS at the plug-in
level, just like a hardware synth or effects processor.
Those factory presets have been "tagged" so they can be used with the SoundFinder function, letting you
select presets by category, regardless of the particular plug-in being used. The SoundFinder function
works on both the "channel" level, as well as on the "global" (PLAY) level, the difference being the
channel level affects only one channel's settings, where as on the PLAY level it affects everything that
is happening in your RECEPTOR. In this sense, the PLAY level presets are like MULTIs or COMBIs in a
workstation keyboard.
10
Using PRESETs in the "PLAY" mode
Now that you have an overview of the different SoundFinder TAGs and what they provide, let's
move ahead and select a couple of presets.
RECEPTOR as a Synthesizer/Sound Module
1. Connect your keyboard to the MIDI input on the back of the unit, and connect the line outputs to
a stereo mixer, keyboard amplier, or a pair of amplied speakers.
2. Power up RECEPTOR (if it is not already on). If not already lit, press the PLAY button.
3. Turn the BOTTOM knob until the "TAG:Acoustic Pianos" is displayed. Press the BOTTOM knob to
select the preset called "Studio Grand".
4. Play your controller keyboard. Feel free to browse the other Acoustic Piano presets and enjoy the
high-quality sampled sounds. Simply turn the top knob and press the bottom knob to load another
preset.
5. Now lets change to a different Tag and browse another category. Turn the bottom knob until it
says "TAG: Electric Pianos". Turn the top knob to select the piano "Contrasted Rhodes." Press the
selector knob to load the sound. Enjoy the richness and detail of an electric piano that uses physical
modelling to create every nuance of the classic electric piano!
RECEPTOR as an Electric Guitar Effects Processor/Amp Modeller
1. Press the power button on your Receptor to power it up if it's not already on.
2. Plug your guitar in to Input jack on the front panel of the unit. Adjust the associated gain control
for minimum gain by turning it all the way counter-clockwise.
3. Go back to the LCD and turn the BOTTOM knob and select the Tag labeled "FX: Clean".
11

4. Play your guitar and adjust the Input 1 GAIN control on the AudioBox 1818 so that the red clip
light on the interface does not illuminate, even when playing loud.
5. Play your guitar and enjoy the incredibly realistic amp modeling provided by RECEPTOR.
Feel free to browse the other Guitar Effect presets; especially in some of the other TAGs since there
are many different sounds available to you. RECEPTOR's high-resolution oating point processing
and 24-bit audio output will makes your guitar sound amazing!
RECEPTOR as an Effects box
1. Start by plugging a line level audio source, like another keyboard, into the line inputs on the
back of your Receptor.
2. Power up RECEPTOR if its not already on. If it isn't already lit, press the PLAY button.
3. Turn the BOTTOM knob and select "TAG: FX: Keyboard". Select the preset "PianoChannelStrip"
using the top knob and push the knob to load. Play your keyboard and adjust the input level
control for Input 2 so that the clip light never illuminates.
Enjoy the high quality processing of your vocals. Feel free to browse the other effets processing
presets and enjoy how RECEPTOR enhances the sound of your other gear!.
4. Note that you can change the input assignments in yout Receptor by simply pressing EFFECT
button (with the new layout) and SETUP, which allows you to re-assign the effects to different
inputs.
You can also set up any of the input or output routings using the GUI of your RECEPTOR, described
later in this guide, which is easier to do if you have a lot of channels running.
12
Selecting Individual Synth Presets
PLAY mode lets you instantly select factory presets using SoundFinder, making RECEPTOR
incredibly simple to use. But what if you want to layer two sounds together, or make your own
custom preset consisting of different effects on different inputs? Well you can make your own
preset easily based on the presets that are in RECEPTOR right from the front panel. You can either
start by modifying an existing PLAY preset, or start with a blank preset and build your sound from
scratch.
To modify an existing PLAY preset, simply press the SYNTH or EFFECT buttons to select the sound
or effect you want to modify, use the CHANNEL + or CHANNEL - buttons to select the particular
sound or effect channel you want to change, and then select a different Preset for that particular
channel. This type of modication is particularly useful when you have a PLAY preset that has
both a keyboard sound and a vocal or guitar input effect working simultaneously, and you want to
change one sound or effect without changing the other.
You can also create a new preset, starting from scratch:
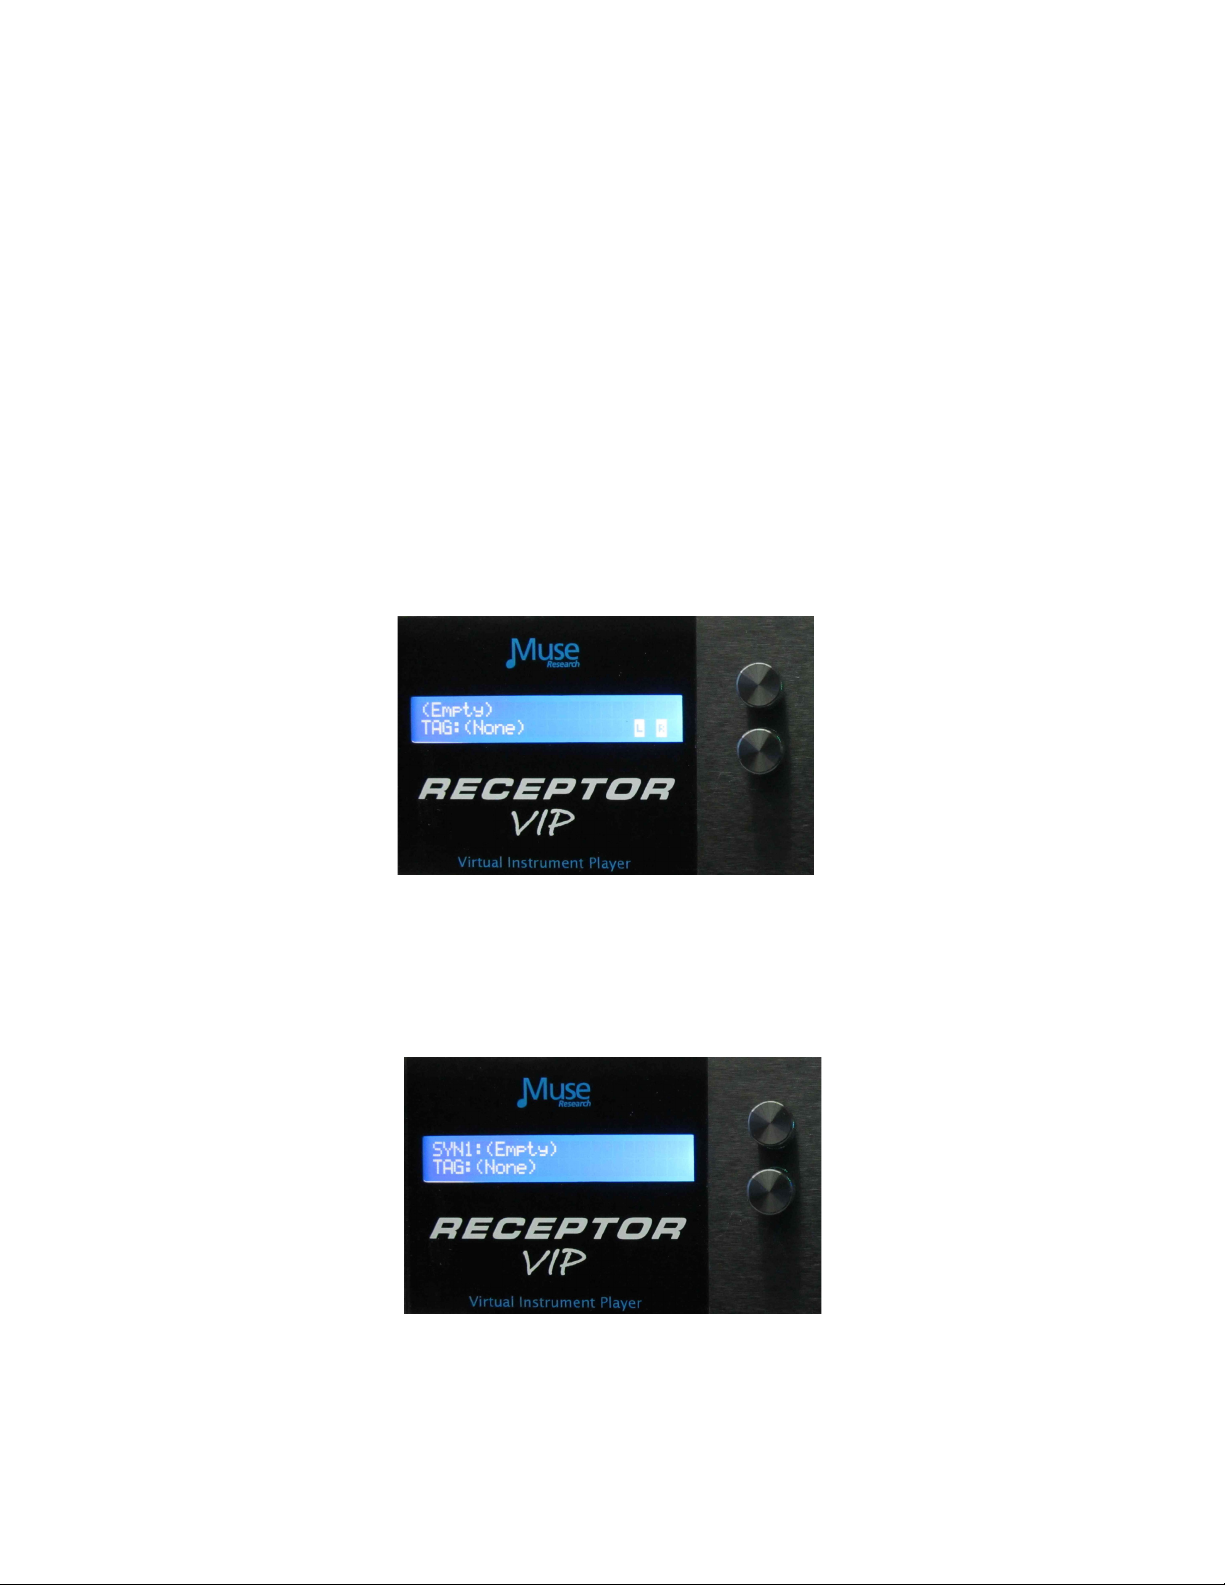
1. First, we want to clear out the system of any presets that are already loaded. To do this, turn the
bottom knob counter-clockwise until you see TAG: (None) and <New Empty Preset> as the preset
name. Press the encoder button to load this empty preset. The display will show this:
2. Now let's select a Synth preset into one the rst Synth channel. With the PLAY mode lit, we
press the SYNTH button. You'll notice it too says (Empty) and Tag: (none).
13
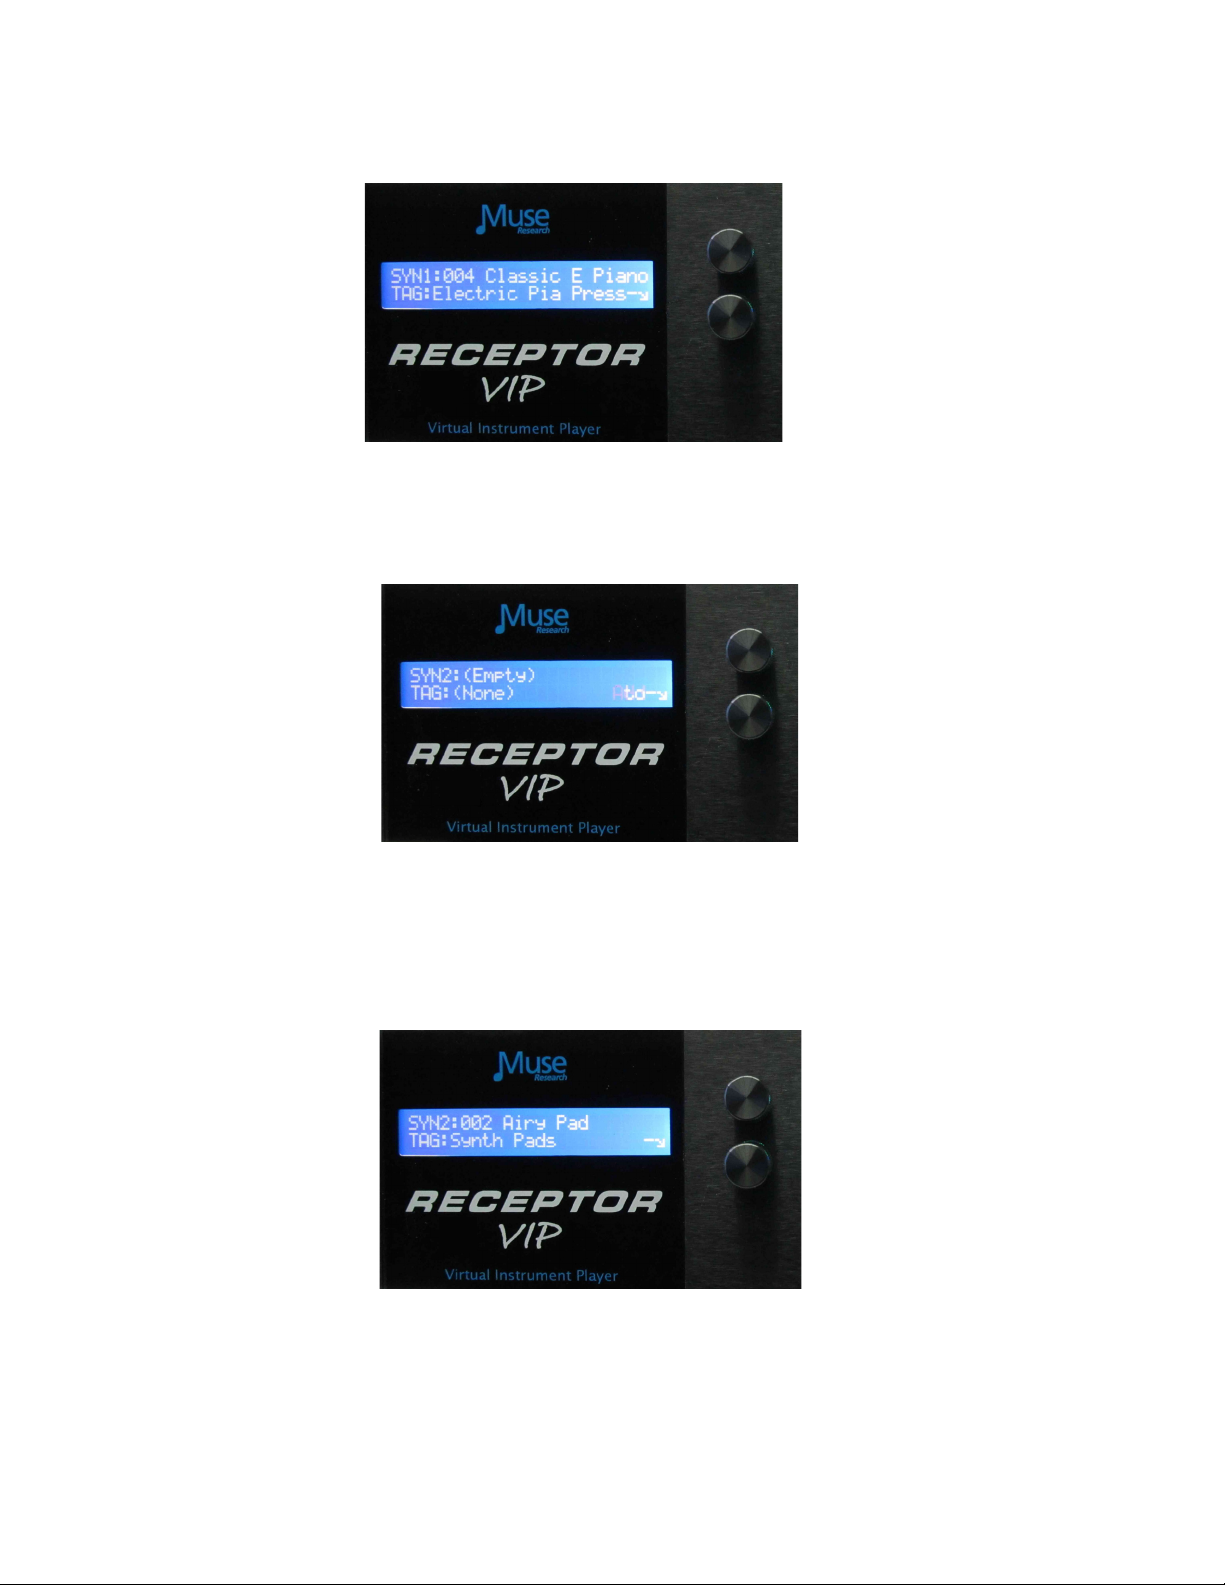
3. Now let's select a preset for this synth channel. Turn the bottom knob to nd the sound you
want. For example, let's choose an Electric Piano patch from the "TAG: Electric Pianos." Press the
knob to load it
3. Now we'll layer that with another sound—say a pad synthesizer. To do this, we press the
CHANNEL + button, and then the bottom encoder switch to add a new channel to what we already
have loaded.
4. Select the TAG and preset of interest, say "Airy Pad" from the "TAG:Synth Pads" category. Press
the knob to load this preset. Now press the "PLAY" button to hear both sounds combined together
What we've done is layered the Electric Piano and the Pad sounds together, which creates an
entirely new sound. You can adjust the volume of either sound by pressing MIX and selecting the
channel of interest to adjust the Electric Piano or Pad volume levels respectively.
NOTE: Whenever you have an individual channel or effect selected in PLAY mode, you will only hear
that channel. To hear the entire system, press the PLAY button to deselect the SYNTH or EFFECT
channel to hear the combined sound.
5. If you want to SAVE this combination of sounds, simply press and hold the EDIT button, and you
can save this preset to the USER TAG. Press the bottom encoder knob to save the preset with a
default name. You can rename it later in the Graphical User Interface if desired.
14
 Loading...