

Muse Research MusePlayer Operating Manual
MusePlayer Manual

Software & Sound License Agreement
Ultimate Sound Bank Software License Agreement
TO PERSONS WHO PURCHASE OR USE THIS PRODUCT:
carefully read all the terms and conditions of this software licensing
agreement. Using the software or this documentation indicates your
acceptance of the terms and conditions of that license agreement.
Ultimate Sound Bank. (“USB”) owns both this program and its documentation. Both the program and the documentation are protected
under applicable copyright, trademark, and trade-secret laws. Your
right to use the program and the documentation are limited to the
terms and conditions described in the license agreement.
Reminder of the terms of your license
This summary is not your license agreement, the entire agreement is
printed in the appendix of this manual. A license agreement is a
contract, and removing MuseBox from its packaging and powering it
on binds you and USB to all its terms and conditions. In the event
anything contained in this summary is incomplete or in conflict with
the actual license agreement, the terms of the complete agreement
prevail.
YOU MAY: (a) use the installed program only on MuseBox; (b) make
copies of the program solely for backup purposes. You must reproduce and include the copyright notice on a label on any backup
copy.
YOU MAY NOT: (a) distribute copies of the program or the documentation to others; (b) rent, lease or grant sublicenses or other rights to
the program; (c) provide use of the program in a computer service
business, network, time-sharing, multiple CPU or multiple user arrangement without the prior written consent of USB; (d) translate, adapt,
reverse engineer, decompile, disassemble, or otherwise alter the program or related documentation without the prior written consent of
USB.
THIS LIMITED WARRANTY AND RIGHT OF REPLACEMENT IS IN LIEU OF,
AND YOU HEREBY WAIVE, ANY AND ALL OTHER WARRANTIES, BOTH
EXPRESS AND IMPLIED, INCLUDING BUT NOT LIMITED TO WARRANTIES
OF MERCHANTABILITY AND FITNESS FOR A PARTICULAR PURPOSE.
THE LIABILITY OF USB PURSUANT TO THIS LIMITED WARRANTY SHALL
BE LIMITED TO THE REPLACEMENT OF THE DEFECTIVE DISK(S), AND IN
NO EVENT SHALL USB OR ITS SUPPLIERS, LICENSORS, OR AFFILIATES
BE LIABLE FOR INCIDENTAL OR CONSEQUENTIAL DAMAGES,
INCLUDING BUT NOT LIMITED TO LOSS OF USE, LOSS OF PROFITS,
LOSS OF DATA OR DATA BEING RENDERED INACCURATE, OR LOSSES
SUSTAINED BY THIRD PARTIES EVEN IF USB HAS BEEN ADVISED OF THE
POSSIBILITY OF SUCH DAMAGES. THIS WARRANTY GIVES YOU SPECIFIC
LEGAL RIGHTS WHICH MAY VARY FROM STATE TO STATE. SOME STATES
DO NOT ALLOW THE LIMITATION OR EXCLUSION OF LIABILITY FOR
CONSEQUENTIAL DAMAGES, SO THE ABOVE LIMITATION MAY NOT
APPLY TO YOU.
Copyright Notice
Copyright © 2001-2011 by Ultimate Sound Bank, Inc. All rights reserved. No part of this publication may be reproduced, transmitted,
transcribed, stored in a retrieval system, or translated into any human
or computer language, in any form or by any means whatsoever,
without express written permission of Ultimate Sound Bank.
Ultimate Sound Bank Sound License Agreement
DO NOT USE THIS PRODUCT UNTIL YOU HAVE READ THIS LICENSE
AGREEMENT. BY USING THIS PRODUCT YOU ACCEPT THIS LICENSE
AGREEMENT.
1. License Grant. USB grants to you, subject to the following terms and
conditions, a non-exclusive, nontransferable right to use each authorized copy of the installed product. The installed product is the property of USB and is licensed to you only for use in this music instrument. This license expressly forbids resale or other distribution of
these Sounds or their derivatives, either as they exist installed, or
mixed, combined, filtered, resynthesized, extracted or otherwise edited, for use as sounds, samples, multisamples, wavetables, programs
or patches in a sampler, microchip or any hardware or software sample playback device. You cannot sell them or give them away for use
by others in their sampling or sample playback devices.
2. Protection of Software. You agree to take all reasonable steps to
protect this product from unauthorized copying or use. You agree not
to modify the installed product to circumvent any method or means
adopted or implemented by USB to protect against or discourage the
unlicensed use of copying of the installed product.
3. Ownership. As between you and USB, ownership of, and title to, the
enclosed digitally recorded sounds (including any copies) will be held
by USB. Copies are provided to you only to enable you to exercise
your rights under the license. Only this license is purchased by you.
4. Term. This Agreement is effective from the date you open this package, and will remain in full force until termination. This Agreement
will terminate if you break any of the terms or conditions of this
Agreement. Upon termination you agree to destroy and return to USB
all copies of this product and accompanying documentation.
5. Restrictions. Except as expressly authorized in this Agreement, you
may not rent, sell, lease, sublicense, distribute, transfer, copy, reproduce, display, modify or time share the installed product or documentation.

Welcome / Table of contents
Thank You!
Congratulations for your purchase of MuseBox™, featuring
built-in sounds from Ultimate Sound Bank. We hope your new
instrument will become a valuable music-making partner for
you and for your musical endeavors.
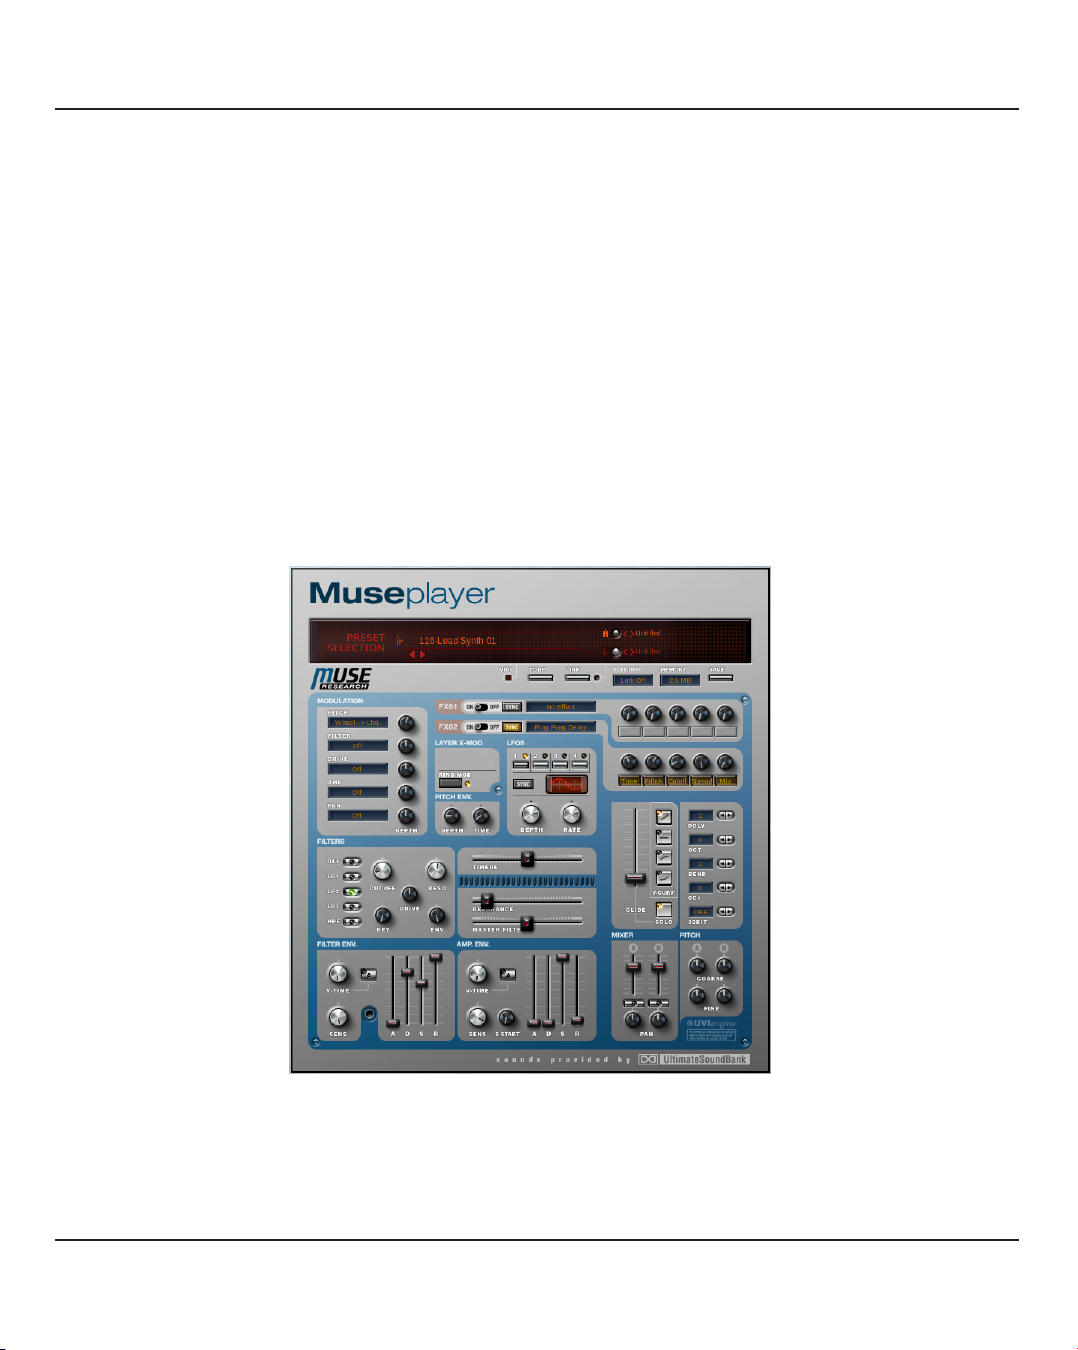
We are proud to feature MusePlayer in MuseBox. MusePlayer
is a software-based virtual instrument that is based on the UVI
Engine, and is a high-quality sampling synthesizer that is versatile and expandable. MusePlayer features a huge range of
sounds, simple access to the presets and great sound shaping
tools so you can create your own custom sounds quickly and
easily.
Thanks to the dual-layer architecture, you can mix and match
all the included sounds to create your own unique sounds.
This is the easiest way to create a fat bass sound, a rich pad,
etc. Each layer is complete with a great arsenal of synthesis
tools: multimode filter, LFOs, envelopes... And a global section
with more filters and LFOs.
- MusePlayer is Built-in and preauthorized.
- Two layers delivering amazing sonic capabilities
- Hundreds of high-quality presets
- Nearly 4 GB of sounds on the built-in solid state drive
- Next-Generation UVI-Engine
- Over-driven “analog” filters available on each layer
- Dual effect section with 29 algorithms
- New LFO waveforms
- LFOs & FX all have host tempo sync
- Ability to create and save your own presets
- Expandable with new sample sets on CF cards
1 Quick Start Guide.................................4-5
Powering up your MuseBox
Selecting a TAG
Selecting a PRESET
Creating your own custom Layer
Saving your new Sounds
4 Using MusePlayer ................6-7
A - Selecting Sounds
B - Dual Layer Architecture
C - MusePlayer ’s Parameters
D- Optimization
E- A few more tips...
6 Interface Overview .............14 - 20
7 MIDI Continuous Controllers Table .. 21
9 General FAQ . . . . . . . . . . . . . . . . . . . . 22 - 23
Award winning technology
MusePlayer is powered by the UVI Engine™, a modern tool
that runs MusePlayer but is invisible to you. The main asset of
the UVI-Engine is the sound quality, thanks to the use of
32-bit floating point proessing throughout its architecture.
Lots of virtual instruments say they sound great, but by simply
doing some critical listening on your own, you'll find in the
case of the UVI Engine, its actually true!
10 Troubleshooting & Support .....24 - 25
11 Credits & Thanks ....................26
English 3

Quickstart Guide
MusePlayer is a virtual instrument powered by the UVI engine
that is built-in and pre-authorized on your MuseBox, ready to
make music immediately. MusePlayer features a comprehensive set of preset sounds that cover nearly any musical situation. By exploring some of the programming capabilities of
this powerful piece of software, you can take these preset
sounds and customize them further to your liking, or come up
with completely new sounds of your own.
The MusePlayer automatically loads when you power on your
MuseBox. The sounds appear as PRESETS organized under
different TAGs, which are definable categories that let you
organize your sounds and presets however you wish.
The Factory Presets can easily be navigated by pressing the
PLAY button on the front panel, and then selecting a TAG of
interest using the top knob, and then selecting the PRESET of
interest by turning the bottom knob. Presets load when selected by pressing the buttom knob to load.
Factory Presets are permanently stored in your MuseBox, but
each preset can be individually edited and stored as USER
presets using the EDIT functions on your MuseBox. The EDIT
functions make the eight most common parameters in
MusePlayer available for adjustment from the front panel,
such as Envelope Attack, Decay, Sustain, and Release, or changing the Filter characteristics. This gives you basic control
over the sounds without requiring you to view the Graphical
User Interface (GUI) of MusePlayer.
However, by connecting a computer monitor or networking
your MuseBox to a computer and running the MuseTools
software to view the GUI remotely, you have COMPLETE
access to the extensive editing capabilities within the
MusePlayer instrument.
Once you've edited or created a new sound inside MusePlayer,
you can store the sound by Saving it in MusePlayer, then "tagging" it so it can be viewed for instant selection in the PLAY
mode of MuseBox.
MusePlayer features a diverse set of presets that are ready to
conquer any musical challenge you face. Pianos, guitars,
drums, synths, pads, strings.... they're all here, categorized in a
straight-forward manner that will make it easy to find the
sound that is just right for your musical needs. This manual
tells you about the MusePlayer functionality and how to program the sounds you have pre-installed on your MuseBox. .
For more information about using MuseBox, consult the
MuseBox manual. The remainder of this document focusses
on using the MusePlayer GUI and the functionality of this
powerful virtual instrument.
Getting Started with MusePlayer
MusePlayer is remarkably easy to use. Built on the UVI sample
synthesis engine that is used in virtual instruments like MOTU
Mach V, Spectasonics Atmosphere and Trilogy, and more, the
MusePlayer virtual instrument sounds great and is very efficient. Once you are familiar with the basic layout of the instrument, you'll be able to modify and make your own sounds
to your heart's content. Here's how to achieve immediate
gratification with your MuseBox using MusePlayer:
1. Connect your MIDI controller
Connect your controller to the MIDI input or to a USB input on
the back of your MuseBox.
2. Turn on your MuseBox
Turning on the power is done by pressing the button in the
top-right hand corner once. The unit will power on and load
the patch that was saved the last time it was shut down.
3. Press the PLAY button to enter PLAY mode.
Play mode gets MuseBox ready to play preests instantly.
MuseBox powers up into PLAY mode, but if you are using any
of the other functions, press the PLAY button to enter the
PLAY mode.
4. Select a TAG of interest
There are a large number of TAGS pre-defined in your
MuseBox. To browse through the TAGs, simply turn the bottom knob until you see a category of interest.
5. Select a Preset from the TAG
Once you've selected a TAG of interest, then turn the top knob
to select a preset in that particular TAG. Press the bottom
knob to load the sound and enjoy!
6. Start Playing
You will now hear the preset you have selected if you have
attached a MIDI or USB keyboard to your MuseBox!
English 4

Quickstart Guide
If you don't hear any sound, check the following:
•VerifyyouhaveconnectedyourMIDIkeyboardtotheMIDI
input on the back of your Musebox, or into a USB port on the
back of your Musebox you are using a USB keyboard with your
MuseBox. Note that MuseBox will ONLY work with devicecompliant USB MIDI devices; not all USB MIDI devices are
device-compliant, so you might need to connect using a standard 5-Pin DIN MIDI cable with some equipment.
•Makesureyourkeyboardorcontrollerispoweredup.
•VerifythatMuseBoxisreceivingMIDIfromyourkeyboard.
This is easily done by looking for the "eighth note" on the
front panel LCD next to the Left and Right level meters. If you
see the note appear, but still don't hear a sound, you can
verify what channel the keyboard is sending on by pressing
the SETUP button. This will display the MIDI Monitor, and you
will see the message "Listening..." until a MIDI message is
received. Once a MIDI message is received, it will display the
channel, the note number, and the velocity value. MuseBox is
setup to receive MIDI in OMNI mode which means it listens on
all channels, but you can over-ride this setting and make it
listen only to one channel. If you have changed the factory
settings for MIDI reception, then make sure you are sending
MIDI on the channel that MuseBox is expecting to receive.
•Verifythatthereisaudioactivitybyviewingthefrontpanel
VU meters on your MuseBox LCD. If you don't see any meter
action, then it is possible that the individual channel volume
is turned down inside your MuseBox.
•CheckthatthemastervolumecontrolonMuseBoxisturned all the way up, and you have either a pair of headphones
connected to the front panel, or a mixer or a pair of amplified
speakers are connected to the LINE OUTPUTS of the
MuseBox.
•Verifythattheampormixeristurnedonandconfiguredto
receive audio, and the input level is set to a nominal listening
level.
Important Information About Presets.
When you turn on your MuseBox and press the PLAY button,
you are accessing the PLAY level presets. Those presets
include all of the sounds available in the MusePlayer virtual
instrument, AS WELL AS ALL THE OTHER VIRTUAL INSTRUMENTS
AND EFFECTS IN YOUR MUSEBOX. In some cases, a PLAY level
preset might consist of MusePlayer only. Sometimes it has
both MusePlayer and a separate effect loaded for an enhanced sound. Sometimes a PLAY preset might have MuseBox
running in parallel with aneffect processing an audio input so
that you can sing and play keyboards at the same time.
This manual covers only the editing and creation of MusePlayer
presets, and PLAY level presets. Please keep in mind that there
are several different virtual instruments inside your MuseBox,
and you might have to open up the GUI of a different virtual
instrument to create or modify some PLAY level presets. For
more information on creating and editing PLAY level presets,
please see your MuseBox Owners Manual.
Presets and TAGS in MusePlayer
Another important thing to understand is that MusePlayer
Factory Presets can are organized in two ways: in Factory
BANK preset mode, and in TAG preset mode. The Factory
BANK of presets are available when you open up the Graphical
User Interface of MusePlayer and select presets with your
Mouse. You can also select presets with MusePlayer loaded
on one of the two synth channels, and then use your mouse
to select presets using the drop-down preset selector and the
BANK button selected. And finally, you can access the Factory
BANK presets from the front panel of your MuseBox when you
have MusePlayer loaded on one of the synth channels and the
EDIT mode is selected.
The Factory Presets are also TAGGED in MuseBox, so you can
use your mouse to select presets using the drop-down preset
selector and the TAG button selected when MusePlayer loaded on one of the two synth channels.
Although this sounds complicated, it isn't: This function simply allows you to select presets alphabetically (using BANK
mode) or by sound category (using TAG mode).
It is important to relalize that MuseBox has two different
"levels" of presets, and two different "types" of presets.
English 5

Using MusePlayer
tisampled preset, you have access to two “layers” that you can
control either individually or grouped. We’ve called the layers
“programs” because in each layer you may load what sounds
like a full-featured instrument. The large A and B buttons
switch the interface panel to control each program (layer)
independently. For each program you may set the filters,
modulations and other parameters independently. You can
also use the “link” switch to allow editing of two programs at
once, which saves time when editing layered sounds.
C - MusePlayer: Parameters
Some Parameters are independent in each layer, while some
other are common to both. To simplify things the background
shade of gray is slightly different for the common parameters. This will be visible on your computer screen.
A - Selecting Sounds
Selecting sounds is very easy : click on the Preset name display and a pop-up directory will appear with the full listing of
MusePlayer ’s sounds organized by category and sub category. Click on the preset name to load the sound.
You can also use the left and right arrow buttons to select
sounds incrementally, moving up and down in the directory
list. This is useful when you are already in the desired subdirectory and want to listen to the next available preset.
The two smaller displays to the right of the preset name display are the Program (or layer) displays. Clicking these displays opens the same directory as the presets, but also shows
the individual layer names that make up each preset, allowing
you to quickly select and build your own presets.
You’ll also find left and right arrows buttons there to select
programs incrementally.
Please take a look at the Sounds listing
for an in-depth look at the presets.
B - Dual Layer Architecture
One of the major features of MusePlayer is the dual layer
architecture. Instead of playing and controlling only one mul-
A- Parameters that can be independent in each layer:
• Eachlayer hasitsownLevel,Pan, PitchcoarseandPitch
Fine knob. This allows you to re-balance the sound, try variations in the mix and the sound.
• Filters:youcanapply onefilterto eachlayerselecting it
from three LPF (Low pass Filter) and one HPF (High Pass
Filter)
• LFO:fourLFOs(LowFrequencyOscillators)canbeusedas
modulation sources for four destinations : Pitch, Filter,
Amplifier, Drive and Pan. Two are specific to each layer and
two are common, although the settings can be different.
• TwoADSRenvelopes:
1. Amplifier Envelope: Controls the nature of the volume
of the sound (Attack, Decay, Sustain, Release).
2. Filter Envelope: Controls the nature of the tone of the
sound by changing how the filter acts on the sound through
time. .
Both envelopes feature a "V-time" knob (applicable to Attack
or Decay) and a "SENS" knob, the Amplifier envelope adds
"START" time knob that changes when the sound starts
playing in the sample itself.
• Pitchenvelopewithtwoparameters:DEPTHandTIME.
English 6

B- Common parameters to both layers :
•Velocitycurve, POLY(phony) setting, OCT(ave), BEND & 32
-bit mode.
• The Master Filter and its resonance slider are common to
both layers.
Using MusePlayer
3. Enable 32-bit mode
This feature allows you to save about 15% of CPU power by
using more RAM. Depending on how many sounds you have
loaded up in your MuseBox, this can provide the benefit of
better sound with less CPU usage.
• The effects settings (FX1 and FX2) are also common to
both layers.
• Eachlayerhas aMUTE button, that mutes the corresponding layer and "solos" other one. When mute is selected, the
LINK function is disabled and the position of the switch beside
it is set on the other layer.
• Twoscreensarededicatedtodisplayingvalues:
EDIT: shows the value of the editing currently applied to a
parameter or if no editing has been done it shows the mode
MusePlayer is in : Dual (two layers) or Single (one layer)
MEM: shows the amount of RAM memory used by the
preset.
• MIDI indicator: the round logo gets animated whenever
the plug-in receives MIDI.
D - Optimization
Using these tips can cut in two the CPU load of your plugin!
1. Disable the effects
Like all good sounding software effects, ours make the CPU
work harder. If you don’t need them on the preset you’ve loaded, turn it off. To do this, turn the ON/OFF knob next to the
FX Sync switch to 0FF .
2 Reduce the polyphony
Unused voices do use a little CPU, especially at higher settings. A manual setting of 40 voices for a part that really uses
16 voices wastes a lot of CPU. Evaluate how many voices your
MIDI part uses, and set the polyphony settings accordingly.
Another great way of setting it is to lower the setting and listen to missing notes: when you hear some, go back up a bit
and you’re set!
4. Disable the unused filters
Disable the multimode filter when not in use. Do this by clicking on “off” in the filter section of each layer. Do the same
with the Master Filter by placing the cutoff at its center detent
position. (Command-click or control-click on Mac, alt click on
PC)
5. Lower the release time of the amplitude Envelope
Make sure that notes don’t continue playing because of a long
release time. This is especially effective for parts played with
sustain pedal, as it may be that many notes continue playing
almost inaudibly, if you’ve changed the ADSR shape.
E - A few more tips...
1. Link
Use the link function to quickly adjust the overall attack and
release : turn the link on and change the Amp envelope attack
and release parameters.
2. Modwheel Morphing & Layering
Feel free to experiment with modulation to create “crossfade
morph” between two layers using mod wheel or other controlers assigned to full amp modulation ( just set one layer mod
positive and the other layer mod negative)
Try using the mod wheel to add a second layer to a sound by
assigning it to positive amp mod; this is very useful to add
bass range, filter, ... sound to a preset or to add warmth at your
convenience.
English 7
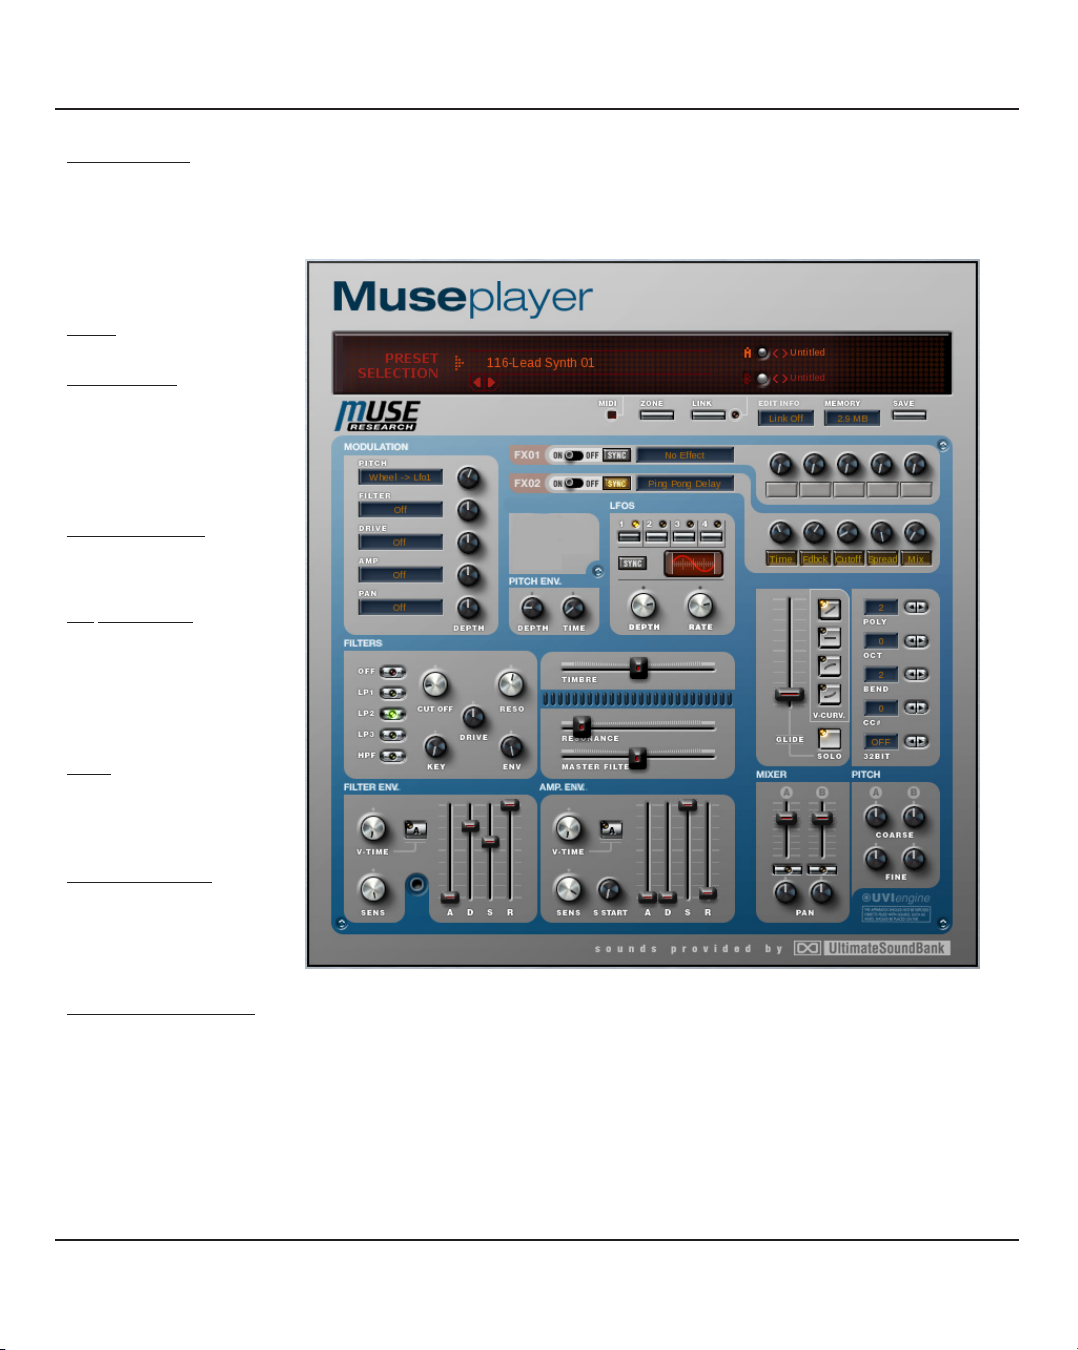
Interface Overview
General controls
A1. Preset selection arrows
A2. Preset selection Menu
A3. Program selection Arrows/Menus
A4. Link & layer display switches
A5. The edit display
A6. Memory use display
A7. Save Switch
Effects
B1.Modulation
- Pitch modulation
- Filter modulation
- Drive modulation
- Amp. modulation
- Pan modulation
B2. Pitch Envelope
- Pitch Env. Depth
- Pitch Env. Time
B3. LFOs section
- LFO selection switch
- Sync Switch
- LFO Waveform Display
/Selection Menu
- LFO Depth/Rate Knobs
F1. FX#1 ON/OFF and Sync switches
F2. FX#1 Parameter knobs +Parameter
names
A2
A1
B1
F1
B3
B2
C1
C2
C3
G1. - Glide Slider/Solo Switch/Velocity
Curves
G2. - Polyphony Setting / Octave
Transposition / Pitch Bend Range / CC#
/ 32-Bit switch
A3
A4
A5
A6
A7
F2
G1
G2
Filters
C1. Multimode filter
C2. Timbre modulation
C3. Master filter
D1- Filter Envelope.
- Filter envelope (Attack,
Decay, Sustain, Release)
- Velocity time knob &
A/D switch
- Velocity Sensitivity
D2- Amplitude Envelope.
- Amp envelope (Attack, Decay, Sustain,
Release)
- Velocity time knob & A/D switch
- Velocity Sensitivity
D3. Sample Start
-Adjusts the start point of a sample
English 8
D1
H1. Mixer (Level/Pan/Mute)
H2. Coarse and Fine Pitch Knobs
I1. UVI Engine Logo
D2
D3
H1
H2
I1
 Loading...