

Page 1

www.multitone.com
Multitone Electronics plc
EkoTek Pager
Quick User Guide
Page 2
9261-9210 EKOPAG/QUG/Iss. 4 2 of 14
EU Declaration of Conformity In Accordance With Article 6.3 of the EU Radio &
Telecommunication Terminal Equipment R & TTE Directive 99/5/EC.
As the manufacturer, we declare under our sole responsibility that the EKOPAG equipment
conforms to all the applicable essential requirements of the EU Directive 99/5/EC, in
accordance with the procedures of Annex II of the Directive and the following technical
standards:-
ETSI EN 300 328 (Directive article 3.2);
ETSI EN 301 489-1; ETSI EN 301 489-3 (Directive article 3.1{b});
EN 60950 (Directive article 3.1{a}).
These equipments are designated as Class 1, Sub Class 21 (non-specific short range
device) under the terms of the Directive and TCAM (Telecommunication Conformity
Assessment and Market Surveillance Committee) classification scheme.
A full copy of the Declaration of Conformity may be obtained from www.multitone.com
, or
upon application to Multitone.
FCC & Industry Canada Statement of Compliance
This device complies with Part 15 of the FCC Rules and Industry Canada Standards RSS
GEN & RSS210.
Operation is subject to the following two conditions: (1) this device may not cause harmful
interference and (2) this device must accept any interference that may cause undesired
operation.
Unauthorised modification to this equipment will void the user's authority to continue to
operate the device within the scope of the Industry Canada and FCC Part 15 Rules.
Cet appareil est conforme au(x) standard(s) RSS exempt(s) de licence d’Industrie Canada.
Son fonctionnement est sujet aux deux conditions suivantes: (1) cet appareil ne doit pas
occasionner d’interférence et (2) cet appareil doit supporter toutes les interférences, y
compris celles qui pourraient provoquer un mauvais fonctionnement de cet appareil.
WEEE Directive & Product Disposal
At the end of its serviceable life, this product should not be treated as
household or general waste. It should be handed over to the applicable
collection point for the recycling of electrical and electronic equipment, or
returned to Multitone or their agent, for disposal.
Page 3
9261-9210 EKOPAG/QUG/Iss. 4 3 of 14
EkoTek Pager Accessory Guide
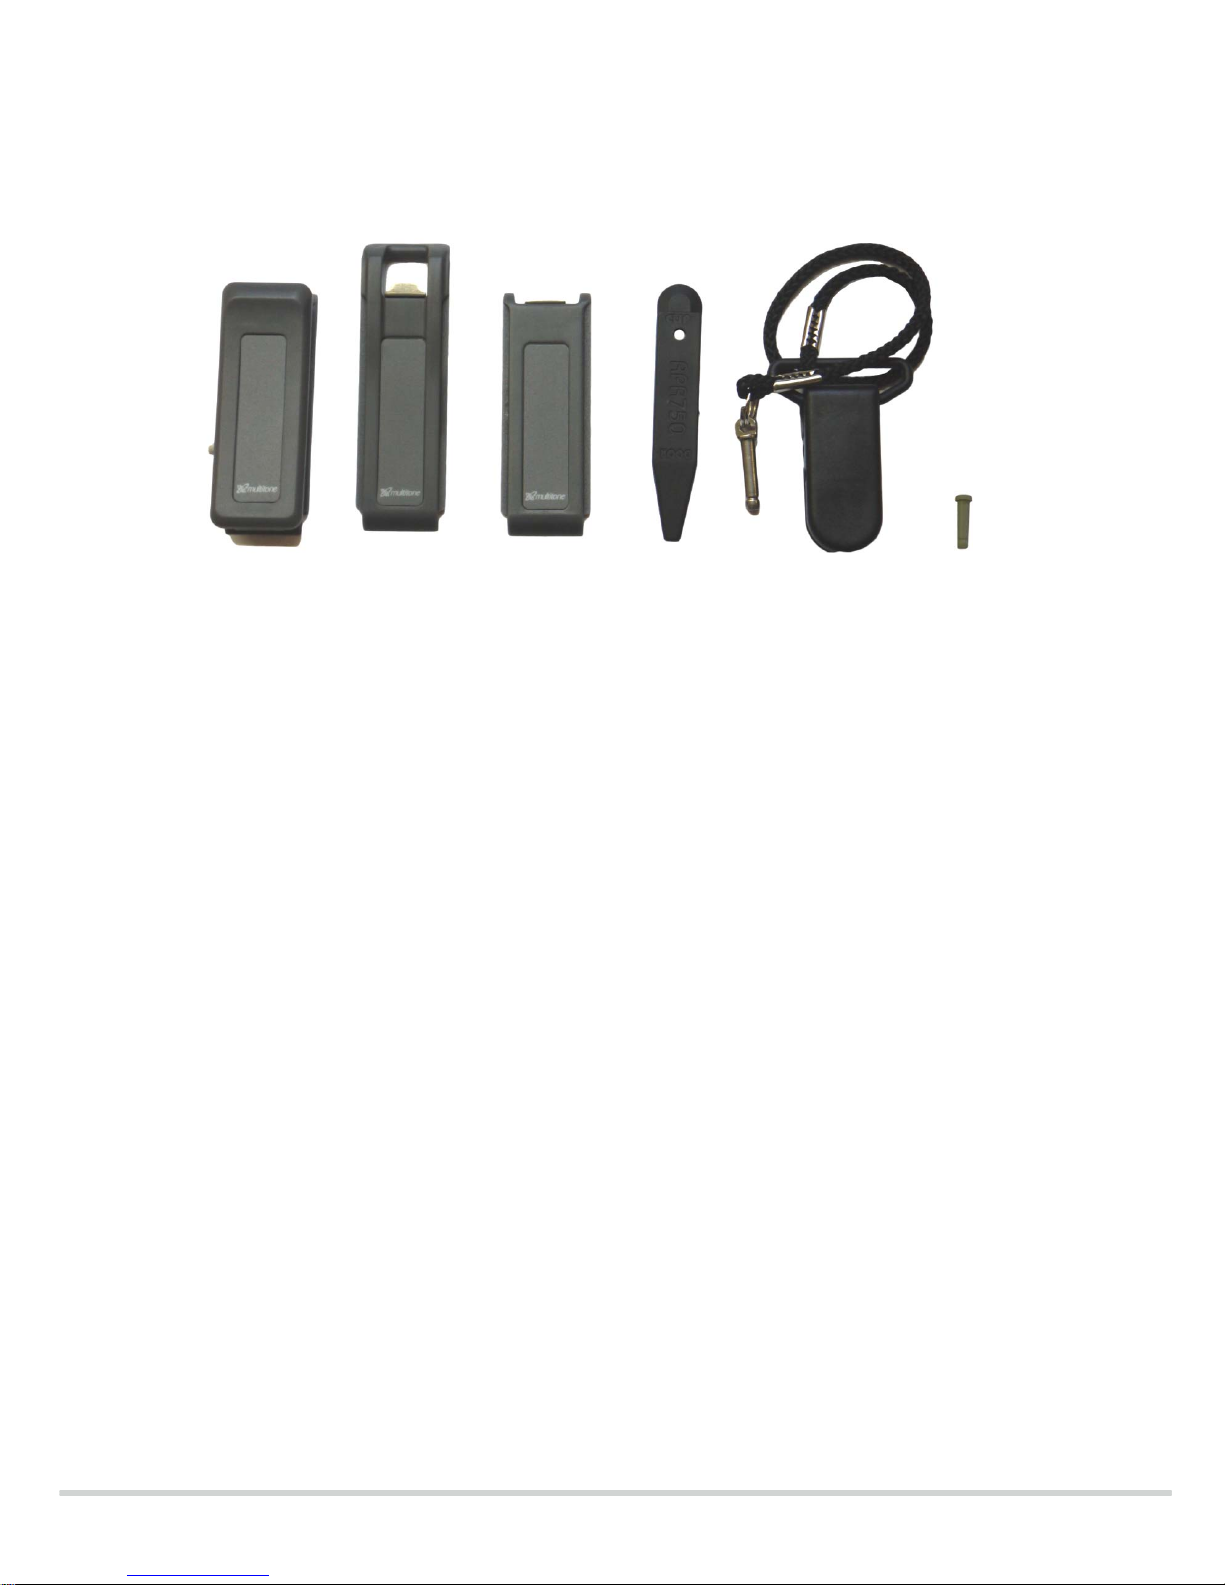
Pager accessories from left to right:
1. Clip - For those staff wishing to wear the device on a belt or other item of clothing
2. Lanyard plate – With a hole for affixing a lanyard
3. Blanking plate – Used for when a clip or lanyard are not required
4. Clip removal tool – Used to aid in the removal of the plates
5. Snatch cord – Used in conjunction with the snatch cord alarm. Should the pager or
cord be snatched, an alarm will be raised, see the full user guide for further
information.
6. Blanking pin – Used to block the snatch cord hole, should the alarm not be required.
Usage instructions
• To insert a plate, slide the clip downwards into the back of the pager.
• To remove a back plate, whether it be the clip or lanyard, insert the removal tool into
the top of the plate between the metal and the device, pushing the metal away from
the pager. Then slide the plate upwards and out of the pager.
• To use the snatch cord or blanking pin, line up the grooves with the hole found on the
top left side of the pager and insert.
Please be aware that once the blanking pin is inserted, it is non-removable
Page 4
9261-9210 EKOPAG/QUG/Iss. 4 4 of 14
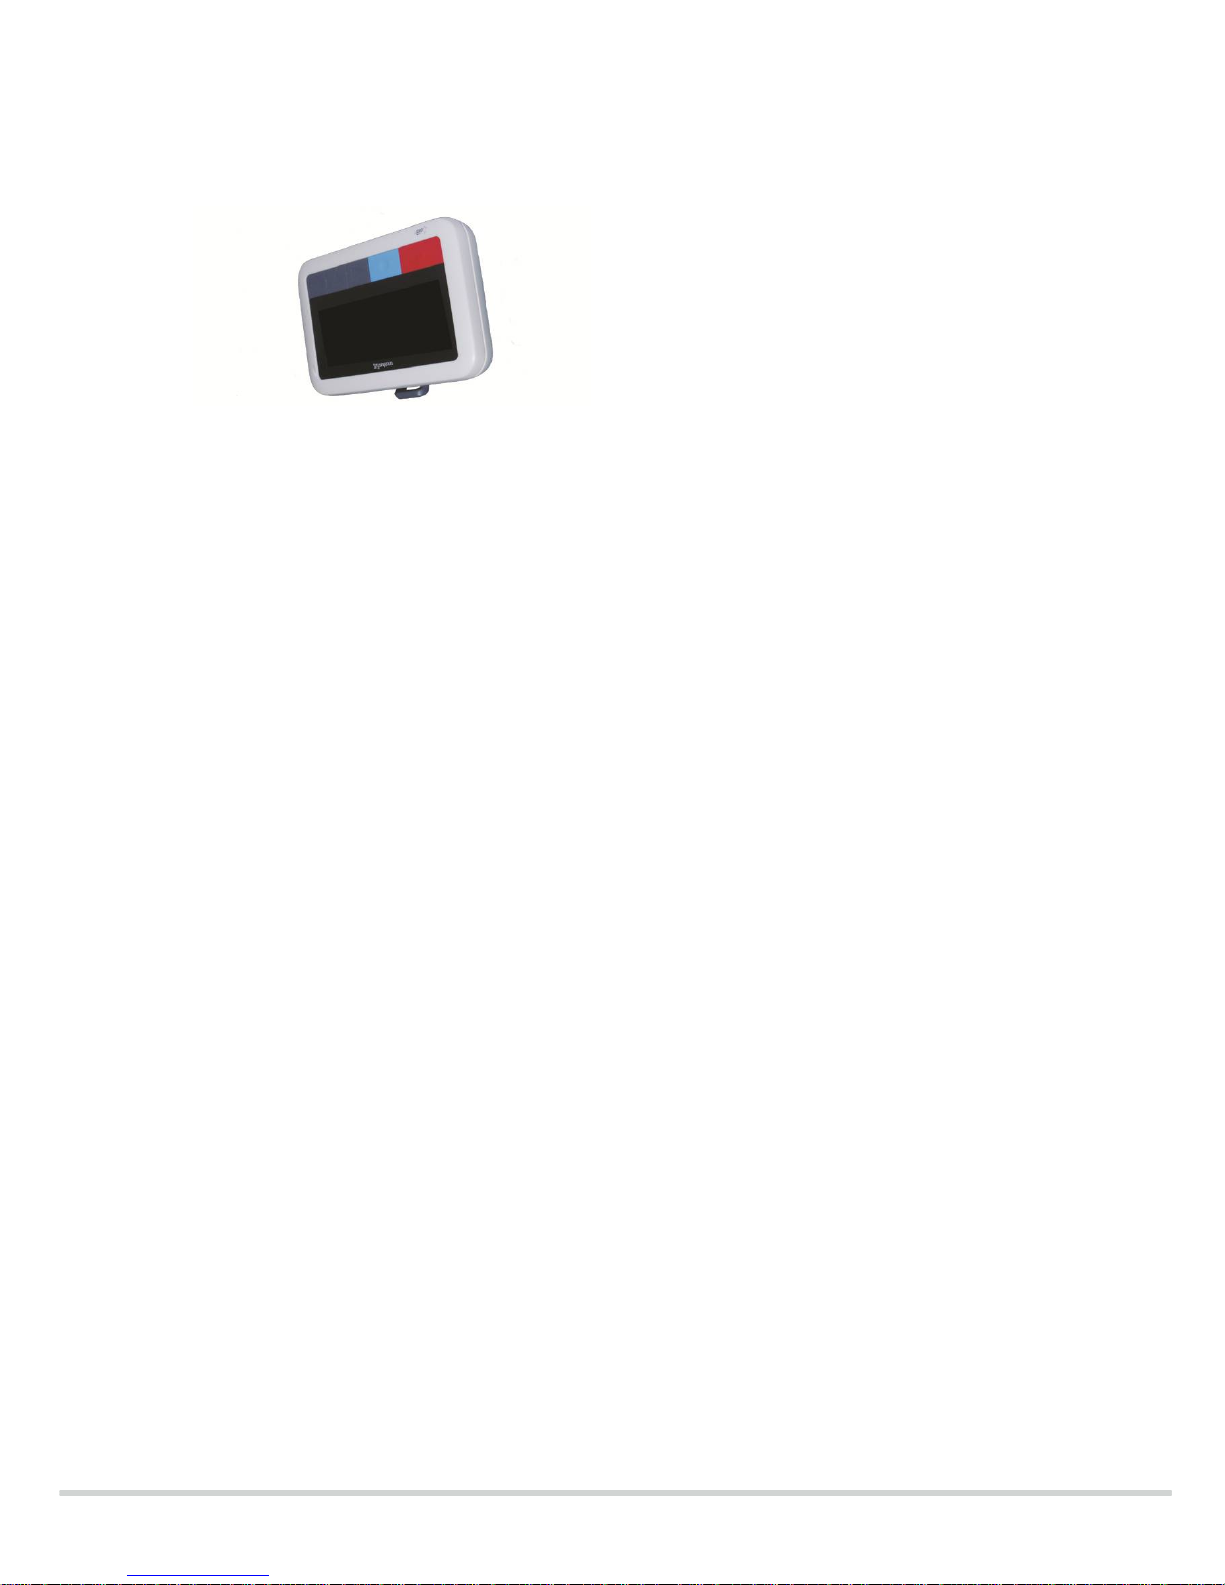
EkoTek Pager
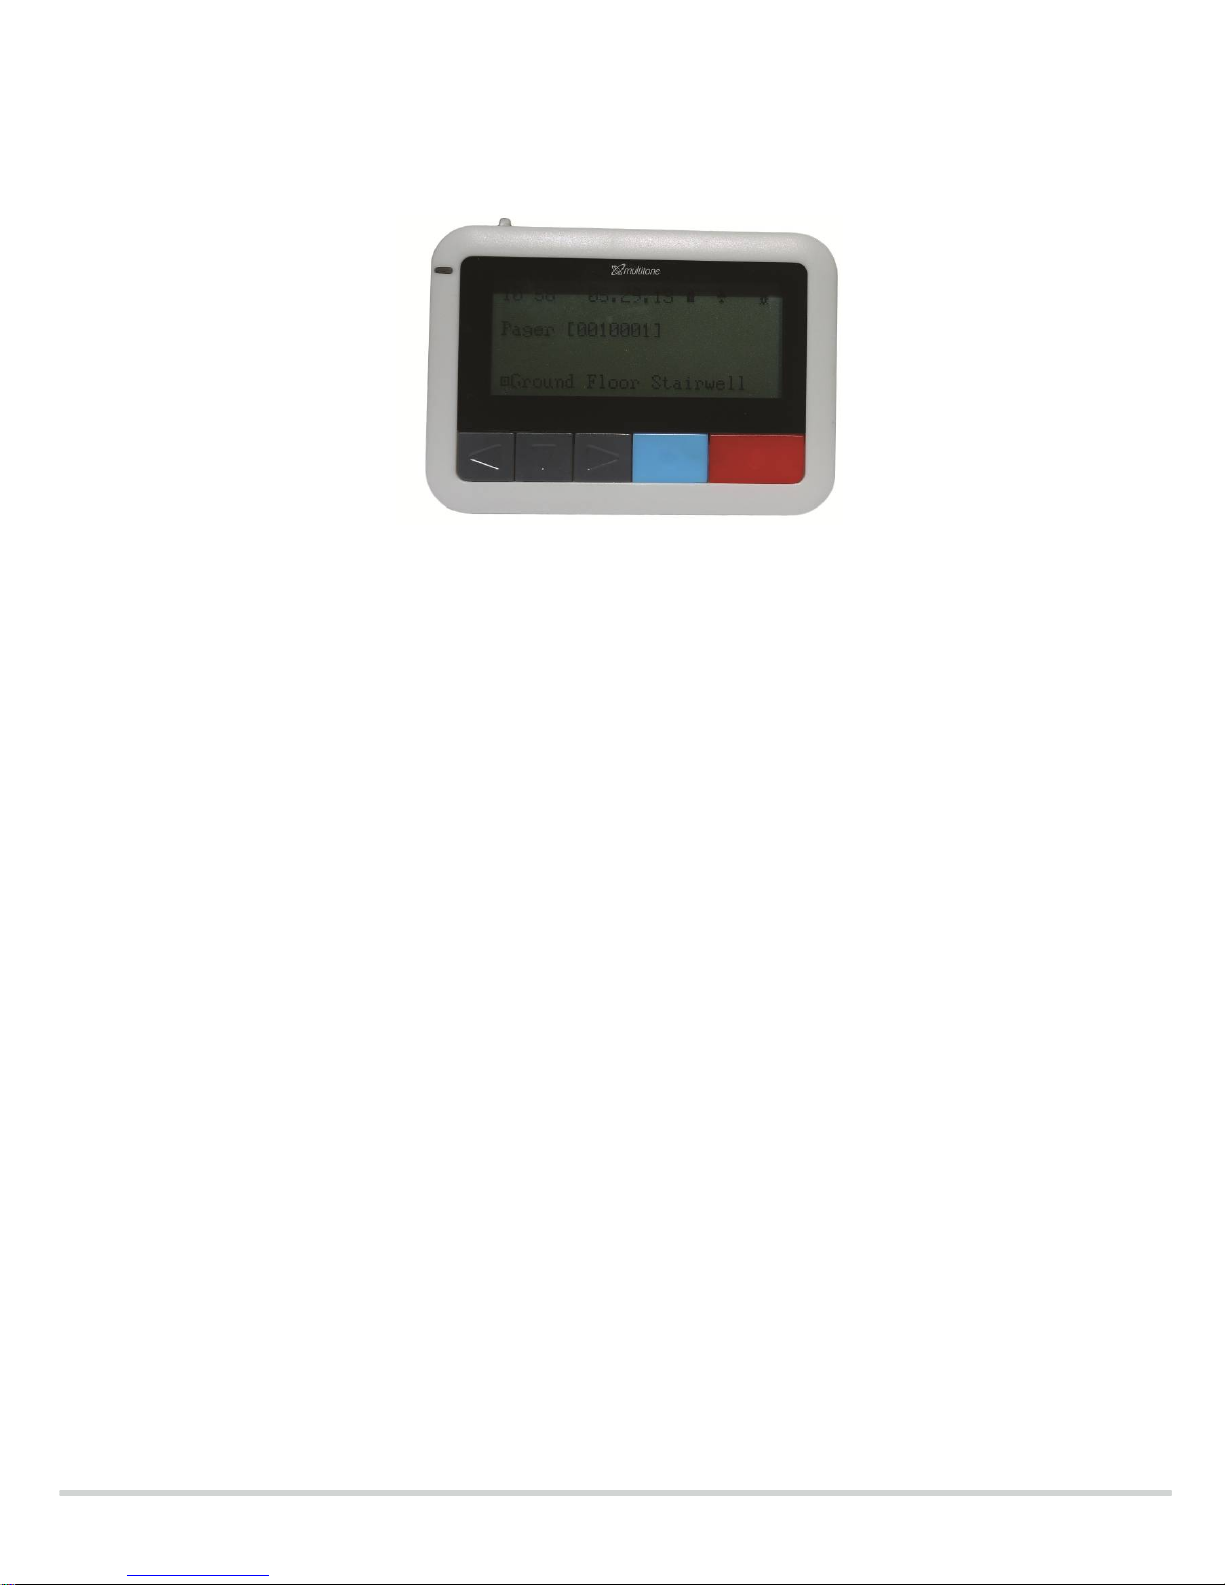
Buttons (from left to right):
Navigation keys: left arrow, down arrow, right arrow.
Blue button: assist alarm.
Red button: emergency alarm.
Operating temperature: 0 to 40°C
Turning on the device
• To switch the device on for the first time, place the unit in the charger and charge for
a minimum of 12 hours.
• Alternatively, press and hold the ◄ to turn on, after a power off.
Charging the Battery
• The pager is fitted with a AAA Ni-MH rechargeable battery.
• To charge the battery, place the device in the charger, the LED will flash to
acknowledge charging.
- 1 flash every 3 seconds – charging.
- 2 flashes every 3 seconds – charged.
When the pager is in a low battery state the pager will automatically switch off the
back-light feature to conserve energy. This feature resumes once the pager is
charged to a sufficient level.
Do NOT attempt to remove the battery.
Opening the device will invalidate any warranty. Please give the device to your
administrator for return to a Multitone Agent for service.
Snatch Cord
• The pager is supplied with a small blanking plug.
• If the snatch cord is not required, the blanking plug can be installed in the snatch
cord socket and the feature disabled by the administrator for this device.
• NB Once inserted, the blanking pin cannot be removed.
Page 5
9261-9210 EKOPAG/QUG/Iss. 4 5 of 14
Display
Status Icons
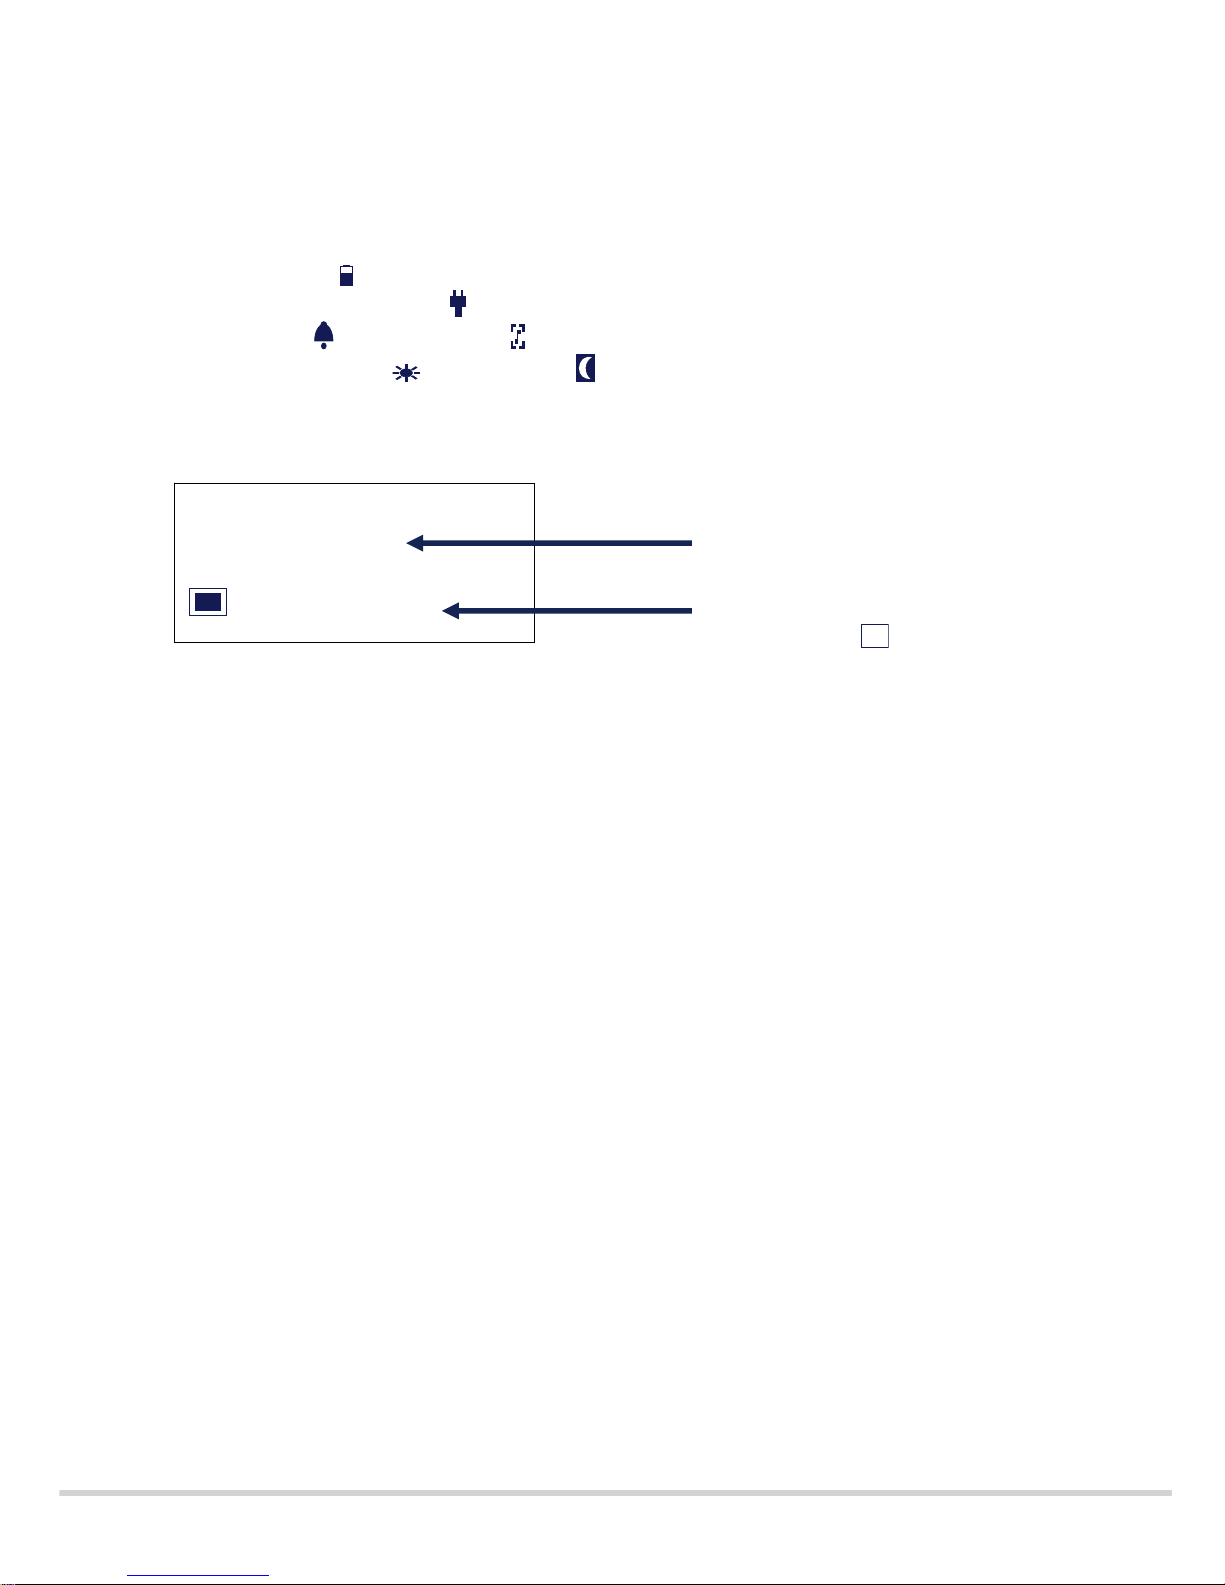
The following icons are displayed in the top right corner of the display as status indicators:
Battery charge:
Plugged in to power source:
Audible alert:
vibrate alert:
Shift mode: day shift:
night shift:
Screen display
11:34 AM 12.03.07
Paul Smith
Training Room
Current Location
If box is empty
- last
known location.
Name / Message status
Page 6

9261-9210 EKOPAG/QUG/Iss. 4 6 of 14
Raising and clearing alarms
• When an alarm is raised a text message is sent to configured group of pagers.
• The text includes the raising device’s identity, the alarm type that has been activated
and the current location of the device.
• On clearance of an alarm, a text message is sent with the device’s identity stating the
alarm has been cleared.
• Upon receiving a message, the pager will sound an alert, vibrate and activate the
backlight (depending on profile settings) and the message will be displayed.
Emergency Alarm (red button): (if enabled)
• Single click or double click, (depending on configuration) raises an emergency alarm.
• The alarm is sent out to the pagers/users configured by the administrator.
• Use the ◄ button to clear the alarm.
• The alarm will be re-sent at an interval configured by administrator, until the alarm is
cleared.
Assist Alarm (blue button): (if enabled)
• Single click raises assist alarm and automatically returns to normal state (no alarm
clear necessary).
• The alarm is sent out to the pagers/users configured by the administrator.
Wander alarm (if enabled)
• Zones which are restricted, are set and configured by the administrator.
• Upon entering one of these restricted zones, the pager will activate a response (as
configured by the administrator):
o Audible and vibrate alert
o Audible alert
o Vibrate alert.
• The message ‘unauthorised zone’ will also appear on the pager screen.
• The alarm is sent out to the pagers/users configured by the administrator.
Page 7
9261-9210 EKOPAG/QUG/Iss. 4 7 of 14
Man-down alarm (if enabled)
• If unit is tilted more than 45 degrees for longer than the configured trigger period,
then it goes into pre-alert mode.
• The unit will beep prior to sending the alarm; to prevent the automatic man-down
alarm being sent, return the unit to the upright position.
• The alarm is sent out to the pagers/users configured by the administrator.
• To clear alarm, return to upright position and use the ◄ button to clear the alarm.
Dead-Man alarm (if enabled)
• Unit will periodically prompt user to press one of the navigation keys (frequency is
configured by the administrator.)
• Press the ◄, ▼ or X button to respond to the periodic check and prevent automatic
alarm generation.
• If a response is not entered, an alarm is sent out to the pagers/users configured by
the administrator.
• To clear a raised alarm, press and hold the ◄ button.
Snatch Cord Operation (if enabled)
• The snatch cord should be inserted in the socket on the body of the pager.
• If the pager is snatched, the cord disengages from the body of the pager and an
alarm is automatically sent.
• Re-inserting the snatch cord cancels the alarm.
Page 8

9261-9210 EKOPAG/QUG/Iss. 4 8 of 14
Receiving Messages
Receiving a message
• The new message will display on the pager screen.
• Message actions:
o Select the ▼ button to see the available responses (accept and reject or
delete).
o Use the▼ button to scroll to the desired option .
o Select the X button to send the response or delete the message.
o Accept responses will be sent to the user that raised the alarm, to show that
help is on its way.
Message Overview Screen
• After display time-out, the screen returns to the message overview screen.
• The first part of each message is shown in a list format.
• Use the ▼ button to scroll through the messages.
• Use the X button to display the full message.
Page 9

9261-9210 EKOPAG/QUG/Iss. 4 9 of 14
Status Indicators
Low battery status alarm (if enabled)
• This alarm occurs when the battery reaches less than 25% charge.
• The notification is either an audible or vibrate alert (dependent on profile settings).
• The message ‘re-charge battery’ will also appear on the pager screen.
Out of network range alarm (if enabled)
• This alarm occurs when the pager is out of range of the EkoTek mesh network.
• The notification, audible or vibrate, depends on the chosen ‘profile’ which can be
found under the ‘advanced’ menu.
• The message ‘out of range’ will also appear on the pager screen.
• Although the pager will automatically search for a network to connect to, this process
can also be quickened by pressing the ◄ button.
Page 10
9261-9210 EKOPAG/QUG/Iss. 4 10 of 14
Menu Navigation
From the stand-by screen:
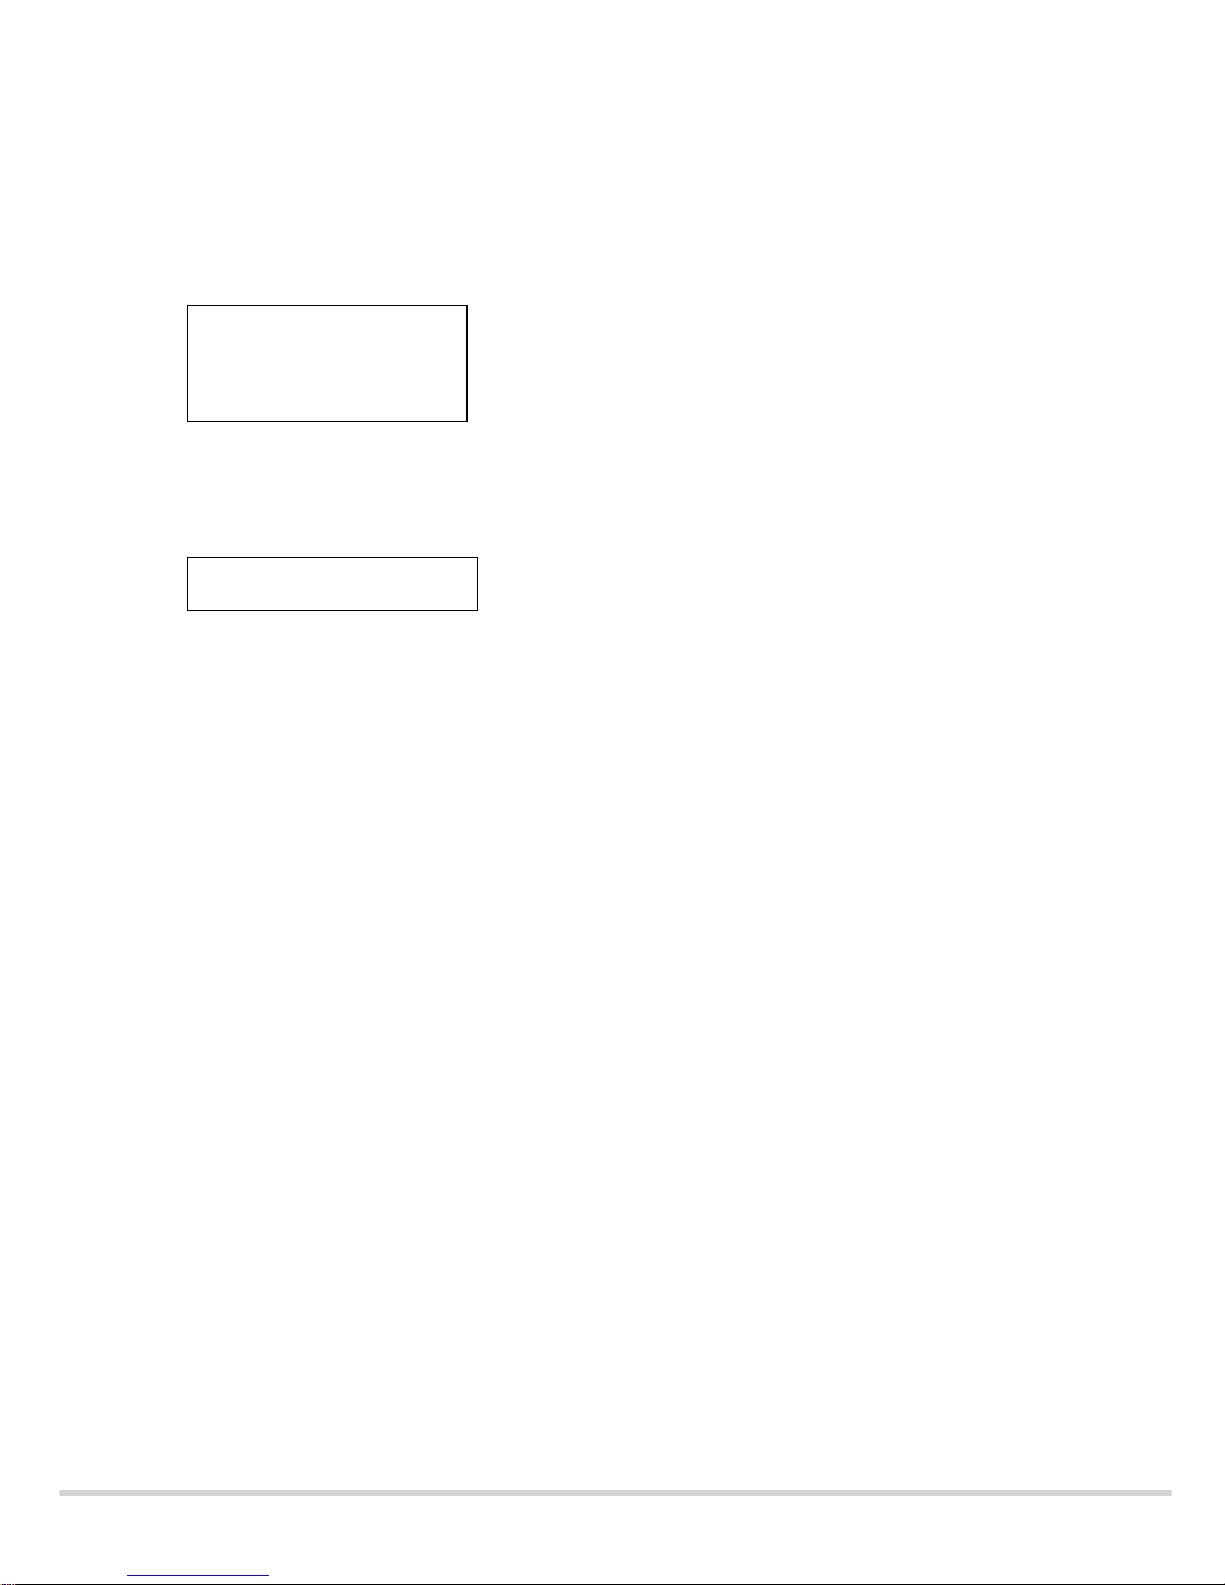
Press and hold the ▼ button to enter the main menu:
Profile
Use the ▼ button to scroll to Profile.
Press the ► button to select this option.
When selected, use the ▼ button to navigate between:
• Custom – Allows individual settings of various options such as backlight, audio and
vibrate alerts and whether messages are displayed when pager is in charger.
• Normal – Disables the custom profile menu, leaving the pager in its default state as
follows: backlight enabled (single colour), audible enabled, vibrate disabled, receive
on and charge disabled.
• Dynamic – Backlight enabled (tri-colour), audible and vibrate alert enabled, receive
on charge disabled.
• Quiet – Backlight only enabled (single colour).
• Desk – Backlight enabled (single colour), audible enabled, vibrate disabled, receive
on and charge enabled.
Pressing the ► button will confirm the selected profile; the ◄ button will leave at current
setting.
Power Off (if enabled by administrator)
• Use the ▼ button to scroll to Power Off.
• Press the ► button to select the option, the ► icon will turn black.
• Press the ► button again to confirm the action and the pager will turn off.
Power On
• To power back on press the◄ and hold to switch back on.
Profile ► Custom
Z Profile
Power Off
Advanced
Page 11
9261-9210 EKOPAG/QUG/Iss. 4 11 of 14
3. Advanced
• Use the ▼ button to scroll to Advanced.
• Press ► to select the option.
• Use the ▼ button to scroll to the desired option:
*if custom profile selected, otherwise this option will be blank.
a) Display
• To select, press ► from the Advanced menu options.
For ALL the following options:
• Use the ► button to select the option
• Use the ▼ button to scroll between options
• Use the ► button to select the required option
• Use the ◄ button to return to the display menu
• Use the ◄ button again to return to the main menu if desired
i. Hour Mode
• Available options: 12H and 24H.
ii. Display Time-out
• Available options: 8, 16, 32 and 64 second time-out.
iii. Font
• Available options: 7 x 5, 10 x 5, 10 x 8 formats (only applicable to message display).
iv. Contrast
• Available options: scroll between 0 to 5.
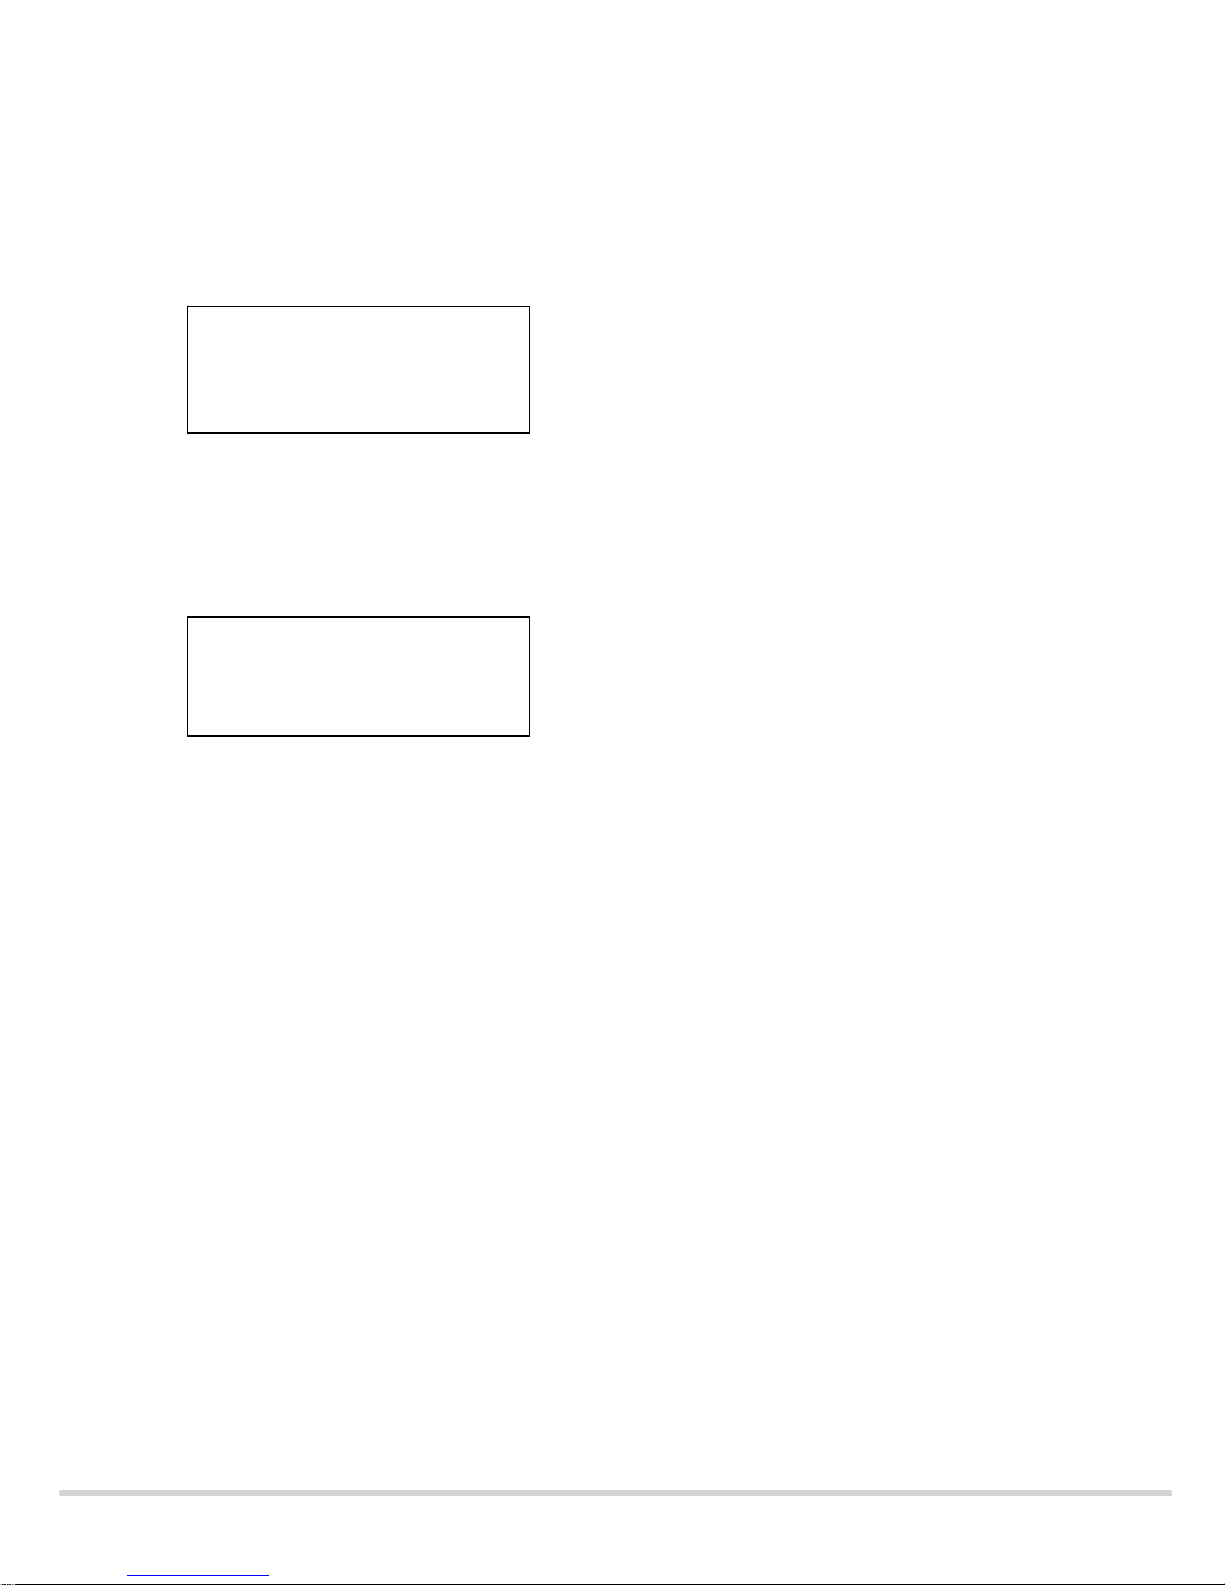
Z Display
Power save Off
Custom profile*
Hide clear info Off
Hour Mode 24H
Display Timeout 16s
Font 10 x 5
Contrast 2
Page 12
9261-9210 EKOPAG/QUG/Iss. 4 12 of 14
b) Powersave – from the main menu
The powersave option blanks the screen after a set period, to save power. Use the ▼ to
scroll to the powersave option. See 3.a) for how to navigate and select options.
c) Custom Profile
• Use the ▼ button to scroll to Custom profile.
• Press ► to select this option, where upon the following options are displayed.
• See 3.a) for how to navigate and select options.
i. Backlight
• Use the ▼ button to scroll to backlight.
• 3 options exist for the coloured backlight and may be selected as follows:
o Off – backlight is switched off
o On – single colour backlight is used
o Tri – backlight colour is co-ordinated with alerts or activity indication.
• See 3.a) for how to navigate and select options.
ii. Audible alert
To turn the audio alert on/off:
• See 3.a) for how to navigate and select options
iii. Vibrate Alert
To turn the vibrate alert on/off:
• See 3.a) for how to navigate and select options.
iv. Rx on Charge
To enable or disable the pager from receiving alerts when on charge:
• See 3.a) for how to navigate and select options.
Note: audio and vibrate settings only change the incoming message alert. To change
full audio settings, access the hub browser. Please contact system administrator to
implement this.
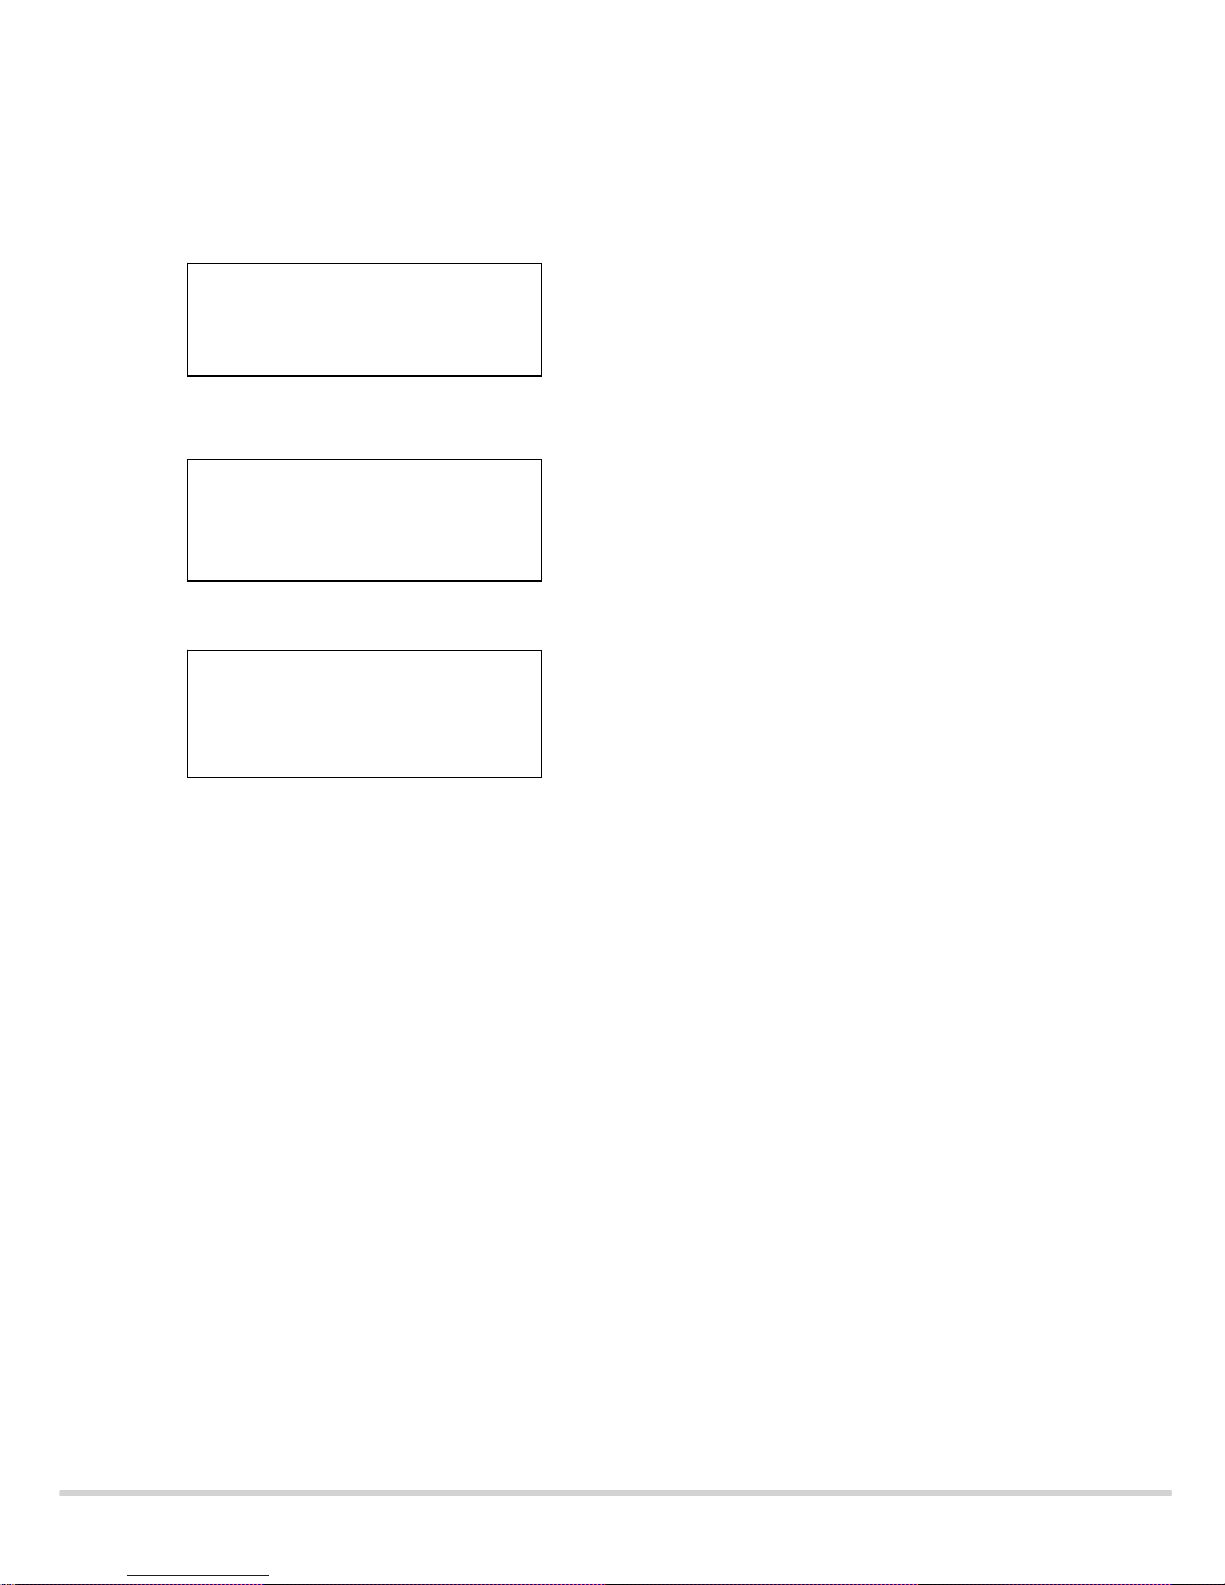
Display
Z Power save On
Custom profile
Hide clear info Off
Z Backlight On
Audible alert On
Vibrate alert On
Rx on charge On
Display
Power save On
Z Custom profile
Hide clear info Off
Page 13

9261-9210 EKOPAG/QUG/Iss. 4 13 of 14
d) Hide Clear Info
• The ‘clear alarm’ instruction can be displayed on the screen to show users how to
clear a raised alarm.
• To hide this information the ‘Hide Clear Info’ function can be turned on.
• See 3.a) for how to navigate and select options.
Page 14

FM 20122
Multitone Electronics plc, Multitone House, Shortwood Copse Lane, Kempshott, Basingstoke, Hampshire, RG23 7NL
Telephone: +44 (0)1256 320292 Fax: +44 (0)1256462643 Email: [email protected] Web: www.multitone.com
This document is for guidance only. Products and services offered are subject to availability and may differ from those described or illustrated in this
document as a result of changes. Specifications are subject to change without notice. Multitone Electronics plc is part of Kantone Holding Ltd, a member
of the Champion Technology group of companies. Registered office: Multitone Electronics plc, Shortwood Copse Lane, Kempshott, Basingstoke,
Hampshire, RG23 7NL. Registered in England & Wales No. 256314. Registered VAT No: GB 232150709.
Care
• The device (excluding display screen) is protected with an anti-bacterial
compound providing first-line defence against bacterial build-up. The
device should however be sprayed or dipped every 24 hrs with suitable
antibacterial liquid to ensure the device is free from bacteria.
• If dropped in water or other solution, rinse in clean water and dry the unit off. The unit
is dust and water resistant and has been tested with Virusolve and Salvesan
disinfectants.
• If the case is dropped or damaged, please refrain from cleaning with liquid.
 Loading...