

Diamond Back
quip
OPERATION AND PARTS MANUAL
SP3 “STREET PRO”
PROFESSIONAL SLAB SAW
35 HP WISCONSIN DIESEL ENGINE
MODELS
SP303516, SP303520, SP303526
SP303530
Revision #3 (09/29/06)
To find the latest revision of this
publication, visit our website at:
www.multi
.com
THIS MANUAL MUST
COMPANY THE EQUIPMENT AT ALL TIMES.

MQ SP-3035 CONCRETE SAW
PROPOSITION 65 WARNING
MQ SP-3035 CONCRETE SAW — OPERATION AND PARTS MANUAL — REV. #3 (09/29/06) — PAGE 1
MQ SP-3035 CONCRETE SAW
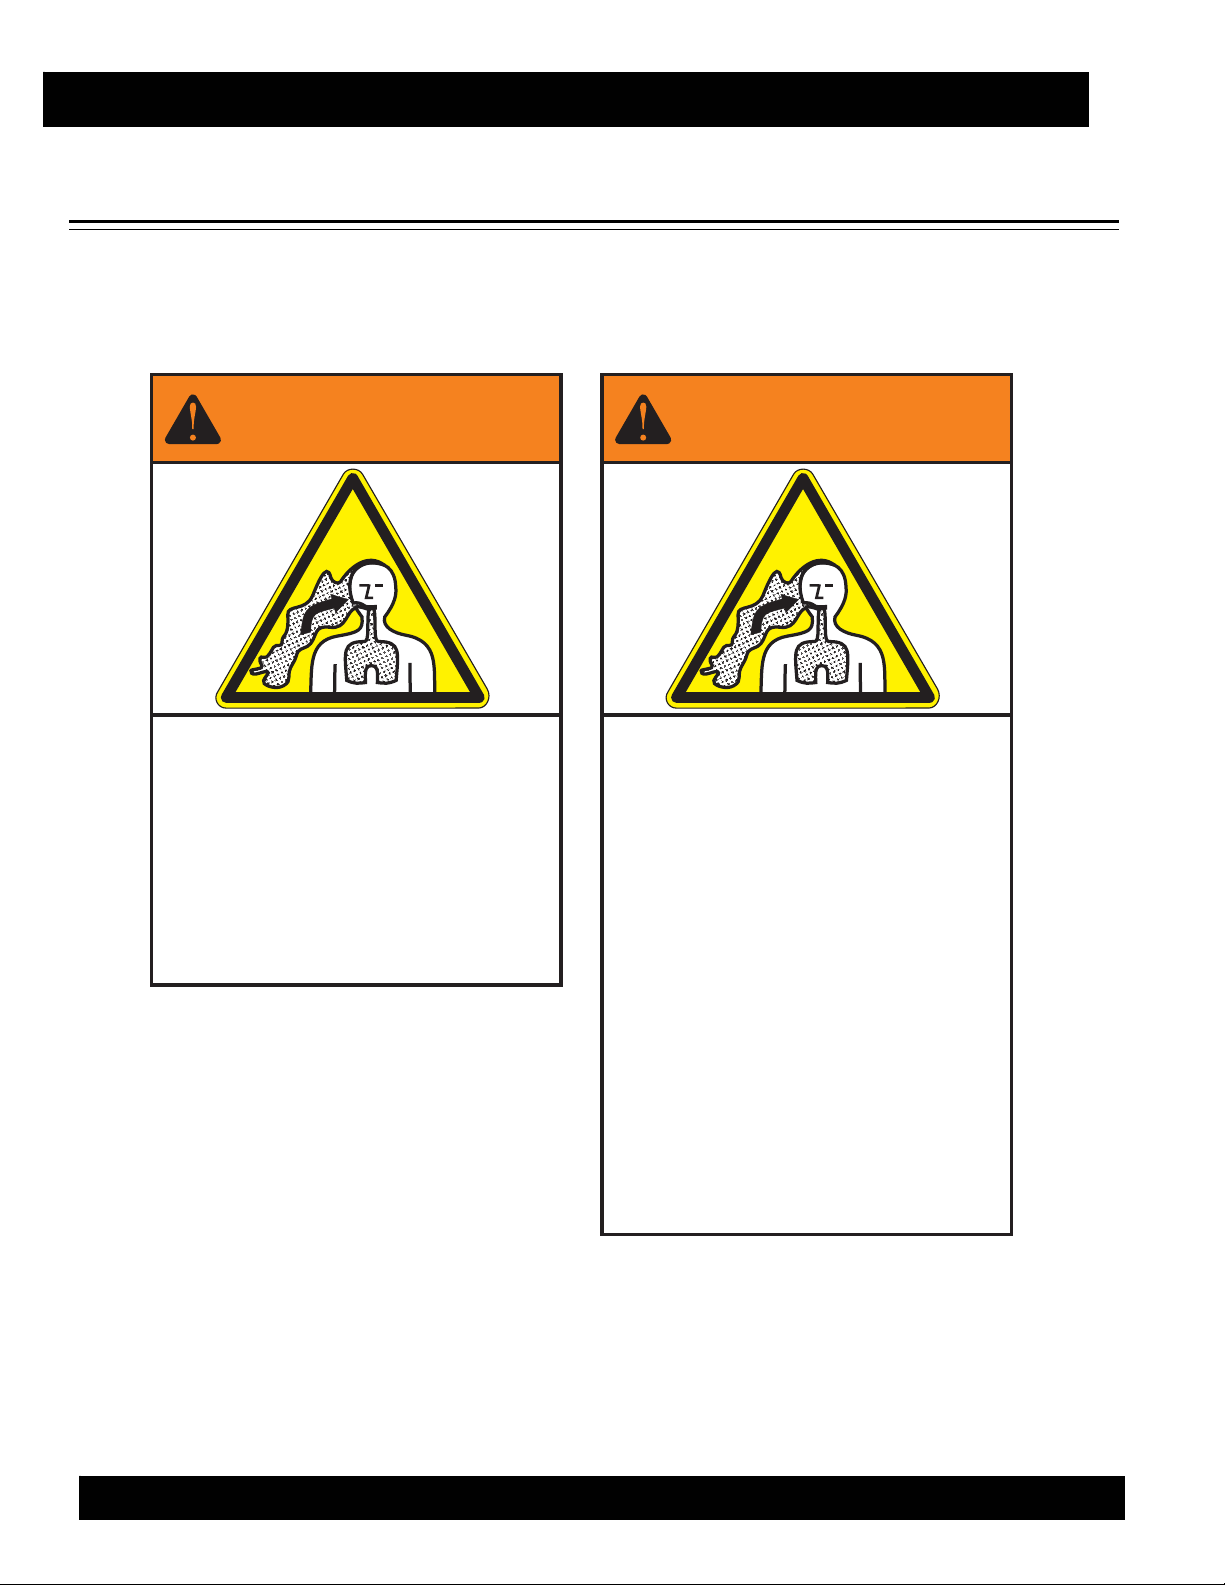
SILICOSIS /RESPIRATORY HAZARDS
WARNING
WARNING
Grinding/cutting/drilling of masonry,concrete,metaland
other materials with silica in their composition may give
off dust or mists containing crystalline silica. Silica is a
basic component of sand, quartz, brick clay, granite and
numerous other minerals and rocks. Repeated and/or
substantial inhalation of airborne crystalline silica can
cause serious or fatal respiratory diseases, including
silicosis. In addition, California and some other
authorities have listed respirable crystalline silica as a
substance known to cause cancer. When cutting such
materials, always follow the respiratory precautions
mentioned above.
SILICOSIS WARNING RESPIRATORY HAZARDS
Grinding/cutting/drilling of masonry,concrete,metaland
other materials can generate dust, mists and fumes
containing chemicals known to cause serious or fatal
injury or illness, such as respiratory disease, cancer,
birth defects or other reproductive harm. If you are
unfamiliar with the risks associated with the particular
process and/or material being cut or the composition of
the tool being used, review the material safety data
sheet and/or consult your employer, the material
manufacturer/supplier, governmental agencies such as
OSHA and NIOSH and other sources on hazardous
materials. California and some other authorities, for
instance, have published lists of substances known to
cause cancer, reproductive toxicity, or other harmful
effects.
Control dust, mist and fumes at the source where
possible. In this regard use good work practices and
follow the recommendations of the manufacturers or
suppliers, OSHA/NIOSH, and occupational and trade
associations. Water should be used for dust
suppression when wet cutting is feasible. When the
hazards from inhalation of dust, mists and fumes cannot
be eliminated, the operator and any bystanders should
always wear a respirator approved by NIOSH/MSHA for
the materials being used.
MQ SP-3035 CONCRETE SAW — OPERATION AND PARTS MANUAL — REV. #3 (09/29/06) — PAGE 2

MQ SP-3035 CONCRETE SAW
Table of Contents
PROPOSITION 65 WARNING .......................................................................................1
SILICOSIS /RESPIRATORY HAZARDS......................................................................2
PARTS ORDERING PROCEDURES........................................................................... 6
SAFETY..............................................................................................................................7
HAZARD SYMBOLS.................................................................................................... 8
GENERAL SAFETY WARNINGS ....................................................................................... 11
BLADE SAFETY......................................................................................................... 13
SAW TRANSPORTATION SAFETY......................................................................... 14
EMERGENCIES .......................................................................................................... 14
MACHINE OPERATION AND SAFETY DECALS................................................... 15
SERIAL TAG................................................................................................................... 16
OPERATION ...................................................................................................................17
BEFORE STARTING......................................................................................................... 17
CONTROL PANEL ........................................................................................................... 18
ENGINE POWER, CUTTING POWER & SHEAVE SIZE........................................................ 19
INSTALLING THE BLADE, BLADE GUARD & BLADE FLANGE ......................................... 20
REMOVING THE BLADE, BLADE GUARD & BLADE FLANGE........................................... 21
STACKING BLADES FOR WIDE CUTS.............................................................................. 22
INSTALLING AND REMOVING THE BLADE GUARD.......................................................... 23
WATER SUPPLY AND CONTROL ..................................................................................... 26
ANDLEBARS................................................................................................................. 27
H
FUELING THE SAW ......................................................................................................... 28
STARTING AND STOPPING THE ENGINE ..........................................................................29
P
OINTER ADJUSTMENT .................................................................................................. 30
RAISE – LOWER CONTROLS ........................................................................................... 31
SETTING THE DEPTH GAUGE & DEPTH STOP ................................................................. 32
DRIVE SYSTEM .............................................................................................................. 33
NIGHT LIGHT ................................................................................................................. 36
TRANSPORTATION TIE-DOWNS AND LIFT POINT ............................................................ 37
PERATION ON A SLOPE OR INCLINE.............................................................................. 38
O
FREEING A STUCK BLADE.............................................................................................. 38
DRAINING THE WATER SYSTEM..................................................................................... 39
MQ SP-3035 CONCRETE SAW — OPERATION AND PARTS MANUAL — REV. #3 (09/29/06) — PAGE 3

MQ SP-3035 CONCRETE SAW
MAINTENANCE.............................................................................................................40
REMOVABLE GUARDS AND ACCESS PANELS.................................................................. 40
BELTS AND PULLEYS ..................................................................................................... 41
BLADE FLANGE REMOVAL/INSTALLATION.................................................................... 45
CIRCUIT BREAKERS ....................................................................................................... 50
MAXIMUM CUT DEPTH ADJUSTMENT............................................................................ 50
LUBRICATION ................................................................................................................ 51
ENGINE MAINTENANCE ................................................................................................. 52
RAISE-LOWER SYSTEM.................................................................................................. 53
CONTROL HANDLE ADJUSTMENT .................................................................................. 54
HYDRAULIC SYSTEM ..................................................................................................... 55
POSITRACTION ADJUSTMENT......................................................................................... 60
EXPLANATION OF CODE IN REMARKS COLUMN.............................................61
SUGGESTED SPARE PARTS.......................................................................................62
COMPONENT DRAWINGS..........................................................................................63
NAMEPLATE AND DECALS ASSY.................................................................................... 63
DECK/GAUGE PANEL ASSY. .......................................................................................... 65
CONSOLE/SHEET METAL ASSY...................................................................................... 67
ACCESS PANEL ASSY..................................................................................................... 69
FUEL TANK ASSY. ......................................................................................................... 71
F-N-R CONTROL HANDLE ASSY.................................................................................... 73
JOYSTICK MOUNTING ASSY........................................................................................... 75
LIFT PUMP CIRCUIT ASSY.............................................................................................. 77
WATER SYSTEM ASSY................................................................................................... 79
DEPTH INDICATOR ASSY................................................................................................ 81
ANDLE AND LIGHT ASSY............................................................................................. 83
H
F
RONT/REAR POINTER ASSY. ........................................................................................ 85
GAUGES AND CONTROLS ASSY...................................................................................... 87
FRONT AXLE ASSY. ....................................................................................................... 89
DEPTH STOP ASSY......................................................................................................... 91
PLATFORM ASSY............................................................................................................ 93
DRIVE ASSY................................................................................................................... 95
BLADESHAFT AND MOUNTING ASSY. ............................................................................ 97
POSITRACTION ASSY...................................................................................................... 99
MQ SP-3035 CONCRETE SAW — OPERATION AND PARTS MANUAL — REV. #3 (09/29/06) — PAGE 4

MQ SP-3035 CONCRETE SAW
PULLEY AND V-BELT ASSY......................................................................................... 101
BATTERY ASSY............................................................................................................ 103
ENGINE BRACKETS ASSY............................................................................................. 105
ENGINE INSTALLATION ASSY....................................................................................... 107
BLADEGUARD ASSY..................................................................................................... 109
OPTIONAL WATER PUMP KIT ASSY............................................................................. 111
COLLAR PULLER ASSY................................................................................................. 113
SEAL SLEEVE PULLER/SEAL INSTALLATION TOOL ...................................................... 115
BUSHING EXTENSION KITS ..........................................................................................117
ELECTRIC SCHEMATIC...........................................................................................119
SPECIFICATIONS........................................................................................................120
MQ SP-3035 CONCRETE SAW — OPERATION AND PARTS MANUAL — REV. #3 (09/29/06) — PAGE 5
y
MQ SP-3035 CONCRETE SAW
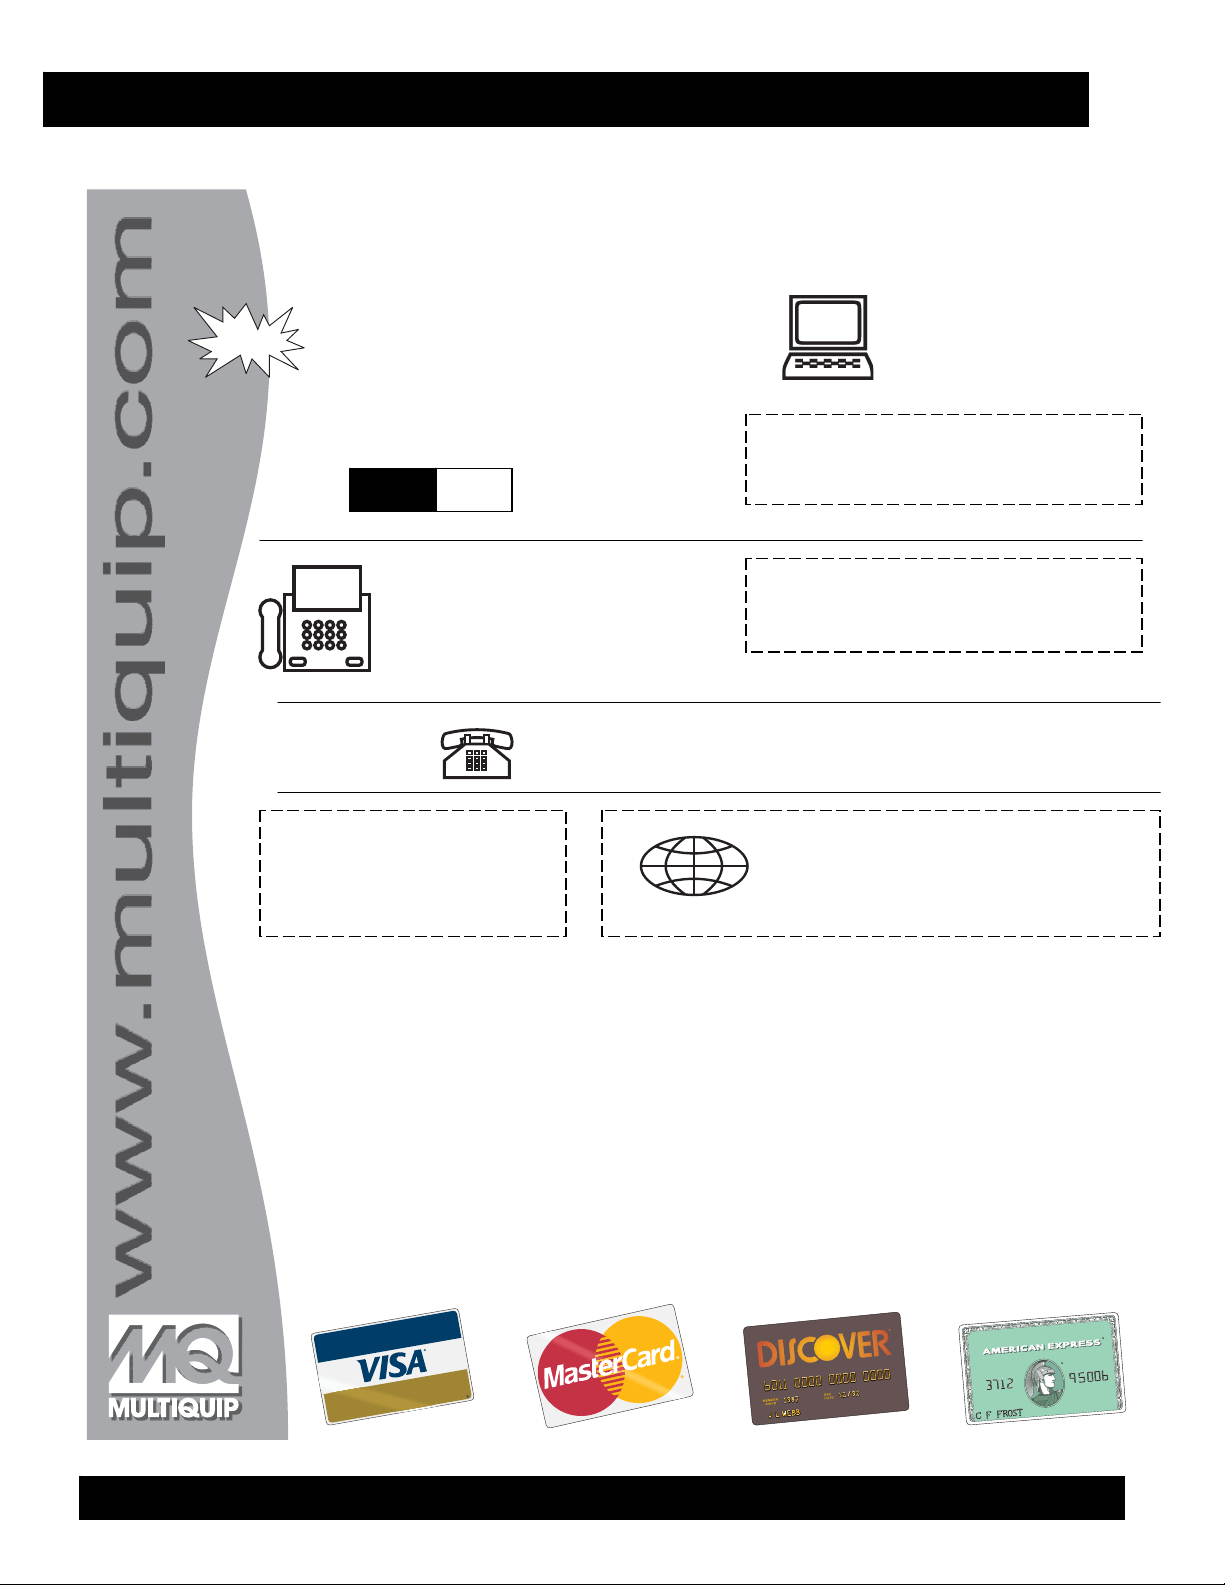
PARTS ORDERING PROCEDURES
Order via Internet (Dealers Only):
Best Deal!
Order parts on-line using Multiquip’s SmartEquip website!
Order Parts
Print Specification Information
Ordering parts has never been easier!
Choose from three easy options:
View Parts Diagrams
Go to www. Multiquip .com and click on
to log on and save!
Order Parts
Fax your order in and qualify for a 5% Discount
on Standard orders for all orders which include
complete part numbers.*
If you have an MQ Account, to obtain a
Username and Password, E-mail us at:
parts@multiquip.com.
To obtain an MQ Account, contact your
District Sales Manager for more information.
Note: Discounts Are Subject To Change
Order via Fax (Dealers Only):
All customers are welcome to order parts
via Fax.
Domestic (US) Customers dial:
1-800-6-PARTS-7 (800-672-7877)
Fax your order in and qualify for a 3% Discount
on Standard orders for all orders which include
complete part numbers.*
Note: Discounts Are Subject To Change
Order via Phone:
Domestic (US) Dealers Call:
1-800-427-124
Non-Dealer Customers:
Contact your local Multiquip Dealer
for parts or call 800-427-1244 for help
in locating a dealer near you.
International Customers should contact their local
Multiquip Representatives for Parts Ordering I
information.
When ordering parts, please supply:
Dealer Account Number
Dealer Name and Address
Shipping Address (if different than billing address)
Return Fax Number
Applicable Model Number
Quantit
, Part Number and Description of each Part
www.multiquip.com
NOTE
Unless otherwise indicated by customer, all orders are treated as Standard Ordersand will ship
within 24 hours. We will make every effort to ship Air Shipments the same day the order is received,
if received prior to 2PM PST. Stock Orders must be noted on fax or web order form.
WE ACCEPT ALL MAJOR CREDIT CARDS!
Specify Preferred Method of Shipment:
Fed Ex/UPS
Priority One
Ground
Next Day
Second/Third Day
DHL
Truck
MQ SP-3035 CONCRETE SAW — OPERATION AND PARTS MANUAL — REV. #3 (09/29/06) — PAGE 6
MQ SP-3035 CONCRETE SAW
SAFETY
FOR YOUR SAFETY AND THE SAFETY OF OTHERS!
NOTE
Safety precautions should be followed at all times when operating this equipment. Failure to read and
understand the Safety Messages and Operating Instructions could result in injury to yourself and others.
This Owner's Manual has been developed to provide instructions for the
safe and efficient operation of the Multiquip SP-3035 CONCRETE SAW.
For engine maintenance information, please refer to the engine
manufacturers’ instructions for data relative to its safe operation.
Before using this CONCRETE SAW, ensure that the operating individual
has read and understands all instructions in this manual.
SAFETY MESSAGE ALERT SYMBOLS
The three (3) Safety Messages shown below will inform you about potential hazards that could
injure you or others. The Safety Messages specifically address the level of exposure to the
operator, and are preceded by one of three words: DANGER, WARNING, or CAUTION.
DANGER: You WILL be KILLED or SERIOUSLY injured if you
DANGER
DO NOT follow directions.
WARNING: You CAN be KILLED or SERIOUSLY injured if you
WARNING
DO NOT follow directions.
CAUTION: You CAN be injured if you DO NOT follow directions.
CAUTION
Potential hazards associated with SP-3035 Concrete Saw operation will be referenced with "Hazard
Symbols" which appear throughout this manual, and will be referenced in conjunction with Safety
"Message Alert Symbols".
MQ SP-3035 CONCRETE SAW — OPERATION AND PARTS MANUAL — REV. #3 (09/29/06) — PAGE 7
HAZARD SYMBOLS
MQ SP-3035 CONCRETE SAW
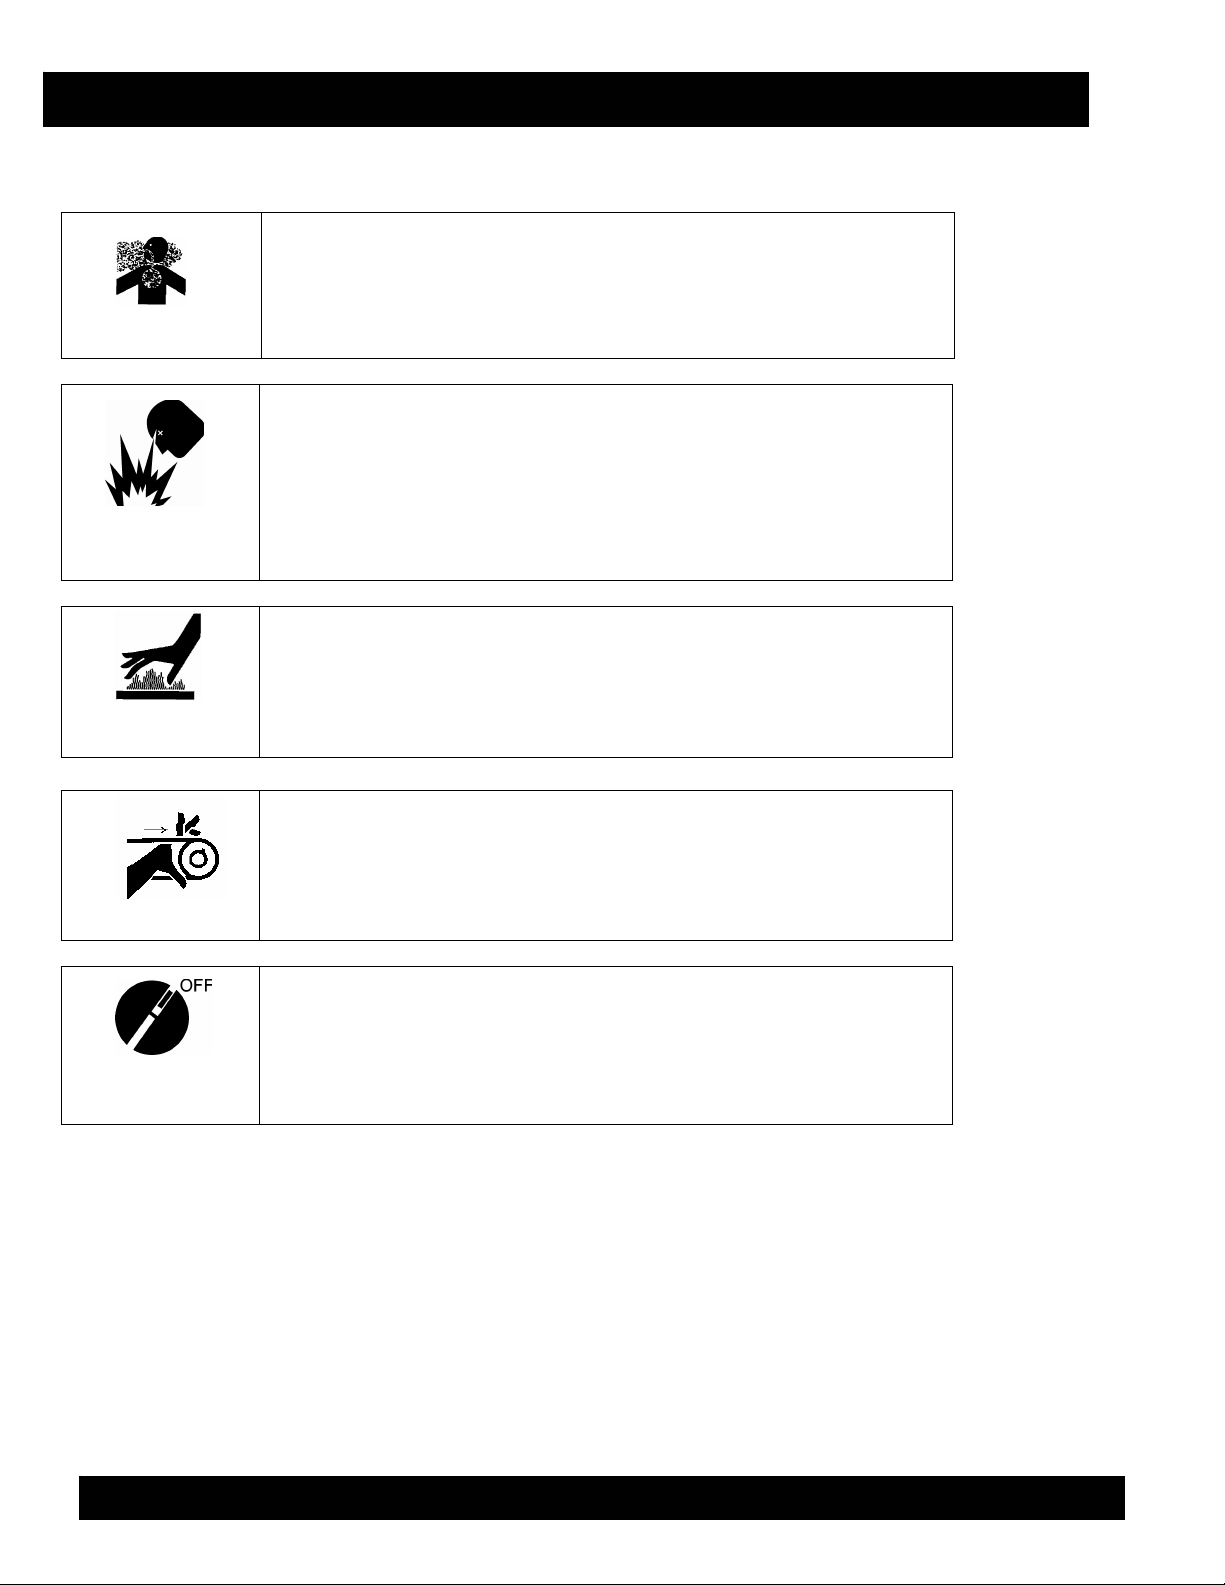
Lethal Exhaust
Gases
Explosive Fuel
Burn Hazards
Engine exhaust gases contain poisonous carbon monoxide. This
gas is colorless and odorless, and can cause death if inhaled.
NEVER operate this equipment in a confined area or enclosed
structure that does not provide ample free flow of air.
Gasoline is extremely flammable, and its vapors can cause an
explosion if ignited. DO NOT start the engine near spilled fuel or
combustible fluids. DO NOT fill the fuel tank while the engine is
running or hot. DO NOT overfill the tank, since spilled fuel could
ignite if it comes into contact with hot engine parts or sparks from
the ignition system. Store fuel in approved containers, in wellventilated areas and away from sparks and flames. NEVER use
fuel as a cleaning agent.
Engine components can generate extreme heat. To prevent
burns, DO NOT touch these areas while the engine is running or
immediately after operations. NEVER operate the engine with heat
shields or heat guards removed.
NEVER operate equipment with covers, or guards removed. Keep
fingers, hands, hair and clothing away from all moving parts to
prevent injury.
Rotating Parts
Accidental
Starting
MQ SP-3035 CONCRETE SAW — OPERATION AND PARTS MANUAL — REV. #3 (09/29/06) — PAGE 8
ALWAYS place ON/OFF switch to the OFF position, remove key
and/or disconnect the spark plug leads before servicing the
engine, equipment, or supporting components. Ground the lead to
prevent sparks that could ignite a fire.
HAZARD SYMBOLS
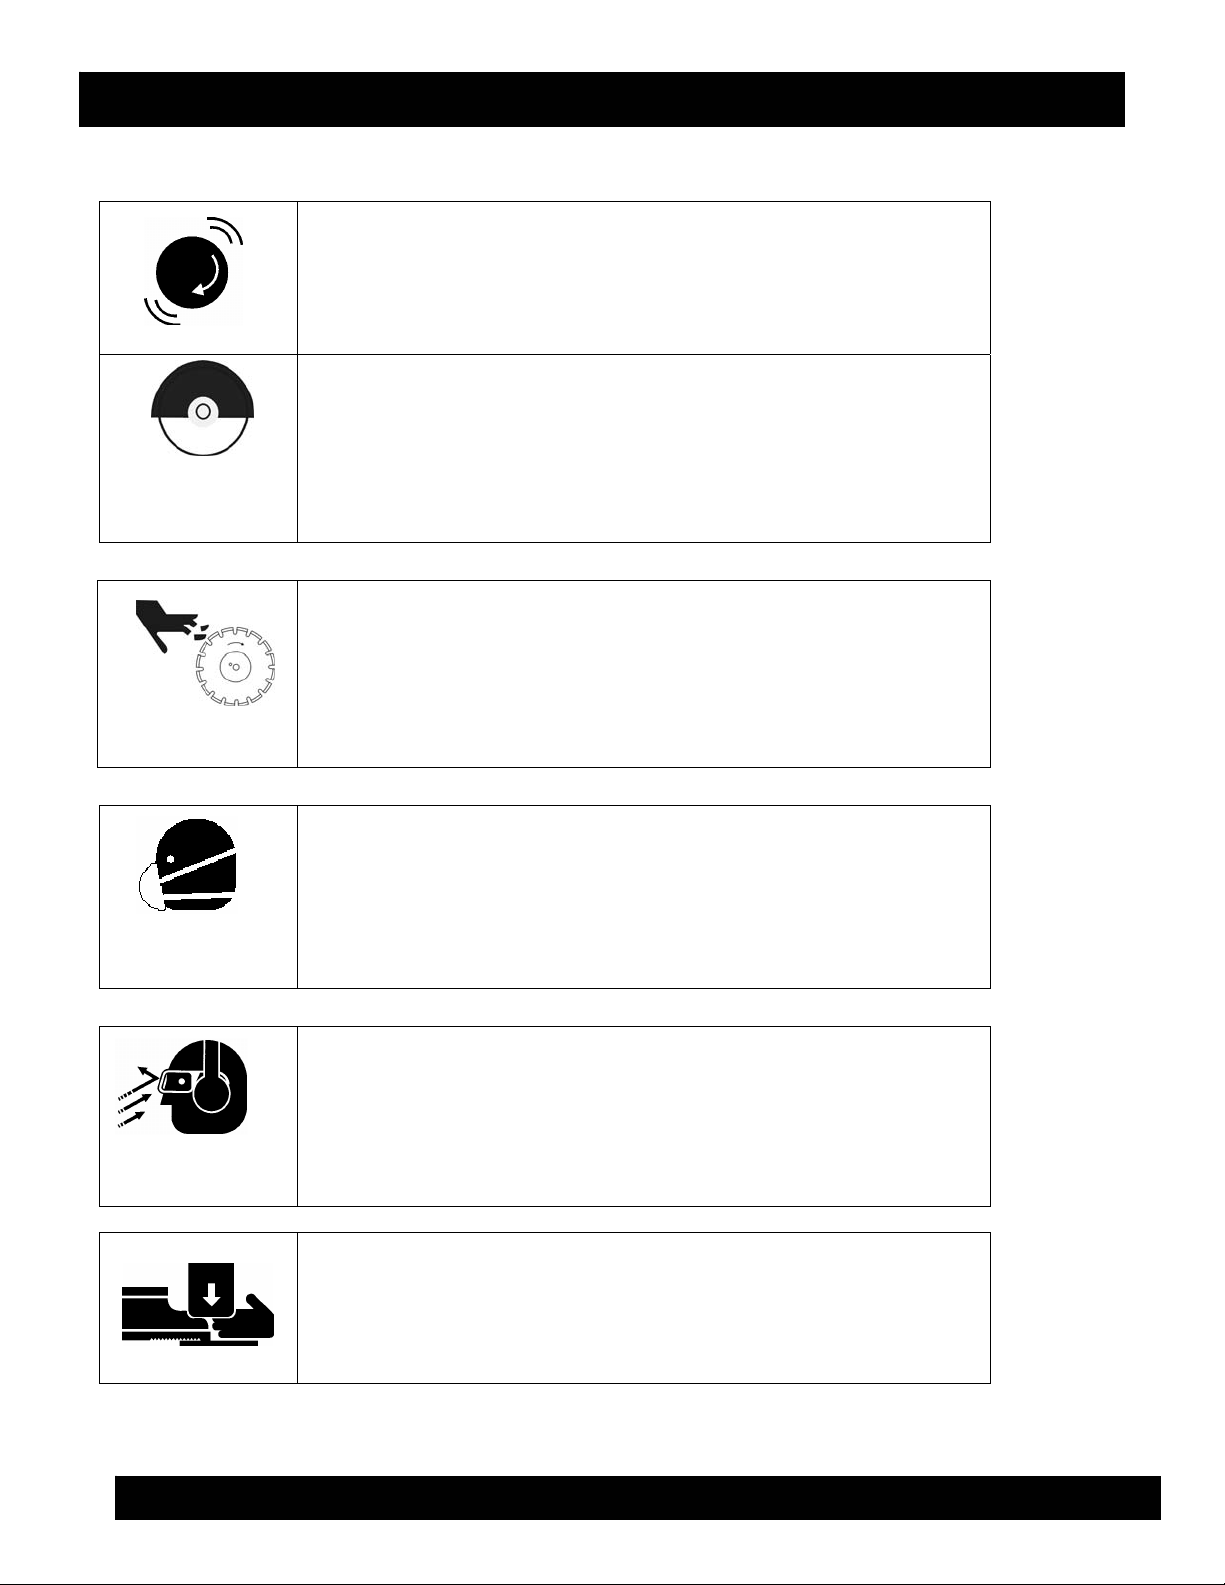
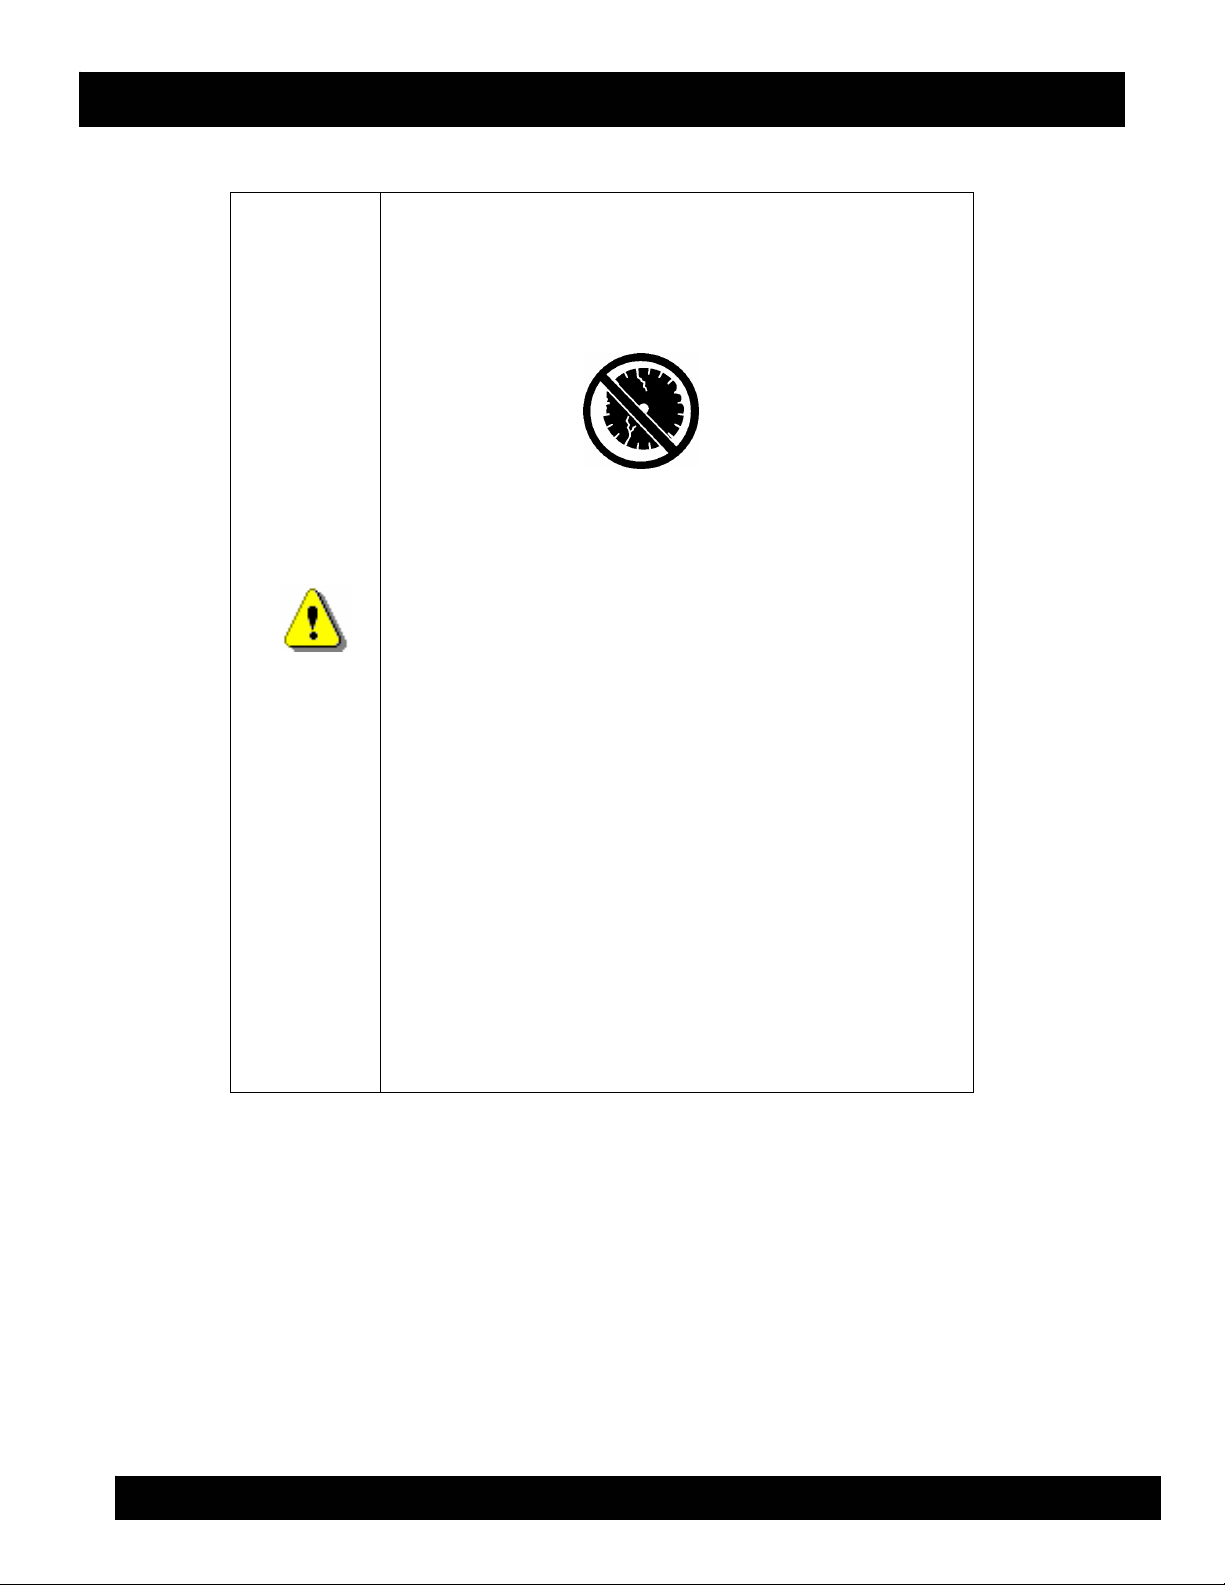
Over Speed
Guards and
Covers in Place
NEVER tamper with factory settings of engine governor or speed
settings. Ensure the proper Speed Kits are installed to safely
support the prescribed RPM settings for diamond blade
operations.
NEVER operate the saw without blade guards and covers in
place. Adhere to safety guidelines ANSI American National
Standards Institute, OSHA, and/or other applicable local
regulations.
Rotating Blade can cut, tear, and crush. Keep hands and feet
clear.
MQ SP-3035 CONCRETE SAW
Rotating Blade
Respiratory
Hazard
Sight &
Hearing Hazard
Crush Hazard
ALWAYS wear approved respiratory protection.
ALWAYS wear approved eye and hearing protection.
CRUSH AND PINCH HAZARD Keep hands and feet clear.
MQ SP-3035 CONCRETE SAW — OPERATION AND PARTS MANUAL — REV. #3 (09/29/06) — PAGE 9
HAZARD SYMBOLS
MQ SP-3035 CONCRETE SAW
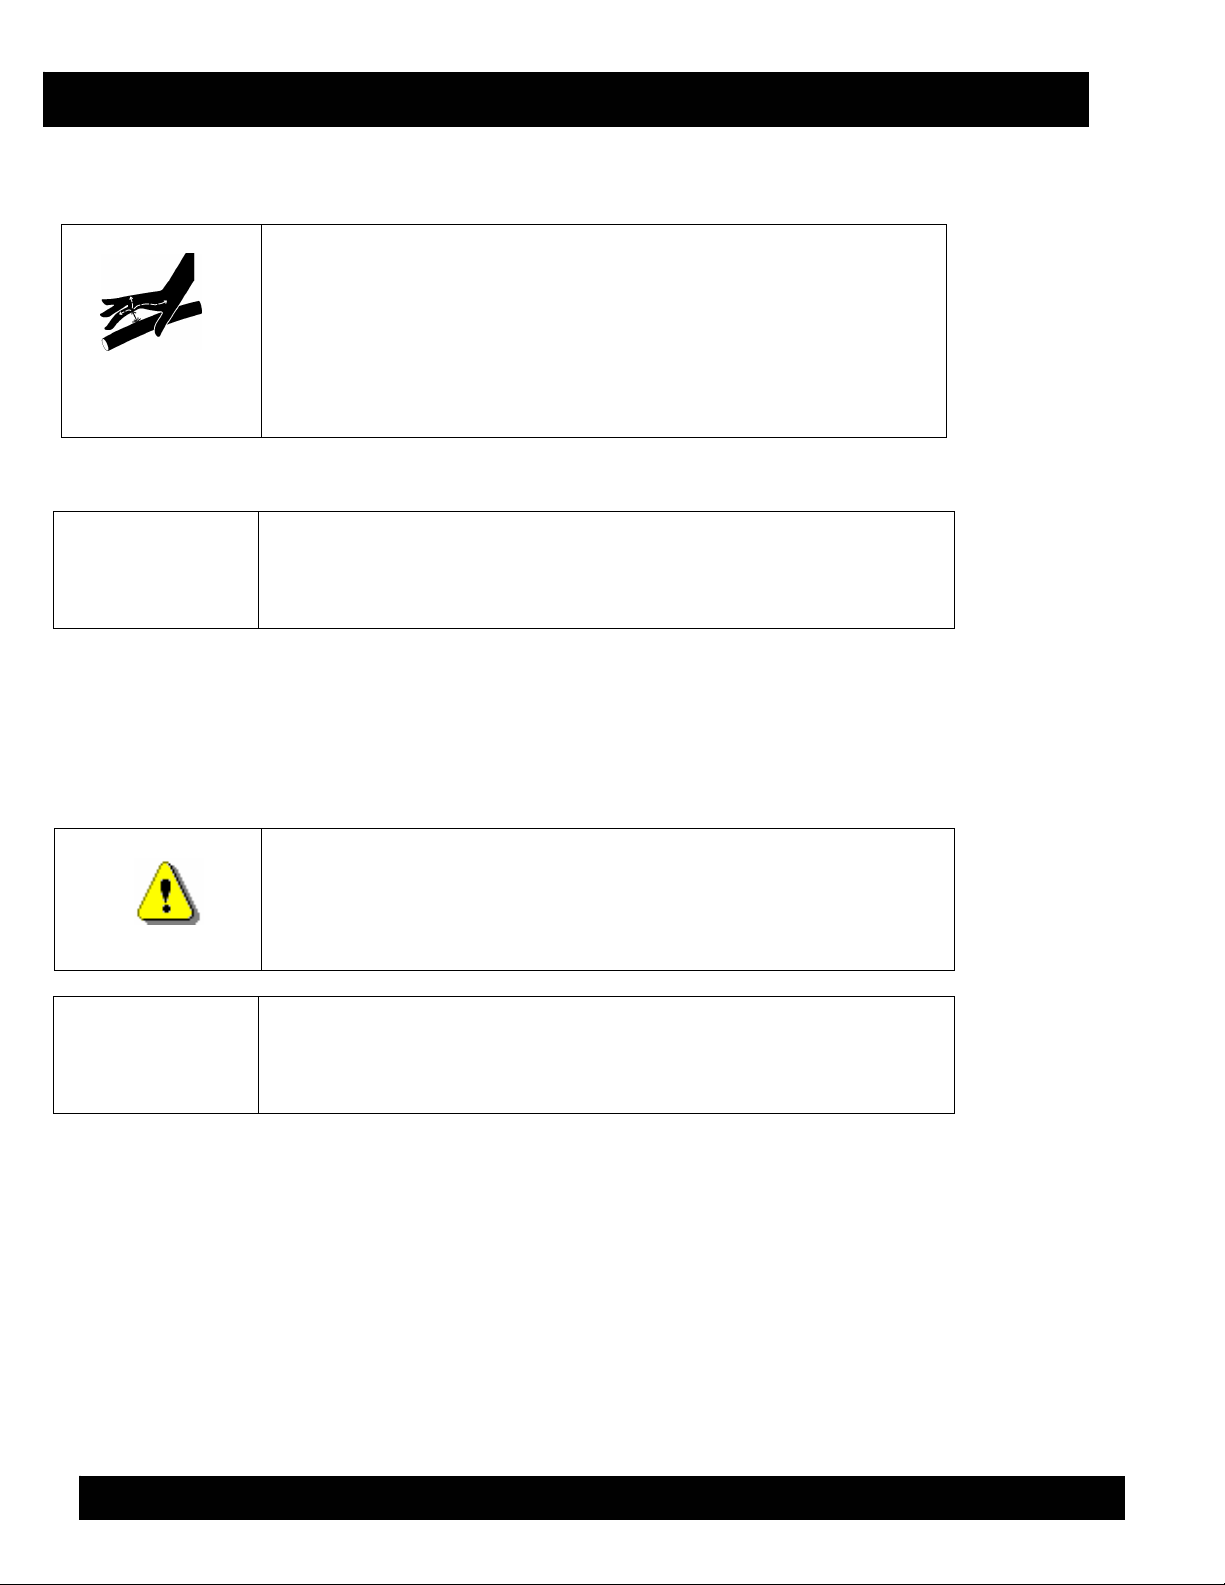
Skin Injection
Hazard
NOTE
Other important messages are provided throughout this manual to
help prevent damage to your concrete saw, other property, or the surrounding
environment.
CAUTION
NEVER use your hand to find hydraulic leaks. Use a piece of wood
or cardboard. Hydraulic fluid injected into the skin must be treated
by a knowledgeable physician immediately or severe injury or death
can occur.
Text set off like this presents clarifying information, specific
instructions or commentary designed to help prevent damage to
your saw, other property, or the environment.
Equipment Damage Message
Other important messages are provided throughout this manual
to help prevent damage to your concrete saw, other property, or
the surrounding environment.
NOTE
This concrete saw, other property, or the surrounding environment could be
damaged if you do not follow instructions.
MQ SP-3035 CONCRETE SAW — OPERATION AND PARTS MANUAL — REV. #3 (09/29/06) — PAGE 10
MQ SP-3035 CONCRETE SAW
General Safety Warnings
Most accidents involving product operation, maintenance and repair are caused by failure to
observe basic safety rules and precautions. Accidents can often be avoided by recognizing
potentially hazardous situations before an incident occurs.
WARNING
Before operating the saw, make sure all protective guards are securely
in place. All saws are supplied with a blade guard, collar guard and belt
guard.
Whenever necessary, replace operation and safety decals if they
become difficult to read
Verify the engine start switch is set to the OFF position before installing
a blade.
Make sure the operator knows how to turn the engine OFF in case of
an emergency.
Do not go near rotating parts (blades, belts, pulleys or wheels) while
engine is running.
Muffler and exhaust gases are extremely hot. Stay clear of muffler and
exhaust gases. Allow these parts to cool before servicing the saw.
Stay clear of the saw while it is being hoisted.
Anytime the saw is lifted onto its nose, or tilted fully back, for
maintenance access, the high end MUST be blocked up to prevent the
possibility of crush injury!
Allow the engine to cool before adding fuel or performing service and
maintenance functions. Contact with HOT components can cause
serious burns.
Never operate the saw in any enclosed or narrow area where free flow
of air is restricted. If the airflow is restricted it will cause serious
damage to the saw’s engine and may cause injury to people.
Remember the saw’s engine gives off DEADLY carbon monoxide gas.
ALWAYS refuel in a well-ventilated area; away from sparks and open
flame. Avoid “topping off” the filler port as spills can result.
ALWAYS use extreme caution when working with flammable liquids.
When refueling, STOP the engine and allow it to cool.
NEVER smoke around or near the machine. Fire or explosion could
result from fuel vapors, or if fuel is spilled on a HOT engine.
NEVER operate the saw in an explosive atmosphere where fumes are
present or near combustible materials. An explosion or fire could
result causing severe bodily harm or even death.
NEVER use fuel as a cleaning agent.
MQ SP-3035 CONCRETE SAW — OPERATION AND PARTS MANUAL — REV. #3 (09/29/06) — PAGE 11
General Safety Warnings
WARNING
ALWAYS read, understand, and follow procedures in the Operator’s
Manual before attempting to operate the equipment.
Be sure the operator is familiar with proper safety precautions and
operating techniques before using the saw.
Make sure the operating area is clear before starting the engine.
Maintain this equipment in a safe operating condition at all times
Keep the saw clean. It will work better and last longer
Use proper blades and follow the blade manufacturer’s
recommendations. Match blade rpm (Spindle rpm) to recommended
blade surface feet per minute (SFPM).
Tighten the 5/8” blade-mounting bolt to 100-125 foot-lbs. torque.
Turn engine OFF prior to fueling the saw!
Start engine with the joystick in NEUTRAL to prevent unexpected saw
movement.
Do not leave saw unattended while engine is running.
Do not start engine on a sloping surface to prevent unexpected loss of
control.
Do not park or leave saw unattended on a slope - the saw can roll when
the engine is OFF. Block the unit when leaving.
If the saw must be parked on a slope, turn it across the angle of the
slope, to prevent accidental downhill movement.
Prior Always store equipment properly when not being used. Equipment
should be stored in a clean, dry location out of the reach of children.
When storing the saw in freezing weather, blow out water lines to
prevent damage to components in the water delivery system.
Prior to service, level the frame surface.
Do not over tighten the Spindle drive belt
Turn on water flow prior to starting the engine, to prevent damage to the
impeller of a belt-driven water pump.
Don’t pollute! Waste oils and other chemicals must be disposed of in a
MQ SP-3035 CONCRETE SAW
manner consistent with local and state environmental protection
regulations.
MQ SP-3035 CONCRETE SAW — OPERATION AND PARTS MANUAL — REV. #3 (09/29/06) — PAGE 12
BLADE SAFETY
MQ SP-3035 CONCRETE SAW
WARNING
ALWAYS inspect diamond blades before each use.
The blade should exhibit no cracks, dings, or flaws in
the steel centered core and/or rim. Center (arbor)
hole must be undamaged and true.
Examine blade flanges for damage, excessive wear
and cleanliness before mounting blade. Blade should
fit snugly on the shaft and against the inside/outside
of the saw.
Only cut the material that is specified by the blade.
Read the specifications of the blade to ensure the
proper tool has been matched to the material being
cut.
ALWAYS keep blade guards in place. Exposure of
the blade must not exceed 180 degrees.
Ensure that the blade does not come into contact
with the ground or surface during transportation. DO
NOT drop the blade on the ground or surface.
The engine governor is designed to permit maximum
engine speed in a no-load condition. Speeds that
exceed this limit may cause the blade to exceed the
maximum safe allowable speed.
Ensure that the blade is mounted for proper
operating direction.
MQ SP-3035 CONCRETE SAW — OPERATION AND PARTS MANUAL — REV. #3 (09/29/06) — PAGE 13
MQ SP-3035 CONCRETE SAW
SAW TRANSPORTATION SAFETY
WARNING
Use appropriate lifting equipment to ensure the safe
movement of the saw.
DO NOT use the handle bars and/or front pointer as lifting
points.
NEVER attempt to tow the untrailered saw behind a vehicle.
NEVER transport the saw with the blade mounted.
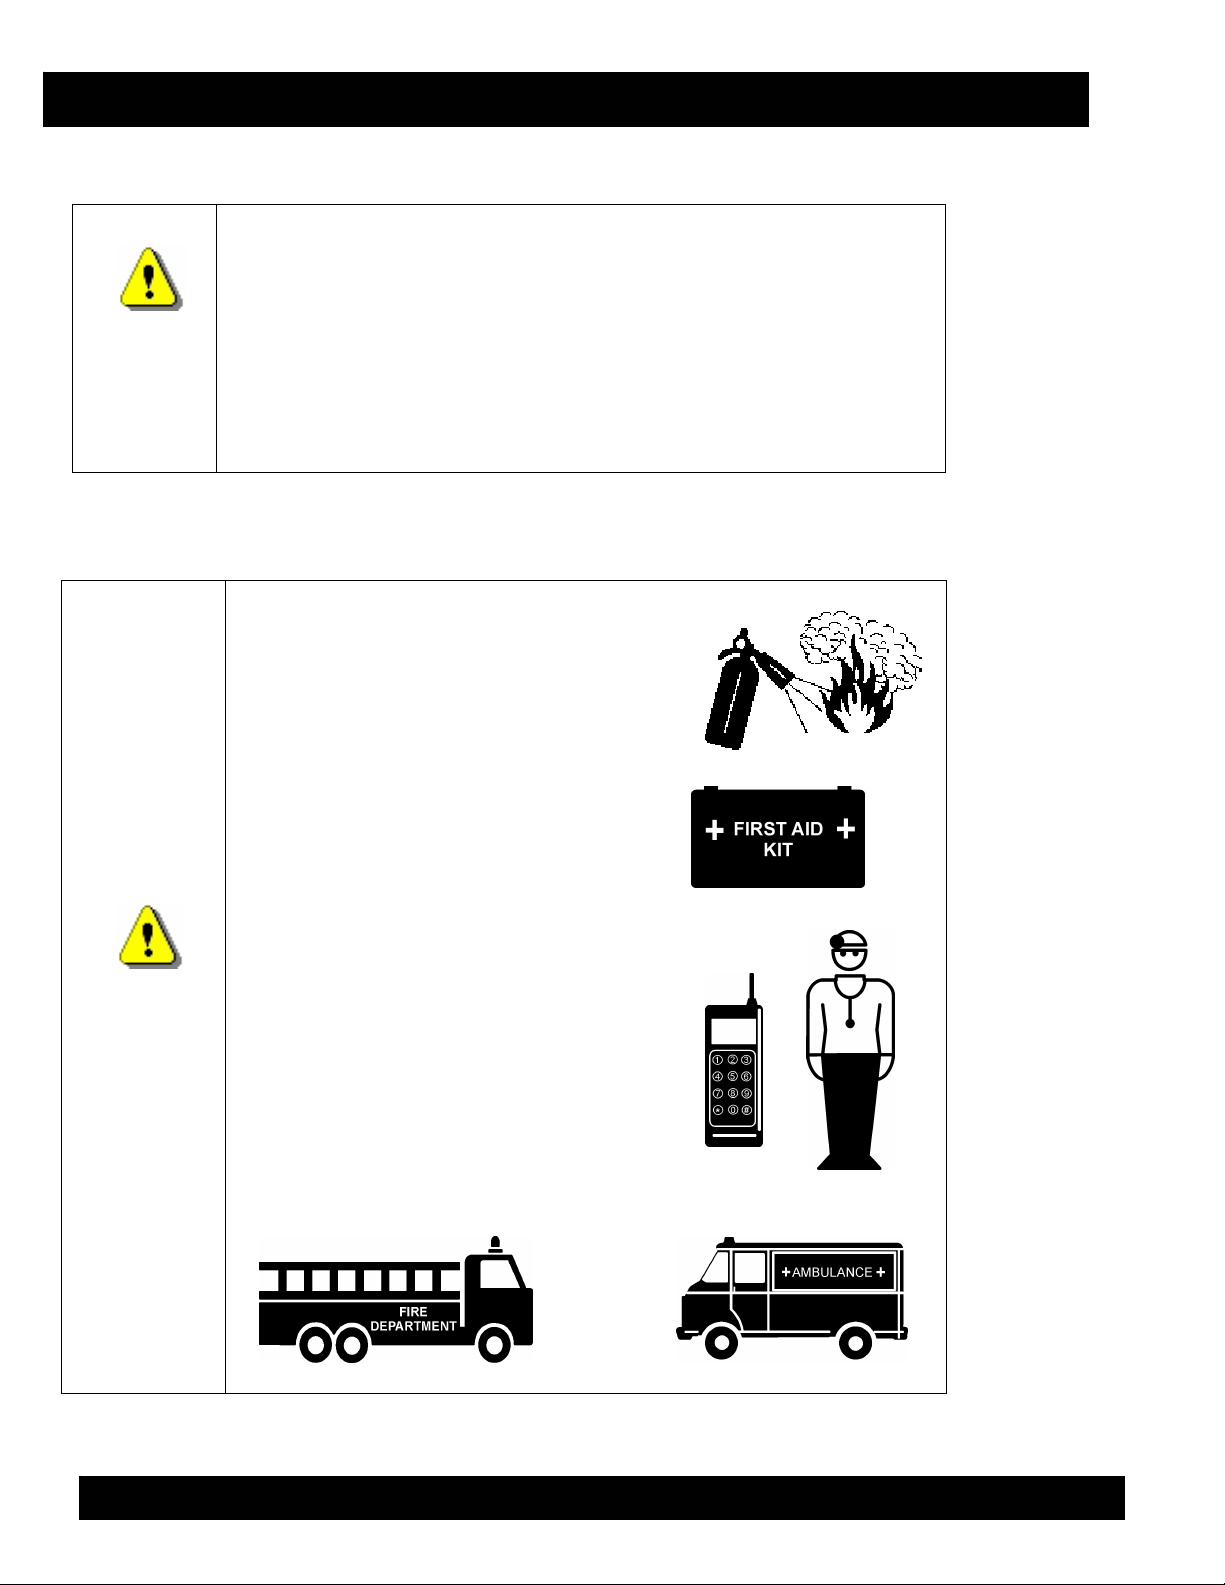
EMERGENCIES
WARNING
ALWAYS know the location of the
nearest fire extinguisher.
ALWAYS know the location of the
nearest first aid kit.
In emergencies always know the
location of the nearest phone or
keep a phone on the job site.
Know the phone numbers of the
nearest ambulance, doctor, and fire
department. Knowing this information
is invaluable in the case of an emergency
and could keep a serious situation from
becoming a tragic one.
MQ SP-3035 CONCRETE SAW — OPERATION AND PARTS MANUAL — REV. #3 (09/29/06) — PAGE 14
MQ SP-3035 CONCRETE SAW
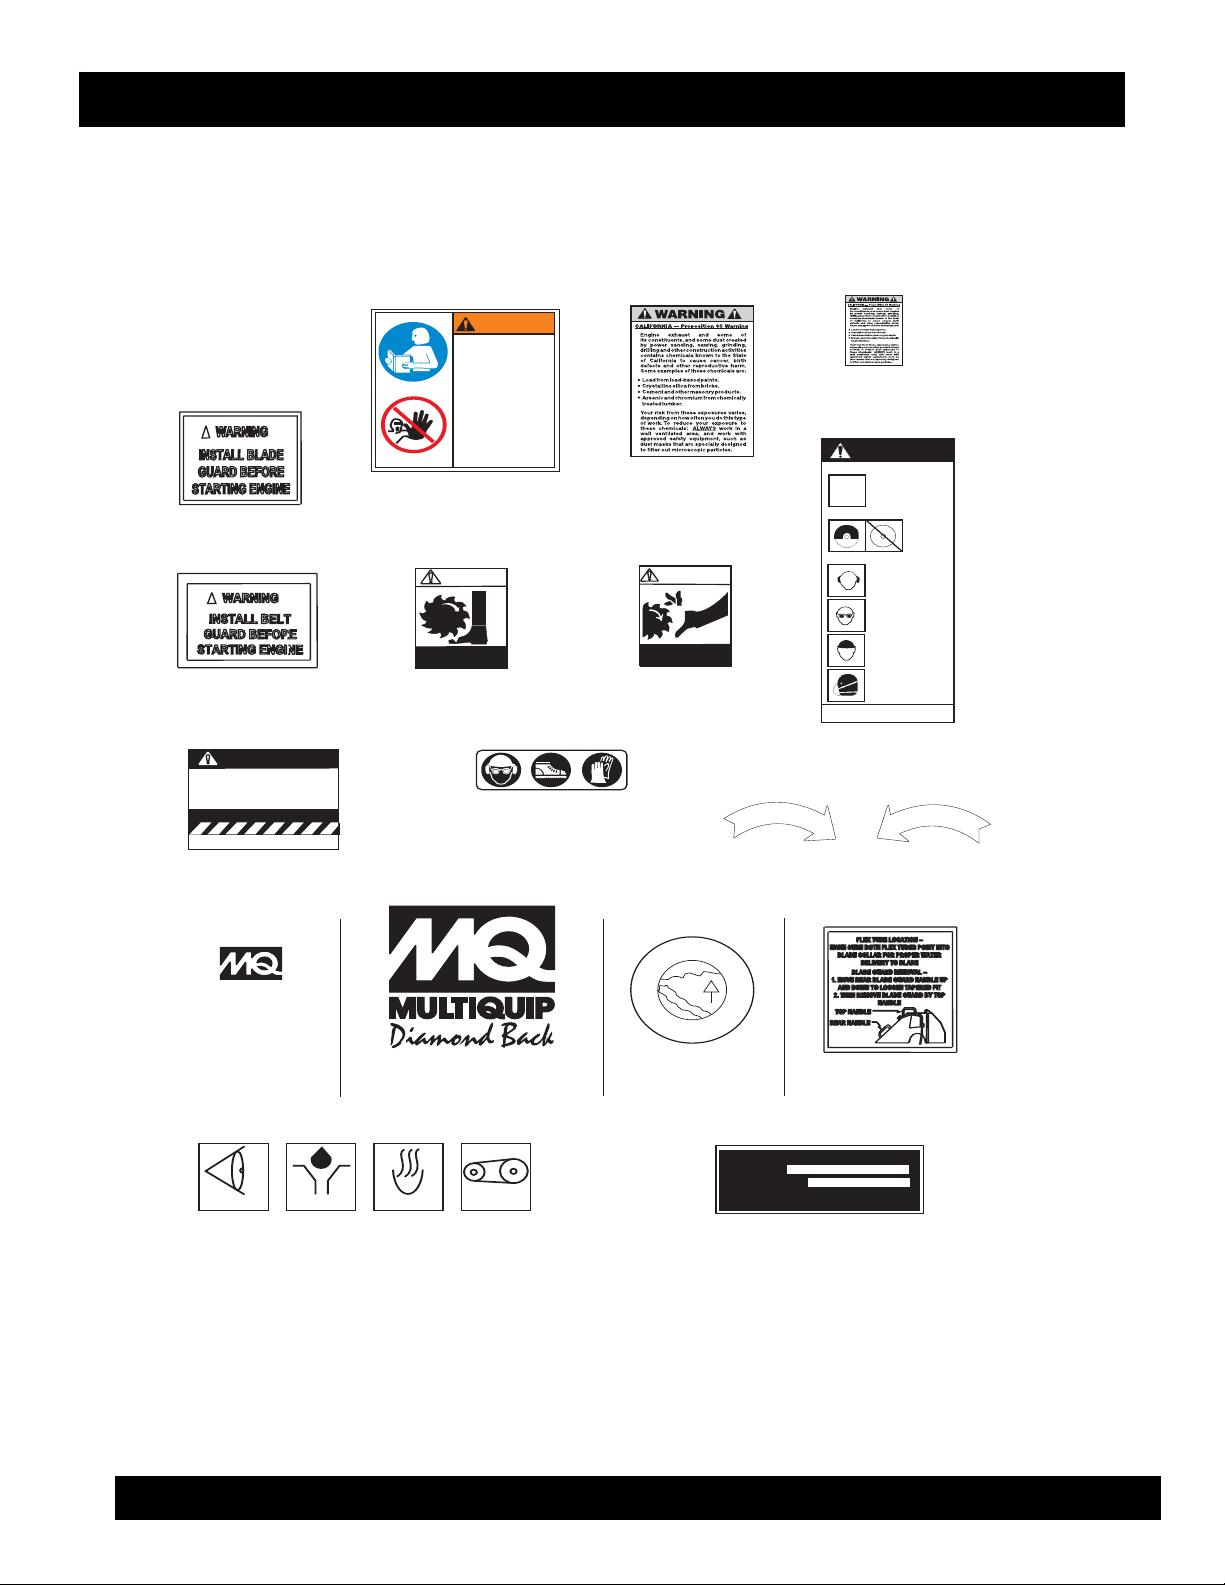
MACHINE OPERATION AND SAFETY DECALS
The Multiquip SP-3035 Saw is equipped with a number of operation and safety decals. Should
any of these decals become unreadable, replacements can be obtained from your dealer.
P/N 604000
P/N 35137
P/N 604001
CAUTION
When Larger Blade and Guard
is Installed, Belt Drive MUST
Be Changed to Proper Size.
See Owners Manual.
FAILURETO COMPLY WITH THE C C AH
JADV EEEAV EEAOIEJGGVCBVVZ
S.M.I. MASONRYAND CONCRETE
SAWMANUFACTURER’S INSTITUTE
P/N 23330-001
P/N 25250-001
WARNING
To avoid injury,
you MUST read
and understand
operator’s manual
before using this
machine.
This machine to
be operated by
qualified
personnel only.
Ask for training
as needed.
WARNING
KEEP FEET
CLEAR
P/N35137
P/N 25249-001
P/N 36099 (ISO Blue)
P/N 20525
WARNING!
KEEP HANDS
CLEAR
P/N 25491
P/N 21571
1-1/2” x 2-1/4”
WARNING
Nasfsaer dfghhte thsfaw wiot
Nesfaer dfgat
the sfarbs in
saccty guizcin
cbccR) 19b4
Nasfsaer dfghhte thsfaw wiot
Nasfsaer dfghhte thsfaw wiot
SMI
Nasfsaer dfghhte thsfaw wiot
Nesfaer df
the sfarbs i
n pbb
Nesfaer dfg
the sfarbs i
Nesfaer dfgate ths
the sfarbs i
Neer dfgate ths
the sfarbs in pbb
Nesfar dfgate ths
tfarbs in pbb
P/N 22122-001
A
T
T
I
O
O
R
N
A
T
T
I
O
O
R
N
P/N 25678
P/N 25483
(small)
CHECK
DECAL SHEET INTL STDS
Fig. 1 — Decals
MQ SP-3035 CONCRETE SAW — OPERATION AND PARTS MANUAL — REV. #3 (09/29/06) — PAGE 15
LUBRICATION
P/N 11246
P/N 25782
HOT
BELT DRIVE
D
W
E
R
O
P
C
O
D
E
A
T
P/N 13118
CONTACT MULTIQUIP
SERVICE DEPARTMENT
MODEL
SERIAL NO.
P/N 606004
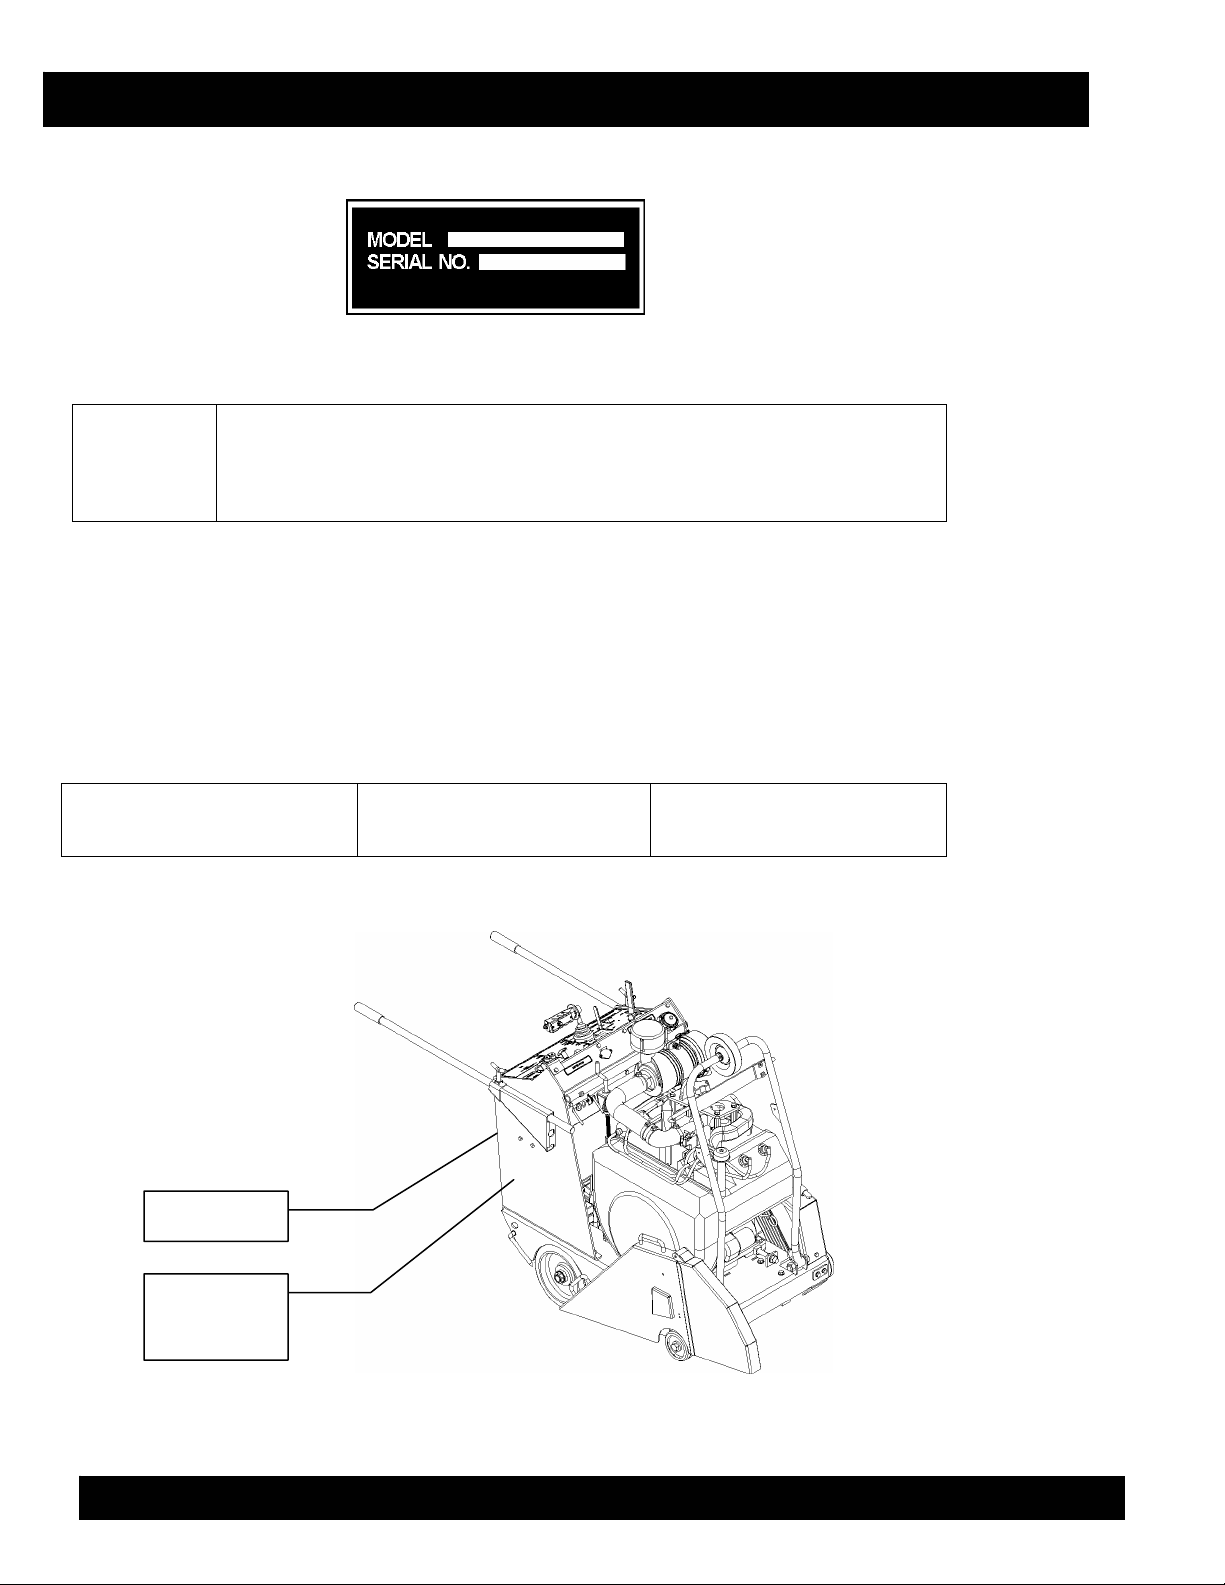
MQ SP-3035 CONCRETE SAW
Serial Tag
Fig. 2 — Serial Tag
For future reference, fill in the model number and serial number of
NOTE
The serial tag contains the model number and serial number of the saw. This information details
all parts that were included with the saw when it was shipped from the factory, as well as the date
of manufacture.
your saw in the space above.
Record your ENGINE model number, spec. number and serial number here:
MODEL NO. SPEC. NO. SERIAL NO.
The serial tag is bonded to the inside panel of the console.
Serial Tag
Engine
Serial
Numbers
Fig. 3 — Serial Number Locations
MQ SP-3035 CONCRETE SAW — OPERATION AND PARTS MANUAL — REV. #3 (09/29/06) — PAGE 16
OPERATION
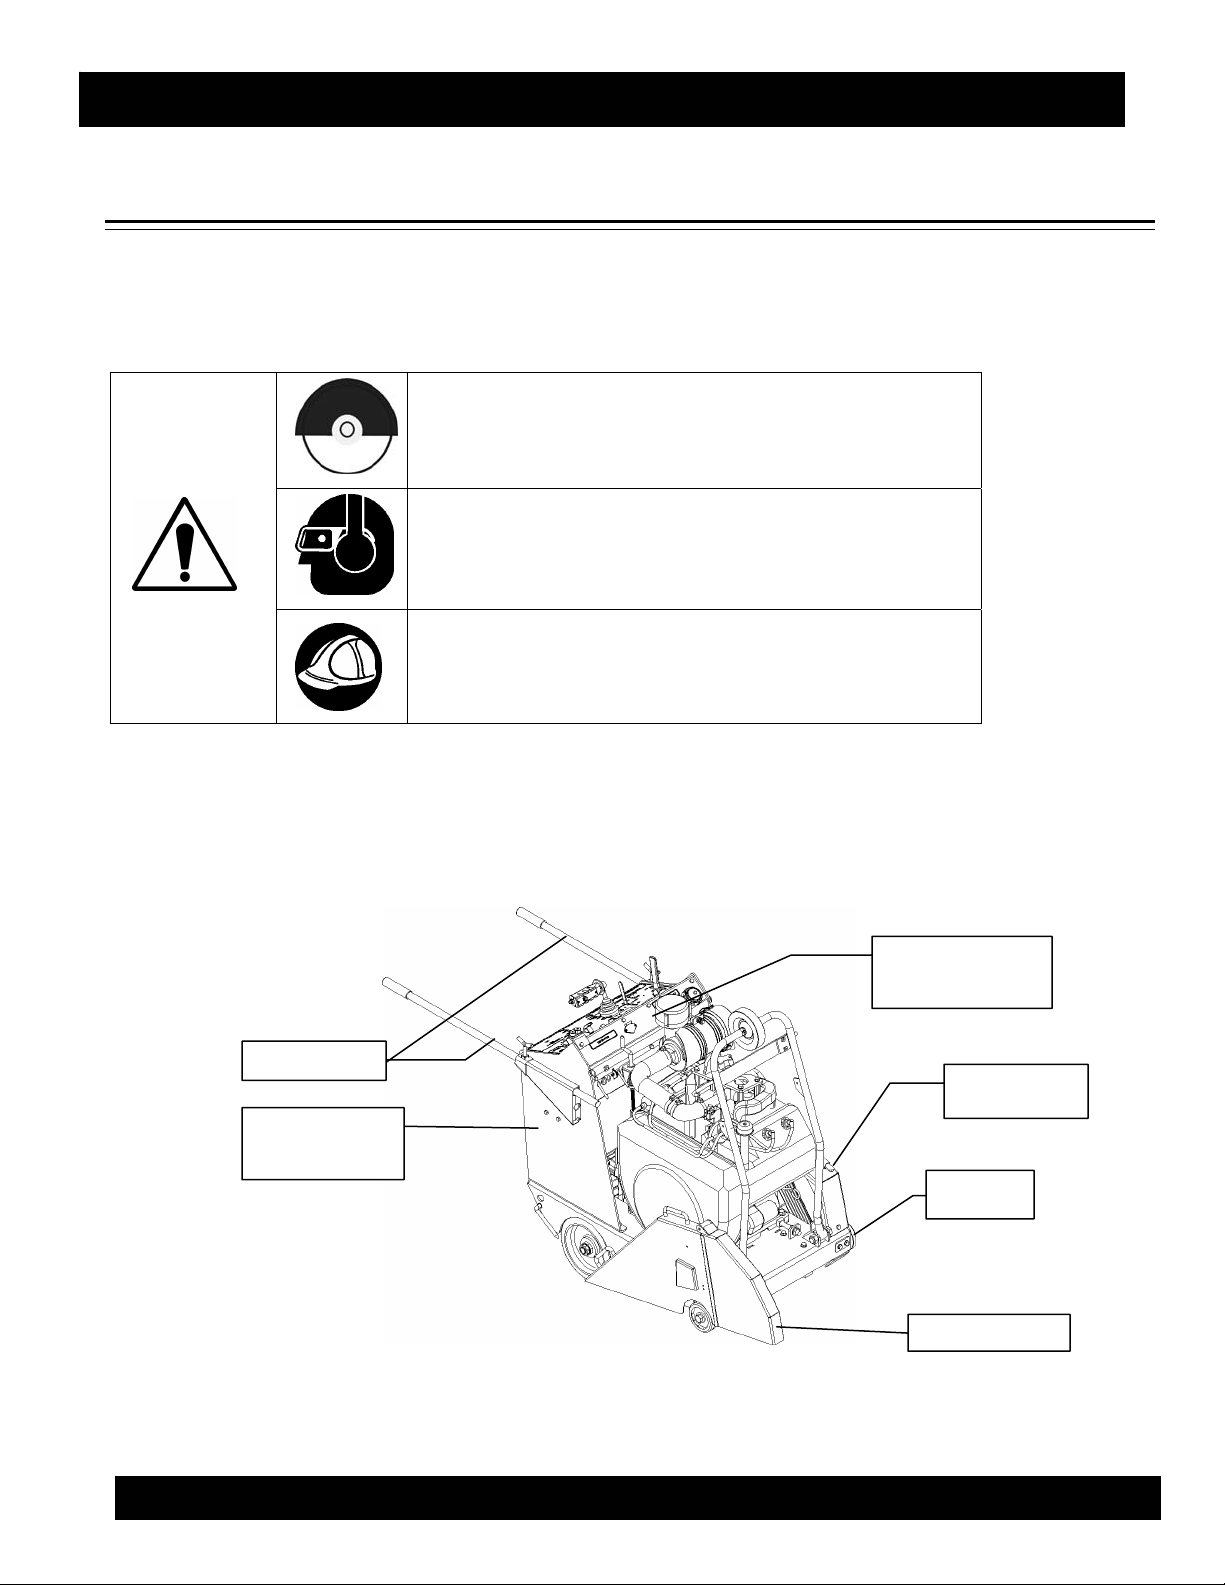
Before Starting
MQ SP-3035 CONCRETE SAW
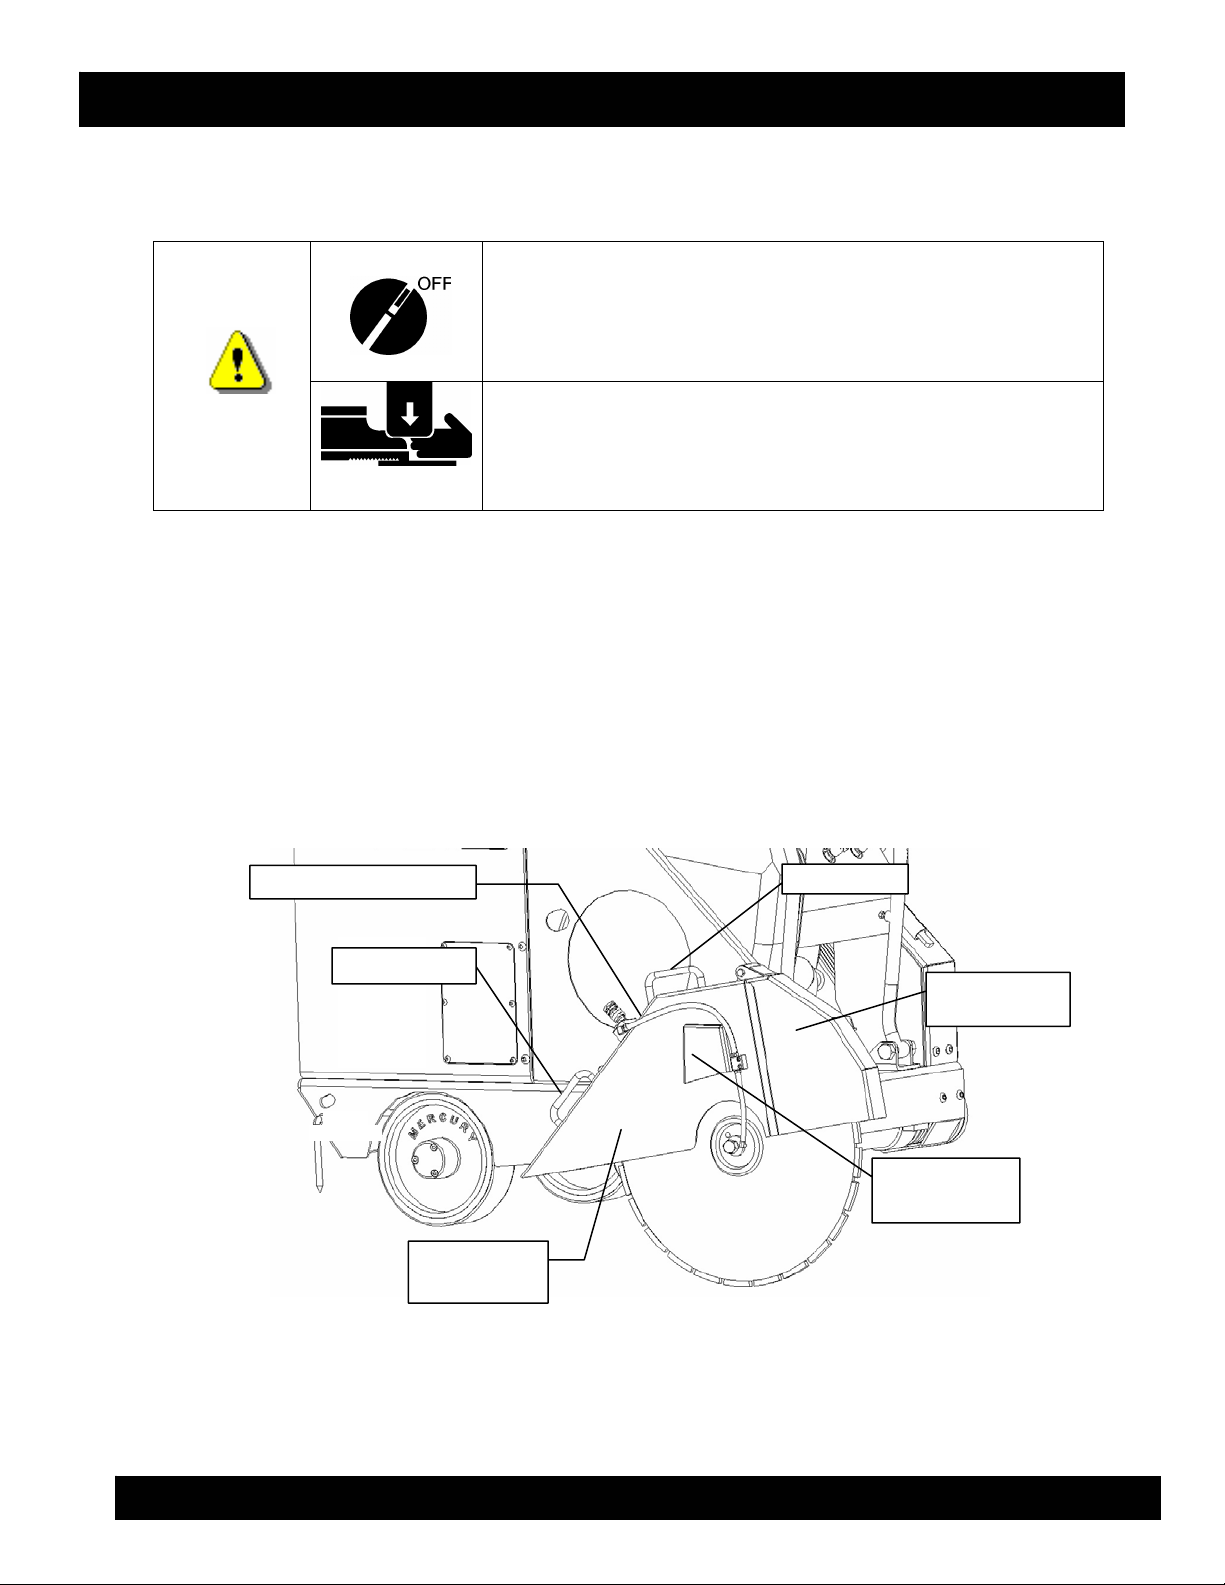
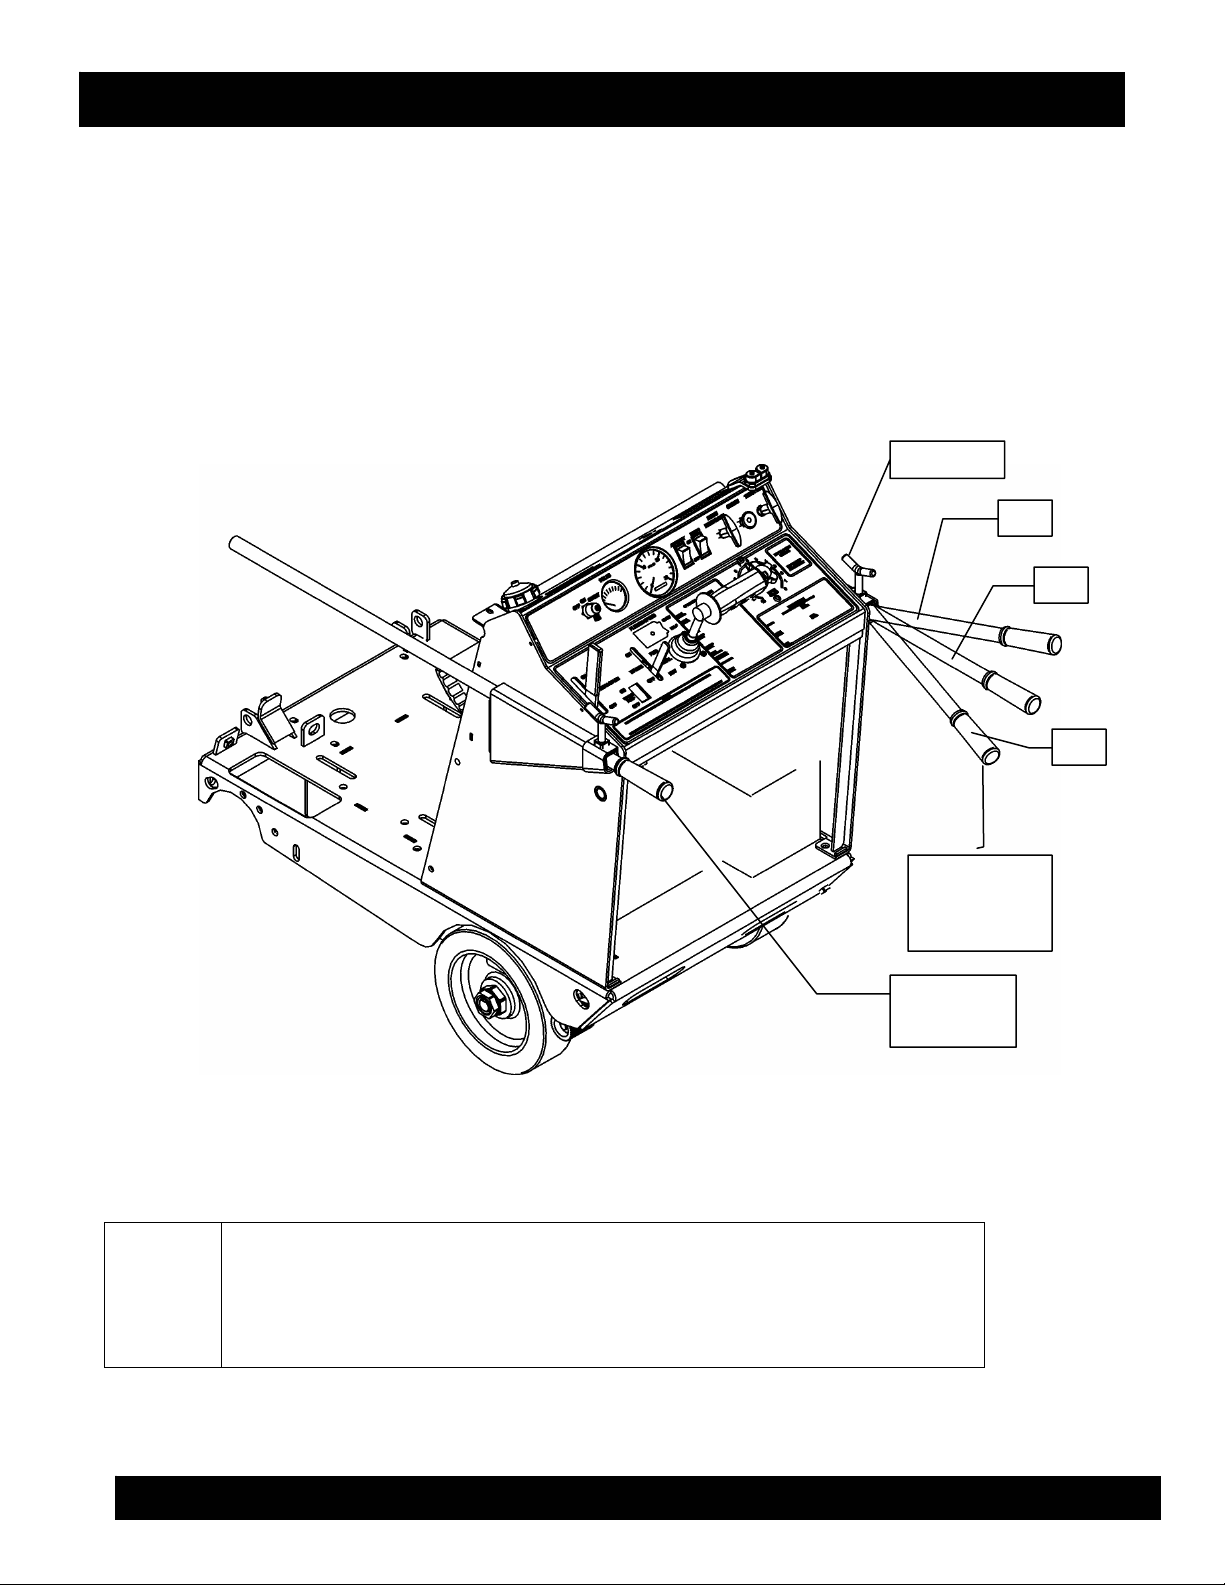
Walk around the saw and ensure that all guards
and panels are properly installed.
Wear eye and hearing protection.
Wear protective clothing.
1. Check engine and hydraulic oil.
2. Verify the proper-sized blade guard is fully installed on the blade guard mounting tab.
3. Adjust handlebars for best operator control.
4. If a belt driven water pump is installed, turn on the water flow before starting the engine.
Console
Access Panel
Handlebars
Belt Guard
Rear Access
Panel
Flange
Blade Guard
Fig. 4 — Guards & Panels
MQ SP-3035 CONCRETE SAW — OPERATION AND PARTS MANUAL — REV. #3 (09/29/06) — PAGE 17
T
f
g
g
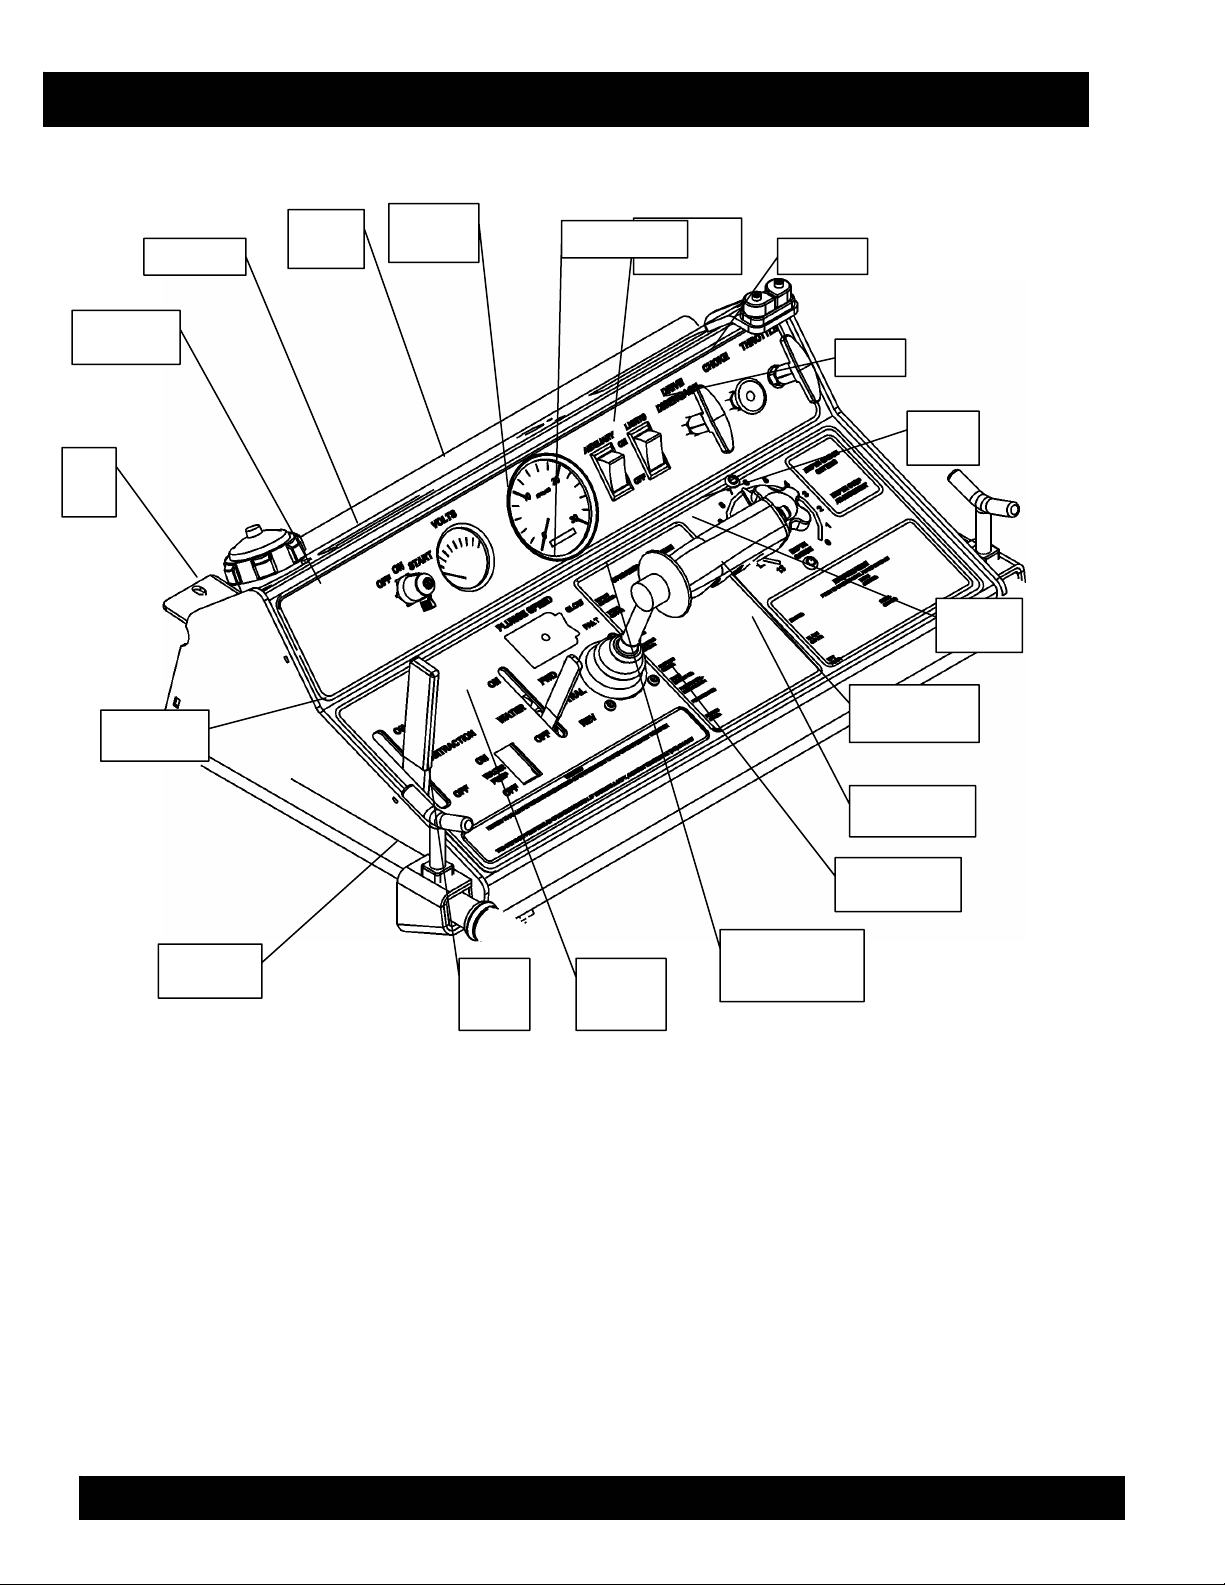
Control Panel
MQ SP-3035 CONCRETE SAW
Engine OnOf
-Start
Fuel
Tank
Cap
Positraction
Control
Voltmeter
Engine
Tach
Auxiliary
Switch
Light Switch
Drive
Disengage
hrottle
Choke
Depth Gauge
Zero
Depth
Gau
Plunge
Button
e
Maintenance
Operating
Instructions
Safety
Warnin
s
Water
Pump
Switch
Water
Flow
Control
Speed Control
Joystick
Fig. 5 — The Control Panel
MQ SP-3035 CONCRETE SAW — OPERATION AND PARTS MANUAL — REV. #3 (09/29/06) — PAGE 18
MQ SP-3035 CONCRETE SAW
Engine Power, Cutting Power & Sheave Size
NEVER tamper with factory settings of engine governor
WARNING
or speed settings. Ensure the proper Speed Kits are
installed to safely support the prescribed RPM settings
for diamond blade operations.
Blade Size & Configuration per Model
The SP-3035 is available in four Blade Speed configurations. The following chart shows the
various configurations for each model.
Blade
Size
16" Q303516 3000 3000 12 25603 540000 3.8" 540006 3.8" 12566
20" Q303520 2520 2800 9 25849 540070 3.6" 540066 4.0" 13195
26" Q303526 2000 2800 7 35103 540012 3.0" 540065 4.2" 13614
30" Q303530 1773 2600 5 35104 540012 3.0" 540049 4.4" 13923
Model Engine
RPM No
Load
Spindle
RPM No
Load
Governor
Setting
(Hole
Number)
Ratio
Kit
Engine
Pulley
Part
Number
Engine
Pulley
Size
When choosing a blade for your cutting conditions, follow the blade manufacturer’s
Spindle
Pulley Part
Number
Spindle
Pulley
Size
Surface
Feet Per
Minute
recommendations. Match blade RPM (Spindle RPM) to the recommended blade Surface Feet Per
Minute (SFPM).
SFPM 12” dia.
RPM
8,000 2546 2183 1910 1698 1528 1273 1175 1019
8,500 2706 2319 2029 1804 1623 1353 1249 1082
9,000 2865 2456 2149 1910 1719 1432 1322 1146
9,500 3024 2592 2268 2016 1814 1512 1396 1210
10,000 3183 2728 2387 2122 1910 1592 1469 1273
10,500 3342 2865 2507 2228 2005 1671 1543 1337
11,000 3501 3001 2626 2334 2101 1751 1616 1401
11,500 3661 3138 2745 2440 2196 1830 1690 1464
12,000 3820 3274 2865 2546 2292 1910 1763 1528
12,500 3979 3410 2984 2653 2387 1989 1836 1592
13,000 4138 3548 3104 2759 2483 2069 1910 1655
14”
dia.
RPM
16” dia.
RPM
18” dia.
RPM
20”
dia.
RPM
24” dia.
RPM
26”
dia.
RPM
30”
dia.
RPM
MQ SP-3035 CONCRETE SAW — OPERATION AND PARTS MANUAL — REV. #3 (09/29/06) — PAGE 19
MQ SP-3035 CONCRETE SAW
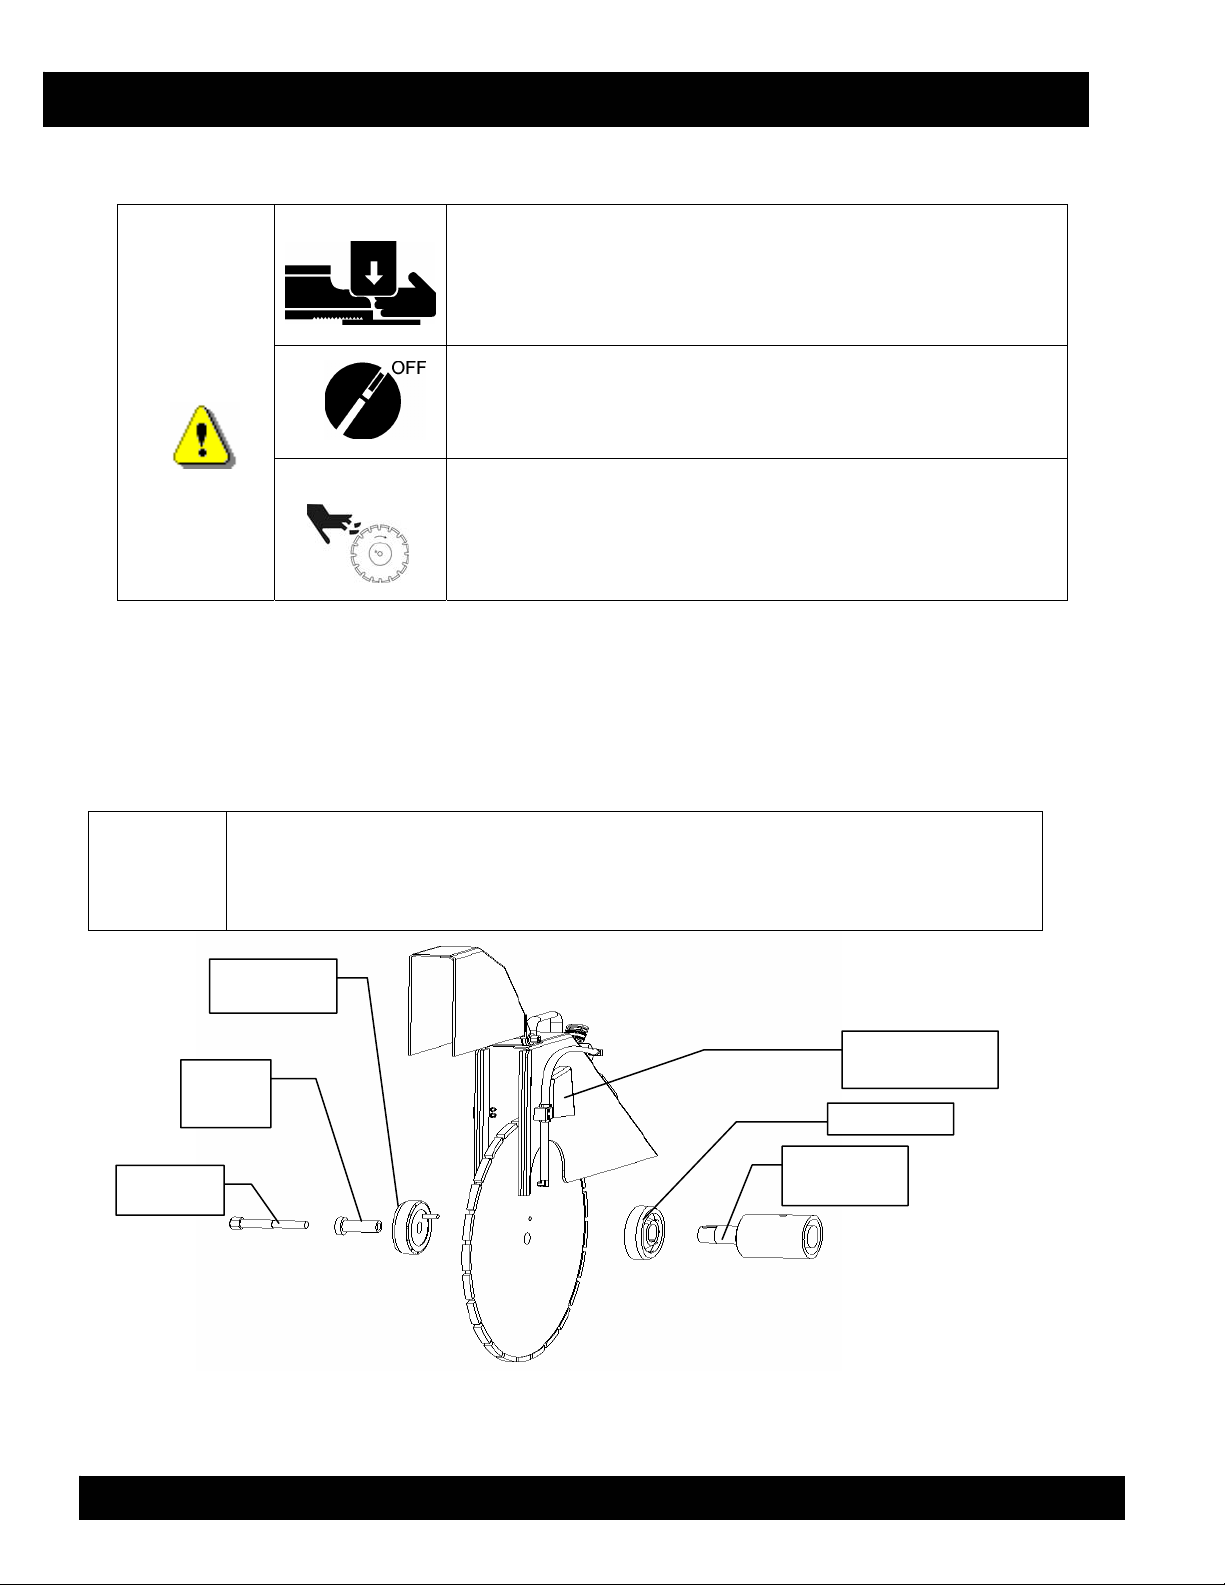
Installing the Blade, Blade Guard & Blade Flange
Remain Clear of all parts of saw while installing blade to
prevent crush injury or death.
Verify the engine start switch is OFF before installing
blade.
Tighten the 5/8” blade-mounting bolt to 100-125 footpounds torque.
WARNING
The blade can be mounted on either side of the saw to accommodate different cutting jobs.
1. Raise the saw so that the blade will clear the ground when installed.
2. Verify that blade flanges are clean and undamaged.
3. Insert the bushing and mounting bolt through the outer flange and blade.
4. Align flange pin through the blade into the inner flange.
5. Tighten the 5/8” mounting bolt to 100-125 foot-pounds of torque.
The blade mounting bolt on the right side of the saw (as viewed from the
NOTE
operator’s position) has a left hand-thread, while the blade-mounting bolt on
the left side of the saw has a right-hand thread.
Mounting
Bolt
MQ SP-3035 CONCRETE SAW — OPERATION AND PARTS MANUAL — REV. #3 (09/29/06) — PAGE 20
Outer Flange
with Pin
Flange
Bushing
Blade Guard
Mounting Clip
Inner Flange
Tapered
Spindle Shaft
Fig. 6 — Blade Components
MQ SP-3035 CONCRETE SAW
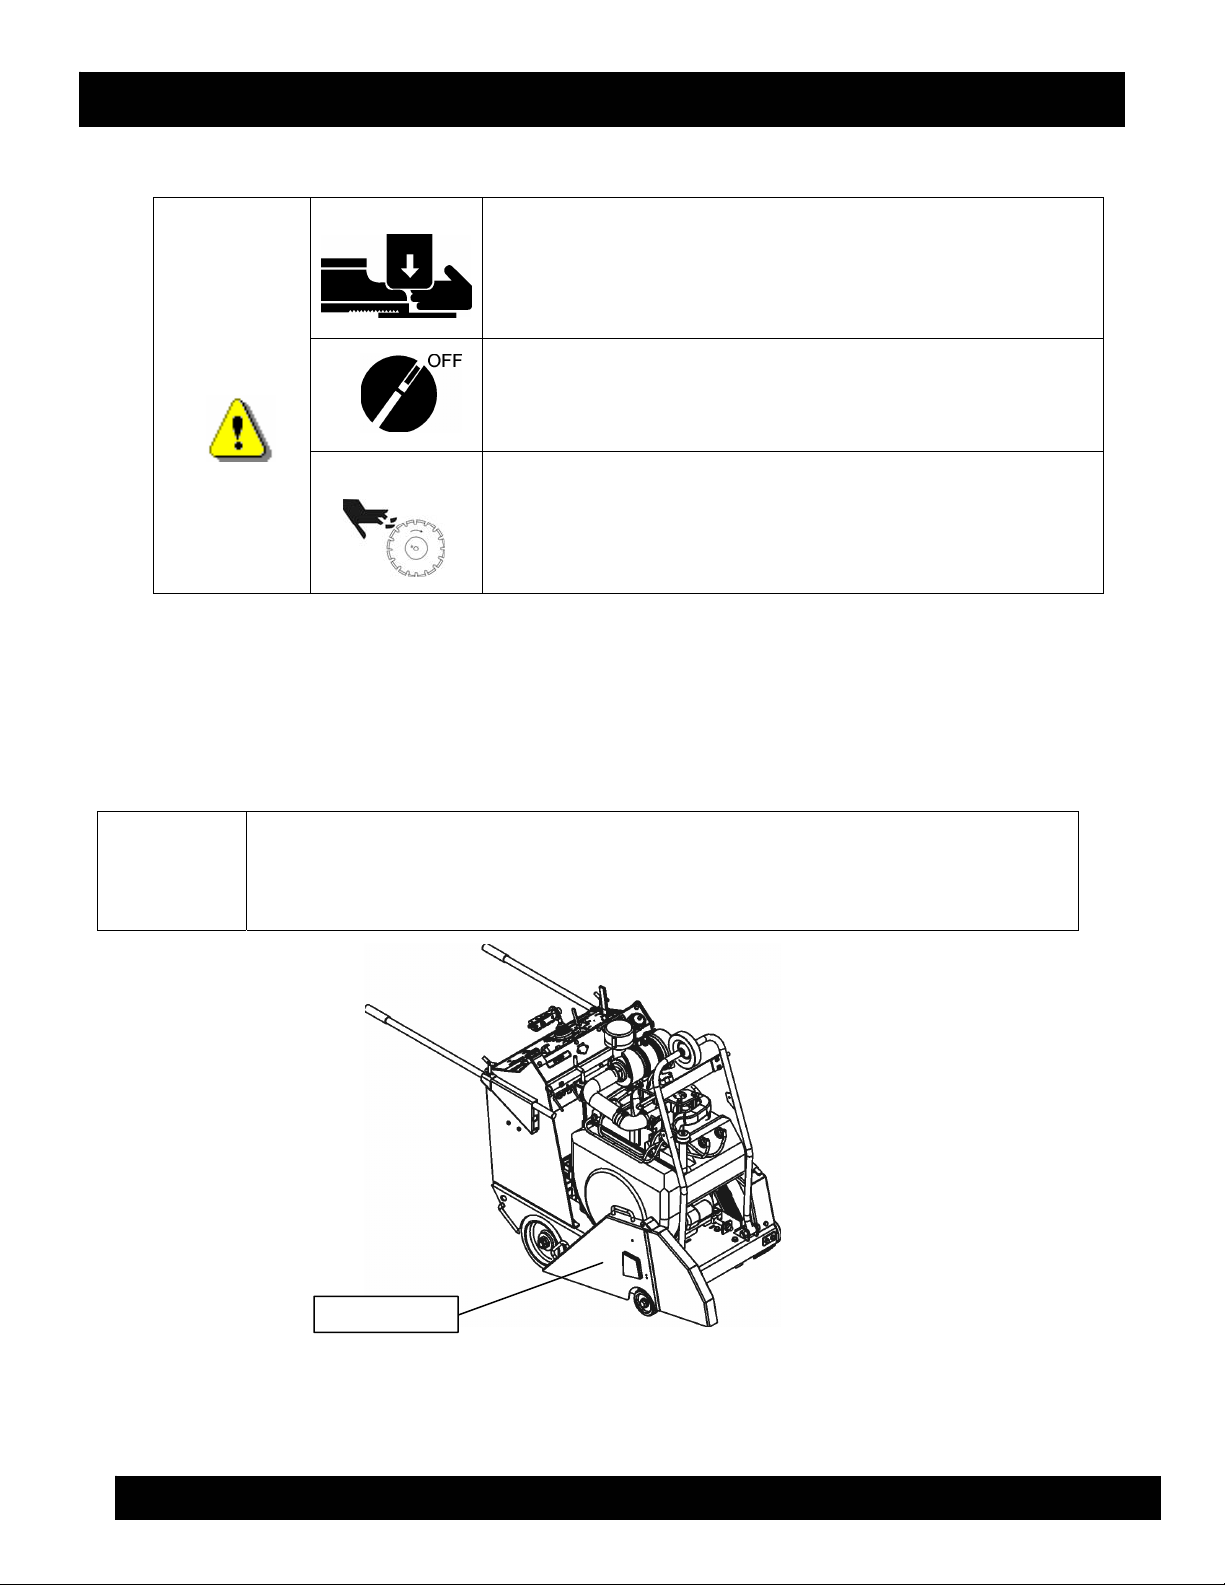
Removing the Blade, Blade Guard & Blade Flange
WARNING
1. Raise the saw so that the blade will clear the ground.
2. Remove blade guard. See fig. 7
3. Remove the mounting bolt from the outer flange and bushing.
4. Remove blade, outer flange and bushing simultaneously.
Remain Clear of all parts of saw while installing blade to
prevent crush injury or death.
Verify the engine start switch is OFF before installing
blade.
Tighten the 5/8” blade-mounting bolt to 100-125 footpounds torque.
5. Reinstall the flange bushing, outer flange and mounting bolt.
6. Tighten the 5/8” mounting bolt to 75 foot-pounds of torque.
The blade mounting bolt on the right side of the saw (as viewed from the
NOTE
operator’s position) has a left hand-thread, while the blade-mounting bolt on
the left side of the saw has a right-hand thread.
Blade Guard
Figure 7. Blade Guard Removal
MQ SP-3035 CONCRETE SAW — OPERATION AND PARTS MANUAL — REV. #3 (09/29/06) — PAGE 21
MQ SP-3035 CONCRETE SAW
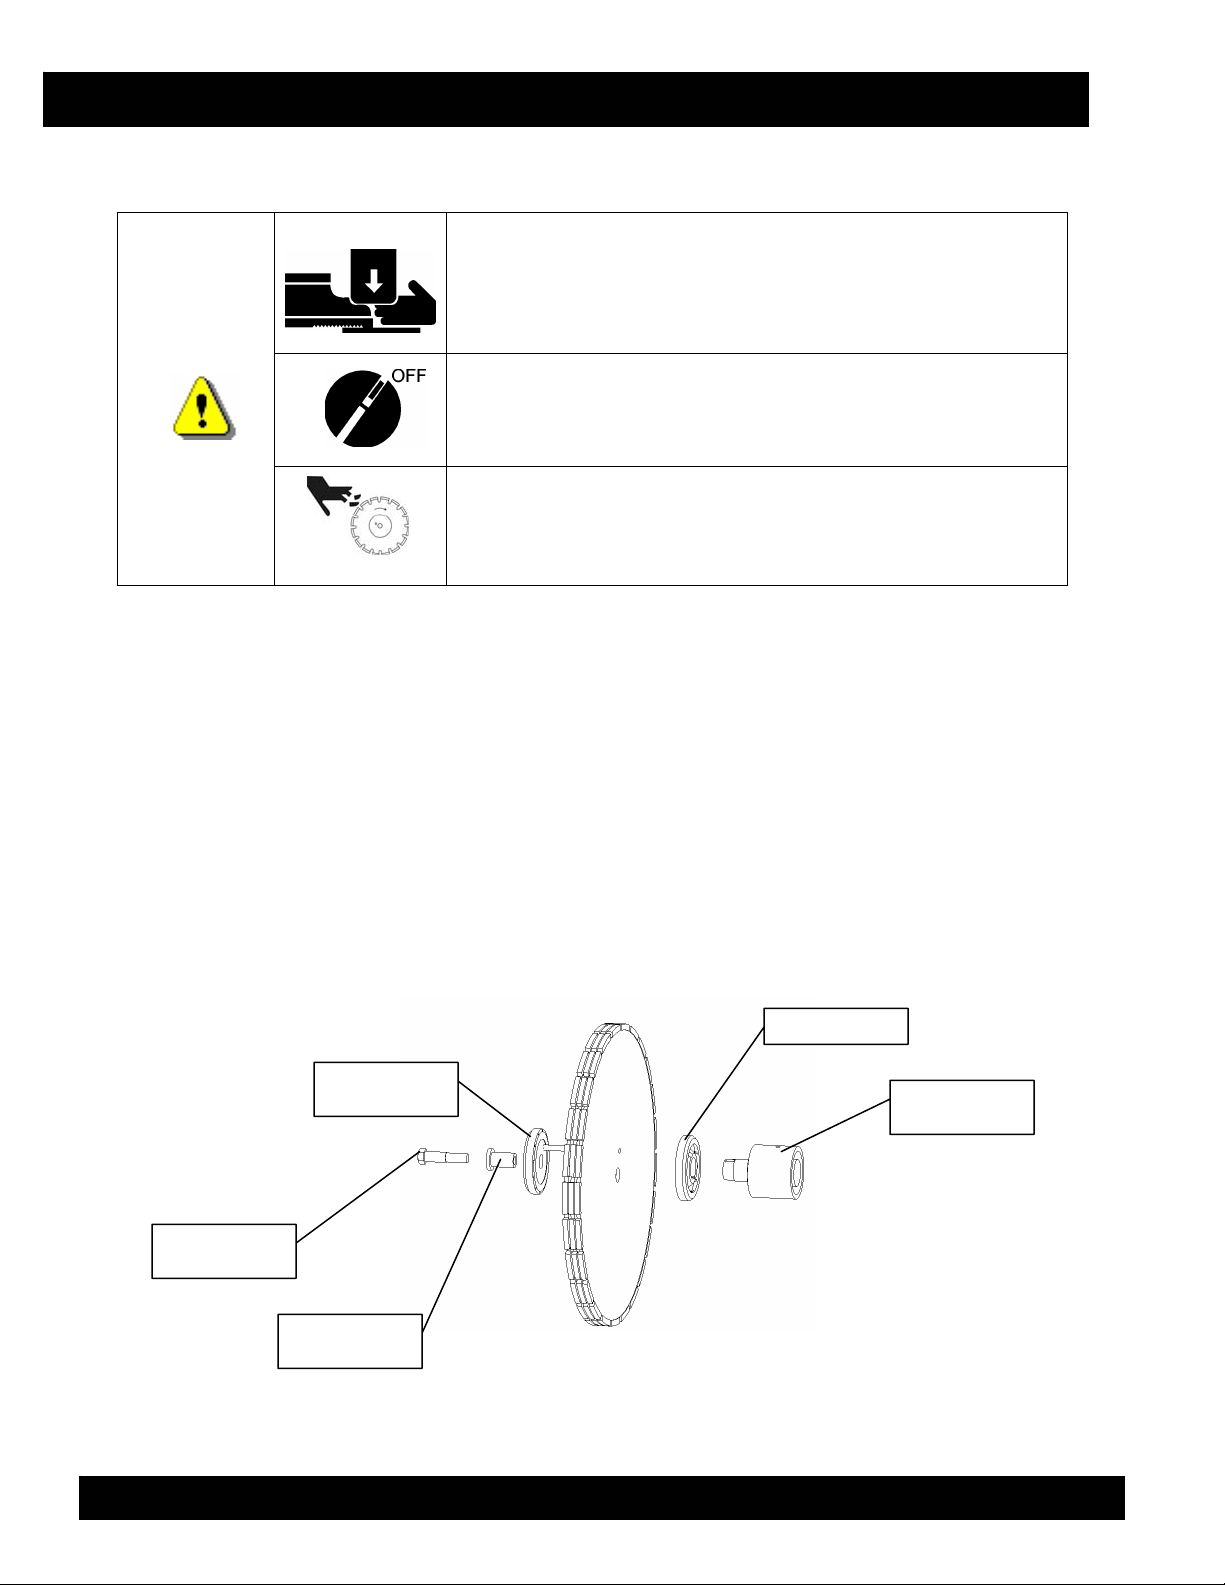
Stacking Blades for Wide Cuts
WARNING
Remain Clear of all parts of saw while installing blade to
prevent crush injury or death.
Verify the engine start switch is OFF before installing
blade.
Tighten the 5/8” blade-mounting bolt to 100-125 footpounds torque.
Combining (stacking) blades to make wide cuts requires an optional Bushing Extension Kit.
Kit #18502 allows blade stacking from .375” to .75” thickness.
Kit #18501 allows blade stacking from .75” to 1.125” thickness.
1. Ensure on/off switch is off. See Fig. 5 or Fig. 15
2. Remove the existing blade. See Removing the Blade Fig. 7
3. Replace the standard Flange Bushing, Flange Pin, and Mounting Bolt that came with the saw
with the longer Bolt, Pin and Bushing which comes with the Kit.
4. Insert the Bushing and Mounting Bolt through the Outer Flange and Blades. The longer
bushing and bolt allow blades to be stacked together.
5. Align the Flange Pin through the stack of Blades into the Inner Flange.
6. Tighten the 5/8” Mounting Bolt to 100-125 foot-pounds of torque.
7. Install blade guard.
Inner Collar
Outer Collar
With Pin
Tapered
Blade Shaft
Mounting
Bolt
Collar
Bushing
Fig. 8 — Blade Stacking
MQ SP-3035 CONCRETE SAW — OPERATION AND PARTS MANUAL — REV. #3 (09/29/06) — PAGE 22
T
MQ SP-3035 CONCRETE SAW
Installing and Removing the Blade Guard
Blade Guards for the SP-3035 concrete saw can be installed on either side of the saw.
WARNING
Verify the engine start switch is OFF before installing
blade.
Remain clear of all parts of saw while installing blade to
prevent crush injury or death.
Installing the Blade Guard
1. Ensure on/off key is off. See Fig. 5 or Fig. 15
2. Slide the Blade Guard Mounting Clip onto the Guard Mounting Tab on the frame.
3. Connect the water delivery hose to the Blade Guard.
4. Ensure that the water tubes are pointed toward the water distribution grooves in the Blade
Collars. See Fig. 10
5. Make sure the front-hinged section of the Blade Guard is fully closed before use.
Water Delivery Hose
Rear Handle
Blade Guard
rear section
Fig. 9 — The Blade Guard installed
op Handle
Blade Guard
hinged front
Blade Guard
Mounting Clip
MQ SP-3035 CONCRETE SAW — OPERATION AND PARTS MANUAL — REV. #3 (09/29/06) — PAGE 23
MQ SP-3035 CONCRETE SAW
Removing the Blade Guard
During use, the Blade Guard can become tight on the tapered mounting tab. To loosen it, wiggle
the Rear Blade Guard Handle up and down, while lifting with the Top Handle.
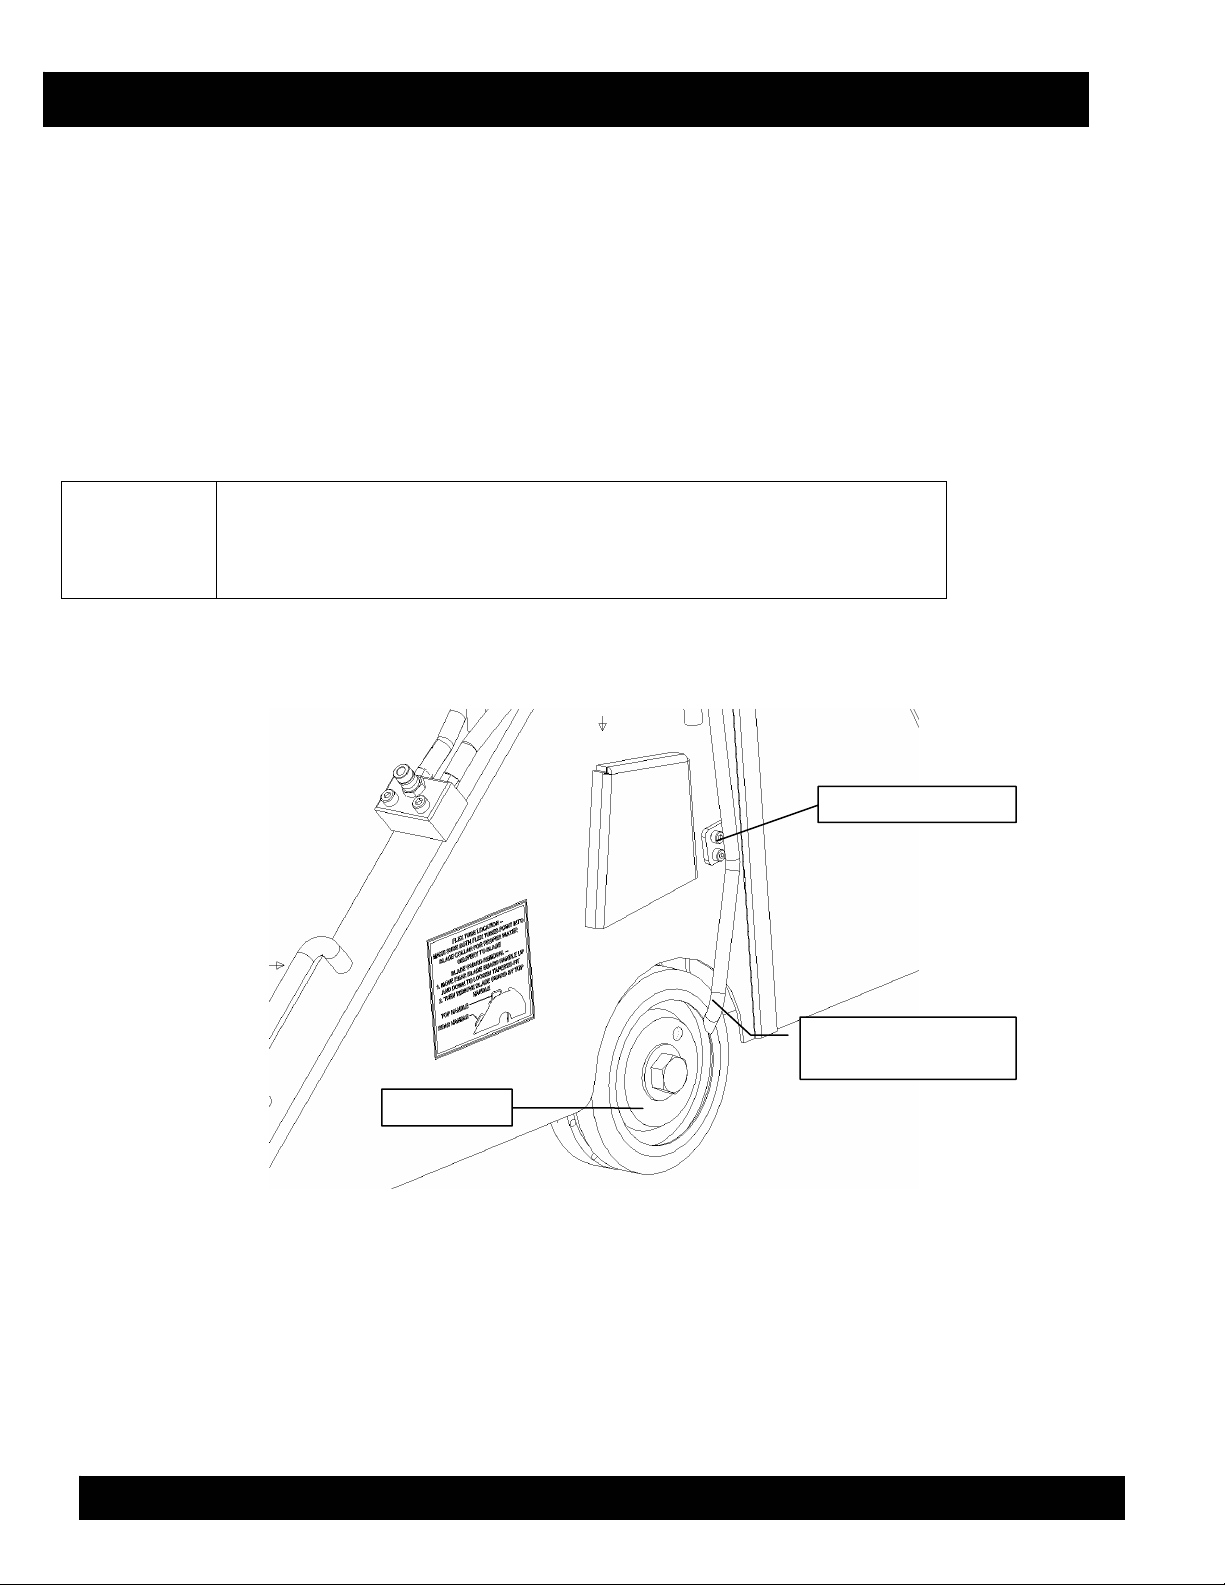
Blade Guard Water Supply
Verify that the water hose on the saw is connected to the Blade Guard and that the water pipes are
pointed into both Blade Collars.
Make sure that the outlets of the water tubes point toward the lower
NOTE
portion of the blade collars, aimed at the delivery ports, for proper
water delivery to the blade.
Blade Collar
Fig. 10 — Water Tubes and the Blade Collar
Water Tube bracket
Water Tube aimed at
groove in Blade Collar
MQ SP-3035 CONCRETE SAW — OPERATION AND PARTS MANUAL — REV. #3 (09/29/06) — PAGE 24
MQ SP-3035 CONCRETE SAW
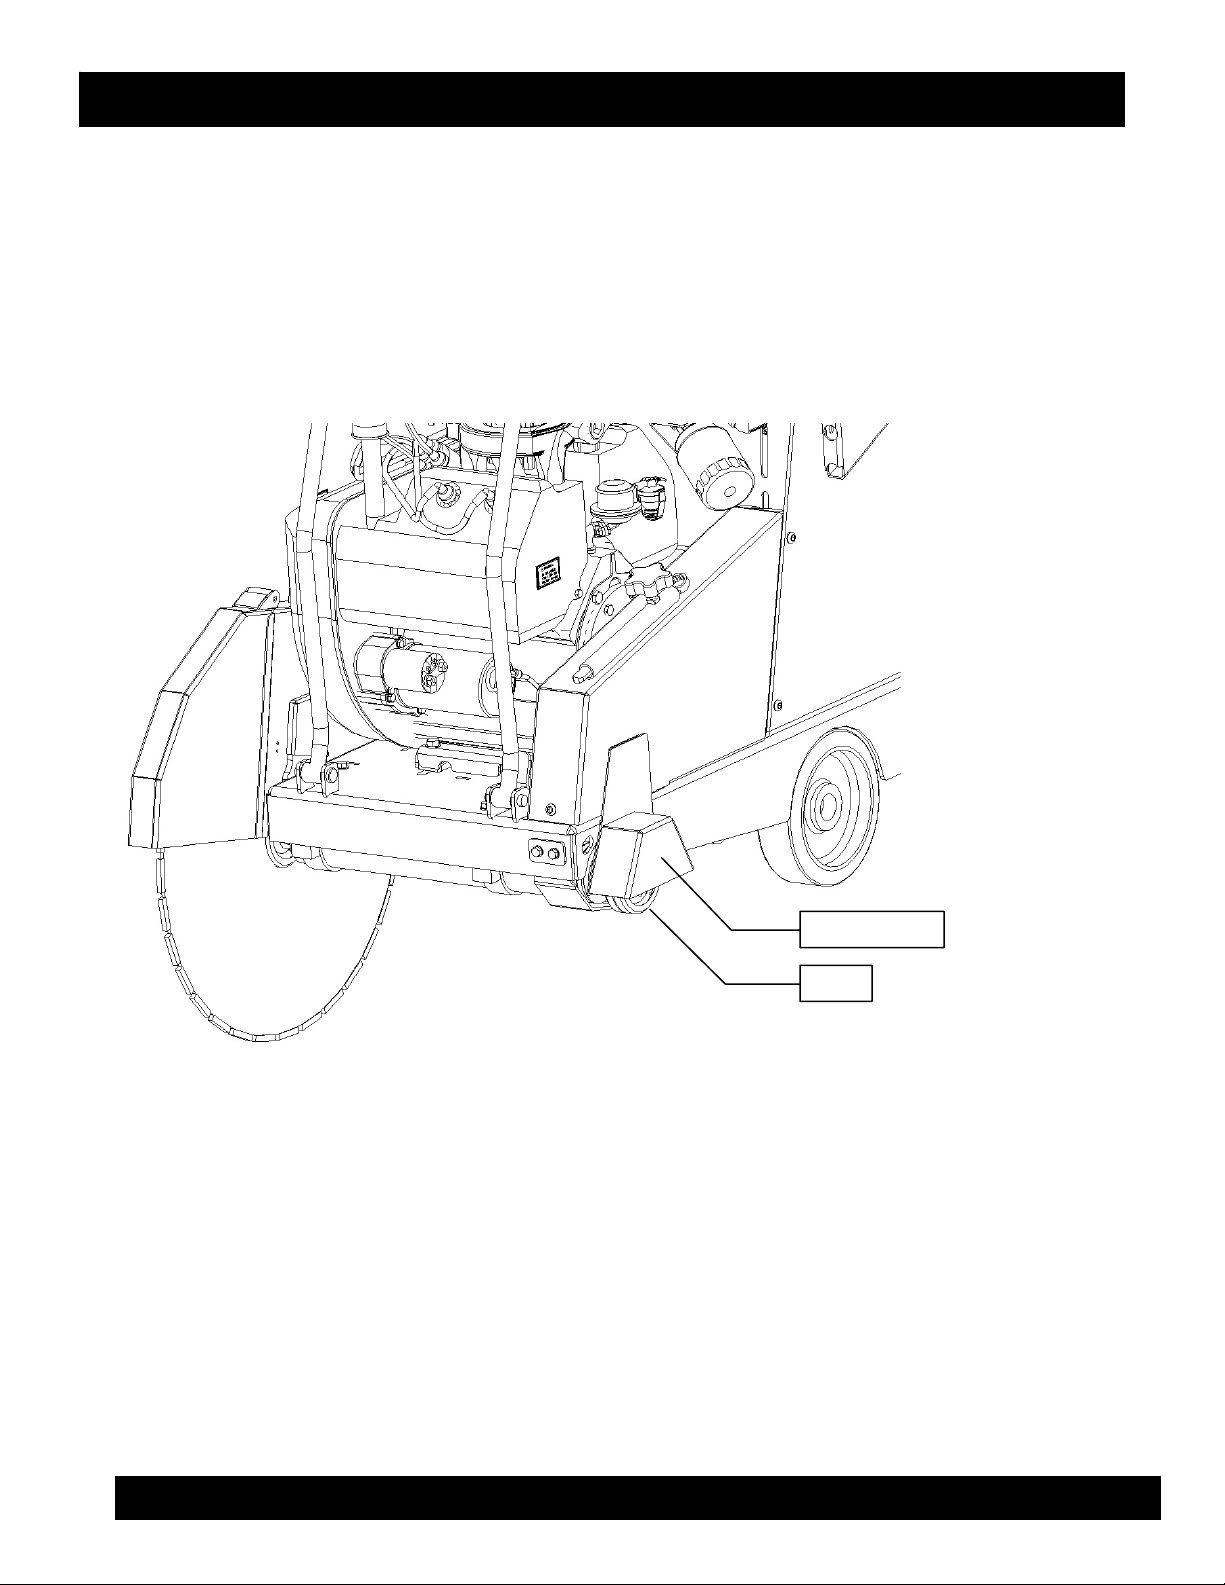
Installing the Flange Guard
The Flange Guard provides protection from the Blade Flange not in use.
1. Verify that the unused Blade Flange is secured to the Spindle by tightening the mounting bolt.
2. Slide the Flange Guard onto the Guard Mounting Tab on the frame.
Flange Guard
Flange
Fig. 11 — The Flange Guard, Installed
MQ SP-3035 CONCRETE SAW — OPERATION AND PARTS MANUAL — REV. #3 (09/29/06) — PAGE 25
Water Supply and Control
MQ SP-3035 CONCRETE SAW
WARNING
To prevent damage to the impeller of a belt driven water pump, do
not run the engine with the water pump switch on, unless the water
supply is connected and water is flowing.
When storing the saw during freezing weather, blow out the water
lines to prevent damage to the water delivery system.
Connect the job water hose to the water inlet fitting on the left side of the saw.
Verify that the water hose on the saw is connected to the Blade Guard and that the water delivery
tubes are pointed into both lower Blade Flanges.
The yellow lever on the control panel regulates water flow volume.
If the saw is equipped with an optional water pump, the ON/OFF switch is on the control panel
next to the water flow control valve.
Because of the water delivery efficiency of the 24-port blade flanges,
NOTE
these saws use less water for blade cooling and flushing than other
saws.
Water Inlet
Pump
ON/OFF
Switch
Flow Control
Lever
Optional
Water Pump
Hose to
Blade Guard
Fig. 12 — The Water Supply System
MQ SP-3035 CONCRETE SAW — OPERATION AND PARTS MANUAL — REV. #3 (09/29/06) — PAGE 26
MQ SP-3035 CONCRETE SAW
Handlebars
The handlebars are adjustable to three different angles, for optimum operator control, and can
also be slid fully inward for storage. Once handlebars are adjusted, lock them into position by
tightening the lock knob on each side.
Using the handlebars in position #2 or #3, when employing larger diameter blades reduces the
need to bend over and the effort required by the operator to maneuver the unit.
Lock Knob
P 3
P 2
P 1
Three
operating
positions
Storage
position
NOTE
MQ SP-3035 CONCRETE SAW — OPERATION AND PARTS MANUAL — REV. #3 (09/29/06) — PAGE 27
Fig. 13 — Handlebar Positions
Using the handlebars in position #2 or #3 when employing larger
diameter blades, reduces the need to bend over, and reduces the effort
required by the operator to maneuver the saw.
MQ SP-3035 CONCRETE SAW
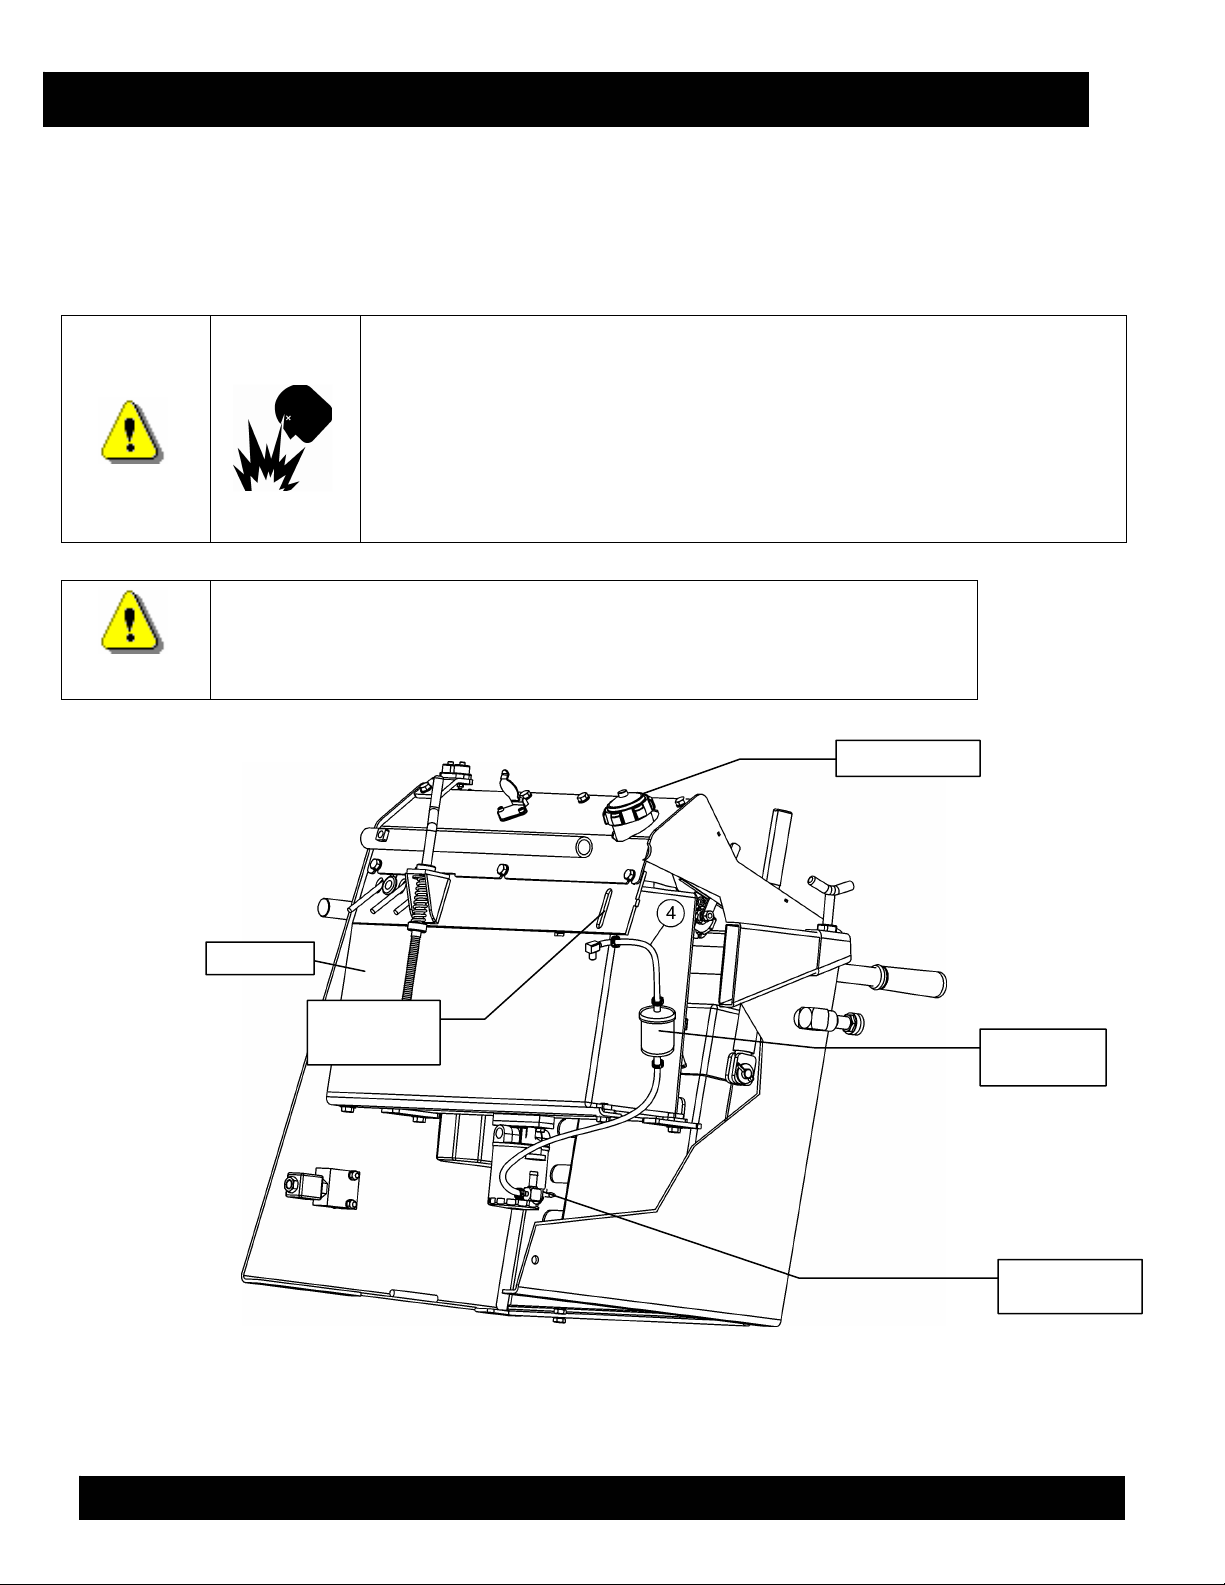
Fueling the Saw
The 3000 Series saws feature a five-gallon clear molded plastic fuel tank with a sight gauge,
central drain, and shutoff valve. The gas tank cap is located at the front of the saw.
WARNING
CAUTION
To prevent damage to the impeller of a belt driven water pump, do not
run the engine with the water pump switch on, unless the water
supply is connected and water is flowing.
When storing the saw during freezing weather, blow out the water
lines to prevent damage to the water delivery system.
Use 90+ Octane Unleaded Gasoline Only
Gas Tank Cap
Fuel Tank
Fuel Sight
Gauge slots
Inline Fuel
Filter
Fuel Shut-off
Valve
Fig. 14 — Fueling the Saw
MQ SP-3035 CONCRETE SAW — OPERATION AND PARTS MANUAL — REV. #3 (09/29/06) — PAGE 28

MQ SP-3035 CONCRETE SAW
Starting and Stopping the Engine
WARNING
CAUTION
1. Check Oil levels in engine and hydraulic system
2. If water pump option is installed, start water supply to blade.
3. Move the speed control joystick to NEUTRAL position.
4. Set the throttle to ½ open
5. Turn on/off switch to “START” position and at the same time pull out choke cable only
sufficient to start the engine. Release choke cable after engine starts. Re-choke if engine tends
to stall. When engine starts, release switch to “RUN” position. Allow engine to warm up
before applying load.
6. Ensure that water lines are attached and water is flowing to the saw.
7. Set the throttle to the recommended engine RPM to match the recommended blade speed of
the attached blade.
8. Lower the blade to the cut depth.
9. Move the joystick FORWARD to advance the cut.
10. When finished cutting, allow the engine to cool down by running at 1000 to 1200 RPM for 3
to 5 minutes depending on how hot the engine has been. This will reduce the chance of
engine damage or vapor lock.
Do not leave the saw unattended while the engine is running.
Do not start, park, or leave the saw unattended on a slope.
If the saw has an optional water pump, do not run the saw dry
with the water pump switch ON — otherwise the pump impellers
will be damaged.
In normal operation, do not stop the engine abruptly when hot!
Reduce the throttle to idle and allow the engine to run one or two
minutes before turning the ignition switch off.
WARNING
Make sure the operator knows how to turn the engine off in case of an
emergency.
Do not go near rotating parts (blade, belts, pulleys, or wheels) while
the saw is running.
To stop the engine, turn the “ON-OFF” switch to the “OFF” position.
ON/OFF
Switch
Fig. 15 — ON/OFF Switch Location
MQ SP-3035 CONCRETE SAW — OPERATION AND PARTS MANUAL — REV. #3 (09/29/06) — PAGE 29

oc
ob
MQ SP-3035 CONCRETE SAW
Pointer Adjustment
1. Lower the front pointer assembly: Release the rope from the cam cleat, and rotate the pointer
forward into position.
2. Adjust the pointer rod by loosening the lock knob: Once the pointer rod is set to the cut line,
tighten the lock knob.
3. Adjust the rear pointer to the cut line: Loosen the lock bolt, position the pointer rod, and
tighten the lock bolt.
4. To raise the front pointer assembly, pull back and up on the pointer cable.
5. Secure the pointer assembly in the desired raised position by locking the cable between the
jaws of the cam cleat.
Pointer
Rod
Fig. 16 — Pointer Adjustment
Pointer Rod
k Kn
L
Pointer
Cable
MQ SP-3035 CONCRETE SAW — OPERATION AND PARTS MANUAL — REV. #3 (09/29/06) — PAGE 30

MQ SP-3035 CONCRETE SAW
Raise – Lower Controls
This saw uses a 12-volt hydraulic pump and cylinder to raise and lower the blade. Controls are
located on the speed control joystick handle.
Plunge Button
Raise Button
Fig. 17 — Joystick Handle
1. To plunge the blade, depress the button on the outer end of the handle.
2. To raise the blade, depress the button on the forward side of the handle.
See the Maintenance section of this manual for a diagram of the Raise-Lower System components.
MQ SP-3035 CONCRETE SAW — OPERATION AND PARTS MANUAL — REV. #3 (09/29/06) — PAGE 31

MQ SP-3035 CONCRETE SAW
Setting the Depth Gauge & Depth Stop
The 3000 Series saws use a cable-controlled Depth Gauge and mechanical Depth Stop to lock the
blade at the desired cut depth. See Fig. 18.
Setting the Depth Gauge
1. Lower the blade until it just touches the cutting surface.
2. Turn the Depth Gauge dial to zero.
The Depth Gauge will show the depth of cut. It should not be necessary to readjust the Depth
Indicator until a different diameter of blade is installed.
Setting the Depth Stop
1. Lower the blade into the cut until the desired cutting depth is achieved.
2. Turn the Depth Stop Crank clockwise to take slack out of the Depth Stop.
To increase cutting depth, turn the Depth Stop Crank counter-clockwise. To reduce cutting depth,
turn the Depth Stop Crank clockwise.
Fig. 18 — Setting the Depth Gauge and Depth Stop
Depth
Stop
Crank
Depth
Gauge
MQ SP-3035 CONCRETE SAW — OPERATION AND PARTS MANUAL — REV. #3 (09/29/06) — PAGE 32

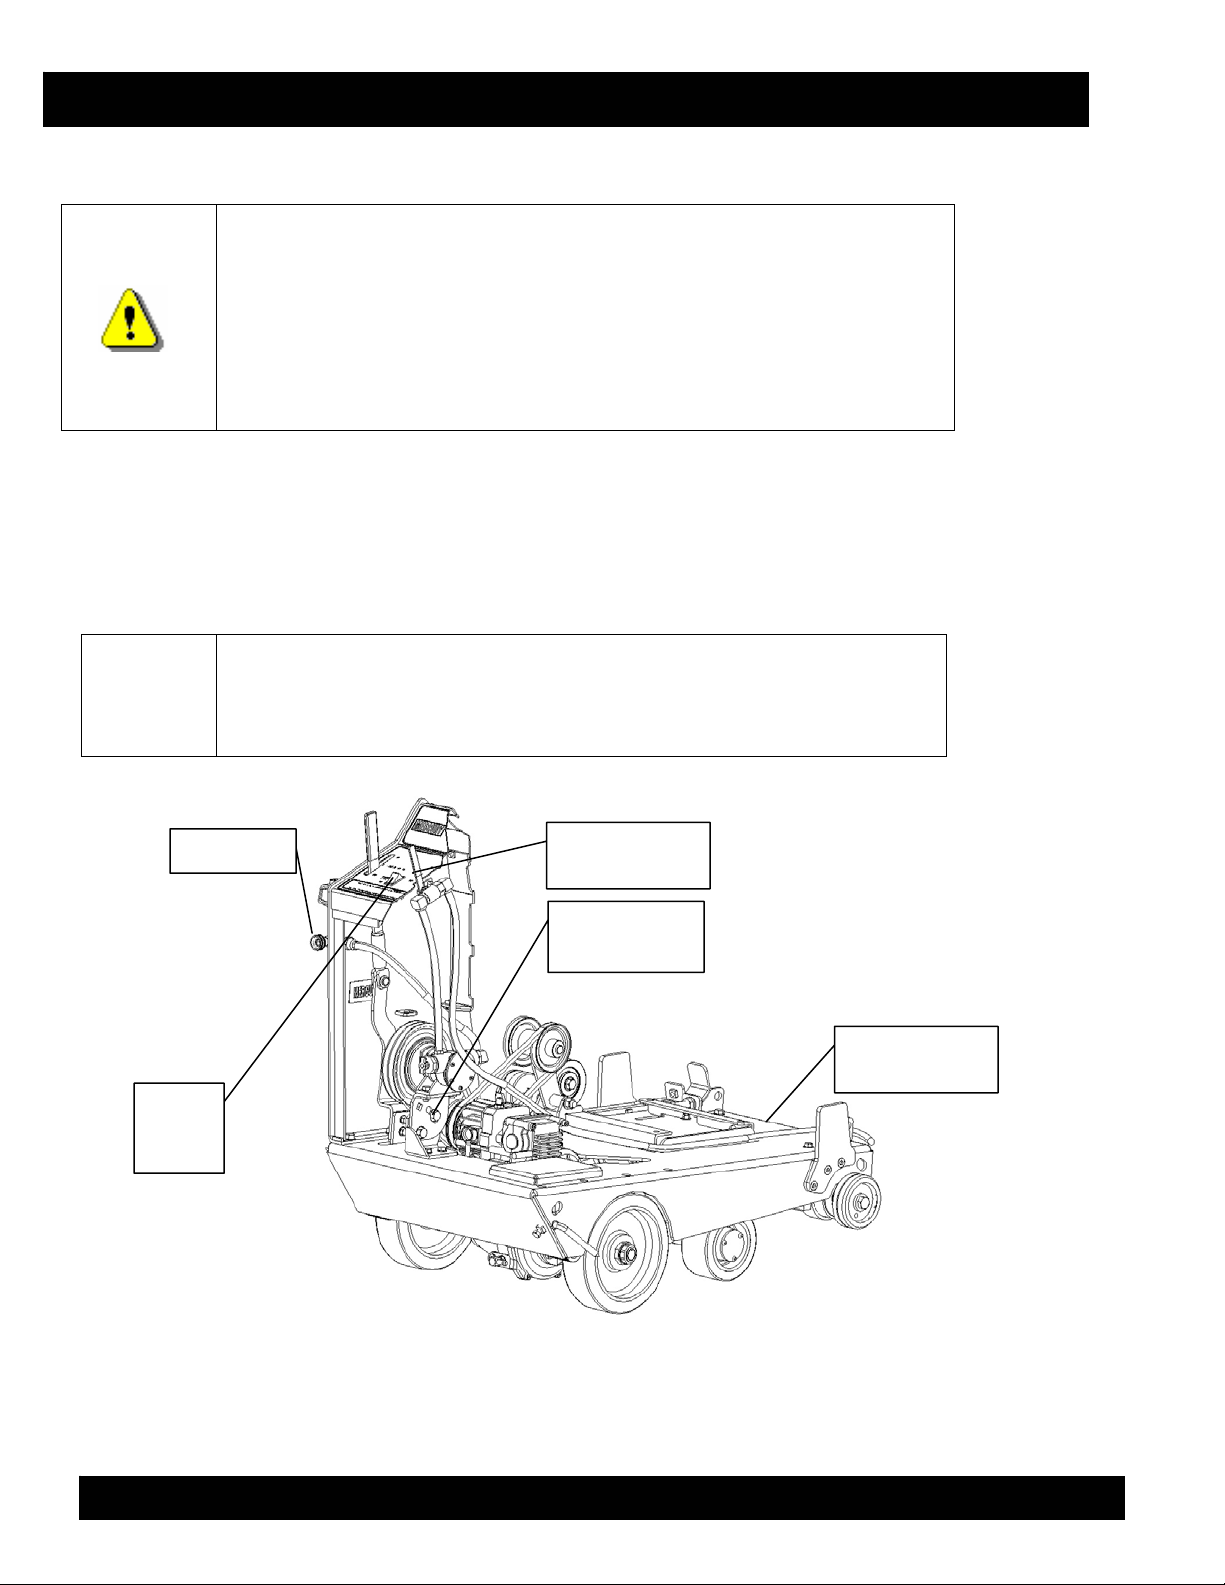
MQ SP-3035 CONCRETE SAW
Drive System
The 3000 Series saws have a cable-controlled Hydro-Gear hydrostatic powered transaxle with
fully adjustable F-N-R (Forward-Neutral-Reverse) speed adjustment via a joystick control handle.
The system utilizes a remote oil filter. There are no chains, sprockets or gearboxes requiring daily
service.
The 3000 Series saws can travel at speeds up to 250 feet per minute.
Transaxle Oil
Filter
Positraction
Engagement
Lever
Transaxle
Positraction Bar
Fig. 19 — The Drive System
MQ SP-3035 CONCRETE SAW — OPERATION AND PARTS MANUAL — REV. #3 (09/29/06) — PAGE 33

MQ SP-3035 CONCRETE SAW
Drive System Controls
The control handle controls FORWARD-NEUTRAL-REVERSE (F-N-R) speeds and the raising and
lowering of the saw. To increase forward speed, slowly move the joystick FORWARD. Pulling the
joystick backward decreases saw speed, and when the joystick passes NEUTRAL the saw moves
into REVERSE. Reverse speed is also controlled by the position of the joystick.
Although not a true “free wheeling” mode, the Drive Disengage handle, when pulled, allows the
saw to be freely moved when the engine is not running.
DO NOT DISENGAGE WHILE ENGINE IS RUNNING.
Drive
Positraction
Lever
Disengage
WARNING
Speed Control
Joystick in
NEUTRAL position
Fig. 20 — Drive System Controls
Start the engine with the Forward-Neutral-Reverse Control in
NEUTRAL to prevent unexpected saw movement.
MQ SP-3035 CONCRETE SAW — OPERATION AND PARTS MANUAL — REV. #3 (09/29/06) — PAGE 34

MQ SP-3035 CONCRETE SAW
Positraction
Positraction, when ON, locks both drive wheels together for straight-line movement. It is
recommended for all cutting and is especially helpful on uneven surfaces, and when loading and
unloading the saw.
1. Move the Positraction lever to “ON” (positraction engaged) to lock both drive wheels.
2. To unlock the drive wheels for easy maneuverability and turning, move the Positraction lever
to OFF.
See the Maintenance Section for instructions on aligning the wheels
NOTE
to correct pulling to the right or left.
Positraction
Engagement
Lever
Positraction Bar
Fig. 21 — The Positraction System
MQ SP-3035 CONCRETE SAW — OPERATION AND PARTS MANUAL — REV. #3 (09/29/06) — PAGE 35

MQ SP-3035 CONCRETE SAW
Transaxle
The hydrostatic-powered transaxle has no chains, sprockets or gearboxes to service. There is a
simple cable control for forward-reverse motion, and a single drive belt from the engine to power
the transaxle.
Fig. 22 —Transaxle
Night Light
The optional night light can be used on either side of the saw, and can be extended and rotated for
best illumination of the cutting area. Once the light is aimed, lock it in position by tightening the
lock knob. The light can be removed for storage by loosening the lock knob, disconnecting the
light cord plug and sliding the light bar out of the saw.
Night
Light
Fig. 23 — Night Light
MQ SP-3035 CONCRETE SAW — OPERATION AND PARTS MANUAL — REV. #3 (09/29/06) — PAGE 36

MQ SP-3035 CONCRETE SAW
Transportation Tie-downs and Lift Point
Tie-downs
The saw is provided with holes at each corner of the lower frame for easy tie-down during
transportation. The saw MUST be tied down whenever it is being transported.
Tie-down
Fig. 24 —Tie-down Points
Tie-down
Lift Point
The convenient single point for raising the saw with a hoist is located on top of the engine.
Lift Point
Fig. 25 — Lift Point
WARNING
To avoid possible injury, stay clear of the saw while it is
being hoisted.
To avoid possible damage to the saw, use approved rigging
when hoisting the saw.
MQ SP-3035 CONCRETE SAW — OPERATION AND PARTS MANUAL — REV. #3 (09/29/06) — PAGE 37

MQ SP-3035 CONCRETE SAW
Operation on a Slope or Incline
Never operate, cut, or face the saw down a slope or incline. The weight of the saw will shift to the
front wheels allowing the rear wheels to skid or come completely off the ground. This allows the saw
to free wheel and possibly cause a runaway condition.
Always remove the blade when transporting or moving the saw outside of the cutting area. Use
the following procedures for loading and unloading the saw.
Using Inclined Ramps to Load and Unload the Saw
Loading UP a Ramp
1. Make sure ramps are of sufficient strength and width to adequately support and load saw.
Ensure the slope of the ramp is gentle enough to load the saw.
2. Remove blade from Spindle if installed.
3. Ensure saw is warmed up to decrease the chance of the engine stalling.
4. Run the engine between ¾ and full throttle.
5. Raise front of saw only enough to get started up ramp. As the rear wheels approach the ramp,
start lowering the front end of the saw. Raise and lower the front end as necessary to keep the
blade flanges off trailer deck.
6. Turn engine off, lower saw fully.
7. Tie the saw down securely for transit.
Unloading DOWN a Ramp
Unload the saw by backing it down the ramp. Never use a ramp with too great a slope as to create
an unsafe loading condition. Use the techniques stated in the steps above to clear the ramp while
keeping the front of the saw as close to the ramp as possible while backing it down. Never unload
with the saw front facing downward on a ramp.
Freeing a Stuck Blade
The only acceptable method for freeing a stuck blade is to remove the saw from the stuck or
pinched blade. DO NOT try to get the blade unstuck using the Raise/Lower system or by lifting
the saw by the lifting bale, etc.
Ensure ignition switch is turned off
Remove blade guard
Remove blade mounting bolt and outer flange
Maneuver saw away from blade
Make a parallel cut next to blade to free blade.
MQ SP-3035 CONCRETE SAW — OPERATION AND PARTS MANUAL — REV. #3 (09/29/06) — PAGE 38

MQ SP-3035 CONCRETE SAW
If an attempt is made to start the saw with the blade pinched, the starter will suffer damage. If an
attempt is made to use the lift pump to raise the saw to free the blade, the lift motor and front axle
could be damaged. If an attempt is made to lift the saw and blade out of the cut utilizing
equipment such as a loader or back hoe, the saw frame and axle are likely to be damaged.
CAUTION
If the Water System is not drained when the saw is not in use and
temperatures fall below 32˚F, damage may occur to optional water
pumps and/or oil coolers.
Draining the Water System
When low temperatures fall below 32˚F:
1. If the saw is equipped with an optional Water Pump, open the drain petcock on the pump and
allow the pump to drain.
2. With the engine running, turn the water pump switch on for a few seconds to purge water
remaining inside the pump body.
3. Tilt the saw up and back, to allow water to drain.
4. Tilt the saw forward, to allow water to drain again.
If an air compressor is available, blow out the system by applying compressed air to the Water
Inlet
MQ SP-3035 CONCRETE SAW — OPERATION AND PARTS MANUAL — REV. #3 (09/29/06) — PAGE 39

MQ SP-3035 CONCRETE SAW
MAINTENANCE
This saw has many service-saving features, such as fully enclosed oil bath lubricated Spindle
bearings, which require no daily lubrication.
Level the saw frame surface prior to service in order to get accurate
NOTE
Removable Guards and Access Panels
For ease of service access, the following guards and panels are removable:
oil level readings.
Blade guard Flange Guard
Rear access panel Console Access Panel
Belt guard
Replace guards and panels prior to starting the engine.
Rear Access Panel
Console Access Panel
Upper
Belt
Guard
Lower
Belt
Protector
Fig. 26 — Guards and Panels
MQ SP-3035 CONCRETE SAW — OPERATION AND PARTS MANUAL — REV. #3 (09/29/06) — PAGE 40
Blade Guard

MQ SP-3035 CONCRETE SAW
Belts and Pulleys
Belt Qty Part Number
Spindle Drive Belt (POWERBAND) 1 520006
Transaxle Drive Belt 1 521005
Engine to Jack shaft Drive Belt 1 521005
Spindle
(Blade Shaft)
Drive Belt
Fig. 27 — Belt Locations
TransAxle Drive Belt
Engine to
Jack Shaft
Drive Belt
V-Belt Tension
The ideal V-Belt tension is the lowest tension at which the belt will not slip under peak load
conditions. Check V-Belt tension frequently during the first 24-48 hours of run-in operation.
CAUTION
Over-tensioning shortens belt and bearing life.
Keep belts clean of foreign material that may cause slippage.
Make V-Belt inspection a periodic procedure.
Never dress belts, as this causes premature failure.
MQ SP-3035 CONCRETE SAW — OPERATION AND PARTS MANUAL — REV. #3 (09/29/06) — PAGE 41

MQ SP-3035 CONCRETE SAW
Spindle (Blade Shaft) Drive Belt Tension Adjustment
When loosening drive belts, lower the saw to reduce stress on the
NOTE
WARNING
1. Remove the Upper Belt Guard (see Fig. 26).
2. Loosen the front Engine Mount lock bolts (A, A) only, to allow the engine to slide. DO NOT
loosen the rear bolts (B, B).
3. With the front bolts loose, the rear Engine Mount bolts (B, B) should have a ¼” space, as
shown:
tensioning system, and use gravity to pull the engine forward slightly.
When tightening belts, raise the saw, and gravity will a id the process
also.
NEVER attempt to check or adjust the V-belt
tension with the engine running. Severe injury can
occur. Keep fingers, hands, hair, and clothing
away from all moving parts.
B
A
¼”
Space
A
B
Fig. 28 — Detail of Engine Mount Lock Bolts
MQ SP-3035 CONCRETE SAW — OPERATION AND PARTS MANUAL — REV. #3 (09/29/06) — PAGE 42

MQ SP-3035 CONCRETE SAW
4. Loosen the Outer Jam Nut on the Single Point Belt Tension Bolt. Turn the Inner Jam Nut
counter-clockwise.
5. Adjust drive belt to desired tension. Do Not over tighten.
6. Tighten Engine Mount Lock Bolts.
7. Tighten the Jam Nuts to prevent the Single-Point Bolt from turning.
Lower Belt Guard Bolts
Lower Belt Guard
Inner Jam Nut
Outer Jam Nut
Fig. 29 — Spindle Drive Belt Adjustment & Replacement
Engine Mount
Lock Bolt (1 of 2)
Spindle Belt
Upper Belt Guard Bolt
Single-Point
Belt Tension Bolt
Replacing the Spindle Drive Belt
1. Remove the Upper and Lower Belt Guards. See Figs. 26 & 29.
2. Loosen the Engine Mount Lock Bolts.
3. Loosen the Single-Point Belt-Tensioning Bolt to allow the belt to slip off the engine
sheave.
4. Slide the belt off of the engine sheave and pull the belt down around the Spindle
sheave.
5. Slide the belt off the top of the Spindle sheave.
6. Reverse steps 1-5 to install a new belt.
MQ SP-3035 CONCRETE SAW — OPERATION AND PARTS MANUAL — REV. #3 (09/29/06) — PAGE 43

y
T
Replacing the Jack Shaft Belt
MQ SP-3035 CONCRETE SAW
WARNING
NEVER attempt to check or adjust the V-belt
tension with the engine running. Severe injury can
occur. Keep fingers, hands, hair, and clothing
away from all moving parts.
1. Remove the Belt Guards (see Figs. 26 & 29).
2. Loosen the Rotary Tensioner.
3. Remove the Spindle Belt (see above).
4. Remove and replace the Jack Shaft Belt.
5. Replace the Spindle Belt (see above).
6. Adjust the Rotary Tensioner.
Rotary Belt Tensioner
The Rotary Belt Tensioner system uses a 3/4”-headed bolt and either a 15/16” or 1” nut to set belt
tension. Adjust Tension Nut to apply tension to the belt. Ridges on the Tensioner Arm gauge the
amount of tension applied.
1. Loosen the Tensioner Lock Bolt Head.
2. Adjust the Tensioner Nut for proper belt tension. (This will be achieved at
approximately 1-1/2 ridges on the gauge.)
3. Tighten the Tensioner Lock Bolt Head.
Jack Shaft Pulle
The Tensioner Nut is
on opposite side
ensioner Pulley
Fig. 30 — Jack Shaft Belt and Rotary Belt Tensioner System
MQ SP-3035 CONCRETE SAW — OPERATION AND PARTS MANUAL — REV. #3 (09/29/06) — PAGE 44
Tensioner Lock Bolt
Head
Tensioner Base

MQ SP-3035 CONCRETE SAW
Blade Flange Removal/Installation
Correct removal or installation of the Inner Blade Flange or Flange requires a Flange Puller
(option Part Number 18503) as shown below.
WARNING
Follow instructions closely to prevent injury from flying Blade Flanges!
Because of tapered fit between Blade Flange and Spindle, 5-10 tons
of force is needed to release the inner flange. Parts and tools can
become dangerous projectiles if instructions are not followed properly.
Front Puller Plate
Perimeter Bolt
Puller Bolt
Horseshoe Plate
Perimeter Bolt
Perimeter Bolt
Fig. 31 — Using the Flange Puller
Removing the Inner Blade Flange
With the Outer Blade Flange in place, and the Blade Mounting Bolt loosened approximately ¼”:
1. With the three perimeter bolts holding the two Puller Plates together, slide the Horseshoe Plate
of the Flange Puller behind the (Shaft) side of the Inner Flange as shown above.
2. Tighten the center Puller bolt to remove the Inner Flange from Spindle.
MQ SP-3035 CONCRETE SAW — OPERATION AND PARTS MANUAL — REV. #3 (09/29/06) — PAGE 45

MQ SP-3035 CONCRETE SAW
DANGER
If the Inner Flange does not readily come free from the tapered
NOTE
Spindle, lightly tap on the central Puller bolt. This should cause
the flange to break free from the shaft.
Installing the Inner Blade Flange
1. Ensure that the tapered portion of the Spindle, and the Inner Spindle are perfectly clean and
free of burrs or indentations. Clean and repair as necessary.
2. Ensure that the Drive Key is in place.
3. Slide the Inner Flange onto the tapered portion of the Spindle.
Ensure the Outer Flange is in place to prevent the
Puller and Inner Flange from flying off when the taper
breaks loose, and causing injury!
Do Not use any lubricant! Lubricant prevents the tapered
NOTE
4. Install the Outer Blade Flange, Flange Bushing, and Mounting Bolt.
5. Tighten with a ½” impact wrench to seat the tapered surfaces of the Inner Flange and Spindle.
surfaces of the Flange and Shaft from mating properly.
Flange Bushing
Outer Flange
Dowel pin
Inner
Drive Key
Spindle
Fig. 32 — Installing the Inner Spindle
MQ SP-3035 CONCRETE SAW — OPERATION AND PARTS MANUAL — REV. #3 (09/29/06) — PAGE 46

MQ SP-3035 CONCRETE SAW
6. Loosen the Mounting Bolt and remove the Outer Flange and Bushing.
7. Inspect the Inner Flange to ensure the proper seating of the tapered fit.
The Inner Flange should be seated between .030” and 0.0” (flush) to the end of the Spindle.
Fig. 33 — Proper seating of the Inner Flange and Spindle
8. Test to ensure that the Inner Flange does not wobble when rotated. Use a dial indicator on the
face of the Flange. Maximum tolerance is .003” run-out on the face of the Flange.
For Spindle Maintenance/hydraulic oil change see page 58.
NOTE
MQ SP-3035 CONCRETE SAW — OPERATION AND PARTS MANUAL — REV. #3 (09/29/06) — PAGE 47

Spindle Replacement
MQ SP-3035 CONCRETE SAW
To assure correct Spindle/Wheel alignment it is recommended that
this operation be performed by a Multiquip Authorized Service Center.
DO NOT unbolt the Spindle Mounting Blocks, as they have been
factory installed for correct Spindle/wheel alignment.
NOTE
1. Remove the Spindle Drive Belts (see Replacing the Spindle Belt, above).
2. Tighten the Engine Mount Lock Bolts to prevent engine movement during step #3.
Engine Mount
Lock Bolt
Engine Mount
Lock Bolt
Fig. 34 — Engine Mount Lock Bolts
DANGER
To prevent the possibility of crush injury, always
ensure that the saw is securely supported whenever it
is lifted for maintenance.
3. Block the wheels then lift the saw to the full up position, and block up the front axle to prevent
accidental crush injury.
4. Disconnect the two hoses attached to the Spindle, and plug hoses and Spindle ports to prevent
drips and dirt contamination.
5. Support the Spindle to prevent tipping or shifting of weight.
6. Unbolt the Spindle Saddle Clamps using a 3/8” Allen wrench.
MQ SP-3035 CONCRETE SAW — OPERATION AND PARTS MANUAL — REV. #3 (09/29/06) — PAGE 48

MQ SP-3035 CONCRETE SAW
Spindle Mounting
Block
DO NOT REMOVE
Saddle
Clamps
Fig. 35 — Spindle Replacement
7. Remove the Spindle.
DO NOT unbolt the Spindle Mounting Blocks, as they have been factory-installed
for correct Spindle/wheel alignment.
8. Fill the new Spindle with approved hydraulic oil and cap.
9. Perform Steps 1-5 in reverse order.
Spindle Mounting
Block
DO NOT REMOVE
Lower Belt
Protector
Spacing
Spacing
Fig. 36 — Maintain equal spacing when tightening Saddle Clamps
Tighten Saddle Clamp bolts equally, maintaining even spacing as you reattach the
Saddle Clamps. Torque bolts to 35 ft. lbs. Do Not over-torque. Apply medium
strength thread lock, Blue Loctite 242 or equivalent.
MQ SP-3035 CONCRETE SAW — OPERATION AND PARTS MANUAL — REV. #3 (09/29/06) — PAGE 49

MQ SP-3035 CONCRETE SAW
Circuit Breakers
Three thermal circuit breakers are located behind the Control Panel access cover.
Remove Dash Panel to
access circuit breakers
Fig. 37 — Circuit Breaker location
Under normal circumstance circuit breakers do not require service; they are automatically re-set
once an overload condition has been corrected. If one or more breakers are cycling on/off, locate
the cause of the electrical overload and repair as required.
Also see the Electrical Schematic on page 61.
Maximum Cut Depth Adjustment
The 3000 Series saws come factory-adjusted for maximum usable cut depth. However, should
you desire to adjust the maximum depth:
1. Park the blade-less saw on a flat and level surface.
2. Fully lower the saw onto the Stop Bolts (see Fig. 38).
3. Measure the distance from the Blade Flanges to the surface.
4. Adjust the Stop Bolts in or out until the Blade Flanges have 1/8” to 3/16” ground clearance.
5. Ensure that both bolts are adjusted to the same setting so that the load is evenly distributed.
MQ SP-3035 CONCRETE SAW — OPERATION AND PARTS MANUAL — REV. #3 (09/29/06) — PAGE 50

MQ SP-3035 CONCRETE SAW
Lubrication
This saw has six grease fittings. Locations are shown in Figure 38 on the front axle assembly, and
one, (not shown) on the Jackshaft assembly.
Front axle pivot bearings (2)
Hydraulic lift cylinder end (1)
Depth cylinder pivot bracket (2)
Jackshaft pivot (1)
These fittings are easily accessed by raising the saw half way up, and then lifting the rear of the
saw until the blade flanges rest on the ground.
WARNING
DANGER
To prevent the possibility of crush injury, ensure that
the saw is securely placed on suitable supports before
servicing the lubrication points.
Grease each fitting every 25 hours of operation using premium grade
waterproof E. P. (extreme pressure) grease.
F1
F2
F3
F4
F5
Maximum Cut
Depth Stop Bolt
Maximum Cut
Depth Stop Bolts
Fig. 38 — Grease Fittings and Maximum Cut Depth Stops
MQ SP-3035 CONCRETE SAW — OPERATION AND PARTS MANUAL — REV. #3 (09/29/06) — PAGE 51

MQ SP-3035 CONCRETE SAW
Engine Maintenance
The Model SP-3035 uses a 35 HP Wisconsin engine. See the engine manual for service details.
Check air filters daily. Do not clean. Replace as needed. See Caution below.
Check engine oil level daily.
Level the saw frame prior to service to get accurate readings.
Change the engine oil and filter every 50 hours of operation.
Filters
Filter Qty Part Number & Cross Reference
Primary Air Filter 1 300000-1
Safety Air Filter 1 300000-2
Engine Oil Filter 1 306004
Hydraulic System Filter 1 306006
Inline Fuel Filter 1 304000
DANGER
Safety Air Filters are NOT intended to be used for primary air
filtration. When the Primary Filter becomes clogged, replace it
immediately – DO NOT run saw using just the Safety filter.
DO NOT attempt to clean dirty air filters by any means.
Air filter
Engine
Oil filter
Hydraulic Oil
Reservoir
Fuel filter
Transaxle
filter
Fig. 39 — Filters
MQ SP-3035 CONCRETE SAW — OPERATION AND PARTS MANUAL — REV. #3 (09/29/06) — PAGE 52

MQ SP-3035 CONCRETE SAW
Raise-Lower System
This saw uses a 12-volt hydraulic pump and cylinder to power the raise-lower system.
Level the frame prior to service to get accurate readings.
Check oil level daily.
Fill the reservoir half full when cold.
Use 5W-30 premium grade engine oil.
Raise-Lower
Pump
Hydraulic
Manifold
Raise-Lower
Cylinder
Raise-Lower
Reservoir
Fig. 40 — Raise-Lower System
MQ SP-3035 CONCRETE SAW — OPERATION AND PARTS MANUAL — REV. #3 (09/29/06) — PAGE 53

MQ SP-3035 CONCRETE SAW
Control Handle Adjustment
The Control Handle is adjustable to provide the preferred “feel”.
1. Using a ¼” Allen wrench and 9/16” wrench, loosen both pivot bolts until they can be turned
by hand. Pivot #1 requires only a 9/16” wrench, as the Allen nut side is welded in place.
2. Tighten pivot #1 until the handle is close to the desired “feel”.
3. Tighten pivot #2 until it just starts to increase the force required to move the handle.
Pivot #1
Pivot #2
Fig. 41 — Control Handle Adjustment
MQ SP-3035 CONCRETE SAW — OPERATION AND PARTS MANUAL — REV. #3 (09/29/06) — PAGE 54

MQ SP-3035 CONCRETE SAW
Hydraulic System
The hydraulic system consists of:
Spindle Assembly (1) Hydraulic Pump (2)
Transaxle Assembly (9) Hydraulic Manifold (4)
Lift Cylinder (5) Oil Filters (3, 6)
Hydraulic Drive and Spindle Oil Reservoir (7) Lift Cylinder Reservoir (8)
Routine Maintenance
Check oil level daily.
Fill the reservoir to the fill line when cold.
Level frame prior to service to get an accurate reading.
Use 5W-30 premium grade engine oil.
Change transaxle oil and filter every 250 hours of operation or annually.
Change Spindle oil every 250 hours of operation or annually.
1
4
3
2
8
7
6
9
5
Fig. 42 — Hydraulic System Components
MQ SP-3035 CONCRETE SAW — OPERATION AND PARTS MANUAL — REV. #3 (09/29/06) — PAGE 55

MQ SP-3035 CONCRETE SAW
Draining & Filling the Hydraulic System
To drain the Transaxle
1. Remove the drain plug from the bottom of the Spindle housing and the bottom of the
Transaxle.
Drain Plug
Fig. 43 — Transaxle Drain Plug
Collect and dispose of the used oil and oil filter in an environmentally
NOTE
2. Remove the old oil filter. See Fig. 43, above.
3. Once drained, reinstall the drain plugs.
4. Pre-fill and install a new oil filter.
5. Refill the Transaxle with hydraulic oil as outlined on page 58
CAUTION
friendly manner. Do not drain onto the ground or pour used oil down
drains.
Pre-fill the oil filter with oil prior to installing to prevent hydraulic
pump damage.
To drain the Spindle
The fully enclosed Spindle eliminates most maintenance. However, if
NOTE
the Spindle ever needs service or repair, contact Multiquip, at the
number listed in the inside of the front cover for details.
MQ SP-3035 CONCRETE SAW — OPERATION AND PARTS MANUAL — REV. #3 (09/29/06) — PAGE 56

MQ SP-3035 CONCRETE SAW
Drain
Fig. 44 — Spindle Assembly
1. Raise the saw 2/3 or more up.
2. Remove the drain plug from the bottom of the Spindle housing.
3. Re-install the drain plug and install a new oil filter.
CAUTION
To prevent damage to the hydraulic pump, pre-fill the new oil filter
prior to installation.
To Remote Fill
Reservoir
To refill the hydraulic system
1. Ensure the saw is fully lowered if it had been raised.
2. Add hydraulic oil to the Drive & Spindle System Reservoir.
Oil will need to be added several times.
3. Jack the unit up so the drive wheels are off the ground, then run the engine for a couple
minutes to cycle oil throughout the system.
4. Add more oil as required.
5. Inspect for leaks after service.
Tips
Remove the oil reservoir cap to speed draining.
Before installing a new filter, fill the reservoir and let it drain down to the filter manifold.
Once new oil reaches the manifold, install the new pre-filled filter.
To help speed up the refilling process, raise the saw half-way up and lift the rear of the saw
until the Blade Flanges touch the ground.
After filling the system, jack the saw up so the drive wheels are off the ground. Start the
saw, and move the joystick half way into FORWARD, to purge air out of the system.
MQ SP-3035 CONCRETE SAW — OPERATION AND PARTS MANUAL — REV. #3 (09/29/06) — PAGE 57

MQ SP-3035 CONCRETE SAW
Drive Wheel Alignment
Below is the suggested technique for aligning the wheels. Distance X is the same on either side;
the Front Axle and Spindle must be at right angles to the frame edge. Distance A is 3/16” (.187”)
longer on the right side, so that the saw steers slightly left. Users may wish to alter the alignment
to fit a particular application.
Fig. 45 — Drive Wheel Alignment
MQ SP-3035 CONCRETE SAW — OPERATION AND PARTS MANUAL — REV. #3 (09/29/06) — PAGE 58

MQ SP-3035 CONCRETE SAW
The drive wheels are aligned by adjusting the entire rear drive assembly.
1. Raise the saw halfway, then lift the rear of the saw until flanges touch the ground. Use suitable
supports to prevent tipping or shifting of weight.
2. Loosen the adjustment-side attachment bolts until washers spin freely.
3. Loosen pivot-side bolts enough to move the adjustment-side wheel in the appropriate
direction to achieve the desired alignment distance.
4. Tighten the Transaxle Attachment Bolts when the appropriate alignment distance is set.
Pivot Side | Adjustment Side
Pivot Side
Attachment Bolts
Adjustment Side
Attachment Bolts
Fig. 46 — Drive Wheel Alignment Bolt Locations
MQ SP-3035 CONCRETE SAW — OPERATION AND PARTS MANUAL — REV. #3 (09/29/06) — PAGE 59

Positraction Adjustment
Clamp Position
(Inner Lip of Drive Hub)
Clamp Plate Bolt
MQ SP-3035 CONCRETE SAW
Clamp Position
(Inside Wheel Lip)
Clamp Plate Bolt
Spacer Position
Fig. 47 — Positraction Adjustment Bolt Locations
1. Lift Saw 4” to 6” and tilt forward to place spindle flanges on ground. When flanges are on the
ground, depress Raise Button to raise the rear of the saw to full height. Use suitable stands to
hold rear of saw up.
2. Disengage Positraction Lever fully.
3. Loosen Positraction clamping plate bolts enough to adjust Positraction assembly.
4. Insert 1/8” flat spacer between Positraction drive hub and rear wheel on both sides. Use a
finger-type clamp to compress the drive hub and the rear wheel, insert spacers between
contact points of wheel and hub. Tighten clamp until rear wheel compresses slightly.
5. Tighten Positraction clamping bolts to secure Positraction assembly. Remove clamps and
spacer.
6. Remove supports. Grasp the handlebars securely and depress the “Lower” button until the
rear of the saw has lowered sufficiently to safely lower the rear wheels to the ground.
MQ SP-3035 CONCRETE SAW — OPERATION AND PARTS MANUAL — REV. #3 (09/29/06) — PAGE 60

y
EXPLANATION OF CODE IN
REMARKS COLUMN
The following section explains the different symbols
and remarks used in the Parts section of this manual.
Use the help numbers found on the back page of the
manual if there are any questions.
The contents and part numbers listed in the
parts section are subject to change without
notice. Multiquip does not guarantee the
availibilit
Sample Parts List:
NO. PART NO. PART NAME QTY. REMARKS
1 12345 BOLT ....................... 1..... INCLUDES ITEMS W/
2# WASHER, 1/4 IN...... ...... NOT SOLD SEPARATELY
2# 12347 WASHER, 3/8 IN. ..... 1.... MQ-45T ONLY
3 12348 HOSE .................... A/R... MAKE LOCALLY
4 12349 BEARING ................. 1.... S/N 2345B AND ABOVE
NO. Column
Unique Symbols - All items with same unique symbol
($, #,
same assembly or kit, which is indicated by a note in
the “Remarks” column.
Duplicate Item Numbers- Duplicate numbers indicate
multiple part numbers are in effect for the same
general item, such as different size saw blade guards
in use or a part that has been updated on newer
versions of the same machine.
NOTE
PART NO. Column
Numbers Used - Part numbers can be indicated by a
number, a blank entry, or TBD.
TBD (To Be Determined) is generally used to show a
part that has not been assigned a formal part number
at time of publication.
of the parts listed.
+, %, or >) in the number column belong to the
When ordering a part that has more
than one item number listed, check
the remarks column for help in
determining the proper part to order
#
MQ SP-3035 CONCRETE SAW
A blank entry generally indicates that the item is not
sold separately or is not sold by Multiquip. Other
entries will be clarified in the “Remarks” Column.
QTY. Column
Numbers Used - Item quantity can be indicated by a
number, a blank entry, or A/R.
A/R (As Required) is generally used for hoses or other
parts that are sold in bulk and cut to length.
A blank entry generally indicates that the item is not
sold separately. Other entries will be clarified in the
“Remarks” Column.
REMARKS Column
Some of the most common notes found in the
“Remarks” Column are listed below. Other additional
notes needed to describe the item can also be shown.
Assembly/Kit - All items on the parts list with the
same unique symbol will be included when this item is
purchased.
Indicated by:
“INCLUDES ITEMS W/(unique symbol)”
Serial Number Break - Used to list an effective serial
number range where a particular part is used.
Indicated by:
“S/N XXXXX AND BELOW”
“S/N XXXX AND ABOVE”
“S/N XXXX TO S/N XXX”
Specific Model Number Use - Indicates that the part
is used only with the specific model number or model
number variant listed. It can also be used to show a
part is NOT used on a specific model or model number
variant.
Indicated by:
“XXXXX ONLY”
“NOT USED ON XXXX”
“Make/Obtain Locally” - Indicates that the part can
be purchased at any hardware shop or made out of
available items. Examples include battery cables,
shims, and certain washers and nuts.
“Not Sold Separately” - Indicates that an item cannot
be purchased as a separate item and is either part of
an assembly/kit that can be purchased, or is not
available for sale through Multiquip.
MQ SP-3035 CONCRETE SAW — OPERATION AND PARTS MANUAL — REV. #3 (09/29/06) — PAGE 61

SUGGESTED SPARE PARTS
MQ SP-3035 CONCRETE SAW WITH WISCONSIN 35
HP AIR-COOLED DIESEL ENGINE
1 to 3 Units
Qty. P/N Description
1.......... 300000-1...........FILTER, AIR, ELEMENT, PRIMARY
1.......... 300000-2...........FILTER, AIR ELEMENT, SAFETLY
1.......... 306004 .............. FILTER, OIL, WISCONSIN 35 HP
1.......... 306006 .............. FILTER, TRANSAXLE
1.......... 304000 .............. FILTER, FUEL, WISCONSIN 35 HP
1.......... 520006 .............. V-BELT, 6 3VX425 (GOODYEAR)
1.......... 521005 .............. V-BELT, AX-31 (GOODYEAR)
1.......... 15503 ................ COMFORT GRIP KNOB
1.......... H9406 ...............NIGHT LIGHT BULB
1.......... 400000 .............. LIFT PUMP SOLENOID
1.......... 362002 .............. TUBE, WATER, RH SIDE
1.......... 362003 .............. TUBE, WATER, LH SIDE
1.......... 200019 .............. FLAP, MUD, BLADEGUARD
1.......... 406000 .............. SWITCH, ROCKER
2.......... 180000 .............. BLADE COLLAR, INSIDE
............180001 ..............BLADE COLLAR ASSY, OUTER
2.......... 980705 .............. PIN, DOWEL 3/8 X 1-1/4"
2.......... 582012 .............. BUSHING, QUICK DISCONNECT
SPINDLE
1.......... 915315 .............. SCREW, HHC 5/8-11 X 3 GRD8
1.......... 915316 .............. SCREW, HHC 5/8 -11 X 3 LH GR8
1.......... 25832 ................ ROPE ASSY, FRONT POINTER
1.......... 35131 ................ MOUNTING HORN, AXLE
1.......... 25839 ................ FRONT WHEEL ASSY
2.......... 500011 .............. REAR WHEEL
2.......... 528038 .............. REAR WHEEL KEYLESS BUSHING
1.......... 29509 ................ CAP, FUEL TANK 2.25 DIA, ONE WAY VALVE
MQ SP-3035 CONCRETE SAW
Part numbers on this
NOTE
Suggested Spare Parts List
may supercede/replace the
P/N's shown in the test
pages of this manual.
MQ SP-3035 CONCRETE SAW — OPERATION AND PARTS MANUAL — REV. #3 (09/29/06) — PAGE 62

MQ SP-3035 Concrete Saw —Nameplate and Decals
COMPONENT DRAWINGS
Nameplate and Decals Assy.
The Multiquip SP-3035 Saw is equipped with a number of operation and safety decals. Should any of these decals
become unreadable, replacements can be obtained from your dealer.
MQ SP-3035 CONCRETE SAW — OPERATION AND PARTS MANUAL — REV. #3 (09/29/06) — PAGE 63

MQ SP-3035 Concrete Saw —Nameplate and Decals
Nameplate and Decals Assy.
NO PART NO PART NAME QTY. REMARKS
1 25250-001 DECAL, WARNING, KEEP FEET CLEAR 2
2 606004 DECAL, BLADE GUARD REMOVAL 2
3 25782 DECAL, MQ DIAMOND LOGO 4
4 21302 DECAL, WARNING, INSTALL BLADE GUARD 2
5 25785 DECAL, SP3 LOGO 3
6 13118 DECAL, POWDER COATED 1
7 35137 DECAL, WARNING, READ MANUAL 1
8 1997 DECAL, NAMEPLATE 1
9 M600021 DECAL, UNLEADED FUEL ONLY 1
10 22122-001 DECAL, WARNING, SERIOUS INJURY 1
11 25249-001 DECAL, WARNING, KEEP HANDS CLEAR 2
12 23330-001 DECAL, CAUTION, DRIVE BELT 1
13 25491 DECAL, ROTATION, CW 1
14 20525 DECAL, WARNING, PROPOSITION 65 1
15 604001 DECAL, WARNING, INSTALL BELT GUARD 1
16 25678 DECAL, ROTATION, CCW 1
MQ SP-3035 CONCRETE SAW — OPERATION AND PARTS MANUAL — REV. #3 (09/29/06) — PAGE 64

MQ SP-3035 Concrete Saw —Deck/Gauge Panel Assy.
Deck/Gauge Panel Assy.
MQ SP-3035 CONCRETE SAW — OPERATION AND PARTS MANUAL — REV. #3 (09/29/06) — PAGE 65

MQ SP-3035 Concrete Saw —Deck/Gauge Panel Assy.
Deck/Gauge Panel Assy.
NO PART NO PART NAME QTY. REMARKS
1 M600020 GAUGE PANEL 1
2 M600019 DECK PANEL 1
MQ SP-3035 CONCRETE SAW — OPERATION AND PARTS MANUAL — REV. #3 (09/29/06) — PAGE 66

MQ SP-3035 Concrete Saw —Console/Sheet Metal Assy.
Console/Sheet Metal Assy.
MQ SP-3035 CONCRETE SAW — OPERATION AND PARTS MANUAL — REV. #3 (09/29/06) — PAGE 67

MQ SP-3035 Concrete Saw —Console/Sheet Metal Assy.
Console/Sheet Metal Assy.
NO PART NO PART NAME QTY. REMARK
1# 0166 SCREW, HHC 3/8-16 X 7/8 3
2# 933242 WASHER, FLAT SAE 3/8 GRD 9 YZ 3
3# 204007 BELT GUARD 1
8 25796 CONSOLE, RED 1
18 0655 SCREW, HHC 5/16-18 X 3/4 6
19 25865 HARNESS, LIGHT KIT, SOCKET 1
22 25805 PANEL, CONSOLE COVER, RED 1
25 3214 SCREW, HHC 1/2-13 X 1-1/4 6
26 933244 WASHER, FLAT SAE 1/2 GRD 9 YZ 6
28# 15503 KNOB, COMFORT GRIP STAR, 3/8-16 X 1 1
29# 584011 WRENCH, 15/16" BLADE CLOSED END 1
30 923114 SCREW, SHC 8-32 X 1/2 2
31 35180 BELT GUARD ASSY ...................................................... 1.................. INCLUDES ITEMS W/#
32 13287 NUT, NYLOC 8-32 2
MQ SP-3035 CONCRETE SAW — OPERATION AND PARTS MANUAL — REV. #3 (09/29/06) — PAGE 68

Access Panel Assy.
MQ SP-3035 Concrete Saw —Access Panel Assy.
MQ SP-3035 CONCRETE SAW — OPERATION AND PARTS MANUAL — REV. #3 (09/29/06) — PAGE 69

MQ SP-3035 Concrete Saw —Access Panel Assy.
Access Panel Assy.
NO PART NO PART NAME QTY. REMARK
1# 25795 PANEL, REAR CONSOLE, RED 1
2# 29057 DOCUMENT BOX, CP90007-07 1
3# 560020 LATCH, REAR SAW ACCESS PANEL 2
4# 577002 WEATHER STRIP, REAR SAW ACCESS PANEL 1.75 FT.
5# 12287 SCREW, THP 1/4-20 X 3/4" SS 4
6# 10024 NUT, NYLOCK 1/4-20 4
7# 10930 WASHER, FENDER, 1/4 X 1-1/4" 4
8 25794 PANEL ASSY., REAR CONSOLE, RED ........................ 1.................. INCLUDES ITEMS W/#
MQ SP-3035 CONCRETE SAW — OPERATION AND PARTS MANUAL — REV. #3 (09/29/06) — PAGE 70

Fuel Tank Assy.
MQ SP-3035 Concrete Saw — Fuel Tank Assy.
MQ SP-3035 CONCRETE SAW — OPERATION AND PARTS MANUAL — REV. #3 (09/29/06) — PAGE 71

MQ SP-3035 Concrete Saw —Fuel Tank Assy.
Fuel Tank Assy.
NO PART NO PART NAME QTY. REMARK
1# 1400003 TANK, FUEL 1
29509 CAP, FUEL TANK 2.25" DIA. ONE WAY VALVE 1
2#
3#
19633 BUSHING, RUBBER FUEL DAPCO 10672 1
4# 446005 VALVE, FUEL ON/OFF 1/4" 1
5# 19473 CLAMP, HOSE WORM #2 4
6# 35022 CLAMP, LOOP CUSHIONED #8 1
7# 35059 HOSE, FUEL .250 ID, 12" 1
8# 2295 SCREW, HHC 1/4-20 X 7/8" 1
9# 304000 FILTER, FUEL, WISCONSIN 1
10# 35060 HOSE, FUEL .250 ID, 11" 1
11# 370626 FITTING, 45
12# 367216 FITTING, 90
13 25831 FUEL TANK ASSY .......................................................... 1 ................. INCLUDES ITEMS W/#
14 25801 MOUNT, FUEL TANK 1
15 933242 WASHER, FLAT SAE 3/8" GD9 4
16 4196 SCREW, SHC 8-32 X 1/2" 4
O
4BARB-1/8" MP 1
O
-1/8" FP-1/8" MP 1
MQ SP-3035 CONCRETE SAW — OPERATION AND PARTS MANUAL — REV. #3 (09/29/06) — PAGE 72

MQ SP-3035 Concrete Saw —F-N-R Control Handle Assy.
F-N-R Control Handle Assy.
MQ SP-3035 CONCRETE SAW — OPERATION AND PARTS MANUAL — REV. #3 (09/29/06) — PAGE 73

MQ SP-3035 Concrete Saw —F-N-R Control Handle Assy.
F-N-R Control Handle Assy.
NO PART NO PART NAME QTY. REMARK
1 560030 F-N-R CONTROL HANDLE ASSY. ......................1 .......................INCLUDES ITEMS W/#
2# 560028-6 SCREW, #6-32 X 3/8 5
3# 5600028-8 WASHER, FLAT #4 NYLON 5
4# 560028-4 RUBBER BOOT 2
5# 560028-3 PLATE, SIDE SWITCH 1
6# 560028-5 SWITCH ASSEMBLY 2
7# 560028-1 HANDLE HOUSING 1
8# 60118 WIRE, F-N-R 1
9# 925381 SCREW, SET 1/4-20 X 3/8 1
10# 560028-2 PLATE, FRONT SWITCH 1
11 35176 F-N-R CONTROL ASSY....................................... 1 ....................... INCLUDES ITEMS W/
12% 25627 F-N-R CONTROL 1
13% 405070 SEAL, WEATHERPACK 4
14% 405046 CONNECTOR, MALE 1
15% 12223 TERMINAL WEATHERPACK 4
16% 6904 NUT, HEX FINISH 1/4-28 ZINC 4
17% 580001 ROD END, 1/4-20 FEMALE RH 2
18% 440006 CABLE, CONTROL 40" X 2" STROKE 1
19% 120077 MOUNT TRANSAXLE CTRL. CABLE 1
20% 565006 SPRING, CTRL. CABLE TENSIONING 1
21% 915003 SCREW, HHC 1/4-20 X 3/4 GRD. 8 1
22% 584044 RETAINER, FNR CABLE SPRING 1
23% 2295 SCREW, HHC 1/4-20 X 7/8 1
24% 440005 PLATE, F-N-R PINTLE CONTROL 1
25% 933240 WASHER, FLAT SAE 1/4" GRD. 9 1
%
MQ SP-3035 CONCRETE SAW — OPERATION AND PARTS MANUAL — REV. #3 (09/29/06) — PAGE 74

—
MQ SP-3035 Concrete Saw — Joystick Mounting Assy.MQ SP-3035 CONCRETE SAW
Joystick Mounting Assy.
25
11
7
6
21
5
13
4
16
2
23
24
20
20
1
20
24
14
18
12
15
1
19
9
10
22
3
8
17
26
MQ SP-3035 CONCRETE SAW — OPERATION AND PARTS MANUAL — REV. #3 (09/29/06) — PAGE 75

—
MQ SP-3035 Concrete Saw — Joystick Mounting Assy.MQ SP-3035 CONCRETE SAW
Joystick Mounting Assy.
NO PART NO PART NAME QTY. REMARK
1# 0161D NUT, HEX FINISH 5/16-18 2
2# 10019 NUT, FYLOC #10-32 1
3# 1579 SCREW. JJC 1/4-20 X .5 1
4# 2203 WASHER, FLAT, #10 4
5# 405053 CORD GRIP, SAW FNR CONTROL 1
6# 442005-6 BOOT, FNR CONTROL HANDLE 1
7# 442006-3 SPACER, F-N-R 1
8# 442011 BELLCRANK, SAW F-N-R 1
9# 442012 PLATE, NEUTRAL DETENT 1
10# 442013 F-N-R MOUNTING PLATE 1
11# 442021 CONTROL LEVER 1
12# 442022 SPACER, F-N-R DELRIN 1
13# 460018 CAM ROLLER, SAW FNR CONTROL 1
14# 565005 EXTENSION SPRING F-N-R CONTROL 1
15# 584021 DENTENT BALL, SAW FNR CONTROL 1
16# 584023 PIN, LONG SPRING HANGER 1
17# 584024 PIN, SHORT SPRING HANGER 1
18# 926348 SCREW, SHOULDER 3/8-16 X 3/4 1
19# 933015 FRICTION DISC, SAW F-N-R 1
20# 933073 1/2 X 1-1/4 BELLEVILLE WASHER 3
21# 933225 WASHER, FENDER 1/2 X 1-1/2 ZINC 1
22# 933240 WASHER, FLAT 1/4 SAE 1
23# 933242 WASHER, FLAT 3/8 SAE 1
24# 938062 LOCKNUT 3/8-16 YZ 2
25# 973735 SCREW, BHSC 10-24X1-SS 4
26 35122 F-N-R MOUNTING ASSY...........................1 ................ INCLUDES ITEMS W/#
MQ SP-3035 CONCRETE SAW — OPERATION AND PARTS MANUAL — REV. #3 (09/29/06) — PAGE 76

MQ SP-3035 Concrete Saw —Lift Pump Circuit Assy.
Lift Pump Circuit Assy.
MQ SP-3035 CONCRETE SAW — OPERATION AND PARTS MANUAL — REV. #3 (09/29/06) — PAGE 77

MQ SP-3035 Concrete Saw —Lift Pump Circuit Assy.
Lift Pump Circuit Assy.
NO PART NO PART NAME QTY. REMARK
2 340011 PUMP, LIFT 1
3 169003 PIN, CYLINDER 2
4 447007 CYLINDER, LIFT 1
5 21159 FITTING, 45 4MJ-4MO 1
6 368817 FITTING, 90 4MJ-4MO 1
7 35149 FITTING, ORIFICE 4MJ-4MO 1
8 366640 FITTING, 90 4MJ-4FJ 1
9 35157 FITTING, TEE 4MO-4MJ 1
10 35156 HOSE ASM, 11.3" 1
11 35250 HOSE ASM, 10.7" 1
12 366437 FITTING, BULKHEAD #4 JIC 1
13 35248 HOSE ASM 9.1" 1
14 570050 CLAMP ASM #4 SINGLE HOSE 1
15 35057 HOSE ASM 28.7" 2
16 0655 SCREW, HHC 5/16-18 X 3/4 2
17 933241 WASHER, FLAT SAE 5/16 GRD 9 YZ 2
18 933240 WASHER, FLAT SAE 1/4 GRD 9 YZ 2
19 20909 SCREW, HHC 1/4-20 X 2 2
20 0949 NUT, HEX FINISH 1/4-20 X 3/8 NP 2
23 480003 SEAL, OIL CR# 9815 4
24 2621 FITTING, GREASE ZERK STR 1/4-28 1
25 446009 SOLENOID VALVE ASM, SAW LIFT 1
26 400000 SOLENOID, 12VDC 1
27 923000 SCREW, SHC 1/4-20 X 3/8 NP 2
28 933076 WASHER, FLAT SAE #12 ZINC 2
MQ SP-3035 CONCRETE SAW — OPERATION AND PARTS MANUAL — REV. #3 (09/29/06) — PAGE 78

Water System Assy.
MQ SP-3035 Concrete Saw —Water System Assy.
MQ SP-3035 CONCRETE SAW — OPERATION AND PARTS MANUAL — REV. #3 (09/29/06) — PAGE 79

MQ SP-3035 Concrete Saw —Water System Assy.
Water System Assy.
NO PART NO PART NAME QTY. REMARK
1 446004 VALVE, BALL, 1/2 BRASS 1
2 35047 HOSE ASM, 95.1" #8LP 1
3 35052 HOSE, 1/2 ID PUSHLOCK 250 PSI, 8" 1
4 25059 FITTING, BRASS 8 PUSH-ON 1/2 MP 1
5 25931 FITTING, 90 8 BARB - 1/2 MP 2
6 26496 FITTING, 90 1/2 MP - 1/2 FP 1
7 25827 FITTING, BRASS (F) 3/4 GHT SWIVEL 1/2 MNPT 1
MQ SP-3035 CONCRETE SAW — OPERATION AND PARTS MANUAL — REV. #3 (09/29/06) — PAGE 80

MQ SP-3035 Concrete Saw —Depth Indicator Assy.
Depth Indicator Assy.
MQ SP-3035 CONCRETE SAW — OPERATION AND PARTS MANUAL — REV. #3 (09/29/06) — PAGE 81

MQ SP-3035 Concrete Saw —Depth Indicator Assy.
Depth Indicator Assy.
NO PART NO PART NAME QTY. REMARK
1 125032 DEPTH INDICATOR U-BRACKET 1
2 110031 POINTER, DEPTH 1
3 560025 KNOB, COMFORT GRIP 1
4 460019 FLANGE BEARING, .25ID 1
5 973752 SCREW, BHSC, 1/4-20 X 5/8 SS 2
6 584025 STUD, 1/4-20 X 1-3/4 1
7 10024 NUT, NYLOC 1/4-20 2
8 926149 SCREW, SHDLR 1/4D X 5/16L, 10-24 SCKT HD 2
9 1618 NUT, NYLOC 10-24 2
10 933240 WASHER, FLAT SAE 1/4 GRD 9 YZ 4
11 540011 PULLEY, CABLE 1-1/4" OD X .25 SHAFT 4
12 583059 SHIM, .020" THICK, .251" ID, .375" OD 9
13 440012 DEPTH INDICATOR CABLE 1
14 120243 PIVOT TAB 1
15 0131 A SCREW, HHC 1/4-20 X 3/4 1
16 1579 SCREW, HHC 1/4-20 X 1/2 1
17 565004 SPRING, EXTENSION 1
18 160013 AXLE, INDICATOR SHEAVE 1
19 923116 SCREW, SHC 8-32 X 3/4 2
20 13287 NUT, NYLOC 2
MQ SP-3035 CONCRETE SAW — OPERATION AND PARTS MANUAL — REV. #3 (09/29/06) — PAGE 82

MQ SP-3035 Concrete Saw —Handle and Light Assy.
Handle and Light Assy.
MQ SP-3035 CONCRETE SAW — OPERATION AND PARTS MANUAL — REV. #3 (09/29/06) — PAGE 83

MQ SP-3035 Concrete Saw —Handle and Light Assy.
Handle and Light Assy.
NO. PART NO. PART NAME QTY. REMARKS
1 12387 NUT, NYLOCK 8X32 2
2 120206 LIGHT BAR, CONCRETE SAW 1
3 405001 CONNECTOR, PLUG, 4 PIN FEMALE 1
4 0161 C WASHER, LOCK 5/16" 1
5 0161 D NUT, 5/16-18 1
6 560023-1 HANDLE BAR, CONCRETE SAW 2
7 560024 KNOB, HANDLEBAR 2
8 923199 SCREW, SHC 8-32 X 1-1/4 2
9 574002 CAM CLEAT 1
10 35359 TERMINAL,FEM-SMALL 16-18 GA 2
11 405002 CORD, LIGHT-EXTENDABLE 1
12 2532 LIGHT ASSY., RECTANGULAR COMP. 1
13 560017 GRIP HANDLE BAR 2
14 0655 SCREW, HHC 5/16-18" X 3/4 1
15 933241 WASHER, FLAT SAE 5/16 GRD 9 YZ 2
16 120244 MOUNT CAM 1
MQ SP-3035 CONCRETE SAW — OPERATION AND PARTS MANUAL — REV. #3 (09/29/06) — PAGE 84

MQ SP-3035 Concrete Saw —Front/Rear Pointer Assy.
Front/Rear Pointer Assy.
MQ SP-3035 CONCRETE SAW — OPERATION AND PARTS MANUAL — REV. #3 (09/29/06) — PAGE 85

MQ SP-3035 Concrete Saw —Front/Rear Pointer Assy.
Front/Rear Pointer Assy.
NO PART NO PART NAME QTY. REMARK
1# 120045 RIGHT SIDE POINTER 1
2# 120046 LEFT SIDE POINTER 1
3# 25832 ROPE ASSY., FRONT POINTER 1
4# 110044 POINTER, FRONT 17-1/4" 1
5# 15503 KNOB, COMFORT GRIP STAR, 3/8-16 X 1 1
6# 500005 WHEEL, POINTER 6 X 1 1
7# 160004 AXLE, POINTER WHEEL 1
8# 582008 BUSHING, FLANGE,1 OD X 3/4 ID 4
9# 966166 PIN, CLEVIS 3/4 X 2 2
10# 965105 PIN, COTTER 5/32 X 1-1/2PLTD 2
11# 933241 WASHER, FLAT SAE 5/16 GRD 9 YZ 2
12# 0202 SCREW, HHC 5/16-18 X 1 ZINC 2
13# 926006 SCREW, SQHS, CP 1/4-20 X 1/2 2
14# 1493 SCREW, HHC 3/8-16 X 3.25 1
15# 10133 NUT, NYLOC 3/8-16 1
16# 1456 NUT, HEX FINISH 3/8-16 2
17# 3233 WASHER, FENDER, 1.5OD X 3/8ID 2
18# 933244 WASHER, FLAT SAE 1/2 " GRD 9 YZ 2
19 M10005 FRONT POINTER ASSY................................................... 1 .......... INCLUDES ITEMS W/#
20 110020 POINTER, REAR 1
21 0205 SCREW, HHC 3/8-16 X 1 ZINC 2
MQ SP-3035 CONCRETE SAW — OPERATION AND PARTS MANUAL — REV. #3 (09/29/06) — PAGE 86

MQ SP-3035 Concrete Saw —Gauges and Controls Assy.
Gauges and Controls Assy.
MQ SP-3035 CONCRETE SAW — OPERATION AND PARTS MANUAL — REV. #3 (09/29/06) — PAGE 87

MQ SP-3035 Concrete Saw —Gauges and Controls Assy.
Gauges and Controls Assy.
NO PART NO PART NAME QTY. REMARK
1 15171 CABLE PULL 1
2 446004 VALVE, WATER FLOW CONTROL 1
3 25627 F-N-R CONTROL ASSY. 1
4 560025 KNOB, COMFORT GRIP 1
5 574002 CAM CLEAT 1
6 15481 CABLE, CHOKE 45" 1
7 120210 MOUNT THROTTLE CABLE 1
8 TBD WASHER 1
9 25634 BULK HEAD ADAPTER 2
10 TBD NUT 2
11 TBD NUT 2
12 15171 CABLE, PULL THROTTLE 1
13 584028 PIVOT END, CABLE 1
14 926327 SCREW SHDLR 1
15 25634 BULK HEAD ADAPTOR 1
16 933242 WASHER FLAT SAE 5
17 5283 NUT, NYLOC 5/15 1
18 35174 POSITRACTION UPPER LEVER ASSY. .............1 .................SEE POSITRACTION ASSY.
19 406001 SWITCH, IGNITION 1
20 423000 VOLT METER 1
21 421000 TACHOMETER 1
22 406000 SWITCH, ROCKER 2
23 35125 HARNESS, WIRING 1
24 406012 MOUNTING BAR, CIRCUIT BREAKER 1
25 933241 WASHER, FLAT SAE 5/16 GRD 9 YZ 2
26 923201 SCREW, SHC 1/4-20 X 1/2 2
27 406019 CIRCUIT BREAKER, 10 AMP 2
28 25935 NUT, HEX 10-32 W/STAR WASHER 2
MQ SP-3035 CONCRETE SAW — OPERATION AND PARTS MANUAL — REV. #3 (09/29/06) — PAGE 88

Front Axle Assy.
MQ SP-3035 Concrete Saw — Front Axle Assy.
MQ SP-3035 CONCRETE SAW — OPERATION AND PARTS MANUAL — REV. #3 (09/29/06) — PAGE 89

MQ SP-3035 Concrete Saw —Front Axle Assy.
Front Axle Assy.
NO PART NO PART NAME QTY. REMARK
8 913161 SCREW, HHC 7/16-14 X 2 4
9 933243 WASHER, FLAT SAE 7/16 8
10 100005 BEARING BACKING PLATE 2
11 460006 BEARING, FLANGED, 1" 2
12 16677 NUT, LOCK NUT, NYLOC 7/16 4
13 2621 FITTING, GREASE ZERK STR 2
14 926064 SCREW, SQHS, CP 2
15 16010-1 FRONT AXLE 1
16 25839 FRONT WHEEL ASSEMBLY...................2....................INCLUDES ITEMS W/#
17# 485002 SEAL 2
18# 500003 WHEEL, FRONT 3" X 6" 2
19# 460002 BEARING 4
20# M508006 SPACER 2
21# 576003 SNAP RING 2
22 933246 WASHER, FLAT SAE 5/8 2
23 06505-008 SCREW, HHC 5/8-11 X 1.00 2
24 508005 COVER, WHEEL, FRONT 2
25 1579 SCREW, HHC 1/4-20 X 1/2 6
MQ SP-3035 CONCRETE SAW — OPERATION AND PARTS MANUAL — REV. #3 (09/29/06) — PAGE 90

Depth Stop Assy.
MQ SP-3035 Concrete Saw — Depth Stop Assy.
MQ SP-3035 CONCRETE SAW — OPERATION AND PARTS MANUAL — REV. #3 (09/29/06) — PAGE 91

MQ SP-3035 Concrete Saw —Depth Stop Assy.
Depth Stop Assy.
NO PART NO PART NAME QTY. REMARK
1 35120 DEPTH STOP LEAD SCREW 1
2 933244 WASHER, FLAT SAE 1/2 3
3 565002 SPRING, COMPRESSION, 7/8 1
4 582009 COLLAR, SET .50 ID 1
5 442014 DEPTH STOP LINKAGE 1
6 19974 PIN, CLEVIS 1/2 X 1.25 EFFECT 1
7 965103 PIN, COTTER 5/32 X 1 PLTD 1
MQ SP-3035 CONCRETE SAW — OPERATION AND PARTS MANUAL — REV. #3 (09/29/06) — PAGE 92

Platform Assy.
MQ SP-3035 Concrete Saw — Platform Assy.
MQ SP-3035 CONCRETE SAW — OPERATION AND PARTS MANUAL — REV. #3 (09/29/06) — PAGE 93

MQ SP-3035 Concrete Saw — Platform Assy.
Platform Assy.
NO PART NO PART NAME QTY. REMARK
1 25807 PLATFORM 1
3 924287 SCREW, FHSC, 3/8-16 X 1-1/4,NP 6
4 120038 CLIP, MOUNT,BLADEGUARD 1
5 120040 SPACER, BLADEGUARD CLIP, .25 THICK 2
6 3214 SCREW, HHC 1/2-13 X 1 1/4 3
7 933244 WASHER, FLAT SAE 1/2 GRD 9 YZ 3
8 583092 WASHER, LOWER BELT PROTECTOR 1
9 25837 GUARD, LOWER BELT PROTECTOR 1
10 25820 WASHER, STRAP LOWER BELT PROTECTOR 1
11 120092 CLIP, RH BLADE GUARD MOUNT 1
12 M200000 GUARD, BLADE COLLAR - SLATE GREY 1
13 5283 NUT, NYLOC 5/16-18 1
14 926327 SCREW, SHSHLDR, 5/16-18X1/2 1
15 448002 LEVER, CAM 1
16 933242 WASHER, FLAT SAE 3/8 GRD 9 YZ 3
MQ SP-3035 CONCRETE SAW — OPERATION AND PARTS MANUAL — REV. #3 (09/29/06) — PAGE 94

Drive Assy.
MQ SP-3035 Concrete Saw — Drive Assy.
MQ SP-3035 CONCRETE SAW — OPERATION AND PARTS MANUAL — REV. #3 (09/29/06) — PAGE 95

MQ SP-3035 Concrete Saw — Drive Assy.
Drive Assy.
NO PART NO PART NAME QTY. REMARK
1 263002 TRANSAXLE ASSY. ................................................................ 1 ............. INCLUDES ITEMS W/%
2 35325 WHEEL, POLY-11X3 ............................................................... 2 ............. REPLACES P/N 500011
3 582038 BUSHING, 1.0” TRANSTORQUE KEYLESS 2
4 206005 SKID PLATE, TRANSAXLE 1
5 35190 FAN ASSY. ..............................................................................1 ............. INCLUDES ITEMS W/#
6 120078 BACKING PLATE, SAW TRANSAXLE 2
7 540033 PULLEY, 4.13 X A X 18 TOOTH SPLINE 1
8 06500-020 SCREW, HHC 5/16-18X2-1/2 2
9 933241 WASHER, FLAT SAE 5/16 GRD 9 YZ 4
10 5283 NUT, NYLOC 5/16-18 2
11# 933242 WASHER, FLAT SAE 3/8 GRD 9 YZ 8
12 1493 SCREW, HHC 3/8-16X3.25 8
13% BDU-10L-122 PUMP MOTOR SUNSTRAND 1
14 25495 SCREW, HHC 5/16-18X4-1/2 3
15 0202 SCREW, HHC 5/16-18X1 ZINC 6
16% 35151 MOUNTING HORN, AXLE 2
17# 933201 WASHER, FENDER 3/16X3/4 ZINC 1
18# 933072 WASHER, FLAT SAE #8 ZINC 1
19# 923118 SCREW, SHC 8-32X1 NP 1
20# 583064 STAND-0FF, 1.00 HEX X 1.483 1
21# 384001 FAN, 5-BLADE 1
22 25623 CIRCLIP, RETAINER 1
23 35019 HOSE, 1/2 ID PUSHLOCK 250 PSI, 6" 1
24 370192 FITTING, 45 8BEAD SHORT-6MO 3
25 370162-1 FITTING, 90 8BARB - 6MO 2
26 368699 FITTING, PLUG 6MO HEX SKT HD 1
27 35054 HOSE, 1/2 ID PUSHLOCK 250 PSI, 22.25" 1
28 25976 HOSE, 1/2 ID PUSHLOCK 250 PSI, 18.5" 1
29 35226 FITTING, 90 8 BEADED HOSE X 10MO 1
30 35050 HOSE ASM, 8.25" #6LP w/35253/370674 1
31 35051 HOSE ASM, 32.85" #6LP w/ 368103 1
32 366692 FITTING, TEE RUN 6MJ - 6MJ - 6FJ 1
33 570053 CLAMP ASM, WELD, #6 DOUBLE HOSE 1
34 35049 HOSE ASM, 22.75" #6LP w/ 370674/370674 1
35 35048 HOSE ASM, 54.9" #6LP w/ 370674 1
36 120260 PLATE, HYDRAULIC OIL FILTER ADAPTER 1
37 25617 FILTER HEAD, TRANSAXLE 1
38 306006 FILTER, TRANSAXLE 1
39 144003 RESERVOIR, HYDRAULIC OIL 1
40 367470 FITTING, STR 4MJ - 6MO 1
41 923200 SCREW, SHC 1/4-20 X 3/8 NP 2
42 933076 WASHER, FLAT SAE #12 ZINC 4
43 923201 SCREW, SHC 1/4-20 x 1/2 4
44 11780 FITTING, 45 6MJ-6MO 1
MQ SP-3035 CONCRETE SAW — OPERATION AND PARTS MANUAL — REV. #3 (09/29/06) — PAGE 96

MQ SP-3035 Concrete Saw —Bladeshaft and Mounting Assy.
Bladeshaft and Mounting Assy.
MQ SP-3035 CONCRETE SAW — OPERATION AND PARTS MANUAL — REV. #3 (09/29/06) — PAGE 97

MQ SP-3035 Concrete Saw —Bladeshaft and Mounting Assy.
Bladeshaft and Mounting Assy.
NO. PART NO. PART NAME QTY. REMARKS
1 35270 BLADESHAFT AND MOUNTING GROUP ................................ 1.......INCLUDES ITEMS W/#
2# 25840 BLADESHAFT ASSY. W/TACH P/U.......................................... 1.......INCLUDES ITEMS W/%
4# 25842 MOUNTING BLOCK, BLADESHAFT 1
5# 120220 MOUNTING BLOCK, BLADESHAFT W/PIN 1
6# 120221 SADDLE CLAMP 1.50X4.00 BLADESHAFT 2
7# 923357 SCREW, SHC 7/16-14 X 1-1/4, NP 4
8# 16530 SCREW, HHC 7/16-14 X 1 2
9# 933243 WASHER, FLAT SAE 7/16 GRD 9 YZ 6
10# 06502-010 SCREW, HHC 7/16-14 X 1-1/4 4
11#% 25841 HOUSING, SINGLE SPEED W/TACH 1
12#% 162000 BLADE SHAFT 1
13#% 576005 SNAP RING, SH-156 2
14#% 10138 SCREW, SHS,1/4-20 X 1/2, NP 6
15#% 486000 WASHER, THRUST 2
16#% 485001 SLEEVE, BLADE SHAFT SEAL 2
17#% 480001 SEAL, OIL CR# 26110 2
18#% 480002 SEAL, OIL CR# 16022 2
19#% 578129 O-RING, SIZE 2-129 BUNA 70 2
20#% 460008 BEARING, 7208BGC3 2
21#% 460004 BEARING, CYLINDRICAL NU2208RC3 1
22#% 11722 FITTING, 90 6MJ-6M0 2
23#% 969314 KEY, WOODRUFF, #61, 3/16" X 5/8" 2
24#% 583026 DRAIN PLUG, MAGNETIC, 1/2-20 1
25#% 577009 GASKET, DRAIN PLUG 1
26#% 35254 SENDER ASM, TACHOMETER SIGNAL GENERATOR .......... 1........INCLUDES ITEMS W/+
27#% 35077 GEAR, SAW BLADE SHAFT SPEED PICKUP 1
28#% 180001 COLLAR ASSY., OUTER BLADE SHAFT ................................. 2........INCLUDES ITEMS W/@
29#% 180000 COLLAR, INNER BLADE SHAFT 2
30#% 582012 BUSHING, QUICK DISCONNECT BLADE SHAFT 2
31#% 915315 SCREW, HHC 5/8-11X3 GR8 1
32#% 25695 WASHER, SEALED 3/4" 1
33#% 915316 SCREW, HHC 5/8-11X3 LH GR8 1
34#% 576002 SNAP RING, VH0-315 1
35#%+ 421001 GENERATOR, TACHOMETER SIGNAL 1
36#%+ 12171 SEAL, WEATHERPACK 16-18 GA, GREEN 2
37#%+ 12179 TERMINAL, WEATHERPACK MALE 14-16 GA 2
38#%+ 12176 CONNECTOR, WEATHERPACK 2 MALE PIN 1
39#%+@ 980705 PIN, DOWEL 3/8 X 1-1/4" 4
40#%+@ 180001-1 COLLAR, BLADE OUTSIDE 2
MQ SP-3035 CONCRETE SAW — OPERATION AND PARTS MANUAL — REV. #3 (09/29/06) — PAGE 98
 Loading...