

Page 1

OPERATION AND PARTS MANUAL
Reversible Plate
Compactor
Model
MVH-702DRSC
© COPYRIGHT 2003, MULTIQUIP INC.
Revision #1 (12/17/03)
MULTIQUIP INC
18910 WILMINGTON AVE. 800-427-1244
CARSON, CALIFORNIA 90746 FAX: 800-672-7877
310-537-3700
800-421-1244 800-478-1244
FAX: 310-537-3927 FAX: 310-631-5032
E-mail:mq@multiquip.com • www:multiquip.com
Atlanta • Boise • Dallas • Houston • Newark
Montreal, Canada • Manchester, UK
Rio De Janiero, Brazil • Guadalajara, Mexico
..
. PARTS DEPARTMENT:
..
SERVICE DEPARTMENT/TECHNICAL ASSISTANCE:
Page 2

PAGE 2 — MQ-MIKASA MVH-702DRSC COMPACTOR — PARTS & OPERATION MANUAL — REV. #1 (12/17/03)
Page 3

HERE'S HOW TO GET HELP
PLEASE HAVE THE MODEL AND SERIAL
NUMBER
MULTIQUIP’S MAIN PHONE NUMBERS
800-421-1244 FAX: 310-537-3927
310-537-3700
PARTS DEPARTMENT
800-427-1244 FAX: 800-672-7877
310-537-3700 FAX: 310-637-3284
MAYCO PARTS
800-306-2926 FAX: 800-672-7877
310-537-3700 FAX: 310-637-3284
SERVICE DEPARTMENT
800-478-1244 FAX: 310-537-4259
310-537-3700
MQ POWER SERVICE DEPARTMENT
800-835-2551 FAX: 310-638-8046
ON-HAND
WHEN CALLING
310-537-3700
TECHNICAL ASSISTANCE
800-478-1244 FAX: 310-631-5032
WARRANTY DEPARTMENT
800-421-1244, EXT. 279 FAX: 310-537-1173
310-537-3700, EXT. 279
MQ-MIKASA MVH-702DRSC COMPACTOR — PARTS & OPERATION MANUAL — REV. #1 (12/17/03) — PAGE 3
Page 4
TABLE OF CONTENTS
MQ MIKASA MVH-702DRSCREVERSIBLE PLATE
COMPACTOR
Proposition 65 Warning ..............................................2
Here's How To Get Help .............................................3
Table Of Contents ......................................................4
Parts Ordering Procedures ........................................ 5
Safety Message Alert Symbols .............................. 6-7
Rules for Safe Operation ....................................... 8-9
Operation and Safety Decals ............................. 10-11
Dimensions and Specifications ................................12
Features ................................................................... 13
Compactor Components .................................... 14-15
Remote Control Components (Body) ................ 16-17
Remote Control Components (Transmitter) ....... 18-19
Before Start-up ........................................................20
Battery Charging ...................................................... 21
Operation ........................................................... 22-23
Loading and Unloading ............................................24
Maintenance ............................................................ 25
Troubleshooting ................................................. 26-29
Block Diagram ..........................................................30
Reciever Wiring Diagram ......................................... 31
Valve Control Diagram .............................................32
Explanation Of Code In Remarks Column ...............34
Suggested Spare Parts ............................................35
PARTS ILLUSTRATIONS
Nameplate and Decals....................................... 36-37
Vibrating Plate Assembly .................................. 38-39
Vibrator Assembly .............................................. 40-41
Cover Assembly ................................................. 42-45
Engine Assembly ............................................... 46-47
Hydraulic System Assembly ............................... 48-51
Electric Device.................................................... 52-55
Terms and Conditions Of Sale — Parts ...................56
Specification and part
NOTE
number are subject to
change without notice.
PAGE 4 — MQ-MIKASA MVH-702DRSC COMPACTOR — PARTS & OPERATION MANUAL — REV. #1 (12/17/03)
Page 5
PARTS ORDERING PROCEDURES
When ordering parts,
please supply the following information:
❒❒
❒ Dealer account number
❒❒
❒❒
❒ Dealer name and address
❒❒
❒❒
❒ Shipping address (if different than billing address)
❒❒
❒❒
❒ Return fax number
❒❒
❒❒
❒ Applicable model number
❒❒
❒❒
❒ Quantity, part number and description of each part
❒❒
❒❒
❒ Specify preferred method of shipment:
❒❒
✓ FedEx or UPS Ground
✓ FedEx or UPS Second Day or Third Day
✓ FedEx or UPS Next Day
✓ Federal Express Priority One
✓ DHL
✓ Tr u ck
Note: Unless otherwise indicated by customer, all
orders are treated as “Standard Orders”, and will
ship within 24 hours. We will make every effort to
ship “Air Shipments” the same day that the order is
received, if prior to 2PM west coast time. “Stock
Orders” must be so noted on fax or web forms.
Here’s how to get help...
Please have the model and serial number on
hand when calling.
Parts Department
800-427-1244 Fax: 800-672-7877
310-537-3700 Fax: 310-637-3284
Mayco Parts
800-306-2926 Fax: 800-672-7877
310-537-3700 Fax: 310-637-3284
Service Department
800-478-1244 Fax: 310-537-4259
310-537-3700
MQ Power Service Department
800-835-2551 Fax: 310-638-8046
310-537-3700
Technical Assistance
800-478-1244 Fax: 310-631-5032
Warranty Department
800-421-1244, Ext. 279 Fax: 310-537-1173
310-537-3700, Ext. 279
Multiquip’s Main Phone Numbers
800-421-1244 Fax: 310-537-3927
310-537-3700
Place Your Parts Order Via Web or Fax
For Even More Savings!
Extra Discounts!
All parts orders which include complete part numbers
and are received by our automated web parts order
system, or by fax qualify for the following extra
discounts:
Ordered Standard Stock orders
via orders ($750 list and above)
Fax 3% 10%
Web 5% 10%
Special freight allowances
when you order 10 or more
line items via Web or Fax!**
FedEx Ground Service
No other allowances on freight shipped by any other
carrier.
NOTE: DISCOUNTS ARE SUBJECT TO CHANGE
at no charge for freight
MULTIQUIP INC.
18910 WILMINGTON AVENUE
POST OFFICE BOX 6254
CARSON, CALIFORNIA 90749
310-537-3700 • 800-421-1244
FAX: 310-537-3927
E-MAIL: mq@multiquip.com
WWW: multiquip.com
MQ-MIKASA MVH-702DRSC COMPACTOR — PARTS & OPERATION MANUAL — REV. #1 (12/17/03) — PAGE 5
Direct TOLL-FREE access
to our Parts Department:
Toll-free nationwide — 800-427-1244
Page 6
MVH-702DRSC — SAFETY MESSAGE ALERT SYMBOLS
FOR YOUR SAFETY AND THE SAFETY OF OTHERS!
Safety precautions should be followed at all times when
operating this equipment. Failure to read and understand the
Safety Messages and Operating Instructions could result in
injury to yourself and others.
This Owner's Manual has been
developed to provide complete
NOTE
for data relative to its safe operation.
Before using this compactor, ensure that the operating
individual has read and understands all instructions in this
manual.
instructions for the safe and
efficient operation of the Multiquip
Model MVH-702DRSC Reversible
Plate Compactor. Refer to the
engine manufacturer’s instructions
HAZARD SYMBOLS
SAFETY MESSAGE ALERT SYMBOLS
The three (3) Safety Messages shown below will inform you
about potential hazards that could injure you or others. The
Safety Messages specifically address the level of exposure to
the operator, and are preceded by one of three words: DANGER,
WARNING, or CAUTION.
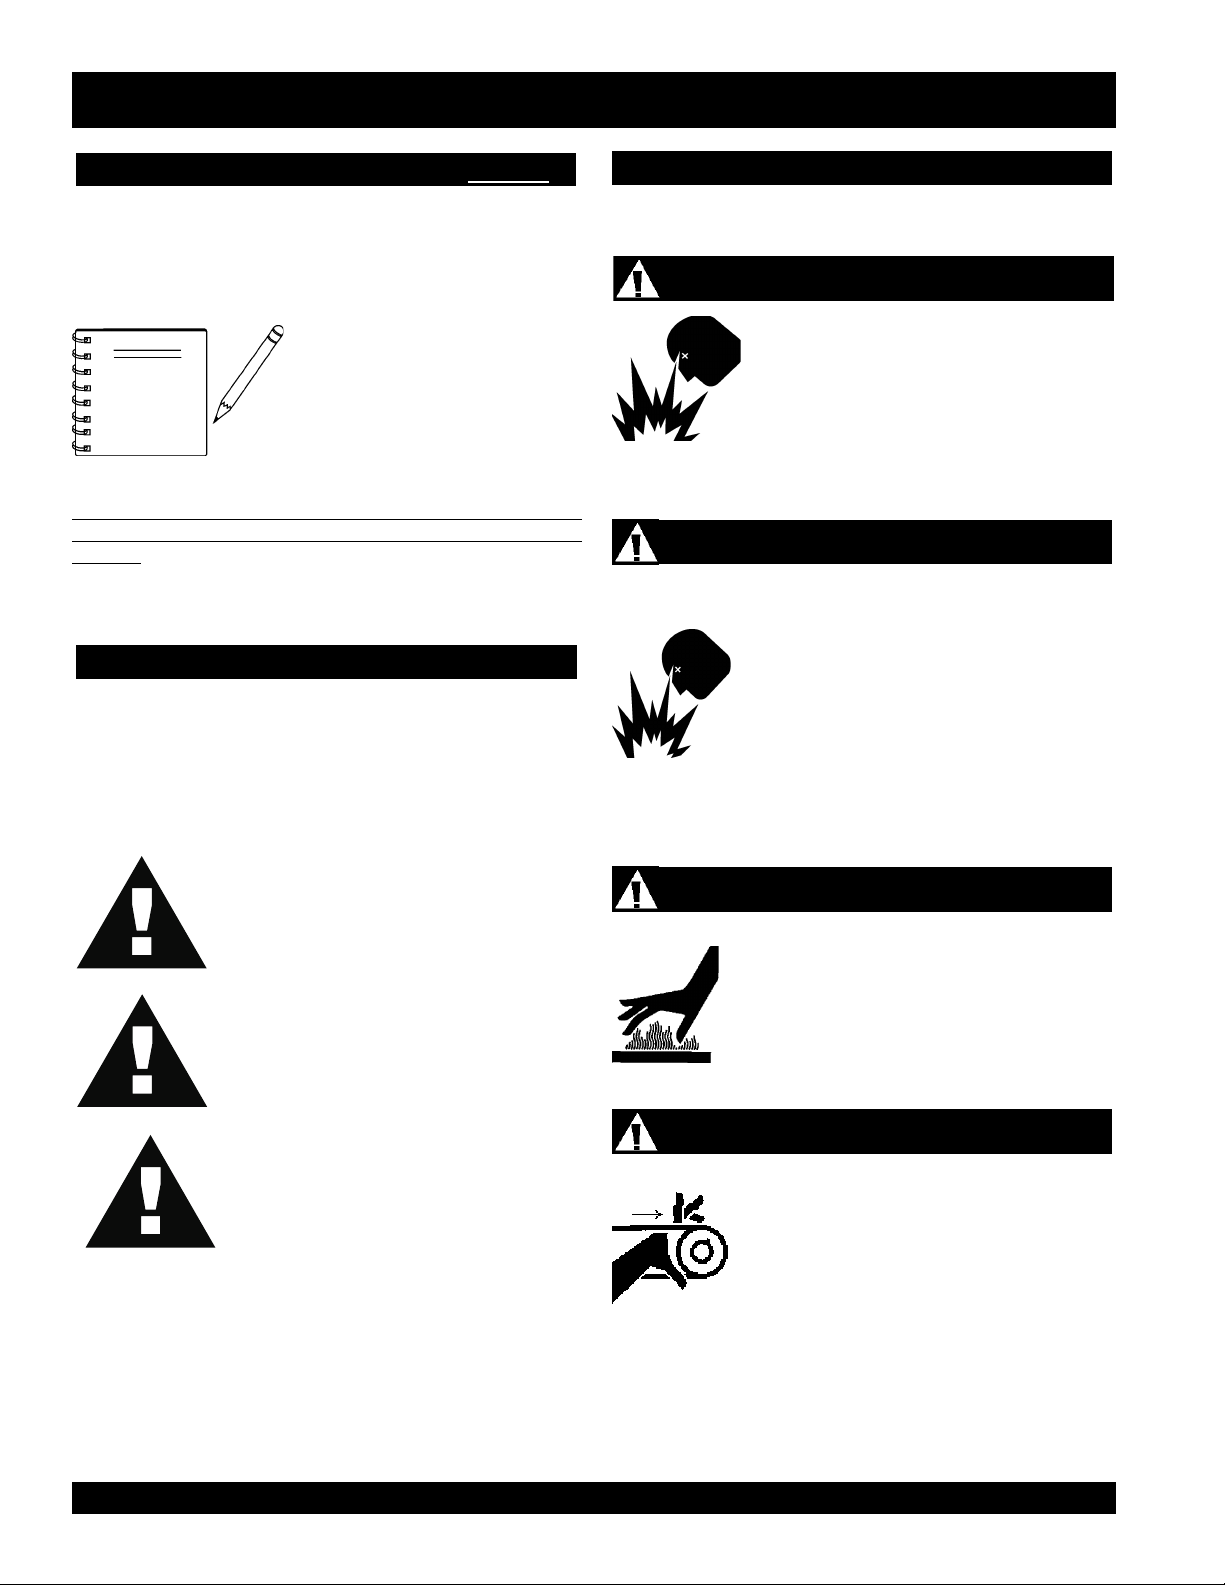
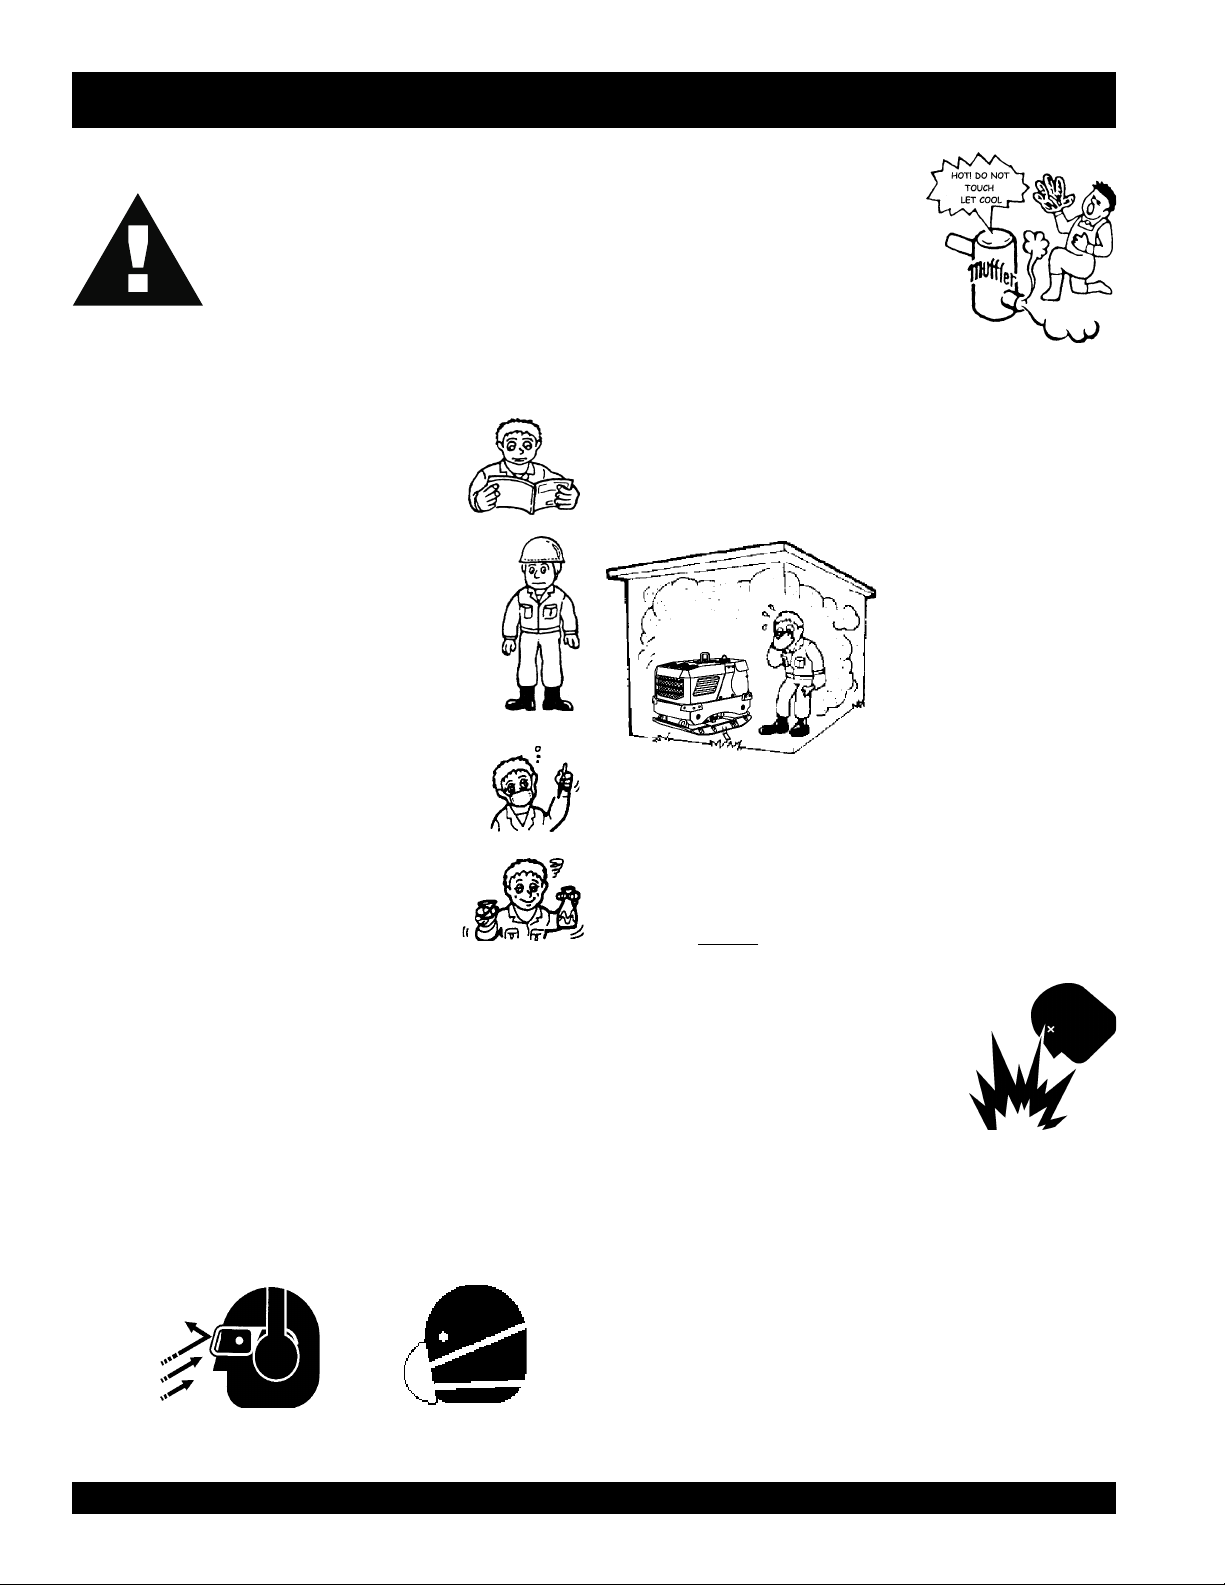
Lethal Exhaust Gases
Engine exhaust gases contain poisonous
carbon monoxide. This gas is colorless and
odorless, and can cause death if inhaled.
NEVER operate this equipment in a confined
area or enclosed structure that does not
provide ample free flow air.
Explosive Fuel
GASOLINE is extremely flammable, and its
vapors can cause an explosion if ignited. DO
NOT start the engine near spilled fuel or
combustible fluids. DO NOT fill the fuel tank
while the engine is running or hot. DO NOT
overfill tank, since spilled fuel could ignite if it
comes into contact with hot engine parts or
sparks from the ignition system. Store fuel in
approved containers, in well-ventilated areas
and away from sparks and flames. NEVER
use fuel as a cleaning agent.
DANGER: You WILL be KILLED or
SERIOUSLY injured if you do not follow
directions.
WARNING: You CAN be KILLED or
SERIOUSLY injured if you do not follow
directions.
CAUTION: You CAN be injured if you
do not follow directions.
Potential hazards associated with this compactor operation will
be referenced with Hazard Symbols which appear throughout
this manual, and will be referenced in conjunction with Safety
Message Alert Symbols.
Burn Hazards
Engine components can generate extreme heat.
To prevent burns, DO NOT touch these areas
while the engine is running or immediately after
operations. Never operate the engine with heat
shields or heat guards removed.
Rotating Parts
NEVER operate equipment with covers, or
guards removed. Keep fingers, hands, hair and
clothing away from all moving parts to prevent
injury.
PAGE 6 — MQ-MIKASA MVH-702DRSC COMPACTOR — PARTS & OPERATION MANUAL — REV. #1 (12/17/03)
Page 7
MVH-702DRSC — SAFETY MESSAGE ALERT SYMBOLS
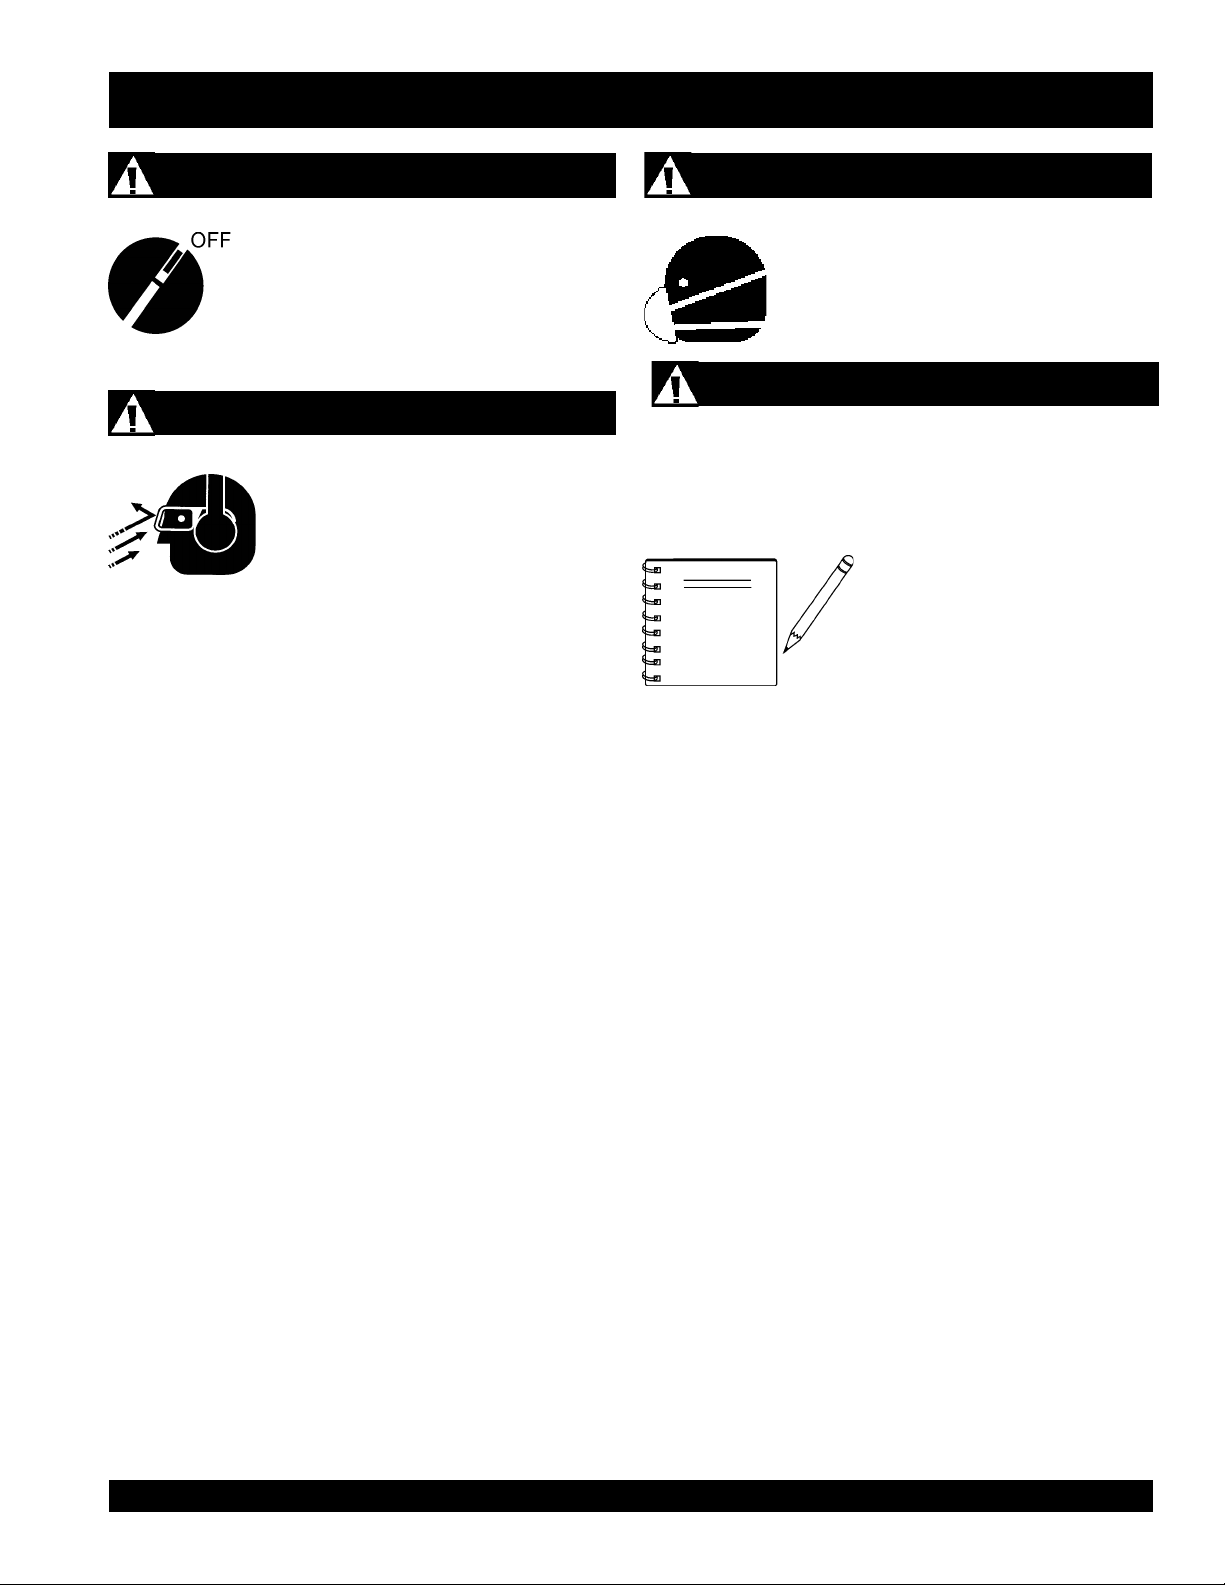
Accidental Starting
ALWAYS place the engine ON/OFF switch in
the OFF position, when the compactor is not
in use.
Sight and Hearing hazard
ALWAYS wear approved eye and hearing
protection.
Respiratory Hazard
ALWAYS wear approved respiratory
protection.
Equipment Damage Messages
Other important messages are provided throughout this manual
to help prevent damage to your compactor, other property, or
the surrounding environment.
This compactor, other property, or
NOTE
the surrounding environment could
be damaged if you do not follow
instructions.
MQ-MIKASA MVH-702DRSC COMPACTOR — PARTS & OPERATION MANUAL — REV. #1 (12/17/03) — PAGE 7
Page 8
MVH-702DRSC — RULES FOR SAFE OPERATION
CAUTION:
Failure to follow instructions in this manual may
lead to serious injury or even death! This
equipment is to be operated by trained and
qualified personnel only! This equipment is for
industrial use only.
The following safety guidelines should always be used when
operating the MIKASA MVH-702DRSC Reversible Plate
Compactor:
GENERAL SAFETY
■
DO NOT operate or service this equipment before
reading this entire manual.
■
This equipment should not be operated by
persons under 18 years of age.
■
NEVER operate this equipment without proper
protective clothing, shatterproof glasses, steeltoed boots and other protective devices required
by the job. ALWAYS wear slip resistant safety
shoes or boots.
■
NEVER operate this equipment when not feeling
well due to fatigue, illness or taking medicine.
■
NEVER operate this equipment under the
influence or drugs or alcohol.
■
NEVER use accessories or attachments, which are not
recommended by Multiquip for this equipment. Damage to
the equipment and/or injury to user may result.
■
Manufacturer does not assume responsibility for any accident
due to equipment modifications.
■
Whenever necessary, replace nameplate, operation and
safety decals when they become difficult read.
■
ALWAYS wear proper respiratory (mask), hearing and eye
protection equipment when operating the compactor.
■
NEVER touch the hot exhaust manifold,
muffler or cylinder. Allow these parts to
cool before servicing engine or
■
High Temperatures – Allow the engine to cool before adding
fuel or performing service and maintenance functions. Contact
hot
with
■
The engine of this compactor requires an adequate free flow
of cooling air. NEVER operate the compactor in any enclosed
■
ALWAYS refuel in a well-ventilated area, away from sparks
and open flames.
■
ALWAYS use extreme caution when working with flammable
liquids. When refueling, stop the engine and allow it to cool.
DO NOT
could result from fuel vapors, or if fuel is spilled on a hot engine.
■
NEVER operate the compactor in an
explosive atmosphere or near
combustible materials. An explosion or
fire could result causing severe
harm or even death.
■
Topping-off to filler port is dangerous, as it tends to
spill fuel.
■ALWAYS stored the compactor in a clean, dry location out of
the reach of children.
components can cause serious burns.
or narrow area where free
flow of the air is restricted. If
the air flow is restricted it will
cause serious damage to
the compactor or engine
and may cause injury to
people and property.
Remember the
compactor's engine gives off
DEADLY gases.
smoke around or near the machine. Fire or explosion
bodily
■
NEVER Run engine without air cleaner. Severe engine
damage may occur.
■
NEVER leave the compactor unattended, turn off engine.
■
CAUTION must always be observed while servicing this
compactor. Rotating parts can cause injury if contacted.
■
DO NOT leave compactor with engine running. Use chock
blocks if parking
PAGE 8 — MQ-MIKASA MVH-702DRSC COMPACTOR — PARTS & OPERATION MANUAL — REV. #1 (12/17/03)
compactor on a grade.
Page 9

MVH-702DRSC — RULES FOR SAFE OPERATION
■
ALWAYS use extreme care when operating near obstructions,
on slippery surfaces, grades and side slopes.
■
When reversing, particularly on the edges and banks of
ditches, as well as in front of obstacles, the operator must
stay in a standing position at a safe distance from the machine.
■
When operating near any house/building or pipelines, always
check the effect of machine vibration. Stop the work if
necessary.
■
Unauthorized equipment modifications will void all
warranties.
■
Refer to the
questions or information.
■
DO NOT operate the compactor with the front or rear cover
open.
■
Replace any worn or damaged compactor components
immediately.
■
ALWAYS turn the engine
before performing maintenance.
■
ALWAYS make sure compactor is correctly secured to the
trailer. Check all supports attaching the compactor to the trailer
and make sure they are tight.
■
ALWAYS keep the machine away from workers and
obstacles. Also keep the immediate area free of bystanders.
■
ALWAYS check the machine for loosened threads or bolts
before starting.
■
ALWAYS read, understand, and follow procedures in
Operator’s Manual before attempting to operate equipment.
■
ALWAYS be sure the operator is familiar with proper safety
precautions and operations techniques before using
compactor.
■
A copy of this manual shall accompany the compactor at all
times.
■
DO NOT use worn out hoses or couplings; inspect daily.
Engine Owner's Manual
OFF
for engine technical
before performing must be
■
■
Emergencies
■
Maintenance Safety
■
■
■
■
■
■
■
Lifting
■
■
High Temperatures – Always stop engine and allow the
engine to cool before adding fuel, oil or performing service
hot
and maintenance functions. Contact with
cause serious burns.
NEVER disconnect any
These devices are intended for operator safety. Disconnection
of these devices can cause severe injury, bodily harm or even
death! Disconnection of any of these devices will void all
warranties.
ALWAYS know the location of the nearest
and
first aid kit
Also know the phone numbers of the nearest
doctor
and
invaluable in case of an emergency.
NEVER lubricate components or attempt service on a running
machine.
ALWAYS allow the machine a proper amount of time to cool
before servicing.
Keep the machinery in proper running condition.
Fix damage to the machine immediately and always replace
broken parts.
Dispose of hazardous waste properly. Examples of potentially
hazardous waste are used motor oil, fuel and fuel filters.
DO NOT use food or plastic containers to dispose of
hazardous waste.
DO NOT pour waste, oil or fuel directly onto the ground,
down a drain or into any water source.
The compactor has an operating weight of approximately
1600 lbs. (728 Kg). Use lifting equipment capable of lifting
this weight.
Make sure the engine is off before lifting the machine.
. Know the location of the nearest telephone.
fire department
"emergency or safety devices"
. This information will be
components can
.
fire extinguisher
ambulance
,
■
Use reliable cable in lifting the machine.
■
Lift upright with sufficient bearing capacity to prevent machine
from tilting or slipping.
■
When lifting, keep the machine away from workers and
animals.
MQ-MIKASA MVH-702DRSC COMPACTOR — PARTS & OPERATION MANUAL — REV. #1 (12/17/03) — PAGE 9
Page 10
MVH-702DRSC — OPERATION AND SAFETY DECALS
CARSON, CALIF.
FOR EMERGENCY
Pull the knob untill
engine
stops completely
MAIN SWITCH
DANGER
FUEL
WARNING
DUST
WARNING
NOISE
WARNING
DUST
WARNING
NOISE
WARNING
DUST
DANGER
FUEL
DANGER
FUEL
DANGER
FUEL
Operate only in well-
ventilated area
Do not stand next to
machine while lifting
Use caution while
operating
Fire Risk
Wear eye protection
Wear ear protection
Operate only in well-
ventilated area
Do not stand next to
machine while lifting
Use caution while
operating
Shell Tellus Oil
45
P/N: 920109800
P/N: 920109700
P/N: 920108810
P/N: 920209020
P/N: 920100920
P/N: 920108350
P/N: 920101580
P/N: 920109840
P/N: 920109750
P/N: 920109770
P/N: 920109550
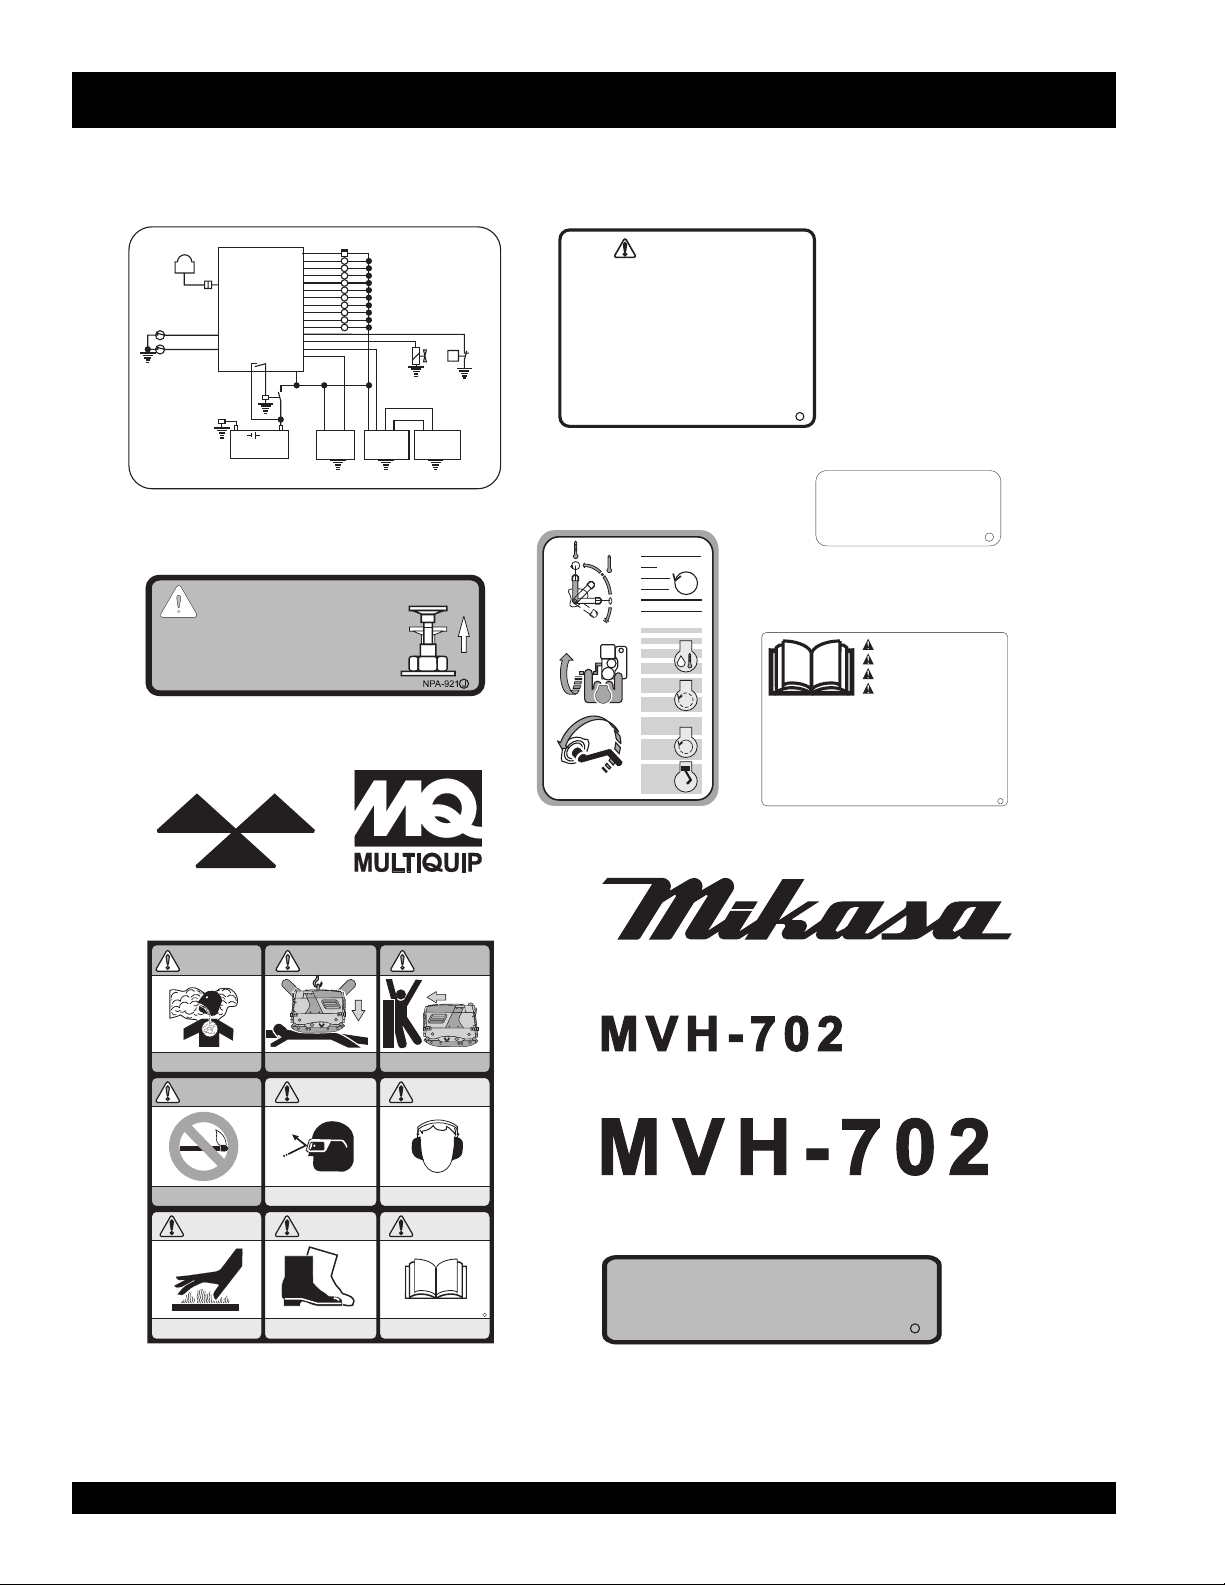
Figure 1 displays the operation and safety decals as they appear on the compactor. Should any of these decals become damaged
or unreadable, contact the Multiquip Parts Department for a replacement set.
I.R RECIEVER UNIT
THERMAL SENSOR 1
THERMAL SENSOR 2
FOR EMERGENCY
Pull the knob untill
engine stops completely
CONTROL BOX
HOUR METER
ABNORMAL COMMUNICATIONLAMP
OVERHEATLAMP
ABNORMAL OIL PRESSURE LAMP
REGULATORABNORMALITY LAMP
OPERATION LAMP
LEFT FORWARD SOLENOID
LEFT BACK SOLENOID
RIGHT FORWARD SOLENOID
RIGHT BACK SOLENOID
VIBRATION SOLENOID
OIL PRESSURE SWITCH
MAGNET VALVEOUTPUT
REGULATORABNORMALITY INPUT
STARTEROUTPUT
GND
-
+
BATTERY
H
X
X
X
X
X
LF
LB
RF
RB
VIB
+12V
STARTER
P/N: 920109700
P/N: 920109800
CARSON, CALIF.
HOUR METER
ABNORMAL COMMUNICATIONLAMP
OVERHEATLAMP
ABNORMAL OIL PRESSURE LAMP
REGULATORABNORMALITY LAMP
OPERATION LAMP
LEFT FORWARD SOLENOID
LEFT BACK SOLENOID
RIGHT FORWARD SOLENOID
RIGHT BACK SOLENOID
VIBRATION SOLENOID
MAGNET
VALVE
REGULATOR
GENERATOR
P
OIL PRESSURE
SWITCH
1) Transmitter must be fully charged
before using.
2) Charge Transmitter for initial use
and after prolonged storage.
3) Solar collectors only maintain
battery charge.
4) See Operations Manual for charging
details.
Set Main switch on Control box to
“OFF” position to avoid battery drain
P/N:TBD
CAUTION
STOP
995.133.4
P/N: TBD
J
NPA-951
Shell Tellus Oil
45
NPA-748
P/N: 920108810
CAUTION
ATTENZIONE
ATENÇAÕ
* Read operator’s manual carefully before use.
* Lire le manuel attentivement avant utilisation.
* Bitte lesen Sie vor Inbetriebnahme der Maschine die
Bedienungsanleitung sorgafältig durch.
* Prima dell’ uso leggere attentamente il manuale.
* Lee com atenÇão o manual de instruÇões antes de
usar.
* Leer detenidamente el manual de instrucciones
antes de usar la maquina.
PRECAUCION
P/N: 920108350
NPA-769
J
J
P/N: 920100920
Operate only in well-
ventilated area
Fire Risk
Operate only in well-
ventilated area
P/N: 920109770
PAGE 10 — MQ-MIKASA MVH-702DRSC COMPACTOR — PARTS & OPERATION MANUAL — REV. #1 (12/17/03)
DANGER
FUEL
DANGER
FUEL
DANGER
Do not stand next to
machine while lifting
WARNING
WARNING
DUST
WARNING
Do not stand next to
machine while lifting
P/N: 920209020
FUEL
DUST
DUST
DANGER
FUEL
Use caution while
operating
WARNING
NOISE
WARNING
NOISE
Use caution while
operating
Figure 1a. Operation and Safety Decals
P/N: 920101580
P/N: 920109550
P/N: 920109840
NPA-923
J
MAIN SWITCH
P/N: 920109750
NPA-930
J
Page 11
MVH-702DRSC — OPERATION AND SAFETY DECALS
P/N: 920109710
P/N: 920109780
P/N: 920209250
P/N: 920109730
P/N: 920209080
P/N: 920102710
P/N: 920109720
HYDRAULIC
OIL ONLY
P/N: 920109810
P/N: 920209310
SAE 10W-40
Motor
Oil
P/N: 920209230
P/N: 920203330
P/N: 920109750
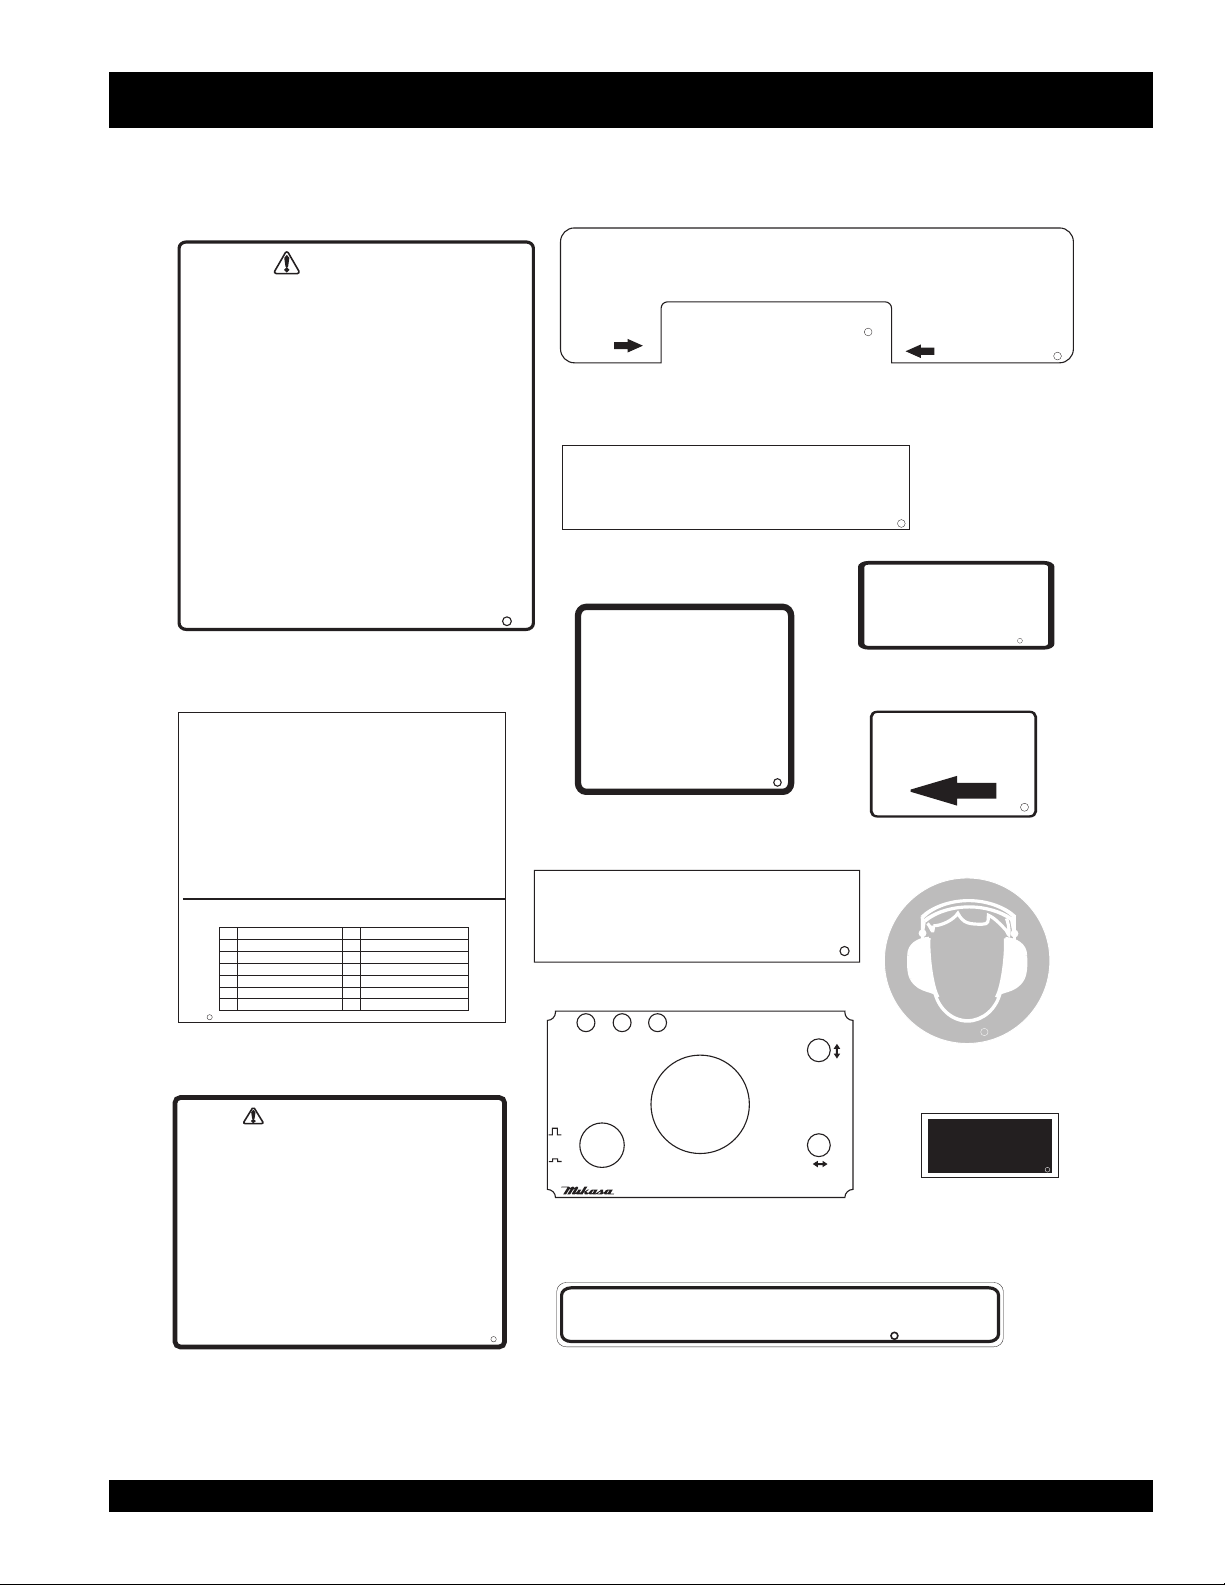
Figure 1 displays the operation and safety decals as they appear on the compactor. Should any of these decals become damaged
or unreadable, contact the Multiquip Parts Department for a replacement set.
1. Read owner’s instruction manual before operating or servicing this machine.
CAUTION
2. The machine consists of the engine located in front, and the aluminum hydraulic oil tank in
rear. The operator should stand 7 feet (2m) away from to operate the machine. When
operating the plate while standing in front of the machine please note that the travel controls
will function in the opposite direction.
3. The remote control operation is restricted to a narrower area the further you are from the
machine. The transmitter should be pointed more directly toward the machine.
4. In case for emergency such as the failure of the transmitter, pull Emergency Stop Lever
located on the machine immediately and wait until the engine stops completely.
5.
The remote control operation is not available in the following cases and the vibration stops
automatically in operation.
The case A: Operator stands within approx. 3 feet (1m) distance, to operate machine.
The case B: Operator stands approx. 60 feet (10m) or father from the machine, to operate
[approx. 40 feet (12m) far in the direct rays of the sun]. These distances may vary.
The Case C: Operator stops sending control signals for more than one second.
6. In the case that several machines are operating in the same area, each machine should be
transmitting on a different infra-red channel.
7. A flashing light of the transmitter blinks during normal operation. A voltage drop of the
transmitter battery will cause the flashing light to alternate between on and off.
8. Hang-up the transmitter away from the machine for safety sake.
9. In operation with remote cable, do not pull out the cable strongly or run over it with the
machine.
10. Keep the transmitter away from the machine for safety sake.
11. To avoid excessive dust contamination of air cleaner, water may be used for dust control
in high dust areas.
12. To finish operation, be sure to switch off the main switch on receiver and press the emergency
stop button on transmitter.
13. When storing outside, keep the machine covered from the rain and always keep the
transmitter indoors.
P/N: 920109780
1. Starting engine by electric starter
a. Ensure that the start switch is set at Cell-Start position and move main
switch to “ON” position.
b. Do not run starter longer than 10 seconds to avoid overheating.
c. Warmup the engine without load for 3 to 5 minutes.
2. Manually starting engine
a. Ensure that the start switch is set at Crank-Start position, and move main
switch to “ON” position.
b. Warm up the engine without load for 3 to 5 minutes.
3. Tostop engine
a. Move stop switch to “OFF” position after running at idle for 3 to 5 minutes.
B. If engine does not stop properly, push the throttle lever next to the oil filter
until it comes to a completely stop, which takes approximately 15 seconds.
c. After operation is completed, move both control switches of machine and
controller to the “OFF” position
J
NPA-903
OPERATIONAL CAUTION
No. Contents
MONITOR LAMP LIST
1 LEFT FORWARD
2 LEFT BACK
3 RIGHT FORWARD
4 RIGHT BACK
5START
6 VIBRATION
P/N: 920109710
NPA-919
No. Contents
7STOP
8 RECEPTION
9 CHARGE
10 OIL PRESSURE
11 OVERHEAT
12 SWITCH OFF
1. Operating multiple machines on a jobsite
Each machine has a remote control channel setting, both in the plate and in the transmitter. Toassure proper operation the channel numbers must match
between the machine and the transmitter. When using more than one machine at the same jobsite, each machine and accompanyingtransmitter must be
set a t a different channel number than the other machines but each machine should still match its transmitter.
2. Air Filter service
a. If air cleaner element is clogged, the over-heat lamp will come on.
b. Clean up or replace the cleaner element immediately.Otherwise, machine vibration will stop automatically and will not start its vibration again until the engine
has enough time to cool down.
SIGNAL
CHANNEL
OPERATIONAL CAUTION
P/N: 920109720
MVH-RC
P/N: 920209080
J
DIESEL
FUEL
ONLY
P/N: 920102710
MAIN SWITCH
P/N: 920109750
BATTERYSIGNAL CHARGE
NPA-927
NPA-908
NPA-908
INLET
K
NPA-907
K
BATTERY
CHARGE
K
HYDRAULIC
OIL ONLY
P/N: 920109810
NPA-928
J
OPEN
J
J
NPA-922
P/N: 920209310
J
NPA-904
VIBRATION
SWITCH
ON
OFF
P/N: 920203330
N
J
P
A
3
-
3
3
MQ-MIKASA MVH-702DRSC COMPACTOR — PARTS & OPERATION MANUAL — REV. #1 (12/17/03) — PAGE 11
NR.
(RECIEVING FAILURE LIGHT)
The remote control operation is restricted to a narrower area the further you are from
the machine. If the operative signals do not reach the plate properly, RECEIVING
FAILURE LIGHT is immediately on and will stop the plate vibration automatically (the
engine will continue running)
OP.
(OIL PRESSURE (ENGINE) FAILURE LIGHT)
If the engine oil is low or the hydraulic oil pump is out of order,
OIL PRESSURE FAILURE LIGHT is on and will stop the engine automatically
RE.
(REGULATOR FAILURE LIGHT)
Tif the alternator and regulator in engine are out of order, REGULATOR FAILURE
LIGHT is on, but the machine is operative. Be sure to check them after operation
OH.
(E/G OVERHEAT LIGHT)
If the engine is continuously overloaded or if the air element is plugged due to excessive
dust, the machine E/G OVERHEAT LIGHT will light to notify of an engine overheat. To
correct, run the machine without vibration about 5 minutes or stop the engine for
cleaning air element. If this is not done the machine will stop vibration automatically
and continue to run without vibration for cooling the engine.
The vibrator will not start again until the engine temperature reaches and acceptable
level.
P/N:920109790
CAUTION
MAIN SWITCH
EMERGENCY STOP
ON
OFF
START STOP
MVH-906
ENGINE
SWITCH
P/N: 920109730
NPA-951
J
OH RE OP NR
P/N: 920209250
Figure 1b. Operation and Safety Decals
SAE 10W-40
Motor Oil
P/N: 920209230
NPA-925
J
NPA-748
J
Page 12
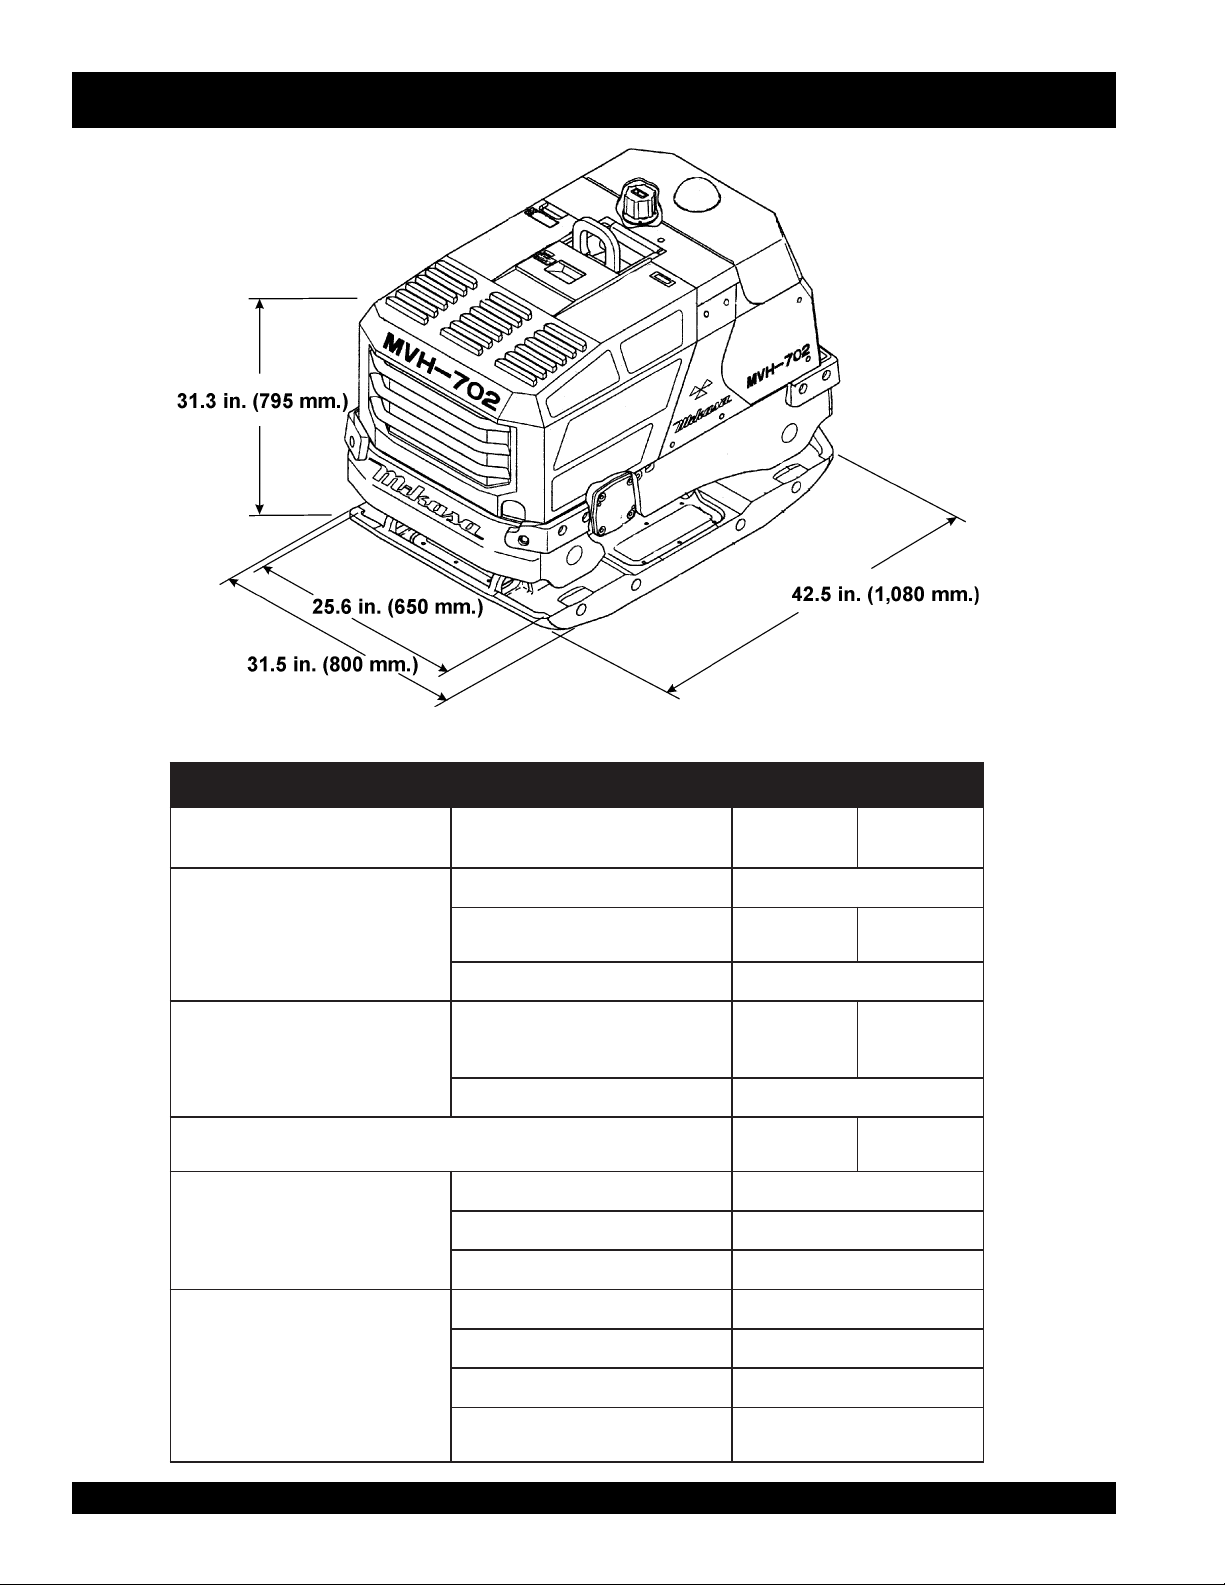
MVH-702DRSC — DIMENSIONS AND SPECIFICATIONS
Figure 2. MVH-702DRSC Compactor Dimensions
snoitacificepSrotcapmoCCSRD207-HVM.1elbaT
ralugeRhtiW
etalP
htgneLllarevO)mm080,1(.ni5.24
snoisnemiDydoB
eziSetalP
thgieWgnitarepO
MPV)zH25(mpr021,3
ecnamrofreP
htdiWllarevO
thgieHllarevO)mm597(.ni3.13
htdiW
htgneL)mm001,1(.ni3.34
ecroFlagufirtneC)NK08(wolb/.sbl000,81
deepSlevarT)nim/m820(nim/tf29-0
ledoMF34NNAMYRAF
.ni8.62
mm086(
.ni6.52
)mm056(
.sbl7741
).gk076(
hcni-3htiW
etalPnoisnetxE
.ni5.13
mm008(
.ni5.13
)mm008(
.sbl3451
).gk007(
tuptuOmumixaM)WK4.11(SP5.51
enignE
leuF)sretil5.7(snollag2LESEID
tratS
tratScirtcelE
)ycnegremerofeldnahknarc(
PAGE 12 — MQ-MIKASA MVH-702DRSC COMPACTOR — PARTS & OPERATION MANUAL — REV. #1 (12/17/03)
Page 13

The Mikasa Model MVH-702DRSC is a Reversible Plate
Compactor which operates by infra-red remote control with
forward-reverse motion, steering, and stepless speed control
by single-lever joystick.
Features include:
Machine operation is automatically stopped (vibration
remains on) by releasing the single-lever joystick.
Monitoring lamps for self-diagnosis are installed at the side
of the machine control unit.
Monitoring lights located on top of the machine indicate
any problem or failure.
An hour meter is installed as standard.
The machine control unit wire harness is coated to make
it splash-proof.
The machine has an aluminum oil tank which minimizes
rising of working oil temperature, loss of vibration power
and periodic inferiority of working oil.
Multiple machines can operate in the same area with each
machine transmitting at a different infra-red channel
(channels 0 to 9).
MVH-702DRSC — FEATURES
A safety crank is installed for use in case of battery failure
or problem.
Front cover provides easier access for pre-operational
check and refueling.
The self-cleaning structure of the vibrating plate removes
mud and sand easily from the plate.
MQ-MIKASA MVH-702DRSC COMPACTOR — PARTS & OPERATION MANUAL — REV. #1 (12/17/03) — PAGE 13
Page 14
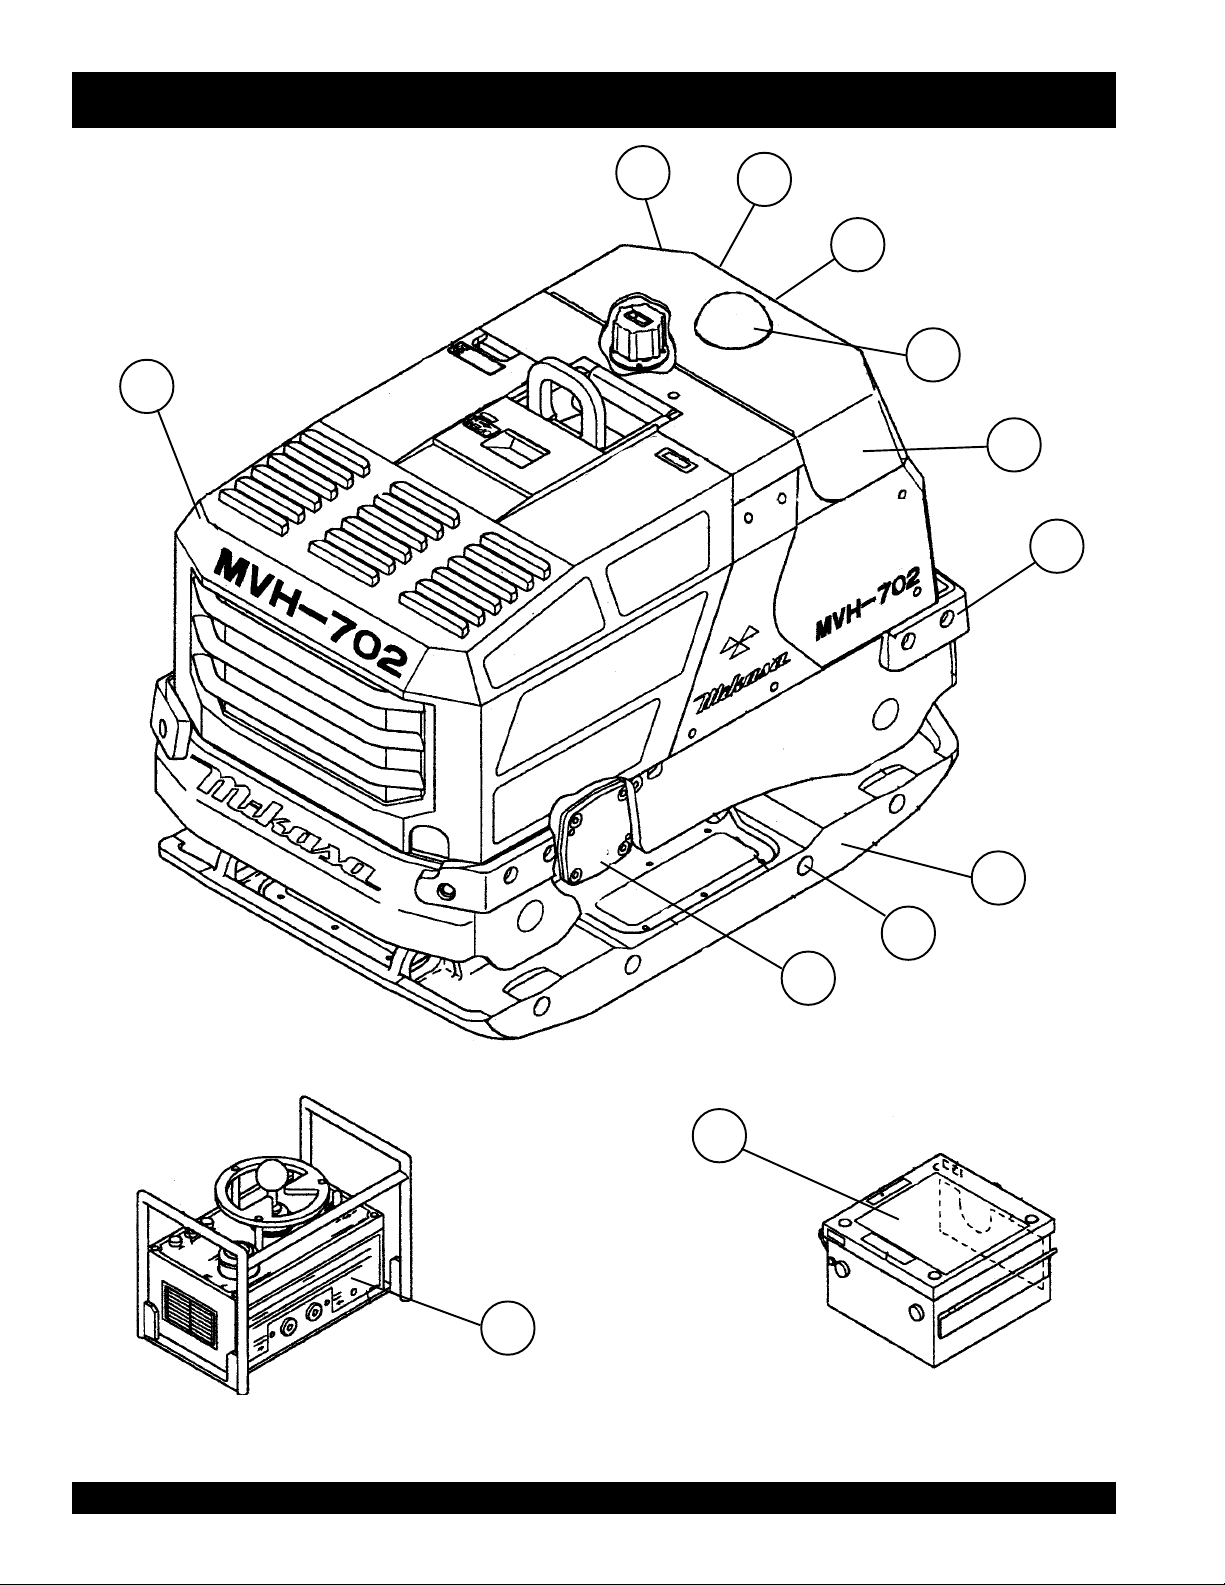
MVH-702DRSC — COMPACTOR COMPONENTS
11
Figure 3. MVH-702DRSC Compactor Components
9
10
1
7
6
3
14
4
12
5
13
PAGE 14 — MQ-MIKASA MVH-702DRSC COMPACTOR — PARTS & OPERATION MANUAL — REV. #1 (12/17/03)
Page 15

MVH-702DRSC — COMPACTOR COMPONENTS
Figure 3 illustrates the location of the major components for the
MVH-702DRSC Reversible Plate Compactor. The function of
each component is described below:
1. Monitoring Lights – Indicates if there is any failure in the
machine. There are four monitoring lights:
Receiving Failure Light
Oil Pressure (Engine) Failure Light
Regulator Failure Light
E/G Overheat Light
2. Lifting Hook Lever – Used to lift the machine.
3. Rubber Bumper – Protects the machine in case of bumps.
4. Extension Plate – Removable when not needed.
5. Hydraulic Motor – Drives all the operation of the machine
such as speed control, forward-reverse switching motion,
and steering as well as the vibrator unit on the base.
6. Rear Cover - When lifted, allows access to the monitoring
lamps, valve unit, block diagram and owner’s manual.
7. Receiver and Receiving Lamp –Receives infra-red
signals from the transmitter indicated by the flashing light
on the receiving lamp.
8. Fuel Tank/Cap – Fill with diesel fuel. Fuel tank holds
approximately 2 gallons (7.5 liters). DO NOT top off fuel.
Wipe up any spilled fuel immediately.
9. Front Cover - Allows easy pre-operational check and
refueling.
10. Valve Unit – Electromagnetic and hydraulic valve: controls
traveling speed and direction.
11. Oil Tank – Fill with proper grade of diesel engine oil.
12. Vibrator Oil Drain - Allows easy draining of vibrator oil.
13. Reciever - Located inside the compactor. Recieves signals
from portable transmitter durring remote operations.
14. Transmitter - Transmits operational signals to compactor
via the onboard receiver durring remote operations.
MQ-MIKASA MVH-702DRSC COMPACTOR — PARTS & OPERATION MANUAL — REV. #1 (12/17/03) — PAGE 15
Page 16
1
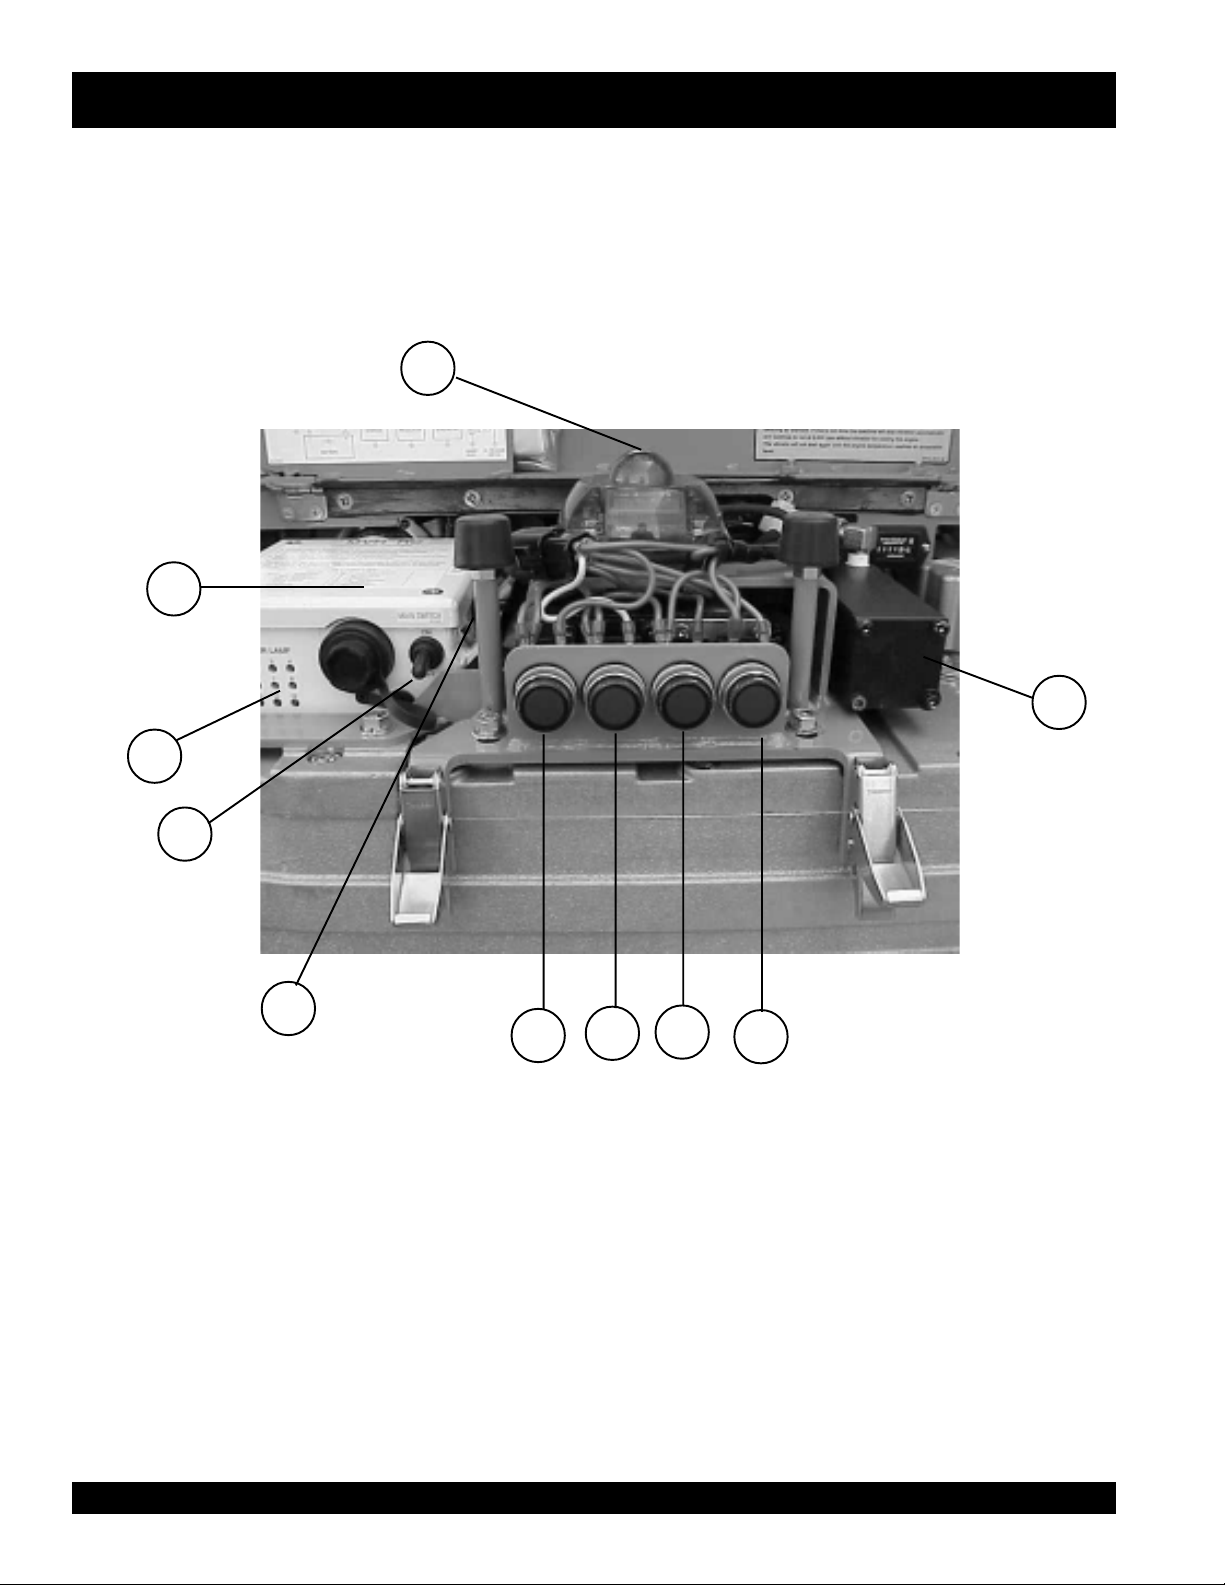
MVH-702DRSC — REMOTE CONTROL COMPONENTS
2
10
3
5
9
Figure 4. MVH-702DRSC Remote Control Components
8
7
6
4
PAGE 16 — MQ-MIKASA MVH-702DRSC COMPACTOR — PARTS & OPERATION MANUAL — REV. #1 (12/17/03)
Page 17
MVH-702DRSC — REMOTE CONTROL COMPONENTS
CONTROL UNIT (BODY)
Figure 4 illustrates the location of the major components for the
Remote Control on the body of the machine. The function of
each component is described below:
1. Control Unit – Controls engine start/stop and hydraulic
valve unit according to the operation signals from the
transmitter. In addition, it also controls the following
monitoring lights:
Receiving Failure Light
Oil Pressure (Engine) Failure Light
Regulator Failure Light
E/G Overheat Light
2. Receiver and Receiving Lamp – Receives infra-red
signals from the transmitter indicated by the flashing light
on the receiving lamp.
3. Main Switch (Battery Master Switch) –Battery power
switch for control unit on body of machine.
4. Valve Unit – Electromagnetic and hydraulic valve; controls
traveling speed and direction.
5. Cell/Crank Start Switch – Selects electric (cell) start for
normal operation or manual (crank) start for emergencies.
6. Receiving Failure Light - Lights to indicate that the signal
from the transmitter is not received. The remote control
operation is restricted to a narrower area , the farther you
are from the machine. When this light is on, plate vibration
will automatically stop but the engine will continue running.
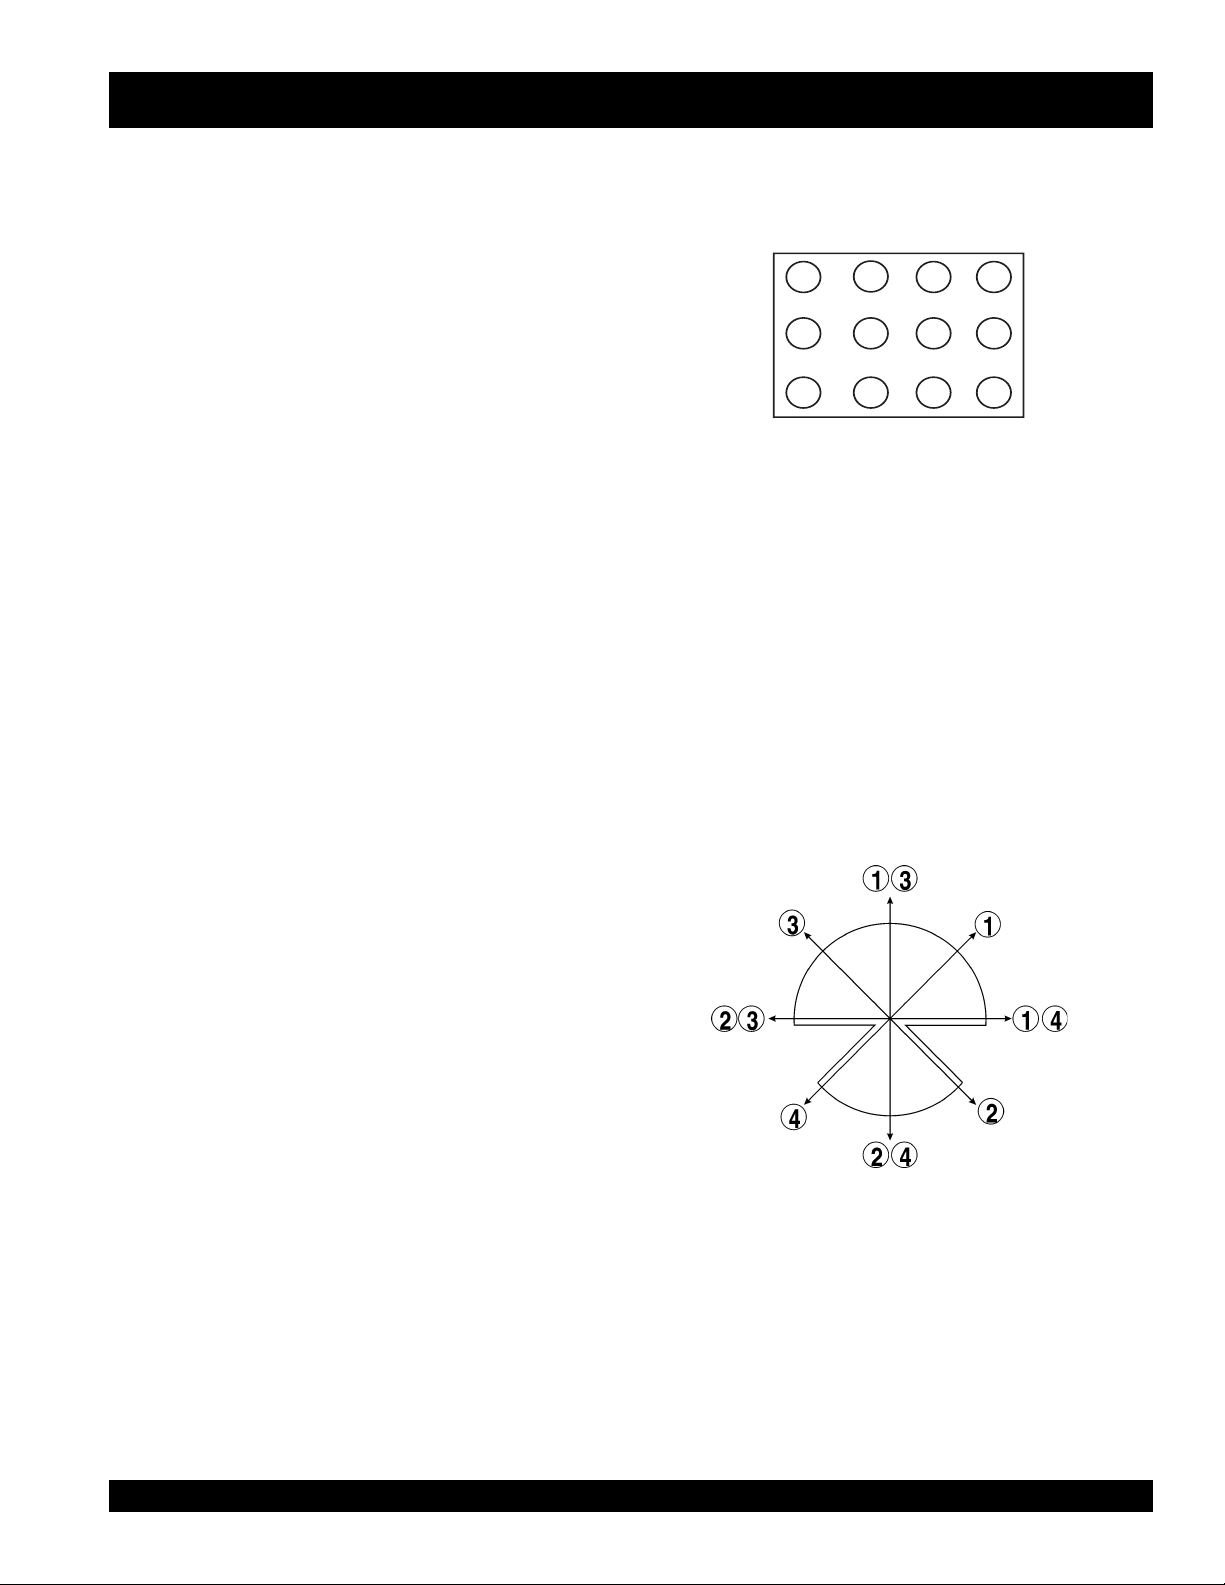
10. Monitoring Lamp – Depending on which numbered lamps
light up, indicates the status of the machine (Figure 5).
1 is lighted: Main Switch is on.
9, 10, and 12 are lighted: Engine start by cell motor.
9 and 10 are lighted: Engine start by crank handle.
5 and 8 are lighted: Transmitter start switch is turned
on. Shortly after the transmitter start switch is turned
on, all lamps turn off.
6 and 8 are lighted: Transmitter vibration start switch
is on.
7, 8, and 12 are lighted: Transmitter start switch is
turned off.
See Figure 6 for correlation of monitor lamp and joystick lever.
MONITOR LAMP
1
5
9
Figure 5. Monitor Lamp
2
6
10
3
7
4
8
11 12
7. Oil Pressure (Engine) Failure Light –Lights to indicate
that the engine oil is low or the hydraulic oil pump is not
functioning properly. When this light is on, the engine will
automatically stop.
8. Regulator Failure Light – Lights to indicate that the
alternator and regulator are not functioning properly. When
this light is on, the machine is still operating. Check alternator
and regulator after operation.
9. E/G Overheat Light - Lights to indicate engine overheat. If
the engine is continuously overloaded or if the air element
is clogged due to excessive dust, the engine will overheat.
To correct this, run the machine without vibration for about
5 minutes or stop the engine to clean air element. If this is
not done, the machine will automatically stop vibration to
cool the engine, and will not start again until the engine
temperature reaches acceptable level.
MQ-MIKASA MVH-702DRSC COMPACTOR — PARTS & OPERATION MANUAL — REV. #1 (12/17/03) — PAGE 17
Figure 6. Correlation of Monitor Lamp
and Joystick Lever
Page 18
MVH-702DRSC — REMOTE CONTROL COMPONENTS
9
1
2
5 6
7
8
4
3
12
10
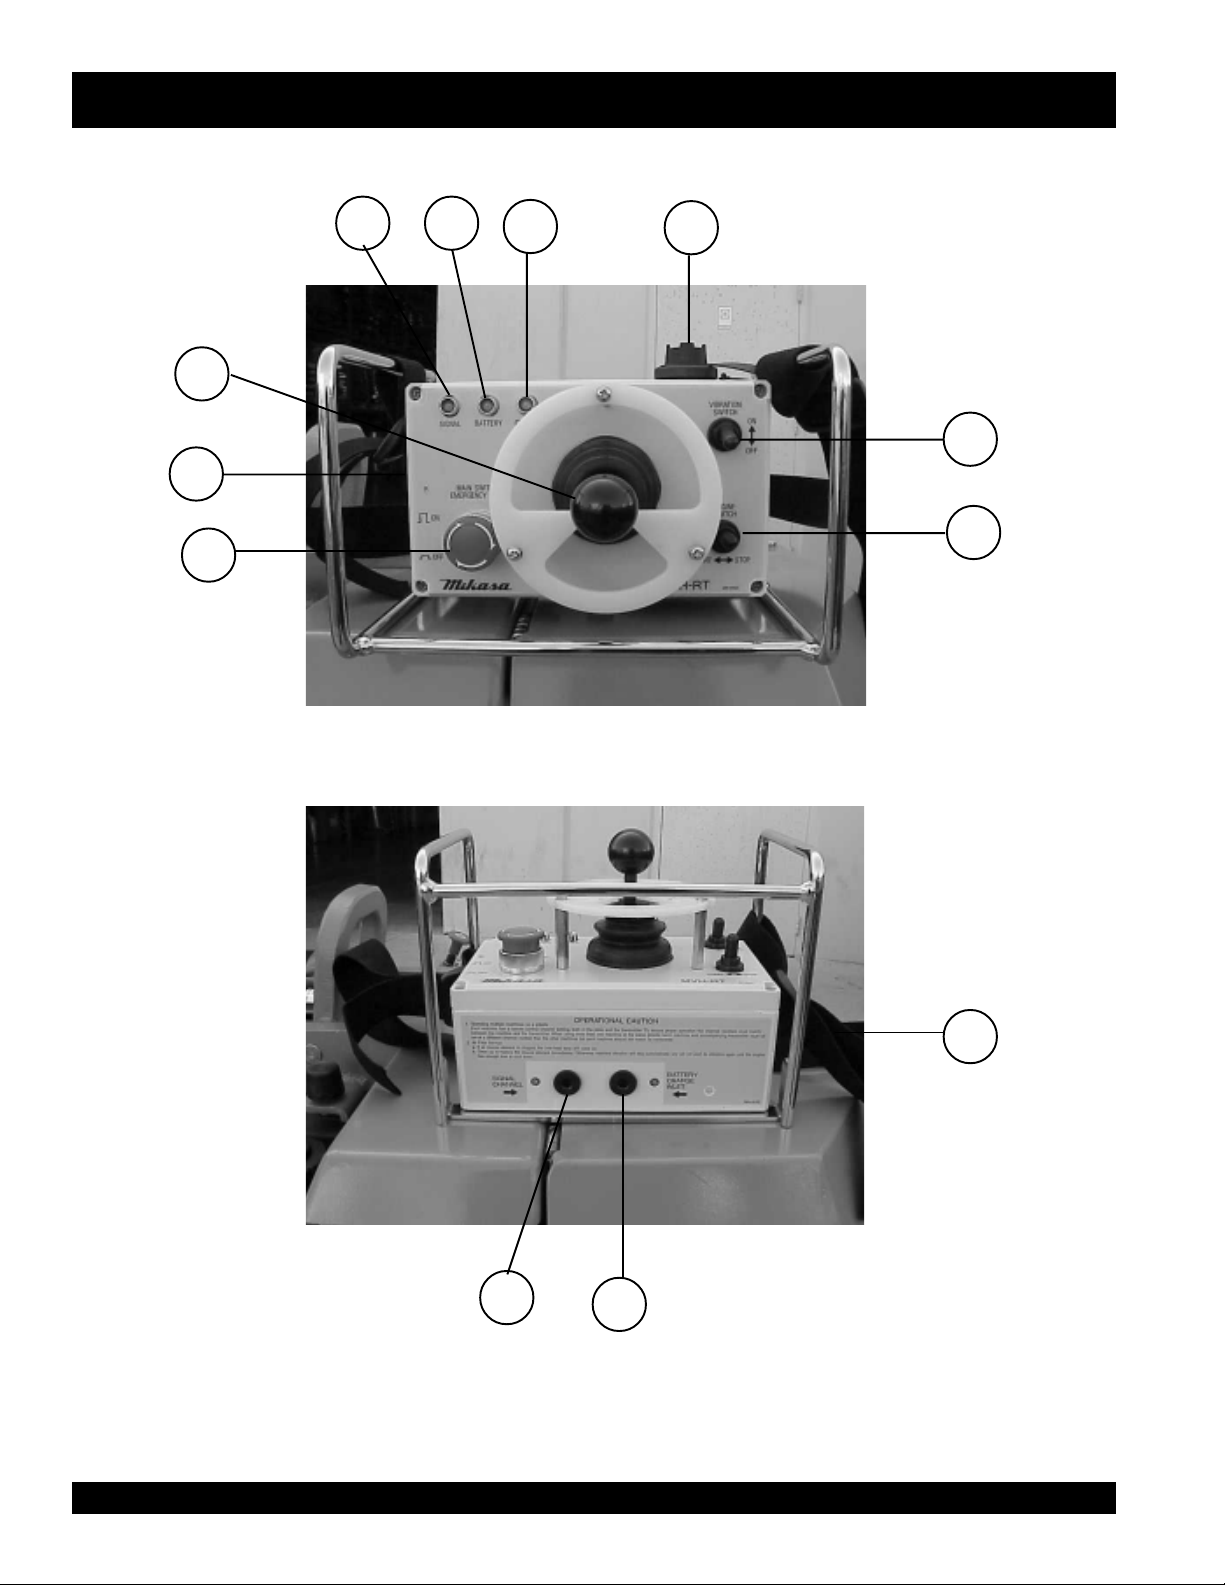
Figure 7. MVH-702DRSC Transmitter Components
PAGE 18 — MQ-MIKASA MVH-702DRSC COMPACTOR — PARTS & OPERATION MANUAL — REV. #1 (12/17/03)
11
Page 19

MVH-702DRSC — REMOTE CONTROL COMPONENTS
TRANSMITTER
Figure 7 illustrates the location of the major components of the
transmitter. The function of each component is described below:
1. Joystick Lever – Controls the traveling speed and
direction of the machine.
2. Main Switch/ Emergency Stop – Immediately stops the
machine in an emergency.
3. Engine Switch –Starts and stops the engine.
4. Vibration Switch – Turns vibration on and off.
5. Signal Lamp – Infra-red monitoring lamp.
6. Battery Lamp - Lights to indicate that battery power is low.
7. Charge Lamp –Lights to indicate that the battery is
charging.
8. Cable Connection – Connector for remote control cable.
9.. Solar Cells - Used to charge unit by utilizing the sun’s solar
energy.
10. Signal Channel Control - Sets the operating channel of
the machine.
11. Battery Charging Connector - Connects battery charger
to transmitter.
12. Carrying Belt - Used by operator to carry remote control
transmitter.
MQ-MIKASA MVH-702DRSC COMPACTOR — PARTS & OPERATION MANUAL — REV. #1 (12/17/03) — PAGE 19
Page 20

MVH-702DRSC — BEFORE START-UP
BEFORE START-UP
1. Read this manual carefully and understand all functions of
the machine before start-up.
2. The engine is located on front side of the machine and the
aluminum oil tank is on the rear.
3. The operator should always keep a distance of 2 meters
away from the machine.
SETTING THE OPERATIONAL CHANNEL
In cases where several machines operate in the same area,
each machine should be transmitting in a different infra-red
channel. Ten different channels can be set (0 to 9). See Table 2.
To set the operational channel of a machine, do the following.
1. On the body of the machine, remove the receiver channel
plug. See Figure 9. Using a screwdriver, set the channel
number desired.
4. The operator should always make sure that the machine
will move in the opposite direction (away from him) when
the machine is started.
2. On the transmitter, remove the channel plug. See Figure
9. Using a screwdriver, set the channel number to the
same one as the receiver (set in step 1).
5. In infra-red remote control operation, the farther the machine
moves, the narrower the control area.
6. If the transmitter fails and during emergencies, pull the
emergency stop lever (Figure 8) continuously until the
machine completely stops.
Remove plug
Emergency
Stop Lever
and adjust
Figure 8. Location of Emergency Stop Lever
Remote Control operation is not available in the following cases.
Vibration stops automatically.
Operator stands within approximately 3 feet (1 m) of the
Remove plug
and adjust
machine.
Operator stands approximately 60 feet (18 m) or farther
from the machine (approximately 40 feet (12 m) when far
from the direct rays of the sun). Note that these distances
may vary .
Operator stops sending control signals for more than one
second.
The engine is overloaded. In the engine temperature
increases, the vibration will automatically stop.
The engine stops automatically in the following cases.
Engine oil level is low.
Control unit fails to receive the operational signal for more
than 30 seconds.
During engine or hydraulic oil warm-up, direct the transmitter to
the body receiver to receive the operational signal. Operation
starts only after the main switch of the transmitter is switched on.
MACHINE
TRANSMITTER
Figure 9. Setting Channels
sgnitteSrebmuNlennahC.2elbaT
RETTIMSNARTREVIECER
00
11
22
33
44
55
66
77
88
99
PAGE 20 — MQ-MIKASA MVH-702DRSC COMPACTOR — PARTS & OPERATION MANUAL — REV. #1 (12/17/03)
Page 21

MVH-702DRSC — BATTERY CHARGING
CHARGING THE BATTERY
The battery can be charged in three different ways:
Using the remote cable
Using the AC plug-in battery charger
Solar Energy
Battery Charging Using Remote Cable
1. Make sure that the engine is stopped before charging.
2. If the temperature of the hydraulic tank or its surroundings
is high, wait for it to cool down before charging.
6. Connect one end of remote cable to the receptacle.
7. Make sure that the transmitter main switch is off.
8. Remove the cover of the remote control receptacle in the
transmitter (Figure 11).
9. Connect the other end of the remote cable to the receptacle.
10. Turn the machine main switch on.
11. The charge lamp flashes while the battery is being charged.
12. The charge lamp will automatically go off after the battery
is fully charged.
3. Open the rear cover of the machine.
4. Unpack the remote cable which can be found in a bag on
the side of the machine ( Figure 10).
Location of
Remote
Control
Cable
NOTE
Battery Charging Using AC Plug-In Charger
1. Switch off the transmitter main switch to stop battery
consumption. The battery can be charged though, even
with the main switch on.
If the charge lamp does not light
when the remote cable is connected, the battery does not require
charging.
Figure 10. Location of Remote Control Cable
5. Remove the cover of the remote control receptacle on the
machine (Figure 11).
Remove cover and connect
one end of remote cable
(Machine)
2. Remove the cover of the battery charger receptacle on the
transmitter. See Figure 7, item 11 for location.
3. Connect the AC plug-in charger to the receptacle.
4. The charge lamp lights while the battery is being charged.
5. The charge lamp will automatically go off after the battery
is fully charged.
NOTE
Battery Charging Using Solar Energy
1. Solar Cell Charging can be done whether the transmitter
main switch is on or off.
2. Expose the solar cells of the transmitter to sunlight
frequently for non-operational daily charging.
Remove cover and connect
other end of remote cable
(Transmitter)
Figure 11. Remote Control Cable Connections
Battery Charging Time
Using remote cable - approximately 2 - 3 hours
Using battery charger - approximately 2 hours
Using Solar Energy - supplemental, available anytime
If the charge lamp does not light
when the charger is connected, the
battery does not require charging.
MQ-MIKASA MVH-702DRSC COMPACTOR — PARTS & OPERATION MANUAL — REV. #1 (12/17/03) — PAGE 21
Page 22

BEFORE OPERATION
MVH-702DRSC — OPERATION
1. Familiarize yourself with the operating and control elements
of the machine and the working environment. This includes
obstacles in the working area, bearing capacity of the
ground and the necessary safety provisions.
2. Understand the geographical features and regulations of
the job site.
3. Inspect caution decals and replace missing/worn-out ones.
4. Check nuts and bolts and tighten if necessary. Loose threads
may cause damage to the machine when vibrating.
5. Make sure lifting hook, shock mounts and control parts are
all working properly. Do not start the machine if any failure
is noted.
6. Wipe off any dust from the receiving lamp of the machine.
Checking Engine Oil Level
CAUTION :
DO NOT overfill oil tank. This could cause
oil leaks and sluggish operation. Clean cap
and surrounding area before opening to
prevent dirt from entering tank.
CAUTION :
Checking Engine Oil Level
1. Unscrew the fuel tank cap. See Figure 13 for location.
2. Visually inspect the fuel level and refill if necessary.
DANGER :
Oil Tank
Fuel
Tank
Figure 13. Oil and Fuel Tanks
Lower grade or lower volume of engine oil can
cause engine burns. The built in sensor
continues to run for about 3 minutes after
sensing lack of oil. Make sure that oil level is
sufficient before starting operation
1. Make sure that the machine is situated in a flat surface so
that level measurements will be accurate.
2. Open the front cover of the machine by moving the lever to
the “OPEN” position then slowly lifting the hook on the cover
(Figure 12).
Pull slowly to open
Move to the OPEN
position
CAUTION :
1. Check the oil tank level gauge (Figure 14). Oil level should
be at the upper indication of the gauge.
2. Check the surroundings of the oil tank, hydraulic pump and
motor for oil leakage.
3. After inspection, close the front cover slowly.
DANGER :
Figure 12. Opening the Front Cover
3. Pull out the dipstick from the oil tank (Figure 13). Check the
oil level and refill if necessary. For selection of proper grade
of diesel engine oil, refer to Table 3 in Troubleshooting
section.
Do not refill with fuel in poorly ventilated
environment. When refueling, make sure the
engine is shut down and that there is no
possibility of starting a fire.
.
Wipe off fuel spills immediately when
overfilled.
Checking The Hydraulic System
Always keep hands and fingers away from
pinch points. Do not allow anyone to reach
in on dangerous sections of the machine to
avoid any accidents.
PAGE 22 — MQ-MIKASA MVH-702DRSC COMPACTOR — PARTS & OPERATION MANUAL — REV. #1 (12/17/03)
Page 23

2. To check if restart failure is due to the reasons listed in step
Oil
Level
Gauge
Figure 14. Checking Oil Level Gauge
Refer to Figures 4 and 7 for the location of controls and
components.
STARTING THE ENGINE
1. Move the cell/crank start switch of the machine to the cell
start position.
2. Move the main switch of the machine to the ON position.
2. Start the cell motor by moving the transmitter engine starter
switch to the on position. Do not run starter longer than 10
seconds to avoid overheating.
3. Warm up engine without load for 3 to 5 minutes.
OPERATING THE MACHINE
1. Read all safety information in this manual and understand
the operation of this machine thoroughly before starting
operation.
2. The infra-red remote control system controls the stepless
adjustable speed, forward-reverse, and steering of the
machine by a single joystick lever in the transmitter.
3. Press the joystick lever slightly to the direction you want the
machine to travel.
4. The speed is also controlled by the joystick lever and is
determined by the pressed angle.
5. Switch on the vibration switch of the transmitter to activate
transmission.
3, move the transmitter engine starter switch to the on
position. Check if the signal lamp. If it does not flash then
reasons listed are confirmed.
5. The remote control cable may be used to restart the engine
in this case. See Battery Charging Section on how to install
the remote control cable.
6. Move the machine main switch to the ON position.
7. Move the transmitter engine starter switch to the on position.
8. Move the transmitter engine starter switch to the on position
to restart.
CRANK STARTING THE ENGINE
When the voltage of the main battery drops and the cell motor is
not running, the engine may be manually started with the crank
handle.
1. Move the cell/crank start switch of the machine to the
crankstart position. See Figure 4, item 5 for location.
2. Move the machine main switch to the ON position.
3. Take out the crank handle from the handle holder.
4. Engage the crank handle with crankshaft and turn the
handle clockwise to start (Figure 15).
5. Once the engine starts, follow normal operating procedure.
STOPPING THE ENGINE
1. Run the machine at idle for 3 to 5 minutes before stopping
engine.
2. Move the transmitter engine starter switch to the off position.
3. If the engine does not properly stop, push the throttle lever,
located next to the oil filter, until it comes to a complete stop
(approximately 15 seconds).
4. After operation is completed, move the main switch of the
machine to the off position.
MVH-702DRSC — OPERATION
RESTARTING THE ENGINE
1. If starting fails or engine stops suddenly, allow an interval
of a few seconds to make sure that the crankshaft of the
engine is completely stopped.
2. Move the transmitter engine starter switch to the on position
to restart.
RESTARTING WITH REMOTE CABLE
1. If machine still fails to restart, check for the following:
The operator approached the machine too closely.
The transmitter is too far from the control area.
Low Battery Power.
MQ-MIKASA MVH-702DRSC COMPACTOR — PARTS & OPERATION MANUAL — REV. #1 (12/17/03) — PAGE 23
Figure 15. Crank Handle
Page 24

MVH-702DRSC — LOADING AND UNLOADING GUIDELINES
LIFTING
1. Use a crane or lift to load and unload the machine. A
skilled crane operator is required to perform the job.
2. When lifting the machine, check for any damaged or loose
bolts, lifting hooks, and shock mounts.
3. Check any damaged or loose bolts in the guard frame to
avoid machine sliding off.
4. Make sure that the machine is shut off before machine is
lifted.
5. Use reliable cable for lifting.
6. Always lift the machine vertically and keep the machine
away from workers and animals.
7. Do not lift the machine higher than the required height.
TRANSPORTING
1. Always make sure that the machine is shut off while being
transported.
2. Check that the fuel cap is properly closed and tightened.
3. When traveling long distances or on rugged terrain, drain
the fuel of the machine before transporting.
4. Tie down the machine securely on the transportation so
that it will not move or topple over.
PAGE 24 — MQ-MIKASA MVH-702DRSC COMPACTOR — PARTS & OPERATION MANUAL — REV. #1 (12/17/03)
Page 25

MVH-702DRSC — MAINTENANCE
MACHINE MAINTENANCE
1. At the end of each day’s operation, wipe off any dust from
the transmitter and the receiver on the body of the machine.
2. At the end of each day’s operation, charge the transmitter
battery if necessary.
Refer to Table 4 in the Troubleshooting section for periodic
inspection and maintenance necessary for the machine.
MACHINE BATTERY MAINTENANCE
1. If a battery has not been used for some time, reduce the
charge level initially to protect each plate inside the battery.
2. Check the battery terminals periodically to ensure that they
are in good condition.
3. Use wire brush or sand paper to clean the battery terminals.
4. If the machine will not be in operation for a long period of
time, charge the battery sufficiently, tighten all caps, correctly,
store in cool dry place and check the battery charge level
every month to maintain the performance of the battery.
BATTERY CABLE CONNECTION
1. When removing cable, disconnect the ground side (normally
negative) first (Figure 16).
2. When installing cable connect the ground side (normally
negative) last .
MACHINE BATTERY MAINTENANCE
DANGER :
flush immediately with clean water and get medical advice.
Wear rubber gloves and protective clothes to keep acid off skin.
If acid gets in contact with skin, wash off immediately with clean
water.
Use a flashlight to check battery electrolyte level. Always check
the engine is stopped.
Do not charge battery or jump-start engine when the battery is
frozen. Warm the battery to 15 degrees F or battery may explode.
Replace the battery with the same or similar capacity battery or
battery may explode.
Do not close the exhaust outlet of battery. The gas pressure
building up in the battery may cause explosion.
Before using a battery charger, read and understand the charger
instruction manual thoroughly.
Charge the battery in a non-spark, well-ventilated area. Avoid
fire from cigarette sparks or matches.
CAUTION :
Lead-acid battery contains sulfuric acid, which
may damage eyes or skin on contact.
Always wear a face shield to avoid acid getting
into the eyes. If acid gets in contact with eyes,
1. If a battery has not been used for some time, reduce the
charge level initially to protect each plate inside the battery.
2. Check the battery terminals periodically to ensure that they
are in good condition.
3. Use wire brush or sand paper to clean the battery terminals.
4. If the machine will not be in operation for a long period of
time, charge the battery sufficiently, tighten all caps, correctly,
store in cool dry place and check the battery charge level
every month to maintain the performance of the battery.
Positive
Terminal
Wear safety glasses or face mask , protective
clothes, and rubber gloves when working
with battery.
Negative
Terminal
Figure 16. Battery Location
MQ-MIKASA MVH-702DRSC COMPACTOR — PARTS & OPERATION MANUAL — REV. #1 (12/17/03) — PAGE 25
Page 26

MVH-702DRSC — TROUBLESHOOTING
trahCnoitacilppAliOCSRD207-HVM.3elbaT
METINOITACOL
liOenignEnaPliOenignEedarGDC-IPA
liOrotoMrotarbiVedarGDC-IPA
liOciluardyHknaTciluardyHliOciluardyH
ECIVRES
NOITACIFISSALC
22-31-4-541231405867768
03-52-02-51-01-05 01025203
)C°/F°(ERUTAREPMETTNEIBMA
03-W5/02-W5EAS
03-W01EAS
04-W02EAS
04-W51EAS
04-W01EAS
03-W5EAS
03-W01EAS
23GVOSI
54GVOSI
OSI
86GV
KROW/NOITACOLYADYREVE
leveLleuFkcehC
leveLliOciluardyHkcehC
noitcepsnIrenaelCriA
kcehClanretxElausiV
tuNrotloBesooL
egakaeLleuF,liO
kcehCyrettaB
tnemecalpeRretliFliO
gninaelClanretnI
tnemecalpeRliOrotarbiV
ecnanetniaMdnanoitcepsnIydoBniaMCSRD207-HVM.4elbaT
GNIDAERRETEMRUOH
050010520050001
O
O
O
O
egamaDesoHdnaeiPciluardyH
OOO
OOO
dnatnemecalpeRliOciluardyH
O
OOO
PAGE 26 — MQ-MIKASA MVH-702DRSC COMPACTOR — PARTS & OPERATION MANUAL — REV. #1 (12/17/03)
Page 27

MVH-702DRSC — TROUBLESHOOTING
ecnanetniaMdnanoitcepsnIenignECSRD207-HVM.5elbaT
GNIDAERRETEMRUOH
KROW/NOITACOL
05001051052003053004054
ylraeY
tnemecalpeRliOenignE
tnemecalpeRegdirtraCrenaelCliO
tnemecalpeRegdirtraCretliFleuF
knaTleuFnilavomeRtnemideS
kcehCtleBeniLleuF
tnemecalpeRpmalCdnaeniLleuF
esooLdnadegamaDrofkcehCgniriW
snoitcennoC
OO
OO
O
OO
OO
OOOOOOOO O
O
euqroTtloBCSRD207-HVM.6elbaT
.mc-fgk002,3ebdluohsstnuomkcohsrotinurotarbivrofdesu81MtlobgnittesehT
.mc-fgk002,4ebdluohsetalpnoisnetxeedisrof42MtlobgnittesehT
.mc-fgk006ebdluohsmupciluardyhrof01Mtlobgnitteseht
mm6mm8mm01mm21mm41mm61
)14SS(T4070510030050570011
)C54S(T8-600105200500800310002
)534MCS(T11051004008002100020092
LAIRETAMMUNIMULAROF001053-003007-056
MQ-MIKASA MVH-702DRSC COMPACTOR — PARTS & OPERATION MANUAL — REV. #1 (12/17/03) — PAGE 27
Page 28

MVH-702DRSC — TROUBLESHOOTING
GNITOOHSELBUORTENIGNE.7ELBAT
MOTPMYSMELBORPELBISSOP NOITULOS
siydobenihcamfohctiwsniamehT
siyticirtceleontub,nodehctiws
dna,01,9spmalgnirotinom(elbaliava
)tinulortnocehtnodethgiltonera21
sirettimsnartehtfohctiwsniamehT
tonseodenigneehttub,nodehctiws
seodrettimsnartfopmallangis(trats
).thgilton
sirettimsnartehtfohctiwsniamehT
tonseodenigneehttub,nodehctiws
sthgilrettimsnartfopmallangis(trats
lortnocno8.onpmalgnirotinomtub
).thgiltonseodtinu
sirettimsnartehtfohctiwsniamehT
tonseodenigneehttub,nodehctiws
seodrettimsnartfopmallangis(trats
no8.onpmalgnirotinomdnathgilton
).thgiltonseodtinulortnoc
sirettimsnartehtfohctiwsniameh
nehttubstratsenigneeht,nodehctiws
seodrettimsnartfopmallangis(spots
no8.onpmalgnirotinomdnathgilton
).thgiltonseodtinulortnoc
?yrettabevitcefeD .yrettabecalperroegrahC
?gnikrowtonhctiwsniaM .hctiwsniamecalperroriapeR
?gnikrowtonhctiwstratsknarc/lleC .hctiwsknarc/llececalperroriapeR
?nekorbdraobtiucrictinulortnoC .draobtiucrictinulortnocecalperroriapeR
?yrettabrettimsnartfoegrahcwoL .yrettabegrahC
?hctiwsrettimsnartniamytluaF .hctiwsniamrettimsnartecalperroriapeR
?nekorbdraobtiucricrettimsnarT .draobtiucricrettimsnartecalperroriapeR
?tsudhtiwderevocpmalder-arfnirettimsnaT
?detcennocylreporptonelbaclortnocetomeR
?denrubenignefoyaler/rotomlleC .noitisopNURotrevelelttorhtnoitisopeR
?denrubdraobtiucrictinulortnoC .retlifleufecalpeR
?wolootrewopyrettabniaM yrettabecalperroegrahC
?dionelosleufenignedeliaF .dioneloseufecalperroriapeR
?ssenraheriwdetiucric-trohsrodetcennocsiD
?tratserdeeN .launamsihtfonoitcesenignEgnitratseRotrefeR
paosdlimesu,ytridyrevfI.htolcnaelchtiwpmalepiW
.tridevomerotrenaelcro
.detcennocylreporpsielbaclortnocetomererusekaM
.stiucrictrohselbissopynatcerrocdnakcehC
dnayoreporpdetcennocsissenraheriwerusekaM
.stiucrictrohsynatcerroc
stratsnoitarbivontubstratsenignE
gnirotinomtub,nosihctiwsnoitarbiv(
tonseodtinulortnocfo6.onpmal
).thgil
stratsnoitarbivontubstratsenignE
gnirotinomdnanosihctiwsnoitarbiv(
).sthgiltinulortnocfo6.onpmal
?revelkcitsyojnekorB .revelkcitsyojecalperroriapeR
levarttonseodtubsetarbivenihcaM
forevelkcitsyojdnapmalgnirotinom(
).gnikrowtonerarettimsnart
levarttonseodtubsetarbivenihcaM
forevelkcitsyojdnapmalgnirotinom(
).gnikrowerarettimsnart
?tinurotarbivfoeruliaF .tinurotarbivecalperroriapeR
?draobtiucricrettimsnartfoeruliaF .draobtiucricecalperroriapeR
?draobtiucrictinulortnocfoeruliaF .draobtiucricecalperroriapeR
?draobtiucricrettimsnartfoeruliaF .draobtiucricecalperroriapeR
?draobtiucrictinulortnocfoeruliaF .draobtiucricecalperroriapeR
?krowtonseodrettimsnartnohctiwsnoitarbiV .hctiwsecalperroriapeR
?ssenraheriwdetiucric-trohsrodetcennocsiD
?tinuevlavfodionelosnoitarbivfoeruliaF .dionelosecalperroriapeR
?ssenraheriwdetiucric-trohsrodetcennocsiD
?tinuevlavfodionelosnoitarbivfoeruliaF .dionelosecalperroriapeR
?ssenraheriwdetiucric-trohsrodetcennocsiD
dnayoreporpdetcennocsissenraheriwerusekaM
.stiucrictrohsynatcerroc
dnayoreporpdetcennocsissenraheriwerusekaM
.stiucrictrohsynatcerroc
dnayoreporpdetcennocsissenraheriwerusekaM
.stiucrictrohsynatcerroc
PAGE 28 — MQ-MIKASA MVH-702DRSC COMPACTOR — PARTS & OPERATION MANUAL — REV. #1 (12/17/03)
Page 29

MVH-702DRSC — TROUBLESHOOTING
)deunitnoc(GNITOOHSELBUORTENIGNE.7ELBAT
MOTPMYSMELBORPELBISSOP NOITULOS
krowtonseodthgileruliafgnivieceR
,ylreporpsetarepoenihcamtub
enigneehttubnosithgilerusserpliO
.potstonseod
nosithgileruliafrotalugeR
nosithgiltaehrevoenignE
noisserpmocedrednilycoN
noisserpmocedrednilyctneiciffusnI
rednilycnidetcejniylreporptonsileuF
).wolfwolsrowolfon(
.rednilycnidetcejnitonsileuF
tub,lamronsinoisserpmoceddnaleuF
.tratstonseodenigne
tsuahxeykomsdnataehrevoenignE
.sag
noituloverenigneelbatsnU
?lioytriD.lioegnahC
?ffognimitnoitcejnI .gnimitnoitcejnireporpteS
?elzzondesolC.elzzonnepO
?nekorbthgileruliafgnivieceR .thgileruliafgniviecerecalperroriapeR
?ssenraheriwdetiucric-trohsrodetcennocsiD
?thgilerusserplionekorB .thgilerusserplioecalperroriapeR
?ssenraheriwdetiucric-trohsrodetcennocsiD
?dionelosleufenignedeliaF .dioneloseufecalperroriapeR
?thgileruliafrotalugernekorB .thgileruliafrotalugerecalperroriapeR
?rotanretlaenignefoeruliaF .rotanretlaenigneecalperroriapeR
?ssenraheriwdetiucric-trohsrodetcennocsiD
?detanimatnoctsudsitnemelerenaelcriA .tnemelerenaelcriaecalperronaelC
?enignedetaehrevO .tratsererofebloocenigneteL
?pudehsupevlavtsuahxeroekatnI.evlavtsujdA
?tnemtsujdanoisserpmocedfoeruliaF noisserpmocedtsujdaylreporP
?tcatnocreporpevahtonodsteehsevlaV .steehsevlavtsujdA
?rednilyc/gnirnotsipnroW .rednilyc/gnirnotsipecalpeR
?detcennocylreporptondaehrednilycdnarednilyC .noitcennocreporpfoerusekaM
?teehselzzonesooL .teehselzzonnethgiT
?deggolcelohdetalitnevpacknaT .elohdetalitnevpacknatgolcnU
?deggolcreniarts/retlifleuF reniarts/retlifleufgolcnU
?epipleufnikcutsriA .riaevomerotytpmetonsiknatleuferusekaM
?deggolcpmupleufforegnulprolerraB .regnulprolerrabgolcnU
?deggolcelohelzzoN .elohelzzongolcnU
?kcutseldeenelzzoN .eldeenelzzonkcutsnU
noitarepotratsrooP .enignetratseR
?epipleufnikcutsriA .riaevomerotytpmetonsiknatleuferusekaM
?ecnanetniamnafgniloocrooP .ylreporpnafgniloocniatniaM
?retlifleufnileufhtiwdeximretaW
?troptsuahxerorednilycnideffutsgalsnobraC .galsnobracevomeR
?tesekomsreporpmI .gnittesekomsreporpfoerusekaM
?dedaolrevoenignE .enignededaolrevonurtonoD
?eveelsdnakrofronrevogneewtebtcatnoctcerrocnI .tcatnoctcerroC
?deliafgnirpsronrevoG .ecalperrotcerroC
.deliaf/nrowstrapgnivloverroetalpylF .strapnrowecalperroriapeR
dnayoreporpdetcennocsissenraheriwerusekaM
.stiucrictrohsynatcerroc
dnayoreporpdetcennocsissenraheriwerusekaM
.stiucrictrohsynatcerroc
dnayoreporpdetcennocsissenraheriwerusekaM
.stiucrictrohsynatcerroc
leufotnitegtonseodretawerusekamdnaleufecalpeR
.retlif
MQ-MIKASA MVH-702DRSC COMPACTOR — PARTS & OPERATION MANUAL — REV. #1 (12/17/03) — PAGE 29
Page 30

MVH-702DRSC — BLOCK DIAGRAM
Figure 17. Block Diagram
PAGE 30 — MQ-MIKASA MVH-702DRSC COMPACTOR — PARTS & OPERATION MANUAL — REV. #1 (12/17/03)
Page 31

MVH-702DRSC — RECIEVER WIRING DIAGRAM
Figure 18. Receiver Wiring Diagram
MQ-MIKASA MVH-702DRSC COMPACTOR — PARTS & OPERATION MANUAL — REV. #1 (12/17/03) — PAGE 31
Page 32

MVH-702DRSC — VALVE CONTROL DIAGRAM
Figure 19. Valve Control Diagram
PAGE 32 — MQ-MIKASA MVH-702DRSC COMPACTOR — PARTS & OPERATION MANUAL — REV. #1 (12/17/03)
Page 33

NOTE PAGE
MQ-MIKASA MVH-702DRSC COMPACTOR — PARTS & OPERATION MANUAL — REV. #1 (12/17/03) — PAGE 33
Page 34

MVH-702DRSC — EXPLANATION OF CODE IN REMARKS COLUMN
How to read the marks and remarks used in this parts
book.
Items Found In the “Remarks” Column
Serial Numbers-Where indicated, this indicates a serial
number range (inclusive) where a particular part is used.
Model Number-Where indicated, this shows that the
corresponding part is utilized only with this specific model
number or model number variant.
Items Found In the “Items Number” Column
NOTE
The contents of this catalog are
subject to change without notice
.
NOTE
If more than one of the same
reference number is listed, the
last one listed indicates newest
(or latest) part avaliable.
PAGE 34 — MQ-MIKASA MVH-702DRSC COMPACTOR — PARTS & OPERATION MANUAL — REV. #1 (12/17/03)
Page 35

MVH-702DRSC — SUGGESTED SPARE PARTS
MQ MIKASA MVH-702DRSC REVERSIBLE
PLATE COMPACTOR
1 to 3 Units
Qty. P/N Description
3 .......... 954001910 ........... OIL FILTER, HYDRAULIC
3 .......... 954001920 ........... SUCTION, OIL FILTER HYDRAULIC
1 .......... 954001900 ........... CAP, WITH BREATHER
MQ-MIKASA MVH-702DRSC COMPACTOR — PARTS & OPERATION MANUAL — REV. #1 (12/17/03) — PAGE 35
Page 36

MVH-702DRSC COMPACTOR — NAMEPLATE AND DECALS
NAMEPLATE AND DECALS
PAGE 36 — MQ-MIKASA MVH-702DRSC COMPACTOR — PARTS & OPERATION MANUAL — REV. #1 (12/17/03)
Page 37

MVH-702DRSC COMPACTOR — NAMEPLATE AND DECALS
NAMEPLATE AND DECALS
NO. PART NO. PART NAME QTY. REMARKS
1 920109840 MODEL- MVH- 702 (350) DECAL 1
2 920109550 MODEL- MVH- 702 DECAL 2
3 920209080 CONTROLLER MVH- RC DECAL .................... 1 ..............NPA-908
4 920203330 EAR PROTECTION LABEL ............................. 1 .............. NPA-333
6 920101580 MIKASA MARK 200MM DECAL 1
7 920100920 MIKASA MARK DECAL 2
8 920209250 WARNING LAMP DECAL ................................ 1 .............. NPA-925
20 920209010 DIAGRAM DECAL ........................................... 1 .............. NPA-901
21 920209020 RECEIVER MONITOR LAMP DECAL ............. 1 .............. NPA-901
22 920209030 MONITOR LAMP OPERATION DECAL ........... 1 .............. NPA-903
23 920209040 MAIN SWITCH DECAL ................................... 1 .............. NPA-904
25 920209060 TRANSMITTER CONTROL DECAL ................ 1 .............. NPA-906
26 920209070 TRANSMITTER CAUTION DECAL ................. 1 .............. NPA-907
28 920209190 9-UP WARNING DECAL .................................. 1 .............. NPA-923
29 920209230 CAUTION OPERATION RULES ....................... 1 ..............NPA-919
30 920209310 CAUTION LAMP DECAL ................................. 1 .............. NPA-951
31 920209210 EMERGENGY STOP DECAL.......................... 1 .............. NPA-921
32 920209280 HYDRAULIC OIL DECAL ................................. 1 .............. NPA-922
33 920209300 MAIN SWITCH DECAL ................................... 1 .............. NPA-930
34 920209270 DIESEL FUEL DECAL..................................... 1 .............. NPA-927
35 920108810 SHELL TELLUS OIL 45 DECAL ...................... 1 ..............NPA-748
36 920108350 CAUTION READ MANUAL DECAL ................. 1 ..............NPA-769
37 920209510 CAUTION TRANSMITTER CHARGE .............. 1 ..............NPA-951
41 920209020 MULTIQUIP CARSON, CALIF. DECAL 1
49 920209230 SAE10W-40 DECAL 1
50 920209310 OPEN DECAL ................................................. 1 .............. NPA-922
MQ-MIKASA MVH-702DRSC COMPACTOR — PARTS & OPERATION MANUAL — REV. #1 (12/17/03) — PAGE 37
Page 38

VIBRATING PLATE ASSY.
MVH-702DRSC COMPACTOR — VIBRATING PLATE ASSY.
PAGE 38 — MQ-MIKASA MVH-702DRSC COMPACTOR — PARTS & OPERATION MANUAL — REV. #1 (12/17/03)
Page 39

MVH-702DRSC COMPACTOR — VIBRATING PLATE ASSY.
VIBRATING PLATE ASSY.
NO. PART NO. PART NAME QTY. REMARKS
1 462116380 VIBRATING PLATE 1
2 953405840 DRAIN PLUG M18(H) 1
3 953402930 COPPER PACKING 19 X30 X1 1
4 953400270 PLUG 1/4X14 10L 1
5 953405260 PACKING 1/4 (CU) 1
6 462340050 PLATE (F&R) 2
7 462340060 PLATE (RIGHT) 1
8 462340070 PLATE (LEFT) 1
9 009120407 SUNK HEAD BOLT 10X 20 T 12
10 001221020 BOLT 10 X 20 T 16
11 030210250 WASHER, LOCK M10 16
13 930413001 SHOCK ABSORBER 130- 80H 4
14 020318150 NUT M18 4
15 030218460 WASHER, LOCK M18 8
16 001221835 BOLT 18 X 35 T 4
18 001222452 BOLT 24 X 60 T 8
19 030224590 WASHER, LOCK M24 8
21 462116480 EXTENSION PLATE (75) 2
21 462116490 EXTENSION PLATE (150) ............................... 2 ..............OPTION
MQ-MIKASA MVH-702DRSC COMPACTOR — PARTS & OPERATION MANUAL — REV. #1 (12/17/03) — PAGE 39
Page 40

VIBRATOR ASSY.
MVH-702DRSC COMPACTOR — VIBRATOR ASSY.
PAGE 40 — MQ-MIKASA MVH-702DRSC COMPACTOR — PARTS & OPERATION MANUAL — REV. #1 (12/17/03)
Page 41

MVH-702DRSC COMPACTOR — VIBRATOR ASSY.
VIBRATOR ASSY.
NO. PART NO. PART NAME QTY. REMARKS
1 462116390 VIBRATOR CASE 1
2 001221876 BOLT 18 X 180 T 6
3 001221855 BOLT 18 X 75 4
4 030218460 WASHER, LOCK M18 10
6 047920100 ROLLER BEARING NJ311C4 4
7 462215570 ROTARY DRIVE SHAFT 1
8 462454560 SPLINE MOTOR DRIVE SHAFT 1
9 951406600 KEY 16 X 10 X 46 RR 2
10 462340080 DRIVE GEAR 1
11 080200600 STOP RING S- 60 2
12 462340100 ECCENTRIC DRIVE ROTOR 2
13 462454900 SCT HEAD BOLT 16 X 80 P1.5 2
14 462215580 ROTARY DRIVE SHAFT 1
15 462340110 ECCENTRIC DRIVE ROTOR 2
16 009120307 SCT HEAD BOLT 16 X 35 P1.5 2
17 462340120 CAM RING 180(R) 1
18 462340130 CAM RING 180(L) 1
19 952406460 COLLAR 60 X 70 X 8 2
20 040306012 BEARING 601203 4
21 462340090 DRIVE GEAR /MVH-702 1
22 462454590 SPRING (1) 30- 126L 2
23 462454600 SPRING (2) 24- 126L 2
24 462454610 SPRING (3) 19- 126L 2
25 462454620 SPRING (4) 15- 126L 2
26 462454630 SPRING (5) 11- 126L 2
28 025510075 KNOCK PIN 10 X 75 2
29 455435051 22.4D PISTON 2
30 455010070 PACKING USH- 22.4 X 30 X 5 2
31 462340140 CAM RING PISTON 2
32 462340150 PISTON ROD 2
33 042506000 BEARING 6000ZZSG 8
34 080200100 STOP RING S- 10 4
35 080100260 STOP RING R- 26 4
37 462215590 CYLINDER 2
38 462340160 BEARING COVER 1
39 050101150 O- RING G- 115 3
40 462340170 MOTOR FLANGE 1
41 050101200 O- RING G- 120 1
42 001211030 BOLT 10 X 30 H 16
43 030210250 WASHER, LOCK M10 16
44 031110160 WASHER, FLAT M10 8
46 462454640 SPLINE JOINT /MVH- 702 1
47 025406030 SPRING PIN 6 X 30 1
49 462340290 SAFETY BELT /MVH- 702 2
50 462340180 SPRING HOOK /MVH- 702 2
51 952406470 COLLAR 19 X 33 X 5 4
53 001201216 BOLT 12 X 16 1
54 031112230 WASHER, FLAT M12 1
MQ-MIKASA MVH-702DRSC COMPACTOR — PARTS & OPERATION MANUAL — REV. #1 (12/17/03) — PAGE 41
Page 42

COVER ASSY.
MVH-702DRSC COMPACTOR — COVER ASSY.
PAGE 42 — MQ-MIKASA MVH-702DRSC COMPACTOR — PARTS & OPERATION MANUAL — REV. #1 (12/17/03)
Page 43

MVH-702DRSC COMPACTOR — COVER ASSY.
COVER ASSY.
NO. PART NO. PART NAME QTY. REMARKS
1 462116400 BASE 1
2 953010020 PLUG 4
4 462215600 HOOK FRAME 1
5 001221850 BOLT 18 X 50 T 4
6 030218460 WASHER, LOCK M18 4
7 462340190 HOOK 1
8 462454650 FIXING HOOK SHAFT 1
9 099206020 SOCKET HEAD SCREW 6 X 20 T 2
10 099206010 SOCKET HEAD SCREW 6 X 10 1
11 032118300 CONICAL SPRING WASHER M18 2
12 031118260 WASHER, FLAT M18 1
13 952406640 COLLAR 12.5 X 18 X 7 1
14 462010010 INNER RACE/ FIR121725 1
15 001521245 SOCKET HEAD BOLT 12 X 45 T 1
16 939010170 RUBBER STOPPER 4
17 020308060 NUT M8 4
19 462215610 UPPER CENTER COVER 1
20 001221225 BOLT 12 X 25 T 2
21 030212300 WASHER, LOCK M12 2
22 031112230 WASHER, FLAT M12 2
23 462454660 CABLE STAY 1
24 001220815 BOLT 8 X 15 T 2
25 030208200 WASHER, LOCK M8 2
27 462116460 RIGHT SIDE COVER 1
28 462116470 LEFT SIDE COVER 1
29 001221020 BOLT 10 X 20 T 12
30 030210250 WASHER, LOCK M10 12
31 031110160 WASHER, FLAT M10 12
32 462454720 F. COVER SUPPORT 2
33 001520615 SOCKET HEAD BOLT 6 X15 T 4
35 462340200 COVER 1
36 462455130 RUBBER SPACER 1
37 001220620 BOLT 6 X 20 T 4
38 952406480 WASHER 6 X16 X1.6 4
39 022720607 NYLON NUT M6, H=6.6 4
40 462215640 REAR COVER 1
41 462215620 RUBBER HINGE 1
42 092006015 FLAT HEAD SCREW 6 X15 10
43 462010030 FASTENER (C- 1321) 2
44 001520510 SOCKET HEAD BOLT 5 X 10 T 4
45 091004010 SCREW 4X10 4
46 462010040 HINGE (B- 1224) 2
47 092005012 SCREW 5X 12 8
49 462215650 STAY 1
52 001220820 BOLT 8X20 T 2
53 030208200 WASHER, LOCK M8 2
MQ-MIKASA MVH-702DRSC COMPACTOR — PARTS & OPERATION MANUAL — REV. #1 (12/17/03) — PAGE 43
Page 44

COVER ASSY.
MVH-702DRSC COMPACTOR — COVER ASSY. (CONT.)
PAGE 44 — MQ-MIKASA MVH-702DRSC COMPACTOR — PARTS & OPERATION MANUAL — REV. #1 (12/17/03)
Page 45

MVH-702DRSC COMPACTOR — COVER ASSY. (CONT)
COVER ASSY.
NO. PART NO. PART NAME QTY. REMARKS
54 031108160 WASHER, FLAT M8 2
56 462116410 FRONT COVER 1
57 462010050 HINGE (B- 801- 1) 2
58 001221025 BOLT 10X25 T 12
59 030210250 WASHER, LOCK M10 12
60 462215660 FRONT GRILL 1
61 001220815 BOLT 8 X15 T 4
62 030208200 WASHER, LOCK M8 4
64 462010060 LOCKING DEVICE (C- 873- 2R) 1
65 462454680 SPRING HOOK 1
66 001220630 BOLT 6 X 30 T 3
67 001220635 BOLT 6 X35 T 1
68 030206150 WASHER, LOCK M6 4
69 031106100 WASHER, FLAT M6 4
70 020306050 NUT M6 4
72 462454690 LEVER 1
73 001220825 BOLT 8 X25 T 1
74 032208180 CONICAL SPRING WASHER M8 1
75 020308060 NUT M8 1
76 462454700 TENSION BAR 1
77 001220615 BOLT 6 X15 T 1
78 020306050 NUT M6 1
79 462454710 PIN 1
80 025910060 SNAP PIN /SSP- 6 1
81 462454910 TENSION SPRING 1
83 462010070 DAMPER (KMF120- 20D) 2
84 462455140 DAMPER PPIN 2
85 952406660 COLLAR 9X 12X 11 2
86 025910100 SNAP PIN /SSP- 10 4
88 462340230 BRACKET (C. UNIT) 1
89 001220820 BOLT 8X 20 T 4
90 030208200 WASHER, LOCK M8 4
91 031108160 WASHER, FLAT M8 2
93 462454780 SLING BRACKET 2
94 001221040 BOLT 10X 40 T 4
95 030210250 WASHER, LOCK M10 4
96 031110160 WASHER FLAT M10 4
98 462215680 RUBBER BUMPER (A) 1
99 462215690 RUBBER BUMPER (B) 1
100 462215700 RUBBER BUMPER (C) 1
101 462215710 RUBBER BUMPER (D) 1
102 952406530 COLLAR 11X 17.5X 8 12
103 031112230 WASHER, FLAT M12 12
104 009110018 SCT. HEAD BOLT 10X 20 P1.5 12
MQ-MIKASA MVH-702DRSC COMPACTOR — PARTS & OPERATION MANUAL — REV. #1 (12/17/03) — PAGE 45
Page 46

ENGINE ASSY.
MVH-702DRSC COMPACTOR — ENGINE ASSY.
PAGE 46 — MQ-MIKASA MVH-702DRSC COMPACTOR — PARTS & OPERATION MANUAL — REV. #1 (12/17/03)
Page 47

MVH-702DRSC COMPACTOR — ENGINE ASSY.
ENGINE ASSY.
NO. PART NO. PART NAME QTY. REMARKS
106 918400700 ENGINE AY FARYMANN- 43F 1
107 001221251 BOLT 12X 55 T 2
108 001221252 BOLT 12X 60 T 2
109 030212300 WASHER, LOCK M12 4
110 031112230 WASHER, FLAT M12 4
111 020312100 NUT M12 2
112 462454580 HOSE STAY /MVH- 702 1
113 954494239 CLAMP SA120- 18 1
114 001220620 BOLT 6X 20 T 1
115 030206150 WASHER, LOCK M6 1
116 031106100 WASHER, FLAT M6 1
117 020306050 NUT M6 1
119 462215670 INTAKE BRACKET 1
120 462340210 AIR CLEANER HOSE 1
121 954406570 CLAMP (AH- 705) 2
122 462454730 CYCLONE JOINT 1
123 462010080 CYCLONE CLEANER 1
124 001220615 BOLT 6X 15 T 2
125 030206150 WASHER, LOCK M6 2
126 031106100 WASHER, FLAT M6 2
128 462340220 COUPLING 1
129 001521045 SOCKET HEAD BOLT 10X 45 T 4
130 462340310 RUBBER COUPLING 1
131 462340320 CYLINDER HUB 1
132 001521235 SOCKET HEAD BOLT 12X 35 T 6
133 025405010 SPRING PIN 5X 10 6
135 462454740 C. HANDLE CLAMP PLATE 1
136 001221040 BOLT 10X 40 T 2
137 030210250 WASHER, LOCK M10 2
138 462454750 C. HANDLE SPONGE 1
139 020308060 NUT M8 2
140 001220830 BOLT 8X 30 T 2
142 462010020 CRANK HANDLE 1
144 462340300 CABLE 1
145 462454670 WIRE STOPPER 1
146 091004010 SCREW 4X 10 1
147 031108160 WASHER, FLAT M8 1
MQ-MIKASA MVH-702DRSC COMPACTOR — PARTS & OPERATION MANUAL — REV. #1 (12/17/03) — PAGE 47
Page 48

MVH-702DRSC COMPACTOR — HYDRAULIC SYSTEM ASSY.
HYDRAULIC SYSTEM ASSY.
PAGE 48 — MQ-MIKASA MVH-702DRSC COMPACTOR — PARTS & OPERATION MANUAL — REV. #1 (12/17/03)
Page 49

MVH-702DRSC COMPACTOR — HYDRAULIC SYSTEM ASSY.
HYDRAULIC SYSTEM ASSY.
NO. PART NO. PART NAME QTY. REMARKS
1 462116420 OIL TANK 1
2 959010441 HELI- SERT M14X2D 2
3 001221445 BOLT 14X45 T 4
4 030214350 WASHER, LOCK M14 4
5 031114260 WASHER, FLAT M14 2
7 462454790 OIL DRAIN JOINT 1
8 953405840 DRAIN PLUG M18 (H) 1
9 953402930 COPPER PACKING 19X30X1 1
10 462116430 OIL TANK COVER 1
11 462454810 RETURN PIPE 1/2” -150L 1
12 462454820 RETURN PIPE 1” 1
13 462454830 RETURN PIPE 1/4” -150L 1
14 050703870 O- RING D3870G 1
15 462215720 BRACKET BASE 1
16 009110019 SOCKET HEAD BOLT 10X30 11
18 462340240 FILTER FLANGE 1
19 462454800 FITTING PT1- 70L 1
20 954001920 SUCTION FILTER 1
21 954010020 CONNECTOR PT, PF1/4 1
22 954002100 ELBOW (45) PF3/4 1
23 001520825 SOCKET HEAD BOLT 8X25 T 6
25 959010170 OIL GAUGE 1
27 462215730 HYDRAULIC VALVE UNIT 1
28 501011540 ELBOW 90 DEG. 1/4 2
29 551010530 ADAPTER 1/2 1009- 08 1
30 009110021 SOCKET HEAD BOLT 10X75 4
32 954001900 CAP, W/ BREATHER 1
33 001220615 BOLT 6X15 T 4
34 030206150 WASHER, LOCK M6 4
36 462340250 MOTOR OIL (MSF10- 10- 3) 1
37 001221030 BOLT 10X30 T 4
38 030210250 WASHER, LOCK M10 4
39 954001860 ADAPTER PF1/2- 3/8 2
40 505013030 UNION BP- 1/4 1
42 462340260 PUMP GEAR (YP15A) 1
43 001221030 BOLT 10X30 T 2
44 030210250 WASHER, LOCK M10 2
45 952406540 WASHER 10X22X3.2 2
46 954002070 JOINT PF1/2 1
47 954002080 ELBOW PF3/4 1
49 462116440 SUB OIL TANK 1
MQ-MIKASA MVH-702DRSC COMPACTOR — PARTS & OPERATION MANUAL — REV. #1 (12/17/03) — PAGE 49
Page 50

MVH-702DRSC COMPACTOR — HYDRAULIC SYSTEM ASSY. (CONT.)
HYDRAULIC SYSTEM ASSY.
PAGE 50 — MQ-MIKASA MVH-702DRSC COMPACTOR — PARTS & OPERATION MANUAL — REV. #1 (12/17/03)
Page 51

MVH-702DRSC COMPACTOR — HYDRAULIC SYSTEM ASSY. (CONT.)
HYDRAULIC SYSTEM ASSY.
NO. PART NO. PART NAME QTY. REMARKS
50 462116450 SUB OIL TANK BASE 1
51 551010530 ADAPTER 1/2 1009- 08 3
52 001521025 SOCKET HEAD BOLT 10X25 T 4
53 050101200 O-RING G- 120 1
54 954002050 SOCKET HEAD PLUG PT1/2 1
55 954002040 FITTING PT1(H) 1
56 001221035 BOLT 10X35 T 4
57 030210250 WASHER, LOCK M10 4
58 031110160 WASHER, FLAT M10 4
59 954002060 PIPE SLEEVE PT1- 26D- 82L 2
60 954001910 OIL FILTER (CP08- 175) 1
62 954001990 OIL HOSE 1/4- 810L 1
63 954002000 OIL HOSE 1/4- 900L 1
64 954002950 OIL HOSE 1/4- 1005- 470 1
65 954001940 OIL HOSE 1/2- 1005- 295 1
66 954001930 OIL HOSE 1/2- 1005- 395 1
67 954001960 OIL HOSE 1/2- 1005- 370 1
68 954001970 OIL HOSE 1/2- 1005- 310 1
69 954002610 OIL HOSE 1/4- 1005- 350L 1
70 954002010 OIL HOSE 3/4- 1005- 285 1
71 954002020 OIL HOSE #25- 310L 1
72 954406580 BAND AH- 1038 2
74 954010200 ELBOW 45 DEG. PF1/4- PT1/4 3
76 954001890 VIBRATOR BREATHER 1
77 954010020 CONNECTOR PT, PF1/4 1
79 511010040 CLAMP TC- 300 1
MQ-MIKASA MVH-702DRSC COMPACTOR — PARTS & OPERATION MANUAL — REV. #1 (12/17/03) — PAGE 51
Page 52

ELECTRIC DEVICE ASSY.
MVH-702DRSC COMPACTOR — ELECTRIC DEVICE ASSY.
PAGE 52 — MQ-MIKASA MVH-702DRSC COMPACTOR — PARTS & OPERATION MANUAL — REV. #1 (12/17/03)
Page 53

MVH-702DRSC COMPACTOR — ELECTRIC DEVICE ASSY.
ELECTRIC DEVICE ASSY.
NO. PART NO. PART NAME QTY. REMARKS
1 462340660 RECIEVER 1
2 930402021 SHOCK ABSORBER 4
3 020306050 NUT M6 8
4 030206150 WASHER, LOCK M6 8
5 031106100 WASHER, FLAT M6 8
7 462340530 FLASHING LAMP(RECEIVING) 1
8 930601220 SHOCK ABSORBER KA- 12 4
9 462454880 NUT PLATE 2
10 030205130 WASHER, LOCK M5 4
11 031105080 WASHER, FLAT M5 4
12 020305040 NUT M5 4
14 462340270 BATTERY RELAY 2 1
15 001220820 BOLT 8X20 T 2
16 030208200 SW M8 2
18 462340520 OVER HEAT SENSOR 1
19 001221020 BOLT 10X20 T 1
20 030210250 WASHER, LOCK M10 1
21 031110160 WASHER, FLAT M10 1
23 462455120 LED LAMP (LU22) 4
24 955406560 HOUR METER 85000 (HOBBS) 1
25 091003512 SCREW 3.5X12 2
26 030203580 WASHER, LOCK M3.5 2
28 955010013 BATTERY 75D23R 1
29 462454870 BATTERY TERMIN AL (-) W /CORD 1
31 001221020 BOLT 10X20 T 1
32 030210250 WASHER, LOCK M10 1
33 031110160 WASHER, FLAT M10 1
34 462454860 BATTERY TERMINAL (+) W /CORD 1
37 462340280 BATTERY BASE 1
38 456447600 RUBBER PLATE 50X240X10 2
39 001221020 BOLT 10X20 T 4
40 030210250 WASHER, LOCK M10 4
41 031110160 WASHER, FLAT M10 4
42 462454840 BATTERY BOLT 1
43 462454850 BATTERY HOLDER 1
44 031108160 WASHER, FLAT M8 1
45 022710809 NYLON NUT M8 1
46 0566000170 CLAMP 1
47 030208200 WASHER, LOCK M8 1
48 001220815 BOLT 8X15 T 1
49 020308060 NUT M8 1
MQ-MIKASA MVH-702DRSC COMPACTOR — PARTS & OPERATION MANUAL — REV. #1 (12/17/03) — PAGE 53
Page 54

MVH-702DRSC COMPACTOR — ELECTRIC DEVICE ASSY. (CONT.)
ELECTRIC DEVICE ASSY.
PAGE 54 — MQ-MIKASA MVH-702DRSC COMPACTOR — PARTS & OPERATION MANUAL — REV. #1 (12/17/03)
Page 55

MVH-702DRSC COMPACTOR — ELECTRIC DEVICE ASSY. (CONT.)
ELECTRIC DEVICE ASSY.
NO. PART NO. PART NAME QTY. REMARKS
51 462340480 HARNESS (PS) 1
52 462340510 HARNESS (LED, F. LAMP) 1
53 462340470 HARNESS (HOUR METER) 1
54 462340460 HARNESS (MAGNET VALVE) 1
55 462340500 HARNESS (REGU.- GENERATOR) 1
56 462340490 HARNESS (ENGINE, RECEIVER) 1
57 462455100 HARNESS (LED) 3
58 462455090 HARNESS (RELAY EARTH) 1
59 462455110 HARNESS (STARTER, REGULATOR) 1
60 462455080 HARNESS (MAG. VALVE /JOINT) 1
61 462454890 HARNESS (RELAY- ELECT. MOTOR) 1
63 959021821 SPIRAL TUBE 6D- 120L 2
64 959021814 SPIRAL TUBE 6D- 200L 1
65 507010110 CLAMP TC- 200 6
66 511010040 CLAMP TC- 300 3
68 462340670 TRANSMITTER 1
69 462340540 CONTROL CABLE 1
70 462340450 CABLE BAG 1
MQ-MIKASA MVH-702DRSC COMPACTOR — PARTS & OPERATION MANUAL — REV. #1 (12/17/03) — PAGE 55
Page 56

Effective: October 1, 2002
TERMS AND CONDITIONS OF SALE — PARTS
PAYMENT TERMS
Terms of payment for parts are net 10 days.
FREIGHT POLICY
All parts orders will be shipped collect or
prepaid with the charges added to the invoice.
All shipments are F.O.B. point of origin.
Multiquip’s responsibility ceases when a signed
manifest has been obtained from the carrier,
and any claim for shortage or damage must be
settled between the consignee and the carrier.
MINIMUM ORDER
The minimum charge for orders from Multiquip
is $15.00 net. Customers will be asked for
instructions regarding handling of orders not
meeting this requirement.
RETURNED GOODS POLICY
Return shipments will be accepted and credit
will be allowed, subject to the following provisions:
1. A Returned Material Authorization must
be approved by Multiquip prior to shipment.
2. To obtain a Retur n Material Authorization,
a list must be provided to Multiquip Parts
Sales that defines item numbers, quantities, and descriptions of the items to be
returned.
a. The parts numbers and descriptions
must match the current parts price
list.
b. The list must be typed or computer
generated.
c. The list must state the reason(s) for
the return.
d. The list must reference the sales
order(s) or invoice(s) under which the
items were originally purchased.
e. The list must include the name and
phone number of the person requesting the RMA.
3. A copy of the Return Material Authorization must accompany the return shipment.
4. Freight is at the sender’s expense. All
parts must be returned freight prepaid to
Multiquip’s designated receiving point.
5. Parts must be in new and resalable
6. The following items are not returnable:
7. The sender will be notified of any
8. Such material will be held for five
9. Credit on returned parts will be issued at
10. In cases where an item is accepted, for
11. Credit issued will be applied to future
PRICING AND REBATES
Prices are subject to change without prior
notice. Price changes are effective on a specific date and all orders received on or after
that date will be billed at the revised price.
Rebates for price declines and added charges
for price increases will not be made for stock
on hand at the time of any price change.
Multiquip reserves the right to quote and sell
condition, in the original Multiquip package (if any), and with Multiquip part
numbers clearly marked.
a. Obsolete parts. (If an item is in the
price book and shows as being
replaced by another item, it is
obsolete.)
b. Any parts with a limited shelf life
(such as gaskets, seals, “O” rings,
and other rubber parts) that were
purchased more than six months
prior to the return date.
c. Any line item with an extended dealer
net price of less than $5.00.
d. Special order items.
e. Electrical components.
f. Paint, chemicals, and lubricants.
g. Decals and paper products.
h. Items purchased in kits.
material received that is not acceptable.
working days from notification, pending
instructions. If a reply is not received
within five days, the material will be
returned to the sender at his expense.
dealer net price at time of the original
purchase, less a 15% restocking charge.
which the original purchase document
can not be determined, the price will be
based on the list price that was effective
twelve months prior to the RMA date.
purchases only.
direct to Government agencies, and to Original
Equipment Manufacturer accounts who use
our products as integral parts of their own
products.
SPECIAL EXPEDITING SERVICE
A $35.00 surcharge will be added to the invoice
for special handling including bus shipments,
insured parcel post or in cases where Multiquip
must personally deliver the parts to the carrier.
LIMITATIONS OF SELLER’S LIABILITY
Multiquip shall not be liable here under for
damages in excess of the purchase price of the
item with respect to which damages are claimed,
and in no event shall Multiquip be liable for loss
of profit or good will or for any other special,
consequential or incidental damages.
LIMITATION OF WARRANTIES
No warranties, express or implied, are made in
connection with the sale of parts or trade acces-
sories nor as to any engine not manufactured
by Multiquip. Such warranties made in connec-
tion with the sale of new, complete units are
made exclusively by a statement of warranty
packaged with such units, and Multiquip nei-
ther assumes not authorizes any person to
assume for it any other obligation or liability
whatever in connection with the sale of its
products. Apart from such written statement of
warranty, there are no warranties, express,
implied or statutory, which extend beyond the
description of the products on the face hereof.
PAGE 56 — MQ-MIKASA MVH-702DRSC COMPACTOR — PARTS & OPERATION MANUAL — REV. #1 (12/17/03)
Page 57

NOTE PAGE
MQ-MIKASA MVH-702DRSC COMPACTOR — PARTS & OPERATION MANUAL — REV. #1 (12/17/03) — PAGE 57
Page 58

OPERATION AND PARTS MANUAL
HERE'S HOW TO GET HELP
PLEASE HAVE THE MODEL AND SERIAL
NUMBER
ON-HAND
WHEN CALLING
MULTIQUIP’S MAIN PHONE NUMBERS
800-421-1244 FAX: 310-537-3927
310-537-3700
PARTS DEPARTMENT
800-427-1244 FAX: 800-672-7877
310-537-3700 FAX: 310-637-3284
MAYCO PARTS
800-306-2926 FAX: 800-672-7877
310-537-3700 FAX: 310-637-3284
SERVICE DEPARTMENT
800-478-1244 FAX: 310-537-4259
310-537-3700
MQ POWER SERVICE DEPARTMENT
800-835-2551 FAX: 310-638-8046
310-537-3700
TECHNICAL ASSISTANCE
800-478-1244 FAX: 310-631-5032
WARRANTY DEPARTMENT
800-421-1244, EXT. 279 FAX: 310-537-1173
310-537-3700, EXT. 279
MULTIQUIP INC.
POST OFFICE BOX 6254
CARSON, CA 90749
310-537-3700 • 800-421-1244
FAX: 310-537-3927
E-MAIL: mq@multiquip.com
WWW: multiquip.com
Quebec, Canada • Manchester, UK • Rio De Janiero, BR • Guadalajara, MX
Atlanta • Boise • Dallas • Houston • Newark
manufactured for Multiquip Inc.
MIKASA SANGYO CO., LTD. Tokyo, Japan
by
 Loading...