

Page 1

OPERATION & PARTS MANUAL
SERIES
MODEL EM-900SD
PLASTER/MORTAR MIXER
(HATZ DIESEL ENGINE)
Revision #1 (07/02/04)
THIS MANUAL MUST ACCOMPANY
THE EQUIPMENT AT ALL TIMES.
Page 2
HERE'S HOW TO GET HELP
PLEASE HAVE THE MODEL AND SERIAL
NUMBER
UNITED STATES
MULTIQUIP CORPORATE OFFICE
18910 Wilmington Ave. Tel. (800)-421-1244
Carson, CA 90746 Fax (310)-537-3927
Contact: mq@multiquip.com
MEXICO
MQ CIPSA
Carr. Fed. Mexico-Puebla KM 126.5 Tel. (52) 222-225-9900
Momoxpan, Cholula, Puebla 72760 Mexico Fax (52) 222-285-0420
Contact: pmastretta@cipsa.com.mx
UNITED KINGDOM
MULTIQUIP (UK) LIMITED HEAD OFFICE
Hanover Mill, Fitzroy Street, Tel. 0161 339 2223
Ashton-under-Lyne, Fax 0161 339 3226
Lancashire OL7 0TL
Contact: kcassell@multiquip.com.uk
CANADA
MULTIQUIP
4110 Industriel Boul. Tel. (450) 625-2244
Laval, Quebec, Canada H7L 6V3 Fax (450) 625-8664
Contact: jmartin@multiquip.com
ON-HAND
WHEN CALLING
BRAZIL
MULTIQUIP
Av. Evandro Lins e Silva, 840 - grupo 505 Tel. 011-55-21-3433-9055
Barra de Tijuca - Rio de Janeiro Fax 011-55-21-3433-9055
RJ CEP 22631-470
Contact: cnavarro@multiquip.com.br, srentes@multiquip.com.br
© COPYRIGHT 2004, MULTIQUIP INC.
Multiquip Inc, the MQ logo and the Essick logo are registered trademarks of Multiquip Inc. and may not be used, reproduced, or
altered without written permission. All other trademarks are the property of thier respective owners and used with permission.
This manual
remain with the unit if resold.
The information and specifications included in this publication were in effect at the time of approval for printing. Illustrations are
based on the
published in this publication at any time without notice and without incurring any obligations.
MUST accompany the equipment at all times. This manual is considered a permanent part of the equipment and should
EM-900SD (CE).
Multiquip Inc. reserves the right to discontinue or change specifications, design or the information
To find the latest revision of this
publication, visit our website at:
www.multiquip.com
PAGE 2 — MULTIQUIP EM-900SDCE— PARTS & OPERATION MANUAL — REV. #1 (07/02/04)
Page 3

TABLE OF CONTENTS
Multiquip — Plaster/Mortar
Mixer Model EM-900SD CE
Here's How To Get Help ........................................... 2
Table Of Contents .................................................... 3
Safety Message Alert Symbols ............................. 4-5
Operation and Safety Decals ................................ 6-7
Specification (Noise and Vibration) .......................... 8
Specifications (Mixer/Engine) .................................. 9
Rules For Safe Operation .................................10-11
General Information ............................................... 12
Engine Components .............................................. 13
Mixer Controls and Components ........................... 14
Paddle Blade Adjustment ....................................... 15
Inspection ..........................................................16-17
Initial Start-up ......................................................... 18
Maintenance ..................................................... 19-20
Troubleshooting (Engine) ....................................... 21
Troubleshooting (Engine/Mixer) ............................. 22
Explanation Of Codes In Remarks Column ........... 24
Suggested Spare Parts .......................................... 25
Nameplate and Decals...................................... 26-29
Mixing Drum Assembly ..................................... 30-31
Paddle Shaft Assembly .....................................32-33
Cabinet Assembly ............................................. 34-35
Frame Assembly ...............................................36-37
Engine
Hatz Engine Assembly ......................................38-39
Transmission
Transmission Assembly..................................... 40-41
Terms and Conditions Of Sale — Parts ................. 42
5
5
NOTE
Specification and part number
are subject to change without
notice.
MULTIQUIP EM-900SDCE — PARTS & OPERATION MANUAL — REV. #0 (07/02/04) — PAGE 3
Page 4

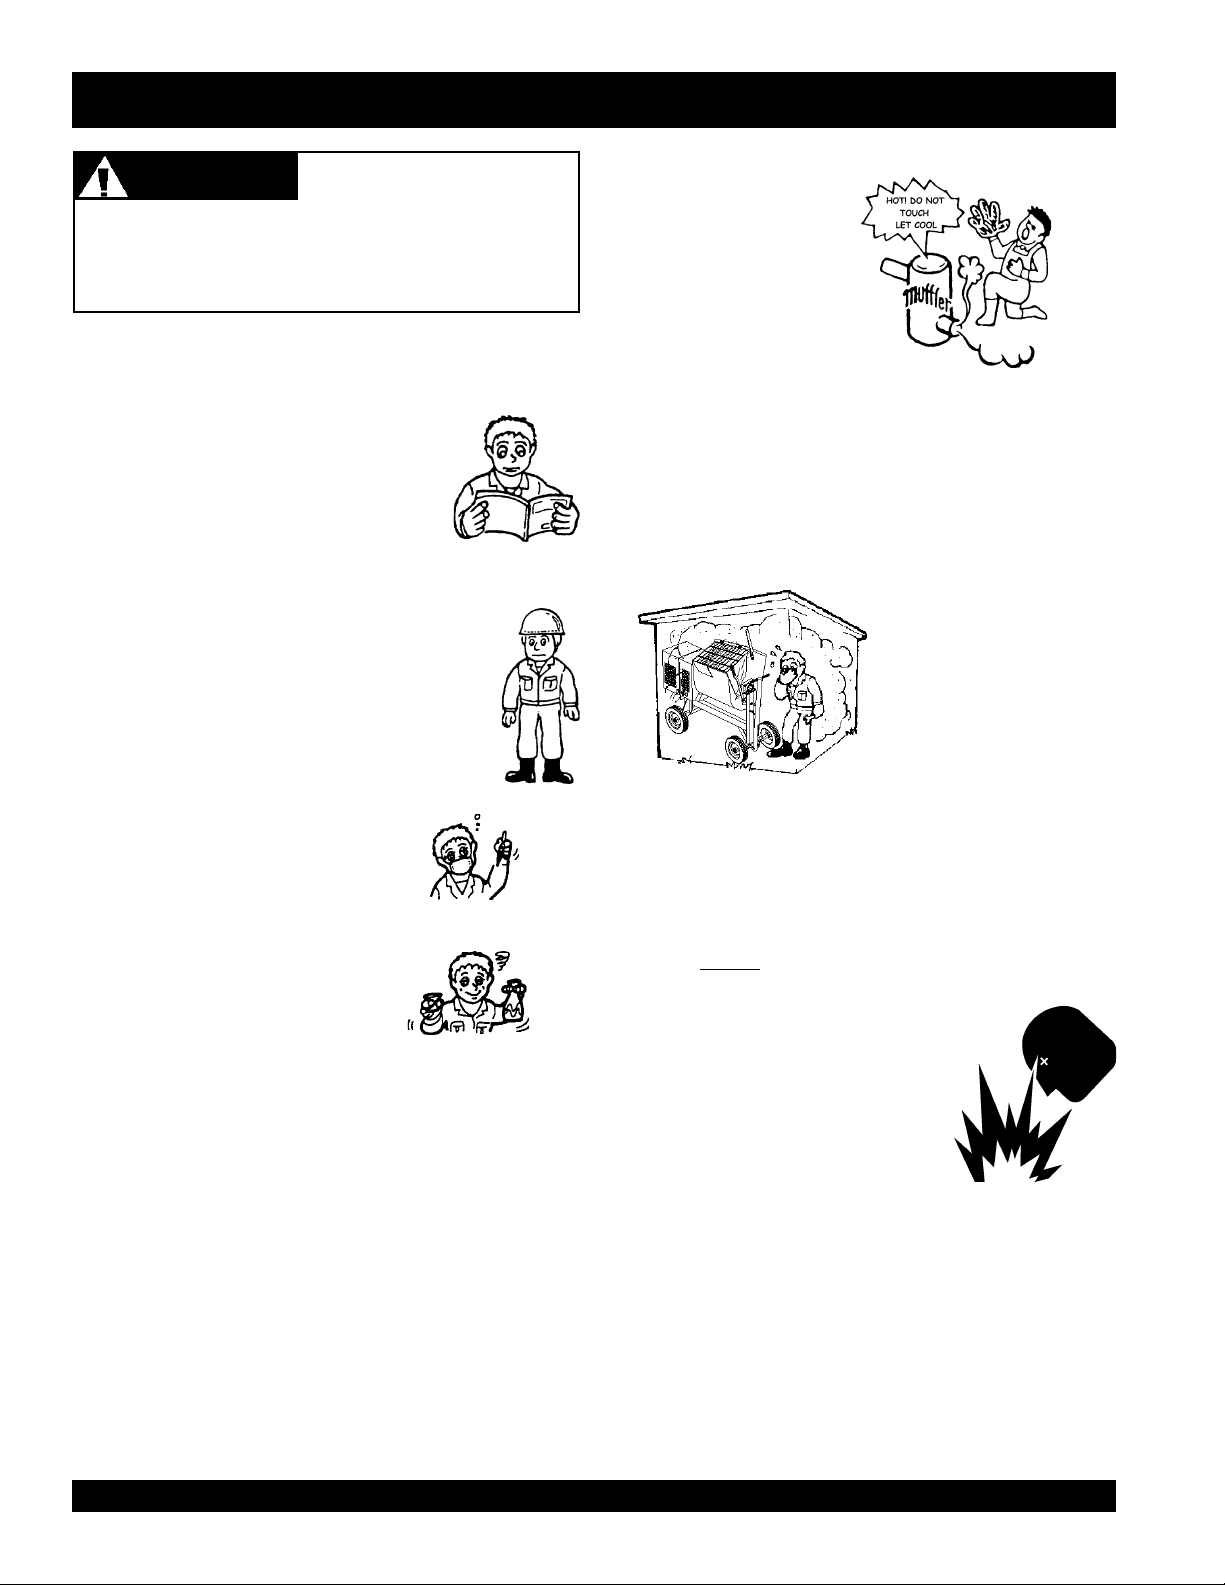
EM-900SDCE MIXER — SAFETY MESSAGE ALERT SYMBOLS
FOR YOUR SAFETY AND THE SAFETY OF OTHERS!
Safety precautions should be followed at all times when
operating this equipment. Failure to read and understand the
Safety Messages and Operating Instructions could result in
injury to yourself and others.
HAZARD SYMBOLS
NOTE
This Owner's Manual has been developed to provide
complete instructions for the safe and efficient operation
of Multiquip's EM-900SDCE mixer. For specific engine
operating questions, please refer to the engine
manufacturers instructions for data relative to its safe
operation.
Before using this MIXER, ensure that the operating
individual has read and understands all instructions
in this manual.
SAFETY MESSAGE ALERT SYMBOLS
The three (3) Safety Messages shown below will inform you
about potential hazards that could injure you or others. The
Safety Messages specifically address the level of exposure to
the operator, and are preceded by one of three words: DANGER,
WARNING, or CAUTION.
Lethal Exhaust Gases
Engine exhaust gases contain poisonous
carbon monoxide. This gas is colorless and
odorless, and can cause death if inhaled.
NEVER operate this equipment in a confined
area or enclosed structure that does not
provide ample free flow air.
Explosive Fuel
Diesel
fuel is extremely flammable, and its
vapors can cause an explosion if ignited. DO
NOT start the engine near spilled fuel or
combustible fluids. DO NOT fill the fuel tank
while the engine is running or hot. DO NOT
overfill tank, since spilled fuel could ignite if it
comes into contact with hot engine parts or
sparks from the ignition system. Store fuel in
approved containers, in well-ventilated areas
and away from sparks and flames. NEVER
use fuel as a cleaning agent.
DANGERDANGER
DANGER
DANGERDANGER
You WILL be
if you DO NOT follow these directions.
WARNINGWARNING
WARNING
WARNINGWARNING
You CAN be KILLED or
you DO NOT follow these directions.
CAUTICAUTI
CAUTION
CAUTICAUTI
You CAN be
these directions.
Potential hazards associated with MIXER operation will be
referenced with Hazard Symbols which appear throughout this
manual, and will be referenced in conjunction with Safety
Message Alert Symbols.
KILLED
INJURED
if you DO NOT follow
or
SERIOUSLY INJURED
SERIOUSLY INJURED
if
NOTE
Burn Hazards
Engine components can generate extreme
heat. To prevent burns, DO NOT touch these
areas while the engine is running or
immediately after operations. Never operate
the engine with heat shields or heat guards
removed.
Rotating Parts
NEVER operate mixer with covers, or guards
removed. Keep fingers, hands, hair and clothing
away from all moving parts to prevent injury.
This
MIXER
, other property, or the
surrounding environment could be
damaged if you do not follow
instructions.
PAGE 4 — MULTIQUIP EM-900SDCE— PARTS & OPERATION MANUAL — REV. #1 (07/02/04)
Page 5
EM-900SDCE MIXER — SAFETY MESSAGE ALERT SYMBOLS
Accidental Starting
ALWAYS make sure the engine is turned OFF
before servicing the engine or equipment.
Sight and Hearing hazard
ALWAYS wear approved eye and hearing
protection.
Respiratory Hazard
ALWAYS wear approved respiratory
protection.
Equipment Damage Messages
Other important messages are provided throughout this manual
to help prevent damage to your mixer, other property, or the
surrounding environment.
This mixer, other property, or the
NOTE
surrounding environment could be
damaged if you do not follow
instructions.
MULTIQUIP EM-900SDCE — PARTS & OPERATION MANUAL — REV. #0 (07/02/04) — PAGE 5
Page 6
EM-900SDCE MIXER — OPERATION AND SAFETY DECALS
Machine Safety Decals
The Multiquip EM-900SDCE mixer is equipped with a number of safety decals (see below and on the proceeding page). These
decals are provided for operator safety and maintenance information. The illustration below shows these decals as they appear on
the machine. If any of these decals become unreadable, replacements can be obtained from your dealer.
PAGE 6 — MULTIQUIP EM-900SDCE— PARTS & OPERATION MANUAL — REV. #1 (07/02/04)
Page 7
EM-900SDCE MIXER — OPERATION AND SAFETY DECALS
MULTIQUIP EM-900SDCE — PARTS & OPERATION MANUAL — REV. #0 (07/02/04) — PAGE 7
Page 8

EM-900SDCE MIXER — SPECIFICATIONS (NOISE AND VIBRATION)
ThEC Declaration of Conformity
E
In accordance with EN 45014:1998
Equipment Diesel powered Mortar/Plaster Mixer
Model Name/Number EM-900SDCE
In accordance with the following Directive(s):
98/37/EC The Machinery Directive
has been designed and manufactured to the following specifications:
BS EN 292-2:1991 Safety of Machinery- General Requirements
prEN12152:1995 Machinery and Plant for the Preparation of Mortar
BS EN1679-1:1998 Compression Ignition Engines
Noise Values
The sound level according to appendix 1, paragraph 1.7.4.f of the EC machinery regulation is defined as:
Sound pressure level at the operator's stand: L
Sound capacity level: L
These sound values were determined according to ISO EN 3744:1994 (E) and 2000/14/EL
= 81.1 db (A)
pA
= 100.0 db (A)
WA
PAGE 8 — MULTIQUIP EM-900SDCE— PARTS & OPERATION MANUAL — REV. #1 (07/02/04)
Page 9

EM-900SDCE MIXER — SPECIFICATIONS
snoitacificepSrexiMECDS009-ME.1elbaT
yticapaC
)sleehwssel(thgieW.sbl)830,1(.gK174
HxWxL
evirDlacinahceM,noissimsnarT
noitcApmuDlaunaM
ledoM03B1
epyTenigneLESEIDekorts-4delooc-riA
metsySnoitsubmoCnoitcejnItceriD
srednilyCfOrebmuN1
rewopesroHPH8.6
sretil842
).tf.uc9(
mc051x721x081
)ni95x05x17(
snoitacificepSenignEZTAH.2elbaT
NOTE
tnemecalpsiDmc743
3
yticapaCliO).tq50.1(retil1
epyTliOenignE
leuFepyT
DPHSROGC-FC-EC
D2/D1-579DMTSA
renaelCriAepyTtnemelEyrD
dohteMgnitratStratSlioceR
ria,knatleufsedulcni(thgieW
dna,recnelistsuahxe,renaelc
).sbl77.38(.gk83
.)retratsliocer
In accordance with our established policy of constant
improvement, we reserve the right to amend these
specifications at any time without notice.
-DC-IPAro2DP-5D-4D-CMCC
-2A/1A9682SB10615NID-095NE
MULTIQUIP EM-900SDCE — PARTS & OPERATION MANUAL — REV. #0 (07/02/04) — PAGE 9
Page 10
EM-900SDCE MIXER — RULES FOR SAFE OPERATION
■
NEVER touch the hot exhaust manifold, muffler or cylinder. Allow
CAUTICAUTI
CAUTION
CAUTICAUTI
Failure to follow instructions in this manual may lead to serious
injury or even death! This equipment is to be operated by
trained and qualified personnel only! This equipment is for
industrial use only.
The following safety guidelines should always be used when
operating the EM-900SD CE mixer:
GENERAL SAFETY
■
DO NOT operate or service this equipment before
reading this entire manual.
■
This equipment should not be operated by
persons under 18 years of age.
■
NEVER operate this equipment without proper
protective clothing, shatterproof glasses, steeltoed boots and other protective devices required
by the job.
these parts to cool before
servicing engine or mixer.
■
High Temperatures – Allow the engine to cool before adding
fuel or performing service and maintenance functions. Contact
hot
with
■
The engine section of this mixer requires an adequate free
flow of cooling air. Never operate the mixer in any enclosed or
narrow area where free flow of the air is restricted. If the air
components can cause serious burns.
flow is restricted it will cause
serious damage to the mixer
or engine and may cause
injury to people. Remember
the mixer's engine gives off
DEADLY carbon monoxide
gas.
■
NEVER operate this equipment when not
feeling well due to fatigue, illness or
taking medicine.
■
NEVER operate this equipment under
the influence or drugs or alcohol.
■
NEVER use accessories or attachments, which are not
recommended by Multiquip for this equipment. Damage to
the equipment and/or injury to user may result.
■
Manufacture does not assume responsibility for any accident
due to equipment modifications.
■
Whenever necessary, replace nameplate, operation and
safety decals when they become difficult read.
■
ALWAYS check the machine for loosened threads or bolts
before starting.
■
■
■
■
ALWAYS refuel in a well-ventilated area, away from sparks
and open flames.
ALWAYS use extreme caution when working with flammable
liquids. When refueling, stop the engine and allow it to cool.
DO NOT
could result from fuel vapors, or if fuel is spilled on a hot
engine.
NEVER operate the mixer in an
explosive atmosphere or near
combustible materials. An explosion or
fire could result causing severe
harm or even death.
Topping-off to filler port is dangerous, as it tends to spill fuel.
smoke around or near the machine. Fire or explosion
bodily
PAGE 10 — MULTIQUIP EM-900SDCE— PARTS & OPERATION MANUAL — REV. #1 (07/02/04)
Page 11
EM-900SDCE MIXER — RULES FOR SAFE OPERATION
GENERAL SAFETY
■
Stop the engine when leaving the mixer unattended.
■
Block the unit when leaving or when using on a slope.
■
Maintain this equipment in a safe operating condition at all
times.
■
ALWAYS stop the engine before servicing, adding fuel and
oil.
■
NEVER Run engine without air filter. Severe engine damage
may occur.
■
ALWAYS service air cleaner frequently.
■
ALWAYS be sure the operator is familiar with proper safety
precautions and operations techniques before using mixer.
■
ALWAYS store equipment properly when it is not being used.
Equipment should be stored in a clean, dry location out of the
reach of children.
■
NEVER use accessories or attachments, which are not
recommended by Multiquip for this equipment. Damage to
the equipment and/or injury to user may result.
■
ALWAYS read, understand, and follow procedures in
Operator’s Manual before attempting to operate equipment.
Maintenance Safety
■
■
■
■
■
■
Emergencies
■
NEVER lubricate components or attempt service on a
running machine.
ALWAYS allow the machine a proper amount of time to
cool before servicing.
Keep the machinery in proper running condition.
Fix damage to the machine immediately and always replace
broken parts.
Dispose of hazardous waste properly. Examples of
potentially hazardous waste are used motor oil, fuel and
fuel filters.
DO NOT use food or plastic containers to dispose of
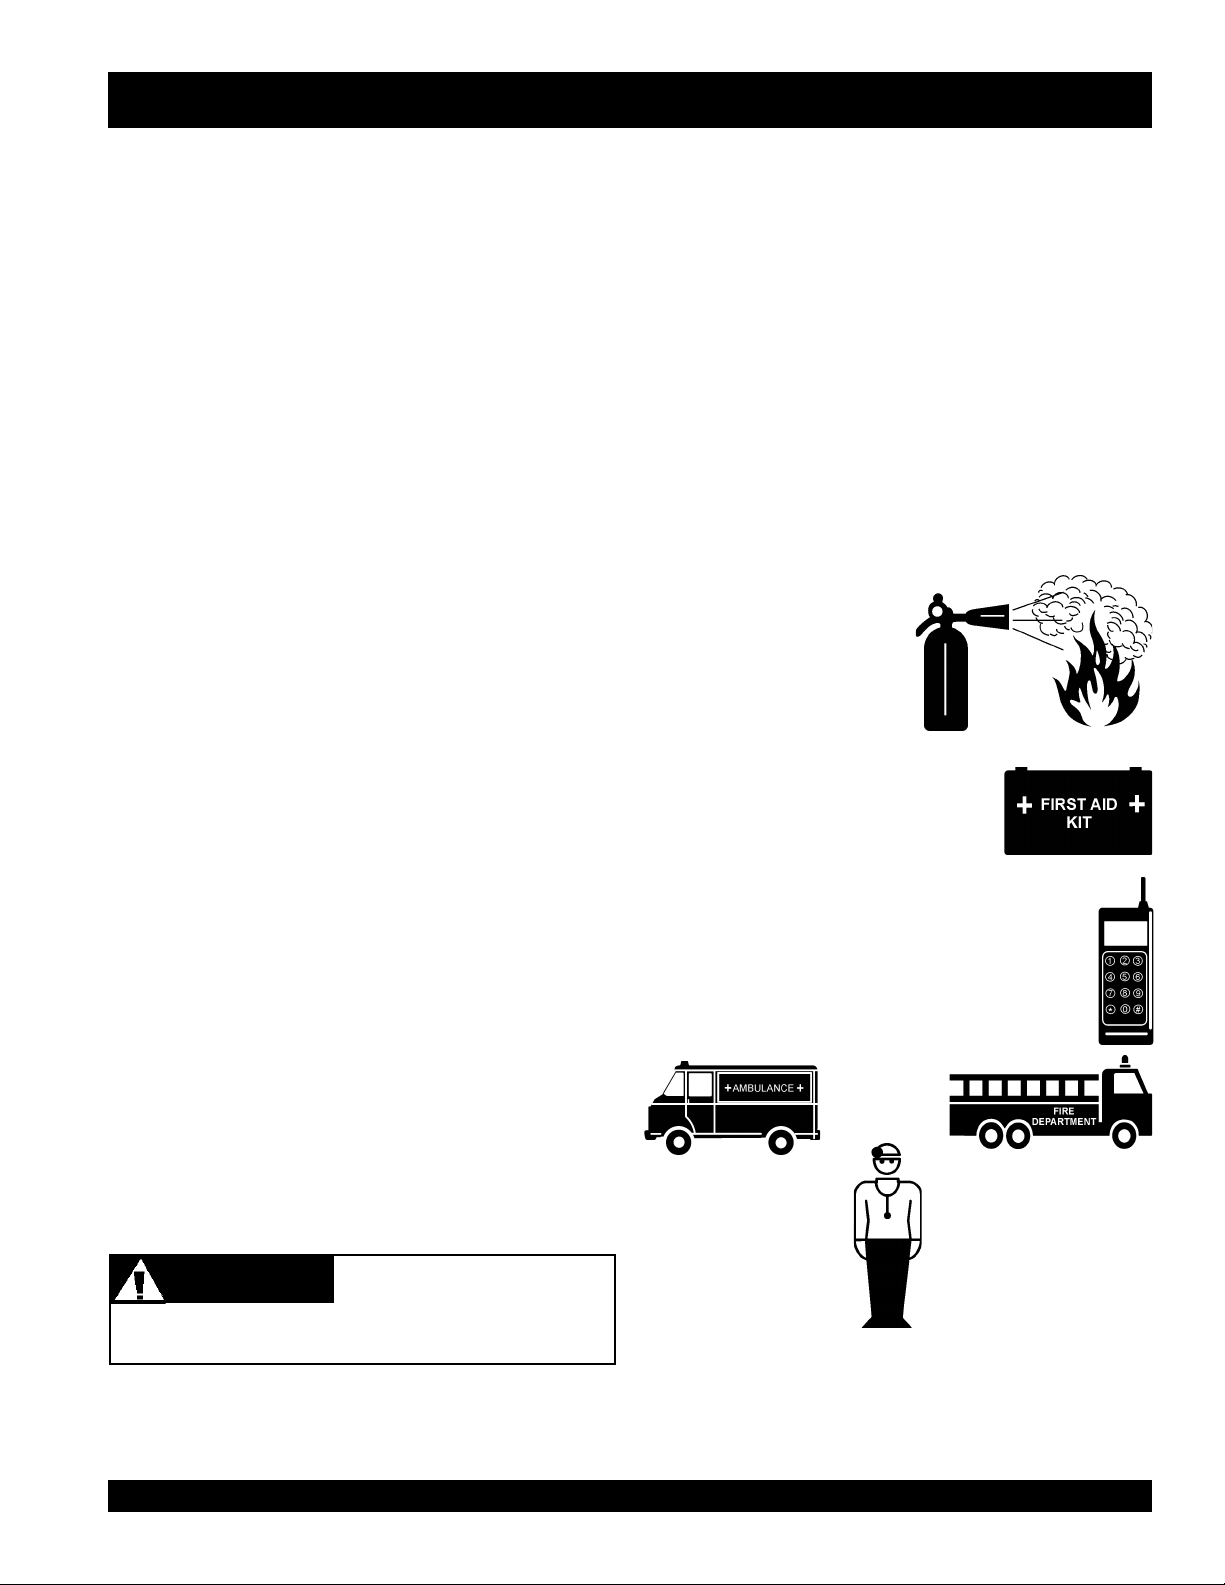
hazardous waste. Emergencies
ALWAYS know the location of
the nearest
fire extinguisher
.
■
CAUTION! must be exercised while servicing this equipment.
Rotating and moving parts can cause injury if contacted.
■
Keep all inexperienced and unauthorized people away from
the equipment at all times.
■
Unauthorized equipment modifications will void all warranties.
■
Check all fasteners periodically for tightness.
■
Stop the engine before allowing anybody’s hands in the mixing
drum.
■
NEVER pour or spray water over the engine.
■
ALWAYS stand clear of dump handle when mixer is in
operation. Any binding of material between the mixer blades
and drum will cause drum and handle to quickly move in the
discharge position.
■
NEVER operate the mixer with the grate (grill)
removed
DO NOT operate this equipment unless all guards and safety
devices are attached and in place.
.
CAUTICAUTI
CAUTION
CAUTICAUTI
open
■
■
or
ALWAYS know the location of the
nearest and
In emergencys
nearest phone or
Also know the phone numbers of the nearest
first aid kit
always
ambulance, doctor
information will be invaluable in the case of an
emergency.
.
know the location of the
keep a phone on the job site
and
fire department
.
. This
MULTIQUIP EM-900SDCE — PARTS & OPERATION MANUAL — REV. #0 (07/02/04) — PAGE 11
Page 12
EM-900SDCE MIXER — GENERAL INFORMATION
trahCeuqroT.3elbaT
retemaiDerawdraHeuqroT
)81-"61-5(mm49.7m/fgk711
2
).sbl-tf42(
)42-"8/3()mm35.9(m/fgk081
2
).sbl-tf73(
)31-"2/1(mm07.21m/fgk091
2
).sbl-tf93(
)31-"2/1(mm07.21
8edarG
m/fgk934
2
).sbl-tf09(
GENERAL
Multiquip's EM-900SD CE series plaster and mortar mixer is
shipped completely assembled and has been factory tested.
The drum batch capacity of this mixer is between 6 and 7 bags
using DIN 1164 size bags (25 kg/bag). With proper care, it will
give continuous service year-after-year.
This mixer is powered by a
6.8 HP HATZ Model 1B30
diesel
DIESEL ENGINE CARE
For care and operation of the
engine manufacturer’s operating instructions furnished with the
engine. We recommend draining and refilling the engine
crankcase at least every thirty hours of operation. Check the
engine oil level daily.
engine. The power from the engine is transmitted via the clutch/
reduction assembly directly to the paddle shaft. Therefore
providing high mixer torque and eliminating V-belts .
BEFORE STARTING
Before starting the engine, read the engine
owners manual and thoroughly understand the
safety information.
OIL LEVELS
Be sure to check the oil levels in the engine and engine reduction
unit before starting the unit.
HARDWARE
HATZ
diesel engine, refer to the
Check all hardware on the mixer before starting. Periodically
inspect all hardware. Loose hardware can contribute to early
component failure and poor performance. Use Table 3 ( Torque
Chart) as a general guideline and keep all hardware tight.
PAGE 12 — MULTIQUIP EM-900SDCE— PARTS & OPERATION MANUAL — REV. #1 (07/02/04)
Page 13
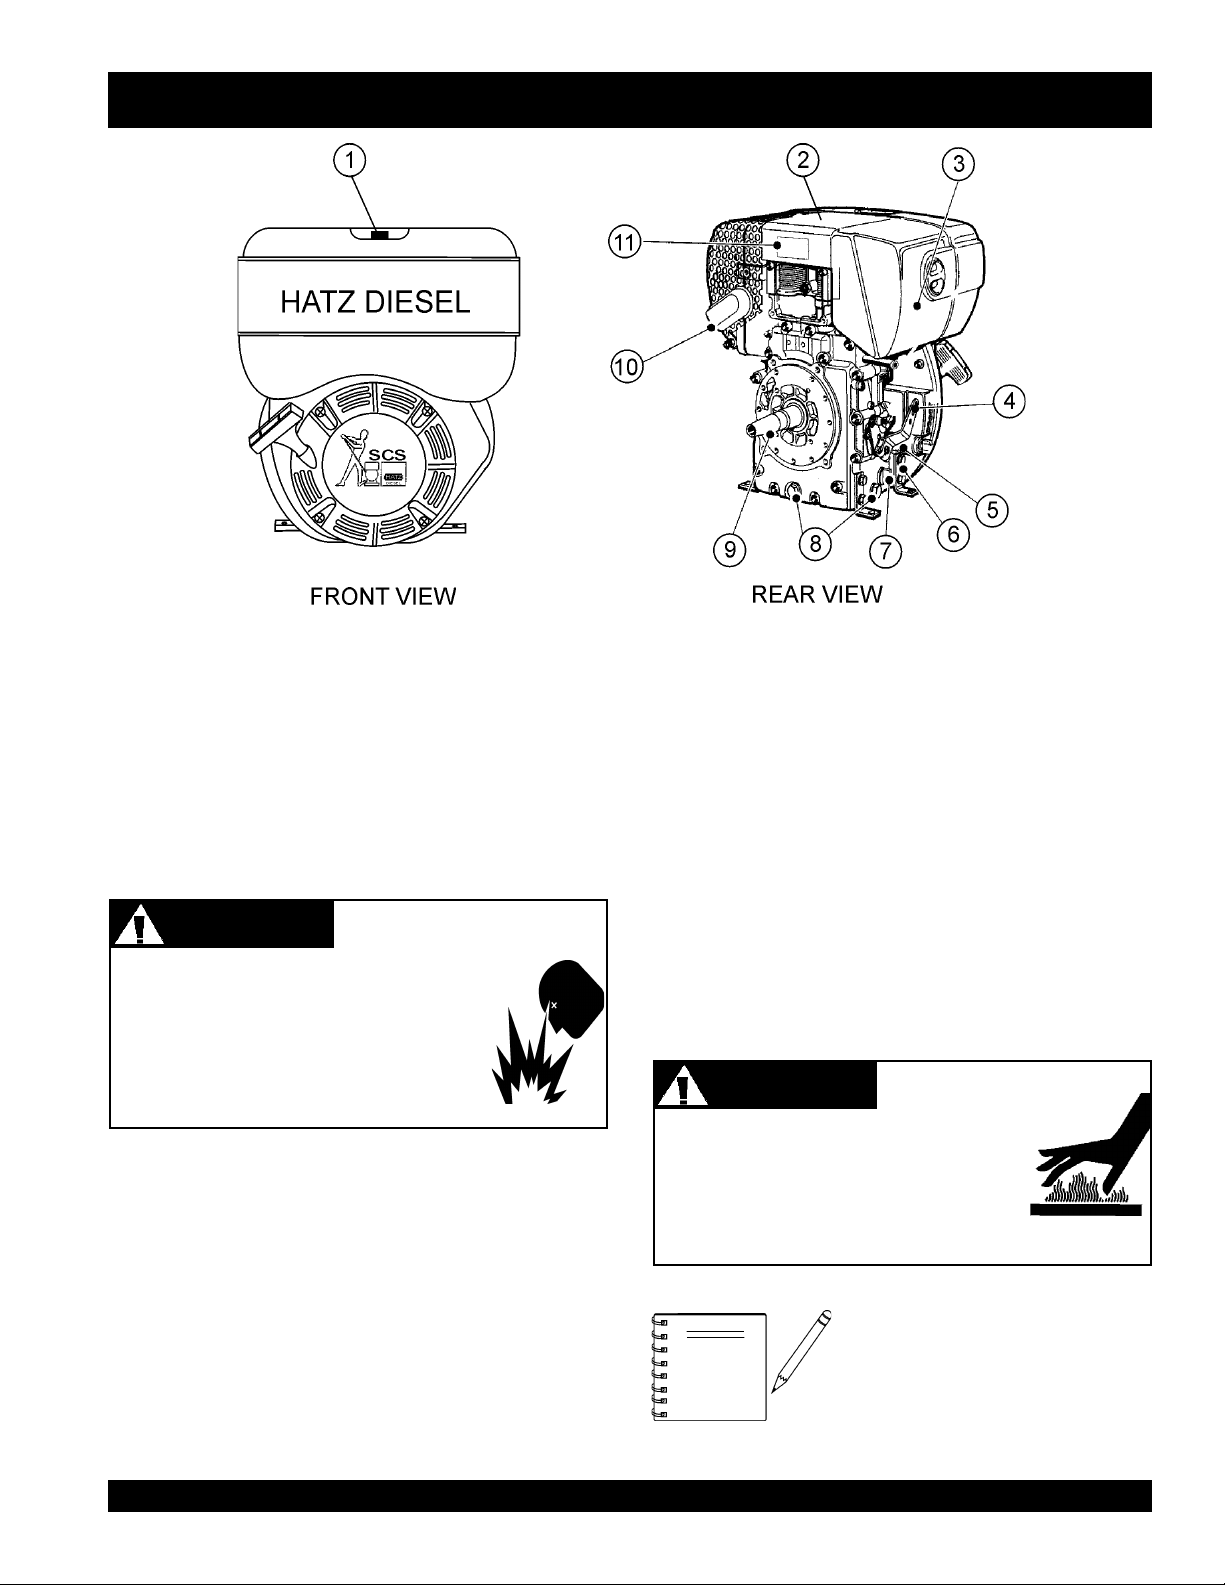
EM-900SDCE MIXER — ENGINE COMPONENTS
Figure 1. Basic Engine Components
INITIAL SERVICING
The engine (Figure 1) must be checked for proper lubrication and
filled with fuel prior to operation. Refer to the manufacturers Engine
manual for instructions & details of operation and servicing.
1. Fuel Filler Cap/Fuel tank – Pull this latch to add
fuel to the tank. After refueling, always make sure the fuel
cap is latched properly. DO NOT over fill. For additional
information refer to engine owner's manual.
DANGERDANGER
DANGER
DANGERDANGER
Adding fuel to the tank should be accomplished
only when the engine is stopped and has had an
opportunity to cool down. In the event of a fuel
spill, DO NOT attempt to start the engine until the
fuel residue has been completely wiped up, and
the area surrounding the engine is dry.
2. Engine Lifting Straps/Cover – Remove the air cleaner
cover, then lift this cover (the one with decals on it) to gain
access to the engine lifting straps.
3. Air Cleaner/Cover – Prevents dirt and other debris from
entering the fuel system. Remove wing-nut on side of air
filter cover to gain access to filter element.
4. Speed Control Lever – This lever is connected to the
throttle control which is located on the side of the engine
compartment cover. Use this lever to control engine speed.
5. Dip Stick – Remove dipstick to determine if the engine oil
level is low. If low add oil as specified in Table 4, page 18.
diesel
6. Engine Motor Mounts – Attach these engine mounts to
the mixer frame. Tighten securely.
7. Oil Filter – Remove this bolt to gain access (internal) to
the engine oil filter. Service the oil filter as recommended
in the maintenance section of this manual.
8. Oil Drain Plugs – There are two oil drain plugs, one is
underneath the flywheel, the other on the side of the engine.
Remove these plugs to drain engine oil from the engine.
9. Crankshaft – Connect this shaft to the input of the
transmission.
10. Muffler – Used to reduce noise and emissions.
11. Nameplate – Contains information about the engine.
Engine components can generate extreme heat.
To prevent burns, DO NOT touch these areas
while the engine is running or immediately after
operating. NEVER operate the engine with the
muffler removed.
NOTE
WARNINGWARNING
WARNING
WARNINGWARNING
Operating the engine without an air
filter, with a damaged air filter, or a
filter in need of replacement will allow
dirt to enter the engine, causing rapid
engine wear.
MULTIQUIP EM-900SDCE — PARTS & OPERATION MANUAL — REV. #0 (07/02/04) — PAGE 13
Page 14
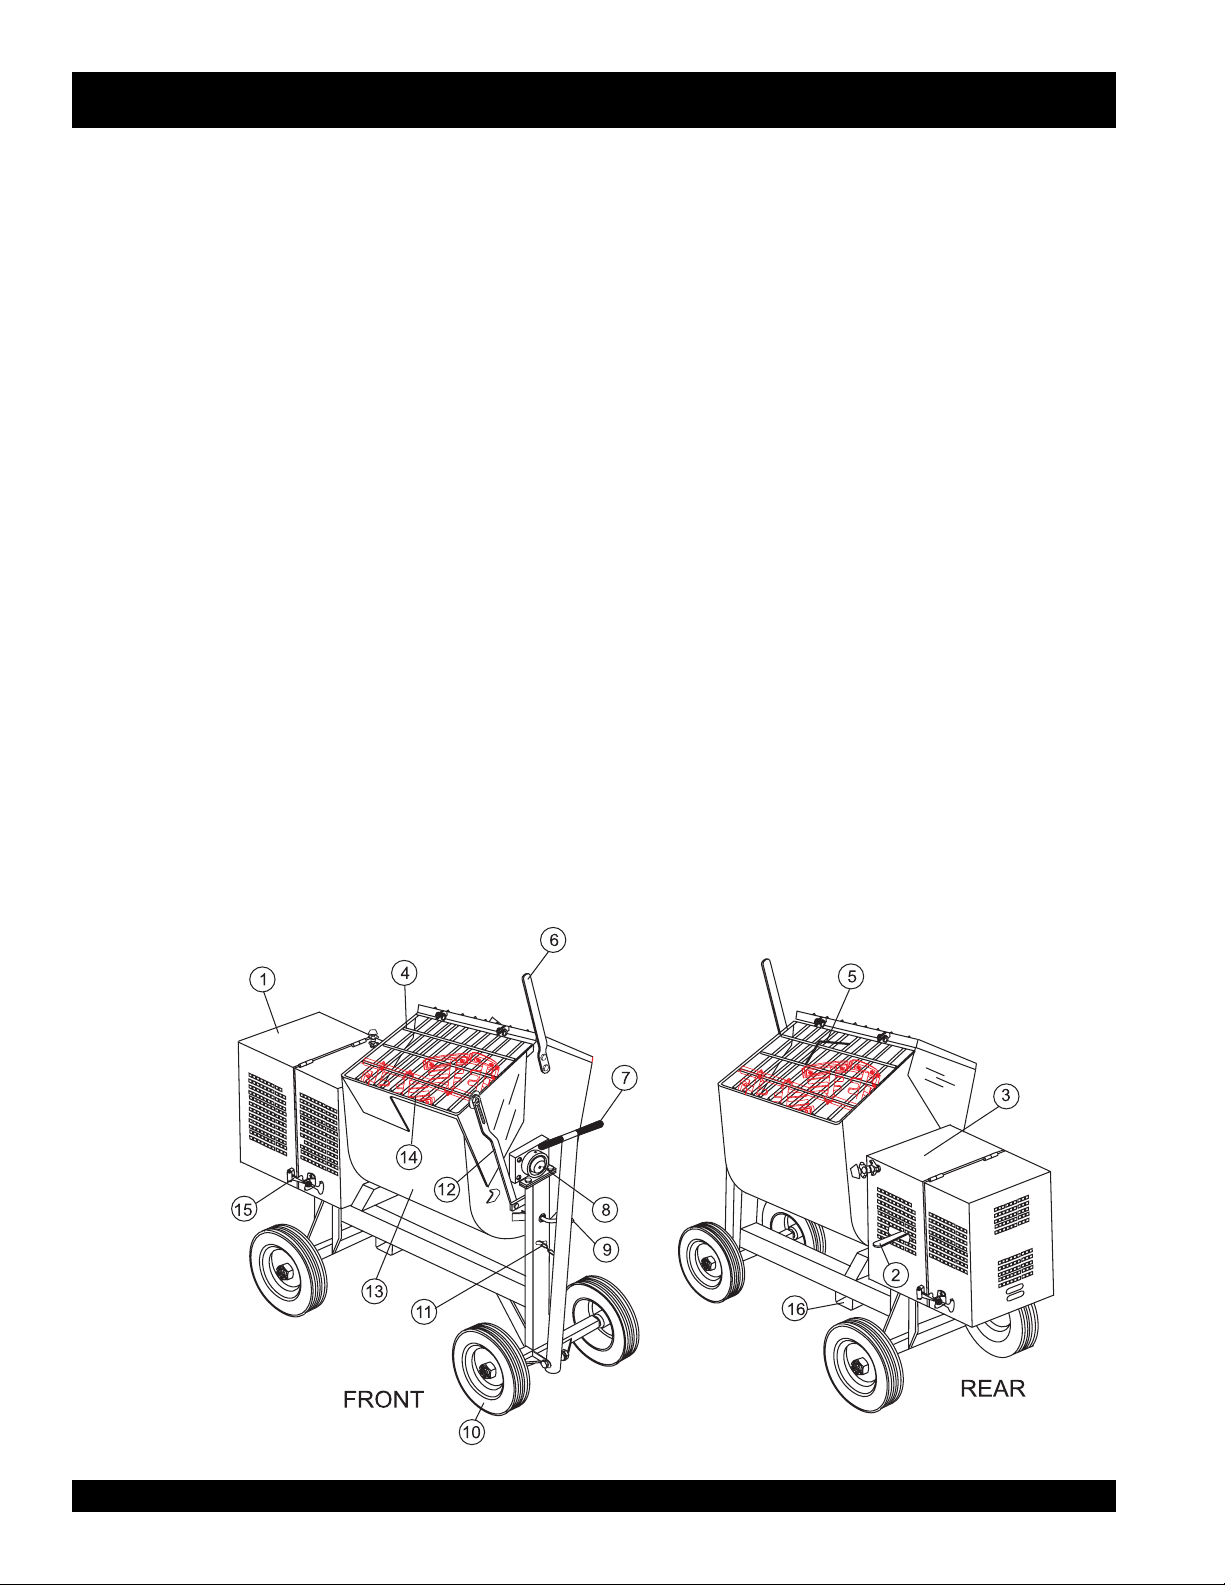
EM-900SDCE MIXER — CONTROLS AND COMPONENTS
1. Engine Cover — Lift this cover to gain access to the engine
compartment.
2. Clutch Engagement Lever — Push the clutch lever
forward, toward the tow end of the mixer to engage clutch.
Once the clutch is engaged the paddle shaft will begin to
rotate. To disengage clutch pull the clutch backwards
towards the engine.
3. Throttle Control/Stop Switch — Pull all the way out to
achieved maximum engine RPM's. To stop the engine, push
the RED stop button inwards.
4. Safety Grill — Provided for operator safety. This safety grill
is designed to keep hands and solid objects out of the
mixing drum when in use. This grill should be closed at all
times when mixer is in use. DO NOT remove the grill or grill
opening bar. Keep the grill clean by washing it down daily.
5. Bag Cutter— This feature allows compound mixing bags
to be opened easily, therefore allowing the contents of the
bag to fall directly into the mixing drum.
6. Dump Handle — Pull this handle downward to dump the
contents of the drum. Push the handle upward to return the
drum to its vertical position.
7. Transport Handle — Use this T-handle to transport the
mixer. NEVER tow this mixer on a highway.
8. Pivot Point/Zerk Fitting — There is, on each end of the
mixing drum a zerk grease fitting. These fittings lubricate
the dumping mechanism. Lubricate both fittings at least
twice a week.
9. Dump Handle Release Pin — Pull this pin outward (spring
10. Tires — This unit employes the use of soild rubber tires.
11. Transport Bar Release Latch — To transport the mixer
12. Safety Grill Lock Handle — To prevent injury to hands
13. Steel Mixing Drum — Mixing materials such as concrete,
14. Mixing Paddles — Used in the mixing of material. This
15. Bunjee Latch — Use this latch to secure the engine
16. Fork Lift Pocket — When lifting of the mixer is required,
loaded) to release the drum, then pull down on the dump
handle to place the drum in the dump position. When drum
is in dump position, pin will automatically lock drum.
un-hook the transport bar from the latch. When work is
being performed ALWAYS have the transport bar latched
in the upright position.
and arms, the safety grill should ALWAYS be locked when
the mixing of plaster or mortar is required. Also when
transporting the mixer the safety grill should be locked. The
safety grill should only be un-locked when cleaning of the
blades and drum is required.
mortar, plaster are to be placed into this drum for mixing.
Always clean the drum after each use.
unit uses four different types of paddles to provide a fast
uniform mix.
compartment cabinet.
use these fork lift pockets to lift the mixer. Remember to
insert the forks of the fork lift a minimum of 60.96 cm. (24
inches) into the mixer's fork lift pocket.
Figure 2. Mixer Major Components
PAGE 14 — MULTIQUIP EM-900SDCE— PARTS & OPERATION MANUAL — REV. #1 (07/02/04)
Page 15

EM-900SDCE MIXER — PADDLE BLADE ADJUSTMENT
Figure 3 illustrates the paddle blade adjustment (
steel drum
).
B
Figure 3. Paddle Blade Adjustment, Steel Drum
MULTIQUIP EM-900SDCE — PARTS & OPERATION MANUAL — REV. #0 (07/02/04) — PAGE 15
Page 16

EM-900SDCE MIXER — INSPECTION
See Figures 1 and 2 (Pages 11 and 12) for the location of any
control or component referenced in this manual.
FUEL
1. Lift the fuel cap latch (Figure 1) located on
top of the fuel tank, then look inside the tank
and determine if the engine fuel is low . If fuel
is low, fill with
CAUTICAUTI
CAUTION
CAUTICAUTI
Handle fuel safely. Motor fuels are highly
can be dangerous if
refueling. DO NOT attempt to refuel mixer if the engine is hot
or running.
diesel fuel
ALWAYS
mishandled. DO NOT smoke while
allow engine to
(Figure 4).
cool
flammable
before refueling.
and
2. Determine if the engine oil is low (Figure 6), add correct
amount of engine oil to bring oil level to a normal safe level.
See Table 4 for recommended oil type.
ZERK GREASE FITTINGS
1. Check the zerk grease fittings at each end of the mixing
drum (Figure 7). These grease fittings lubricate the dumping
mechanism. If the dumping handle is stiff or hard to move
lubricate these fittings.
Figure 6. Dipstick
Figure 4. Fuel Tank
ENGINE OIL
1. Remove the engine oil dipstick from its holder (Figure 5).
Figure 5. Oil Filler Port/Dipstick
PAGE 16 — MULTIQUIP EM-900SDCE— PARTS & OPERATION MANUAL — REV. #1 (07/02/04)
Figure 7. Zerk Fittings (Bearings)
Page 17

LUBRICANTS
EM-900SDCE MIXER — INSPECTION
CLUTCH OIL
1. Remove the clutch oil level plug (Figure 8). If oil begins to
seep out as the plug is being removed, then it can be
assumed that the clutch oil is at the proper operating level.
2. If oil does not seep out as the oil level plug is being removed,
then remove the clutch oil fill plug and fill with SAE 30
engine oil to the proper operating level.
GEAR REDUCTION OIL (TRANSMISSION)
1. Remove the transmission oil level plug (Figure 8). If oil
begins to seep out as the plug is being removed, then it
can be assumed that the transmission oil is at the proper
operating level.
2. If oil does not seep out as the oil level plug is being removed,
then remove the transmission oil fill plug and fill with
SAE 90 transmission oil to the proper operating level.
Figure 8. Transmission/Clutch Lubrication
MULTIQUIP EM-900SDCE — PARTS & OPERATION MANUAL — REV. #0 (07/02/04) — PAGE 17
Page 18

EM -900SDCE MIXER — INITIAL START-UP
Push
This section is intended to assist the operator with the initial
start-up of the EM-900SDCE mixer. It is extremely important that
this section be read carefully before attempting to use the mixer
in the field.
DO NOT use your mixer until this section is thoroughly
understood.
CAUTICAUTI
CAUTION
CAUTICAUTI
Failure to understand the operation of the EM-900SDCE mixer
could result in severe damage to the mixer or personal injury.
STARTING THE ENGINE
The following steps outline the procedure for starting the engine.
1. Make sure the clutch engagement lever is in the dis-engage
position (lever is pointing towards the
2
PUSH
the "RED" button (Figure 9) on the throttle control
engine end
).
and pull the round black knob about halfway out. Make
sure that the throttle lock knob has been dis-engaged.
PUSH-IN, THEN PULL
TO SET THROTTLE
(RPM’s)
THROTTLE LOCK
KNOB, TURN CLOCKWISE
TO LOCK THROTTLE CABLE.
THROTTLE RELEASE
AND STOP BUTTON
PUSH ALL THE DOWN
TO STOP ENGINE
Figure 9. Throttle Control Knob
Pull
the
6.
starter grip
(Figure 10) lightly until you feel
resistance, then pull briskly. Return the starter grip gently.
7.
toward the
throttle lever so that paddle shaft inside mixer rotates
between 30 - 40 RPM's. The number of RPM's will vary
depending on engine type and load.
MIXING
1. The paddle shaft inside the drum should be rotating at
this time.
2. Lift the mixing bag compound onto the steel grate over
the bag cutter and let the contents fall into the drum.
3. Add water, and mix compound to desired consistency,
NOTE
STOPPING THE ENGINE
1. Place the clutch engagement lever in the dis-engage
position (lever is pointing towards the
2.
PUSH
Allow the engine to cool for 3-5 minutes.
3.
PUSH
stop the engine.
the clutch engagement lever forward (Figure 11),
tow end
of the mixer. When engine starts adjust
Figure 11. Clutch Engagement Lever
Be sure to stand clear of the
handle
when the mixer is
dump
operational. Any binding of material
between the mixer blades and the
drum will cause the drum handle to
move to the discharge position, thus
causing bodily harm.
engine end
).
the "RED" throttle button halfway in (idle speed).
the "RED" throttle button all the way in, this will
Figure 10. Starter Grip
PAGE 18 — MULTIQUIP EM-900SDCE— PARTS & OPERATION MANUAL — REV. #1 (07/02/04)
Page 19

EM-900SDCE MIXER — MAINTENANCE
SHAFT SEALS
CAUTICAUTI
CAUTION
CAUTICAUTI
IMPORTANT -DRUM HEAD SEAL CARE
Grease seals every 40 hours of operation using any grade
#1 lithium base grease. Apply grease until visible inside
of mixing tub (over grease). This will purge seal system
of contamination.
The clutch reduction assembly has two separate compartments.
Each of which must be filled with its proper lubricant and checked
at regular intervals.
clutch compartment
The
number 30 SAE engine oil which can be poured through the
filler hole located just above the clutch inspection door on the
opposite side of the transmission. Fill the clutch compartment
with 30 SAE engine oil until it overflows the oil level plug located
on the shifter side of the clutch compartment . Check this oil level
every two or three months and add oil as required. Drain and
refill once a year.
should be filled with a good grade of
ENGINE OIL
1. If engine oil is low, fill engine crankcase with lubricating
oil through filler hole (Figure 1), but DO NOT overfill.
2. The oil listed in Table 4 is recommended to ensure better
engine performance. Use class CD or higher grade motor
oil.
reduction gear, upper compartment
The
number 90 SAE oil, as used in automobile transmissions. The
filler plug is at the top of the reduction gear case and the oil level
plug is on the same side of the case as the clutch lever. Fill the
reduction gear compartment with 90 SAE transmission oil until it
overflows the oil level plug. Check this oil level every two or
three months and add oil as required. Drain and refill once a
year.
PADDLE SHAFT BEARINGS
The paddle shafts in the Multiquip EM900SDCE mixers rotate in
sealed ball bearings, which require no additional lubrication as
they are packed and sealed at the factory.
There is, on each end of the mixing drum, a zerk grease fitting
(pivot point). Grease these fittings once a week as they lubricate
the dumping mechanism of the mixing drum.
CAUTICAUTI
CAUTION
CAUTICAUTI
Failure
to lubricate the zerk grease fittings once a week will
cause the dumping mechanism to stiffen, making the mixer
hard to dump.
should be filled with
AIR CLEANER (DRY TYPE)
1. Change the air cleaner every 500 hours. See Figure 1
for location of air cleaner.
FUEL FILTER/FUEL TANK
1. Change the fuel filter every 500 hours. Fuel filter is
located inside fuel tank.
2. Siphon water out of fuel tank once a year.
CLEANING
ALWAYS make sure engine is OFF before cleaning the inside
of the drum. NEVER put hands, fingers or arms inside mixing
drum when engine is ON.
NEVER pour or spray water over engine.
For consistent performance, long life and high quality mixing,
thoroughly clean the mixer inside and out at the end of each
day’s operation. To prevent lumps of dried mortar from forming
and contamination of future batches, DO NOT allow a buildup of
materials to form on the blades or anywhere inside the drum.
■
MULTIQUIP EM-900SDCE — PARTS & OPERATION MANUAL — REV. #0 (07/02/04) — PAGE 19
Page 20

EM-900SDCE MIXER — MAINTENANCE
Clutch Adjustment Mechanical 9 CF Mixer
If the rotating mixing paddles appear to be losing rotational speed,
it may be necessary to adjust the clutch. For optimum
performance Multiquip recommends 47.45-74.57 N-m (35-55 ftlbs). applied pressure to the hand clutch lever. After the first initial
operating hours (8) check the clutch for proper ensasment
pressure.
Clutch Adjustment Procedure
CAUTICAUTI
CAUTION
CAUTICAUTI
A. Rotate the clutch using the recoil starter until the
adjustment lock
Using a flat blade screwdriver loosen the adjustment bolt
just enough to release the adjustment lock.
B. Using a punch, rotate the
one notch at a time in the counter-clockwise direction until
a firm 47.45-74.57 N-m (35- 55 lbs.) pressure is felt when
engaging the clutch lever (the lever should snap into the
engaged position).
ALWAYS stop the engine before attempting this
procedure.
1. To gain access to the " Gear Reduction Compartment"
remove the four 14 mm (9/16-inch) hex head bolts that
secure the hood to the engine and remove engine hood.
2. Drain the clutch compartment oil (Figure 8) by removing
the magnetic 9 mm (3/8-inch) plug located at the bottom of
the Gear Reduction Assembly.
The Gear Reduction Compartment
NOTE
reduction. Remember each compartment requires a different
type of lubricating oil.
consist of two compartments, a lower
lower
and upper. The
houses the clutch, the
compartment contains the actual gear
compartment
uppe
r
Figure 13. Clutch Adjustment Lock Location
NOTE
3. To gain access to the "
the six 12 mm (1/2-inch) cap screws (Figure 12 ) and lock
washers that secure the clutch inspection door. Remove
door and gasket.
Figure 12. Clutch Inspection Door
clutch Inspection door
" remove
C. When the clutch has been satisfactorily adjusted reinstall
the
bolt.
D. Reinstall the
(1/2-inch) cap screws and lock washers, and also check
that the gasket is not worn or broken.
E. Remove the 9 mm (3/8-inch) square head pipe plug located
on the lower clutch compartment. Refill the clutch
compartment with 2.12 liters (2-1/4 quarts) of SAE 30 motor
oil to the level of the plug. When done reinstall plug.
F. Start engine, check for proper clutch engagement and
inspect for any oil leaks.
(Figure 13) P/N EM934040 is visible.
If the clutch cannot be adjusted, it may
be necessary to inspect or replace the
clutch.
adjustment lock
clutch Inspection door
P/N EM 934040 and tighten lock
adjusting ring
P/N EM 934045
using the six 12 mm
4. Check that the clutch is disengaged by pulling the shifter
lever towards the engine end of the mixer.
5. Refer to Figure 13 for steps 5A through 5F:
PAGE 20 — MULTIQUIP EM-900SDCE— PARTS & OPERATION MANUAL — REV. #1 (07/02/04)
NOTE
Any questions regarding the above
procedure please contact the Multiquip
Service Department.
Page 21

EM-900SDCE MIXER — TROUBLESHOOTING (ENGINE)
Practically all breakdowns can be prevented by proper
handling and maintenance inspections, but in the event of a
breakdown, please take a remedial action following the
diagnosis based on the Engine Troubleshooting (Table 5)
information shown below and on the proceeding page. If the
problem cannot be remedied, please leave the unit just as it
is and consult our company's business office or service
plant.
NOTPMYSMELBORPELBISSOPNOITULOS
?pmupnoitcejnignihcaerleufoN .metsysleuferitnekcehC.leufddA
?pmupleufevitcefeD.pmupleufecalpeR
?deggolcretlifleuF .knatnaelcdnaretlifleufecalpeR
sitratsrotratstonlliwenignE
nacenignehguohtla,deyaled
.revodenruteb
?enilylppusleufytluaF .enilleufriaperroecalpeR
?wolootnoisserpmoC
?yltcerrocgnikrowtonrotcejnileuF
GNITOOHSELBUORTENIGNE.5ELBAT
?noitisop"POTS"nisirevellortnocdeepS .noitisop"TRATS"otrevellortnocdeepsteS
rotsujdA.sevlavdnarednilyc,notsipkcehC
.launamriaperenignerepriaper
htiwecnadroccanirotcejniecalperroriapeR
.launamriaperenigne
?wolooterusserpliO .erusserplioenignekcehC
dedeecxetimilerutarepmetgnitratswoL
otecnatsiseretauqedanisahsetarapesleuF
lliwenigneserutarepmetwoltA
.tratston
sanoosspotstubserifenignE
.ffodehctiwssiretrats
gnirudflestiybspotsenignE
.noitarepolamron
?serutarepmetwol
.leuf
?kcihtootlioenignE
?noitisopPOTSnirevelelttorhT .noitisopNURotrevelelttorhtnoitisopeR
?dekcolbretlifleuF.retlifleufecalpeR
?dekcolbylppusleuF .metsysleuferitneehtkcehC
?ytpmeknatleuF.leufddA
?dekcolbretlifleuF.retlifleufecalpeR
.ytisocsivlioreporp
.tnemnorivneretniwrof
dnasnoitcurtsnignitratsdlochtiwylpmoC
segremeleuf)dibrutton(raelcrehtehwkcehC
noitcejnimorfhcated(enilleufehtmorf
mraw,detarapesrodibrutsileufehtfI.)pmup
leufetelpmocehtniardroenigneehtpu
leseidedargretniwhtiwleufeR.metsysylppus
liofoepyttcerrochtiwesacknarcenignellifeR
MULTIQUIP EM-900SDCE — PARTS & OPERATION MANUAL — REV. #0 (07/02/04) — PAGE 21
Page 22

EM-900SDCE MIXER — TOUBLESHOOTING (ENGINE/MIXER)
)DEUNITNOC(GNITOOHSELBUORTENIGNE.5ELBAT
NOTPMYSMELBORPELBISSOPNOITULOS
?ytpmeknatleuF.retlifleufecalpeR
?deggolcretlifleuF.retlifleufecalpeR
dnatuptuo,rewopenignewoL
.deeps
?etauqedanisignitnevknatleuF .detnevyletauqedasiknattahterusnE
detcelesniniamertonseodrevellortnocdeepS
.noitcaevitcerrocroflaunamenigneeeS
?noitisop
?llufootlevellioenignE ?levellioenignetcerroC
dnatuptuorewopenignewoL
tsuahxekcalb,deepswol
.ekoms
?dekcolbretlifriA .retlifriaecalperronaelC
?secnaraelcevlavtcerrocnI .noitacificepsenignerepsevlavtsujdA
?rotcejnitanoitcnuflaM.launamenigneeeS
Practically all breakdowns can be prevented by proper handling and maintenance inspections, but in the event of a
breakdown, please take a remedial action following the diagnosis based on the Mixer Troubleshooting (Table 6) information
shown below. If the problem cannot be remedied, please leave the unit just as it is and consult our company's business
office or service plant.
GNITOOHSELBUORTREXIM.6ELBAT
MOTPMYS MELBORPELBISSOP NOITULOS
?niprotcennocnekorB
.etatortonlliwsedalB
?hctulcdetsujda-simroevitcefeD .hctulcecalperrotsujdA
.sdne
murdmorfgnikaellairetaM
?slaes
?deggolcretlifria
)tlit(egrahcsidottluciffidmurD
?stekcarb
tfahselddapevitcefedronroW
,metsysrenaelc-rianinoitcnuflaM
troppusmurdnrowroevitcefeD
.thgitootdetsujdasedalB .murdfosllawedishcuottsomlayehtlitnusedalbtsujdA
.slaesecalperrotsujdA
.retlifriaecalperronaelC
.ecalperrotekcarbotesaergylppA
.gniredronehw751369N/PesU.niprotcennocecalpeR
PAGE 22 — MULTIQUIP EM-900SDCE— PARTS & OPERATION MANUAL — REV. #1 (07/02/04)
Page 23

NOTE PAGE
MULTIQUIP EM-900SDCE — PARTS & OPERATION MANUAL — REV. #0 (07/02/04) — PAGE 23
Page 24

EXPLANATION OF CODE IN REMARKS COLUMN
How to read the marks and remarks used in this parts book.
Section 1: Items Found In the “Remarks” Column
Serial Numbers-Where indicated, this indicates a serial
number range (inclusive) where a particular part is used.
Model Number-Where indicated, this shows that the
corresponding part is utilized only with this specific model
number or model number variant.
Section 2: Items Found In the “Items Number” Column
All parts with same symbol in the number column,
>
, belong to the same assembly or kit.
If more than one of the same reference
NOTE
NOTE
number is listed, the last one listed
indicates newest (or latest) part
available.
The contents of this parts catalog
are subject to change without notice.
, #, +, %, or
*
PAGE 24 — MULTIQUIP EM-900SDCE— PARTS & OPERATION MANUAL — REV. #1 (07/02/04)
Page 25

EM-900SDCE MIXER — SUGGESTED SPARE PARTS
EM-900SDCE 1 TO 3 UNITS
Qty. P/N Description
6 ............ 491010 ............ RUBBER LATCH ASSY.
1 ............ EM200293 ...... PADDLE ARM TOW SIDE
1 ............ EM200294 ...... PADDLE ARM CENTER TOW SIDE
1 ............ EM200295 ...... PADDLE ARM CENTER ENGINE SIDE
1 ............ EM200296 ...... PADDLE ARM ENGINE SIDE
3 ............ EM200863 ...... RUBBER BLADE KIT (STEEL DRUM)
2 ............ EM200297 ...... U-BOLT
2 ............ EM200268 ...... U-BOLT
2 ............ EM902153 ...... BEARING, PADDLE SHAFT
3 ............ EM963157 ...... CONNECTOR BOLT
1 ............ EM934041 ...... CLUTCH, DRIVEN MEMBER
6 ............ EM200301 ...... PACKING RING
1 ............ 3249................ CAP, DUST
2 ............ 20561-001 ...... BEARING SEALED
4 ............ EM200285 ...... PACKING GLAND
4 ............ 507844 ............ SPRING
4 ............ EM200286 ...... CARRIAGEBOLT SPECIAL
2 ............ EM200287 ...... ADJUSTMENT BOLT
EM-900SDCE 5 TO 10 UNITS
Qty. P/N Description
4 ............ 491010 ............ RUBBER LATCH ASSY.
2 ............ EM200293 ...... PADDLE ARM TOW SIDE
2 ............ EM200294 ...... PADDLE ARM CENTER TOW SIDE
2 ............ EM200295 ...... PADDLE ARM CENTER ENGINE SIDE
2 ............ EM200296 ...... PADDLE ARM ENGINE SIDE
6 ............ EM200863 ...... RUBBER BLADE KIT (STEEL DRUM)
4 ............ EM200297 ...... U-BOLT
4 ............ EM200268 ...... U-BOLT
4 ............ EM902153 ...... BEARING, PADDLE SHAFT
5 ............ EM963157 ...... CONNECTOR BOLT
1 ............ EM934041 ...... CLUTCH, DRIVEN MEMBER
24 .......... EM200301 ...... PACKING RING
2 ............ 3249................ CAP, DUST
4 ............ 20561-001 ...... BEARING SEALED
8 ............ EM200285 ...... PACKING GLAND
8 ............ 507844 ............ SPRING
8 ............ EM200286 ...... CARRIAGEBOLT SPECIAL
4 ............ EM200287 ...... ADJUSTMENT BOLT
MULTIQUIP EM-900SDCE — PARTS & OPERATION MANUAL — REV. #0 (07/02/04) — PAGE 25
Page 26

NAME PLATE AND DECALS
EM-900SDCE MIXER — NAME PLATE AND DECALS
PAGE 26 — MULTIQUIP EM-900SDCE— PARTS & OPERATION MANUAL — REV. #1 (07/02/04)
Page 27

EM-900SDCE — NAME PLATE AND DECALS
NAME PLATE AND DECALS
NO PART NO PART NAME QTY. REMARKS
1 DCL212 DECAL: FORKLIFT (LEFT) 1
2 DCL213 DECAL: FORKLIFT (RIGHT) 1
3 DCL280 DECAL: WARNING, STAND CLEAR OF DUMP HANDLE 1
4 513479 DECAL: WARNING, DO NOT REMOVE SAFETY GRATE 1
5 948121 DECAL: IMPORTANT, SELF ADJUSTING SEALS 1
6 PLATE : SERIAL NO. ......................................................... 1 ......... CONTACT MQ PARTS
....................................................................................................... DEPT. W/MODEL & S/N
7 11092 DECAL: CE 1
8 13118 DECAL: POWDER COATED 1
9 948013 DECAL: TRANSMISSION OIL FILLER 1
10 948012 DECAL: CLUTCH OIL FILLER 1
SEE DECAL ILLUSTRATIONS ON PAGES 6 AND 7.
MULTIQUIP EM-900SDCE — PARTS & OPERATION MANUAL — REV. #0 (07/02/04) — PAGE 27
Page 28

NAME PLATE AND DECALS
EM-900SDCE — NAME PLATE AND DECALS
PAGE 28 — MULTIQUIP EM-900SDCE— PARTS & OPERATION MANUAL — REV. #1 (07/02/04)
Page 29

EM-900SDCE — NAME PLATE AND DECALS
NAME PLATE AND DECALS
NO PART NO PART NAME QTY. REMARKS
1 DCL216 DECAL: DANGEROUS FUMES 1
2 DCL211 DECAL: EYE PROTECTION 1
3 DCL210 DECAL: HEARING PROTECTION 1
4 DCL224 DECAL: CLUTCH LEVER 1
5 DCL215 DECAL: READ SERVICE MANUAL 1
6 DCL214 DECAL: READ OPERATION MANUAL 1
7 EM948630 DECAL: PUSH TO STOP 1
8 DCL227 DECAL: MULTIQUIP (SMALL) 2
9 CIPDCL160 DECAL: WARNING CRUSH HAZD. 2
10 504713 DECAL: WARNING,READ OWNER'S MANUAL 1
11 35137 DECAL: WARNING, AVOID INJURY (READ MANUAL) 1
12 DCL219 DECAL: NO SMOKING 1
13 DCL218 DECAL: NO MAINT. WHEN RUNNING 1
14 DCL217 DECAL: KEEP GRATE CLOSED 1
15 DCL225 DECAL: DO NOT CLEAN MIXER 1
16 DCL226 DECAL: DO NOT MOVE MIXER 1
17 DCL222 DECAL: INSPECTION 1
18 DCL228 DECAL: MULTIQUIP (LARGE) 1
19 DCL330 DECAL: NOISE LEVEL 1
SEE DECAL ILLUSTRATIONS ON PAGES 6 AND 7.
MULTIQUIP EM-900SDCE — PARTS & OPERATION MANUAL — REV. #0 (07/02/04) — PAGE 29
Page 30

MIXING DRUM ASSY.
EM-900SDCE MIXER — MIXING DRUM ASSEMBLY
PAGE 30 — MULTIQUIP EM-900SDCE— PARTS & OPERATION MANUAL — REV. #1 (07/02/04)
Page 31

EM-900SDCE MIXER — MIXING DRUM ASSEMBLY
MIXING DRUM ASSY.
NO PART NO PART NAME QTY. REMARKS
1 512990 PADDLE SHAFT 1
2 EM963610 SCREW, HHCS 3/8 "NC X 1-1/4" G5 ................... 6 ......... REPLACES P/N 492375
3 EM201537 HANDLE, DUMP 1
4 6109160 NUT, HEX 1/2" ..................................................... 2 ......... REPLACES P/N 492556
5 EM963692 BOLT, 1/2" UNC X 1-1/2 2
6 EM966048 CARRIAGE BOLT 3/8-16 x 1-1/4 8
7 EM200286 CARRIAGE BOLT SPECIAL 4
8 512983 DRUM ASSY. 1
9 EM200237 PACKING BOX WELDMENT 2
10 EM200303 FOLLOWER RING 2
11 EM200301 PACKING RING 12
12 EM200285 PACKING GLAND 4
13 EM200288 PRESSURE PLATE 2
14 507844 SPRING 4
15 492602 WASHER, FLAT 5/8" 4
16 EM200287 ADJUSTMENT BOLT 4
17 EM200018 SET COLLAR 2
18 492470 SET SCREEN 4
19 EM963057 SCREW, HHCS 3/8" X 1-1/2" ............................... 2 ......... REPLACES P/N 505196
20 20561-001 BEARING, SEALED 2
21 EM201648 DRUM HEAD 2
22 EM916019 GREASE, ZERK FITTING ................................... 2 ......... REPLACES P/N 491705
23 513153 BRACKET, DRUM 2
24 512943 END LINER SET 1
25 512944 SIDE LINER 1
26 512960 MOVING GRATE 1
27 512989 FIXED GRATE 1
29 EM969013 LOCK NUT 3/8" .................................................... 6 ......... REPLACES P/N 492583
31 506109 WASHER 1
32 EM969023 LOCK NUT ........................................................... 1 ......... REPLACES P/N 492586
33 513035 SAFETY BAR 1
34 492600 WASHER, FLAT 1/2" 1
35 EM963102 BOLT, G5 .............................................................. 1 ......... REPLACES P/N 492393
36 3019092 WASHER, FLAT 3/8 ............................................. 4 ......... REPLACES P/N 492598
37 506488 WASHER, LOCK 3/8 4
38 491008 CAP, ZERK FITTING 4
39 492584 LOCK NUT 1/2" 2
40 3249 CAP, DUST 1
41 15081 GRIP 1
MULTIQUIP EM-900SDCE — PARTS & OPERATION MANUAL — REV. #0 (07/02/04) — PAGE 31
Page 32

PADDLE SHAFT ASSEMBLY
EM-900SDCE MIXER — PADDLE SHAFT ASSEMBLY
PAGE 32 — MULTIQUIP EM-900SDCE— PARTS & OPERATION MANUAL — REV. #1 (07/02/04)
Page 33

EM-900SDCE MIXER — PADDLE SHAFT ASSEMBLY ASSEMBLY
PADDLE SHAFT ASSY.
NO. PART NO. PART NAME QTY. REMARKS
1 512990 PADDLE SHAFT 1
2 492584 NUT, LOCK 1/2" 6
3 EM200295 PADDLE CAST, CENTER ENGINE END 1
4 510721 B0LT, 1/2 " X 6" G5 2
5 EM200292 INSERT, PADDLE ARM 4
6 EM200296 PADDLE CAST, ENGINE END 1
7 504322 WASHER, FLAT 1/2" 6
8 EM200297 U-BOLT, END PADDLES 2
9 EM200294 PADDLE CAST, CENTER TOW END 1
10
11
12
13
14
15
16 EM200293 PADDLE CAST, TOW END 1
17
18
19 EM200863 KIT, WIPERS, SCRAPERS AND HARDWARE ........... 1 ...................INCLUDES ITEMS W/
492367 SCREW, HHC 5/16-18 X 1-3/4 G5 14
*
EM923023 WASHER, FLAT 5/16" 28
*
EM200212 WIPER, BOTTOM, RUBBER 4
*
EM203432 TOP SCRAPPER BLADE 4
*
2105164 NUT, HEX 5/16" NC G5 14
*
EM923343 WASHER, LOCK 5/15" 14
*
EM203433 SIDE SCRAPPER BLADE 2
*
EM200213 WIPER, RUBBER SIDE 2
*
*
MULTIQUIP EM-900SDCE — PARTS & OPERATION MANUAL — REV. #0 (07/02/04) — PAGE 33
Page 34

CABINET ASSEMBLY
EM-900SDCE MIXER — CABINET ASSY.
PAGE 34 — MULTIQUIP EM-900SDCE— PARTS & OPERATION MANUAL — REV. #1 (07/02/04)
Page 35

EM-900SDCE — CABINET ASSY.
CABINET ASSY.
NO PART NO PART NAME QTY. REMARKS
1 513053 CABINET, ENGINE W/DECALS .................. 1 ........... INCLUDES ITEMS W/
2 490202 RUBBER PROTECTOR 4
3 13287 LOCK NUT 8-32 ........................................... 6 ........... REPLACEMENT PART ONLY
4 2203 WASHER, FLAT #10 .................................... 6 ........... REPLACEMENT PART ONLY
5 1307 SCREW RHMS 8-32 X 1/2" ......................... 6 ........... REPLACEMENT PART ONLY
6
*
7 492375 BOLT 3/8" NC X 1" G5 4
8 492598 WASHER, FLAT 3/8" 4
9 492583 NUT 3/8" NC G5 4
491010 LATCH ASSY., COMPLETE 2
*
MULTIQUIP EM-900SDCE — PARTS & OPERATION MANUAL — REV. #0 (07/02/04) — PAGE 35
Page 36

FRAME ASSY.
EM-900SDCE MIXER — FRAME ASSY.
PAGE 36 — MULTIQUIP EM-900SDCE— PARTS & OPERATION MANUAL — REV. #1 (07/02/04)
Page 37

EM-900SDCE MIXER — FRAME ASSY.
FRAME ASSY.
NO PART NO PART NAME QTY. REMARKS
1 514842 DRUM LATCH 1
2 491692 COTTER PIN 3/16" X 1-1/4" 1
3 530023 SPRING, COMPRESSION 1
4 507444 WASHER, FLAT 3/4" 1
5 492584 NUT, HEX 1/2" 10
6 504322 WASHER , FLAT 1/2" 4
7 492394 BOLT, 1/2" NC X 1-1/2" G5 10
8 513050 SUPPORT BRACKET TRAMSMISSION 1
9 490957 RETENTION RING 5100-100 4
10 512937 AXLE, REAR ASSY. (RIGID) 1
11 513010 FRAME, EM900SD CE 1
13 491008 GREASE FITTING 1
14 491700 CAP GREASE FITTING 1/4" NPT 1
15 512942 AXLE, FRONT ASSY. 1
16 492400 BOLT, 1/2" NC 3-1/2" G5 1
17 491692 COTTER PIN 3/16" X 2" 1
18 492537 CASTLE NUT, 1-1/4" NF 1
19 513042 HANDLE TOW 1
20 15081 HAND GRIP 2
MULTIQUIP EM-900SDCE — PARTS & OPERATION MANUAL — REV. #0 (07/02/04) — PAGE 37
Page 38

HATZ ENGINE ASSY.
EM-900SDCE MIXER — HATZ ENGINE ASSY.
PAGE 38 — MULTIQUIP EM-900SDCE— PARTS & OPERATION MANUAL — REV. #1 (07/02/04)
Page 39

EM-900SDCE MIXER — HATZ ENGINE ASSY.
HATZ ENGINE ASSY.
NO PART NO PART NAME QTY. REMARKS
1 1B30 HATZ DIESEL 6.8 HP 1
2 506257 U-BOLT 1
3 504322 WASHER , FLAT 1/2" 1
4 492394 BOLT, 1/2" NC X 1-1/2" G5 1
5 513973 EXHAUST MOUNTING TUBE 1
6 492584 NUT, HEX 1/2" 1
7 513716 STUB SHAFT 1
8 502625 KEY, 1/4" X 25 MM 1
9 513954 ADAPTER PLATE 1
10 512899 OIL SEAL 1
11 13379 WASHER, LOCK 3/8" 4
12 506612 BOLT, M10 X 35 P-1.5G 4
13 492468 SET SCREW 1
14 801965 GASKET 1
15 512223 STUD 7/16" X 2" 4
16 511121 TRANSMISSION, MECHANICAL 1
17 492555 NUT, HEX 7/16 G5 4
18 492625 WASHER, LOCK 4
19 510229 THROTTLE CABLE 1
20 492581 NUT, HEX 1/4" 1
21 512900 BRACKET, THROTTLE CABLE 1
22 EM963007 CAP SCREW 1-1/4" X 1-1/2" G5 ................................ 1 .......... REPLACES EM492359
23 TBD THROTTLE CABLE CLAMP 1
24 511123 SHIM O.018" 2
25 511122 SHIM 0.030" 2
28 491089 SCREW, CG 8 NC X 1/4" G 2
29 EM501102 NIPPLE THROTTLE ANCHOR 1
30 492581 NUT, HEX 1/4" 1
31 513213 GUIDE, THROTTLE CABLE 1
32 EM934022 CLUTCH ASSY. ........................................................... 1 .......... INCLUDES ITEMS/W#
33# 9503 SLOTTED HHCS 1/4-20 X 1/2” 1
34# EM934040 ADJUSTING LOCK 1
35# EM934039 CLUTCH HOUSING 1
36# EM934043 RELEASE SLEEVE 1
37 EM492359 ADJUSTMENT RING 2
38# EM969009 LOCK NUT 2
39# EM934044 RELEASE BEARING ASM 1
40# EM963289 BOLT 2
41# EM934042 PRESSURE PLATE ASM 1
42# EM934041 SPLINED CENTER W/FACING 1
43# EM918009 SPRING 3
44# EM961045 SET SCREW, 5/16-18 X 1/2”NYLOC 1
45 492365 BOLT, 5/16" NC X 1-1/4" G5 4
46 505679 WASHER, FLAT 5/16 4
47 492623 WASHER, LOCK 4
48 492553 NUT, HEX 5/16" G5 4
49# EM959012 LEVER 6
50# EM925016 LONG LINK PIN 3
51# EM925018 SHORT LINK PIN 3
52# EM925013 LEVER PIN 3
53# EM934053 CONNECTING LINK 6
54# 5117 COTTER PIN 9
55# EM934054 ROLLER 3
MULTIQUIP EM-900SDCE — PARTS & OPERATION MANUAL — REV. #0 (07/02/04) — PAGE 39
Page 40

TRANSMISSION ASSY.
EM-900SDCE — TRANSMISSION ASSY.
PAGE 40 — MULTIQUIP EM-900SDCE— PARTS & OPERATION MANUAL — REV. #1 (07/02/04)
Page 41

EM-900SDCE — TRANSMISSION ASSY.
TRANSMISSION ASSY.
NO PART NO PART NAME QTY. REMARKS
1# 2200 SCREW, HHCS 3/8-24 X 2" 1
2# EM600029 SHIFTER SHAFT 1
3# EM914005 SEAL 1
4# EM600028 CLUTCH YOKE 1
5# 0181 B LOCK WASHER 1/4” 2
6# 0730 SCREW, HHCS 1/4-20 X 1” 2
7# EM926029 SNAP RING 2
8# EM600023 BEARING RETAINER 1
9# EM600022 BEARING RETAINER GASKET 1
10# 914209 SEAL 1
11# EM902091 BALL BEARING 4
12# EM600016 INPUT PINION SHAFT 1
13# EM911329 SQ HEAD MAG. PINE PLUG 3/8” 2
14# EM600020 INTERNAL GEAR 1
15# EM010062 SQ KEY 3/8 X 1-3/8” 1
16# EM600131 OUTPUT DRIVE PINION 1
17# 10136 FLAT WASHER 3/8” 1
18# EM902161 BALL BEARING 1
19 507658 SCREW, HHCS 5/8 X 4-1/2” G5 1
20 EM961019 SET SCREW, SQHSS 3/8-16 X 1-1/4” CUP ..... 2............. REPLACES P/N 492484
21 512991 PADDLE SHAFT COUPLER 1
22 EM010022 SQ KEY 3/8 X 3/8 X 1-3/4’ 1
23 EM969023 LOCK NUT 3/8" 1-1/4" ...................................... 1............. REPLACES P/N 492586
24# 600015 OUTPUT SHAFT 1
25# 914207 OIL SEAL 1
26# 600014 TRANSMISSION COVER 1
27# 1729 ROLL PIN 1
28# EM926036 SNAP RING 1
29# EM911064 SQ HEAD PINE PLUG 1/2 NPT 2
30# EM600012 MAIN TRANSMISSION HOUSING 1
31# EM911356 BREATHER VENT PIPE PLUG 1/2” 2
32# EM600133 OUTPUT SHAFT GEAR 1
33# EM600024 LOCK PLATE 1
34# EM927048 WOODRUFF KEY #A 1
35# 10133 LOCK NUT 3/8-16 1
36# EM600021 TRANSMISSION COVER GASKET 1
37 EM600018 SHIFTER LEVER 1
38# 0161 C LOCK WASHER 3/8” 17
39# 0202 SCREW, HHCS 5/8-16 X 1” 17
40# 4196 SCREW, HHCS 3/8-16 X 3/4” 6
41# 1875 INTER. SHKP WASHER 3/8” 6
42# EM931233 SHIFTER COVER 1
43# EM600026 SHIFTER COVER GASKET 1
44 EM300999 STUD 7/16-14 X 2-1/16” 4
45 2955 LOCK WASHER 7/16” 4
46 EM968010 HEX NUT 7/16-14 4
47 EM925109 DOWEL PIN 3
48 EM801965 GASKET 1
49 EM600000 COMPLETE TRANS. ASSY. ............................. 1............. INCLUDES ITEMS W/#
MULTIQUIP EM-900SDCE — PARTS & OPERATION MANUAL — REV. #0 (07/02/04) — PAGE 41
Page 42

Effective: October 1, 2002
TERMS AND CONDITIONS OF SALE — PARTS
PAYMENT TERMS
Terms of payment for parts are net 10 days.
FREIGHT POLICY
All parts orders will be shipped collect or
prepaid with the charges added to the invoice.
All shipments are F.O.B. point of origin.
Multiquip’s responsibility ceases when a signed
manifest has been obtained from the carrier,
and any claim for shortage or damage must be
settled between the consignee and the carrier.
MINIMUM ORDER
The minimum charge for orders from Multiquip is $15.00 net. Customers will be asked
for instructions regarding handling of orders
not meeting this requirement.
RETURNED GOODS POLICY
Return shipments will be accepted and credit
will be allowed, subject to the following provisions:
1. A Returned Material Authorization must
be approved by Multiquip prior to shipment.
2. To obtain a Return Material Authorization,
a list must be provided to Multiquip Parts
Sales that defines item numbers, quantities, and descriptions of the items to be
returned.
a. The parts numbers and descriptions
must match the current parts price
list.
b. The list must be typed or computer
generated.
c. The list must state the reason(s) for
the return.
d. The list must reference the sales
order(s) or invoice(s) under which the
items were originally purchased.
e. The list must include the name and
phone number of the person requesting the RMA.
3. A copy of the Return Material Authorization must accompany the return shipment.
4. Freight is at the sender’s expense. All
parts must be returned freight prepaid to
Multiquip’s designated receiving point.
5. Parts must be in new and resalable con-
6. The following items are not returnable:
7. The sender will be notified of any material
8. Such material will be held for five working
9. Credit on returned parts will be issued at
10. In cases where an item is accepted, for
11. Credit issued will be applied to future
PRICING AND REBATES
Prices are subject to change without prior
notice. Price changes are effective on a specific date and all orders received on or after that
date will be billed at the revised price. Rebates
for price declines and added charges for price
increases will not be made for stock on hand
at the time of any price change.
Multiquip reserves the right to quote and sell
dition, in the original Multiquip package (if
any), and with Multiquip part numbers
clearly marked.
a. Obsolete parts. (If an item is in the
price book and shows as being replaced by another item, it is obsolete.)
b. Any parts with a limited shelf life
(such as gaskets, seals, “O” rings,
and other rubber parts) that were purchased more than six months prior to
the return date.
c. Any line item with an extended dealer
net price of less than $5.00.
d. Special order items.
e. Electrical components.
f. Paint, chemicals, and lubricants.
g. Decals and paper products.
h. Items purchased in kits.
received that is not acceptable.
days from notification, pending instructions. If a reply is not received within five
days, the material will be returned to the
sender at his expense.
dealer net price at time of the original
purchase, less a 15% restocking charge.
which the original purchase document
can not be determined, the price will be
based on the list price that was effective
twelve months prior to the RMA date.
purchases only.
direct to Government agencies, and to Origi-
nal Equipment Manufacturer accounts who
use our products as integral parts of their own
products.
SPECIAL EXPEDITING SERVICE
A $35.00 surcharge will be added to the invoice
for special handling including bus shipments,
insured parcel post or in cases where Multiquip
must personally deliver the parts to the carrier.
LIMITATIONS OF SELLER’S LIABILITY
Multiquip shall not be liable hereunder for
damages in excess of the purchase price of the
item with respect to which damages are
claimed, and in no event shall Multiquip be
liable for loss of profit or good will or for any
other special, consequential or incidental dam-
ages.
LIMITATION OF WARRANTIES
No warranties, express or implied, are made
in connection with the sale of parts or trade
accessories nor as to any engine not manufac-
tured by Multiquip. Such warranties made in
connection with the sale of new, complete units
are made exclusively by a statement of war-
ranty packaged with such units, and Multiquip
neither assumes nor authorizes any person to
assume for it any other obligation or liability
whatever in connection with the sale of its
products. Apart from such written statement of
warranty, there are no warranties, express,
implied or statutory, which extend beyond the
description of the products on the face hereof.
PAGE 42 — MULTIQUIP EM-900SDCE— PARTS & OPERATION MANUAL — REV. #1 (07/02/04)
Page 43

NOTE PAGE
MULTIQUIP EM-900SDCE — PARTS & OPERATION MANUAL — REV. #0 (07/02/04) — PAGE 43
Page 44

PARTS AND OPERATION MANUAL
HERE'S HOW TO GET HELP
PLEASE HAVE THE MODEL AND SERIAL
NUMBER
UNITED STATES
MULTIQUIP CORPORATE OFFICE
18910 Wilmington Ave. Tel. (800)-421-1244
Carson, CA 90746 Fax (310)-537-3927
Contact: mq@multiquip.com
MEXICO
MQ CIPSA
Carr. Fed. Mexico-Puebla KM 126.5 Tel. (52) 222-225-9900
Momoxpan, Cholula, Puebla 72760 Mexico Fax (52) 222-285-0420
Contact: pmastretta@cipsa.com.mx
UNITED KINGDOM
MULTIQUIP (UK) LIMITED HEAD OFFICE
Hanover Mill, Fitzroy Street, Tel. 0161 339 2223
Ashton-under-Lyne, Fax 0161 339 3226
Lancashire OL7 0TL
Contact: kcassell@multiquip.com.uk
CANADA
MULTIQUIP
4110 Industriel Boul. Tel. (450) 625-2244
Laval, Quebec, Canada H7L 6V3 Fax (450) 625-8664
Contact: jmartin@multiquip.com
ON-HAND
WHEN CALLING
^^^^^*^^^^^^^^^^^^^^^^^^^^^^^^^*^6668
BRAZIL
MULTIQUIP
Av. Evandro Lins e Silva, 840 - grupo 505 Tel. 011-55-21-3433-9055
Barra de Tijuca - Rio de Janeiro Fax 011-55-21-3433-9055
RJ CEP 22631-470
Contact: cnavarro@multiquip.com.br, srentes@multiquip.com.br
Your Local Dealer is:
MULTIQUIP (UK) LIMITED
HEAD OFFICE
Hanover Mill, Fitzroy Street,
Ashton-under-Lyne,
Lancashire OL7 0TL
Tel.: 0161 339 2223
Fax: 0161 339 3226
Contact: kcassell@multiquip.com.uk
Internet:multiquip.com
 Loading...