

Page 1
Equipment Installation Instructions
English Translation
Caution: To Avoid Serious Injury
Important: Read the following warnings before beginning an installation. Failure to do so
may result in possible death or serious injury.
DO Adhere to all National and Local Plumbing and Electrical Safety Codes.
DO Turn “off” incoming electrical service switches when servicing, installing, or
repairing equipment.
DO Check that all flare fittings on the carbonation tank(s) are tight. This check
should be performed with a wrench to ensure a quality seal.
DO Inspect pressure on Regulators before starting up equipment.
DO Protect eyes when working around refrigerants.
DO Use caution when handling metal surface edges of all equipment.
DO Handle CO
2 cylinders and gauges with care. Secure cylinders properly against
abrasion.
DO Store CO2 cylinder(s) in well ventilated areas.
DO NOT Throw or drop a CO2 cylinder. Secure the cylinder(s) in an upright position
with a chain.
DO NOT Connect the CO2 cylinder(s) directly to the product container. Doing so will
result in an explosion causing possible death or injury. Best to connect the
CO2 cylinder(s) to a regulator(s).
DO NOT Store CO2 cylinders in temperature above 125°F (51.7°C) near furnaces,
radiator or sources of heat.
DO NOT Release CO2 gas from old cylinder.
DO NOT Touch Refrigeration lines inside units, some may exceed temperatures of
200°F (93.3°C).
Notice: Water pipe connections and fixtures directly connected to a potable water supply
shall be sized, installed and maintained in accordance with Federal, State, and Local codes.
EI218380
Revision C (PW/JRM/KAK) 3 May, 2001
1
Page 2
Equipment Installation Instructions
English Translation
Multiplex Model MPC84B Eight Valve 4-Size/5-Size Portion
Control Board with Top-off (P.N. 00218380)
Run Mode
Size Buttons
Press any size button on any station to dispense product for
that station for pre-programmed time for that respective size.
STOP-FILL Buttons
If no dispense is in progress, press any STOP-FILL button to
manually dispense from the station. If portion dispense is in
progress, press the STOP-FILL button to manually cancel.
Portion Control Water/Soda dispensing
1. Press either the WATER or the SODA button momentarily.
2. Now press any size button on the respective station (within
a maximum of 2 seconds).
3. Portion dispense will continue automatically for that size
only.
Program Modes
Entering the Program Mode CAL No. 1 (total volume)
T o enter the Calibrate No. 1 mode, simultaneously press the
CAL button and the Size 1 button on any station. The CAL light
will come “on” constantly.
Volume Sizing
Note: Use a Calibration Cup (or an appropriate size cup
with the proper amount of ice).
1. Press the respective size button for that cup size at
that station.
2. Fill the cup with product to the correct level.
Note: This same size button may be started and stopped
as many times as desired to acquire the correct level
while letting the drink settle. All times for the same station and size are additive in the program session.
3. Repeat volume sizing procedure for all sizes and stations needing programming.
Flow Rate Calibration
In the Calibrate No. 1 Mode, press any STOP-FILL button one (1) time. That respective valve will flow for exactly 4 seconds allowing for checking or adjusting the valve
flow rate.
One Station Sets All
Immediately after entering the Calibrate No. 1 Mode,
press any STOP-FILL button two (2) times in less than
1 second. The CAL light will flash constantly, 2 times per
second. Now all volumes on that station programmed in
this session, will copy to all other stations when exiting.
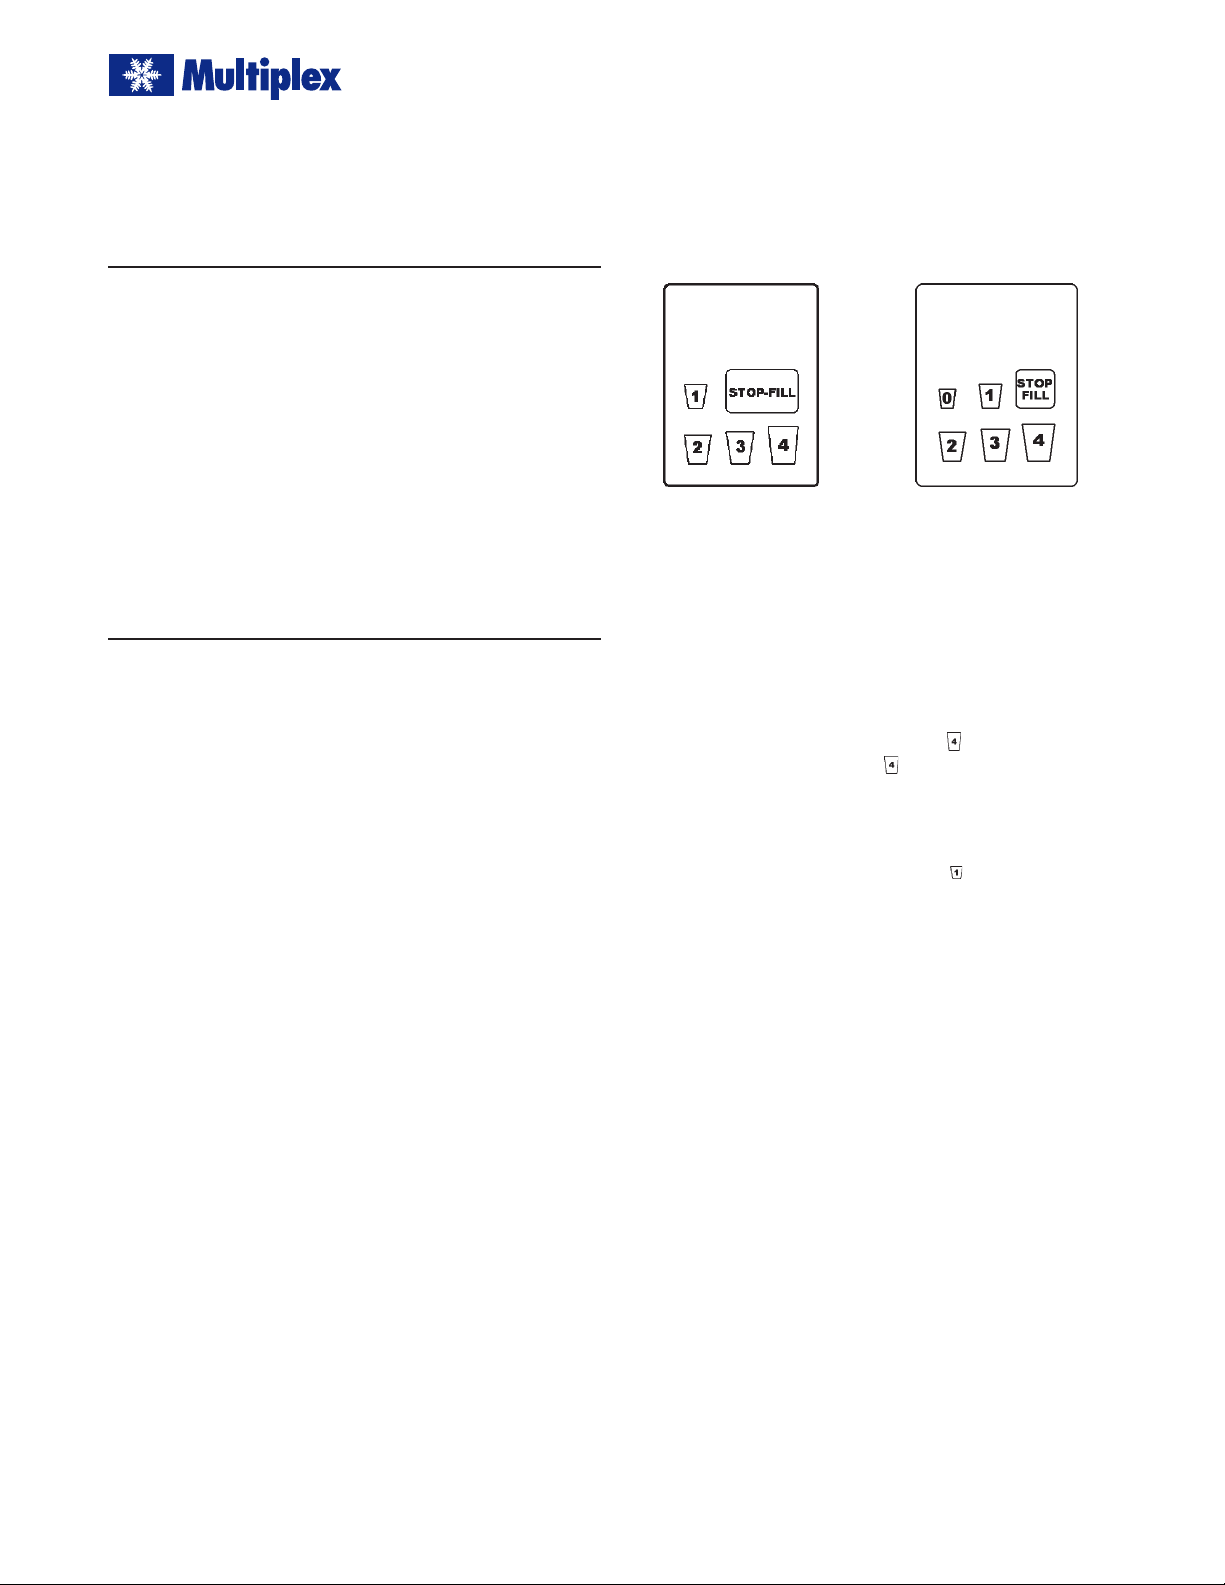
4-Size Keyboard 5-Size Keyboard
Entering the Program Mode CAL No. 2 (incremental)
T o enter Calibrate No. 2 Mode, simultaneously press the CAL
button and the Size 2 button on any station. The CAL light will
flash constantly, one (1) time per second.
Volume in-crementing/de-crementing
1. Press the size switch on the specific station that needs
a small increment of time adjustment. The CAL light
will come “on” constantly indicating this size/station
time is selected.
2. To increase time, press the Size
Each press of the Size button will increase total
selected size stored time by 0.1 seconds. The CAL
light will go “off” every time button is pressed.
Example: 10 presses = 1 second.
3. To decrease time, press the Size
Each press of the Size 1 button will decrease total
selected size stored time by 0.1 seconds. The CAL
light will go “off” every time button is pressed.
4. Press STOP-FILL button on this station to temporarily
save new time for this size this station. The CAL light
will resume flashing.
5. Repeat procedure 1 through 5 for any other size or
station needing incremental time programming
Exiting the Program Mode, CAL No. 2
T o exit, press the CAL button one (1) time turning “off”
the flashing CAL light. All incremental volume changes
made during this session will be permanently stored.
button at this time.
button at this time.
Exiting the Program Mode, CAL No. 1
T o exit, press the CAL button one (1) time turning “off”
the CAL light.
Note: All volume changes made during this session will be
permanently stored.
2
Revision C (PW/JRM/KAK) 3 May, 2001
EI218380
Page 3

Equipment Installation Instructions
English Translation
Multiplex Model MPC84B 4-Size Portion Control Board with
Top-off (P.N. 00218380)
(continued)
Top-off Program Mode
Entering the Top-off Program Mode
To enter the top-off program mode, simultaneously press
CAL button and the Size 4 button on any station. The CAL light
will flash five (5) times and then remain “on”.
Enabling and/or Disabling the individual station Top-off
Enabling the individual station top-off allows every size
dispensed on this station to pour all the volume programmed in two (2) pours with a 3 second delay between
pours. Disabling the individual station top-off allows every size dispensed on this station to pour all the volume
programmed in one pour.
1. Press the STOP-FILL button on the station desired to
change the top-off mode.
2. The CAL light will immediately flash five (5) times to
indicate the top-off mode has been toggled. If the
respective station was disabled for top-off, then it
will toggle to enable for top-off. If the respective
station was enabled for top-off, then it will toggle to
disable for top-off.
Exiting the Top-off Program Mode
T o exit the Top-off P rogram Mode, press the CAL button
one (1) time turning “off” the CAL light. All station topoff mode changes made during this session will be permanently stored.
Sanitation Mode
1. With the power “off”, press the CAL button and turn power
“on” simultaneously.
2. Release the CAL button. Each station will come “on” for
4 seconds sequentially. This allows automatic pouring of
the sanitation fluid from each station for 4 seconds, in
sequence, until each line drains.
Note: If the drain can support more than one (1) valve pouring at a time, press the STOP-FILL button on the station number for the desired number of valves flowing simultaneously.
Example: At station number 3, press the STOP-FILL button,
and three (3) valves will flow simultaneously, in sequence.
Special Programming Mode for
Installers and Service Personnel
Special Programming Mode for Installers and Service
Personel
(Should be set at factory, but may have to be reset in field if
someone inadvertently changes, or water/soda placement
needs to be changed)
Entering Water/Soda Programming Mode CAL No. 3
T o enter water/soda programming mode, press and hold the
CAL button and Size 3 button on any station. The CAL light
will come ON constantly.
Test Mode
1. With the power “off”, press the CAL button and turn power
“on” simultaneously.
2. Release the CAL button. The portion control board will
sequence each station for 4 seconds starting with the left
most (station No. 1).
3. Check that each LED on the Portion Control board comes
“on” sequentially and all valve solenoids come “on”.
Note: If the LED light does not come “on” for any station(s),
the Portion Control board is bad. If the LED light comes “on”
but the valve does not come “on”, check wiring and valve
solenoids.
Once in this mode:
Pressing
will set the special W A TER solenoid driver J10 to come ON
with all dispensing at this station, as well as the WATER
button dispensing plain water from this station. An automatic 2 second pour of the water solenoid from this station will occur, to verify setting.
Pressing
tion, will set the special SODA solenoid driver J9 to come
ON with all dispensing at this station, as well as the SODA
button dispensing soda water from this station. An automatic 2 second pour of water solenoid from this station
will occur, to verify setting.
In addition, you must make sure the correct W A TER and
SODA solenoids (from the stations just programmed) are
wired correctly to J10 and J9 respectively.
Note: that only one WA TER and one SODA station can be programmed at any time.
Press the CAL button to EXIT this programming mode,
CAL LED will go OFF.
SIZE 1 (SMALL) button on any specific station,
SIZE 4 (XLARGE) button on any specific sta-
EI218380
Revision C (PW/JRM/KAK) 3 May, 2001
3
Page 4

Foodservice Group
Multiplex Beverage Equipment Installation Instructions for
Multiplex Model MPC84B 4-Size Portion
Control Board with Top-off (P.N. 00218380)
For use with any Portion Control Keyboard (up to Eight Valves and
up to 5-Size)
4-Size Keyboard
Manitowoc Beverage Equipment
2100 Future Drive Sellersburg, IN 47172-1868
Tel: 812.246.7000, 800.367.4233 Fax: 812.246.9922
www.manitowocbeverage.com
5-Size Keyboard
In accordance with our policy of continuous product development and improvement,
this information is subject to change at any time without notice.
EI218380 Revision C (PW/JRM/KAK) 3 May, 2001
 Loading...