

Page 1

MP3 DIGITAL PLAYER OPERATION MANUAL
MSI P310
Page 2

Thank you for using the MP3 digital player of our company
Please read and retain all the operating instructions before operating the unit.
For better services, the content of this operation manual may be changed.
Specifications are subject to change and improvement without notice
If the actual setup and usage of the unit are different from this operation manual,
please view the website of our company to inquire about the latest product
information.
Page 3

Features
AMV movie function
JPEG picture viewing function
Support various of audio format
Such as MP1, MP2, MP3, WMA, WMV, ASF, WAV etc.
Firmware upgradeable
You can download the latest upgrade software from the website of our company to
improve the function of the unit.
FM stereo radio
FM tuner with 40 station memories (20 station each system)
FM recording
Record your favorite programs to the record folder while listening to the radio
No driver Program necessary under windows2000 and above
"Special space" disk mode
Divide the disk into two part by the enclosed tool of the unit and encrypt one part
to hide the space. Therefore, the files saved in the encrypted part can not be read
and write by others.
Page 4

Digital recording/ A-B repeat function
To record by the microphone, and then save the recorded contents as audio files in
WAV or ACT format. Fragment repeat or contrast repeat function.
7 equalizers
Natural, Rock, Pop, Classical, Soft, Jazz, DBB
Seven recycling mode
Normal, Repeat One, Folder, Repeat Folder, Repeat All, Random, Intro
Timing power off
Flash menu
Built-in double-channel louder speaker
Features INTRODUCTION OF LCD
Page 5

Charging instruction (enclosed presswork picture)
Display
Capacity of battery
The unit introduces 9 grades monitoring.
The indicator is full when the capacity of the battery is 4.2V. The indicator
decreases as the using time increases.
The indicator appears blank when the battery is nearly exhausted. Please
charge in time then.
While charging, please turn on the power switch or the player dose not
response and can not be charged. If there was no operation on the player for
several seconds during charging, it entered screen saver mode automatically
(the screen turns dark).
Please turn off the power when you don't' want to use it.
Page 6
Operation on buttons
Functions of the buttons
1. button: Power on/power off/play//stop pause
2. MENU button: select/enter
3. +/- button: adjust volume
4. button: next/FF
5. button: previous/REW
6. RESET button: initialize
7. USB : USB jack
8. earphone jack : earphone standard jack.
Measures of pressing buttons
There are four measures to press buttons: press momentarily, press & hold, hold
and single press. Expect specified notice, the measures of pressing are press
momentarily in this manual.
Press momentarily: it takes effect once you press the button.
Press & hold: it takes effect and only once after pressing and holding the button
for more than 1.2 seconds.
BASIC FUNCTION BASIC FUNCTION
Page 7

Single hold: press and hold the button, it takes effect until you release the button.
Hold: during pressing and holding the button, it takes effects for several times by
a certain frequency, such as "FF" and "REW".
Basic function
Enter the menu
Enter the menus by pressing the MENU button. There are main menu (press &
hold to enter when it stops), sub-menu while playing (press momentarily to enter)
and sub-menu under stop status (press momentarily to enter).
Browsing operation
select browsing songs, menu option
FF or REW while playing back
Entering different function modes
Enter the different function modes from the main menu.
Main menu: press & hold the MENU button to enter.
Page 8

Music mode AMV playback Record mode Voice playback
FM tuner JPEG browse System Setup E-book
BASIC FUNCTION BASIC FUNCTION
Page 9
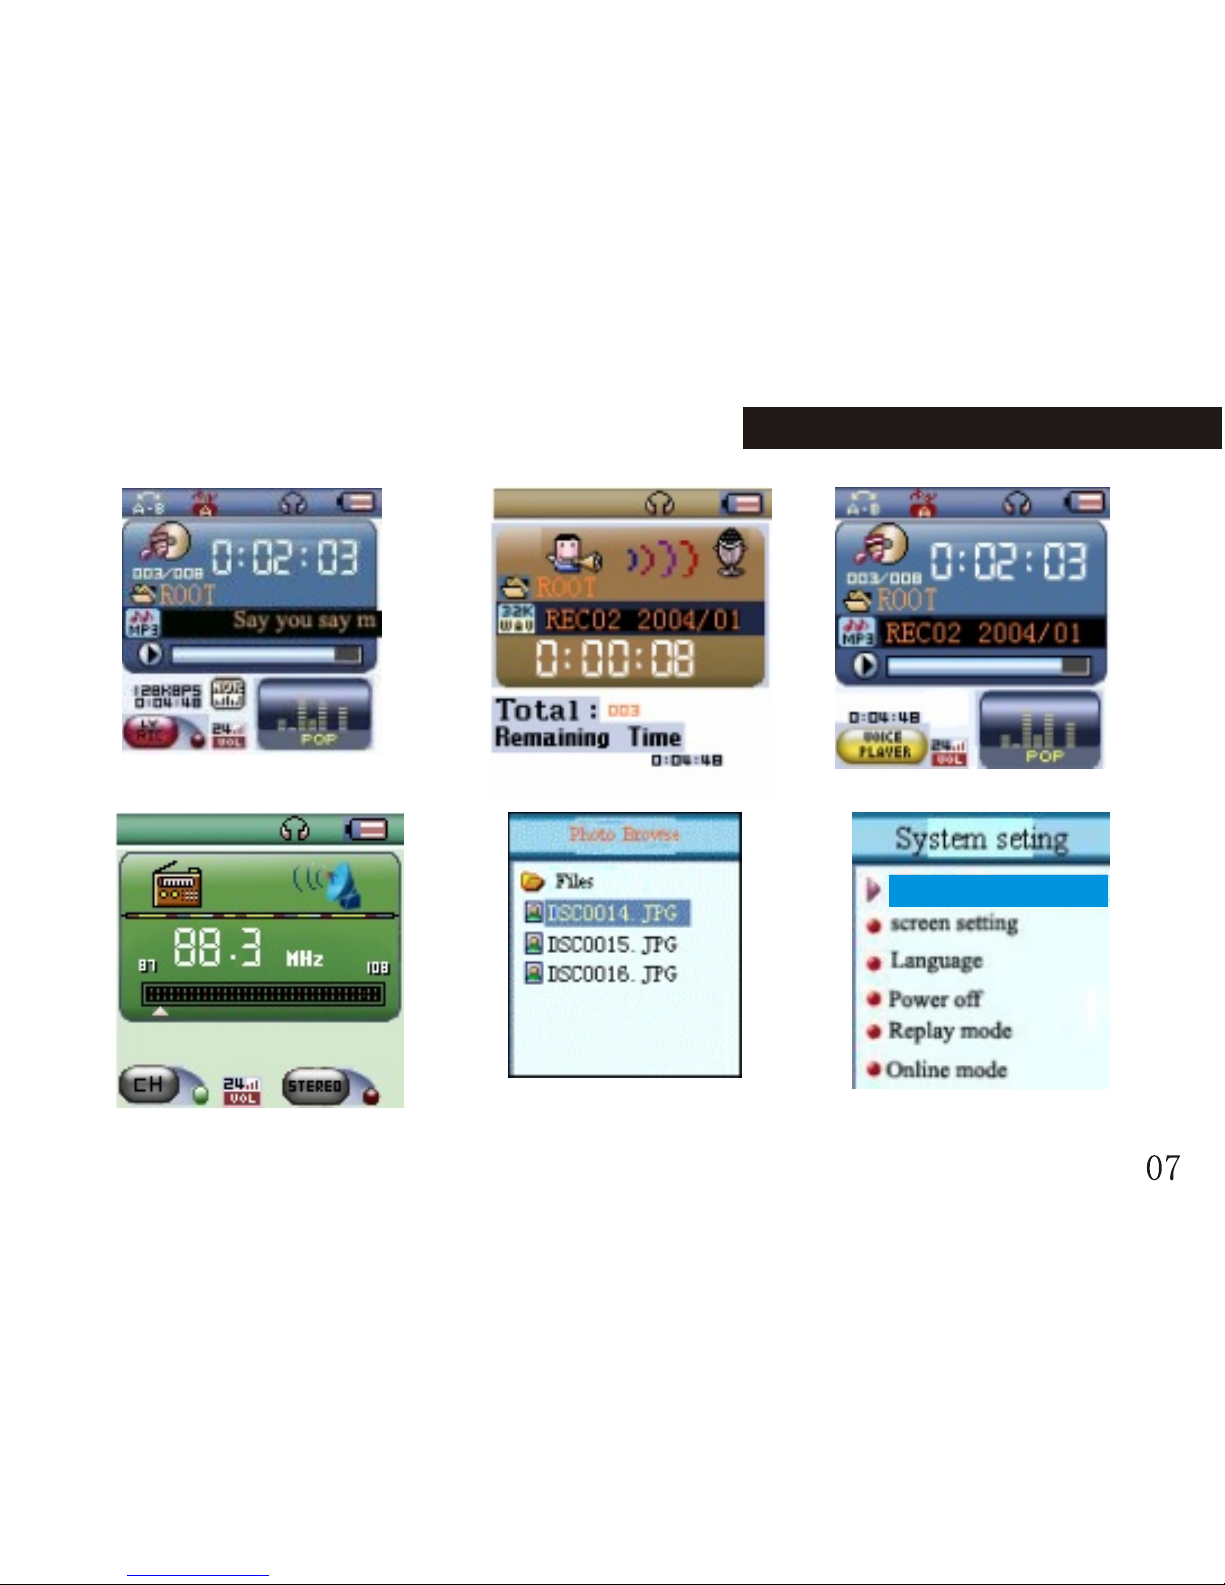
FM mode
Pictures browsing
System setup
Music mode
Voice playback
Record mode
Recording time
Page 10
Enter the USB mode by connecting with the PC (as the following picture):
Adjust volume
: Increase volume; : Decrease the volume
Power on/off
Press hold " " button to power on under
the off status.
Press hold " " button to power on under
the on status.
Play or stop; exit from submenu
Under the music mode, press " " button momentarily to play the music.
Under the music playing status, press " " button momentarily to stop playback.
Record/Pause (press momentarily), stop recording (press & hold)
Under the recording status, press " " button momentarily to pause recording.
Press & hold it to stop recording.
BASIC FUNCTION BASIC FUNCTION
Page 11
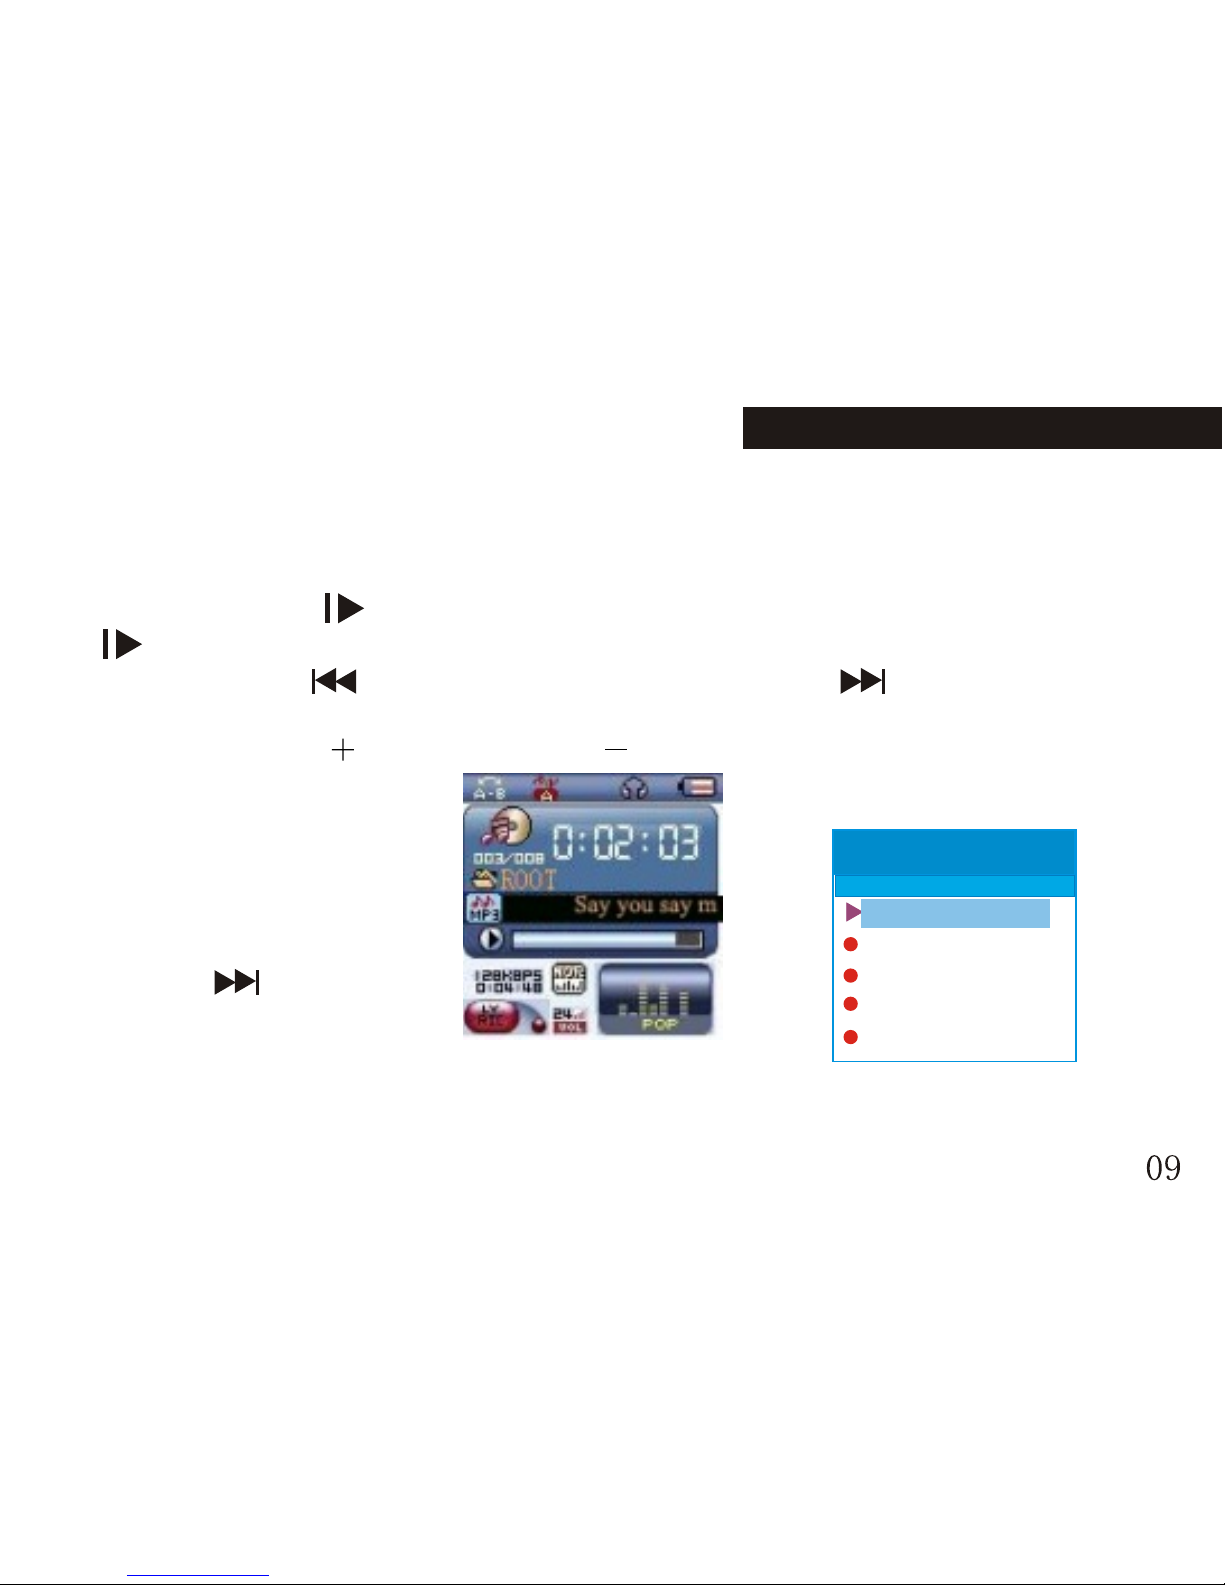
Music playback
Simple operation
1.Plug the earphone into the earphone jack.
2. Press & hold " " button to power on and enter s the "music mode". Press "
" button momentarily to start to play the music.
3.Select music: " " button: select the previous song; " " button: select the
next song.
4.Control volume: : Increase volume; : Decrease the volume
EQ mode
1.While playing music files.
2.Press the MENU button
momentarily to enter the
music submenu.
3.Press " " button
momentarily to select
"Equalizer".
4.Press the MENU button
momentarily to enter the "Equalizer" selection menu.
Equalizer Selection
Normal
Repeat One
Folder
Repeat Folder
Repeat All
Music
Equalizer
Page 12

5. There are 7 equalizers: Natural, Rock, Pop, Classic, Soft, Jazz and DBB.
6. Press " " button to select and press MENU to confirm.
Lyrics synchronization
The player supports "*.LRC" lyric files, to achieve the synchronous play of lyric
and sound.
How to use the lyric file?
The name of lyric file should be consistent with the name of the song file.
For example:
The song file name is: A-Do Night.mp3
The lyric file name is: A-Do Night.lrc
How to know whether it has lyric?
1. If the current song has its consistent lyric file, the dot beside the icon LYRIC is
green, or it is red.
2. Press & hold MENU button to enter the lyrics interface.
BASIC FUNCTION BASIC FUNCTION
Page 13

3. Lyrics displayed.
4. Press the MENU button momentarily to return to the music mode.
5. Thumb the lyrics by hand: press +/- button momentarily to thumb the lyrics.
Conversion and usage of AMV
1.Turn on the PC; put the tool install CD into the CD-ROM after entering the
Windows system. The system runs the install program automatically. Click
"Next" as per the prompt. Click "close" when it prompts install finished to finish
the installation.
2.If the PC does have the auto-run function, please install the program manually.
Double click the Setup.exe file under the root directory of the CD.
Click "Next" as per the prompt. Click "close" when it prompts install finished to
finish the installation.
After the tool is installed, a program group "MP3 Player Utilities" is built in the
"Start" "Program" menu. "AMV Convert Tool" is the convert tool, while "AMV
Player" is player which is used to play the converted AMV files.
Page 14

This tool is used to convert the media files into the AMV format files that the MP3
player can playback. There are 6 media file formats which supports conversion:
1.AVI format files with the extension avi.
2. Windows Media format files with the extension asf or wmv
3. MPEG1 format files with the extension mpg or mpeg
4. Real PLAY format files with the extension rm
5. Quicktime format files with the extension mov
6. MPEG2 format files with the extension vob.
Platform: Windows98, Windows Me, Windows2000 and Windows XP.
Windows Media Player please upgrade to version 9.0 or above. DirectX please
use version 9.0 or above.
Play AMV format
Playing AMV music files please refer to the steps of music playback. While
playing AMV files, only the following buttons are available:
BASIC FUNCTION BASIC FUNCTION
Page 15

" ": stop playback. Press & hold to power off.
MENU: press & hold to enter the main menu.
" "/" ": previous/next; FF/REW.
"+/-": adjust volume.
Usage of AMV convert tool: mp3player Utilities3.57
1.This tool is used to convert the media files into the AMV format files that the
MP3 player can playback. There are 6 media file formats which supports
conversion:
1). AVI format files with the extension avi.
2). Windows Media format files with the extension asf or wmv
3). MPEG1 format files with the extension mpg or mpeg
4). Real PLAY format files with the extension rm
5). QuickTime format files with the extension mov
6). MPEG2 format files with the extension vob.
Page 16

Platform: Windows98, Windows Me, Windows2000 and Windows XP.
Windows Media Player please upgrade to version 9.0 or above. DirectX please
use version 9.0 or above.
2. Install software
The operations of AMV Convert Toll are as below:
2.1 Turn on the PC; put the tool install CD into the CD-ROM after entering the
Windows system. The system runs the install program automatically. Click
"Next" as per the prompt. Click "close" when it prompts install finished to finish
the installation.
2.2 If the PC does have the auto-run function, please install the program manually.
2.2.1 Double click the Setup.exe file under the root directory of the CD.
2.2.2 Click "Next" as per the prompt. Click "close" when it prompts install
finished to finish the installation.
After the tool is installed, a program group "MP3 Player Utilities" is built in
the "Start" "Program" menu. "AMV Convert Tool" is the convert tool, while
"AMV Player" is player which is used to play the converted AMV files.
3. Run the software
3.1 Introduction of buttons
BASIC FUNCTION BASIC FUNCTION
Page 17
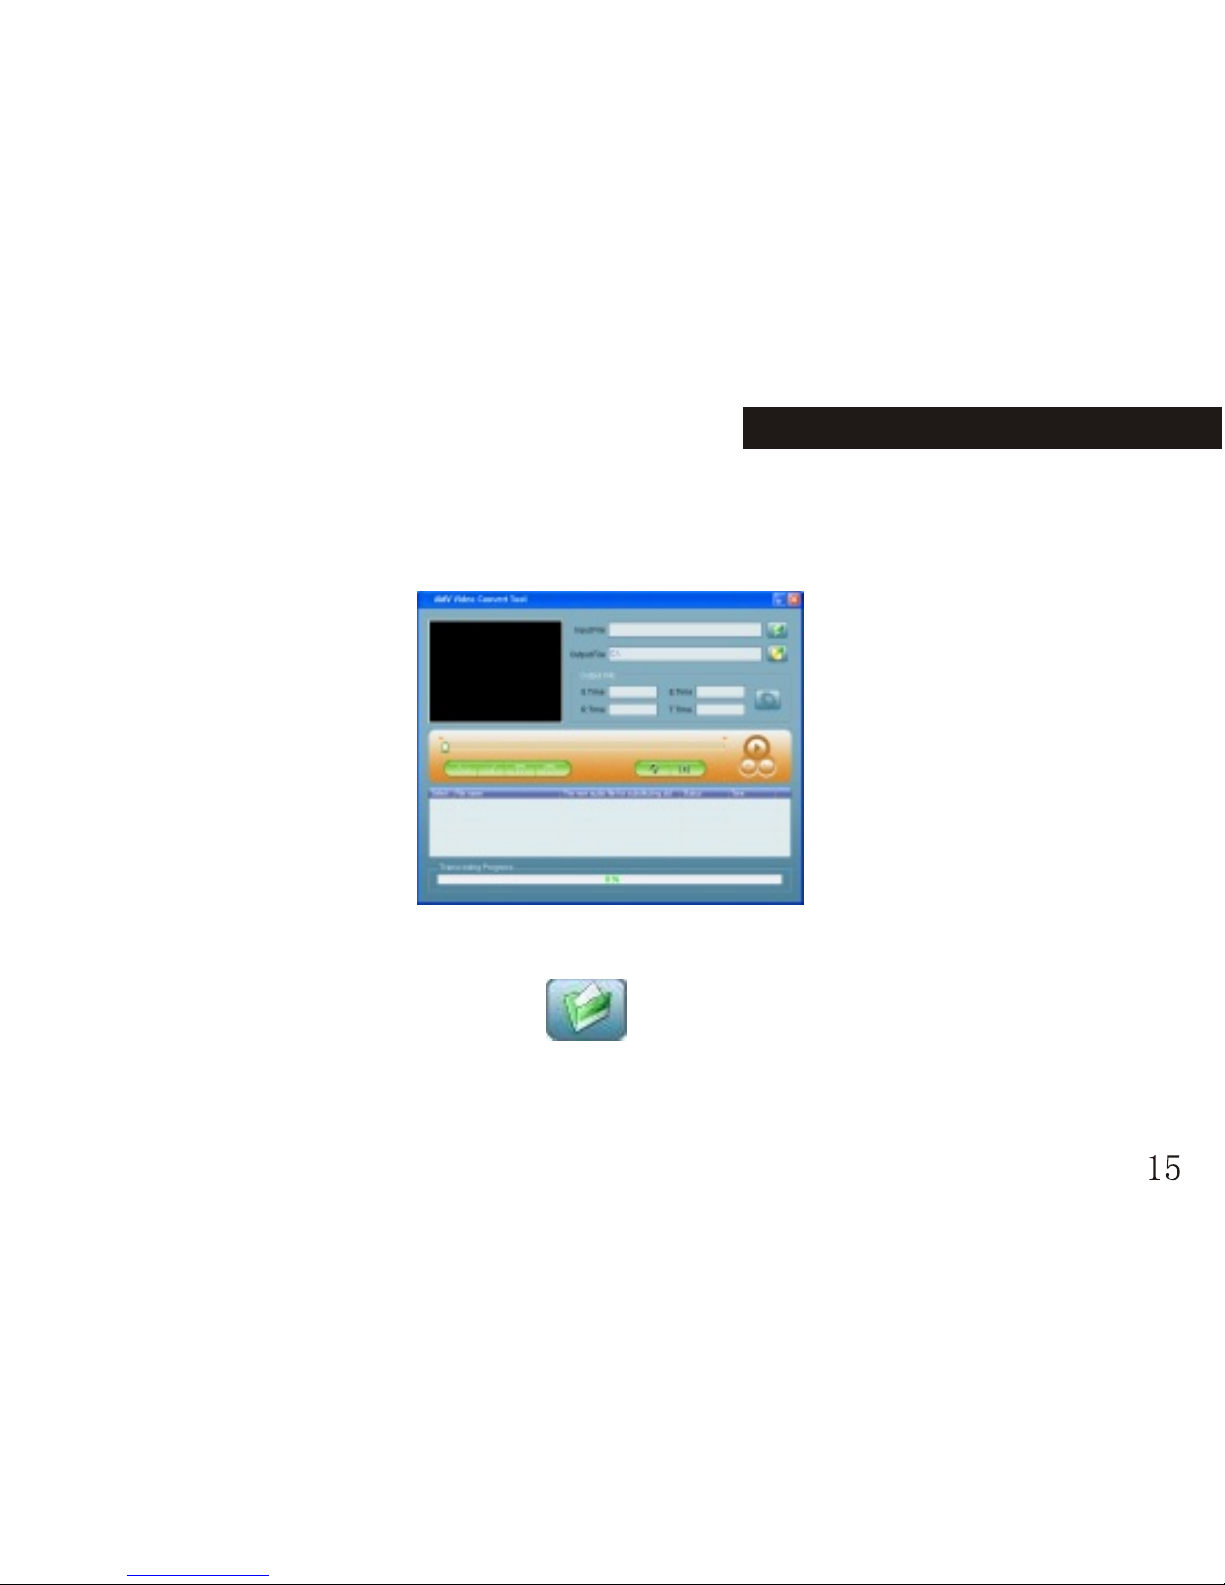
Click [start] button [program] menu to run the software. Select "MP3 Player
Utilities" "AMV Convert Tool" to open the tool interface. In the below picture,
the names of the buttons are marked in blue:
While using this tool, keep the mouse on the button for 1-2 seconds when it is
available, the name of the button is displayed.
3.2 Add media files
After running the software, click " " (add file button) on the right side of
"input file" to add media files (i.e. pending convert files. Expect specified notice,
media files are meant to pending convert files in the manual), and click the
buttons as the following picture:
Page 18
16
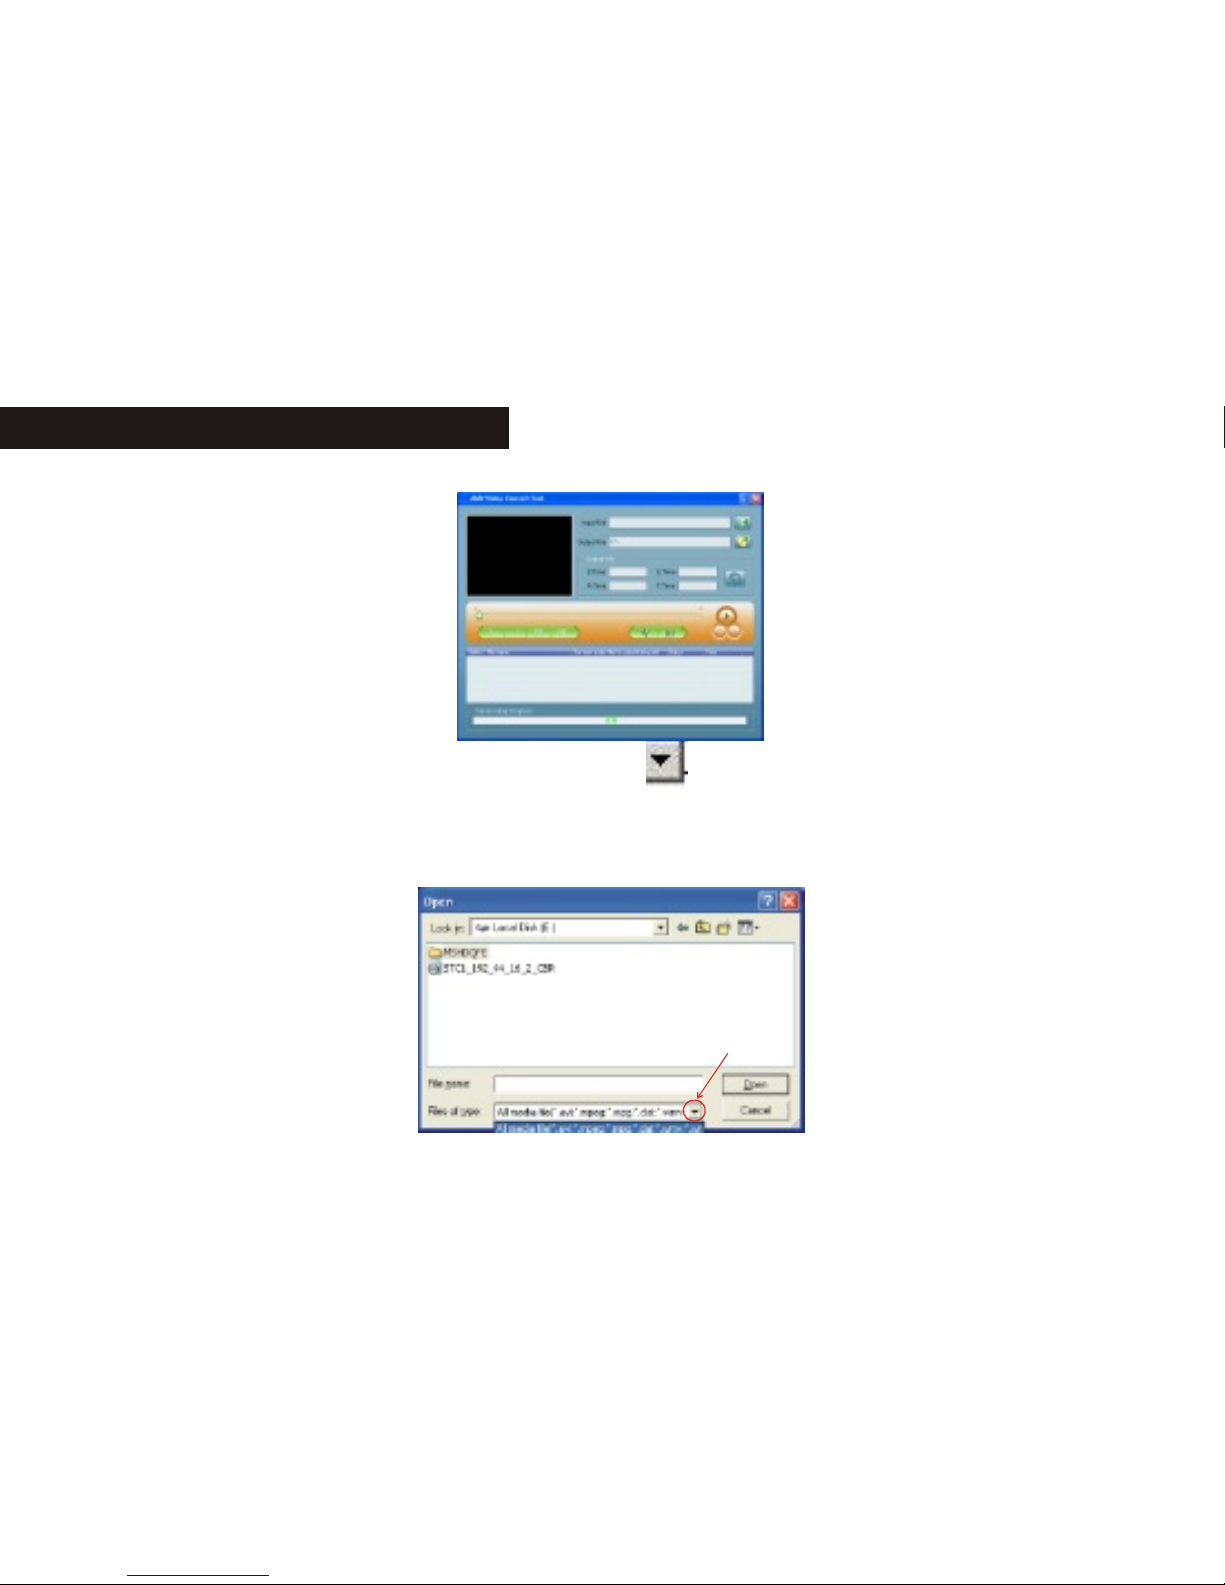
The media file path is popped up. Click " " button on the right side of "file
type" to select proper file type. After correctly selecting file or files, click "open"
button, the interface displays as the following picture (the selected file types in
the following picture are only for reference):
BASIC FUNCTION BASIC FUNCTION
Page 19

17
After adding files, the path of media file is displayed in the bar "input file" of the
convert tool; the related information of the
added file is displayed in the status bar,
such as check box, file name and path,
status, length of time, etc. As the red
marks in the following picture:
3.3 Play media files
The convert tool has the function of
playing media files. However, the re
lated decoder had been installed
first. Details please refer to the
following "notice". Click a single
media file in the status bar, the play
button is available then. Click the
play button to start to play the file:
Page 20

18
when the media file is playing, the schedule of playback is display in the schedule
bar; the status of the media file in the status bar changed from "unsettled" to "
OK"; the time of the file changed from "0:00" to the actual length of time "0:51";
the "stop" button and "pause" button are both available in the tool interface. Click
the two buttons to stop or pause the playback. The interface is as below:
Notice: when the status of the file changed from "unsettled" to "OK", it means
that the PC had installed such type of decoder, and the tool can play the media
files normally. You can convert it after stop playing. Of course you can convert
directly before playing the media files, but it is recommended to convert after
playing in order to convert the media files successfully.
BASIC FUNCTION BASIC FUNCTION
Page 21

19
4. Convert files
4.1 Select pending convert files
In the status bar, on the left side of every media file name, there is a check box and
a serial number. New added media file is defaulted tick off the check box. Check
boxes are used to select several media files and convert continually. If the check
box is not ticked off, it is not selected and will not be converted.
1.1.1 Selection and cancellation of media files
4.1.1.1 You can click the check box directly to decide whether convert the media
file or not. As the below picture shows:
4.1.1.2 Except for click the check box directly, you can select or cancel by
clicking the right key of the mouse to select "select" or "cancel". As the below
Page 22

20
picture shows:
1.1.1 Deletion of media files
As to the added media files, if you want to delete some of them, click the right
button of the mouse on the
selected file or files and
select "delete", the file(s)
would be deleted in the list.
As the right picture shows:
BASIC FUNCTION BASIC FUNCTION
Page 23

21
4.2 Save path of AMV files
The defaulted save path of AMV files of the convert tool is C:\. Before converting,
click AMV save path button " "
on the right side of "output file" to
specify the position of saving the AMV
file. as the following picture shows:
When the browsing folder dialog box popped up, select the save path you want to
specify and then click "OK" button:
Page 24

22 23
After finishing the above steps, the "output file" bar of the convert tool inter face
appears the whole save path of the AMV path:
4.3 Attribute setup
The convert tool has the function of setting parameter of AMV files, such as set
the intercepted video fragment of AMV file, video size, playback frame etc. There
are two measures to enter the attribute setup interface:
a. Click the " " button in the "output information" bar after selecting file or
files;
b. Click the right button of the mouse after selecting file or files, and then select
"setting" to enter.
When selecting file or files, it doesn't mean to select the check box of the files, but
to click the name of the files by mouse which makes the background color of the
BASIC FUNCTION BASIC FUNCTION
Page 25

file turn to blue.The details of setup will be list in the following texts. The below
picture is the defaulted setup of AMV files:
4.3.1 Intercept source video fragment
Intercept video fragment is to intercept a
fragment from a media file to convert it.
Then the start position and ending position
have to be set. There are two measures to
set the start position and ending position:
4.3.1.1 Set on the attribute setting interface
Firstly, tick off the check box which on the left side of "intercept video fragment"
to make the start time and ending time editable, and
then input the start time and ending time.
The interface is as the following picture shows:
Page 26

24 25
As the above picture shows: the current media file is interceptted from 1 minute
10 second to 3 minute 20 second.
Note: if the check box which on the left side of "intercept video fragment" is not
ticked off, the whole media file will be converted.
4.3.1.2 Set on the media file playback interface
While playing the media file, the output information bar of the tool interface
displays the related information of the AMV file, such as start time, ending time,
running time, total time. Hence, the button "start position" and the button "ending
position" are both available. As the following picture shows:
BASIC FUNCTION BASIC FUNCTION
Page 27

Click the "start position" button, the selected start time displays in the start time
bar, as the following picture shows:
Page 28

26
Also, click the "ending position" button, the selected ending time displays in the
ending time bar, as the following picture shows:
After the two time are selected, click the "select" button in the tool interface to
confirm the length of the intercept file, and shows it in the running time bar. It
only convert the intercept fragment while converting, as the right picture shows:
BASIC FUNCTION BASIC FUNCTION
Page 29

27
As the above picture shows: the current media file is interceptted from 2 minute
12 second to 2 minute 40 second, totally 28 seconds.
If you want to cancel the intercept fragment, you can click "cancel" button. Thus
the time in the running time bar returns to the total time of the file, and the
interface returns to the interface before clicking "select". It converts the whole
file while converting.
Note: the measure lists in 4.3.1.1 is suitable to the intercepted fragments from
the file or files that set together. The measure lists in 4.3.1.2 can only be
finished while playing media files, and is only
available to the files which are being playing.
4.3.2 Select the video size of AMV file
The video size of AMV file is 96*64 or 128*96,
the unit is pixel. Please select the size of the AMV
file according to the size of the screen of you
player. The interface is as the right picture shows:
4.3.3 Playing frame per second of AMV files
There are three types of the frame per second of
AMV files: high, middle and low. The default
Page 30

28
is middle. If the video effect is not good after
converting, you can try to change the setup.
The interface is as the following picture shows:
4.3.4 Images shortage, insert image
It is defaulted to tick off this option. For better
video effect, please use the default setup.
4.3.5 Replace the old audio data by new audio files
Replace the old audio data by new audio files means select new audio file (WAV
file) to replace the audio part of the current media file, while the video part is kept.
Click the " " button on the right of the "Replace the old audio data by new
audio files" path bar on the attribute setup interface to open the window of adding
files. The interface is as the following picture shows:
BASIC FUNCTION BASIC FUNCTION
Page 31

29
In the above picture, click " " icon to select the path new audio files, then
click "open" after selecting the proper audio file. As the following picture shows:
After selecting new audio files correctly, the path of the file is displayed in the
"Replace the old audio data by new audio files" interface, click "OK" button then.
As the following picture shows:
Page 32

30
After adding new audio files, the attribute setup interface is as the following
picture:
BASIC FUNCTION BASIC FUNCTION
Page 33

31
4.3.6 Voice shortage, insert voice
It is defaulted to tick off this option. For better voice effect, please use the default
setup.
4.3.7 Other settings
4.3.7.1 "Overlay file" is to replace the same name AMV files at the specified
saving position automatically by the creating AMV files. The option is defaulted
to tick off. If the option is not selected, the created AMV files are already exit. It
says error while converting.
4.3.7.2 "Play after converting" is to auto-run the AMV Player and play the AMV
file after converting. The option is defaulted to tick off. If the option is not
selected, it will not play the AMV file automatically. You have to open the AMV
Player manually.
4.3.7.3 "Try other decoders" means that if there is no corresponding decoder to
the media files, the convert tool will try to use other decoders. The option is
defaulted not tick off. The suffix of the files can be revised at the same time since
the corresponding file suffixes correspond the corresponding decoders.
It is recommended to keep the default of the tool in the setup of "other settings".
Click "OK" button after finishing the above steps to save the settings.
Note: as to the above settings of system parameters, it only applies to the
selected media files while converting. The media files which did not been
Page 34

selected still keep the defaulted settings while converting. It dose not mean to
select the check box of the media files by "select" here, but to keep the mouse
on the name of the files to make the background of the files turn to blue. Then
click the "setting" button directly or select "setting" by click the right button
of the mouse.
4.4 Start to convert files
4.4.1 After finishing system setup, double check the check
boxes of the media files that you want to convert are
ticked off. Click "start to convert" button on the tool
interface directly, the program start to convert all of the t
icked off files one by one. The status of the files changed
from "finished" to "converting". The converting schedule
bar displays the converting schedule, as the right picture shows:
4.4.2 After the conversion finished, the program auto-run The
AMV Player, and the player plays the converted AMV files
one by one. The correctly played files means the files
had been converted successfully. The interface is as the right
picture shows:
32
BASIC FUNCTION BASIC FUNCTION
Page 35

4.4.3 except for the above converting measures, you can also click the right button
of the media files which save in the hard disk to select "start video converting".
The program runs automatically and starts to convert files directly.
5. Notice
Please install corresponding decoder while converting Real play, QuickTime,
MPEG2 format files.
While converting Real play, QuickTime, MPEG2 (DVD) format files, if your
Windows Media player can not play the file directly, you have to install the
corresponding compatible Windows Media Player decoder, or the tool can not
work normally.
The pictures list in the manual are for reference only.
33
Page 36

Voice recoding
Make sure there is enough battery capacity while recoding.
The unit supports 99 record files' storage under
every directory.
Record in record mode:
1. Enter the main menu:
2. Press " " momentarily to select "record mode"
3. Press MENU button to enter the record mode,
as the right picture shows:
4. Press " " to start to record.
5. Under recording status, press " " momentarily
to pause recording, press & hold " " button to
save and stop recording. Press & hold MENU button
to save recording and return to the main menu.
34
BASIC FUNCTION BASIC FUNCTION
Page 37

Recorded voice is save in the set current directory in "record stop submenu/main disk directory".
If the LCD displays "Disk Full", it means that there is no enough space in the
disk, please delete some files to release the space.
If the LCD displays "Directory Full", it means that there are already 99 files in
the directory. Please change to another directory.
During recording, only " " and "MENU" buttons are available.
Select record type
1. Enter the record stop interface.
2. Press MENU button momentarily to enter the record sub-menu.
3. Press " " momentarily and select the submenu "record type", press MENU
button momentarily to enter.
4. Select proper record type by " "button and press MENU button momentarily
to enter.
Record type:
5. Press " " button to start to record.
35
SP record WAV format, good timbre
LP record ACT format, general timbre
SP Voice-control WAV format, voice-control REC
LP Voice-control ACT format, voice-control REC
Page 38

Play recorded files
1. Enter the main menu
2. Press " " button momentarily to select "voice mode".
3. Press MENU button momentarily to enter the playback mode interface.
4. Press " " button to start to playback.
5. Select recorded file:
" " button: select the previous recorded file
" " button: select the next recorded file
6. Volume control:
: Increase volume; : Decrease the volume
Convert ACT recorded file to WAV
The recorded ACT files can be convert to WAV files
by the enclosed install program tool bag.
1. Run the "Sound Converter" program and click "Open".
36
BASIC FUNCTION BASIC FUNCTION
Page 39

2. Select the ACT file you want to convert.
3. Click "convert" button to start conversion.
Except for the function of converting ACT to WAV, the tool can also play the WAV
and MP3 format files.
Using FM Radio
The player enters play mode every time, and needs to
resume the current pre-save station and playback.
The first time when entering, the frequency of the
current station is min frequency.
Interface format instruction:
37
Page 40

: the current frequency position, changes the position at the frequency dial
with the changes of the current frequency.
:frequency dial
: the corresponding pre-save station number of the current station. 20 presave stations at most.
: the current frequency value.
Listen to the radio
1.Enter the main menu.
2. Press " " button momentarily to select "FM mode".
3. Press MENU button momentarily to enter the "FM mode".
4. Auto searching
Hold the / button for about 2 seconds, the player searches for stations
forwards or backwards by 100KHz and stop at the searched station; if you want
stop searching, press / momentarily.
5. Adjust frequency
Press " " button momentarily: forwards 100KHz
Press " " button momentarily: backwards 100KHz
6. Save the searched frequencies
Press MENU button momentarily to enter the FM submenu, press MENU button
momentarily again to save the station
38
BASIC FUNCTION BASIC FUNCTION
Page 41

7. Listen to a saved station
If there is one or more saved stations, press " " button momentarily to listen.
The sequence is backward.
8.Record function
While listening to the radio, you can record your favorite program.
Press MENU button momentarily to enter the FM submenu and select SP record or
LP record. You can record the current playing program then. Press MENU button
momentarily to exit.
9. Volume control: : Increase volume; : Decrease the volume
"Normal frequency" and "Japanese frequency" can store 20 stations respectively
at most.
The delete of stations please refer to the section of "delete files" in the following
text.
JPEG browser
Browsing JPEG pictures, the player has to support all
kinds of familiar JPEG formats on the internet.
File selection status
While entering the main menu, the player is at file
selection status, as the picture shows:.
39
Page 42

JPEG interface- file selection- select file 05.jpg
It is a blank directory if there is no file in it.
Press " " button to enter the picture playback status.
Press / button to select previous/next file.
Press MENU button to enter the stop submenu: 1. local folder, 2. play set, 3. delete,
4.exit.
Play set including: 1. manual play, 2.auto play
The auto play time can be set from 1 second to 8 seconds.
Other keys are unavailable.
Picture play status
Enter the picture play status
Press / momentarily, it displays the next/previous picture.
Press " " momentarily, it returns to the file selection status.
Press & hold MENU button, it returns to the
main menu. Other keys are unavailable.
40
BASIC FUNCTION BASIC FUNCTION
Page 43

System setup
How to enter?
Set the system parameters here, the options change as the upgrades of the
firmware.
1. Enter the main menu.
2. Press " " button momentarily to select "Setup".
3. Press MENU button to enter "Setup".
Introduction of parameters:
41
Clock Set the date and time while saving recorded files.
LCD set Set the brightness and dark screen mode of LCD
Language Set the languages
Power off Set a time, the player will power off automatically at this
time
Replay mode Set the working status of repeat
Online mode Options to "special space" function
Memory info Check the capacity and using status
Firmware Version Display the firmware version of the player
Firmware upgrade Upgrade the firmware
Exit Exit the interface
Page 44

Instructions:
set of "clock"
1. System setup interface
2. Press MENU button momentarily to enter the
clock interface:
3. Press + momentarily to set begin with year (- button to set from the end of the
interface), the "year" twinkles.
4. Press " "momentarily to adjust begin with a bigger value (" " is contrary).
5. Press MENU button to exit after adjusting.
"Language" selection
Operations as the set of "Equalizer"
LCD set
42
BASIC FUNCTION BASIC FUNCTION
1. Brightness Adjust the brightness of the LCD
2. Black The LCD turns dark if there is no operation on it
within set seconds.
3. Exit
Page 45

"Brightness" means the setup of the brightness of the LCD. 7 is the brightest and 0
is the darkest. Press / momentarily to move the cursor; and press MENU
button to return to the previous menu. Set of "black" please refer to set of
"brightness".
"Power off"
"Off time": you can set a length of time (unit: second), under stop status, if there
was no operations within this time, the player would power off automatically to
save power. Numeral 0 means the function is closes.
"Sleep time": you can set a length of time (unit: second), under whatever status, if
there was no operations within this time, the player would power off automatically.
This function is suitable to using before sleeping.
Note: the "sleep mode" is valid only once after setting. It would clear the set
automatically after powering off. You have to set it again if you want to use it next
time.
"Replay mode"
The operation measures please refer to the set of "Equalizer".
"Manual mode" means it can not pause automatically during A-B repeat. It pauses
43
Page 46

at the manually set position.
"Auto mode" means it pauses automatically during A-B repeat.
"Online mode"
The operation measures please refer to the set of "Equalizer".
Some operation systems (versions before Windows 2K SP4) do not support two
diver letter in one disk, so, after using "special space" function, you have to select
the current disk, i.e. "normal only" and "encrypted only" so that when connected
with the PC, the selected disk would be displayed.
"Memory info"
The numeral is the total capacity of the disk. Percentage is the rate of the used
space and the total space.
"Firmware version"
Check the current firmware version of the player.
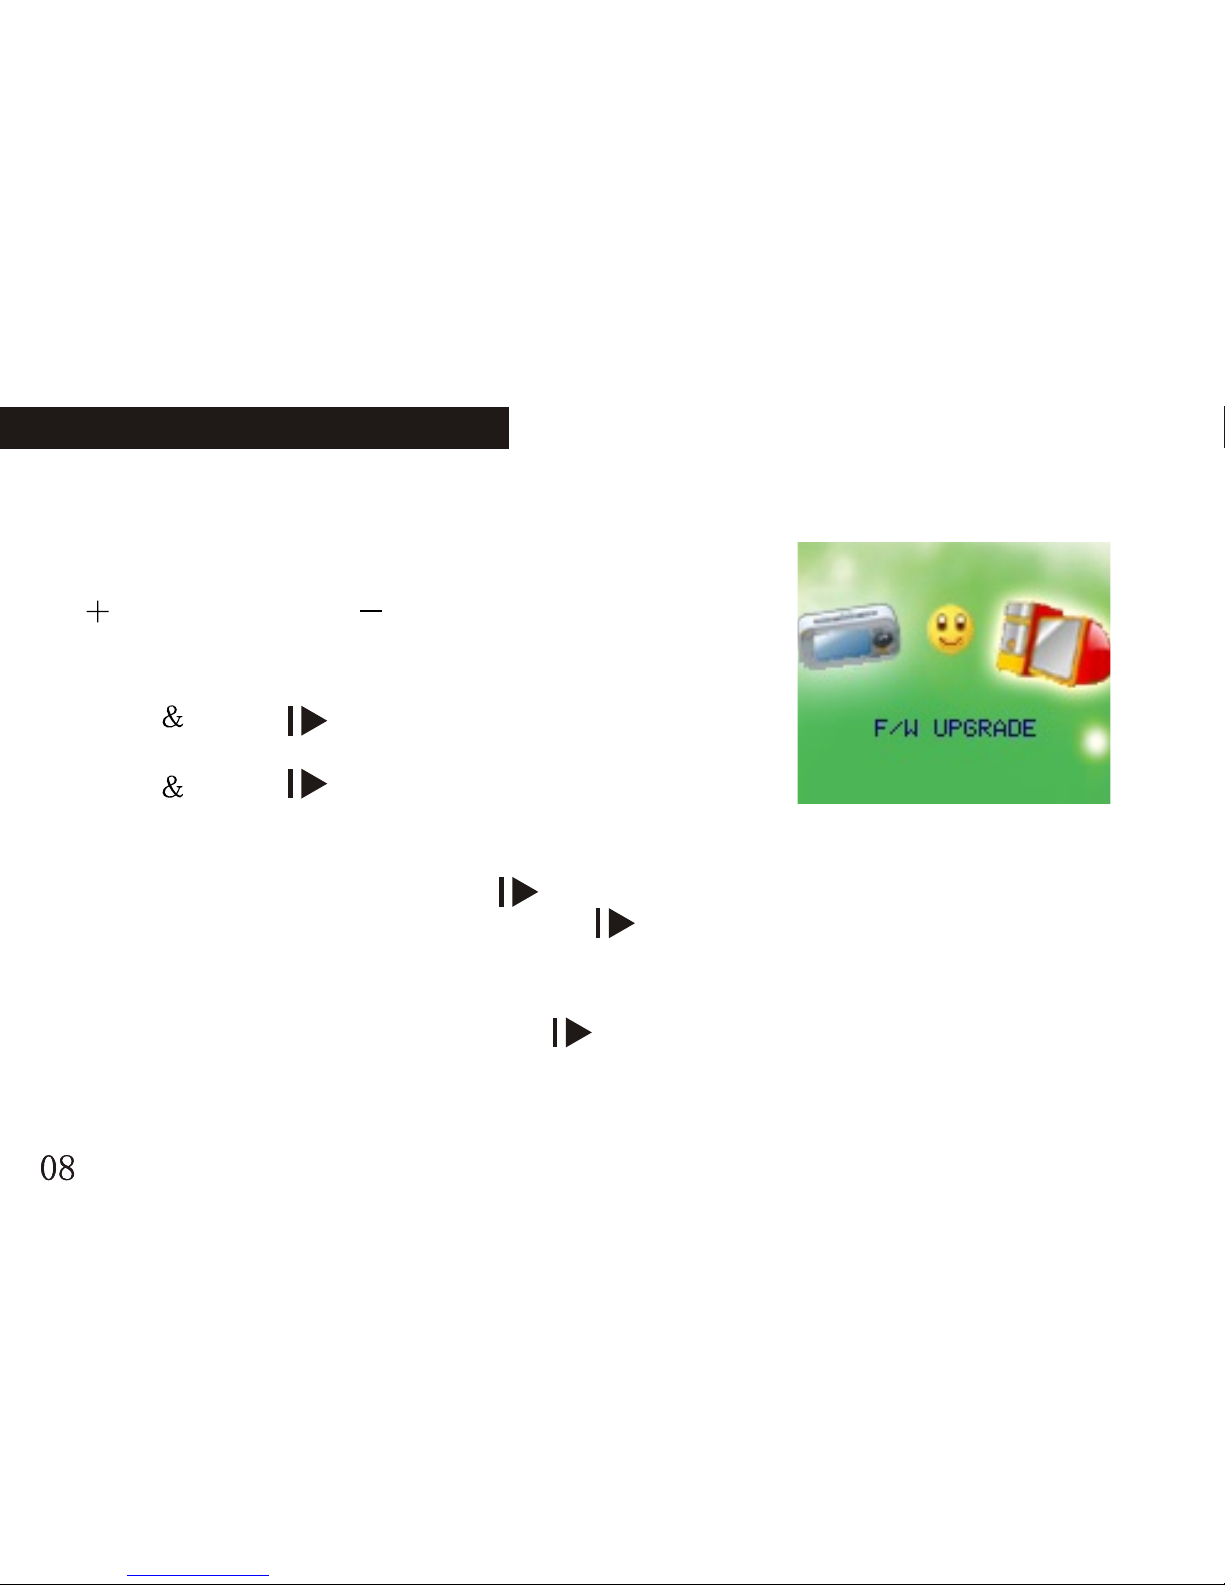
"Firmware upgrade"
The interface is used to upgrade firmware. When upgrade firmware, it has to enter
this interface first.
Tips: after setting the options by pressing MENU button momentarily, press
" " button momentarily to exit the menu quickly. This "exit menus
quickly" function is available to all menus.
44
BASIC FUNCTION BASIC FUNCTION
Page 47

E-book
Enter the main menu, jog " " to select book press MENU button momentarily
to enter the sub menu.
Directory selection: select the root directory of the movable disk.
Press MENU button momentarily to enter the "local folder" directory. Select the
directory you want by " " or " " button. Press MENU button momentarily
to confirm and return to the previous menu.
Note: there is no need to select directory if the text you want to read is save in
the root directory of the movable disk.
"Local folder": select local folder by " " or " " button:
Select the file name and press MENU button momentarily to confirm.
Press " " button to select "Play set" and press MENU button momentarily to
confirm. You can read your selected text now.
Press " " or " " momentarily to thumb while reading.
45
Page 48

Using USB disk
The player is a standard USB Disk, supports these systems including Windows98
(it needs to install the driver), over Windows2K (it's unnecessary to install the
driver), Mac OS X 10.3 and above, Linux 2.4.2 and above.
The player supports USB power supply. In Ready state, press MENU key
momentarily to exit to main menu, and select the working mode to enter.
The player support Suspend mode.
There are three modes for the player after connecting with PC:
46
BASIC FUNCTION BASIC FUNCTION
1. Ready status 2. Downloading 3. Uploading
Page 49

Select different Directory (Stop submenu)
You can put different files in different directories (the directories should be set in
the PC first) to classify and manage them. The unit distinguishes 9 top submenus.
1. On the stop interface (the example isunder music mode.
Recording and voice mode can also select directories).
2. Press MENU button to enter the stop submenu.
47
Music
Local folder
Delete
Repeat
Exit
Page 50

3. Press MENU button again to enter the directory
selection mode.y
4.Press " " or " " to select in the directory.
5.Press MENU button to confirm the selected directory.
Note: the music mode, recording mode and voice mode can set their
corresponding independent directories. That is to say, three modes do not
corresponding one directory.
Delete files (stop submenu)
You can delete corresponding files
or save stations under music mode,
voice mode or FM mode.
48
BASIC FUNCTION BASIC FUNCTION
ROOT
Nick Cave
Music
Local folder
ROOT
Nick Cave
Music
Local folder
Music
Local folder
Delete
Repeat
Exit
1. on the stop interface 2. Press MENU button momentarily
(FM has no stop interface) to enter the stop submenu.
Page 51

"Delete all" deletes all of the related files in the current mode (such as "delete all"
in the music mode deletes all of the music files, recording files will not be deleted.)
The delete interface of FM is even simpler. It only processes to the third step.
What it deletes are the stations you saved before.
While deleting files on the computer, please make sure to pull out the USB cable
after the player is popped up safely. Or the files might not be deleted.
Repeat mode (play submenu)
While playing music files and recording files, you can select different repeat
mode (such as repeat, shuffle, etc.).
The first option in the play submenu is "repeat mode". The player will playback as
per the set rule.
49
Music
Local folder
Delete
Repeat
Exit
Music
Delete
I`m alive mp3
we`MTVmtv
Music
EXIT
Delete
Delete all
Delete...
3. Press " " or " " momentarily to 4. Press MENU button momentarily to
select "delete files" in the menu. enter the delete interface.
5.Select the file you want to delete, 6. Press" "or" "to select "delete
press MENU button momentarily files" in the menu, and press MENU
to enter the interface. button momentarily to confirm.
Page 52

Repeat
Normal: After the music in the current directory have been played fully, the
player will play the music in the next directory till all files are played and then it
will stop.
Repeat One: Repeat playing a single piece of music.
Folder: Play all the music in the folder.
Repeat Folder: Repeatedly play all the music in the folder.
Repeat All: Repeatedly play all the music.
Shuffle
Random: Play randomly the music in the current folder.
Intro
Intro: Play all the music of the first ten seconds in the current folder.2)
Tempo rate (play submenu)
While playing music (only available to MP3 files), you can select different tempo
50
BASIC FUNCTION BASIC FUNCTION
Page 53

rate (faster or slower), the voice will not change.
1. While the music is playing
2. Press MENU button momentarily to enter the play submenu.
3. Press " " momentarily to select "tempo rate".
4. Press MENU button momentarily to enter the "tempo rate".
5. Press " " momentarily to play faster, and press " " momentarily to play
slower.
Replay mode (play submenu)
Enters by the play submenu:
A-B repeat
1. During music playback or voice playback,
2. Press MENU button momentarily to enter the play submenu.
3. Press " " momentarily to select "replay".
4. Press MENU button momentarily to enter "replay".
Replay mode: the "A" icon of the replay icon "A-B" twinkles, waiting for
confirming the start "A".
51
Page 54

5. Press " " button momentarily to confirm the start "A".
Replay mode: the "B" icon of the replay icon "A-B" twinkles, waiting for
confirming the end "B".
6. Press " " button momentarily to confirm the end "B".
The replay icon "A-B" is fixed. The player starts to play repeatedly between the
start "A" and the end "B", and quit the replay mode after repeated the set times.
Press " " momentarily to reset the start "A" in the mode. (Times of player
please refer to "replay times" in the following text.)
Following function (unavailable to voice mode)
1. A-B section is replaying
52
BASIC FUNCTION BASIC FUNCTION
Page 55

2. Press " " momentarily to enter the following mode.
3. The replay icon "A-B" changes to " ". The player
starts to record the user's voice then. The length of time
is same as the A-B repeat time.
4. It plays the original voice once the time is up, and the
icon changes to " ". You can press " " to start
contrast function at this time.
Pressing " " to return to the "A-B repeat" status at
this status.
Contrast function
1. The A-B repeat icon changed to " " after entering
the contrast function. It plays the original voice at this time.
2. After the original voice is played, the icon changes to " ",
and the recorded following voice is played then.
Under this status, press " " button momentarily, it returns to the "following
function" status.
Under the above three status, press MENU button momentarily, it returns to the
replay mode.
53
Page 56

Replay times (play submenu)
Operations please refer to the set of "power off".
"Replay times" decides how many times it will replay before exit.
Replay gap (play submenu)
Operations please refer to the set of "power off".
"Replay gap" decides the time interval between this playback and last playback.
(Unit: seconds)
Function of Special Space
The common MP3 users often meet the problem of "Data disclosing" as they do
not want the personal data to be seen by other people. When the friends borrow the
MP3 Player, they have to delete the personal data first, which may annoy them
very much. From today, the function of "Special Space" provided by this player
has solved this problem completely. The user can arbitrarily divide the USB disk
into two parts through the tools enclosed with the player, (the use can see two disk
letters. For system of Windows 2K, the computer should be installed with the SP4.
Otherwise, the user can only see one disk letter. If the user wants to see the other
disk letter, he has to select the "Single common disk" or "Single encryption disk"
54
BASIC FUNCTION BASIC FUNCTION
Page 57

under "System setting/ On-line mode". One part shall be encrypted (it may not be
encrypted, thus the disk can be used as two) so as to hide the contents. Such data
cannot be seen without the passwords. This is a very good function of "Special
Space".
1. Connect the player with the computer.
2. Run the tool kit MP3 Player Disk Tool Of
installation program enclosed with the player.
3. The user will first see the format tool. Then
select the "Divide/encrypt" and select a proper
capacity for the encryption disk. Then click
the related block to set the user' name and
the passwords. Enter the name in the block
of "New user's name" and enter the password
in the block of "New password". Then enter t
he new password again in the block of
"Confirm the new password". Click the
button "Start" to start dividing the disk.
55
Page 58

4. After dividing, the user will
see the following Indications:
5. Press "Enter", and the computer will indicating for restart the system. Confirm
it so as to restart the computer system.
6. After starting, the user will see two disks (for the operation system lower than
Windows 2K SP4, the user can only see one disk letter). Click the encrypted disk
(listed at the second place), which has three files. Two are hidden files and one is
the execution file. The disk only has the space of 300K.
56
BASIC FUNCTION BASIC FUNCTION
Page 59

7. Run the execution file "RdiskDecrypt.exe" and enter the user's name and
password into the Dialogue box. If the password is correct the Copy file in the
disk will be opened.
8. Each time when connecting with the computer, user must enter the user's name
and password so that he can open the encrypted disk.
Note: Either when the disk is divided into two parts or when two disks are
combined into one, the data in the disk will be deleted, please backup the data
in advance.
Warning: Please don't lose your User's name and password; otherwise the
encrypted disk cannot be used. The encrypted disk can only be cancelled by
combining the disks, and this loses the files in the encrypted disk.
57
Page 60

Trouble Shooting Specifications:
TROUBLE SHOOTING
58
No power supply Make sure the player had been powered on.
No voice in the earphone Make sure the volume is not at the status of 0, and the
connection of the earphone has no problem.
Make sure the cleanness of the earphone.
Damaged MP3 may cause different degree of noises; it
may even not be able to play music. Make sure the file
is integrated
Letters on the LCD are
exceptional
Make sure you've chosen proper language.
FM receiving effect is not
good
Adjust the place of the earphone and the player
Turn off the electrical instruments near by.
The earphone can be used as antenna.
Can not download music
files normally
Check if the USB cable is broken, and it is connected
with the player correctly.
Check the drive program is installed properly.
Check if there is enough memory
Page 61

SPECIFICATIONS
59
Dimension 74x18x49.5mm
Weight 55g
Display CSTN 1.5' screen
Connect with PC USB2.0 (FS) Flash disk
Memory 64MB-1GB
Power supply Max playback time: 5-6 hours
Record
Sampling rate 8KHz
Record format WAV(32K bps), ACT(8K bps)
Record time 35 hours (ACT, 128M Flash)
MP3,WMA
WMV, ASF
Earphone max output (L)10mw+(R)10mW (32Ohm)
MP3,WMA
WMV, ASF
MP3 bit rate 8K bps+320K bps
WMV, ASF
WMA,WMV,ASF bit rate 5K bps-384K bps
Frequency response 20Hz-20KHz
Page 62

60
SPECIFICATIONS
Frequency response 20Hz-20KHz
SNR 85Db
Distortion < 0.05
FM
Range of frequency 76MHz-96MHz/87MHz-108MHz
Station 20+20
Earphone max output (L)10mw+(R)10mW (32Ohm)
SNR 45Db
Music format MP1,MP2, MP3, WMA, WMV, ASF, WAV
Condition to use
-5~40
Language Chinese, English, Japanese, French etc.
Operation system Windows98/SE/ME/2K/XP, Mac OS 10, Linux 2.4.2
Note: The design and the specification of the player are subject to change without notice.
 Loading...