

Page 1

G52-B6287X2
Software Installation Guide
MEGA III Series
Page 2

ii
Trademarks
All trademarks are the properties of their respective owners.
Intel® and Pentium® are registered trademarks of Intel Corporation.
PS/2 and OS®/2 are registered trademarks of International Business Machines Corporation.
Windows® 95/98/2000/NT/XP are registered trademarks of Microsoft
Corporation.
Netware® is a registered trademark of Novell, Inc.
Award® is a registered trademark of Phoenix Technologies Ltd.
AMI® is a registered trademark of American Megatrends Inc.
Copyright Notice
The material in this document is the intellectual property of MICROSTAR INTERNATIONAL. We take every care in the preparation of this
document, but no guarantee is given as to the correctness of its contents.
Our products are under continual improvement and we reserve the right
to make changes without notice.
Revision History
Revision Revision History Date
V 1.0 First Release December 2004
Page 3

iii
CONTENTS
ENGLISH....................................................................................1
DEUTSCH..................................................................................21
FRANÇ AIS................................................................................41
ESPAÑ OL....................................................................................61
.....................................................................................81
?蔨いゅ......................................................................101
繁體中文......................................................................121
日本語..............................................................................141
Page 4

iv
1. Always read the safety instructions carefully.
2. Keep this User’s Manual for future reference.
3. Keep this equipment away from humidity.
4. Lay this equipment on a reliable flat surface before setting it up.
5. The openings on the enclosure are for air convection hence protects the
equipment from overheating. DO NOT COVER THE OPENINGS.
6. Place the power cord such a way that people can not step on it. Do not
place anything over the power cord.
7. All cautions and warnings on the equipment should be noted.
8. Never pour any liquid into the opening that could damage or cause electrical shock.
9. If any of the following situations arises, get the equipment checked by a
service personnel:
- The power cord or plug is damaged.
- Liquid has penetrated into the equipment.
- The equipment has been exposed to moisture.
- The equipment has not work well or you can not get it work according to
User’s Manual.
- The equipment has dropped and damaged.
- The equipment has obvious sign of breakage.
10. DO NOT LEAVE THIS EQUIPMENT IN AN ENVIRONMENT
UNCONDITIONED, STORAGE TEMPERATURE ABOVE 600 C (1400F), IT
MAY DAMAGE THE EQUIPMENT.
Safety Instructions
Page 5

1
Software Installation
ENGLISH
Installation Sequence
1. Installing InterVideo InstantON
2. Installing Windows XP
3. Installing Drivers under Windows XP
4. Installing SCM under Windows XP
5. Installing InterVideo Home Theater
Page 6

2
1. Installing InterVideo InstantON
(Optional)
Please install the softwares in accordance with our suggested
sequence:
1. InterVideo InstantON (Optional)
2. Windows XP Operating System
3. Drivers under Windows XP
4. System Control Manager (SCM) under Windows XP
5. InterVideo Home Theater
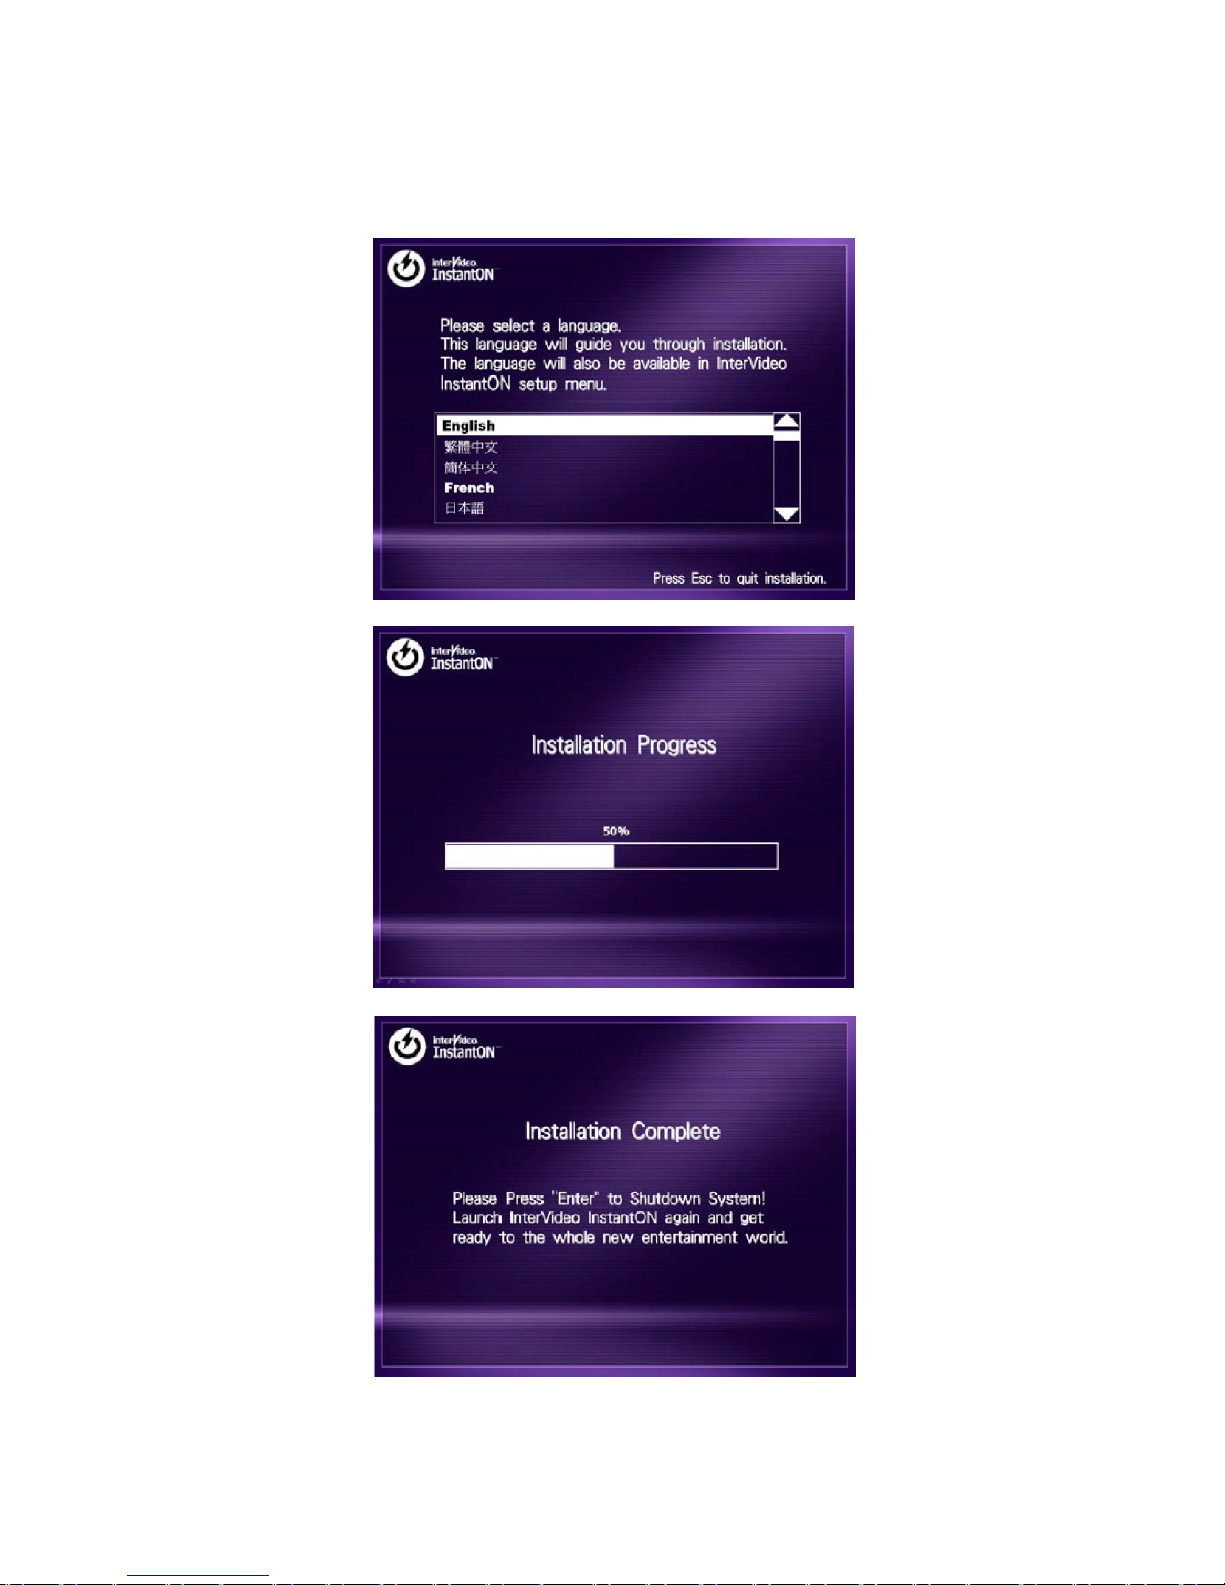
In your package you will find an InterVideo InstantON installation
CD. It is a bootable disc for users to install InstantON to their
system. This Linux-based application allows you to operate your
MEGA III in A/V mode without booting into Microsoft’s Windows
XP operating system. To install the application, please make sure
to use a completely empty HDD or a used HDD with at least 210MB
free space (non-partitioned space).
Warning!
1. Windows XP operating system must be installed prior
to other software installation (Except InstantON).
2. The system is not compatible with any VGA card. The
InstantON application will stop responding if a VGA
card is installed.
Page 7

3
Software Installation
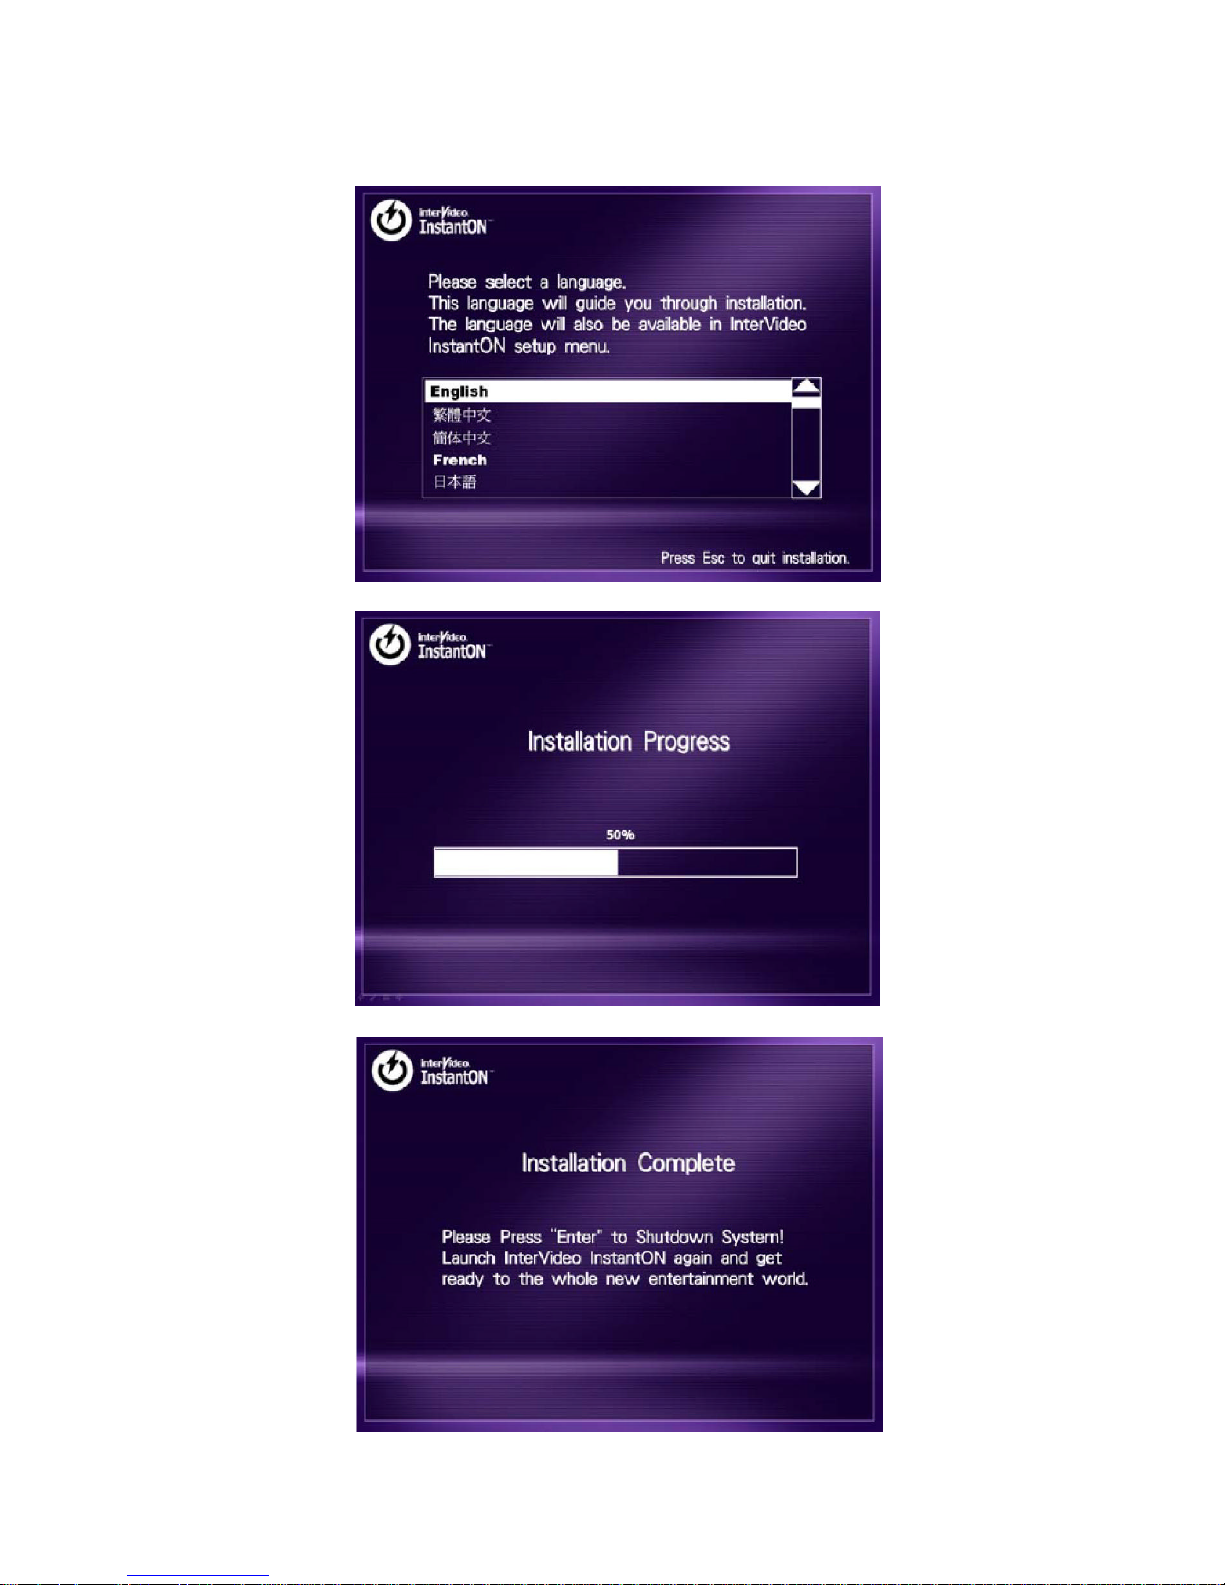
Installation
You can choose to install the InstantON to an empty HDD or a
non-empty HDD with at least 210MB non-partitioned space.
Option 1. Install to an empty and non-partitioned HDD
1. Turn off the system before inserting the installation CD in
the CD/DVD-ROM drive.
2. Turn on the system and the system will boot from the
installation CD. Make sure to specify CD/DVD-ROM as
your first boot device.
Option 2. Install to a non-empty HDD
1. Please make sure to leave at least 300MB free space (nonpartitioned space).
2. Turn off the system before inserting the installation CD in
the CD/DVD-ROM drive. Make sure to specify CD/DVDROM as your first boot device.
3. Turn on the system and the system will boot from the
installation CD.
4. Follow the on-screen instructions to complete the installation.
How to specify your boot priority:
a. Power on the system and press Delete to enter the
BIOS Setup during the POST process.
b. Point to [Advanced BIOS Features] and press Enter.
c. Set [First Boot Device] to [CD-ROM].
d. Finally, select [Save & Exit Setup] and press Enter
to save the parameters and exit BIOS.
Page 8
4
Page 9

5
Software Installation
2. Installing Windows XP
To install the Windows XP Operating System, you can use a completely empty or a used HDD. However, if you choose to use a
non-empty HDD, please remember to delete the original partition
table in HDD and reserve at least 250MB non-partitioned space.
Installation
Please refer to your Microsoft User’s Manual for Windows XP OS
installation.
Warning: Backup your used HDD in case data loss may
occur during the Windows XP installation.
Page 10
6
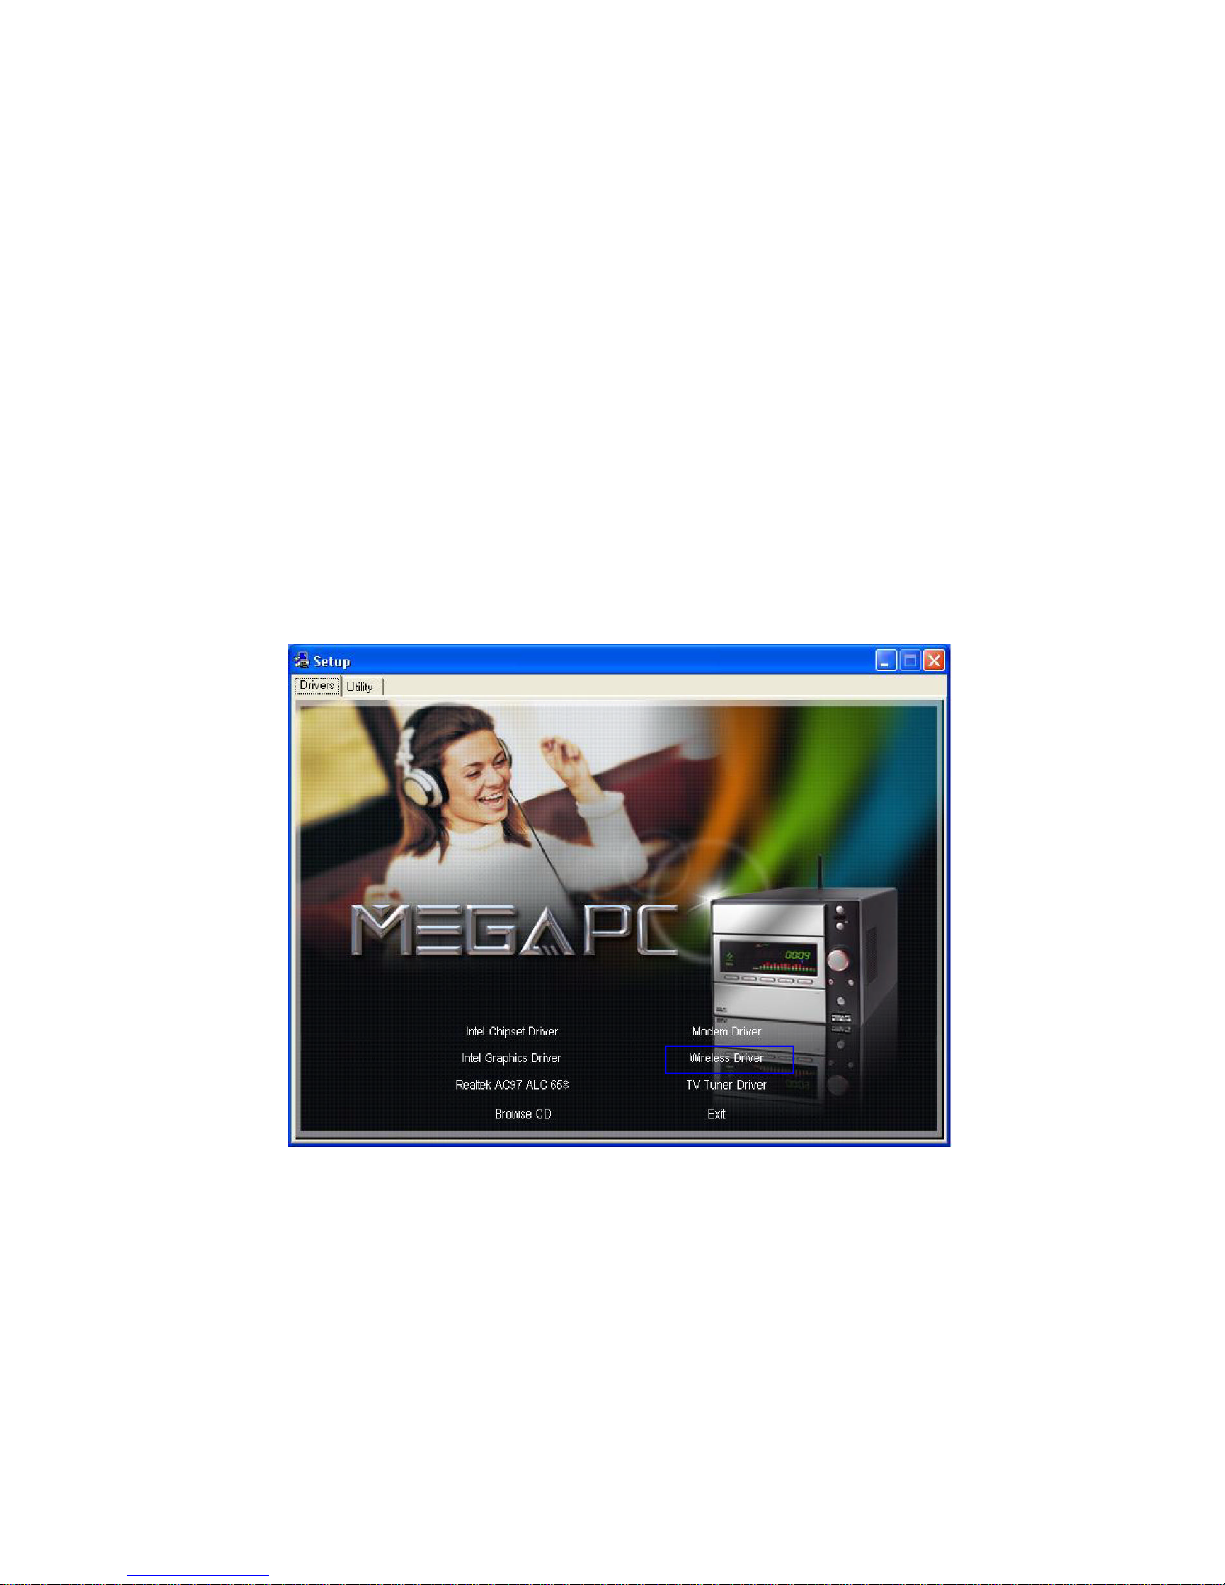
1. Turn off all running applications before you install drivers
under Windows XP.
2. Insert the attached CD into the CD/DVD-ROM drive.
3. When you see the following Drivers Setup Window, click
the driver (e.g. Wireless Driver) to be installed to your system.
3. Installing Drivers under Windows XP
You need to install drivers under Windows XP for normal system
Page 11

7
Software Installation
5. Select the “I Accept” check box and then click Next to
4. Click Next on the Welcome page to continue.
Page 12

8
6. Enter the user information and click Next.
7. click Install to start the installation.
Page 13
9
Software Installation
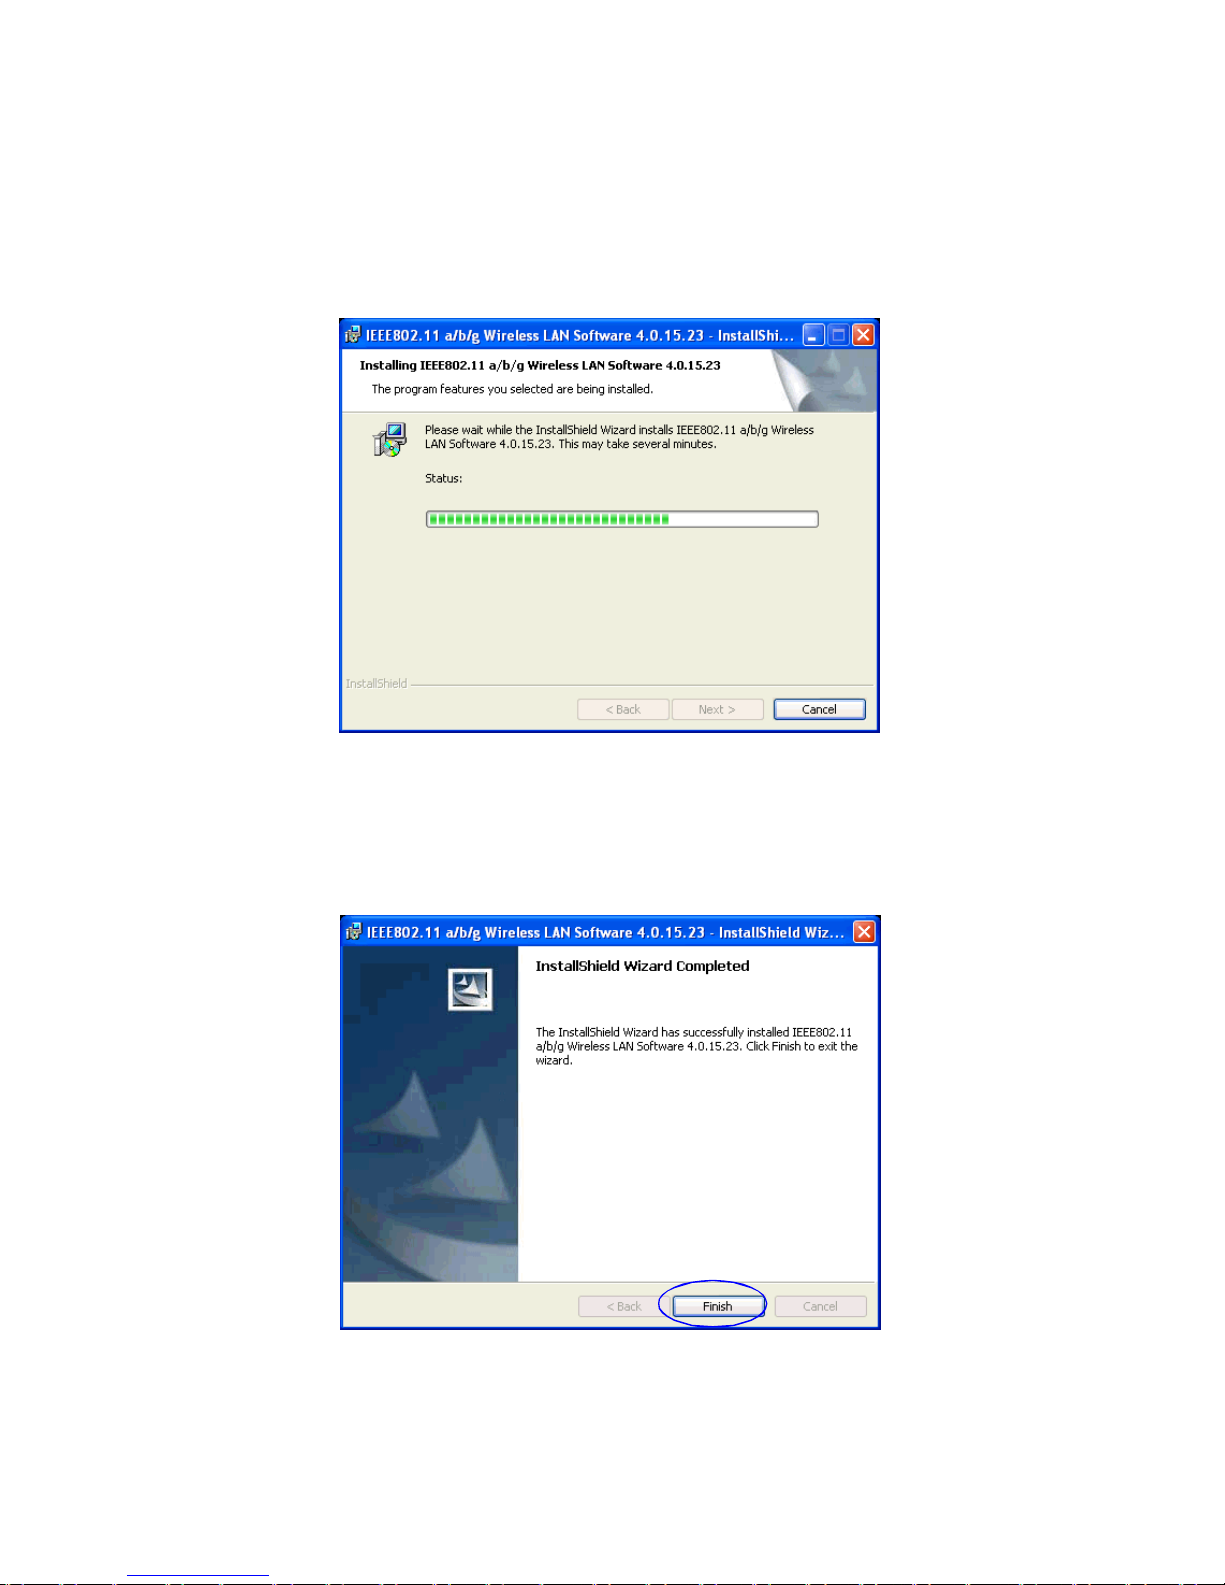
8. It shows the percentage of the installation process that has
been completed. Please wait.
9. The installation is complete. Click Finish to exit.
Page 14

10
10. You can find the Wlan Utility icon on the desktop.
Page 15

11
Software Installation
4. Installing SCM under Windows XP
You need to install System Control Manager (SCM) under Windows
XP for normal system operation.
4.1 System Control Manager
System Control Management is a new generation and powerful
tool of screen control with E-mail coming alarm and colorful status
displays for function keys integrated. System Control Manager
makes more interactive displays for you to notice what functions
you are using. There are three major functions of System Control
Manager: Front Panel Display Control, On Screen Display and Mail
Notification. Once you have installed the SCM application, you
will see an icon on the taskbar.
4.1.1 Front Panel Display Control
When you press the function key on the front panel, the front panel
will display the application’s status.
For example, if you press Play in Music mode, the front
Warning: If the System Control Manager application is
not installed or is terminated, some control functions will
not work.
Page 16
12
4.1.2 On Screen Display (OSD)
When you press the function key on the front panel, the monitor
will display the command received.
For example, if you press Play in Music mode, the
monitor will display the corresponding status:
Play
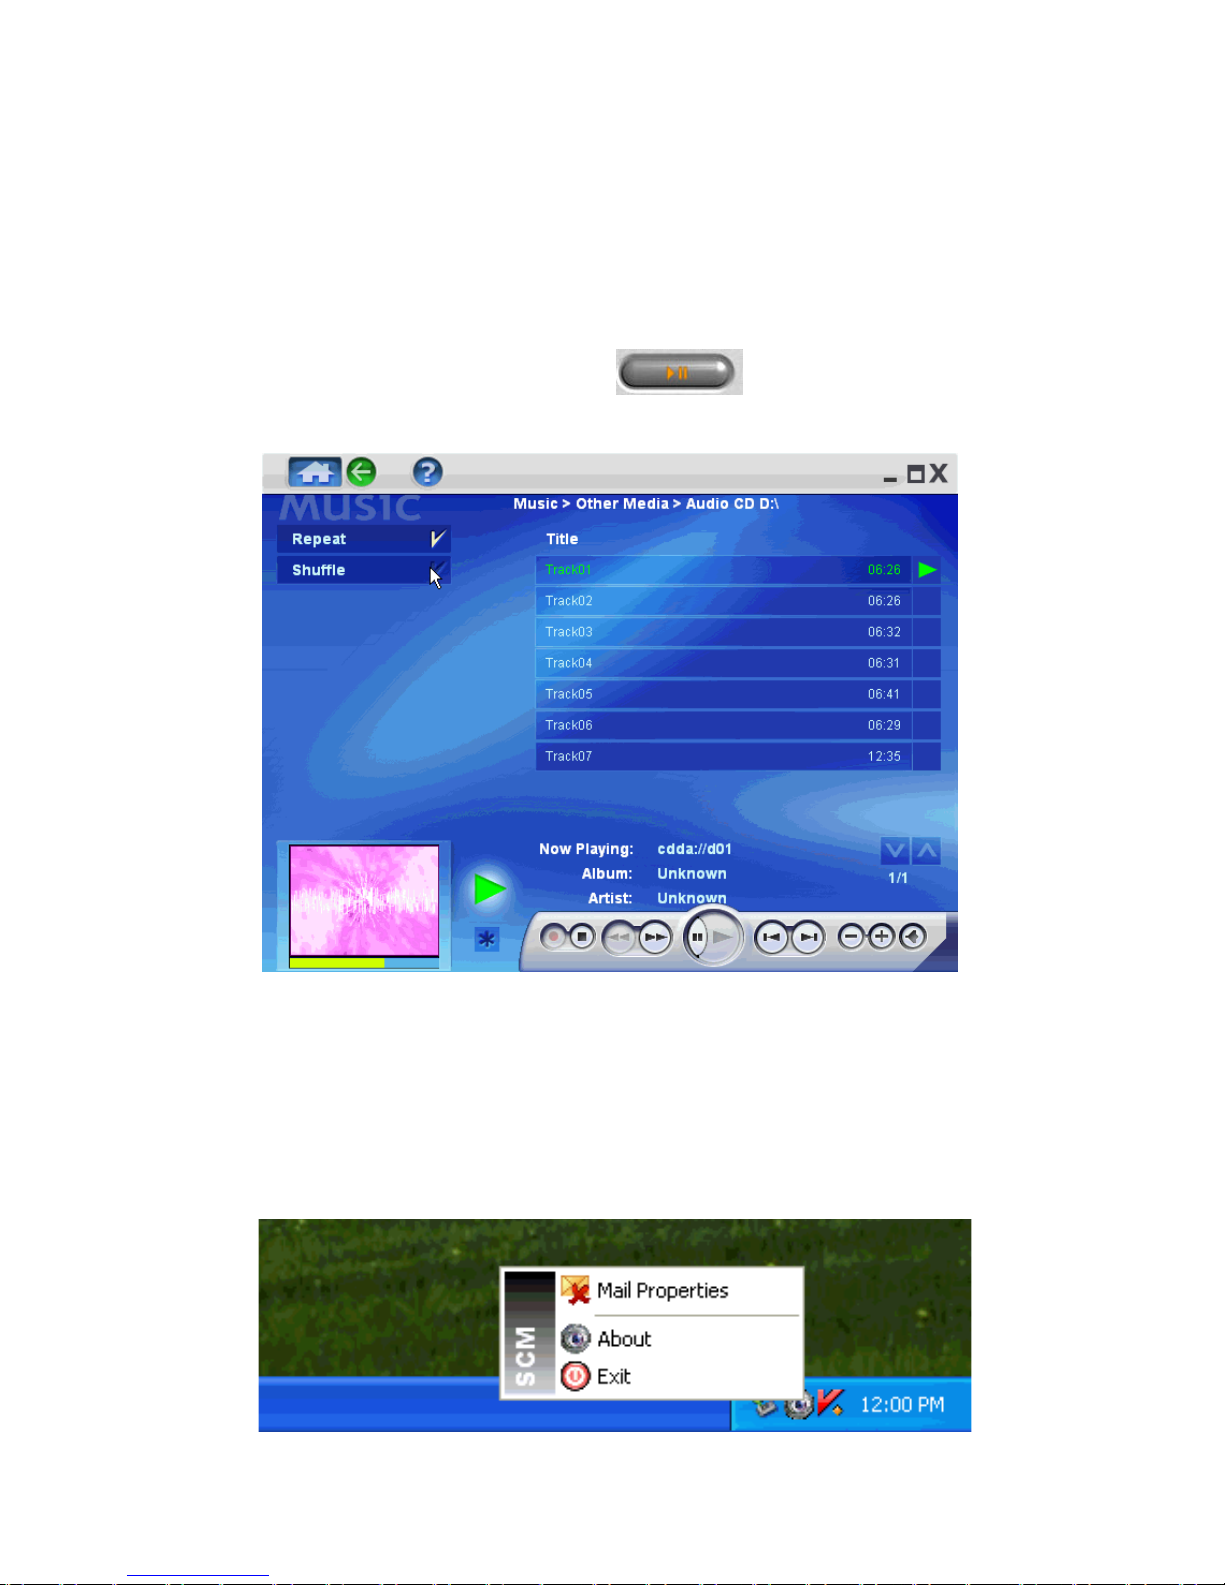
4.1.3 Mail Notification
With this feature launched, you don’t have to turn on and off the
mail box frequently to check out in-coming mails. Right click the
icon on the taskbar and select Mail Properties.
Page 17
13
Software Installation
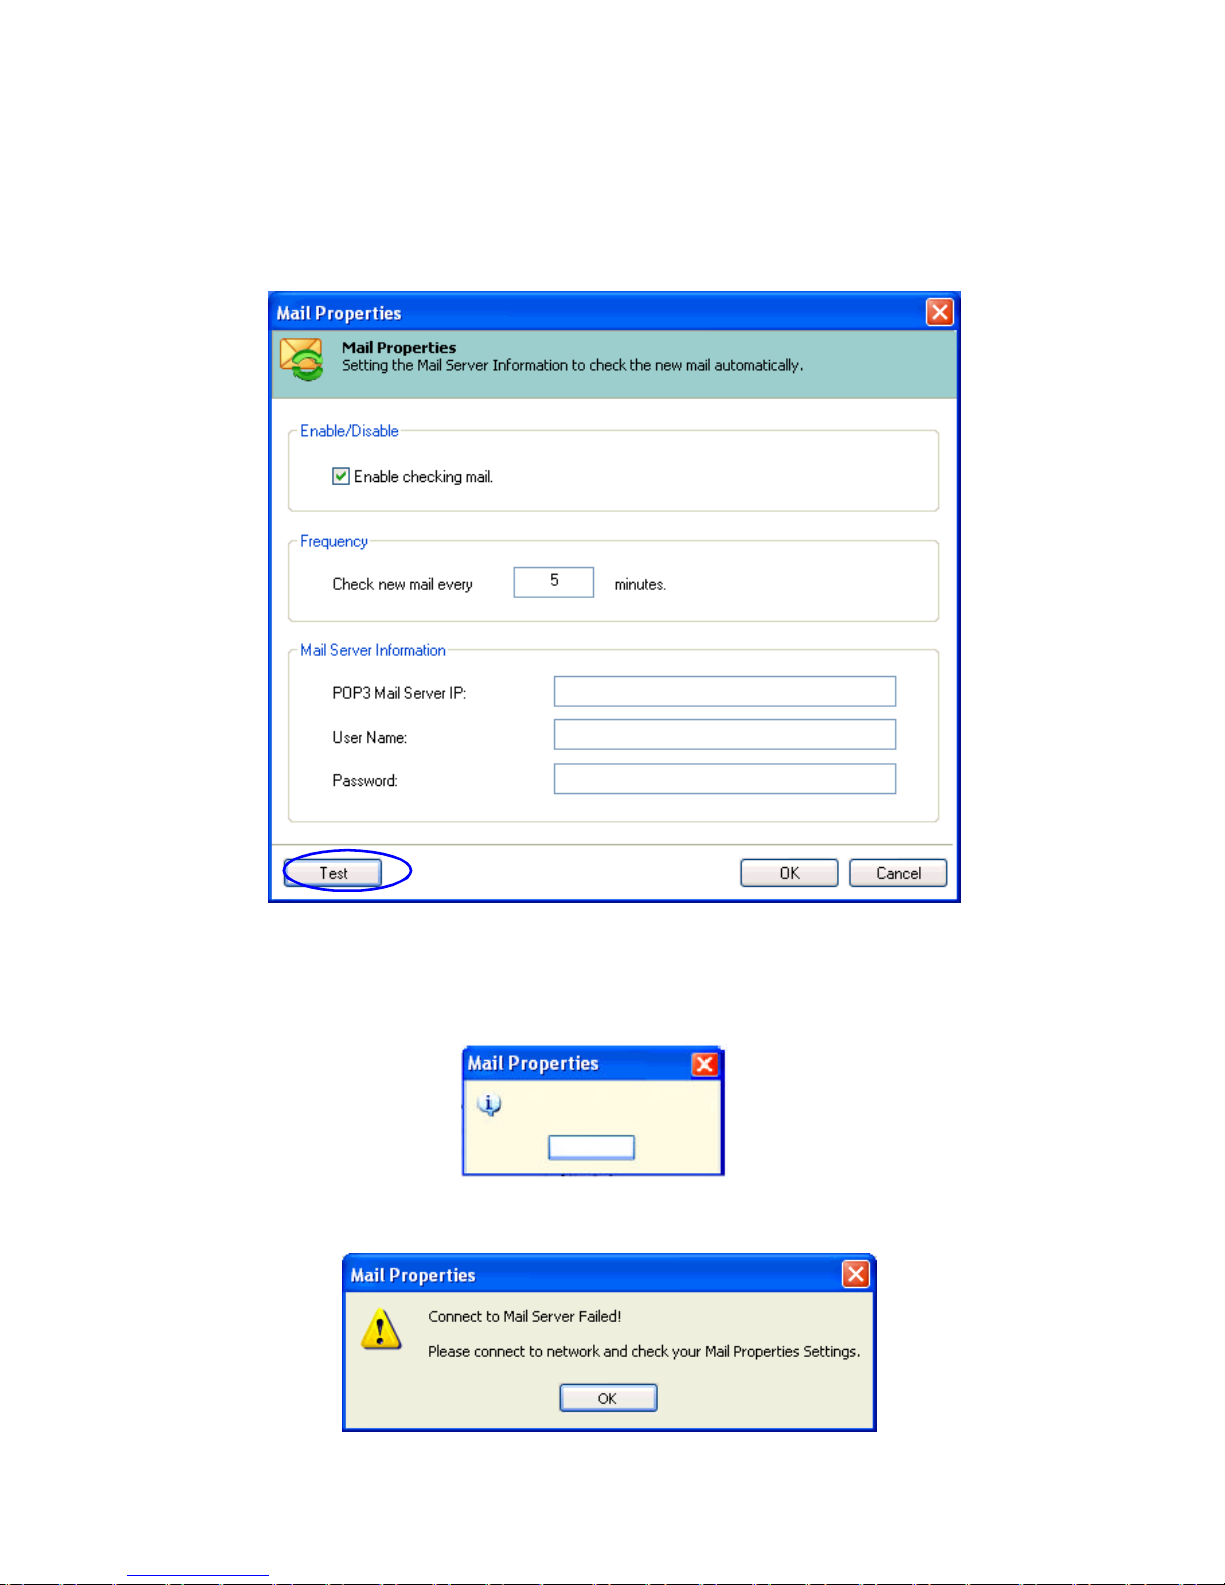
Enter the Mail Server Information to check the mail automatically
and configure the frequency.
To test if you have entered the Mail Server Information correctly,
press Test. If the setting is OK, it will show you the following
If the setting is failed, you will need to reset the information.
Connect to Mail Server Succeeded!
OK
Page 18

14
4.2 SCM Installation
1. When you see the following Setup Window under the Utility
tab, click System Control Manager.
2. Click Next on the Welcome page to continue.
Page 19
15
Software Installation
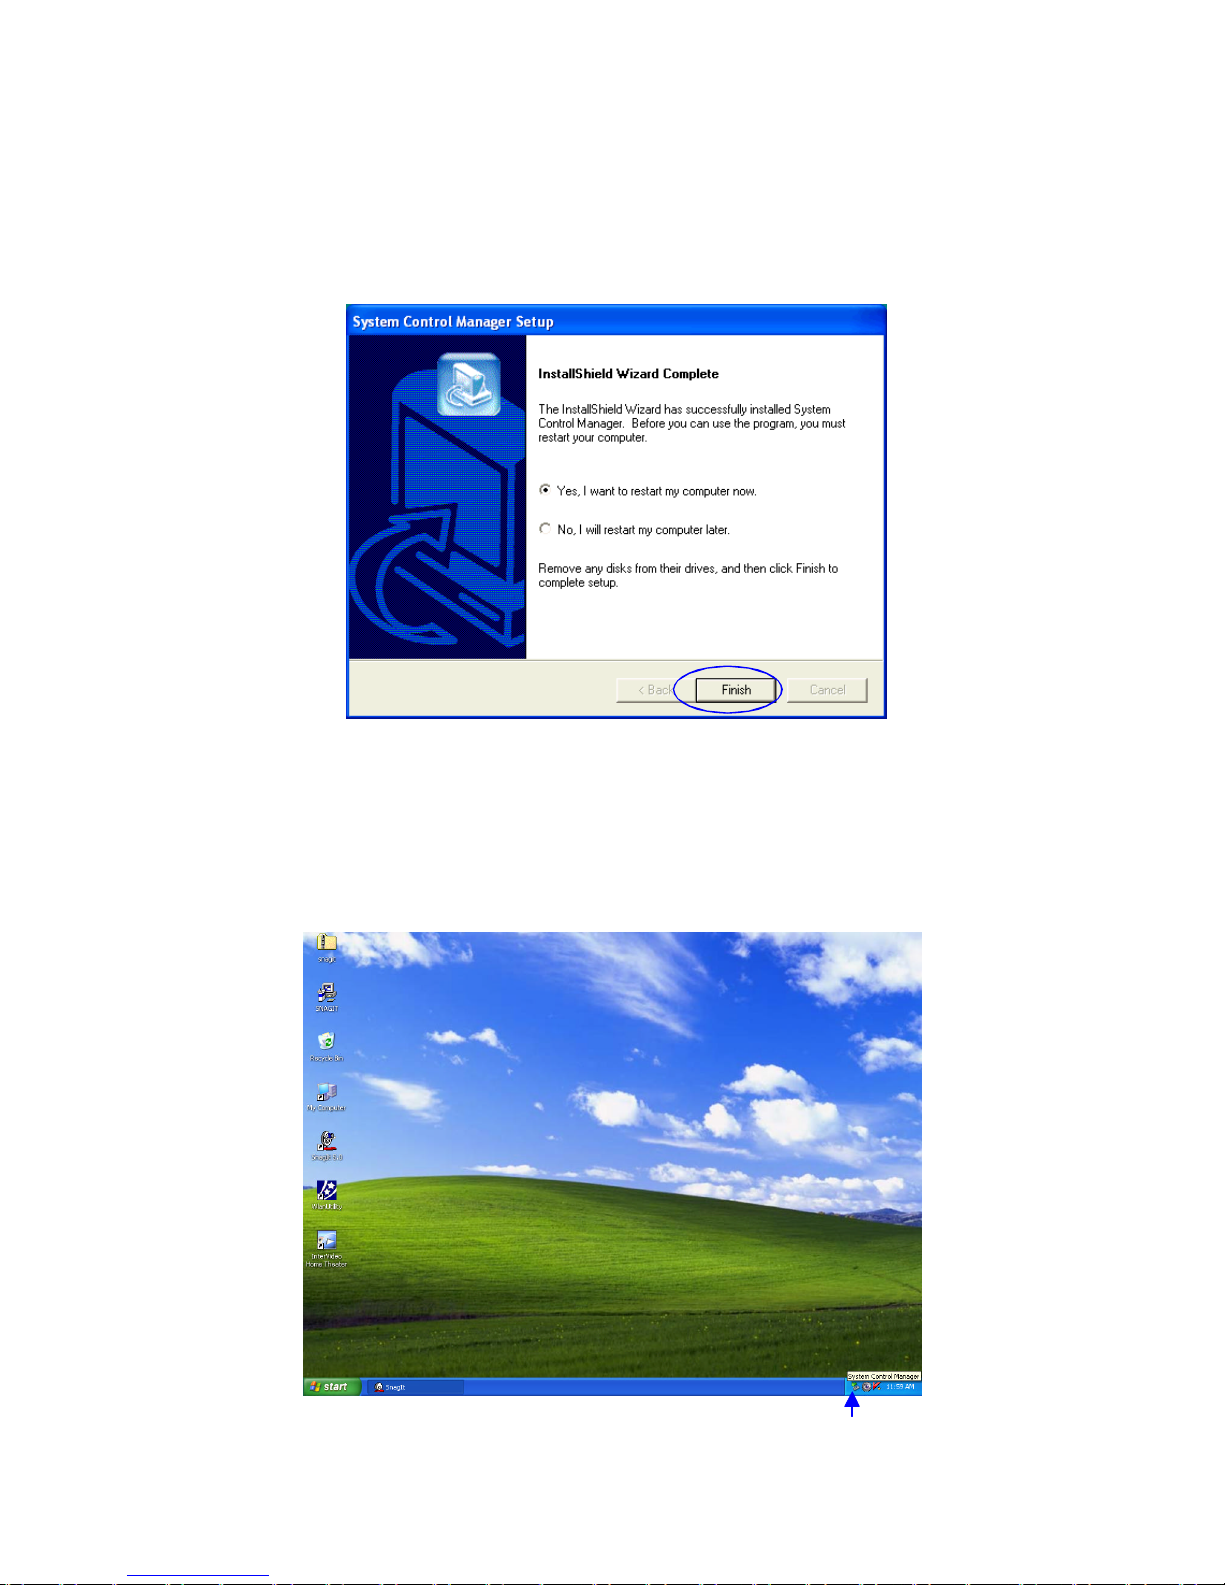
3. The installation is complete. Click Finish to exit.
4. After you restart the computer, you can find the SMC icon
on the status area.
Page 20
16
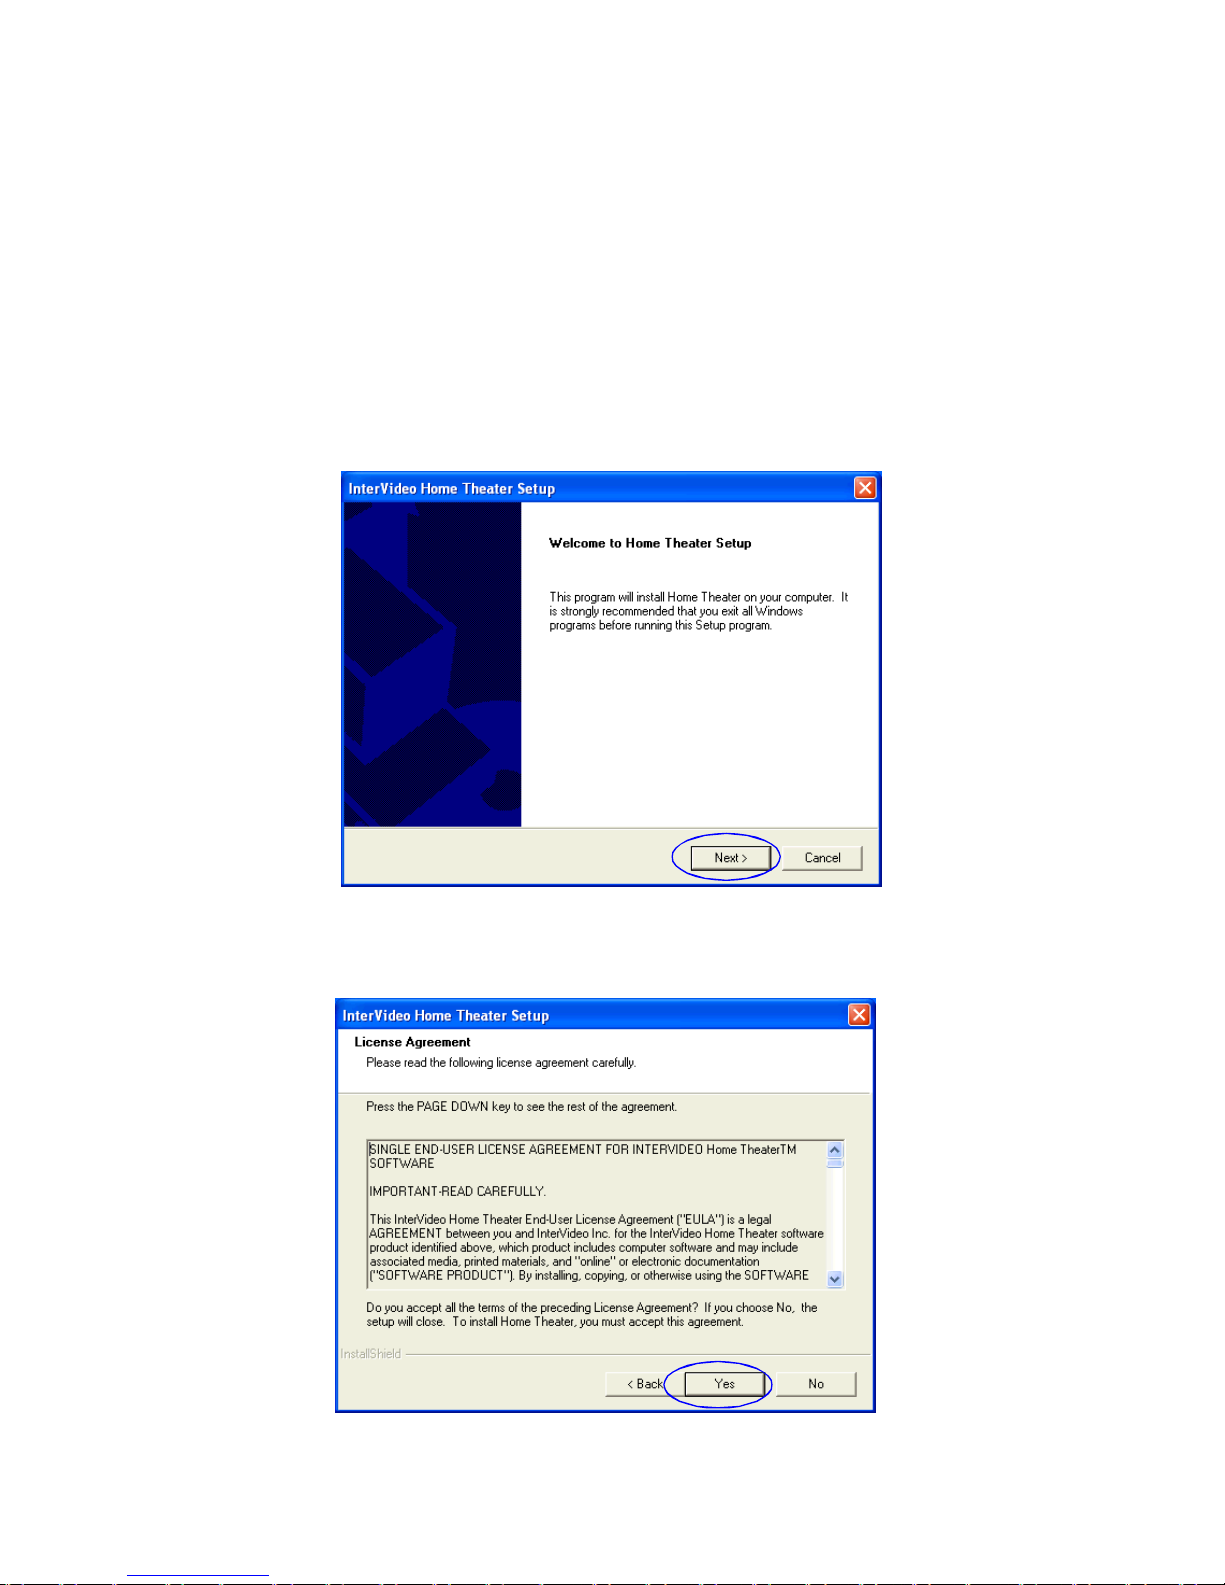
5. Installing InterVideo Home Theater
Insert the attached CD into the CD/DVD-ROM drive to install the
Home Theater application. Follow the on-screen instructions later
to complete the installation.
Note: Turn off all running applications before you start.
1. Click Next on the Welcome page to continue.
2. Click Yes to proceed to the next step.
Page 21

17
Software Installation
3. Enter user’s information and serial number. The serial number
can be found on the packing of the CD. Click Next to
4. The Home Theater application will be installed to the default
folder or your preferred one. Click Browse to point to the
preferred folder. Click Next to continue.
Page 22
18
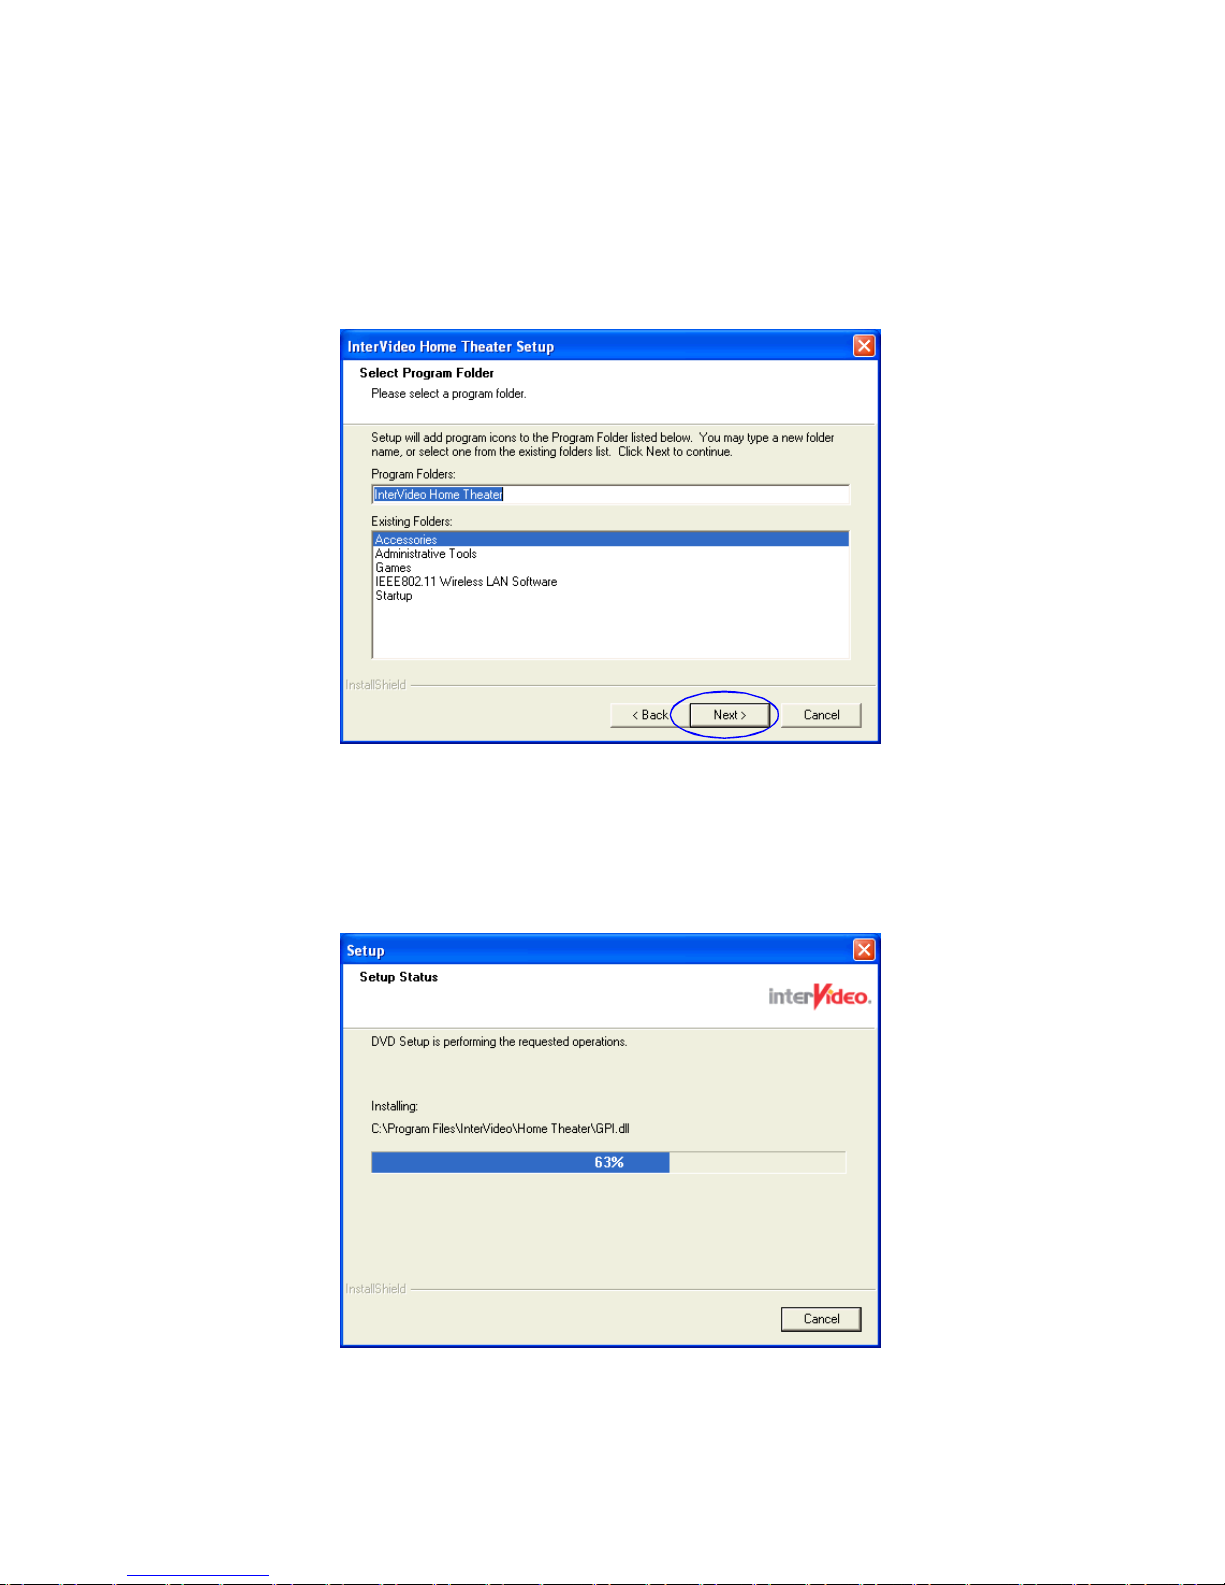
6. The progress indicator displays the percentage of the
installation process that has been completed.
5. It will be installed under the default program folder of
InterVideo Home Theater. You can edit a preferred title for
it. Click Next to continue.
Page 23
19
Software Installation
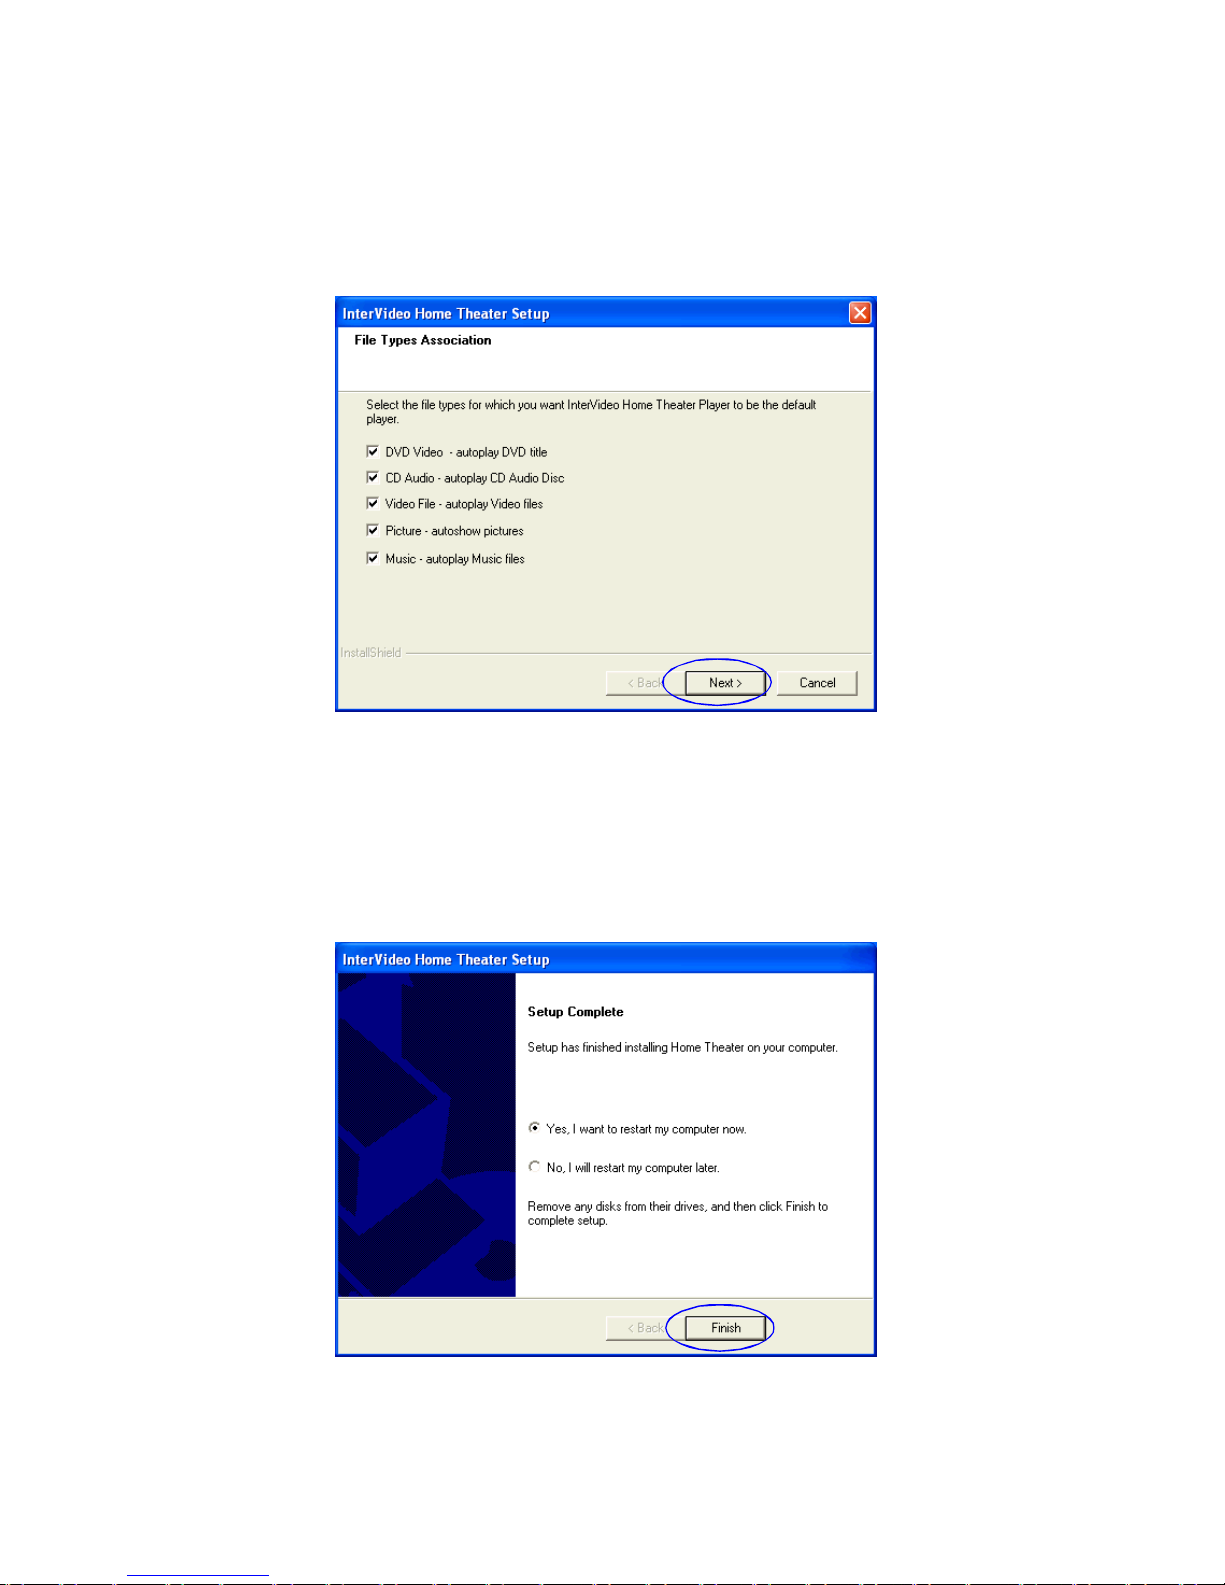
7. Select the check boxes to configure your Home Theater
control panel. Click Next to continue.
8. Click Finish to complete the Home Theater installation.
Page 24

20
9. After you restart the computer, you can find the InterVideo
Home Theater icon on the desktop.
Page 25

Installationsreihenfolge
1. Installation InterVideo InstantON
2. Installation Windows XP
3. Treiberinstallation unter Windows XP
4. Installation SCM unter Windows XP
5. Installation InterVideo Home Theater
Deutsch
Page 26

22
Zum Lieferumfang gehört die InterVideo InstantON InstallationsCD. Diese bootfähige CD dient zur Installation von InstantON auf
Ihrem System. Diese Anwendung basiert auf Linux und ermöglicht
es Ihnen, Ihren MEGA III im A/V Betrieb einzusetzen, ohne das
Betriebssystem Windows XP hochfahren zu müssen. Verwenden
Sie zur Installation der Anwendung entweder eine vollständig leere
Festplatte oder eine Festplatte mit mindestens 210 MB freiem
(unpartitioniertem) Platz.
Installation
Sie haben die Wahl, ob Sie InstantON auf einer leeren Festplatte
oder auf einer teilweise belegten mit wenigstens 210MB
unpartitioniertem Platz installieren.
Achtung:
1. Das Betriebssystem Windows XP muss vor der Instal
lation weiterer Software aufgespielt werden.
2. Das System ist zu keinerlei VGA Grafikkarte
kompatibel. InstantON reagiert nicht mehr, wenn
eine VGA Grafikkarte eingebaut ist.
1. Installation InterVideo InstantON
(Optional)
Bitte installieren Sie die Software in der vorgeschlagenen
Reihenfolge:
1. InterVideo InstantON (Optional)
2. Das Betriebssystem Windows XP
3. Windows XP Treiber
4. System Control Manager (SCM) unter Windows XP
5. InterVideo Home Theater
Page 27

23
Software Installation
Möglichkeit 2. Installation bei teilweise belegter Festplatte
1. Bitte lassen Sie mindestens 210MB (unpartitionierten) Platz
auf Ihrer Festplatte frei.
2. Schalten Sie das System aus und legen Sie danach die Installations-CD in Ihr CD/DVD-ROM Laufwerk. Stellen Sie
sicher, dass CD/DVD-ROM als erstes Bootlaufwerk
angegeben ist.
3. Schalten Sie das System ein, es bootet dann von der Installations CD.
4. Befolgen Sie die Anweisungen auf dem Bildschirm, um die
Installation abzuschliessen.
Wie Sie die Reihenfolge der Bootlaufwerke festlegen:
a. Drücken Sie während des automatischen Selbsttest
nach dem Anschalten (POST) die Taste Entfernen
(Delete), um das BIOS aufzurufen.
b. Wählen Sie [Advanced BIOS Features] und drücken
Sie die Eingabetaste (Enter).
c. Wählen Sie unter [First Boot Device] bitte [CD-
ROM].
d. Schlussendlich wählen Sie [Save & Exit Setup] und
drücken Sie die Eingabetaste (Enter), um Ihre
Eingaben zu speichern und das BIOS zu verlassen.
Möglichkeit 1. Installation auf einer leeren unpartitionierten
Festplatte
1. Schalten Sie das System aus und legen Sie danach die Installations-CD in Ihr CD/DVD-ROM Laufwerk.
2. Schalten Sie das System ein, es bootet dann von der
Installations CD. Stellen Sie sicher, dass CD/DVD-ROM als
erstes Bootlaufwerk angegeben ist.
3. Stellen Sie die für Sie geeignete Sprache für die Installation
ein. Befolgen Sie die Anweisungen auf dem Bildschirm, um
die Installation abzuschliessen.
Page 28
24
Page 29

25
Software Installation
2. Installation Windows XP
Zur Installation des Betriebssystems Windows XP können Sie sowohl
eine vollständig leere oder aber teilweise belegte Festplatte
verwenden. Sollten Sie sich zur Installation auf einer teilweise
belegten Festplatte entscheiden, vergessen Sie bitte nicht, die
ursprüngliche Partitionstabelle zu löschen und wenigstens 250MB
unpartitionierten Platz frei zu halten.
Installation
Bitte entnehmen Sie die notwendigen Installationshinweise dem
Benutzerhandbuch zu Microsoft’s Betriebssystem Windows XP.
Achtung: Führen Sie ein Backup der Daten auf der teilweise
belegten Festplatte durch, für den Fall, dass es während
der Installation von Windows XP zu Datenverlusten kommt.
Page 30

1-26
3. Treiberinstallation unter Windows XP
Um den normalen Betrieb des Systems zu ermöglichen, müssen
Sie under Windows XP Treiber installieren.
1. Beenden Sie alle laufenden Programme, bevor Sie die
Windows XP Treiber installieren.
2. Legen Sie die beigefügte CD in das CD/DVD-ROM Laufwerk.
3. Wenn Sie das folgende Fenster “Teibereinrichtung” sehen,
klicken Sie den Treiber an, der auf Ihrem System installiert
werden soll (z.B. Wireless Driver für WLAN).
Page 31

27
Software Installation
5. Setzen Sie den Punkt neben “I Accept” (Lizenzbedingungen
annehmen) und klicken Sie dann auf Next (Weiter), um
fortzufahren.
4. Klicken Sie auf Next (Weiter) auf dem Startbildschirm um
fortzufahren.
Page 32

28
6. Geben Sie Ihren Namen und den Ihrer Organisation ein und
klicken Sie dann auf Next (Weiter).
7. Klicken Sie auf Install um mit der Installation zu beginnen.
Page 33

29
Software Installation
8. Im folgenden wird der Installationsfortschritt in Prozent
angezeigt. Bitte warten Sie.
9. Die Installation ist abgeschlossen. Klicken Sie auf Finish
(Beenden), um das Installationsprogramm zu verlassen.
Page 34

30
10. Sie finden das Icon “Wlan Utility” auf dem Windows Desktop.
Page 35

31
Software Installation
4. Installation des SCM unter Windows XP
4.1 System Control Manager
Das System Control Manager ist eine neue Generation von
Werkzeug, zur Ü berwachung via Bildschirm, Meldung über E-MailEingang und farbige Statusanzeige mit integrierten Funktionstasten.
Der System Control Manager bietet Anzeigen mit gesteigerter
Interaktivität, um Ihnen Rückmeldungen zu den genutzten
Funktionen zur Verfügung zu stellen. Der System Control Manager
beinhaltet drei Hauptfunktionen: Kontrolle über die Anzeige an
der Gehäusevorderseite, Anzeige am Bildschirm und
Benachrichtigungen bei Maileingang. Nach der Installation der
SCM Anwendung finden sie das Icon in der Taskleiste.
4.1.1 Kontrollanzeige Gehäusevorderseite
Wenn Sie die Funktionstaste auf der Vorderseite drücken, gibt die
Kontrollanzeige den Status der Anwendung wieder.
Drücken Sie beispielsweise Play (Abspielen) im Musikmodus, gibt
die Anzeige den entsprechenden Status wieder:
Achtung: Ist der System Control Manager nicht installiert
oder wird er beendet, stehen einige Kontrollfunktionen
nicht zur Verfügung.
Um den normalen Betrieb zu gewährleisten, müssen Sie den System
Control Manager (SCM) unter Windows XP installieren.
Page 36

32
4.1.2 Bildschirmanzeige (OSD)
Drücken Sie die Funktionstaste an der Gehäusevorderseite, dann
wird Ihnen der jeweils empfangene Befehl auf dem Monitor
angezeigt.
Drücken Sie beispielsweise Play (Abspielen) im Musikmodus, wird
der entsprechenden Status auf dem Bildschirm wiedergegeben:
4.1.3 Benachrichtigung bei Maileingang
Wird diese Funktion gestartet, erledigt sich häufiges Aufrufen der
Mailbox, um den Maileingang zu überprüfen. Klicken Sie mit der
rechten Maustaste auf das Icon in der Taskleiste und wählen Sie
Mail Properties(Eigenschaften E-Mail).
Play
Page 37

33
Software Installation
Geben Sie die Informationen zu Ihrem Mail Server ein, um
automatisch die Mail abzurufen und geben Sie die Häufigkeit
(Frequency) der Abfrage ein.
Drücken Sie Test, um die Richtigkeit Ihrer Angaben zum Mailserver
zu testen. Sind die Einstellungen in Ordnung, wird die folgende
Dialogbox angezeigt:
Führen diese Einstellungen nicht zum Erfolg, müssen Sie die
Angaben erneut machen.
Connect to Mail Server Succeeded!
OK
Page 38

34
4.2 SCM Installation
1. Unter dem Register “Utility” finden Sie das folgende
Einrichtungsfenster. Klicken Sie auf “System Control Man-
ager”.
2. Klicken Sie auf Next (Weiter) auf dem Startbildschirm um
fortzufahren.
Page 39

35
Software Installation
3. Die Installation ist abgeschlossen. Klicken Sie auf Finish
(Beenden), um das Installationsprogramm zu verlassen.
4. Nach dem Neustart des Computers finden Sie das “SMC”Icon
im Statusbereich der Taskleiste unten rechts.
Page 40

36
5. Installation InterVideo Home Theater
Legen Sie die beigefügte CD in das CD/DVD-ROM Laufwerk, um die
Anwendung InterVideo Home Theater zu installieren. Befolgen Sie später
die Anweisungen auf dem Bildschirm, um die Installation abzuschliessen.
1. Auf der Startseite klicken Sie bitte Next (Weiter) an, um
weiter zu machen.
2. Klicken Sie auf Yes (Ja), um mit dem nächsten Schritt
fortzufahren.
Hinweis: Bevor Sie beginnen, beenden Sie bitte alle laufenden
Programme.
Page 41

37
Software Installation
3. Geben Sie Ihren Namen, den Ihrer Organisation und die
Seriennummer ein. Sie finden die Seriennummer auf der
Verpackung der CD. Klicken Sie dann auf Next (Weiter).
4. Die Anwendung “Home Theater” wird entweder in das
voreingestellte Verzeichnis oder eines Ihrer Wahl installiert.
Klicken Sie Browse an, um ein Verzeichnis nach Ihrem
Wunsch auszuwählen. Klicken Sie dann auf Next (Weiter).
Page 42

38
6. Im folgenden wird der Installationsfortschritt in Prozent
5. Falls Sie keinen eigenen Titel nach Ihrer Wahl eingeben,
wird das Programm in das Verzeichnis “InterVideo Home
Theater” installiert. Um fortzufahren, klicken sie auf Next
Page 43

39
Software Installation
7. Wählen Sie durch setzen eines Hakens die Dateitypen aus,
die mit diesem Programm angezeigt bzw. wiedergegeben
werden sollen. Um fortzufahren, klicken sie auf Next
8. Klicken Sie auf Finish(Beenden), um die Installation des
Home Theater abzuschliessen.
Page 44

40
9. Nach dem Neustart finden Sie das Icon des “InterVideo Home
Theater” auf dem Windows Desktop.
Page 45

41
Installation Logiciel
Français
Etapes de l’installation
1. Installer InterVideo InstantON
2. Installer Windows XP
3. Installer les pilotes de Windows XP
4. Installer SCM sous Windows XP
5. Installer InterVideo Home Theater
Page 46

42
1. Installer InterVideo InstantON
(optionnel)
Attention !
1. Windows XP doit avoir été installe AVANT tout autres
applications.
2. InstantON n’est pas compatible avec les cartes VGA
additionnelles. L’application InstantON ne fonctionnera
pas si une carte graphique additionnelle a été installée.
Installation
Pour installer InstantON utilisez une disque dur vierge ou avec 210Mo
libre et non partitionné.
Vous trouverez un CD d’installation de InterVideo InstantON avec le
barebone. Il s’agit d’un CD d’auto installation. Cette application sur
base Linux permet au MEGA III des fonction Audio/Vidéo sans charger
Windows. Pour installer cette application, utilisez un disque dur vierge,
ou assurez vous d’avoir au moins 210Mo d’espace libre non
partitionné.
Installer les logiciels dans l’ordre suivant :
1. InterVideo InstantON (optionnel)
2. Windows XP
3. Les pilotes de Windows XP
4. System Control Manager (SCM) sous Windows XP
5. InterVideo Home Theater
Page 47

43
Installation Logiciel
Option 2. Installer sur un Disque Dur non vierge.
1. Assurez vous que le disque posscde au moins 210Mo d’espace libre
et non partitionné.
2. Eteignez le systcme avant d’insérer le disque dans le lecteur CD/
DVD-ROM.
3. Allumer le systcme, le CD d’installation se lance automatiquement.
Assurez vous toutefois que vous avez paramétré CD/DVD-ROM en
First Boot Device dans le Bios..
4. Suivez les instructions r l’écran pour compléter l’installation.
Comment paramétrer le boot sur CD ?
a. Allumer le systcme et appuyer sur la touche Delete / Suppr.
pour entrer dans le Bios.
b. Entrer dans le menu [Advanced BIOS Features] et valider
avec Entré.
c. Parametrez [First Boot Device] en [CD-ROM].
d. Pour finir, sélectionnez [Save & Exit Setup] et appuyez sur
Entré pour sauver le paramétrage et quitter le BIOS.
Option 1. Installer sur un disque vierge et non partitionné.
1. Eteignez le systcme avant d’insérer le disque dans le lecteur CD/
DVD-ROM.
2. Allumer le systcme, le CD d’installation se lance automatiquement.
Assurez vous toutefois que vous avez paramétré CD/DVD-ROM en
First Boot Device dans le Bios..
3. Suivez les instructions r l’écran pour compléter l’installation.
Page 48

44
Page 49

45
Installation Logiciel
2. Installer Windows XP
Pour l’installation de Windows XP, vous pouvez utiliser un disque dur
vierge ou non. Toutefois, si vous utilisez un disque ayant déjr des
données, assurez vous d’effacer la partition originale et de posséder
au moins 250Mo d’espace non partitionné.
Installation
Referez vous au manuel de Windows XP pour l’installation du systcme
d’exploitation.
Attention : faites une sauvegarde de vos données, si vous
utilisez un disque non vierge. Des pertes de données peuvent
survenir durant l’installation de Windows XP.
Page 50

46
3. Installer les pilotes pour Windows XP
Vous devez installer les pilotes pour Windows XP pour que le systcme
fonctionne normalement..
1. Fermez toutes les applications avant l’installation des pilotes.
2. Insérez le CD de pilotes dans le lecteur CD/DVD-ROM.
3. Lorsque la fenetre Drivers Setup apparaît, cliquez sur le pilote que vous
souhaitez installer. (ex. Wireless Driver).
Page 51

47
Installation Logiciel
4. Cliquez sur Suivant on the Welcome page to continue.
5. Apres avoir lu les conditions, cliquez dans la case “J’accepte” puis
cliquez sur Suivant.
Page 52

48
6. Entrez les informations demandées puis cliquez Suivant.
7. Cliquez Installer pour lancer l’installation.
Page 53

49
Installation Logiciel
8. Pendant l’installation une barre vous montre la progression.
Attendez que l‘installation soit complcte.
9. Lorsque l’installation est complcte, cliquez sur Terminé.
Page 54

50
10. L’icône Wlan Utility apparaît sur le Bureau.
Page 55

51
Installation Logiciel
4. Installer SCM pour Windows XP
Pour un fonctionnement normal du systcme vous devez installer
System Control Manager (SCM).
Attention : Si le System Control Manager n’est pas installée
ou complété, certaines fonctionnalités ne seront pas
disponibles.
4.1 System Control Manager
System Control Manager est un outil de nouvelle génération pour le
contrôle des fonction d’affichage, d’email… SCM rend les affichage
encore plus interractif. Il offre 3 fonctions : Affichage en façade avant,
affichage r l’écran, et alerte mail. Une fois installé, une icône
apparaîtra sur la barre de tache.
4.1.1 Contrôle en façade
Quand vous appuyez sur les boutons de la façade avant, l’afficheur de
la façade vous indique les états des applications.
Par exemple, si vous appuyez sur le bouton Play en mode Music,
l’afficheur vous indiquera l’état suivant :
Page 56

52
Play
4.1.2 Affichage r l’écran (On Screen Display -OSD)
Lorsque vous appuyez sur un bouton avant, la commande apparaît
également sur l’écran principale (Moniteur ou TV)
Par exemple, si vous appuyez sur le bouton Play en mode Music,
L’écran vous indique l’état suivant :
4.1.3 Notification de Mail
Grâce a cette fonction, vous etes averti de l’arrivé de mails sans avoir r
ouvrir votre application réception mail. Cliquez avec le bouton droit de
votre souris sur l’icône dans la barre de tâche et sélectionnez Mail
Page 57

53
Installation Logiciel
Connect to Mail Server Succeeded!
OK
Entrez les information du Server Mail ainsi que la fréquence de
vérification.
Vérifiez que les informations ont été correctement enregistrée en
cliquant sur le bouton Test. Si tout est correct, la fenetre suivante
Si la connexion échoue, vous devrez reparamétrer les informations.
Page 58

54
4.2 Installation de SCM
1.Lorsque vous voyez la fenetre suivante, dans l’onglet Utility, cliquez
sur System Control Manager.
2. Cliquez Suivant sur la page d’accueil.
Page 59

55
Installation Logiciel
3. L’installation est complcte. Cliquez Terminé pour sortir.
4. Aprcs avoir redémarrer Windows, l’icône SMC apparaît dans la barre
de tâche.
Page 60

56
5. Installer InterVideo Home Theater
Insérez le CD dans le lecteur pour installer l’application de lecture DVD.
Suivez les instructions afficher r l’écran pour compléter l’installation.
Note: Fermez toutes les applications avant l’installation.
1. Cliquez Suivant sur la page d’accueil.
2. Cliquez Oui pour continuer.
Page 61

57
Installation Logiciel
3. Entrez les informations demandées et le numéro de série. Le numéro
de série se trouve sur l’emballage du CD. Cliquez Suivant pour
continuer.
4. L’application sera installée dans le répertoire par défaut, ou dans un
répertoire de votre choix. Cliquer Parcourir pour choisir votre
répertoire. Cliquez Suivant pour continuer.
Page 62

58
5. Le repertoire s’intitulera InterVideo Home Theater. Vous pouvez
modifier le nom du répertoire. Cliquez Suivant pour continuer.
6. Une barre vous indique la progression de l’installation. Patientez
jusqu’r l’installation complcte de l’application.
Page 63

59
Installation Logiciel
7. Cliquez sur les cases pour configurer l’application Cliquez Suivant
pour continuer.
8. Cliquez Terminé pour finir l’installation de l’application.
Page 64

60
9. Aprcs avoir redémarrer Windows, L’icône InterVideo Home Theater
apparaîtra sur le bureau.
Page 65

Pasos de instalación
1. Instalando InterVideo InstantON
2. Instalando Windows XP
3. Instalación de Drivers para Windows XP
4. Instalación de SCM en Windows XP
5. Instalación de InterVideo Home Theater
Español
Page 66

62
1. Instalando InterVideo InstantON
(opcional)
Rogamos instale el software siguiendo los siguientes pasos:
1. InterVideo InstantON (opcional)
2. Sistema Operativo Windows XP
3. Drivers para Windows XP
4. System Control Manager (SCM) para Windows XP
5. InterVideo Home Theater
En la caja encontrará el CD de instalación de InterVideo InstantON.
Es un disco autoejecutable para instalar InstantON en su sistema.
Esta aplicación, basada en Linux le permite, trabajar con su MEGA
III en modo A/V sin arrancar Windows XP. Para instalar la
aplicación, compruebe que tiene un disco duro vacío o ya usado
pero con al menos 210MB de espacio libre junto.
Atención!
1. Windows XP ha de ser instalado antes que
cualquier otro programa
2. El sistema no es compatible con cualquier tarjeta
VGA. La aplicación InstantON no funcionará si se
instala la tarjeta
Page 67

63
Instalación de Software
Como especificar la prioridad en el arranque:
a. Encienda el sistema y presione Delete para entrar
en “BIOS Setup” durante el proceso de arranque.
b. Colóquese en [Advanced BIOS Features] y presione
Enter.
c. Asigne [First Boot Device] a [CD-ROM].
d. Finalmente, selecione [Save & Exit Setup] y presione
Enter para guardar los parámetros y salir de la
BIOS.
Opción 2. Instalar en un disco duro ya usado
1. Compruebe que tiene al menos 210MB de espacio libre
(espacio sin particiones).
2. Apague el sistema antes de insertar el CD de instalación
en la unidad CD/DVD-ROM. Compruebe que tiene como
primera unidad de arranque el CD/DVD-ROM.
3. Encienda el sistema y arrancará automaticamente desde
el CD de instalación.
4. Siga las instrucciones que aparecen por pantalla para
completar la instalación.
Instalación
Puede usar un disco duro vacio o con una sola partición al menos
210MB
Opción 1. Instalar en un disco duro vacio y sin particiones
1. Apague el sistema antes de insertar el CD de instalación
en la unidad CD/DVD-ROM.
2. Encienda el sistema y se ejecutará directamente el CD de
instalación. Compruebe que tiene como primera unidad de
arranque el CD/DVD-ROM.
3. Siga las instrucciones que aparecen por pantalla para
completar la instalación.
Page 68

64
Page 69

65
Instalación de Software
2. Instalando Windows XP
Para instalar el S.O. Windows XP, puede usar un disco duro
vacio o ya con información. No obstante, si decide usar uno que
no esta vacío, recuerde eliminar la partición original del disco
duro y reservarse en una sola partición al menos 250MB.
Instalación
Consulte su manual de usuario de Microsoft para la instalación
Atención: Debe hacer una copia de seguridad de la
información de su disco duro para prevenir pérdidas
de información durante la instalación de Windows
Page 70

66
1. Salga de todas las aplicaciones que se están ejecutando
antes de instalar los drivers para Windows XP.
2. Inserte el CD incluido en la unidad CD/DVD-ROM.
3. Cuando vea la siguiente ventana, haga clic en driver (por
ejemplo Wireless Driver) para que se instale en su sistema.
3. Instalación de Drivers para
Windows XP
Necesita instalar los drivers para Windows XP para un uso normal.
Page 71

67
Instalación de Software
5. Seleccione el recuadrado de diálogo “I Accept” y haga clic
en Next para continuar.
4. Haga Click en Next en la página de bienvenida para
Page 72

68
6. Introduzca los datos de usuario y haga clic en Next.
7. Haga click en Install para iniciar la instalación.
Page 73

69
Instalación de Software
8. Muestra el porcentaje de la instalación que se ha
completado. Debe esperar.
9. La instalación está completada. Haga Clic en Finish para
salir.
Page 74

70
10. Puede encontrar el icono de Wlan Utility en el escritorio.
Page 75

71
Instalación de Software
4. Instalación de SCM en Windows XP
Necesita instalar System Control Manager (SCM) en Windows
XP para un uso normal.
4.1 System Control Manager
System Control Manager es una nueva generación en
herramientas para el control de pantalla con E-mail alarma de
entrada y muestra del estado con imagenes coloristas para las
teclas de función integradas. System Control Manager le permite
ver de una forma interactiva las funciones que se están usando.
Hay tres funciones principales en el System Control Manager:
Control del panel frontal, Información en pantalla y notificación de
mail. Una vez que ha instalado la aplicación SCM, verá un icono
en la barra de menus.
Atención: Si la aplicación System Control
Manager application no estás instalada
completamente, algunas funciones no estarán
disponibles.
4.1.1 Control de panel frontal
Cuando presione la tecla de función en el panel frontal, se le
mostrará el estado actual de la aplicación.
Por ejemplo, si presiona Play en el modo de música, el panel
frontal le mostrará el correspondiente estado:
Page 76

72
4.1.2 On Screen Display (OSD)
Cuando presione la tecla de función en el panel frontal, el monitor
le mostrará la información requerida.
Por ejemplo, si presiona Play en modo música, el monitor le
mostrará el correspondiente estado:
Play
4.1.3 Notification de Mail
Con esta función, no necesita chequear constantemente el mail
para saber si hay algún nuevo mail. Con el botón derecho haga
click en el icono de la barra de menus y seleccione Mail Proper-
ties.
Page 77

73
Instalación de Software
Introduzca la información del servidor de Mail para chequear el
mail y configurar la frecuencia.
Para comprobar si ha introducido correctamente la información
del servidor de correos, presione Test. Si los ajustes están OK, le
aparecerá la siguiente pantalla:
Si los ajustes están erroneos, necesitará resetear la información.
Connect to Mail Server Succeeded!
OK
Page 78

74
4.2 Instalación SCM
1. Cuando vea la siguiente ventana de configuración en la
etiqueta Utility, haga click en System Control Manager.
2. Haga Clic en Next en la página de bienvenida para continuar
Page 79

75
Instalación de Software
3. La instalación está completa. Haga Clic en Finish para salir.
4. Una vez que reinicia el ordenador, puede encontrar el icono
SMC en el área de estado.
Page 80

76
5. Instalación de InterVideo
Home Theater
Inserte el CD incluído en la unidad CD/DVD-ROM para instalar la
aplicación Home Theater. Siga las instrucciones en pantalla para
completar la instalación.
Nota: Salga de todas las aplicaciones antes de continuar.
1. Haga Click en Next en la página de bienvenida para
continuar
2. Haga Click en Yes para ir al siguiente paso.
Page 81

77
Instalación de Software
3. Introduzca la información de usuario y el número de serie.
El número de serie lo puede encontrar en la caja del CD.
Haga clic en Next para continuar.
4. La aplicación Home Theater se instalará en la carpeta por
defecto o en la que usted seleccione. Haga Clic en Browse
para indicar la carpeta que prefiera. Haga Clic en Next para
continuar.
Page 82

78
6. La pantalla de progreso le muestra el porcentaje de la
instalación que se ha realizado hasta el momento.
5. Se instalará por debajo de la carpeta actual del programa
InterVideo Home Theater. Puede cambiar el nombre. Haga
Clic en Next para continuar.
Page 83

79
Instalación de Software
7. Seleccione las cajas de opción para configurar el panel de
control de su Home Theater. Haga Clic en Next para
continuar.
8. Haga Clic en Finish para completar la instalación de Home
Theater.
Page 84

80
9. Al reiniciar el ordenador, encontrará el icono de InterVideo
Home Theater en el escritorio.
Page 85

Page 86

1. InterVideo InstantON
System Control Manager (SCM)
InterVideo Home Theater
CD [InterVideo InstallON] CD
[InterVideo InstantON]
MEGA III A/V CD
HDD
HDD
Page 87

InstantON OS
HDD
HDD
CD/DVD-ROM CD
CD/DVD-ROM
CD
[Delete]
[Advanced BIOS Features]
[First Boot Device] [CD-ROM]
[Save & Exit Setup]
Page 88

Page 89

2. XP
Page 90

CD/DVD-ROM CD (Drivers and Utilites)
Wireless
Page 91

Page 92

Page 93

Page 94

Page 95

Page 96

Page 97

Page 98

Page 99

Page 100

CD/DVD-ROM [Home Theater]
 Loading...