

Page 1
Start here.
Introduction...
Thank you for purchasing MSI Wireless 11b Access
Point AP11B. In the fast growing network
environment, AP11B provides you with an innovative
and convenient solution that lets you connect to the
network without limitation, whether in office, at home,
or even on the go.
How to use this guide...
This Quick Start Guide describes the features of AP11B,
and provides the steps needed to install and configure
yourAP11B. You can know your AP11B well and complete
basic installation through the "instruction box" in this
guide:
Package Contents and Product View, see 1a, 1b.
AP11B Installation:
free-standing, see 2a.
Wall- or ceiling-mounted, see 2b.
Network Configuration:
Default parameters, see 3a.
System requirements, see 3b.
Web-based configuration, see 3c.
Typical configuration, see 3d.
Please note that all figures in this guide are for reference
only; the actual setup screens may be varied on different
system. For more information, please visit MSI website:
http://www.msi.com.tw
Preparation.
Check...
Unpack the package and you will find the following items:
AP11B and stand
Quick Start Guide
CD-ROM containing User's Manual and Quick Start
Guide
DC 12V/500mA Power Adaptor
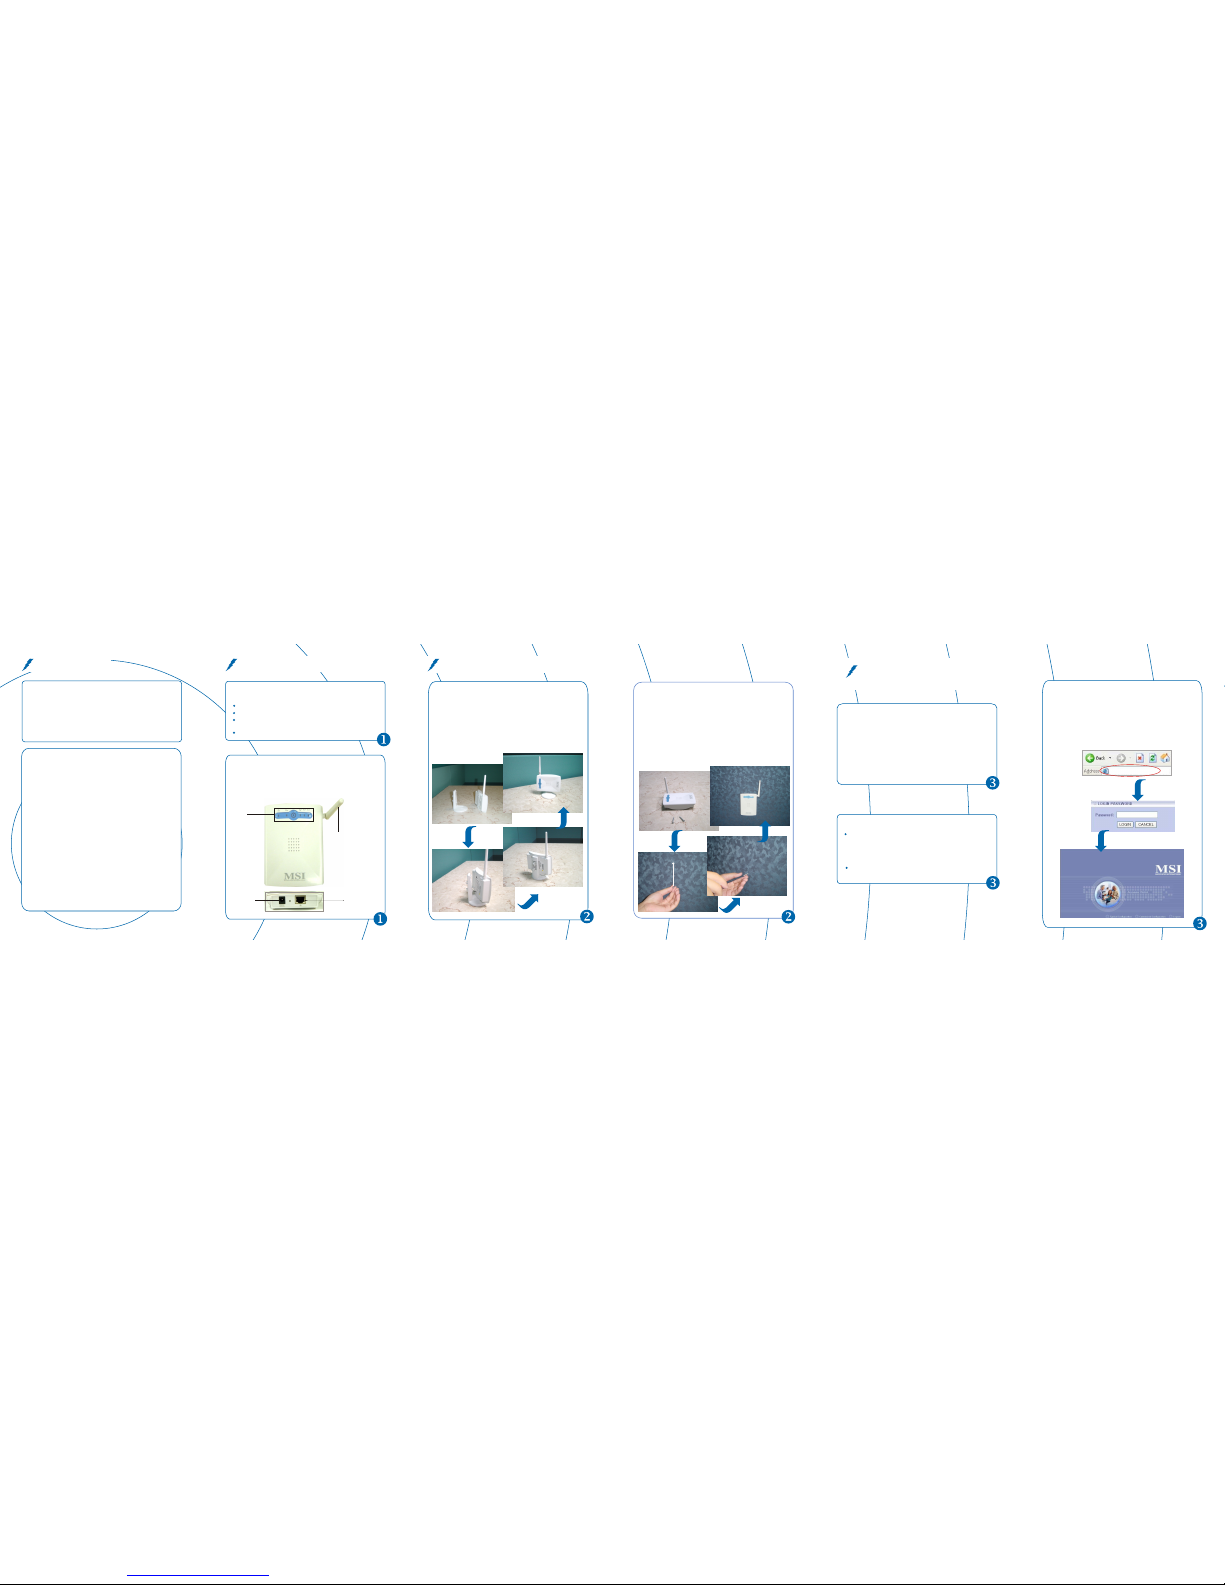
Product View...AP11B wireless access point is an
IEEE802.11b compliant device. It connects one or more
wireless enabled computers to an Ethernet network or
Cable/xDSL modem for high speed connection, anywhere
in your home or office.
AP11B Installation
Free-standing Installation
Step 1. Take out the AP11B and its stand.
Step 2. Locate the mounting holes on the rear panel of
Step 3. The AP11B is hooked to the stand.
Step 4. The free-standing installation is completed.
a
a
b
b
RJ-45 Ethernet Jack
Power Jack
External dipole antenna
LEDs
Start here...
b
b
Wall-mounted Installation
Step 1. Take out the AP11B and screws.
Step 2. The mounting distance between screws is 5.5cm.
Step 3. Hammer the screws partly into the wall and then
Step 4. Align the mounting holes with the screws and then
Step 5. The wall-mounted installation is completed.
5.5cm5.5cm
Second screwSecond screw
First screwFirst screw
System requirements...
Computers with the following operating systems and
with an installed Ethernet adapter
- Microsoft Windows
- Linux
- MAC OS
Any browser compatible with Internet Explorer 6.0 and
later, or Netscape Communicator 6.0 and later
b
b
enter default
password "admin"
Web-based Configuration
The AP11B provides you with a convenient tool to
customize the network settings. Whenever you want to
configure the respective settings, open your web browser
(eg. Internet Explorer or Netscape Communicator), then
type the default IP address 192.168.1.254 in the Address
bar and press [Enter].
http://192.168.1.254
*****
Start here...Start here...
c
c
a
a
a
a
Default Parameters
IP Address 192.168.1.254
Password admin
Subnet Mask 255.255.255.0
SSID AP11B
Channel 7
Encryption Off
DHCP Client Disable
Network
Configuration
the AP11B and align them to the hooks of the stand.
push the AP11B downward to secure it in place.
use the screwdriver to screw them half to the wall.
Page 2
ã2003 MICRO-STAR INTERNATIONAL. All Rights Reserved.
Ver. 1.0 June 2003 PN/G52-C6809X1-G22
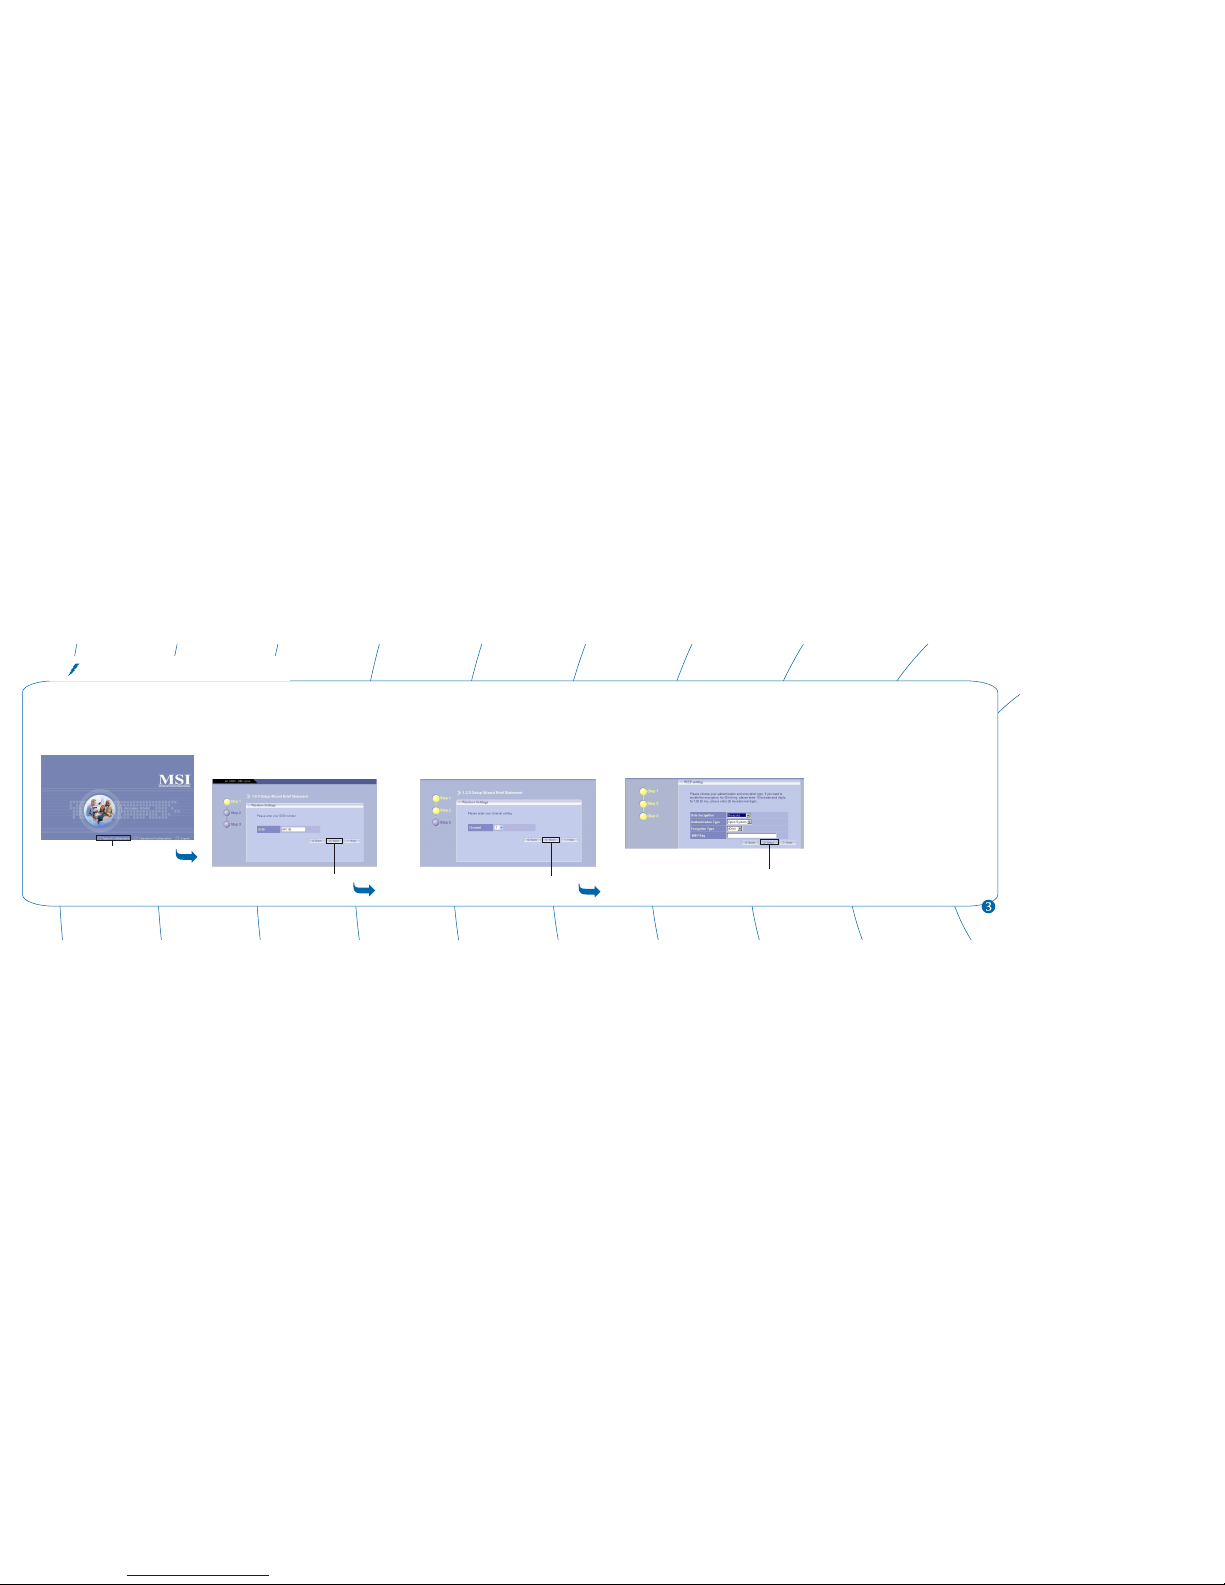
Typical Configuration
Network Configuration (continued)
1-2-3 Setup Wizard
Step 1. Setting the SSID
Enter the default "AP11B" or new SSID.
Click Next to continue.
d
d
1-2-3 Setup Wizard
Step 2. Setting the Channel
Select the default "Channel 7" or new setting.
Click Next to continue.
1-2-3 Setup Wizard
Step 3. WEP Settings
NOTE:
To learn more about Customized Configuration,
please refer to User's Manual.
Click
Click
Encryption Type
Select the level of encryption desired: 40-bit or 128-bit. If
you want to enable the encryption, for 40-bit key, enter 10
hexadecimal digits; for 128-bit key, enter 26 hexadecimal
digits.
NOTE: Hexadecimal digits consist of the numbers 0-9 and
the letters A-F.
WEP Key
Enter your 10- or 26-digit WEP Key.
When completed, click Next to close the 1-2-3 Setup Wizard.
Click
Data Encryption
If Data Encryption is set to "Required", all items must be
answered.
If it is set t o "Not Required", you may skip Step 3 and then
click Next to close the 1-2-3- Setup Wizard.
Authentication Type
Open System: communicates the key across the network
Shared Key: devices must have identical WEP settings
to communicate
Both: communicate using either Open System or
Shared Key
Click
 Loading...