

Mountain Off Road BLYJ8795A User Manual
MOUNTAIN OFF ROAD ENTERPRISES, LLC.
P.O. BOX 690, DELTA, COLORADO 81416
©
970-625-0500 970-625-3747 Fax
E-mail: info@mountainoffroad.com
www.mountainoffroad.com
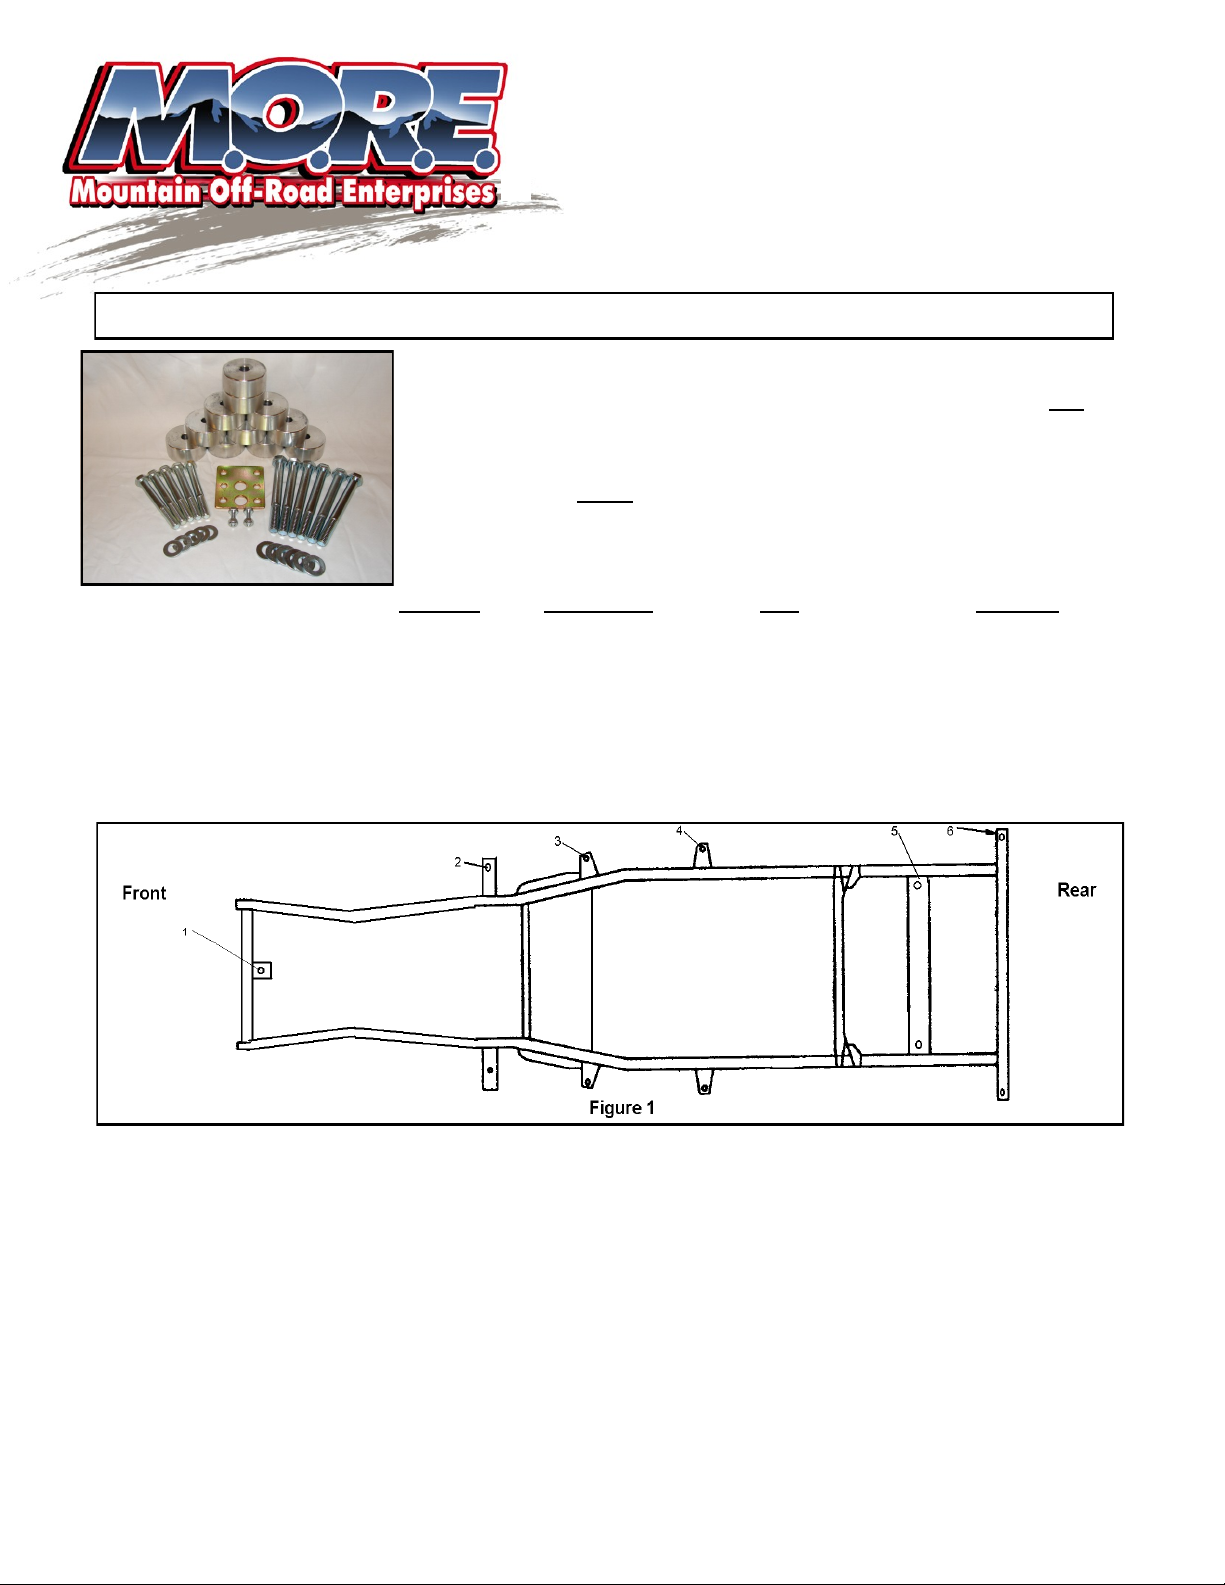
INSTRUCTIONS for M.O.R.E.™ BLYJ8795A 1” BODY LIFT KIT / SYSTEM
This M.O.R.E.™ One Inch Body Lift Kit fits 1987-1995 Jeep® YJ® Wrangler®
vehicles with ether 2.5L or 4.0L engines, with Automatic transmissions, with or
without air conditioning. This kit has been designed to fit on YJ Wrangler’s that
are stock (no suspension lift), or Wrangler’s that have been lifted with aftermarket suspension lift kits up to 4”. Please read all instructions and our Terms and
Policies on page 2 before you begin installing this kit. Familiarize yourself with
all components in this kit and the parts of your Jeep that you will be working on.
Common hand tools are required and some knowledge of mechanical things
are needed. This kit contains the following items:
Quantity: Description: Size: Location:
11 Puck-Aluminum 2-1/4” x 1” 1/2” hole All
5 Bolt 7/l6” x 3-1/2” 1,5,6
6 Bolt l/2” x 4-1/2” 2,3,4
2 Bolt 1/4” x 3/4” Trans. Linkage Bracket
2 Lock Nut 1/4” Trans. Linkage Bracket
1 Bracket Trans. Linkage Bracket
5 Washer-Flat 7/16” 1,5,6
6 Washer-Flat 1/2” 2,3,4,
1. Remove the plastic front frame cover between the bumper and grille.
2. Remove the steel strip just in front of the grille that holds the steel brake line in place. Remove the two
plastic clamps that locate the brake line to the steel strip and save them for later.
3. Remove the 4 bolts holding the shroud to the radiator.
4. Loosen but DO NOT REMOVE all 11 body to frame mounting bolts. Hint : The two hidden bolts
are located behind the rear axle just in front of the fuel tank ( location 5 )
5. Remove the one bolt under the grille. Remove 5 bolts on the drivers side of the Jeep.
6. Place a stout piece of wood under the floor pan between body mounts 3 and the outside edge of the
body. Jack up the body on the piece of wood just enough to place the 1” pucks on top of the rubber insula-
tors. It is recommended that you use lock tight on the new longer bolts to keep them in place. Start the new
longer bolts into the body but DO NOT tighten them at this time. Repeat this procedure on the passenger
side of the body. Install one puck under the grille and start it’s longer bolt.
Page 1 of 3
7. After all of the pucks and longer bolts are in place, tighten the bolts. Use Your judgement as to how
tight. Do not over tighten them, but do not leave them loose. Do not “crush” the rubber insulators.
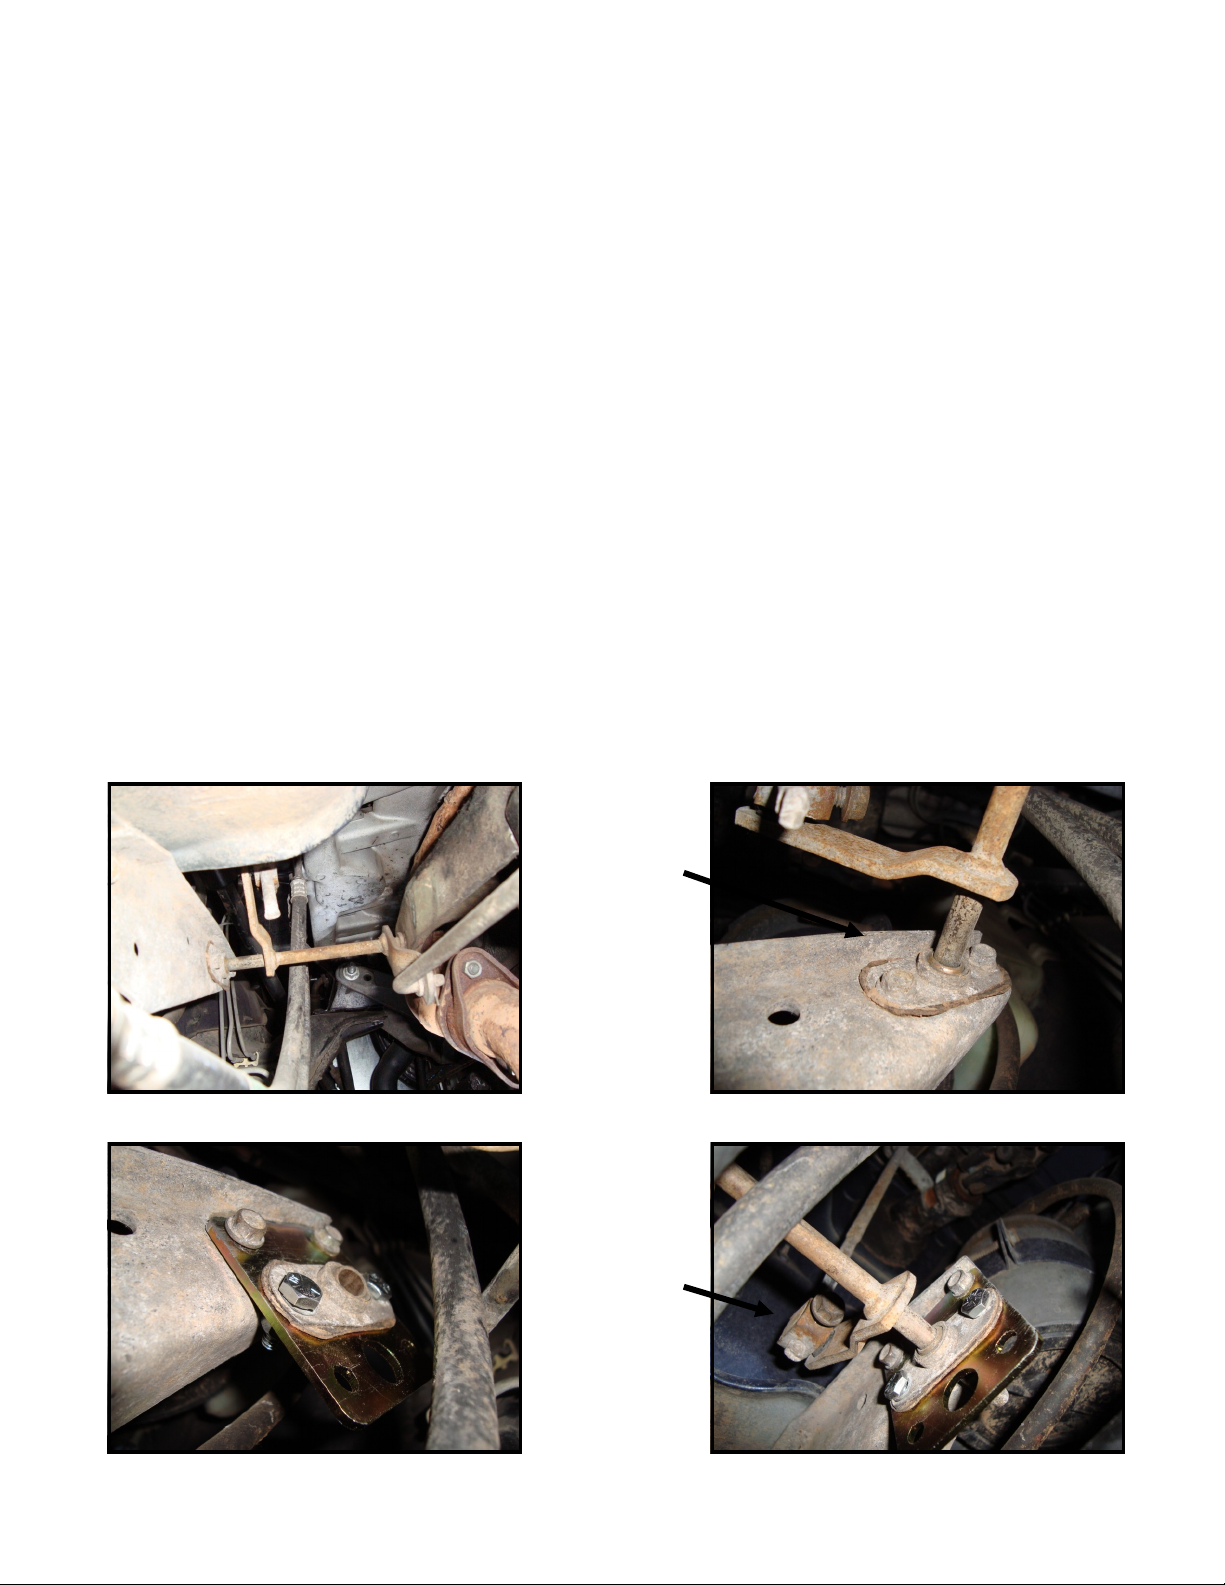
8. Locate the Transmission Bell crank linkage ( located on bottom of DS firewall ) See figure 2. You
will need to relocate the bell crank pivot 1” lower on the bracket that is attached to the body. Re-
move the pivot bearing plate See Figure 3 , It is easiest to remove the bell crank rod from the
bracket that is attached to the transmission and loosen the adjuster on the rod coming down from
the steering column. Install the pivot bearing plate onto the new relocation bracket using the supplied bolts & nuts and then attach this bracket to the body bracket using the original bolts See Fig-
ure 4. After everything is bolted back together you will need to re-adjust the linkage rod See Figure
5.
9. Locate the front grille support that is welded on the round frame crossmember ( location1 ). Drill
two holes 3/16” in diameter on the top of this support about 3/4” in from the edge and just in front of
the grille. Insert the two plastic clamps that you removed from the steel strip in step 2 in the holes
you just drilled. Snap the steel brake line into the clamps. Discard the steel strip removed in step 2.
Re-attach the plastic frame cover if so equipped.
10. Hold the shroud to the radiator one inch lower then the original mounting location. Mark the holes.
Center punch them and drill a small pilot hole. Now, enlarge them to 5/16” in diameter. Re-attach
the shroud to the radiator in the new holes drilled.
11. If your Jeep has stock suspension (no lift) you are finished ! If your Jeep has a suspension (lift) kit
that incorporates a drop skid pan ( crossmember under the transmission/transfer case), installation
of this body lift kit may cause the transmission shift lever to contact the floor (body) of your Jeep.
To keep this from happening , you must perform the following: Remove the shift lever boot from the
floor pan and trim the sheet metal with tin snips until the transmission can be shifted into 2nd, 4th
and reverse gears without interference. The boot has a metal ring molded into it’s base and it will
need to be located back approx. 3/4” or more on the floor by re-drilling the mounting holes. Fill any
gaps in the floor with black silicone.
FIGURE 2 FIGURE 3
Remove bolts
retaining the
pivot bearing
plate.
FIGURE 4 FIGURE 5
Readjust linkage rod once
everything is
bolted back
together.
Page 2 of 3
 Loading...